Cardinal
-
Content Count
94 -
Joined
-
Last visited
Content Type
Profiles
Forums
Calendar
Blogs
Posts posted by Cardinal
-
-
Floor 26
<<Den of the Skyrats>>
Party Limit: 4 | 20+ Posts
Prerequisite: Must have completed <<Bitter Winds: Mid Air Madness>>
Repeatable for standard thread rewards and to defeat Moxy the Were-Chef
Rewards:- 3,000 Experience Points (each)
- 10,000 Col (each)
-
POTENTIAL REWARD | Each player receives:
- For Defeating <<Moxy the Were-Chef>>: Each player gains an additional 250 EXP * Player’s Tier.
- Unlocks <<Bitter Winds: Vermin’s Vengeance>> Quest
Requirements:
- The party leader must link the final post from a closed thread for the Trouble at the Skyport quest. Its outcome must note whether Ryland survived, was killed during the escape, or turned over to Ulric Drell by the players.
- Using the map obtained from the Skyrat Raiders at the end of Mid Air Madness triggers the quest and summons an unmanned Skyrat Skiff that carries them to a quest-specific dungeon beyond the walls of Ladonia.
- Sneak into the base and search for clues.
- Defeat First Mate Fresco and 3 Skyrat Marines.
- Find the alchemy labs. Defeat High Alchemist Harbourne. If the party leader turned Dockmaster Ryland over to Ulric Drell during the linked Trouble at the Skyport quest, they must also fight The Rylander at the same time.
- The party must choose whether to save or abandon found prisoners and post their decision in the thread closing post.
Summary:
Having learned the potential location of the Skyrats’ lair from intel obtained at the end of the previous quest, the players are surprised to see one the pirates’ very own aerial skiffs land nearby, apparently summoned by their triggering of the next leg. It conveys the players beyond the normal boundaries of the zone to the hidden mountain retreat on a peak far from the Ladonian capital. The skiff deposits them on a small ledge partway down the slope to avoid immediate detection, and flies off to join other similar vehicles high overhead the moment the players disembark.
From here the players must sneak into the Skyrat den and risk detection. Scouring their base reveals that the Skyrats were once Galtean soldiers under the command of King Gabrandr. They were ambushed and captured, then experimented on by Ladonian alchemists in the hopes of developing biological weapons for use against the Galteans during the war. Razwell’s discovery and use of the Scather made their efforts obsolete and the labs - including this facility - were abandoned. Some of the subjects eventually escaped, but the damage had been done. Lycanthropy had ravaged their ranks. Where the Skyrats were once a pestilence in name only, they had literally succumbed to their own moniker. Every last one of them is now a wererat, and they want vengeance. Clues scattered throughout the base point to Ulric Drell’s grand plan, and make reference to a turncoat called ‘Harbourne.’
High Alchemist Harbourne was born Ladonian and served at the Emperor’s pleasure, until he didn’t. His protests when the crown shut him down earned him a dose of his own medicine, plus a cocktail of other alchemical reagents for his trouble. The guards locked him in with his subjects when they abandoned the base, and he’s been plotting his revenge ever since. The Skyrats haven’t just been looting and pillaging, they’ve been collecting: tools, materials and test subjects. Harbourne is developing a more virulent strain of the virus that turned him and the Skyrats into their current state. Together with Ulric Drell, who apparently survived his earlier encounter with the players, they intend to unleash their plague upon Ladonia in the coming days.
The full scope of the threat having been made clear, the players must rush to defeat High Alchemist Harbourne, free his prisoners and destroy his virus before Drell can implement their plan.
Outline:
PART I | Den of Secrets
Having arrived the Skyrat lair, each player must spend a post action to roll stealth or searching while they explore the living quarters, training rooms, armories and workshops within. The party must roll at least once for each of these four areas. Players with the Disguise skill as an Extra skill in the thread, or a Hunting Familiar, may use them to bypass the need for this roll on their turns. Each bypass option can only be used once per thread.Stealth: All normal modifiers apply. Mob stealth detection in the base is 12. If the roll fails, use the CD value from the same roll and consult the table below.
Searching: All normal modifiers apply, including enhancements and consumables. The Detect (mod), Reveal (addon) will each add +2 to the roll. Players must roll 21 or higher or they accidentally stumble somewhere or touch something they shouldn’t have. If the roll fails, use the CD value from the same roll and consult the table below.
CD Result 1-3 Four Skyrat Marines are alerted and must be defeated before continuing with the mandatory rolls for Part I. 4-6 Toxic gas pocket. Each player takes 200 unmitigated damage. 7-9 Plague-fever. Each player is afflicted by a Blight effect. They suffer 20 damage each round and -20 to their MIT for the rest of the thread unless they use an antidote or are treated with the Purify skill. In this special case, a player using the Purify skill can affect all members of the party as a single post action, but must pay the skill’s energy cost for each targeted player. 10-12 Stumbled into Moxy the Were-Chef in his kitchen. The party must defeat him before continuing with the mandatory rolls for Part I. The party should roleplay their personal approach and discoveries as part of these posts prior to moving on to Part II. If all players in the party agree, if any players has successfully completed this quest before, they may link the thread closing in their post and choose to encounter Moxy the Were-Chef, bypassing the party’s needs to make the mandatory rolls in this part of the quest.
PART II | Last Sentinels
Upon completing all of the requirements of Part I, the players will move deeper into the Skyrats’ lair where they will inevitably be discovered and challenged by First Mate Fresco and 3 Skyrat Marines guarding the heart of the complex.Fresco, like any good villain and lackey, reveals that Ulric Drell lives and is already on his way to wreak vengeance on Ladonia for what they did to Galtea and the Skyrats. He goes on, at length, to reveal how High Alchemist Highbourne switched sides after Razwell’s betrayal, and being left here to die. Lastly, he will reveal how they plan to unleash a new alchemical plague on Ladonia that turn everyone infected into more wererats, just like him.
PART III | The Dirtiest Rat
Entering High Alchemist Harbourne’s lab, the party will find a tall, lanky and humanoid rat waiting for them on a dais at the centre of the chamber. He will have heard their battle with Fresco and used his time to prepare. Unfortunately for him, the lack of alternate exits offers him no other options. Harbourne’s fur is slightly blue in colour and looks to be growing mold. Clearly, time has not been kind. He is perfectly lucid and willing to discuss his plans for revenge. As far as he’s concerned, every minute wasted talking is more time for Ulric Drell to enact his vengeance.If Dockmaster Ryland was handed over to Ulric Drell in the party leader’s linked thread closure for Trouble at the Skyport, they will find the man transformed into a rat-like monstrosity and standing at Harbourne’s side as his newest and most loyal pet. The party must fight both of them together.
Wrought iron cages line alcoves in the the walls of the octagonal chamber and hang from the ceiling. Each contains human subject taken from Ladonia during the Skyrats’ raids. None are Galtean refugees, but cry out for aid once Harbourne is defeated.
PART IV | Difficult Choices
Time is of the essence. The entire party must agree to choose to stop and save the prisoners held in the lab, or to rush back to Ladonia in order to stop Ulric Drell. The party’s decision must be noted in the thread closing post. Players are encouraged to debate the moral dilemma.
Enemies:
<<Skyrat Marines>>
Doing their part to swab the deck and making sure it's squeaky clean of infiltrators.HP: 750/750 | DMG: 250 | MIT: 120 | ACC: 2 | EVA: 1
Abilities:
- Poisoned Blade | On MD 8-10, apply Toxic Venom 30 to the target for 3 turns. If already active, the effect refreshes.
- Blood Frenzy | While subject to any DoT effects, a Skyrat Pirate gains +2 ACC, +1 EVA and -20 MIT.
- Martial Training | Skyrat Marines are veterans of a forgotten war, but their skills have hardly dulled. They will score a critical hit on MD 8-10, adding +10/+20/+30 to their damage, respectively.
<<First Mate Fresco>>
His bark is as good as his bite.HP: 1200/1200 | DMG: 280 | MIT: 200 | ACC: 3 | EVA: 2
Abilities:
- Poisoned Blade | On MD 8-10, apply Toxic Venom 30 to the target for 3 turns. If already active, the effect refreshes.
- Blood Frenzy | While subject to any DoT effects, a Skyrat Pirate gains +2 ACC, +1 EVA and -20 MIT.
- Damn the Rules | First Mate Fresco gave up on fighting fair a long time ago. He will score a critical hit on MD 8-10, adding +20/+40/+60 to his damage, respectively.
- Prone to Monologue | First Mate Fresco is a blowhard and blabbermouth. If a player uses his post action to egg him on, he will be distracted and suffer a -2 ACC penalty to all attacks he makes on his next turn. This effect can only be triggered once and does not stack with Hypnosis.
<<The Rylander>>
There can be only one. And he’s really pissed at what you let them do to him.HP: 1800/1800 | DMG: 300 | MIT: 150 | ACC: 3 | EVA: 2
This boss uses its own MD roll when attacking.Abilities:
- Payback | The Rylander makes two attacks in a round. The first is made against the player with the highest hate. The second is made against the player with the lowest hate.
- Savvy | If The Rylander misses, he gains +3 ACC and does not automatically miss on a natural MD roll of 1.
- Driven by Rage | The Rylander cannot be disabled. If subject to a disabling effect, he loses the second attack granted by Payback until his next turn.
- Unstable | The alchemical cocktails that turned Dockmaster Ryland into this monster were highly experimental. When The Rylander reaches 0 hit point, he explodes. The player dealing the damage that killed him rolls an AoE attack against each member of the party using whatever stats current apply for The Rylander. Player take 300 unmitigatable damage if he hits, or 100 unmitigatable damage if he misses.
<<Moxy the Were-Chef>>
[Secret Boss]
Imagine the Pillsbury dough boy, but as a giant cheese elemental. Getting turned into a were-rat just made him look moldy, adding a surface layer of fuzz.HP: 2000/2000 | DMG: 360 | MIT: 160 | ACC: 3 | EVA: 3 | FIREPROOF
This boss uses its own MD roll when attacking.Abilities:
- Best Before | Moxy the Were-Chef always acts first in combat and his first attack always triggers Frying Pan-Ultimate.
- Frying Pan-ultimate | On an MD 9-10, Moxy the Were-Chef’s attack becomes an AoE. Roll against each player separately. Damage is resolved normally.
- Not’yo Cheese | Players that successfully hit Moxy the Were-Chef have their weapons coated in ewy-gooey melted cheese, suffering -2 ACC on their next attack which also cannot benefit from absolute accuracy. Critical hits do not trigger this effect.
Environmental Effect:
- If You Can’t Stand the Heat | Moxy’s kitchen is absolutely sweltering. Each player suffers 50 unmitigatable damage per turn while in this room, or 100 unmitigatable damage per turn if wearing heavy armor. This damage is halved by the Survival Extra skill, and can then be further reduced by Probiotics. The Fireproof provides a player with immunity from this effect.
<<High Alchemist Harbourne>>
Harbourne’s experiments took a toll on his body long before lycanthropy made things worse. He’s been twisted and become literally rotten to the core.HP: 2000/2000 | DMG: 360 | MIT: 160 | ACC: 3 | EVA: 3
This boss uses its own MD roll when attacking.Abilities:
- Thine Own Medicine | High Alchemist Harbourne reduces total DoT damage he suffers each round by 40, to a minimum of 0.
- Life Leech | High Alchemist Harbourne regains 200 hit points when he successfully hits a target.
- Spore Loser | The mold in High Alchemist Harbourne’s fur is a natural defense mechanism. When a player hits him with an attack, on a CD 7+, they suffer Blight 40 and their MIT is reduced by 20 for two turns. This effect will not stack with itself, but can be refreshed. This effect will stack with Plague-Fever from Part I.
Environmental Effect:- Reactive Spore Cloud | The mold growing on High Alchemist Harbourne pervades the entire lab and is part of the delivery vector for the new plague he and Ulric have been developing. Battle healing will not function for the duration of this battle. Any player that benefits from the Regen, Vampiric (Offensive) or Vampiric (Defensive) enhancements finds their maximum health reduced by 30 for the balance of this thread, for each and every occurrence. Consumables, Healing skills and Holy Blessing are only half as effective (round down), but do not reduce a player’s maximum hit points.
Epilogue:
If the players take the time to save the prisoners:
SpoilerDesperate pleas for help become sobbing thanks as you free the Skyrats’ captives from their pens and cages. Merchant sailors and citizens taken from docks and ships raided by the pirates, all echo the horrors they witnessed at the High Alchemist’s vile whims. Once enough are freed and organised, they promise to release the rest so that the players can rush to save their friends and families back in Ladonia.
If the players leave the prisoners and rush back to Ladonia to stop Ulric Drell:
SpoilerThe good of the many over the good of the few. But what happens when even the few are so many? Whether through callous disregard or the necessity of an impossible choice, you leave the prisoners to their fates. Maybe there will be time enough to return once the capital is saved? Judging by the state of some, they might not have that long.
-
Floor 26
<<Mid Air Madness>>
Party Limit: 4 | 20 or 30 Posts
Prerequisite: Must have completed <<Bitter Winds: Trouble At the Skyport>>
Repeatable for standard thread rewards and Heart of GoldRewards:
- 2,000 Experience Points (each)
-
Each player receives:
-
Sordid Sea Chanty
- A tale of woe and antics put to song and best delivered over a stiff drink
- When applied, the first critical hit made against the user in a thread becomes a normal hit. Additional effects that would trigger as a result of the mob’s dice rolls also do not trigger. Lasts for one thread. Consumed when applied.
- Not Transferrable
-
Sordid Sea Chanty
-
POTENTIAL REWARD | Each player receives:
-
Heart of Gold - Quest is completed in 20 posts. If Ryland survived the Trouble at the linked Skyport quest, this limit is extended to 30 posts.
- The Kalabor’s crew provides the players with 4,000 col if all four members of their team are saved within the allotted number of posts
-
Heart of Gold - Quest is completed in 20 posts. If Ryland survived the Trouble at the linked Skyport quest, this limit is extended to 30 posts.
- Unlocks <<Bitter Winds: Den of the Skyrats>> Quest
Requirements:
- The Party Leader must link the final post from a closed thread for the Trouble at the Skyport quest. Its outcome must note whether Ryland survived, was killed during the escape, or turned over to Ulric Drell by the players.
- Roleplay boarding the Kalabor, either by convincing the pilot to drop the players off, or jumping as he flies by.
- Defeat the Skyrat Raiders, save the Kalabor’s crew and repair damage done to the ship before time runs out, or be forced to flee on an escape pod. You must conclude the thread on post #20 for full rewards. If Dockmaster Ryland was alive at the end of Trouble at the Skyport, this limit may be increased to 30 posts. Exceeding this post count limit will deny the players the Heart of Gold reward, but they can still complete the quest.
Summary:
Pirate raids have only grown bolder since the incident at Span 17. Local guards and militia remain disorganised in the aftermath of the emperor’s demise and struggle to respond. Commerce and trade waver under the strain, threatening an already threadbare stability. Everywhere you turn, someone is running a scam, pilfering a neighbour’s pockets or stealing goods from a sparsely stocked market stall. People are growing desperate and every new incident makes things feel even worse.
You find yourself shuttling over Ladonia’s busy streets in an aerial taxi, traversing above the endlessly layered cityscape when your pilot spots a large merchant vessel under attack from various smaller skiffs. A local patrol craft attempts to respond and is instantly shot down leaving the cargo ship and its crew vulnerable. A mayday call crackles over local channels but abruptly falls silent as several explosions blast away portions of the ship’s hull.
The players have a chance to save the beleaguered sky ship and crew, but must act quickly. Time is not in their favour. A combination of clever action, hard choices and sheer luck will be needed to save the day.
Outline:
Part 1 | Mind the Gap
If the party leader successfully saved Dockmaster Ryland in Trouble at the Skyport, their pilot recognizes them and offers to fly them to the cargo ship Kalabor.“He’s as stubborn as a mule, but his heart’s always been in the right place. We all heard how you saved his backside against those pirates. Consider this a courtesy for looking after one of our own.”
Make a CD roll, with -1 if wearing light armor, and -3 if wearing heavy armor. Must roll at least CD 7 or lose 25% of your max HP.
If Ryland did not survive, the pilot will refuse to go anywhere near the battle, but is willing to perform a flyover and let the players jump down. How very gracious? No amount of arguing will dissuade him.
Part 2 | Toil and Trouble
A total of eight Skyrat Raiders have boarded the Kalabor and are scattered about harassing its crew or attempting to scuttle the ship. The players have limited time to find and slay all eight raiders, rescue the four members of the Kalabor’s crew and repair the engines and helm. On their turn, each player may choose to take one of the following post actions:Find the Raiders
Roll LD. Standard LD modifiers apply. Hunting Familiar adds +3 to the roll. Divide the resulting roll by 5 and round down. This is the number of Skyrat Raiders found (maximum 4 per attempt, only a total of 8 are available to be found.)Find Kalabor Crew
Roll LD. Standard LD modifiers apply. Scouting Familiar adds +5 to the roll. Divide the resulting roll by 10 and round down. This is the number of crew Kalabor crew found (a total of 4 are available to be found.)Heal Kalabor Crew
Use an antidote or healing consumable to treat a member of Kalabor’s crew for injuries (must be in Battle Ready inventory). All four have been hurt. Players may also use the following skills: Healing Familiar, First Aid (Energize, Barrier or Field Medic) skill, Leadership (Rally and Inspiring Speech). Normal cooldowns apply.Attempt to repair the engines or helm
Roll LD. Only the following modifiers apply: Professional Familiar grants +3; Lock Picking (including Dismantling); Detect mod and Reveal addon each grant +2. A roll of 15 or higher is required to repair each system. Each must be repaired separately.NPCs:
<<Crew of the Kalabor>>
Only a few of the ship’s original crew survived the Skyrat’s initial assault. Those that did are scattered throughout the burning vessel’s wreckage. You will need to rush and find them before the hull gives way and you all end up having a very bad day.
Enemies:
<<Skyrat Raiders>>
Agile and daring, these cutthroats won’t hesitate to skewer anyone foolish enough to step between them and some ill-gotten booty.
HP: 500/500 | DMG: 250 | MIT: 70 | ACC: 2 | EVA: 2Abilities:
- Poisoned Blade | On MD 9-10, apply Toxic Venom 30 to the target for 3 turns. If already active, the effect refreshes.
- Blood Frenzy | While subject to any DoT effects, a Skyrat Pirate gains +2 ACC, +1 EVA and -20 MIT.
- Sordid Sea Chanty | Skyrat Raiders sing an unbearably bad rendition of a popular Galtean sailor’s tune as they fight. Players suffer -2 ACC on their first attack against any individual Skyrat Raider and cannot score a critical hit on that attack. All other skill and enhancement effects based on dice results trigger normally.
Epilogue:
After the harrowing rescue of the Kalabor, hidden among the loot and other assorted items collected in their desperate efforts to save the ship, each player finds copies of a tattered map pointing to a nearby peak. The location is annotated in code they cannot decipher, but is likely the pirates’ lair.
-
Floor 26
<<Trouble at the Skyport>>
Party Limit: 4 | 20+ Posts
Repeatable for standard thread rewards
Rewards:
- 2,000 Experience Points (each)
- 4,000 Col (each)
-
POTENTIAL REWARD | Each player receives:
-
Skyrat Surcoat - Defeat Ulric Drell
- A tired looking marine captain’s surcoat replete with faded decoration
- T4 Perfect [Armor of Choice] with Mitigation I, Recovery II
- Not Transferrable
-
Skyrat Surcoat - Defeat Ulric Drell
- Unlocks <<Bitter Winds: Mid Air Madness>> Quest
Requirements:
- Roleplay meeting Dockmaster Ryland and listening to his rant
- Roleplay catching corrupt Guard Captain Calas making a deal with Ulric Drell while Skyrat pirates pillage the docks.
- Defeat Guard Captain Calas and 3 Corrupt Dock Guards.
- Defeat at least 8 Skyrat Pirates or accumulate a total of 100 LD (+20 per player in the thread) on escape rolls
- Hand over Ryland or defeat Ulric Drell
- Escape on the aerial skiff
- Thread closing must clearly state whether Ryland lived or died.
Summary:
By chance or appointment, the party meets Dockmaster Ryland who complains bitterly of grift and open corruption among the guards assigned to patrol his port. Too many served under former Emperor Razwell and his lackeys. Manpower is in short supply, so the new people in charge had no choice but to keep some of Razwell’s crew around to keep goods flowing. To make things worse, the Skyrat pirate gang has become an outright menace since the regime fell, brazenly raiding the docks on a regular basis. “Something must be done,” he declares, slamming down his ledger.
Ryland suspects that a deal might soon be going down on one of the lower, commercial decks. He needs the players to back him up if things go sideways and offers to pay them for their efforts, provided they are willing to get their hands dirty.
Upon their agreement, he leads the party to Span 17, an isolated arms in the lower reaches of the Ladonian Skyport. Skyrat pirates are already gleefully pilfering everything that isn’t bolted to the deck while guards count the bribe money being thrown their way. Two notable figures seem to be leading the show: a scruffy looking mariner with an overdeveloped five o’clock shadow and clean cut Ladonian guard captain whose polish has long since faded from his worn surcoat’s buttons.
Ryland instantly loses his cool and calls the miscreants out, drawing their attention and several dozen blades to boot. Suddenly realising how badly outnumbered you are, things only get worse when the raiders cut off your retreat.
“Get to that ship,” Ryland cries out, pointing to the far end of the span. The rickety service skiff in the distance lists heavily to one side as it floats in its grungy berth, but it may be your only hope.
Outline:
Part 1 | A Surly Heart of Gold
The players encounter Dockmaster Ryland in his office, on the street, or by whatever means the players devise. His frustration with the state of affairs in the skyport is immediately apparent, and he intends to do something about it. Enlisting the players as muscle to counter the corrupt guards, he leads them up to Span 17 where they stumble right into a ripe mess. Ryland calls out Calas by name, and Drell by reputation, earning their ire. It’s instantly apparent that both intend to resolve the matter violently.
Part 2 | Running the Gauntlet
The docks are overrun with enemies too numerous for the party to overcome by force. The only remaining option is a running battle to the service skiff with pirates and guards giving chase. Once the battle begins, the party will be considered to be in combat until they reach the skiff. Use of battle ready consumables and skills is permitted, but players cannot otherwise access their inventories until the quest is complete.Guard Captain Calas and three of her Corrupt Dock Guards have the most to lose and are the first to respond. As Guard Captain Calas and her guardsmen are defeated, Skyrat Pirates will fill in their ranks and take over the chase. The party will always be facing four enemies on each turn.
Once Guard Captain Calas is defeated, as a free skill action on their turn, each player may roll LD to work their way towards the skiff. Searching skill, consumable and equipment buffs apply. A combined total LD of 100, plus 20 per player in the thread is required to reach the skiff. Alternatively, if the party prefers to fight their way through, at least 8 Skyrat Pirates must be defeated, though more will continue to spawn without limit. Note that the pirates continue to attack even if the party chooses the LD option.
Sadly, Ryland is a bureaucrat whose fighting days are long behind him. His spirit is willing, but he’s unarmed and his work clothes offer poor protection. He’s also just painted the biggest and brightest target imaginable on his own back and his mouth keeps doubling down. Every post where it is the enemy’s turn to act, the player controlling that post must roll BD to check for the effect of Ryland’s Big Mouth.
Part 3 | A Sudden Stop at the End
Once all of the required Skyrat Pirates have been defeated or the combined LD total achieved, on the next post, Ulric Drell will order his crew to pull back and offer the players a deal. If he still lives, they can hand over Dockmaster Ryland and Drell will allow them to use the skiff to leave.If the party refuses, or Ryland is already dead, they must immediately face Ulric Drell in battle. The other Skyrat Pirates will not interfere. If they defeat Ulric Drell, the players are permitted to leave on the skiff, and take Ryland with them (if he survived). This battle counts as part of the ongoing combat from Part II without any opportunity for rest.
If they hand over Ryland, Drell mockingly tells them to take the skiff and go.
Allies:
<<Dockmaster Ryland>>
Principled and proud, Ryland was appointed to run the docks after the old imperial regime fell. He doesn’t much appreciate the old way of doing things and isn’t afraid to speak his mind about it.
HP: 1000/1000 | DMG: 0 | MIT: 20 | EVA: 2
Abilities:
-
Ryland’s Big Mouth | The dockmaster can’t help but give voice to his frustrations, cursing out the thieves even while threatened with death. Before mobs act on their turn, roll BD to determine hate generation for Ryland as noted above.
- BD 1: Either too winded or suppressed by other sounds, Ryland generates no hate that round.
- BD: 2-4: Ryland generates 2 hate.
- BD: 5-8: Ryland generates 3 hate.
- BD: 9-10: Oh, that was a good one. Ryland generates 4 hate and all other player hate values are halved.
- Staying Alive | Ryland can be healed by players’ skills and consumables as if he was a member of the party and can benefit from Barrier.
- Shut Yer Gob! | If a player uses a healing skill on Ryland, his hate is reduced by 4. This effect can only occur once per party rotation
Enemies:
<<Guard Captain Calas>>
An equal opportunist, Calas never chose sides during the rebellion, allowing her to keep her post when most of the old guard were swept away. She’s used her contacts and influence to good effect, amassing quite the fortune through liberal application of grift.
HP: 1000/1000 | DMG: 250 | | MIT: 100 | ACC: 3 | EVA: 2
This boss uses its own MD roll when attacking.Abilities:
- Officer Training | While Guard Captain Calas remains in combat Corrupt Dock Guards are immune to disabling effects.
- Ready Riposte | Begins combat with Parry and Vengeful Riposte in effect. Once expended, Calas will regain those benefits on a CD 9+ when making an attack
<<Corrupt Dock Guard>>
Mercenaries in mien, these men are loyal to Calas because she feeds them and looked out for their interests when no one else would.
HP: 600/600 | DMG: 220 | MIT: 100 | ACC: 2 | THORNS 30Abilities:
- Old Blighty | Targets struck by a Corrupt Dock Guard have their mitigation reduced by 50 for 2 turns. This effect does not stack
<<Skyrat Pirate>>
Wearing patchwork gear made up of mostly scavenged or pillaged loot, these raiders gleefully cut down any who foolishly attempt to stand in their way.HP: 600/600 | DMG: 250 | MIT: 70 | ACC: 2 | EVA: 1
Abilities:
- Poisoned Blade | On MD 9-10, apply Toxic Venom 30 to the target for 3 turns. If already active, the effect refreshes.
- Blood Frenzy | While subject to any DoT effects, a Skyrat Pirate gains +2 ACC, +1 EVA and -20 MIT.
<<Ulric Drell>>
Notably calmer and more calculating than his brethren, Ulric Drell has a manner about him that speaks of a storied past. He’s candid, if gruff, but utterly ruthless and quick to violence.
HP: 2000/2000 | DMG: 300 | MIT: 75 | ACC: 3 | EVA: 3
This boss uses its own MD roll when attacking.Abilities:
- Poisoned Blade | On MD 9-10, apply Toxic Venom 30 to the target for 3 turns. If already active, the effect refreshes.
- Whirling Dervish | On CD 11-12, Ulric Drell’s attack becomes an AoE effect that includes Dockmaster Ryland and all players in the party.
- Oddly Resilient | Ulric Drell heals 100 damage at the start of each of his turns, and reduces the duration of Bleed, Blighted, Toxic Venom and Envenomed effects by 1 turn.
- Captain’s Nerve | Ulric Drell cannot be disabled. But, each disabling effect instead reduces his ACC and EVA by 1 until the start of his next turn. This debuff can stack.
Epilogue:
If Ryland is killed trying to escape or the players refuse to turn over Dockmaster Ryland, then defeat Ulric Drell:
SpoilerSneering defiantly as the players whittle down the last of his health bar, the captain flourishes his longcoat with a spin. When the turn is complete, the navy blue garment falls to the heavy wood deck, but it’s occupant is gone. His goons still linger, but keep their distance, leaving the party little choice but to board and escape on the skiff before whatever will is holding them back loosens its grip.
If the party turns Ryland over to Ulric Drell:
Spoiler“Smart of you. Good choice,” Ulric says, smiling to reveal sharpened teeth. Four of his minions clasp irons upon the Dockmaster who glares at you with fury from beneath his brow. His hatred is palpable. “Come along, Ryland. There’s someone who’s been itching to meet you, and he’s not as patient as I am.”
“What do we do with this lot, captain?” The skyrat rank and file press forward. “Can we Skewer’em now?!”
Turning to follow his prisoner, Drell sounds oddly sentimental as he replies.
“No. Let them go. I gave them my word. But, if they do anything other than leaving, shove’em over the edge.”
-

<<Floor 28>>
Floor twenty eight is a scenic hideaway. Trapped in eternal autumn, it is a wonderland of colorful leaves, sweater weather, and pumpkin spice. Dense forests and rolling grasslands make up the floor, along with rocky cliffs and stormy seas to the north and east. Rivers crisscross the land, providing transportation, food, water, and breathtaking views. The temperature swings between forty and sixty degrees Fahrenheit, with occasional rain and storms. A variety of wild animals call the floor home, including wolves, coyotes, bears, moose, snakes, and birds. Most notable, however, are the herds of wild horses. NPCs utilize the horses in many aspects of their lives, such as farming, transportation, and even entertainment.
NPC Inhabitants of this floor are entirely human. Their communities are run by elected officials, and there appears to be very little crime or unrest. All in all, the people seem happy with their lives. They are eager to talk with Players, and offer aid when the opportunity arises. Don't be surprised if an NPC invites you over for a porch chat, or a home-cooked meal. They hold a variety of different jobs, including shopkeepers, farmers, lumberjacks, horse trainers, carpenters, and clergymen. The larger towns even have their own postal systems. Though some families lean toward traditional gender roles, women are just as present in the workplace. The architecture is largely colonial style. Multiple lighthouses dot the northern and eastern coasts, providing guidance to the few ships brave enough to venture into the darkness. Small farmsteads dot the floor, offering Players both a place to stay, and a place to earn some extra col. These NPCs who live outside of the towns occasionally make the trip back for special occasions. Festivals are common, and Players are likely to find one happening somewhere on any given day.
Main Settlement:
<<Glyndebourne>>
Located at the center of the floor, Glyndebourne is the largest and most well-known city. It is home to basic factories, a postal service, a university, and the most popular event of the year - the Fall Festival. NPCs from all over make the trip to join the celebration, which includes fried food, fireworks, live music, and a horse show. To the north sits a nondenominational church, less preoccupied with a specific religion, and more focused on providing people a place to gather and unwind. To the south, Players can find a sort of shopping district, featuring goods brought in from all over the floor. The taverns here are plentiful, but clean, and well-regulated by the town's government. A person is more likely to find a game of darts or a round of trivia than a bar brawl.
Life here is quaint. While there are certainly moments of excitement, such as the Fall Festival, NPCs prefer to move at a slower speed. Of course, hard work still goes a long way, especially when helping townspeople with their many tasks. Community is at the heart of everything in Glyndebourne, and Players can expect to be treated as a neighbor.
Sub-Settlements:
◉« The MacDonald Farmstead »
Spoiler
Home to the elderly Ewan MacDonald and his wife, Claudia. Though it may look like a picture on a postcard, the homestead is a very busy place. Ewan and his many farmhands raise animals, work the land, and train the wild horses that are brought in from the Thessacoln Pastures. They have bunk rooms available to anyone who needs a place to stay, but expect to work off the cost of room and board!
Other Locations
◉« Daunson Falls »
Spoiler
A string of small waterfalls, named for the family that used to live beside the river. The Daunsons have since moved on, but the falls remain a picturesque place for hiking, fishing, and reflection. Bears can often be seen catching salmon along the banks, surrounded by rainbows sparkling in the splashing water.
◉« Fire Forest »
Spoiler
A sprawling scarlet forest located on the north end of the floor. With such dense foliage, there are areas of the forest floor that remain untouched by the sunlight. The result, however, is a thick canopy overhead that glows like the most vivid flames. Various wild animals call the Fire Forest home, and of them, a disproportionate amount are albino. Whether this is simply a stylistic choice by the floor’s creators, or something is causing the genetic malfunction, no one knows for sure. Regardless, Players are likely to stumble across white haired, pink-eyed deer, squirrels, rabbits, wolves, raccoons, and more.
◉« Thessacoln Pastures »
Spoiler
The Thessacoln Pasures span the western portion of the floor, and consists primarily of open, grassy meadows. The area is dominated by the herds of wild horses that call it home. Though Players are able to catch these horses, it is a nearly impossible task, and breaking the horse to ride is even more difficult. Simply watching the animals in their natural habitat is far easier, and less painful!
Transportation
Horses are the transportation of choice on the twenty eighth floor. Riding and driving wagons are how many people get around. A few bicycles have made their way into the more populated areas, and can be rented, or borrowed from friendly NPCs. Small boats can often be seen navigating the many rivers. Then, of course, there is always walking. The floor boasts some beautiful landscape, and hiking is a favorite when it comes to seeing all that is offered.
Common Mobs of Floor Twenty Eight
Spoiler-
Black Bear: Amidst the verdant wilderness, one might find a solitary figure moving with measured grace. A black bear, a sentinel of the untamed world. The creature sports dark fur, broad shoulders, and a sturdy frame honed by the rigors of nature's unforgiving domain. Thick, muscular limbs carry this creature aloft, each step leaving an indelible impression upon the earth beneath. This animal embodies the spirit of the a wild - a symbol of nature's strength, resilience, and untamed beauty.
- Locations: Anywhere
-
Copperhead Snakes: In the heart of the wild, amidst gnarled roots and rustling leaves, slithered a creature whose presence commands both respect and caution. The copperhead snake, with scales adorned in a mosaic of earthy browns and reddish hues reminiscent of aged copper. The patterns in its muted colors mimic the cryptic artistry of nature, forming a tapestry that blends seamlessly with its surroundings. Its serpentine form moves with sinuous grace through the underbrush, ready to strike at the slightest provocation. With venomous potential lurking in its fangs, the copperhead is a symbol of nature's elegance and danger combined; a creature that navigates the balance of life and death in the untamed world.
- Locations: Anywhere
-
Coyote Packs: Darting through rugged terrain under the cloak of night, a pack of coyotes move as shadows, their presence both enigmatic and relentless. In the moonlight, their fur took on shades of gray and brown, their natural camouflage, allowing them to blend seamlessly with the landscape. Tricksters - but not deceivers - these creatures straddle the line between curiosity and caution, ever watchful for the shifting fortunes of the wilderness. Many move as one, with silent communication and awe-inspiring synchronization, embodying the essence of nature's coordinated danger. Always together, these animals represent the pragmatic and resourceful characters who navigate their environment with both cunning and determination.
- Locations: Anywhere
-
Moose: Amid the towering conifers and rugged terrain of the wilderness, there stood a colossus of the wild. Its fur, dark as the night sky, offers stark contrast to the pale birch trees that dot the landscape. Its legs, like pillars supporting a regal temple, carry its substantial bulk with an air of indomitable strength. Antlers branch out like the gnarled branches of ancient trees, hovering overhead as a testament to the moose's resilience and vitality. This majestic creature, with its massive frame and imposing antlers, serves as the embodiment of nature's grandeur and untamed power.
- Locations: Anywhere
« Floor 28 Labyrinth »
The Floor Twenty Eight Labyrinth continues the autumn theme, but with a bit of a twist. Rather than a pleasant fall day, the labyrinth presents a forest after nightfall. Cold and rainy, the weather is nearly as chilling as the strange noises that follow adventurers through their journey. Wolves, bears, coyotes, and any number of equally terrifying mobs lurk in the shadows. Only the bravest of Players will navigate this haunted wood, and emerge victorious on the other side.
A scouting party consisting of no more than four Players must roll a combined 300 LD.
Be advised, the process for locating the boss room has changed. Please refer to the updated guide.Quests:
Coming Soon.Labyrinth: Information unknown.
Boss: Information unknown. -
Black Bear: Amidst the verdant wilderness, one might find a solitary figure moving with measured grace. A black bear, a sentinel of the untamed world. The creature sports dark fur, broad shoulders, and a sturdy frame honed by the rigors of nature's unforgiving domain. Thick, muscular limbs carry this creature aloft, each step leaving an indelible impression upon the earth beneath. This animal embodies the spirit of the a wild - a symbol of nature's strength, resilience, and untamed beauty.
-
Any Floor
<<Katana Skill Acquisition>>
Party Limit: 2 | 20+ Posts
Recommended Level: Any
Repeatable for standard page rewards only
Rewards:
- <<Katana>> Weapon Skill
- SP invested into <<Curved Sword>> is refunded to the player for free.
Requirements:
- <<Curved Sword>> Weapon Skill at Rank 1.
-
Roleplay the following:
- Obtain a Katana. Players are given reign to craft the acquisition method on their own accord.
- Find a player or NPC with knowledge of the Katana Skill.
- Train with them on the proper use of the blade and unlock the use of sword arts.
Summary:
While most every weapon in the game is available through simple means of allocating SP, the <<Katana>> skill, much like the <<Martial Arts>> skill, must be learned and earned. Players who wish to make use of this specific weapon must go through training to perfect the technique to use this weapon's sword arts.
Once a Katana is obtained, look for a player to train you on how to use the blade, or find an NPC who can help you. Roleplay out your character's experience with learning how to activate sword arts with a Katana. When the quest is finished, players will have access to the Katana Skill and may start using it in their next threads.
Outline:
This quest is strictly a roleplaying exercise. There are no mandatory mechanics, save the general rules of the game.
Epilogue:
SpoilerWith knowledge of weapon mastery now in your possession, a player with this skill may help others learn how to take advantage of the Katana's power. The player may also use the Katana freely. Even if the skill is dropped, this quest does not have to be retaken.
-
Orion's Resource List
[NOTES: CUSTOM SKILLS DESIGN CONSIDERATIONS]
Spoiler1. Won't anyone think of the PST!?
Limiting the overall number of custom skills to a manageable number helps preserve the sanity of our poor site PSTs. If each player was required to create their own custom skill, the sheer volume of additional rules, exceptions and interactions to be adjudicated would become overwhelming. The system would eventually collapse under its own weight.2. Eliminate exclusivity.
This was an inherent flaw in the original concept of Unique Skills, within the context of a shared game experience. No player should be able to access content that another player cannot. It's simply unfair.3. The catalog can grow to meet demand
This playtest offers a limited selection of Custom Skills for the sake of initial feedback. We know that there isn't necessarily something on the list for every build. The intent is that additional skills can and will be developed to the catalog, after implementation. In other words, if you really had your heart set on a particular concept, the options to submit new custom skills will exist after implementation. These same design considerations are expected to apply.4. Value for SP, and benefits to match
All Custom Skills are intended to be balanced around a cost of 10 SP. As a result, most of the Unique skills are nowhere near as potent as their previous versions. This is deliberate. After implementation, Custom skills will also be interchangeable through the skill refund mechanic, should you feel that a previous choice didn't quite meet your needs or expectations.5. Drawbacks are not a bad thing
Some Custom Skills still include drawbacks, reflecting that specializing on a style sometimes carries consequences in other areas, or as offsets against the potency of some versus others.6. The damage is always greener...
Custom skills must avoid being pure damage adders, or they become an endless cycle of ever-escalating damage buffs. Too much of the system is already inherently focused on damage output, and this would only compound existing challenges. It was very telling that this was the direction where most of the early CS submissions immediately went during the original release of the mechanic. The goal of Custom Skills is primarily to improve functionality, versatility and enhance the roleplaying experience, not to just buff more stats. Minor or indirect damage buffs are still possible, but must be tempered by real and unavoidable drawbacks.7. No Descriptions?
Custom skill descriptions have deliberately been left out of the catalog. The intent is that each player skins their version of the skill to suit the themes and style of their character. Thus, even if three players are running with Dual Blade in a single thread, each remains distinct and different in how they appear to use the same skill - it's what makes them unique.[CUSTOM SKILLS]
Spoiler► Achilles
Passive
Requirement: Combat Mastery [Mitigation], R5 Heavy Armor Skill, Must be wearing Heavy Armor
Effect: Direct final damage dealt to the user is reduced by 10%.
Drawback: Disabling effects remove the damage reduction effect for their duration, but cannot stack this negation. DoT effects will tick for an additional turn.► Battōjutsu
Active: Passive
Requirement: R5 Weapon Skill [Katana], Focus [Katana] addon and Charge skill; Must be wielding a Katana.
Effect: After a successful ST-B attack, you may choose between regaining (2*Tier) energy or reducing the cooldown of the Charge skill by 1 turn.
Drawback: While Charge is on cooldown, your EVA is reduced by 1.► Bloody Slaughter
Passive
Requirement: R10 Cooking Profession or Large Pockets Mod
Effect: The user gains a stack of Bloody Slaughter for every 4 loot-minimum mobs killed. The user must land the killing blow against these mobs for them to count towards generating Bloody Slaughter stacks. Each stack increases its user’s max HP capacity by 50 and max EN capacity by 2 until the end of the thread, up to a maximum of 5 stacks. Once the user has at least 1 stack of Bloody Slaughter, they may gain one of the following benefits each time they defeat a loot minimum mob, though each benefit can only be obtained once per post.- Regains [Tier * 1] EN for each mob personally defeated; or
- Regains [Tier * 5] HP for each mob personally defeated; or
- Gains +[Tier * 2 MIT] until the end of the current combat rotation.
Drawback: Bloated. When the user has at least one stack of Bloody Slaughter, their capacity to heal and be healed both, through any source, will be halved. Every two stacks (round up) of Bloody Slaughter reduces the wielder’s EVA by 1.
► Darkness Blade
Passive
Requirement: R5 Weapon Skill (any), Fighting Spirit active
Effect: User ignores 20% Mitigation on all successful attacks. This effect can stack with the Phase Enhancement.
Drawback: Critical hits against you gain the benefits of the Phase enhancement (ie. attacks ignore 50% mitigation). If the attack already benefits from Phase, it ignores an additional 20% of your mitigation instead.► Dual Blades
Active: Post Action
Cooldown: 5 Turns (Shared with Quick Change)
Requirement: Quick Change, R5 Weapon Skill(s) (Any). Only weapons of the matching skill(s) may be used.
Effect: The user must have equipped two weapons instead of one, but remains limited to standard three standard item slots. Unless using Dual Strike (see below), the user can only make use of one weapon at a time when resolving attacks. The weapon used must be specified in the attack’s description in the roller.
Drawback: Once this skill has been used, neither weapon used to make the Dual Strike may be unequipped until the thread ends.Dual Strike:
Activating this skill adds a surcharge of +8 EN (even on a miss) and can only be triggered when using the ST-II or AoE-II sword arts. Any target hit by this attack suffers normal damage for the sword art used, but applies the enhancements from both of the user’s equipped weapons. This skill shares a cooldown with Quick Change.► Duelist
Passive
Requirement: R5 Weapon Skill (Any), Focus or Ferocity (matching R5 weapon skill) addon
Effect: Increases BD by 1. The user gains the benefits of both Focus and Ferocity addons when wielding a weapon of the corresponding skill.
Drawback: Your energy costs for striking multiple targets with an AoE sword art increases by 1 per target hit.► Double or Nothing
Passive
Requirements: Must have the Hyperactive mod active
Effect: When activating the Hyperactive addon, the user of this custom skill may apply it to also transfer all of their EN regeneration for this round to the target, keeping none for themselves. This effect cannot cause the target to exceed its maximum EN pool. Any excess EN is lost. When applying Hyperactive with this CS active, the cost of Hyperactive is reduced to 0 EN.
Drawback: The user cannot benefit from battle healing while Hyperactive is on cooldown.► Holy Blade
Passive
Requirement: Parry Extra Skill and at least one Parry mod must be active to benefit from this custom skill
Effect: Parry becomes a free action. Justified Riposte now applies Paralyze or Stun, at the user’s discretion, while the reflected damage from Vengeful Riposte gains Phase.
Drawback: EN cost of Parry is expended immediately upon activation, and remains spent even if the effect does not trigger. Parry and its mods only last 2 turns, but their skill cooldowns remain unaffected.► Infinite Wield
Active: Free Action
Cooldown: 3 Turns
Requirement: R5 Weapon Skill (Any), Any Shift, Quick Change
Effect: You may temporarily change to a different shift, applying its benefits and costs until the cooldown of this skill is complete. Your native Shift is unavailable while you have changed to another. This ability shares a cooldown with Quick Change.
Drawback: Using a Shift other than your native one adds an extra +2 EN surcharge to the standard Shift cost. Your native Shift reasserts itself automatically at the end of the cooldown.► Inquisitor
Passive
Requirement: R5 First Aid Extra Skill and at least one First Aid mod must be active
Effect: User and fellow party members regain an additional 2 energy at the beginning of each of their turns. When the user activates skills or uses consumables that restore hit points to themselves or their party members, the benefits are increased by 20%.
Drawback: Users of this custom skill cannot select Hiding as an active Extra skill or benefit from any of its mods.► Shadowed Path
Passive
Requirement: ST-Shift, R5 Hiding Extra Skill, Vanish mod and one Surprise Attack mod must be active
Effect: Allows the user to activate Vanish as a Free Action in the same post after an attack without needing to slay a mob. EN costs for Vanish and Surprise Attack (both) are reduced by 2 EN.
Drawback: A player cannot make AoE attacks while possessing this custom skill.► Strength of a Mountain
Passive
Requirements: Rank 3 [Leadership]; R5 Block, Forgotten King's Authority Extra Skill and the Steadfast Leadership Art must be active
Effect: This skill enhances the Steadfast mod, and reduces its cooldown to 0. While Steadfast is active, two instances of any given status effect must be applied to the user before it takes effect. -

The Eternal Hunt [v3.1.2]
This event will lapse on 15 May, 2359ET.SpoilerImagine a pitch black canvas that mirrored one's reflection just as well as glass. When left out in the open, during the night, such a spread of darkness would capture the many twinkling lights in the sky, even as its hue shifted from teals and greens to blues. Such was the majestic sight from Coral, had one taken their time to shuffle down to the lake for a midnight stroll.
And it was against this backdrop that the Lake of Reflections had captured a constellation that shone brighter than the others, the fury of which laid within it was beyond celestial comparison.
There was a slam on the wooden refectory table, a gloved fist in black. The halls of one of the sky's imperial palaces — Orion's domain — was alive with a feast that day, hearth burning alight with an intensity rivalling the Hunter's disdain. The others at the table each flinched during their partake of their meal. Only three select others seemed unmoved by his antagonism, with one of them, female, even bothering to spare him notice from her plate.
 "Can you believe it? No wonder our offerings have been scarce lately. With the way Cardinal's been shifting its elements around... One would think it's almost looking for a way to snuff us out!"
Orion was positioned at the far corner, closest to the fire, with a mop that complimented that blaze by his side. His once kindly blue eyes were narrowed, squinted, sights set past his opposition, distant. The woman in his vision huffed, lion ears atop her head flicking.
"I can believe you're being a little brat when we're not in the mood."
 "When exactly is anyone going to listen to me, Bellatrix?" The Hunter shoved a cube of steak into his mouth, before jabbing at air towards his sole responsive company, fork prongs dripping with sauce and fat. "Between our troops these days, it's either hunting or gathering with little for anything in between!"
"You... are terrible at time management. A majority of our officials remain here anyway despite our need to send some of them out for food."
"Well they shouldn't have to in the first place." The pause in between his words gave Bellatrix enough time for an eye roll and a dicing of her meal before Orion spoke again. "How many are you talking about when you say 'majority'?"
The woman waved a hand. "Like sixty percent."
"So I'll have to make two speeches anyway to let my people know about recent developments." Orion shook his head, pulling away from his meal to slump against the back of his chair. "No, no. This won't do at all. We sincerely cannot lose our faith from the people, the players..."
Bellatrix was silent at his lament, save for a bored blink and a clink of her utensil against her plate. She raised her chin towards her brother. "Hey. Eat your food first."
Orion groaned, but sat upright to comply.
"You'll think of something," she reassured him, eyes returning to her plate and sizing up some roasted vegetables by the side. "I'm sure of it."
"Yeah," he scoffed, cutting into his meal once again. "I'll think of something. I need to think of something. We need to come up with a plan. Cardinal needs to..."
Four prongs sank into a stalk of broccoli just as Orion's voice faded into the clatter of dinnerware. Bellatrix gave it a big bite, before realizing her younger brother had gone quiet. A glance upwards — that distant look again, a faded presence from the man himself — and Bellatrix grunted in annoyance, raising a hand to wave in his periphery.
"Hey, eejit."
"—!"
Before her fingers could make it into his view, Orion's gaze shot back up to his sister, focus returning to the present. And that slight scowl from earlier grew into an even greater smile.
"Cardinal... just needs to change how combat works again."
Recurring dreams strike the players of Aincrad as some memories stir anew. A celestial palace; so the rumors of its existence speak true -- but the only concrete take away anyone has of it to prove other than a collective unconscious is the message in their inbox, delivered only to certain players. The castle's few strongest.
To them, an alert pinpoints an investigation into their skill menus. The message to players reads as follows:
"Hey, fellow hunters! Orion here!
I hope you remember me from a while ago. If not, don't worry, there's no need to cause a ruckus under my blessing.
If you hadn't heard from last time, I'm wishing to conduct an experiment recently. You may have noticed a new icon in your status bar. If it's there, then my plan has worked. If not, ignore this message.
I've made some changes to the combat system, if you'd take a look. Additional skills -- free of charge! Of course, their availability differs depending on the type of build you've gone for. Do talk with one another if you'd like to cross reference the conditions to unlock certain skills (but not too much to cause alarm, I hope!).
Anyone wishing to help me out on this endeavor will gain a few tokens for their effort that can be exchanged for prizes in my home. Mintaka's got a few more items stocked in this time! You'll get there if you wish for it in your sleep. Feel free to drop by and say hello during this time period!
If everything goes well, then most, if not some, of these changes will be made permanent. I suggest you try the alterations out in a quest or two, see how that feels. I'm sure you lot are already a mighty bunch, so try as you might to test your mettle on something you haven't before! If not for your sake, then maybe for mine, alright?
That's it from me for now. I'll be in touch if I need to.
Take care, players! Orion, out!"
Vanity: The Palace of Three Stars
SpoilerYou only see this palace in your dreams, during the occasion where Orion's Blessing is active in your status bar. All of them start off dark, from the black of night to a growing stretch of blue, above and below, a deep and rich midnight color. Stars come alive in tiny twinkles amidst the parallel sea, and each step a player takes in this galaxial realm sends ripples through the clear and desolate space landscape.
Then the palace appears, at the turn of one's head.
It looks to be imperial, traditional, decorated in red and whites, black and gold hues. The stone steps to reach it in the ocean are high, within a blink you advance past it, a warm toasty atmosphere inside to greet waking and dreaming visitors alike. Within, staff of various races bustle about, hauling cloth and donning armor, to and fro the different roads ahead. You intrinsically understand that wings to house staff are down the East and West corridors. Ahead, the building opens up to a beautiful Japanese courtyard in the open air.

The gardens split into three ways again; the large door at the center of the East wing leads to a grand feast hall, with a brazen fireplace left attended to by small lizard aides. To the West, hot springs are open for company to bask within, cleanse themselves of the day's duties. Up ahead lies the throne room; Orion would not be present to grace your presence at all times, despite his lineage to the castle, but you know relevant faculty to his position await you should you have any concerns about your visit to the palace.
There are some familiar faces walking about. Betelgeuse, Rigel; you're not sure how you're able to identify them, but their names come to you when you spot them, and vanish the moment you lose sight of them. Each celestial barely shoots you a glance if you had not attended Tanabata festivities, they keep you in their sights momentarily if you had. Did you? It's hard to recall in a dream like this. You know you can speak to them if you want to, but something about them is intimidating in these halls. Still, the want to try remains.
Sleepiness overtakes you when your time at the castle is over; a few minutes to a few hours, it's hard for anyone to keep track of time in the haze. Objects in your periphery start to blur at the seams and muddle into colours given time. When you give into rest, you wake moments after.
Any items traded at Mintaka's Treasury or small vanity items you'd collected through your visit remain in your inventory. These are the only physical traces players would have of the Palace of Three Stars in Aincrad; the rest remains a myth to the player base as far as most brokers are concerned.
★ Event Details: Orion's Blessing
Spoiler Orion's Blessing
"The Master of the Palace of Three Stars sends his regards."
During the duration of the event, all players are invited to test out changes to the current 3.0 system. Please look to the following posts for more information on the skills available/changes made. Players will also have access to the Palace of Three Stars, which they may interact with in this thread.
To participate in the event, players must create threads with the [PT-CS] tag to differentiate them from the current 3.0 system. Players must then engage in 3.0 content (combat, combat-related quests) while altering their skills to fit proposed changes to the system. Upon [PT-CS] thread closures, players will be awarded with mon tokens depending on the content engaged with. The current mon distribution is as follows:
- Thread closures: +1 mon
- Field Bosses: +1 mon
- Dungeons: +1 mon
- First Quest Completion in 3.0**: +2 mon
* Mon rewards are additive. As an example, a closed thread that has completed a quest with the [PT] tag will reward players with 3 mon each.
** Quests that have been cleared in 2.6 may be cleared again in 3.0 for mon bonuses. If a player had taken [Guardian of Fire] in 2.6, they may complete it again in this event for mon bonuses. If a player had taken [Monkey King] in 3.0, they may not complete it again in this event for mon bonuses.Mon tokens may then be exchanged in this thread for a variety of rewards. See [Mintaka's Treasury] below for details.
During the event, the 3.0 system abides by the following:
- Players will obtain loot from mobs slain with the [PT-CS] system so long as the mobs meet loot minimum requirements.
- Quests cleared with the [PT-CS] tag are considered canon.
As the event continues, any additional changes and updates proposed to the system will be edited into this segment, logged within [Bellatrix's Agenda].
Staff wishes to remind and urge players with any queries to direct their questions to #ask-a-staff on Discord. Thank you very much for your co-operation.
★ Event Progress: Bellatrix's Agenda
SpoilerI
 n the throne room, Bellatrix's seat amongst the council is distinct, but unused despite the celestial being present in its vicinity. The lioness eyes each player as they walk in, back hunched, cross-legged upon a black metal safe and beside a small notice board crafted out of bamboo and rope. Anyone with a knowledge of cat behaviour knows that the batting of tails is a sign of anxious energy, and the woman is no different when players draw close enough, with intent to query her questions. Her knuckles rasp on the green wood beside her.
"Check the board before you ask. I don't like to speak much. I'm shy."
Whether the celestial lies is anyone's guess.
Current phase of playtests: [Custom Skills]
Staff is currently attempting to adjust the Sword Arts system so that cooldowns are removed from each Art use while attempting to incorporate some Extra Skills as individual Sword Arts instead.
More information may be found [here]. The list of proposed changes to skills may be found [here].
Regarding the previous playtest:
- Players who had accumulated unspent mon from the previous playtest may spend as much of it as they had collected in the new playtest.
- As an example, players who had collected 5 leftover mon from [PT] and collected 3 mon from [PT-CS] may spend a total of 6 mon in Mintaka's Treasury (3 * 2 = 6).
When participating in this playtest, note the following:
- Only players at the current level cap (Level 32) may partake in this playtest.
- There is no SP cost for accessing a Custom Skill as part of this playtest, and players are free to select different skills to try out in different threads.
- Custom Skills cannot be used in staff-run events or raids.
- Everyone is encouraged to provide feedback in the #systems channel on our Discord. We want to hear your thoughts, suggestions and experiences with this new mechanic.
Projected phases of playtesting:
[ █ █ █ █ █ ]
- pending list of updates.
★ Event Shop: Mintaka's Treasury
Spoiler
"I-I should've known Master Orion would've chosen to outsource his treasury funds, too..."
The young girl sighs, tears nearly welling in her eyes as her hand grips tightly at the winter scarf around her neck. She turns from the room she examines into, filled high with gold and ornate antiques. Players may spot her at a set of thin double doors down the West hall, entry half-opened, stopped by her miniature figure and desk breaking traffic in the corridor. When her eyes are upon the red passageway, she'd watch travelers pass her by with the gentle kicking of short feet, the kid on a high chair. Mintaka is shy; any player's approach sends her in a minor panic, and she straightens her back, trying to look professional.
"H-hi! Y-yes, we're trading goods for mon tokens here if you have any! Please examine our wares if you're interested! T-thank you for helping the Palace of Three Stars out...!"
Players may make a post exchanging mon for items in Mintaka's Treasury. Posts should abide by the 150 word count rule. Please remember to attach the post link and item purchases for mon sent to the @Banker.
ITEMS Nametag (x1)
Allows its user to change the name and description of an equipment piece.1 mon Reroll Tickets (x3)
Allows a re-identification attempt on a single enhancement slot from a single piece of gear at a Merchant. May be used on a piece of equipment that has hit reroll limitations (item fusion, reroll cap).1 mon Cluster of Stars (x1)
Changes the type of an item as long as its enhancements are applicable to its new type.2 mon Bottled Vigor (x1)
Gain +(200 * Tier) EXP. Untradable; applied upon purchase.3 mon Demonic Shard (x1) 2 mon Gleaming Scale (x1) 2 mon Celestial Scroll (x1)
+1 CD to a day's worth of crafts or item identifications.2 mon Platinum Key (x5)
A single-use item that grants an LD bonus (+3) when opening a Treasure Chest.3 mon Candy Corn (x1)
Increase the effectiveness of a single crafted potion consumed in a thread by +1 (Player’s Tier) slot. Cannot be applied to an enhancement that has already benefited from [Candy Corn].3 mon Memory of Battle (x1)
Double the bonus from Scents of the Wild totems for one thread.3 mon Celestial Favour (x1)
Allows a re-identification attempt on a single enhancement slot from a single piece of gear at a Merchant using only their Unique Enhancement table. If an enhancement is rolled that matches a pre-existing enhancement on the equipment piece at capacity, the player is allowed an additional reroll attempt.
(eg. If a player rolls [FALLEN/HOLY] on a perfect sword that has [FALLEN II/???], the player may choose either [HOLY] on their roll or opt for the reroll attempt.)5 mon Gungir's Shard (x1)
Caches and expends a craftable consumable. The item to be cached must be submitted to a player's evaluation thread. Once confirmed, players may use the item to provide a buff to their characters once per thread. Other players can be affected by this item’s effects (eg. feasts, mass healing crystals), but the item cannot be used in combat. This item is tradable until an item has been evaluated on it.10 mon
One-time purchase per character.Hammerspace Backpack (x1)
Adds +1 to the player's Battle Ready Inventory. In addition to this effect, all Battle Ready Inventory slots extend their item capacity by 2. A player may only benefit from one Dimensional Backpack or Hammerspace Backpack at once, the latter taking precedence over the former.10 mon
One-time purchase per character.True-Light Lantern (x1)
When lit this simple brass lantern burns away shadows and deception, aiding in the connection of blows in the darkness. Negates the effects of low-light. Grants its user's party +1 ACC and +1 LD. A party may only benefit from one True-light Lantern at any given time.10 mon
One-time purchase per character.Fragment of Meissa (x1)
Removes an existing enhancement on any piece of equipment and replaces it with [HOLY]. Compatible only with Demonic items. One-time use.15 mon
One-time purchase per character.Pocket of Dark Matter (x1)
Removes an existing enhancement on any piece of equipment and replaces it with [FALLEN]. Compatible only with Demonic items. One-time use.15 mon
One-time purchase per character. -
To be updated incrementally with past events (and probably with better formatting):
3.0.2 Sword Art Playtesting:
Halloween 2021 Celebration:
3.1.2 Custom Skill Playtesting:
-
Floor 27
<< Part 4: Braso>>
Party Limit: 4 | 20+ Posts
Repeatable for standard thread rewards.
Quest Rewards:
Each Player receives the following, in addition to standard thread rewards:
- 2,000 Experience Points
- 2,000 col
Requirements:
- Roleplay travelling from Ordsea to Braso
- Speak with Commander Fudral and then journey to the Cave
- Defeat your Greatest Fear(s)
Summary:
Commander Fudral may have information regarding the attack on President Brienne, but he is not quick to trust an outsider. You'll have to earn it by taking your lumps, just like everyone other Braso trainee. The best way to do so is to visit the Cave, a hallowed place known across the entire floor. Anyone hoping to train in Braso must not only vanquish their fear, but come to terms with it. If you can do the same, and prove your worth to him, he may be more willing to share what he knows.
Outline:
Part 1 | Dire Dwarf in a Dour Mood
Perhaps the most jarring transition on the entire floor, leaving Ordsea's warmth for Braso's wilderness feels a bit like venturing into a stormy sea. Howling winds, pounding rain, and feet of snow are not only common, but liable to all happen in the span of a single day. As stark as the change from red to white crystals is, the shocking climate change is a more obvious indicator that one has crossed the boundary line. Only the bravest souls - or the craziest - would be willing to abandon the calm south for this western chaos.After travelling from Ordsea to Braso, you are ushered in to meet with Commander Fudral to discuss the attack on President Brienne. Clearly disturbed by the news, the Commander also gives the impression that he knows more than he is prepared to share with you. When he dismisses you, thanking you for the information, it becomes apparent that proving yourself will be the only way to gain his trust, and learn whatever secrets he keeps.
Part 2 | Reflect Upon Yourselves
One of Fudral’s lieutenants appears to sense the Players’ dilemma and offers them a bit of insight, suggesting that they should travel to a nearby sacred cave and endure the same trials as all of Braso’s initiates. He provides them with directions and wishes them luck, suggesting that they keep this to themselves if later asked how they found out about the site. The Cave is in the mountains not far from Targuk, though storms and terrain make it difficult to reach.When the Players arrive, they are confronted by a spirit that reflects their collective strengths, but also their personal weaknesses. They will have to work together to defeat it, hopefully gaining insight not only about themselves, but also their colleagues.
NPCs:
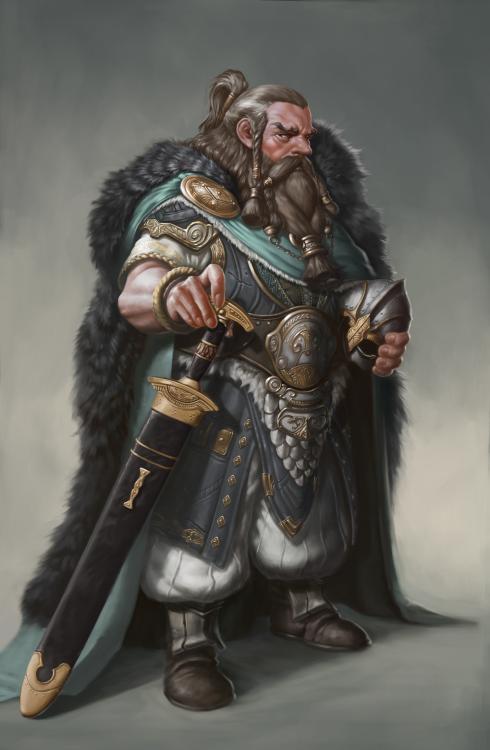
<<Commander Fudral>>
A dwarf with a more commanding and powerful presence than individuals twice his size. It is clear he is held in high regard, gaining the respect and loyalty of all those he trains.<<The Cave>>
SpoilerReferred to as simply “the Cave,” this space appears largely unremarkable. Located on the far West point of floor twenty seven, Players making the trip must be mindful of the snow, ice, and unforgiving weather. One of the floor's many caves, the one in question is identified only by the sword and shield symbol, etched into the stone above its single opening. Once inside, Players can walk for about five minutes before reaching the back. What happens during that time varies, but most everyone comes back changed. Anyone trained in Braso must first spend time in the Cave, and prove their worth by both defeating and making peace with their biggest fear. No standard mobs spawn here, but Players should prepare themselves nonetheless.

<<The Sum of All Fears>>
Your personal and collective nightmares, realised.
HP: (Highest Players’ Level) x 30 x number of players
DMG: (Highest Players’ Level) x 8
MIT: (Highest Player’s Level) x 3
ACC: (Highest Player's ACC +2, minimum 3)
EVA: 1 | Paralytic Venom (Defensive) | Phase
Paragon Levels are not taken into account when considering these calculations.
Abilities:
- Laid Bare | <<The Sum of All Fears>> attacks on every post action during combat, ignoring hate mechanics and targeting only the Player making the post.
- Brutal Honesty | <<The Sum of All Fears>> presents itself in the form of the greatest fear of the player making the current post. It can appear as anything, changing forms repeatedly throughout the fight, with the ability to alter the appearance of the cave as well.
- Some Things Never Die | Disabling effects only prevent <<The Sum of All Fears>> from attacking on the same post, but fade immediately afterwards. Immunity cooldowns still apply, but are reduced by 1 on each subsequent post. If disabled for two consecutive posts, <<The Sum of All Fears>> becomes immune to all disabling effects for a full party rotation.
Epilogue:
SpoilerYou emerge from the cave to find Commander Fudral waiting for you, and impressed by your show of strength (both physical and mental). It strikes you as likely that he was behind his subordinate sending you here in the first place. Fudral agrees to share what he knows.
“A group of trainees, after being disciplined for disrespectful and dishonorable behavior, fled the Targok training camp. Before doing so, they stole a considerable number of weapons from the local armoury. While I cannot be certain of their end-goal, I urge you to remain vigilant, and keep me apprised of any new developments. I will promise to do the same, and provide aid in bringing these bandits to justice." Nodding, Commander Fudral added, "'Honor in all things' is a saying we take very seriously here. That, and one more, which has been the motto of the Braso warriors for as long as anyone can remember. As you've earned that title, I suppose you should know it as well."
Upon successful closure of the thread, a secret phrase will be private messaged to all participants.
-
Floor 27
<< Part 3: Ordsea>>
Party Limit: 4 | 20+ Posts
Repeatable for standard thread rewards.
Quest Rewards:
Each Player receives the following, in addition to standard thread rewards:
- 1,500 Experience Points
- 3,000 col
Requirements:
- Roleplay travelling from Srona to Ordsea
- Speak with President Brienne
- Locate and secure at least five separate sets of documents
- Confront the bandits
- Return the Documents to Brienne
Summary:
After a suspicious cave collapse and mysterious fire, the possibility of deliberate sabotage has inevitably been raised. The people of Dagan and Srona deserve answers. Why is this happening? Who could be responsible? Could one territory be targeting the others, threatening the harmonious balance that floor twenty seven enjoys? An intermediary from Ordsea could be beneficial in mediating these discussions. You’re fortunate enough to have been granted an audience with President Brienne, herself. Unfortunately, Ordsea is not exempt from these acts of terror, and you find yourself finally facing the culprits head-on.
Outline:
Part 1 | A Meeting in Ordsea
As the trees begin to thin out, and the air grows noticeably warmer, it becomes evident that some invisible border between Srona and Ordsea has been crossed. Cool green crystals give way to fiery red ones, lighting the well-worn mountain path that leads to Lichten. Instead of humble crafters’ cottages, the grandest buildings on the entire floor rise up like giants, looking down on the newcomers in more ways than one.
After journeying to the enormous and historic Presidential Estate, you are quickly ushered in to sit down with President Brienne. Only moments after you’ve explained what happened in Dagan and Srona, shouts of alarm fill the mansion. A small, well-armed militia has forced its way in, and begun scouring its many rooms. Brienne, with her body-guard at her side, is not concerned for her own well-being. She is, however, worried about various critical documents hidden throughout the building. Five lock-boxes have been stashed in different rooms. Armed with a map of the house, and a small silver key, she asks you to retrieve the information before it falls into the wrong hands. She also requests that you refrain from using force, and absolutely do not take any lives, until it is determined who these bandits are.Part 2 | Locating the Lock Boxes
Select your first room. Check the room description from the list below for inspiration. Your post should describe travelling to the room, searching it, and unlocking the box/retrieving the documents. Make a roll linked to this post. If the natural LD result is 12 or less, a bandit enters the room while you are searching. Specific alternate bonuses may also apply to certain rooms (see list below). Searching or Hiding skills may be applied to the roll as a substitute in any room, but will not stack with other bonuses.
If a bandit is alerted to their presence, the party will need to write an additional post to describe avoiding or otherwise convincing the bandit to leave before you can access the lock-box and move on to the next room. Repeat the process until you have successfully collected at least five boxes. Each room may only be searched once. For a more challenging, less predictable approach, feel free to roll for which room you'll be checking.Part 3 | Confronting the Bandit
After having collected all of the documents requested by Brienne, and despite your best efforts, you come face-to-face with a bandit in the hallway outside of her study. After a quick altercation (either verbal or physical), the door swings open, and Brienne's bodyguard emerges. He kills the bandit, much to the President's dismay. This is strictly a roleplay encounter, and does not require rolls or combat mechanics.
With the culprit dead and his allies vanished into the night, you return the retrieved documents to the president. The immediate danger appears to have passed.
The Presidential Estate:

1
Kitchen
5
Workshop
9
Library
2
Laboratory
6
Armory
10
Recreational Room
3
Grotto
7
Menagerie
11
Master Bedroom
4
Dining Hall
8
Rooftop Garden
12
Conference Room
MAIN FLOOR
Kitchen
A long room with a low ceiling. There is little clearance to move about, as the space is filled with crammed cupboards and counters. Metal cookware dangling from ceiling racks clinks like pleasant windchimes with the slightest breeze. Jars filled with exotic spices in all colors are arranged in precise order along shelves on the walls.
Note: Characters with the Cooking Profession can apply their profession rank when searching this room for documents. Every two ranks grants a +1 bonus to the LD roll, rounded up.Laboratory
A small room, with a slanted ceiling, tucked beneath the grand staircase. It has no windows, and one door. Glass vials filled with numerous chemicals are housed on shelves. A long table occupies the far wall, with an ornate, complicated chemistry set spread across it.
Note: Characters with the Alchemist Profession can add their profession rank when searching this room for documents. Every two ranks grants a +1 bonus to the LD roll, rounded up.Grotto
A one-of-a-kind addition to Presidential Estate. The small room is designed to mimic a grotto, with real rock lining the floor, ceiling, and walls. Veins of multi-colored crystal shimmer from the rockface. Everything is damp, and has a very earthy smell. A small pool, big enough for three or four people, rests in the middle.
Note: Characters with the Alchemist Profession can add their profession rank when searching this room for documents. Every two ranks grants a +1 bonus to the LD roll, rounded up.Dining Hall
A massive room, used to host fancy dinners and frivolous galas. A massive wooden table, long enough to seat forty people, stands in the middle of an easily-converted dance floor. It is set for as many people, with plates, cutlery, and glass drinkware. Ornate tapestries hang from the walls, and a collection of musical instruments wait in the corner.
Note: Characters with the Performer Profession can add their profession rank when searching this room for documents.Workshop
A space for tinkering, the workshop is littered with piles of wood, swaths of cloth, and other half-completed projects waiting to be brought to life. A myriad of tools hang from the wall, and blueprints for… something… are spread across the table.
Note: Characters with the Tailor Professions can add their profession rank when searching this room for documents. Every two ranks grants a +1 bonus to the LD roll, rounded up.Armory
Suits of armor frame the doorway, both on the inside, and the outside. Weapons of all shapes and sizes rest on wall-hooks, and a mat covers much of the floor. Twin punching bags hang in two of the corners.
Note: Characters with the Blacksmith Profession can add their profession rank when searching this room for documents. Every two ranks grants a +1 bonus to the LD roll, rounded up.Menagerie
One of the largest rooms in the house, and one that the Presidential Estate is best known for. Exotic animals from all over the floor are housed here in a single, walk-through enclosure. Brightly colored birds sing from their perches, reptiles lurk beneath rocks, small mammals scurry through the live underbrush, and fish circle the small pond. The personal zoo is cleaned almost around the clock, and an animal expert lives on the premises to care for them. The menagerie was built by the first President to occupy the building.
Note: Characters with the Fishing Profession can add their profession rank when searching this room for documents. Every two ranks grants a +1 bonus to the LD roll, rounded up.UPSTAIRS
Rooftop Garden
Glass ceiling and exterior walls trap the heat inside, and bring life to the Estate's collection of exotic plants. The smell is overpowering, intoxicating, and the space stays warm year-round. These plants, which have been cultivated to thrive in the darkness, are arranged to mimic nature's chaos. A multi-tiered fountain bubbles joyfully in the middle.
Note: Characters with the Foraging Profession can add their profession rank when searching this room for documents. Every two ranks grants a +1 bonus to the LD roll, rounded up.Library
The thick carpet and dark colors create a snug, homely atmosphere, accented by a crackling fireplace and overstuffed armchairs. The walls are lined, floor to ceiling, with shelves of books.
Note: Characters with the Appraiser Profession can add their profession rank when searching this room for documents.Recreation Room
A cozy room with forest green wallpaper and lush carpet. The heads of dangerous animals are proudly displayed along the walls alongside two dartboards. A pool table with rich crimson velvet sits in the center.
Note: Characters with the First Aid Extra Skill can add their skill rank when searching this room for documents.Master Bedroom
Where the President sleeps. A large room with surprisingly modern décor. There is a king-sized bed draped in white and gray blankets. There is also a writing desk, a dresser, a wardrobe, and shelves containing artistic treasures.
Characters with the Artisan Profession can add their profession rank when searching this room for documents. Every two ranks grants a +1 bonus to the LD roll, rounded up.Conference Room
An additional space for conferencing with visitors, added by Brienne herself. The room is decorated in simple black and white, with a long table and ten chairs. Rows of shelves containing encyclopedias, ledgers, and other relevant resources line three of the four walls. The sleek, no-nonsense room speaks of efficiency, a stark contrast to the extravagance of the rest of the house.
Note: Characters with the Leadership Extra Skill can add their skill rank when searching this room for documents.
NPCs:

<<President Brienne>>
A fierce, charismatic leader who believes in five united territories despite strong opposition.

<<Bandit>>
Whoever they are, they're armed to the teeth and unafraid to use force to achieve their goals.Epilogue:
SpoilerThe other bandits apparently managed to escape, and interrogating a dead bandit is impossible, it appears that your story is at an end. Fortunately, someone mentions the sword and shield tattoo on the bandit's forearm. The bodyguard explains that this is the symbol of Braso, and shows his own tattoo. Many who train in the Western territory adopt the mark to show their accomplishments as warriors. If the bandit trained in Braso, there may be a record of who he was. Brienne urges you to meet with Commander Fudral, and provides you with a letter that will give you immediate access to such an influential person. She also begs that you be careful, as the journey to the city of Targok is quite treacherous.
"I'll share with you the words the former President told me," Brienne says, "but please hurry to Braso. These individuals must be stopped. This matter is much larger than any one territory."
Upon successful closure of the thread, a secret phrase will be private messaged to all participants.
-
Floor 27
<< Part 2: Srona>>
Party Limit: 4 | 20+ Posts
Repeatable for standard thread rewards and Ushiame Salves.
Quest Rewards:
Each Player receives the following, in addition to standard thread rewards:
- 1000 Experience Points
- 1000 Col
-
POTENTIAL REWARDS | Ushiame Salve
-
Tierless Perfect Mass HP Recovery (Crystal) - The party must have successfully gathered at least two additional times beyond the quest minimum requirements to obtain one Ushiame Salve, to a maximum of one per party member per thread. This reward is repeatable.
- Though it looks like a salve, this potent curative has absorbed the power of the green crystals around Srona and can be activated as a free action
-
Tierless Perfect Mass HP Recovery (Crystal) - The party must have successfully gathered at least two additional times beyond the quest minimum requirements to obtain one Ushiame Salve, to a maximum of one per party member per thread. This reward is repeatable.
Requirements:
- Roleplay travelling from Dagan to Srona
- Help put out the fire and speak with Percival
- Roleplay finding the Blooming Grove
- Collect Ushiame from the Blooming Grove
- Roleplay returning the Ushiame to Percival
Summary:
The alchemists of Srona need your assistance. A mysterious fire has destroyed their batch of Ushiame, the main ingredient used in the creation of their healing salve. While they prepare what they have on hand, you must travel to the Blooming Grove to collect more of this mystical flower. But be warned, the Grove Guardian has been angered by the recent blaze and stands guard to protect the grove from ill intentions.
Outline:
Part 1 | The Mysterious Blaze
Travelling from Dagan to Srona, in search of their powerful healing salve to save the rescued farmers injured in an unfortunate cave collapse, you stumble upon a group struggling to put out a raging fire burning in one of their storage sheds. Those trapped inside have already been overwhelmed by the smoke and heat, but hope remains to save them and possibly some of the remaining salve ingredients.Help the villagers put out the fire. Players must roll natural CD to put out the fire and continue the quest. A combined total of 10 [+10 per member in the party] is required to achieve this goal. Sadly, what salve remains is barely enough to tend to those wounded by the fire.
Once the blaze is extinguished, Lead Alchemist Percival informs that more salve could be created if the party can retrieve several bushels of Ushiame flowers from the Blooming Grove. The NPCs must remain to tend to their wounded, but Percival informs the party that the grove can be found part way up the mountain and is obscured by thick growths of massive, densely packed trees. Large, glowing, green crystals overlook the site slowly pulsing with light and will help guide them to its location.
Part 2 | Need Versus Greed at The Blooming Grove
The Players must roleplay finding the Blooming Grove and will be able to see the Grove Guardian watching them when they arrive.Attempting to gather Ushiame requires a post action. A modified LD of 15 or higher is required to successfully gather the rare flowers. A total of [4 +1 per party member] successful attempts is required to obtain the required quantity of material. Additional rewards can be gleaned if players are willing to push their luck and risk the Guardian’s wrath.
The party must also keep a running tally of CD roll results for every gathering attempt made (use the CD results from your LD rolls). Foragers may reduce their CD roll results by a value equal to their rank in the profession, to a minimum of 0.
If the CD roll tally exceeds a combined total of 30, you will have overstayed your welcome in the grove and the Guardian will begin expressing its displeasure according to the following table:
CD Tally
Consequence
31-40
If the MD result on your roll was 6 or higher, the Grove Guardian summons vines from the ground that hamper and eventually pin you down. Your gathering action fails and another player must spend their post action to free you.
41-50
If the MD result on your roll was 5 or higher, The Grove Guardian summons wasps, beetles, and other insects from the surrounding trees, attacking all players in the party, dealing 100 unmitigatable damage and your gathering action fails.
51-60
If the MD result on your roll was 4 or higher, both of the effects noted above are applied. Only the Player making the roll is trapped by vines.
61+
If the MD result on your roll was 3 or higher, both of the effects noted above are applied, but damage is increased to 200. Only the Player making the roll is trapped by vines.
Note that Regeneration and Battle Healing will not be triggered by these effects, though other enhancements and healing effects may be applied to negate these injuries.
Escaping the Grove requires a single post action by the party. No escape mechanic required. All Players must be freed from the Guardian’s vines before this can be attempted.
NPCs:
<<Percival, Lead Alchemist>>
A kind, yet obviously overworked man in his early middle age. Recognizes the tension between the territories, but wants to see past it for the good of all the territories.
Lead Alchemist Percival informs you of where the Ushiame flower grows, The Blooming Grove. The Grove is located part way up the mountain entirely covered with trees. The glowing green crystals seem to slowly pulse there, denoting its location.
Enemies:

<<Grove Guardian>>
A large, stag like creature with two, undiscernible faces and golden laurel leaves where antlers would be.The Grove Guardian is an invulnerable creature that remains docile unless provoked, or if the Grove is heavily disturbed.
They slowly patrol the Grove, watching you from a distance as you take what you need.. and only what you need.Epilogue:
SpoilerAs soon as Percival is presented with the Ushiame, he and the other alchemists immediately get to work creating the healing salve. He thanks you for replenishing their stock, and for saving the lives of the injured farmers.
"You've done us a great service," he tells you, "so I'd be happy to share a phrase that we Sronians have always held close to our hearts. I hope it might provide some answers." Percival scrubs his face with both hands, then heaves an enormous sigh. "And while I hate to ask more of you, I hope you might find us some answers as well. The fire was no accident, as a number of people claim to have seen culprits fleeing the scene. If your travels take you to Ordsea, please speak with President Brienne about our troubles. Tell them I sent you. Maybe Brienne will know what to do."
Upon successful closure of the thread, a secret phrase will be private messaged to all participants.
-
Floor 27
<< Part 1: Dagan>>
Party Limit: 4 | 20+ Posts
Repeatable for standard thread rewards and Care Package.

Quest Rewards:
Each Player receives the following, in addition to standard thread rewards:
- 500 Experience Points
- 500 Col
-
Care Package
- Perfect Cooking Consumable of your choice and tier.
Requirements:
- Roleplay travelling from Ronbaru to Dagan and speaking with Tiberius
- Perform various tasks to help rescue the farmers caught in the collapse (see below)
- Roleplay travelling back to Dagan and reporting to Tiberius to receive part of the secret phrase
Summary:
Tiberius, a representative from the Farmer’s Guild, has expressed that a cave in has trapped a number of their farmers. He requests your assistance to travel into the caverns , find the farmers, and bring them home. Then he will tell you what you want to know regarding the divide.
Outline:
Part 1 | Arriving in Dagan
Within the town square of the territory's central city, Vesh, you enter the Town Hall. Voices spill out into the street, including both cries pleading for help and shouts demanding action. It seems something has gone awry. Pushing past the crowd and slipping into an the guild representative's office , you find Tiberius with his face in his palms. A heavy sigh escapes him before he looks up at you, requesting to know what business brought you to his settlement.Tiberius dismisses any requests for information regarding the floor's recently increasing disharmony, claiming there are much more pressing matters at hand. He speaks of a network of caves that run through the mountains behind the local granaries. These unnatural caverns provide the perfect environment to grow their unique and bountiful crops, thanks to the rich, mineral filled water that drips through the cracks in the ceilings and low hanging crystalline formations that provide just the right amount of light. However, as the farmers began sowing the innermost cavern, the ceiling apparently gave out and trapped them inside. Their current status is unknown, but the only one who made it out heard screams of help from the other side of the fallen debris. He begs for your help, offering to answer all of your questions if you will first rescue his citizens.
Part 2 | Rescuing the Farmers
You were told that the farmers were trapped deep within the network of caves, but the damage is far more extensive than you expected. Most of the crystals that illuminated the cavern have been destroyed or blocked off, offering nothing but very dim light for you to navigate. Players must use a combination of skill, wit and other resources from the following list to help bring the trapped farmers to safety:- Use First Aid or a healing consumable
- Use any Leadership Art
- Make a Searching or Lockpicking roll with a result of at least LD 14 (totems and consumable apply, but mods, addons and other buffs do not)
- Provide guidance to others by having the Night Vision mod active
- Remove debris (can be done once for Extended Weight Limit and again if another character has the Large Pockets mod)
- Call out to the trapped NPCs (require Howl skill)
- Devise some technical or mechanical contraption to assist (requires TECH shift, Meticulous mod or Resolve addon)
- Navigate tight and narrow openings to help open a passage (requires Athletics mod, Nimble addon, or Hiding of at least rank 3)
- Put your familiar to good use (requires a familiar)
Unless otherwise noted, each of the actions listed above can be done twice by the group, but not more than once by any given Player.
NPCs:

<<Tiberius>>
A portly, older gentleman with both human and dwarven features. They speak and act in much higher regard when in public, but shift back into their farmer-like demeanor when speaking with players in private.Tiberius dismisses your need for information regarding the floor's split, claiming there are much more pressing matters at hand. They tell you of a network of caves that run through the mountains behind the barns. These unnatural caverns provide the perfect environment to grow bountiful crop, thanks to the rich, mineral filled water that drips through the cracks in the ceilings and low hanging crystals that provide the right amount of light. However, as the farmers began sowing the innermost cavern, the ceiling gave out and trapped them within. Their current status is unknown, but one who made it out heard screams of help from the other side of the fallen debris.
Epilogue:
SpoilerReturning to Tiberius, the commotion outside of the representative's office seems to have calmed down. The crowds have dispersed to tend to the wounded, though it seems that simple first aid may not be enough. Tiberius explains that the apothecaries of Srona, the eastern territory, have created a healing solution that could save those most seriously injured.
"You need to travel there anyway, don't you? In your search for answers?" He nods. "But of course, you have done our city a great service. I will leave you with this, a phrase in the old language of our people. It may not seem like much now, but I am sure it will provide you the answers you need in time."
Upon successful closure of the thread, a secret phrase will be private messaged to all participants.
-

The Mysterious Divide
"This is a place of learning." Motioning to the seemingly endless rows of books, the old man smiled mischievously. "Of course, finding answers has a funny way of creating more questions. The more we learn about farming practices, the more interested we become in the crystals that make the growth possible. The more natural resources we locate in Srona, the more we wonder why those same resources aren't distributed evenly through the land. And after the Misadventure of Mistrek, we find ourselves asking how one man could possibly manage to fit inside a-" With a quick wave of his hand, the NPC cut off his little diversion. "Oh, that doesn't matter much. What does matter is the most important question of all, and the one the Lapis Society was founded on. The Universal Truth. The 'big one.'" After a dramatic pause, the snowy-haired man threw his arms out wide, his brown robe flapping theatrically. "Why the territories exist at all!"
Moving into a leisurely walk, Destin continued to address his small audience. "We've uncovered literature that hints at a time before the boundary lines, but no one knows for sure why they came into being. Did war break out? Was there a natural disaster, or some act of nature that drove the people into their separate corners? Or did the leaders at the time just decide it was a good idea?" Chuckling to himself, the man shrugged his narrow shoulders. "Were there even leaders? Did they elect them, as they do in Ordsea? Did they serve until death, or-" For the second time, Destin caught himself before giving in to full-fledged rambling. "I apologize, but I find myself endlessly intrigued by our mysterious history. It's why I joined the Lapis Society, and I suppose my enthusiasm is why I was chosen to represent them."
Finally, the man's amber eyes hardened with resolve. "This is where I must ask a favor of you. We had a donation made to the library recently. A woman claimed that the journals belonged to a distant relative, and that they've been stashed in the attic for as long as she could remember. As said woman has no interest in genealogical studies, she gave them to us. Though most of what is written is somewhat mundane - climate patterns, growing seasons, crop yields - the entries grow darker, and more cryptic toward the end. Many references to some unknown threat, and words such as 'separate' and 'divide' appear quite often. The last entry mentions a 'the most important phrase,' but also that it is 'best forgotten.'" Destin's eyes crinkled at the edges as he scowled. "Not much to go on, but also the most promising lead we've had since I've been here. If you're willing, I would like to send you to the four other territories, to meet with most prominent figures you can, and ask them about a secret or important phrase." Smiling sheepishly, Destin added, "They may have no idea what you're talking about. But on the other hand, they may. I'm willing to take that risk if it means uncovering the truth."

<<Destin>>
An intelligent and excitable man, and the head of the Lapis Society.
In Ronbaru's Grand Library, the Lapis Society works tirelessly to solve the floor's greatest mysteries. The group consists of NPCs from all walks of life, who can often be found pouring over historical texts, or exploring significant landmarks in search of these great answers. The age-old mystery that the Lapis Society aims to solve is the reason behind the great divide of the floor, and the formation of its various regions: the northern territory, Dagan, the eastern, Srona, the southern, Ordsea, and to the west, Braso.
That is where you come in. The Lapis Society has requested that you travel to the four territories and speak with their leaders, in hopes you may learn what they know about the 'most important phrase.' It will be a long, dangerous journey across the entirety of the twenty seventh floor. Do you accept?
-
Each quest must be completed in order. You cannot skip around, and you must meet all requirements and have your thread closed before moving on to the next.
- This only applies to the initial play-through. Once you've completed the quest line in its entirety, you may take any of the four quests at any time.
- For the second, third, and fourth quests, please link to the previous quest in your first post.
- Pay close attention as you work your way through. Each quest has various objectives that must be completed. The components of some may be more complicated than others, so please be sure to read carefully.
-
Once you have completed each quest, and it is successfully closed, a staff member will privately message all involved Players the secret phrase given by the territory's leader.
- Players are strongly discouraged from sharing the phrase OOC, and only IC if the situation is appropriate. Basically, please don't rob others of the chance to discover and use this phrase on their own.
- All quests are repeatable for standard thread rewards. Additional rewards may only be collected on subsequent run-throughs if noted in the quest description.
-
Each quest must be completed in order. You cannot skip around, and you must meet all requirements and have your thread closed before moving on to the next.
-
<<Floor 27>>
Floor twenty seven is a land plunged into a perpetual darkness. Even during the day, no sunlight permeates the floor above. Though this may seem off-putting to some, the floor is actually quite popular. It is frequently visited by Players, and even more telling, the NPCs seem to be very happy with their virtual realities. This is in large part due to the abundance of natural resources. Ore items can be found in nearly every part of the floor, making it a popular destination for artisans. Precious stones of various colors can be found here as well, primarily blue, yellow, white, green, and red. These massive gems hang overhead from the twenty eighth floor, and also protrude from the mountainous terrain, tinting the area in a kaleidoscope of colors.
The NPCs on the floor are an equal mix of humans and dwarves. Despite the difference in races, there is no evidence to suggest that these two groups have ever demonstrated any animosity toward each other. While it is true that many dwarves hold jobs related to mining natural resources, there are also those who work as farmers, soldiers, educators, engineers, scholars, and even politicians. Likewise, humans can be found doing a variety of jobs across the floor as well. There appears to be no social or economic divide between humans and dwarves. Both thrive here, and have adapted to life in the darkness by developing an enhanced night-vision. In fact, the only real separation on the floor can be defined by its five distinct regions, and the NPCs who have adjusted to life there. The gems that cover the floor can indicate where a Player is, with each area sporting a different color. As a Player moves from one region into another, both types of gem can briefly be found, before giving way entirely to a single shade.
Overall, the floor gives the impression of being a pleasant, peaceful place to live, work, and train. Though it is divided into five areas, each with its own unique quirks, there appears to be no tension between them, aside from occasional teasing. Each group plays their part to help the floor flourish. Interestingly, no one seems to remember why or how the divide came into being, simply that it has always been a natural part of their lives. Of course, appearances can be deceiving. Something is waking on the twenty seventh floor, and it is darker than the eternal night.
Main Settlement:
<<Ronbaru>>
The first of the five regions, Ronbaru, is located at the center of the floor. It houses the main teleportation plaza. A bustling city, Ronbaru occupies a circular valley carved out of the floor’s mountains. The layout is similar to a wagon wheel, with a round outer wall, and a network of roads that all lead to a central park. Ronbaru is something of a melting pot, boasting the greatest diversity of people and professions. Painters and poets work alongside scientists and architects, and displays of every type imaginable fill the various storefronts. Due to this variety of people, Ronbaru is considered a cultural hotspot, offering the best in dining, shopping, and entertainment. It is not unusual for NPCs from elsewhere to visit Ronbaru for special occasions. While Ronbaru is made up of only a single city, it's size and importance gives it the right to be considered one of the floor's five territories. Therefore, Ronbaru is both a city, and a territory. The NPCs here have formed a Meritocracy, where the most prominent men and women in society make the decisions. The most respected among them, Grath, heads the Lapis Society. This group of NPCs come from all walks of life, and have joined together to seek the “universal truth” - why the floor is fractured into five territories. Tasked with solving the floor’s greatest mysteries, they are often found pouring over historical texts, or exploring significant landmarks. They work out of a large library, filled to the brim with an array of literature, artifacts, and interesting knick knacks. Their name is a nod to the spiritual significance of the Lapis Lazuli, and the blue gems that decorate the city.
Territories:
◉ « Dagan »
Spoiler
In the North, you’ll find the territory of Dagan. Though the rugged mountains and endless darkness may not look like a harvesting haven, the people here have done an exceptional job of cultivating fruits and vegetables. Their strengths lie in growing plants without light, and in some areas, with limited water and soil. Great steps have been carved into the sides of the slopes, utilizing terrace farming where the landscape allows. Much of the farming takes place in the shallow valleys, and even in the cave systems themselves. While the farmers are constantly experimenting with new fertilizers and farming practices, it is believed the crystals provide the energy necessary to grow the crops. Unfortunately, attempts to move the crystals elsewhere have proven unsuccessful, and the power simply vanished from them once they left Dagan. As such, nearly all of the floor’s food is produced in the North, and distributed by wagons pulled by sturdy mules. The NPCs here are incredibly hard-working, and they value those with strong work ethics. A group of the most prominent farmers form the Dagan Guild, which makes the decisions for the territory. “Dagan” refers to the entire territory, its various farms, smaller communities, and main city, known as Vesh. While Vesh itself is a safe zone, the rest of the territory is not. Players will know that they are entering Dagan by the sight of the yellow crystals cropping up from the rich soil.
◉ « Braso »
Spoiler
To the West lies the territory of Braso. Here, Players will find some of the most volatile weather on the entire floor. Cloudless nights can give way to torrential rains, spitting snow, and gusting winds without warning. It is fitting, then, that the toughest individuals should be stationed in Braso. Men and women of all walks of life venture into the Western mountains for training in various disciplines. Hand to hand combat, featuring numerous different martial arts, are the backbone to a warrior’s training. They are also educated in strategy and warfare, and trained in mounted combat, and an array of different weapons. These soldiers are disciplined, skilled, and unlikely to partake in activities they deem immoral or inappropriate. A rigid ranking system dictates power level in Braso, with Commander Fudral at the very top. A highly respected dwarf, he makes the decisions for his soldiers, their families, and all others in Braso. Though no NPC can recall a time without peace, the drills continues. Those trained here provide all “muscle” for the twenty seventh floor, from guarding Dagan wagons to escorting Ordsean politicians. A large city called Targok houses the majority of warriors, with smaller satellite training camps spread throughout the region. Targok features dormitory-style housing, workout centers, and training facilities built into the mountains themselves. Targok is a safe zone, while the rest of the region is not. The white gems signal the beginning of the Braso territory.
◉ « Srona »
Spoiler
To the East lies the territory of Srona. Though the mild weather remains largely unchanging, the area boasts exceptional variety in a different aspect - its trees. Trees of all shapes and sizes thrive here. Some cling to the steep mountainsides in remarkable feats of anti-gravity, while others cluster together in lush forests in numerous small valleys. Nestled among them are woodshops, forges, apothecaries, and all manner of other workspaces. Srona is considered the crafting capital of the floor, where raw material is processed with awe-inspiring speed and efficiency. Items brought to life in Srona are sent to all other territories, furnishing their houses, improving their machinery, and healing their ailments. The theme of the territory, experimentation, can be seen everywhere. The NPCs are always reaching for the stars, exploring new approaches to familiar concepts, and working to make the rest of the floor a safer and more comfortable place to live. The main city, and only safe zone, is called Ylvon. It is a community of crafters, and the meeting place for the monthly Srona Union meetings, where anyone interested can meet to discuss policy decisions. Green gems alert Players to their proximity to the Srona region.
◉ « Ordsea »
Spoiler
The fifth and final territory, Ordsea, is located to the South. The weather here rarely dips below sixty degrees Fahrenheit, despite the fact that the sun never actually rises. The geography is otherwise fairly unremarkable, without the impressive vegetation or weather patterns of the other regions. Instead, the NPCs have brought the beauty inside, covering the territories in the most magnificent buildings. The structures vary in style, but a Player would be hard pressed to find anything smaller than a mansion here. A crimson and gold theme weaves through nearly every architectural masterpiece, as does wealth and grandeur. Within these gilded walls, brilliant minds study, teach, and, of course, debate. Ordsea, and its safe-zone capital city of Lichten, house the diplomats and the delegates, the philosophers and the professors. Where Braso may provide the muscle, in many cases, Ordsea provides the brains. Because of this, there are some Ordseans who look down on the rest of the floor. In fact, some in Ordsea's multiple-party system have publicly spoken out against this "equal treatment" approach. The current president, Brienne of the United People's Party, discourages this line of thinking. She constantly advocates for community, despite the fierce opposition. On the surface, it appears that the vast majority of Ordseans agree with her. Red crystals cover Ordea, a nod to the fire and passion the area is known for.
Other Locations
◉ « Ming Garden »
Spoiler
Nestled in the center of the Dagan territory sits the Ming Garden. Blooms of all sizes, shapes, and colors fill the night with a soft, bioluminescent glow. A stunning place of solitude and tranquility, many come here to meditate. Occasionally, couples might visit on a date, but the sense of silence and stillness is to be respected. Loud noises and disruptive behavior cause the blooms to close up, much to the disappointment of other garden visitors. Though not a recognized safe zone, no mobs have ever spawned here.
◉ « The Cave »
Spoiler
Referred to as simply “the Cave,” this space appears largely unremarkable. Located on the far West point of floor twenty seven, Players making the trip must be mindful of the snow, ice, and unforgiving weather. One of the floor's many caves, the one in question is identified only by the sword and shield symbol, etched into the stone above its single opening. Once inside, Players can walk for about five minutes before reaching the back. What happens during that time varies, but most everyone comes back changed. Anyone trained in Braso must first spend time in the Cave, and prove their worth by both defeating and making peace with their biggest fear. No standard mobs spawn here, but Players should prepare themselves nonetheless.
Transportation
Only the sturdiest of creatures could haul the heavy loads around floor twenty seven. Short, shaggy ponies and long-eared mules are the common choice. They can be borrowed from various stables in all five territories, to be ridden, or pulled in small carts. Of course, those who are hesitant around the animals are welcome to catch a ride with traveling NPCs, or simply explore on-foot.
Common Mobs of Floor 27
Spoiler-
Water Elemental - A small, blob-like creature made entirely of water. They are difficult to hit, as they have the ability to move through the air. Small and nimble, they are said to have a playful side, but an exceptionally short temper. While they collect near bodies of water, they can
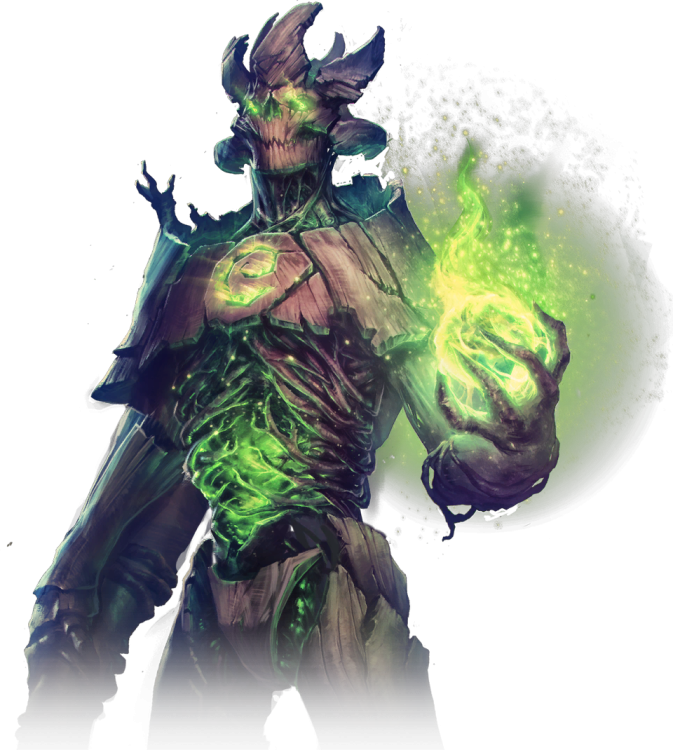 travel over short distances. During rainstorms, the Water Elementals have a habit of swarming.
- Locations: <<Ronbaru>>
-
Earth Elemental - A short, stocky humanoid made entirely of packed earth. They can generally be found tending to the plants, and while they appear gentle at first, they are exceptionally territorial, and refuse to share their land with humans. They are prone to attack on sight.
- Locations: <<Dagan>>
-
Metal Elemental - In many ways, a walking suit of armor. They roam the mountains of Braso, completely unaffected by the harsh terrain and brutal weather. While the same height as most Players, and likely twice as heavy, they have a tendency to move more slowly than other mobs. Of course, when they do hit, the results are devastating. Many warriors face off against Metal Elementals as a training exercise.
- Locations: <<Braso>>
-
Wood Elemental - Tall, willowy creatures with deceptively weak wooden bodies. They move among the trees, seeming to melt into them to avoid detection. They will not attack immediately, generally content to observe. However, if a Player engages first, or attacks the trees that the Wood Elementals love so dearly, they will take offensive action.
- Locations: <<Srona>>
-
Fire Elemental - Shapeshifting creatures of fire and heat. They are similar to their water-based counterpart in that they don't keep a solid form, but differ in that they constantly move between them. Some Fire Elementals appear as humans, while others take the shape of animals, or perhaps most frightening, small fire tornadoes. They attack without discrimination, though they typically don't do so in groups.
- Locations: <<Ordsea>>
« Floor 27 Labyrinth »
The Floor Twenty Seven Labyrinth is an interesting reflection of the floor itself. Players can enter the enormous network of tunnels within the mountains, and follow them through familiar environments - Braso's frigid cold, Dagan's vegetation, Ordea's heat, and Srona's towering trees. Crystals of red, green, white, yellow, and blue illuminate the many crisscrossing paths. Vast caverns filled with the floor's flora and fauna provide a beautiful, but confusing pathway for scouts to follow. Dangers lurk in the caves, chief among them the floor's many elementals. Those brave enough to venture into the labyrinth, may be rewarded with treasure chests, an encounter with the labyrinth guardian, the location of the boss room, or the stairway to the next floor.
A scouting party consisting of no more than four Players must roll a combined 300 LD.
Be advised, the process for locating the boss room has changed. Please refer to the updated guide.Quests:
<<The Mysterious Divide>>Labyrinth: Unknown
Boss: Unknown -
Water Elemental - A small, blob-like creature made entirely of water. They are difficult to hit, as they have the ability to move through the air. Small and nimble, they are said to have a playful side, but an exceptionally short temper. While they collect near bodies of water, they can
-
REWARDS
Event Part 2 will take place soon.EXP
SpoilerPlayer Tier Raw EXP Mega Slime Adjusted EXP Post Count Base Col Reward Laurel Wreath Total Col Shield 10 68950 1.1 75845 8 20000 11377 31377 Baldur 9 62055 1.1 68261 8 20000 10240 30240 Calrex 10 68950 1 68950 7 20000 10343 30343 Crozeph 7 48265 1.1 53092 6 20000 7964 27964 Koga 6 41370 1.1 45507 9 20000 6827 26827 Hirru 8 55160 1 55160 9 20000 8274 28274 Raidou 11 75845 1.1 83430 8 20000 12515 32515 Eruda 7 48265 1 48265 8 20000 7240 27240 Freyd 12 82740 1 82740 8 20000 12411 32411 Freya 7 48265 1.1 53092 6 20000 7964 27964 Mina 4 27580 1 27580 6 20000 0 20000 Shiina 6 41370 1.1 45507 7 20000 6827 26827 Oscar 8 55160 1.1 60676 5 20000 9102 29102 Lessa 8 55160 1.1 60676 5 20000 9102 29102 Ariel 9 62055 1 62055 6 20000 9309 29309 Night 10 68950 1 68950 6 20000 10343 30343 Zandra 10 68950 1.1 75845 6 20000 11377 31377 Morg 8 55160 1 55160 8 20000 8274 28274 Hidden 8 55160 1.1 60676 7 20000 9102 29102 Sam 7 48265 1.1 53092 6 20000 7964 27964 Mac 10 68950 1 68950 7 20000 10343 30343 Simmone 6 41370 1.1 45507 7 20000 6827 26827 Staff Reward 8.22 11508 1 11508 9 (Avg player tier) (Not applied) SpoilerTotal Word Count (Players): 41,358
Total Word Count (Boss): 8,383
Player Word Count:Party 1 Shield Baldur Calrex Crozeph Koga Hirru 1983 1689 2326 1490 1771 4065 Party 2 Raidou Eruda Freyd Freya Mina Shiina 2349 1270 4085 1266 1752 1391 Party 3 Oscar Lessa Ariel Night Zandra 2008 1391 1138 1982 1331 Party 4 Morg Hidden Sam Mac Simmone 2177 1437 1116 1900 1441
All Players receive:
x1 Fate's Armament(Vanity) : An unfinished weapon granted by Gabrandr. For now, it spins slowly around the player in the shape of the weapon they use most. It's almost as if it is waiting to be used at the right moment.x20,000 additional Col
x20 Materials.
-

A-G
SpoilerH-P
SpoilerQ-Z
Spoiler -

A-G
Spoiler► Aerial Ace
Cost: 10 SP
Active: Free Action
Effect: Stacks with Combat Skill [Charge]. As a free action, change the player's stance from [Standard] to [Aerial]. While in [Aerial] stance, on a [Sword Art]'s execution, the following changes are applied until the start of the next turn:- DMG is increased by (Player's Tier).
- EN cost of the Sword Art performed is increased by (Sword Art Rank),
- EVA is decreased by (Sword Art Rank),
- MIT is decreased by (2 * Sword Art Rank * Player's Tier).
Description:
With experience comes tinkering, and with tinkering comes innovation. Through rigorous training, Macradon had found a way for him to enhance his sword arts by adding momentum to his attacks by executing them mid-air. Aerial strikes hinders his basic defensive dexterity while airbound, but provides more than enough power in return. The Aerial Ace style always has the sword in one hand when initiating a Sword Art to aide the user in nimbleness to jump into the air, while in the air the user presumes the sword art stance and activates their Sword Art.Created by: @Macradon
Creation Details: [here]
► Bloody Slaughter
Cost: 10 SP
Passive
Effect: The user gains a stack of Bloody Slaughter for every 4 loot-minimum mobs killed. The user must land the killing blow against these mobs to be considered towards gaining Bloody Slaughter stacks.- Each stack grants its user [+1 DMG, +50 max HP] up to a cap of 5.
- When the user has at least one stack of Bloody Slaughter, their capacity to heal and be healed both, through any source, will be halved.
- Enemies slain towards Bloody Slaughter will not drop loot until the user has maxed out their stacks of Bloody Slaughter in a thread.
Description:
Crozeph's weird appetite took a dark turn as he tried to pursue an improvement for his kendo skills. Instead of finding something or someone to give him an idea ( or simply training with Baldur or Ariel), he instead realized that he is what he eats. As he kills enemies, the corpses never shatters into fragments and instead consumed by Crozeph and as the buffs stack, the sclera in his left eye darkens.Clarifications:
- Healing done to the user by Battle Healing is affected by Bloody Slaughter.
- Healing done by the user through both skills and items is affected by Bloody Slaughter.
- Max HP raised by Bloody Slaughter will not boost Base HP; the user cannot heal from Bloody Slaughter stacks.
H-P
Spoiler► Lady Midnight
Cost: 10 SP
Passive
Requirements: Rank 5 [Hiding], [Vanish] Mod
Effect: The user may use [Vanish] as a free action.
Description:
Legend has said there are three that preside over the shadows. The Master of Shadows, The Lord of Darkness, and Lady Midnight. Lady Midnight directly ties the user to the shadows, and allows for the user to gather and manipulate shadows at will, however; this more affects the ethereal realm than that of the physical.Created by: @Hidden
Creation Details: [here]
► Meikyo Shisui
Cost: 10 SP
Passive
Debuff: +(Player)Tier*EN to all SAs / -3 ACC [Permanent]
Effect: During combat, allows the user to store up to 3 [ II ] or [ B ] charges of any combination.- [ II ] charges may be gained by using ST-I or AoE-I.
- [ B ] charges may be gained by rolling CD9+ on any SA that isn't ST-B.
- [ II ] charges may be used to activate either ST-II or AoE-II without their necessary preconditions, while [ B ] charges may be used to activate ST-B without its necessary preconditions.
A charge is expended when used. All charges are lost upon a fight's completion. If the user already has 3 charges and gains another, their additional charge will be lost.
Example:
- On a stat bar, the three slots should be represented as such: [ - - - ]
- As the slots are filled, each slot should be indicated with the type of charge it is carrying: [ II B - ]
Description:
Through training and meditation, Ariel managed to distillate her battle experience into a skill that allows her to creatively use all Sword Arts at her disposal.Created by: @Ariel - The Crowned Lion
Creation Details: [here]Q-Z
Spoiler► Shades of the Gemini
Cost: 10 SP
Passive [Addon]
Requirements: Disguise [Extra] Skill (must be active/equipped)
Limitation: User cannot benefit from, or inflict, any returned damage enhancements or item effects based on an attackers dice roll [Thorns, Immolation, Aura]. This restriction does not affect the Parry skill or its mods/addons.
Effect: Disguise effects become a constant, passive, critical hits made against you only occur on a BD: 10, or BD:9-10 if the attacker has focus. Additional narrative effects as noted below.
Description:
Gleaned from extensive study of the Gemini, the Player learns to modify his own appearance and grant limited autonomy to their shadow, imbuing it with instruction and enabling it to appear as a duplicate that can act independently. This shade can also divide itself into multiple further copies. While not able to attack in any way, these duplicitous shadows serve as ongoing distractions during combat and carry potential for a broad variety of clandestine purposes. Narratively, the player can change his or her appearance at will: including voice, gender, gear worn and held, height and build. In addition, this can conceal the users cursor from view.Created by: @Freyd
Creation Details: [here] Ticket #0029
► Veteran
Cost: 10 SP
Passive
Requirements: Any Rank 5 Weapon Skill, Quick Change Skill
Effect: Choose two Weapon types. Declare one as Primary and one as Secondary. The Secondary Weapon now shares all Weapon Skill Ranks, Mods, and Shifts as the Primary Weapon. If Quick Change is used to switch between the two weapons types, Quick Change's effective Cooldown is reduced by one turn.
Description:
Adaptability is a crucial skill in combat. Those experienced in battle understand that sometimes, a single weapon doesn't cut it. -
-
<<Champion's Hall>>

After a long, arduous journey to become stronger, players will receive a message informing them that the 'Champion's Hall' has now been made available to them. Speaking its name instead of a Town on top of every floor's teleporter will lead to a gilded hallway. The walls are lined with altars displaying both new and old items players may be familiar with. Suits of armor and weapons on statues flank each alter. Trying to save this location to a teleport crystal will not work, and any players that haven't been messaged by the system regarding this place will be unable to travel there, even if they try.
Upon trying to pick one of the items up off its altar, all of the statues will raise their weapons as though guarding them, and prevent players from getting any closer. From there on out, the only option is to leave the hall, as no more than one player may be present in it at a time. Which floor or where this hall is remains a mystery, but perhaps it'll be uncovered, sooner or later.
Rules:
- Players may post in the Champion’s Hall once per month (30 days since the last post) in order to obtain a copy of an expired or seasonal consumable.
- Posts made in this thread must still adhere to the 150 words minimum requirement, and players may not interact with one another in their posts. This is a consequence of the one post per month rule the thread follows.
Champion's Choice
Spoiler-
Duality (1)
Choose one of the following effects: +30 MIT, -3 DMG or +3 DMG, -30 MIT. These effects stack with other buffs.
-
Love's Respite (1)
Using this item will reset one's crafting attempts. This item can be used in conjunction with Crafter's Respite in the same day.
-
Memory of Battle (1)
Doubles the bonus from Scents of the Wild totems for a single thread.
-
Memory of the Blood Crystal (1)
Replace an enhancement slot on a weapon with the Vampiric (Offensive) enhancement for a single thread.
-
Galaxial Water Snake (1)
Provides +1 CD when rolling to train familiars in <<Taming your Friend>>. Can also be used to change a familiar's appearance to a starry sky’s form of itself. Single-use item. CD buff lasts for one thread.
-
Ghost Treat (1)
Allows its user to skip the searching portion of the <<Feeding your Enemy>> quest. If the player fails to tame the creature, they will have to find it again by the searching rules in the quest. Can also be used to change a familiar’s appearance to a ghostly form of itself.
-
Horn of Battle (1)
Sounding this horn will grant oneself and their party +2 increased energy regen for a single thread.
-
Respec Ticket (1)
Allows a single enhancement slot on a single piece of gear to be replaced with an enhancement of the player's choosing at a crafter who specializes in the gear's item type. Players may only select enhancements from the crafter's standard enhancement table, and enhancements must continue to obey their slot caps.
-
Burning Determination (1)
Applies BURN I to one's weapon for a single thread.
-
Cold Shoulder (1)
Applies FREEZE I to one's weapon for a single thread.
-
Die For Me! (1)
Applies BLEED I to one's weapon for a single thread.
-
Bring the Thunder (1)
Applies PARALYZE I to one's weapon for a single thread.
-
Extinguished (1)
Applies FIREPROOF to the user for a single thread.
-
No Chill (1)
Applies ANTIFREEZE to the user for a single thread.
-
Iron Will (1)
Applies BLOODCLOT to the user for a single thread.
-
Weather the Storm (1)
Applies PARALYTIC IMMUNITY to the user for a single thread.
-
Ring of Platinum Keys (5)
Each Platinum Key is a single-use item that grants +3 LD when opening a Treasure Chest. Only one Platinum Key made be used per thread.
-
Blessed Bandages (3)
A package of linen bandages inscribed with blessed and holy runes. Each bandage removes one debuff on a target party member of the player's choice. Requires a post action to apply.
-
Floor 26
<<Slime Conundrum>>
Party Limit: 6 | 20+ Posts
Repeatable for standard page rewards, col, and items.Quest Rewards:
- 6,000 EXP
- 22,500 Col
- King’s Core (T4/Unique/Consumable): The user gains +20% Overhealth and +80 MIT at the cost of -10 DMG.
Requirements:
- Roleplay entering the sewers
- Make your way through the hordes of slimes in the dungeon
- Defeat the Slime King
- Collect the treasure in the Slime King’s chest
Summary:
With the Shadow’s fall, the 26th floor was unlocked, revealing a sprawling city. There are very few areas one could call dangerous, but the sewers are certainly among them. They are filled those in hiding, be it due to a wanted status, or a simple desire to disappear. Regardless of their reasons, these inhabitants all have one thing in common - the struggle to survive in such a godless place. This necessity has led to the rise of numerous information brokers, all of whom have explored the sewers.
It was these info brokers who first spoke of a special dungeon hidden, albeit poorly, in the sewers. With multiple entrances throughout, it’s easy to access, but the simplicity ends there. The dungeon itself is packed with very strong gelatinous, foes. They are agile and deadly to those who do not properly prepare themselves. These monsters are tenacious, and determined to protect whatever lies at the deepest point of the dungeon. The brokers suspect it is a mother slime, or even a king. Human or monster? Only one way to find out.
Outline:
The players must first roleplay entering the sewers, and locating one of the multiple entrances to the dungeon. Next, they’re met with waves of combat that they must clear in order to reach the dungeon’s boss.
Once they’ve entered the dungeon, they’re faced with the first party of enemies. It consists of x3 Slime Worms, x1 Slime Polyp and x1 Slime Abomination.
Upon defeating them, they may delve further in to find the second party of enemies. This wave is made up of x1 Slime Worm, x3 Slime Polyps and x2 Slime Abominations.
With room to rest before their next encounter, each party member may choose to spend a post action to recover their health and energy back to full. Next, they must find the dungeon’s final corridor. There, they will be faced with a single <<Slime King>>. However, not all is as it appears. Once he is felled, he will be regenerated, although slightly weaker than the time prior. He will come back twice in total. Defeating all three of his forms will lead to a congratulatory message, showing the party their way out of the dungeon, and providing them with ample amounts of col and EXP.
Enemies:
<<Slime Polyp>>
A tower that appears to be static, but can stretch any direction it wants to dodge or extend the reach of its attacks. Weapons, bones and trash can be seen floating inside it, as though they’re caged up.HP: 800
DMG: 80
MIT: 60
ACC: 3
EVA: 2Toxic: On an MD 9-10, the monster’s attacks will inflict T4 Blight for two turns on their targets.
Acid Spit: In the case of a CD 6+ and MD 9-10, the attack will become an AoE and target the four players with the highest hate.
Unison: If another Slime monster falls, <<Slime Polyp>> will gain +10 DMG for the rest of the battle.<<Slime Worm>>
Although its body is a lot more dense than the rest, it’s still fairly agile. It isn’t capable of taking hits in stride, as evidenced by the various cuts across its form, but it can just as easily dish them out itself.
<<Slime Worm gets its own separate roll to attack.>>HP: 1200
DMG: 120
ACC: 3
EVA: 1Predator: On an MD 10, <<Slime Worm>> will attack again. This effect cannot occur twice in a row.
Toxic Touch: If an attack roll against a <<Slime Worm>> results in an CD 10+, the player will lose 3 base DMG for the next two turns. This effect does not stack.<<Slime Abomination>>
An assortment of bones, all covered in a thick, bouncy slime. At the end of each of its appendages lies another head, but they appear non-functional. Its core swims at the very center of what would be its torso, open wide and exposed.HP: 900
DMG: 100
MIT: 40
ACC: 4
EVA: 2Back and Forth: If a <<Slime Abomination>> takes 500 DMG before its next turn, it will attack twice during the following turn.
Strength in Numbers: If any other Slime monsters are alive, every second attack, the <<Slime Abomination>> will instead heal every Slime for its DMG.
Unison: If another Slime monster falls, <<Slime Abomination>> will gain +10 DMG for the rest of the battle.<<Slime King>>
A wretched being that has taken over this part of the sewer. It appears to spawn slimes out of its own body, blending them with whatever trashed objects he can find to preserve as much of his own existence as possible.
<<Slime King gets its own separate roll to attack.>>HP: 5000/2500/1250
DMG: 220
MIT: 50
ACC: 4
EVA: 4King’s Aura: The <<Slime King>> is unaffected by Paralyze, Freeze and the Familiar’s Grappling skill.
Almighty: The boss cannot be afflicted with both Lullaby and Hypnosis.
Pure Structure: Any DoT effects on the boss will last half their original duration, except for Burn. Afflicting the boss with Burn will also deal double damage to it.
Self Sustaining: On a CD 9+, <<Slime King>> will heal 100 HP at the end of his turn.
Royal Gel: On an MD 9-10, the <<Slime King>> will launch an AoE attack at the four players with the highest hate, dealing 160 DMG and afflicting them with T4 Blight for two turns. This skill cannot occur once <<Gelatinous Form>> has activated.
Quick Split: On a CD 9+ and LD 10+, the <<Slime King>> will not attack and instead, summon a <<Slime Abomination>> to his aid. A <<Slime Abomination>> can only be summoned once per turn. This skill is deactivated once <<Gelatinous Form>> has activated twice.
Gelatinous Form: Every time the boss’ health reaches 0, two more Kings will spawn, using the next lowest HP available. If a Slime King with the lowest amount of max HP possible dies, he will not spawn any more.
Epilogue:
SpoilerAs the final blow is dealt, the <<Slime King>> explodes, sending pixels and bits of green goo in all directions. This time, he actually stays dead. Yet even as Players celebrate, and follow the quest's prompts out of the dungeon, tiny bits of slime creep closer to each other across the dirty, trash-littered floor.
-
Floor 25
<<Trouble Brewing>>
Party Limit: 6 | 20+ Posts
Repeatable for standard page rewards, col, and items.Quest Rewards:
- 5,000 EXP
- 20,000 Col
- Dragon’s Jewel (T4/Unique/Consumable): Provides the user with DMG +5, at the cost of all non-action inhibiting status effects lasting twice their original duration against the user. This effect does not stack with other consumables.
Requirements:
- Roleplay entering the maze
- Locate a Foreboding Tower (LD 18+)
- Defeat the Shadow Dragon Matriarch in its lair
Summary:
Rumblings of another powerful enemy are causing mass confusion and wide-spread fear across the 25th floor. NPCs worry that the floor they call home may be destroyed, while Players wonder what the appearance of this powerful enemy might mean for the game. Not only is the dragon fearsome, it's arrival has been accompanied by a frightening boom in the Shadow Dragon population.
Now, exploring the maze's many twisting corridors is even more risky than usual; Players are bombarded with hellfire as soon as they dare turn a corner. This menace in question is said to live atop one of the ten Foreboding Towers that line the maze. To find the dragon is an arduous task, as the towers rotate daily. To make matters worse, it often flies from one tower to the other, setting up camp for a few days before nesting on the next one. Whatever it’s doing to keep the Shadow Dragon population up, be it feeding them or giving birth to more, it needs to be stopped before the maze becomes impassable.
Outline:
The players must first roleplay entering the maze, and then begin rolling their LD as a post action to locate one of the Foreboding Towers. They must roll an LD 18+, including modifiers to locate a tower. Once they do, they may roleplay their ascent up the tower, or gloss over it as they see fit, before they’re met with the Shadow Dragon Matriarch. Once they defeat her, they may expend a post action on rolling nat LD to see which tower they ended up on, which will cause the loot to vary.
In the case they roll an LD of 1-6, the players will find a stash of T4 Unidentified Demonic Weapons equal to their party amount.
In the case they roll an LD of 7-12, they will find a stash of T4 Unidentified Demonic Armors equal to their party amount.
In the case they roll an LD of 13-18, they will find a stash of T4 Unidentified Demonic Trinkets equal to their party amount.
If they roll an LD 19-20, the players will instead be rewarded with 1 Demonic Shard and 2 Gleaming Scales each.
Enemies:
<<Shadow Dragon Matriarch>>
A fearsome and large Shadow Dragon. Unlike the rest of them, it’s slower but its scales can deflect attacks with ease, and its strength is overwhelming. Its black fire breath appears deadly enough to make most want to steer clear of the beast.
<<Shadow Dragon Matriarch>> gets its own separate roll to attack.HP: 4500
DMG: 250
MIT: 150
ACC: 3
EVA: 1
Dragon’s Scales: The Matriarch’s scales protect it, not allowing its MIT to drop below 110.
Pureblood: The boss is immune to Hypnosis, Lullaby, Misperception, Paralysis, Freeze as well as the Familiar’s Grappling Skill.
Tail Swipe: When rolling MD 9-10, the Matriarch will use its tail as a whip to attack all of the party, dealing 120 unmitigatable damage and lower everyone’s energy by 10.
Piercing Gaze: On a CD 10+, the boss will paralyze the player with the lowest hate for a turn before attacking normally. This skill cannot activate alongside <<Tail Swipe>> or <<Hellfire>>.
Vicious Stomp: In the case of a CD 6-9 and LD 10+, the Matriarch will stomp the ground, lowering the entire party’s EVA by 1 for two turns. This effect does not stacked and any further activations will refresh its duration.
Preparation: Every four turns, the boss will attack the player with the highest hate for 100 DMG before flying up in the air, preparing to bombard the players with fire on its next turn.
Hellfire: After staying in <<Preparation>> for a turn uninterrupted, the boss will breathe out fire on the players, dealing 300 unmitigatable DMG and applying 24 Burn DMG for the next two turns.
Bring Down The House: If the Matriarch is still in <<Preparation>>, players can deal 750 DMG to it to knock it out of the sky. Doing so will prevent it from using <<Hellfire>> and deal an additional 250 unmitigatable DMG to it.
Epilogue:
SpoilerAt long last, the Matriarch has been defeated. The population of the Shadow Dragons will steadily dwindle, and the maze will become a less perilous trek once more. At least, until another Shadow Dragon takes up the mantle, and continues where the previous Matriarch left off. But the Players should have enough time to recover before that happens.
-
Floor 24
<<In Too Deep>>
Party Limit: 6 | 20+ Posts
Repeatable for standard page rewards, col, and items.Quest Rewards:
- 5,000 EXP
- 15,000 Col
- Shore’s Treasure (T4/Unique/Consumable): Doubles a user’s Prosperity buffs for a single thread.
Requirements:
- Roleplay the group making their way to the Paradise Islands
- Defeat the Sand’s Claw
- Check around the shore for extra loot by rolling nat LD 15+
Summary:
Rumors have begun to spread across the more recently unlocked floors. There is talk of strong monsters making their territory well known, and aggressively trying to protect it, warding off NPCs and players alike. Some block off useful resources, while others only make travelling about the area a nuisance at worst. If the stories are to be believed, the creatures are incredibly strong. Whoever can bring an end to them will surely receive an abundance of col and rare items.
On the Paradise Islands of the tropical 24th Floor, a huge rock can be seen shifting about the sands from time to time. Occasionally, it even stretches a massive claw out to snap at whatever tries getting close. Little else is known about the creature, and as such, it’s only natural that the island’s citizens warn players to never go near it. Upon getting too close to the beach where the <<Sand’s Claw>> is said to lay, a quest prompt will emerge for players to accept or decline. Regardless of their choice, it’s advised that Players prepare themselves, should they decide to keep forging ahead.
Outline:
The players will need to roleplay their trip to the Paradise Islands in however many posts they please before facing the <<Sand’s Claw>>. Upon defeating it, they’re free to spend their post actions on searching the beach up to six times total.
Rolling the LD, players must get a natural LD 15 or higher in order to discover a group of <<Sand Dollars>> equal to their party size. Taking out these weak enemies will result in extra treasures for those lucky enough.
Enemies:
<<Sand’s Claw>>
A massive crab with a boulder on its back. Despite the looks though, it’s too slow to pose a threat against a well coordinated group. So long as one stays out of its grip, they’ll be just fine.
<<Sand’s Claw>> gets its own separate roll to attack.
HP: 4000
DMG: 220
MIT: 125
ACC: 3
EVA: -1Tough Shell: This monster’s MIT and ACC cannot be reduced, and it remains unaffected by Incarcerate, Paralysis and Freeze effects.
Too Large: Familiars’ Grappling Skill cannot be used to stun the boss. Only normal stuns will work on it as a result of SAs or skills being used, and they will have a 4 turn cooldown.
Pincer Attack: Sand’s Claw will attack two times during its turn, targeting the player with the highest hate, and then the player with the second highest hate. Perform one attack roll for each attack.
Sand Cloud: Upon rolling CD 9+ and LD 10+ during one of its attacks, the boss will instead raise a cloud of sand from the beach, lowering each player’s ACC by -1 for their next two turns. This effect does not stack and any further activations will refresh its duration.
King’s Grip: On an MD 10, Sand’s Claw will lower the target’s MIT by 15 for the next two turns. This effect stacks up to two times, and any further activations will refresh its duration.
Bubble Spray: On an MD 10 and CD 6+, Sand’s Claw will instead hit the entire party for 125 unmitigatable DMG, lowering every player’s EVA by 1 for two turns. This effect does not stacked and any further activations will refresh its duration.
Gobble Up: If the boss’ health reaches 2000, on its next turn it will skip its attack and start eating rocks. It must be hit with 3 or more Delay SAs until its next turn, otherwise it will expend it on healing 1000 HP. This can only occur once per battle.
Soft Skin: Once afflicted with Bleed, the effect will not wear off for the remainder of the battle.
Unguarded Sides: Area of Effect attacks consume twice the base energy, but deal 50% (rounded up) more damage.<<Sand Dollar>>
HP: 25
DMG: 10
MIT: 5Stacked: Defeating a Sand Dollar will result in the Players getting +200 EXP each, as well as +2,000 Col to split however they please at the end of the thread.
Heavy Pockets: Once a group of Sand Dollars is defeated, one of the players may roll CD. On a CD 10, Unidentified Demonic T4 Trinkets are found. On a CD 11, Unidentified Demonic T4 Weapons are found. On a CD 12, Unidentified Demonic T4 Armors are found. These rolls are not affected by buffs, and the amount of equipment found is equal to the players present in the party.
Few Stragglers: No more than two groups of Sand Dollars can be found in a single thread.
Epilogue:
SpoilerHaving defeated the monstrous crustacean, the Players are now free to leave the 24th Floor... The villagers appear to be more at ease with the departure of the adventurers, but also unsure of how to return the favor for the time being. Should the Players again feel up to the task when another <<Sand's Claw>> emerges, the villagers will certainly be willing to pay handsomely for its removal.
-
Floor 1
<<Black Iron Dungeon>>
Party Limit: 4 | 20+ Posts
Repeatable
Quest Rewards:
-
Any materials and loot that you find/gather.
Requirements:
- None.
Summary:
Beneath the Black Iron Palace in the Town of Beginnings lay a hidden dungeon that wasn’t discovered until recently. The revelation of its existence came as a shock to the Players of Aincrad, who had tirelessly scoured the first floor since the game’s debut. Had they simply overlooked it during their investigations? Or had it sat in waiting for the opportune moment to present itself?
Once it was discovered, a scout team was sent in to investigate. The first few levels were fairly easy, but the difficulty ramped up rapidly. After encountering a trap room that locked them inside and disabled Teleport Crystals, two members of the party were killed, and the survivors were consequently forced to turn back. Ever since, it has been seen as taboo for all but the most powerful of warriors to venture into its depths. Even then, it is stressed that survival is not guaranteed.
Outline:
The Black Iron Dungeon is an atypical dungeon that hosts powerful mobs, dangerous traps, and untold treasures. The Black Iron Dungeon holds multiple levels, descending downwards.
Loot earned within the dungeon will be tiered to the Black Iron Dungeon's Level number (Level B1 = Tier 1 loot, Level B2 = Tier 2 loot, etc). Standard loot tables apply when looting mobs/bosses/treasure chests.
Maps looted from monsters in the Black Iron Dungeon will open on any floor currently available and the dungeon's tier will scale to that floor.
New levels will be unlocked at each new tier in Sword Art Online. See the following for specific details of each level.
Spoiler[LEVEL B1]
Unlocked instantly.Standard Mobs present here will have varying stats that adhere to the following parameters:
- HP: 20 ~ 200
- DMG: 6 ~ 60
B1 Trap: The player steps on a panel. As the panel sinks into the floor, arrows will rain upon the party from above, dealing 50 unmitigatable damage. Players with three slots of EVA in their armor will be nimble enough to avoid damage, while Players with three slots of MIT will witness the arrows harmlessly bounce off of them.
B1 Boss Monster will adhere to the following parameters:
- HP: 1000
- DMG: 120
- EVA: 1
- ACC: 1
[LEVEL B2]
Unlocked at Tier 2.Standard Mobs present here will have varying stats that adhere to the following parameters:
- HP: 220 ~ 400
- DMG: 66 ~ 120
B2 Trap: The floor beneath the Players shifts, creating a downward slope where the path was once level. Only once the floor has pitched will the Players realize it is slicked with some sort of mysterious oil. They’ll slide helplessly down the ramp and into a shallow pool of viscous ooze, which covers their bodies and reduces their mobility. EVA and ACC are reduced by 2 for the next combat encounter, and Sword Arts will cost an additional 2 EN each until the fight has concluded.
B2 Boss Monster will adhere to the following parameters:
- HP: 1500
- DMG: 180
- MIT: 50
- EVA: 1
- ACC: 1
[LEVEL B3]
Unlocked at Tier 3.Standard Mobs present here will have varying stats that adhere to the following parameters:
- HP: 420 ~ 600
- DMG: 126 ~ 180
B3 Trap: The corridor suddenly becomes pitch black, filled with a darkness so palpable the Players can practically feel it. As though pulled along like a puppet by invisible strings, a Boss Monster will lumber into view, shambling toward the Players like a predator with prey in its sights. Seemingly immobilized by the sudden onset of the darkness, the Players won’t regain mobility until the Boss Monster has reached them, forcing them to fight.
B3 Boss Monster will adhere to the following parameters:
- HP: 2000
- DMG: 240
- MIT: 75
- EVA: 1
- ACC: 2
[LEVEL B4]
Unlocked at Tier 4.Standard Mobs present here will have varying stats that adhere to the following parameters:
- HP: 620 ~ 800
- DMG: 186 ~ 240
B4 Trap: Shackles erupt from the floor and walls of the corridor and bind the Player that tripped the trap. A surge of electricity runs along the length of the chains and into the Player, instantly reducing their HP to red (25%). The energy will arc to all surrounding Players, inflicting 50% of the damage dealt to the target Player as unmitigatable damage. The ruckus will attract five nearby loot minimum mobs, who will attack the Players on the following post.
B4 Boss Monster will adhere to the following parameters:
- HP: 2500
- DMG: 300
- MIT: 100
- EVA: 1
- ACC: 2
- Immune to Debuffs.
Exploration
Every fifth post (post #5, post #10, post #15, etc.) within this dungeon requires a roll for LD, even when in the middle of combat against standard mobs. This LD can only be influenced with the Searching Skill and/or Scouting Familiar and/or Nimble Cloth Armor Mod. This roll does not require a Post Action, but must be performed separately and after all other rolls within the post. In the event that the Player(s) are already engaged with a Boss Monster, Chest Room, or Trap, they are exempted from this roll.
LD Result Outcome [1] Boss Monster encounter. [2] Trap encounter. [3 - 18] Nothing happens. [19+] Chest Room encounter. Chest Room
When opening a Chest in a Chest Room within the Black Iron Dungeon, roll for natural CD and LD. LD may only be modified by the Lock Picking Skill and/or a Scouting Familiar.
If your CD is 7 or lower, the chest will be empty. The room will lock and trap the Player(s) inside, disabling Flee mechanics as well as Teleport Crystals. When the room locks, the walls will open to reveal 10 mobs with stats relative to the maximum the Dungeon Level you are on permits.
In the event that your CD is 8 or higher, the chest will produce loot as normal in accordance with the natural LD. All party members will receive a copy of the loot produced by the chest.
LD Result Rewards [1 - 4] (Dungeon Level * 1000) col, (Dungeon Level * 3) Materials. [5 - 8] (Dungeon Level * 2000) col, (Dungeon Level * 5) Materials. [9 - 12] Unidentified Perfect Weapon (1)
Unidentified Perfect Armor/Shield (1)
Unidentified Perfect Trinket (1)[13 - 16] Unidentified Perfect Weapon (2)
Unidentified Perfect Armor/Shield (2)
Unidentified Perfect Trinket (2)[17 - 18] Unidentified Perfect Weapon (3)
Unidentified Perfect Armor/Shield (3)
Unidentified Perfect Trinket (3)[19+] Gleaming Scale (1) or Demonic Shard (1) Bonus EXP
Players can potentially receive bonus EXP for each page completed or Boss Monster killed within the Black Iron Dungeon, provided they are interacting with the floor corresponding with their own Tier. This bonus EXP is progressively unlocked as the Player completes Sword Art Online’s quest content, with the exception of these quests:
- Making Vows
- Saying Vows
- Breaking Vows
- Nature's Treasure
- Redemption
- Black Iron Dungeon
The Bonus EXP breakdown is as follows:
-
50 quests completed:
- Boss Monster = Current Highest Floor * 100 EXP
- Page Completion = Player Tier * 75 EXP (in addition to standard page rewards)
-
75 quests completed:
- Boss Monster = Current Highest Floor * 200 EXP
- Page Completion = Player Tier * 125 EXP (in addition to standard page rewards)
-
100% of quests completed:
- Boss Monster = Current Highest Floor * 300 EXP
- Page Completion = Player Tier * 175 EXP (in addition to standard page rewards)
Epilogue:
Spoiler—Are you still in one piece?
Yeah?
Cardinal will try again another time.
-
-
Below are a list of words defined to be related to SAO-RPG's systems and setting. Search for 'define: [term]' on this page to look up the term's definition. Players are invited to add words and their definition by submitting them to the #suggestions channel on Discord.
GENERAL define: SAO
Short for Sword Art Online, the name of the franchise that this roleplay is based off of, and the name of the game that players in this roleplay are trapped in.define: VRMMORPG
Short for Virtual Reality Massively Multiplayer Online Roleplaying Game, a new type of video game genre that takes advantage of virtual reality technology to create a realm that supports a large number of players.define: FullDive
FullDive defines a type of VR simulation where the player's consciousness is fully transported into a simulated reality.define: NerveGear
NerveGears are the periphery with which Sword Art Online uses to connect its users to the game. It takes advantage of FullDive technology.define: Cardinal
The name of the system that runs Sword Art Online. It is capable of monitoring player behavior and states as well as control enemies and generate new content for players in the game.define: Aincrad
The world and setting of Sword Art Online. Aincrad is described as a giant iron castle in the sky, consistent of 100 floors. The game will end once the boss of the 100th floor has been defeated.define: Floor
A vertically-separated layer within the castle of Aincrad. Each floor differs from one another in terms of environment, enemies and atmosphere.define: Settlement
Cities of a floor. The main hub of a floor is often referred to as the main settlement.define: Teleporter
The main method of transportation between the different floors and realms of Aincrad. There is a teleporter in every main settlement of a floor.SAO-RPG define: SP
Short for Skill Points. Alternatively, if used in a thread title, short for Solo Party.
Further Reading: [Skills & Mods] | [Thread Anatomy]define: PP
Short for Private Party. Commonly found in thread titles.
Further Reading: [Thread Anatomy]define: OP
Short for Open Party. Commonly found in thread titles. Alternatively, if used in a chat context, slang for overpowered.
Further Reading: [Thread Anatomy]define: 1HAS, OHAS, 2HAS, THAS
Short for One-Handed Assault Spear or Two-Handed Assault Spear respectively. Both are weapon types and weapon skills players may obtain in SAO-RPG.define: 1HSS, OHSS, 2HSS, THSS
Short for One-Handed Straight Sword or Two-Handed Straight Sword respectively. Both are weapon types and weapon skills players may obtain in SAO-RPG.define: 1HBA, OHBA, 2HBA, THBA
Short for One-Handed Battle Axe or Two-Handed Battle Axe respectively. Both are weapon types and weapon skills players may obtain in SAO-RPG.define: MA
Short for Martial Arts. It is a weapon type and weapon skill that players may obtain in SAO-RPG.define: SA
Short for Sword Art. They define combat movements used by players and guided by Cardinal.
Further Reading: [Sword Arts]define: Tier
Indicates the required level of a player to equip or consume an item. New tiers are unlocked at specific floor intervals.
Further Reading: [Tiers]COMBAT define: HP
Short for Health Points. When this reaches 0, a character is forfeit.
Further Reading: [Stats] | [Combat Stats]define: EN
Short for Energy. In combat, this resource limits how many sword arts and/or skills players can use in succession.
Further Reading: [Stats] | [Combat Stats]define: DMG
Short for Damage. Defines the amount of damage a player is able to deal to a given enemy in combat. All players have at minimum a DMG of 1.
Further Reading: [Stats] | [Combat Stats]define: MIT
Short for Mitigation. Defines the amount of damage a player is able to negate from enemies in combat.
Further Reading: [Stats] | [Combat Stats]define: ACC
Short for Accuracy. Defines how well a player is able to land strikes on their target in combat.
Further Reading: [Stats] | [Combat Stats]define: EVA
Short for Evasion. Defines how well a player is able to avoid strikes from enemies targeting them in combat.
Further Reading: [Stats] | [Combat Stats]define: Post Action
An action that requires a player to make a post to execute.
Further Reading: [Post Action]define: Free Action
An action that does not require a player to make a post to execute. Often, players may only execute one free action per post.
Further Reading: [Free Actions]define: Base DMG
Also known as Base Damage. A player's DMG stat taken at the moment of damage calculation. May be modified during combat by critical hits or skills.
Further Reading: [Calculating Damage Values in Combat]define: Final DMG
A player's damage dealt to an enemy after calculations are complete (sword art multipliers, enemy's MIT deduction, etc).
Further Reading: [Calculating Damage Values in Combat]define: Phase
An action's attribute that directly deducts from mitigation before Final DMG is calculated. Differs from the 'Phase' Unique weapon enhancement. The percentage indicated in front of Phase (eg. 50% Phase) indicates the amount of mitigation deducted or ignored.
Further Reading: [TBD]define: CHARACTER GROWTH define: Skills
Skills often describe specializations that a character has decided to invest in. Skills may be bought using a character's SP.
Further Reading: [Skills]define: Extra Skills
Separate from Skills, Extra Skills allow players to perform different actions in Combat. These Extra Skills may be obtained from quests or through the expenditure of SP.
Further Reading: [Extra Skills]define: Combat Mastery
A special type of skill that greatly boosts the capabilities of a character starting from Tier 2. Only one Combat Mastery may be obtained per character at any time.
Further Reading: [Resources List]define: Familiar Mastery
A special type of skill that requires the aid of a Familiar to utilize. Only one Familiar Mastery may be obtained per character at any time.
Further Reading: [Resources List]define: define: Table of Contents | [top]
Spoiler- Introduction
- Table of Contents
- Starting the Game
-
Character Creation
> Navigating the Site
> Stats, Items & Tiers
> Skills & Mods
-
Roleplay Rules
> Thread Anatomy
> Using the Dice Roller
> Using the Economy Dashboard
-
Gameplay
> Thread Mechanics
>> Post Actions
>> Gathering
>> Treasure Chests
>> Dungeons
>> Combat
>> Looting
>> Stealth
>> Field Bosses
-
> Character Growth
>> Quests
>> Evaluations
>> Familiars
>> Shops >> Professions
>> Guilds
>> Housing
>> Cursor Colours
>> Paragon Levels
>> Custom Skills
>> Custom Sword Arts
-
> End Game
>> PvP, Player Killing
>> Labyrinths
>> Floor Boss Raids
>> Death & Rebirth
- Glossary

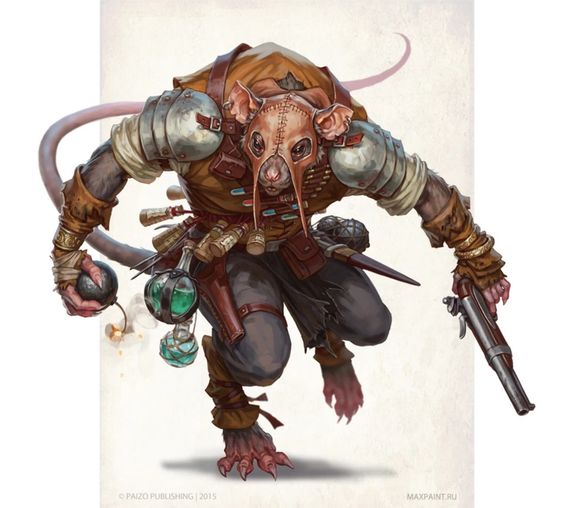
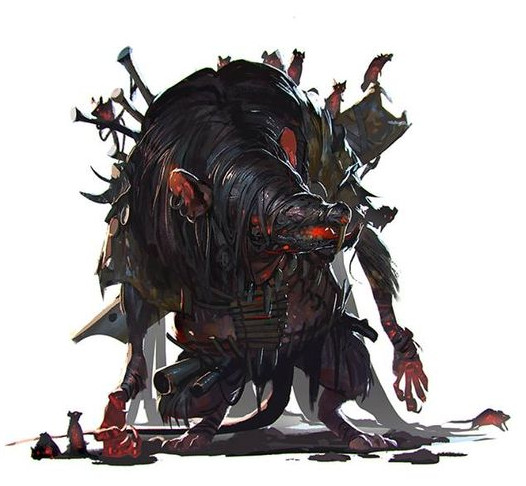
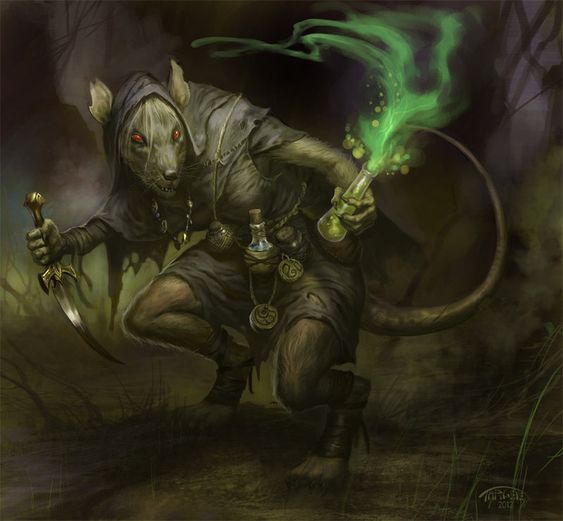
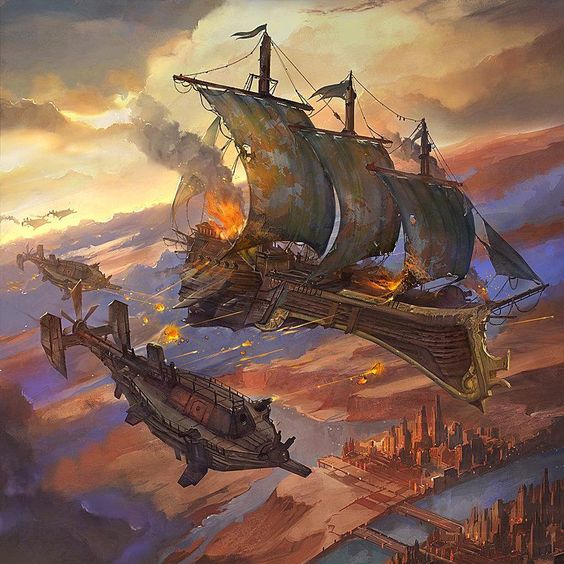
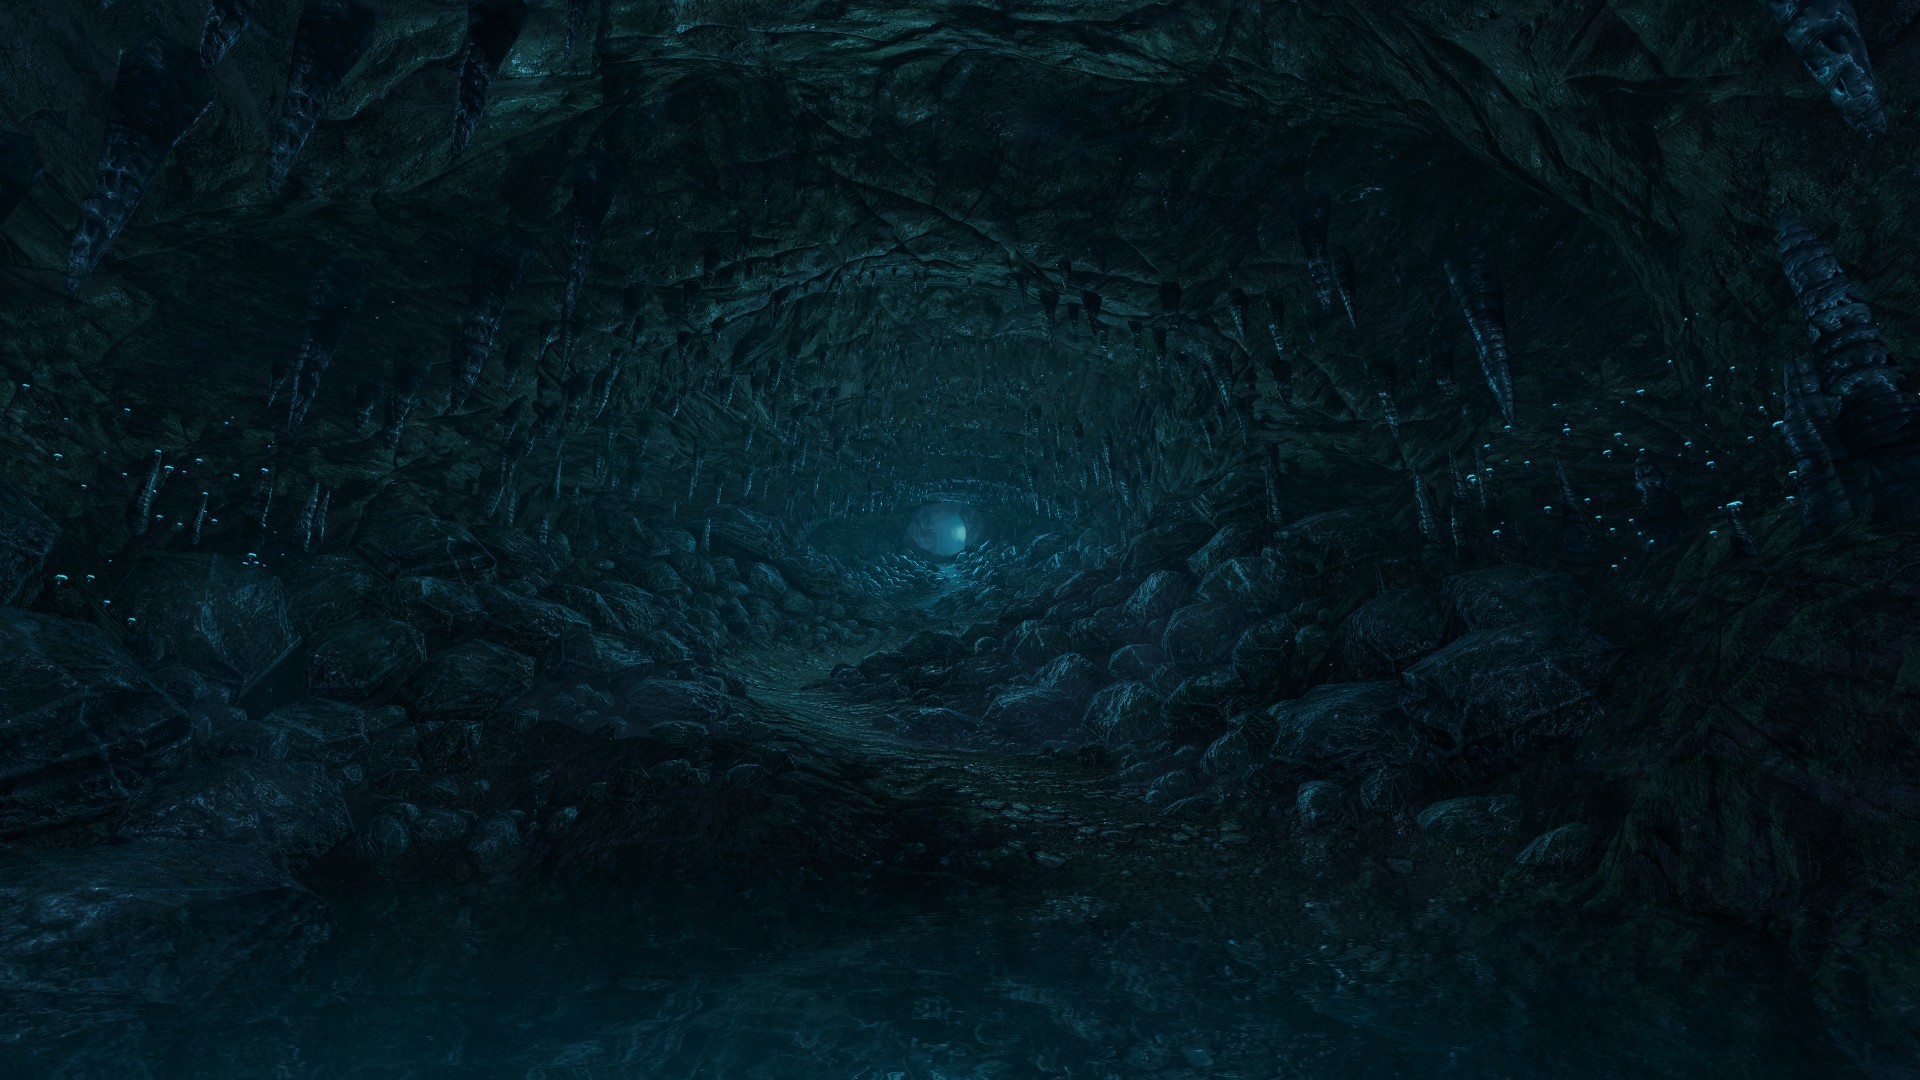
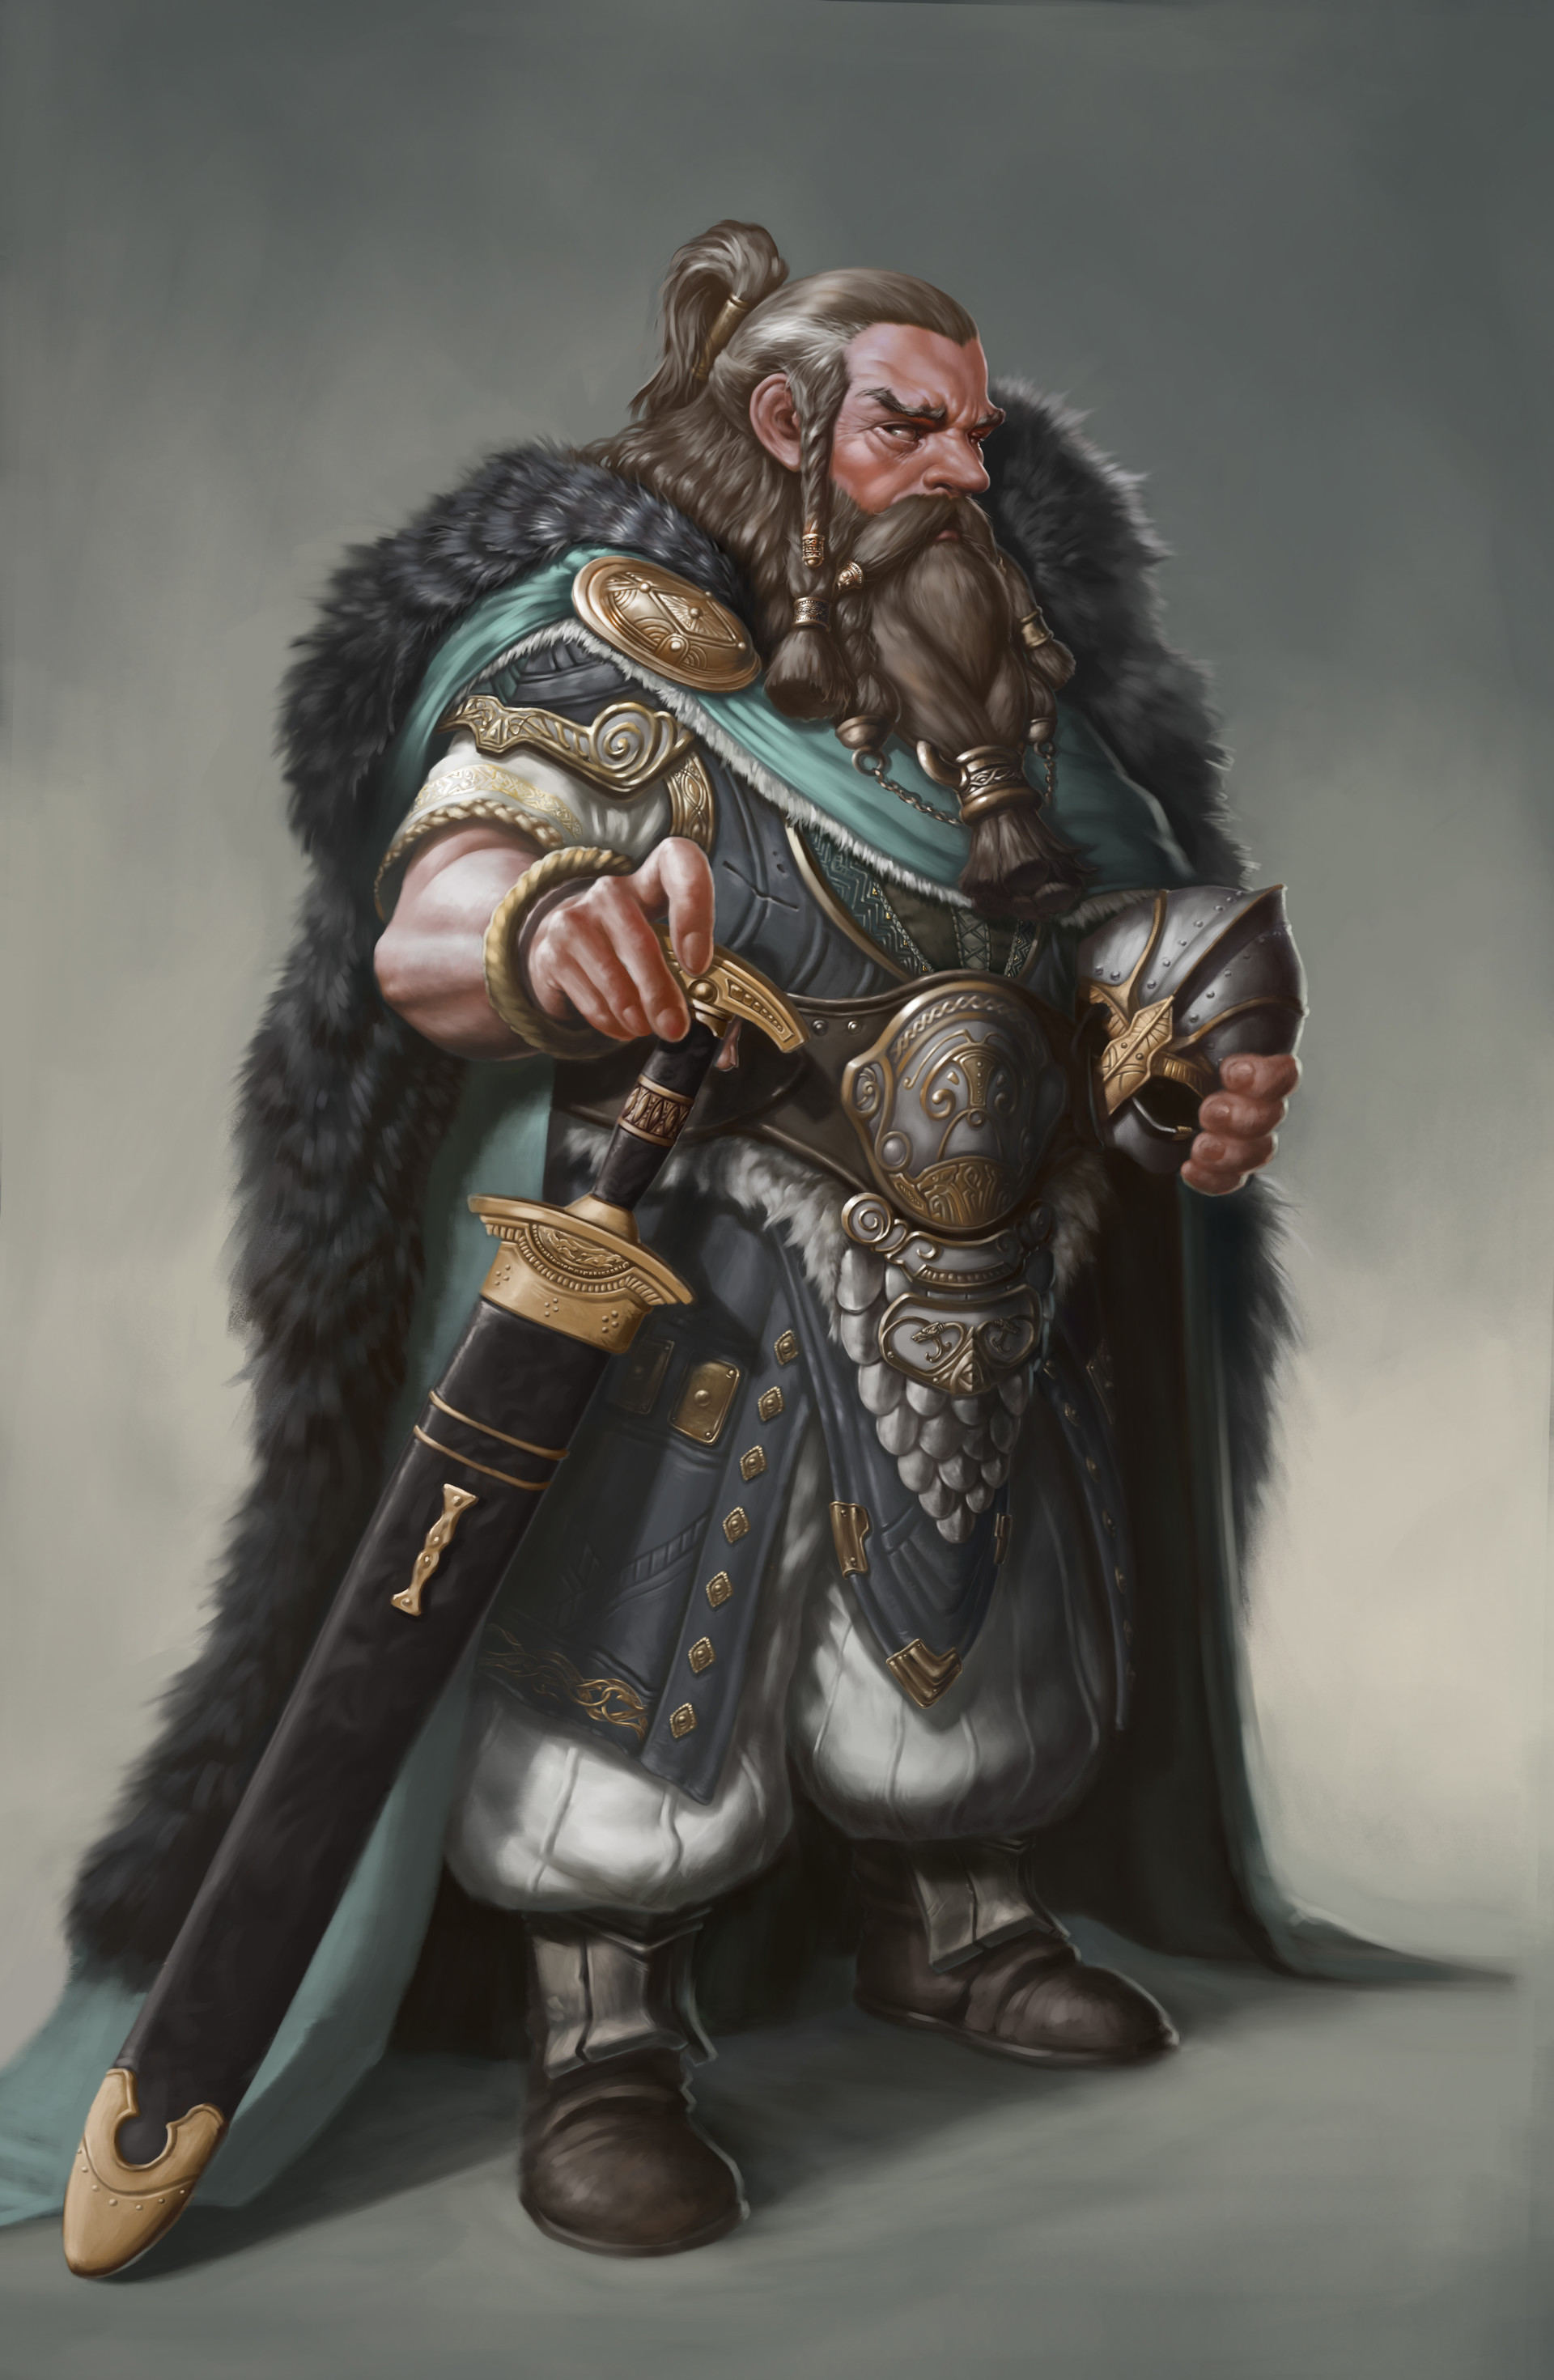


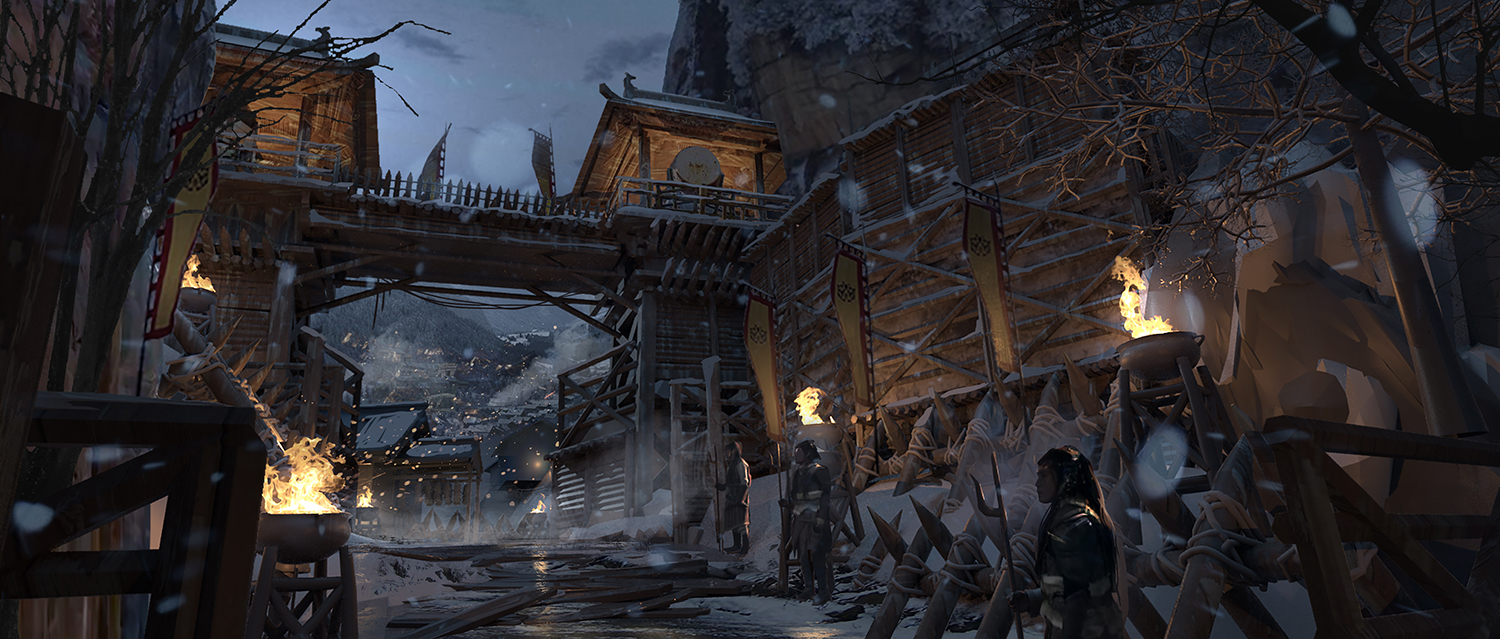


[F26] <<Bitter Winds>>
in Quests
Posted
Floor 26
<<Vermin’s Vengeance>>
Party Limit: 4 | 20+ Posts
Prerequisite: Must have completed <<Bitter Winds: Den of the Skyrats>>
Repeatable for standard thread rewards and Harbourne’s Cure
Rewards:
The crazy old coot had a cure after all. It tastes strangely like blue cheese.
Consumable. Single use. Grants the user immunity to Toxic Venom and Envenom. Effect lasts for one thread.
Requirements:
Summary:
Notes found in High Alchemist Harbourne’s laboratory pinpoint the preferred location within the sewers of Ladonia for Ulric Drell to unleash the wererat plague. Unfortunately, the details are rather vague and sewers are a literal maze. The quest gathers the party and an outfall near the noble district where the grates have been recently cut to provide access. Fresh tracks are visible in some of the firmer muck and sludge spilling out of the tunnel and match Drell and his compatriots.
Players must then defeat Wererat Captain Drell and his pack of most devout followers. The enemy has gathered in a large underground chamber situated over a major cistern fed by various aqueducts that supply the city with most of its water. The players’ search of the sewers leads them upwards to this location through various service tunnels where they might otherwise have expected to be bound for the depths. It is precisely why this location best suits their plan. Small casques filled with Harbourne’s engineered plague are stacked near the access hatches and ready to be delivered. Revealing his true form, the party must defeat Wererat Captain Drell within the allotted time before his minions manage to loose any of their vile brew.“No more games. No more hiding,” says the former Galtean captain as he turns to face off against you. “Finish it, lads. The rest of us will hold off these lap dogs.” His form shifts as he speaks, sprouting fur and broad whiskers as his eyes turn blood red. Ulric’s teeth elongate and his fingers grow claws, revealing his cursed appearance.
Outline:
PART I | Desperate Search
The players must roll LD to search for and find the central chamber where the Skyrats plan to unleash their weapon. A combined total LD of at least 50 is required to locate him. Standard modifiers for Searching rolls apply. Use of the Tracking mod eliminates the need for LD rolls.
PART II | Desperate Plan
The players must face off against Wererat Captain Drell and his endless horde of Skyrat Fanatics. Only killing the boss will vanquish their zeal and send them skittering back into the sewers.
Enemies:
<<Skyrat Fanatic>>
Fully committed to their captain, these zealots long ago gave up their claim to humanity and embraced the curse flowing through their veins. They will give their lives to see it spread across Ladonia.
HP: 250/250 | DMG: 250 | MIT: 80 | ACC: 3 | EVA: 1
Abilities:
<<Wererat Ulric Drell>>
Once a gallant Galtean hero, Ulric Drell was consumed by a need for vengeance well before Harbourne’s disease ravaged his flesh. Now, all that matters to him is sharing his pain with everyone else.
HP: 3000/3000 | DMG: 300 | MIT: 75 | ACC: 5 | EVA: 3
This boss uses its own MD roll when attacking.
Abilities:
Epilogue:
If the players defeat Wererat Captain Drell before their post deadline:
The Skyrat plot has been foiled. Everyone in the city is grateful to the players for their aid and thanks them repeatedly. Some are willing and able to learn, preferring to bury past grievances for a chance at a better future. The streets of Ladonia are more peaceful, at least for awhile.
If the players fail to defeat Wererat Captain Drell before their post deadline:
Sickness spreads in all districts of Ladonia. Galtean refugees are blamed by the local populace, encouraged by those with axes to grind or something to gain by assigning scapegoats. Many go missing, and rumours spread of more wererats gathering beneath the city, The cycle of vengeance and persecution persists.