Cardinal
-
Content Count
94 -
Joined
-
Last visited
Content Type
Profiles
Forums
Calendar
Blogs
Posts posted by Cardinal
-
-
Floor 19
<<Scents of the Wild: The Colossal Shadow>>
Party Limit: 2 | 20+ Posts
Prerequisite: Must complete <<Scents of the Wild: Keepers of Nature>>.
Repeatable for standard page rewards.Quest Rewards:
- 2,500 Experience Points
- 5,000 Col
-
Each player receives:
-
Tanos Key
- One of six chunks of the tablet found within a cavern on the first floor. It resembles the indent of the door holding treasure from players. Shaped like that of a mountain range, it is necessary to open the door on floor one.
- Not Transferrable
-
Tanos Key
- Completion of this quest is required to unlock <<Scents of the Wild: Shocking Stallion>>
Requirements:
- Must find <<Colossus>> with an LD of 15+. (Each roll requires a post action)
- Must climb to weak points to attack (requires 2 posts per player).
- Defeat <<Colossus>>.
Summary:
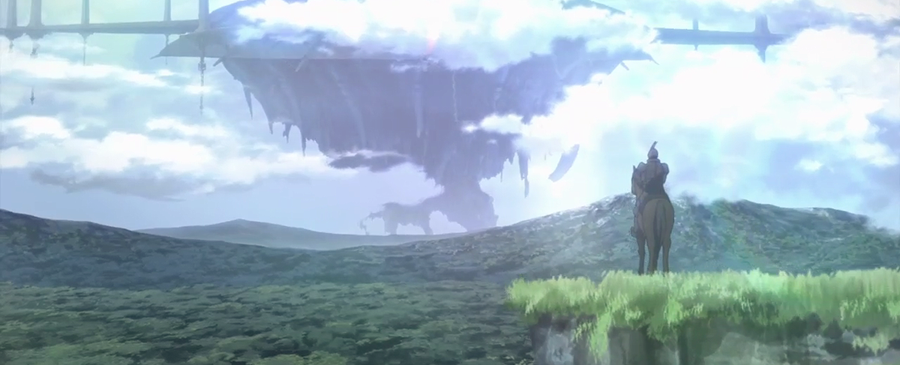
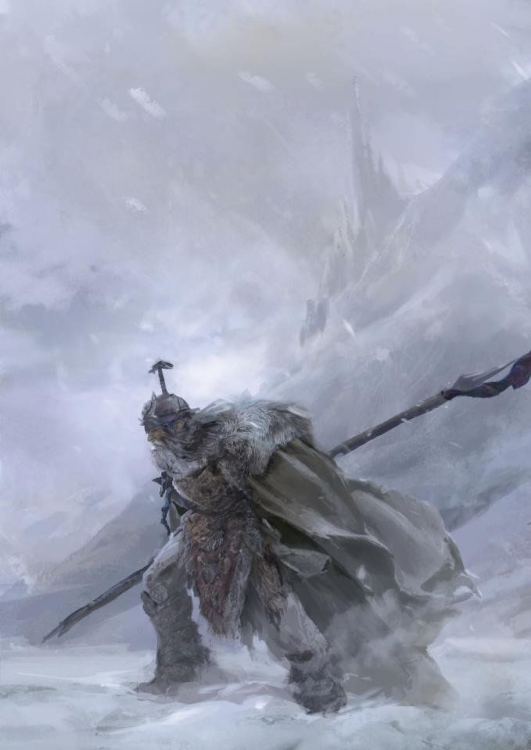
A mountain shadowing everything within its path, the fourth of Nature’s Guardians. The <<Colossus>> is an oblivious or callous being that ploddingly walks its own path, seemingly intending to do so for the rest of eternity. Towering high above the Forbidden Lands as its stomps around in meandering ways, the players are going to have to fell the beast to get one of the keys to the door.
Outline:
On floor nineteen, players will have to find the <<Colossus>> walking around the field careless and free. Once they’ve found him, it’s as simple as bringing him down. Should be easy to accomplish since it doesn’t seem to actively fight. Upon its death, the tablet will again shatter into another piece of the key. This one resembles the mountains.
Enemies:
<<Colossus>>
HP: 1500/1500 | MIT: 150 | EVA: -2
This boss uses its own BD roll when attacking.Abilities:
-
Weak Points | Weak points can be found on both hands, chest, and head. These can only be attacked up to three times each before the weak point is gone, and you have to move onto the next one. If you miss attacking it, it will not count as using one of the three chances.
- [Note: To climb to a weak point, you must spend 2 Posts climbing to it, and this goes for every weak point.]
- Oblivious | Since the boss is so large and you have to hold on and climb, players have no way to get space to <<Charge>> for extra damage. Hiding, the Surprise Attack mods and the Tracking mod similarly have no effect on the creature.
-
Shake | This boss does not attack directly. Instead, every three rotations after the boss is found, <<Colossus>> will try to "shake" the player(s) off of its body. Players have to grip onto the creature, rolling an LD as a Post Action to see how strong their grip is on the creature. The next post, <<Colossus>> will roll his own LD. If his LD is greater than the player, the player is thrown off, dealing 250 Unmitigatable damage to the player. They will then have to restart their climb to the next Weak Point.
- [Note: LD equipment and consumables can come into effect when rolling, but no skills or mods that give an LD bonus can help.]
Epilogue:
SpoilerAs the mighty beast is toppled, the players can't help but wonder if the slaying of this gentle giant was necessarily called for. Who is the real monster here? Within the rubble of the mountain's remains, the glint of the Tanos Key can be seen. The Colossus has been grounded and now you are one step closer to opening that door.
-
Floor 16
<<Scents of the Wild: Fighting Fish>>
Party: 2 | 20+ Posts
Prerequisite: Must complete <<Scents of the Wild: Keepers of Nature>>.
Repeatable for standard page rewards.Quest Rewards:
- 2,000 Experience Points
- 3,000 Col
-
Each player receives:
-
Mōretsuna Key
- One of six chunks of the tablet found within a cavern on the first floor. It resembles the indent of the door holding treasure from players. This one is shaped into a wave of water.
- Not Transferrable
-
Mōretsuna Key
- Completion of this quest is required to unlock <<Scents of the Wild: Shocking Stallion>>
Requirements:
- Must fish up <<Mōretsuna>> (Roll a CD of 9+; players with the Fishing Skill gain a +2 Bonus. Each roll requires a post action.)
- Defeat <<Mōretsuna>>.
Summary:
The King of the Sea, and the third Guardian of Nature’s bounty: The Mōretsuna. A massive fish with razor sharp teeth that swims at speeds unmatched by anything else in the water. Players will have to fish for it and hope that it doesn’t snap their lines, or their spines.
Outline:
Take a boat into the water and fish for the Mōretsuna. Players with the fishing skill should have an easier time pulling it to shore, but that won’t make it any easier. Be ready for a tough fight. Upon defeating the fish, just like the others, the tablet will break again in the shape of waves like the ocean.
Enemies:
<<Mōretsuna>>
HP: 1100/1100 | DMG: 200 | MIT: 125 | ACC: 2 | EVA: 1
This boss uses its own BD roll when attacking.Abilities:
- Drown | On a CD of 10+, <<Mōretsuna>> will attempt to drag down the player instead of attacking. The player, on their next turn, will need to make a separate LD roll (as a free action) of 10+ to resist being dragged down. If the player fails, they lose their current turn and are dunked deep into the water, where they take 150 unmitigatable damage. The damage repeats at the start of the player's turn until they spend a post action to return to the boat.
- Splash | On an attack roll of a natural 9-10, along with its basic attack, <<Mōretsuna>> will splash water onto the player, bringing them to their knees and stunning them their next turn.
-
Struggle | On an attack roll of natural 1, <<Mōretsuna>> will flail and automatically hit each player for 50 unmitigable damage, but also deals 50 unmitigated damage to itself.
Epilogue:
SpoilerAs the water calms with the fall of the massive deep sea creature, players find the Moretsuna key floating along the waves of the water. The Fighting Fish was floored, and now you have half of the pieces of the lock for the door the Temple of the Keepers.
-
Floor 10
<<Scents of the Wild: Leeching Nightmare>>
Party Limit: 2 | 20+ Posts
Prerequisite: Must complete <<Scents of the Wild: Keepers of Nature>>.
Repeatable for standard page rewards.Quest Rewards:
- 1,000 Experience Points
- 2,500 Col
-
Each player receives:
-
Yamata no Orochi Key
- One of six chunks of the tablet found within a cavern on the first floor. It resembles the indent of the door holding treasure from players. This one is shaped like the skull of the Leech Lich.
- Not Transferrable
-
Yamata no Orochi Key
- Completion of this quest is required to unlock <<Scents of the Wild: Shocking Stallion>>
Requirements:
- Must travel to the Stygian River (minimum 3 Posts).
- Must defeat an initial pack of 4 <<Stygian Warriors>> before engaging the boss.
- Defeat <<The Leech Lich>> and 4 additional <<Stygian Warriors>>
Summary:
Cold, dark death approaches. As in life there is always death, the second of the Guardians of Nature is the keeper of the Stygian River: A leech lich that feeds off the souls of the deceased in the river to the underworld. If left to its own devices, it will surely become a powerful entity, too strong to be defeated without calling back heroes that are needed on the frontlines.
Outline:
Make a journey to the Stygian river and deal with the growing problem that is the Leech Lich. Once it is defeated, players will find that the next part of their tablet breaks off, giving them the second key to the locked door.
Enemies:
<<The Leech Lich>>
HP: 450/450 | DMG: 175 | MIT: 75 | ACC: 2
This boss uses its own BD roll when attacking.Abilities:
- Leech | Four <<Stygian Warriors>> spawn with the boss when it is engaged in combat. <<The Leech Lich>> will consume up to two creatures per turn as a Free Action and will do so whenever it can. If it consumes the creature, it gains +25 Mitigation, +50 Base Health, +25 Damage for the rest of the battle, and restores +100 HP after the other effects have taken place. If it lands a hit on the player, <<The Leech Lich>> will heal a third of the final damage it dealt to the player (rounded up). At the start of every other turn (starting on the second turn), two more <<Stygian Warriors>> will spawn, but there will always be a maximum of four <<Stygian Warriors>> at any given time.
- Protected | <<The Leech Lich>> cannot be attacked until the all active <<Stygian Warriors>> are defeated or devoured by <<The Leech Lich>>. After the original 4 die, <<The Leech Lich>> is no longer protected.
- Undead | Fallen damage has no effect on <<The Leech Lich>>, but Holy damage deals +25 final damage when the enhancement procs.
<<Stygian Warriors>>
HP: 100/100 | DMG: 75 | MIT: 35 | ACC: 1
Epilogue:
SpoilerA calm falls over the battlefield but the stench of death will never truly disappear. The Stygian River is now freed from the lich's control. Within the remained ruined robes of the necromancer, players will find the Yamata no Orochi Key. With the Leech Lich felled, players now have the second 'lock' to the door. There's still four left to go, however.
-
Floor 8
<<Scents of the Wild: Ferocious Foe>>
Party Limit: 2 | 20+ Posts
Prerequisite: Must complete <<Scents of the Wild: Keepers of Nature>>.
Repeatable for standard page rewards.Quest Rewards:
- 1,000 Experience Points
- 2,000 Col
-
Each player receives:
-
Kumatetsu Key:
- One of six chunks of the tablet found within a cavern on the first floor. It resembles the indent of the door holding treasure from players. This one resembles a massive bear claw.
- Not Transferrable
-
Kumatetsu Key:
- Completion of this quest is required to unlock <<Scents of the Wild: Shocking Stallion>>
Requirements:
- Find <<Kumatetsu>> with an LD roll of 15+ (each roll requires a separate post action)
- Defeat <<Kumatetsu>>.
Summary:
Through the thick trees of the Floor Eight forest, Players find the first Guardian of Nature’s power: Kumatetsu. A massive bear with the strength to overpower any player. Over the years, Kumatetsu has grown to twice the size of any regular bear with the strength to snap trees in half like twigs. Mother Nature wishes to test the strength of those who would ask for her blessing. Players can find the bear in the deepest reaches of Floor 8’s forest, but he won’t make himself an easy target.
Outline:
Travel to the eighth floor and search for the Kumatetsu. Once found, it must be defeated. Upon its demise, the first part of the tablet will be broken off, resembling the indent in the stone door on floor one.
Enemies:
<<Kumatetsu>>
HP: 500/500 | DMG: 200 | MIT: 50 | ACC: 1 | EVA: 2
This boss uses its own BD roll when attacking.Abilities:
- Dodge and Parry | On a player's natural attack roll of 10, the attack will miss <<Kumatetsu>>. Instead <<Kumatetsu>> will gain a +2 Accuracy and +15 Damage for his next attack. These buffs expire after the attack has been resolved.
- Beast Form | When <<Kumatetsu>> is reduced to 250 (or lower) health, he will transform and turn into a bulked-up creature, increasing his damage to 250, but also reducing his ACC by 1 and MIT to 25.
-
Ferocious Roar | When <<Kumatetsu>> rolls a CD of 10+, he lets out a mighty roar instead of his attack, paralyzing the party.
Epilogue:
SpoilerIn the wake of the Kumatetsu's dissipating data, players are left to wonder what sort of boon they're benefactor might award them. The grove goes silent and those taking the quest can see the tablet laying within the grass not far away from where their enemy was slain, upon a stone pedestal they could have sworn was not there before. With the Kumatetsu defeated, players with tablets now have a separated piece of it broken from the main part. This piece goes to the door they found on the first floor.
-
Floor 1
<<Scents of the Wild: Keepers of Nature>>
Party Limit: 2 | 20+ Posts
Repeatable for standard page rewards.Quest Rewards:
- 500 Experience Points
-
Each player receives:
-
Nature’s Tablet
- A stone with a message directing the player to defeat six tough enemies. It is an <<Immortal Object>> and cannot be broken by any other means than clearing the SotW questline.
- Not Transferrable
-
Nature’s Tablet
-
Unlocks the following quests:
- <<Scents of the Wild>> quest line
Requirements:
- Explore the cavern and find the tablet.
- Decipher the tablet on the tree bark (Combined LD total of 60 from all players. Equipment and skill buffs apply, consumables do not.)
Summary:
Information brokers have found something amazing underground on Floor One. Near the edge of the floor, there is a cavern that was once known as a great farming location when the game was first started. With the recent unlock of floor twenty-five, people were amazed to find a sealed off location revealed! A rock wall had disappeared, leading into a smaller cavern. The most notable thing was a massive, closed door carved into the stone. No matter what is attempted, the door refuses to budge. Upon further inspection, you find six indents within the door in peculiar shapes.
The room also contains a giant tree, having somehow grown to tremendous size despite the barest hints of sunlight that reach down from above. At the base of the tree is a podium with a tablet. On one side, there are six markings similar to those on the door. On the other, there is a message written in another language. Luckily for you, there is a cipher etched against the tree bark. Do some research and figure the message out.
Outline:
Once the tablet is acquired, players must make a collective LD count of 60 to decipher the message on the back of the tablet. Once the tablet is readable, the words on the stone begin to change into the players' native language.“If seeking power, wisdom and resilience, find ye those which embody nature’s graces: The fiercest of beasts with unmatched strength; a sentinel to the afterlife bound by the Stygian river; a wise and wily water-borne predator; the unmoved titan who is callous and free; a sly shadow high in the branches of the forest; and lastly, that which prowls and safeguards the sky. Only once vanquished will you harness their power to your benefit. These are the Keepers of Nature.”
Once translated, players may undertake the Scents of the Wild quests. For each quest completed, the tablet they carry with them will break into a shape of the indents in the door. These keys will be used to open the stone door and reach the ‘Power of Nature’ hidden within.
Epilogue:
SpoilerWith Mother Nature's blessing, the Player has acquired a stone tablet after transcribing the etchings. They may now undertake the "Scents of the Wild" quest line.
-
Floor 3
<<Captured>>
Party Limit: 1 | 20+ Posts
Repeatable for standard thread rewards.Quest Rewards:
- 500 Experience Points
- 500 col
Requirements:
- Talk with Issela in Flora.
- Roleplay travelling to the fort and getting captured by the pitfall trap along the way. (3+ posts)
- Work your way through the fort, defeating six regular bandits and then the leader. (Enemies can be fought one at a time or in parties, not exceeding four mobs at a time. Rests may be taken between fights to replenish HP and EN. This works for Kagamine as well, who possesses standard T2 out-of-combat healing.)
- Return the teenager to his mother in Flora.
Summary:
The peaceful town of Flora is located underneath the canopy of the forest of Floor Three, and has been plagued by a nasty predicament. They need help. The Faultwarren Bandits have begun terrorizing the town, stealing from shops and breaking into homes. While wandering through Flora's cramped streets, you hear a Fae woman calling out to you. She pleads that bandits have kidnapped her son and are holding him for a ransom. They are asking for much more than she has to give however, leaving her to beg strangers for help.
Agreeing to help, she provides you with the instructions she was given to hand over the ransom. Making your way towards that location in the Forest of the Wavering Mists, you fall prey to one of the bandit's traps near the fort where they’ve made their home. A hole in the ground opens beneath you, putting you in a celled room, trapped. In another cell across from yours, you find the boy you were sent to rescue. Through strange coincidence, all that remains is to make your escape.
Outline:
After accepting the quest, you will head towards Faultwarren Fort where the bandits main encampment resides. Here they have locked up Kagamine, Issela's son. Just as you spot and approaching the fort, a pitfall trap opens beneath you. Suddenly, you are just as trapped as the person you set out to save. Put your brain and brawn together to make it out of the stone fort alive.
Kagamine will fight with you on your way through the fort. You can instruct him to use certain weapons if it means he makes it out alive. Giving him a one handed weapon and a shield or a two handed weapon will change his stats.
(Optional) Kagamine can also be instructed not to fight at all, which will keep him safe through the entire quest.
If Kagamine is defeated, he is knocked out. The player is instantly ejected from the fort and must retry the quest.
Allies:
<<Kagamine>>
A somewhat nervous teenager who is willing to help fight if it gets him out of the dungeon more quickly.HP: 300/300 | DMG: 75 (1H) or 100 (2H) | MIT: 75 (1H) or 50 (2H)
Abilities:
-
Worrywart | On a CD 1-2 on Kagamine’s turn, he will get nervous and miss no matter what he rolled.
NPCs:

<<Issela>>
A normally cool-headed woman who has gotten nervous with the kidnapping of her son. Urgency is in her voice until her son makes it back safe.
Enemies:
<<Faultwarren Bandit>>
Brash men willing to use lethal force to ensure their ransom doesn’t escape.HP: 350/350 | DMG: 100 | MIT: 40 |ACC: 1
Abilities:
- Target Focus| On MD of 6-8, the Bandit will ignore hate values and focus the target with the least amount of current health points.
<<Faultwarren Leader>>
A crude woman who has been leading this gang of bandits for years. Ruthless, but collected, her and her zweihander are always looking for a good fight.HP: 600/600 | DMG: 125 (150 on a 9-10) | MIT: 60 | ACC: 1 | EVA: 1
Abilities:
-
Critical Target Focus | On Mob Dice of 9-10, the Bandit will ignore current hate values and focus on the target with the least amount of current health points.
Epilogue:
SpoilerThe player returns to Flora with Kagamine in tow. Reuniting him with his distraught mother. Though unable to pay the ransom that had been set, Issela gives the player the amount she had managed to scrape together in her efforts, grateful that he has been returned to her safe and sound.
Note: If Kagamine is brought to zero HP, he will fall and the quest fails. The player is instantly teleported to the beginning of the quest where they must retake the quest from the beginning. The NPCs will not recognize you if you undertake the quest from a restart.
-
Floor 9
<<Guardian of Fire>>
Party Limit: 4 | 20+ Posts
Repeatable for standard thread rewards.Quest Rewards:
- 1,000 Experience Points
-
Each player receives:
-
Cerberus Soul (T1 Unique Consumable)
- Adds 12 Burn damage for two turns to a weapon on a Natural BD roll of 8-10 for the duration of the thread. Does not stack with the Burn Enhancement.
-
Cerberus Soul (T1 Unique Consumable)
- Unlocks <<Gatekeeper of Fire>> Quest
Requirements:
- Hear rumors of the Cerberus in Inferno Cavern and collect information to travel.
- Journey from Knorilt Village across the Volcanic Flatlands to Inferno Cavern over at least three posts of roleplay.
- Defeat the Cerberus and its minions (3 Hellhounds per player present).
Summary:
Unease hangs heavy upon the residents of Knorilt Village, and has caught the attention of several info brokers in the area. Players can easily find information relating to the Cerberus that has made its home in the volcanic region nearby. It terrorizes and threatens anyone who decides to step out of the safe zone of Knorilt Village, wandering over a wide area that has been claimed as its territory. One broker has determined the location of the beast’s den and offers great rewards if someone is willing to take on the burden of dispatching the beast.
Outline:
Gather some information on Cerberus to find its home. Once the players have found its location, they travel across the Volanic Flatlands to an area known asthe Inferno Cavern. The scorching heat in this area slowly injures anyone foolish enough to enter proper protection. During combat within the Infernal Cavern, each player suffers 15 unmitigatable damage every post unless they have the <<Survival>> skill active for this thread, or are wearing equipment with the Fireproof or Flame Aura enhancements. After having slain the beast, the players can return to Knorilt Village and claim their reward from the info broker for their heroic efforts.
NPCs:
<<Injured Broker>>
An injured info broker who went on an expedition to find Cerberus’s lair. He is calm and will relay the information to the players when they express interest in finding the beast. If asked for his name, he insists that the players cannot afford it.
Enemies:
<<Hellhound>>
A hound, vicious as the magma it was summoned from. Protects the chamber to Cerberus's den.
HP: 200/200 | DMG: 50<<Cerberus>>
The guardian of the underworld, a three headed canine beast.
Head #1: HP: 200/200 | DMG: 40
Head #2: HP: 200/200 | DMG: 40
Head #3: HP: 200/200 | DMG: 40Abilities:
- Triple Threat | Each head functions as its own entity, with its own health bar. <<Cerberus>> makes a separate attack per head still alive.
-
Glowing Maw | The fiery jaws of the beast leave targets sundered. On MD 9-10, the Cerberus will ignore 50% (rounded up) of the target’s Mitigation and inflict Burn on them for two rounds dealing 10 unmitigated damage per turn.
Epilogue:
SpoilerOnce the Cerberus is dead, players make their way out of Inferno Cave and back to Knorilt Village, where the info broker will reward them for the information they've collected on the Cerberus.
-
Floor 21
<<Trouble in the Mines>>
Party Limit: 4 | 20+ Posts
Repeatable for standard thread rewards, and bonus col (only) from potential rewards.Quest Rewards:
- 1,500 Experience Points
- 2,500 col
-
POTENTIAL REWARDS | Complete the Hunt Drakelings quest path
- +100 Experience Points for each additional <<Drakeling Skin>> you bring back past the goal - for a maximum of 1500 bonus Experience Points.
- Five of the collected <<Drake hides>> are consumed upon returning to the Foreman.
- The Foreman will pay an additional +500 col for each additional <<Drakeling Skin>> the party brings back past the goal - no cap.
-
POTENTIAL REWARDS | Complete the Lure Drakelings Away quest path
- +500 Experience Points
- Seven of the gathered <<Iridescent Drag Caps>> are consumed luring the Drakelings away.
- The Foreman will pay +250 col for each additional <<Iridescent Dragon Cap>> you bring back past the goal - no cap.
-
POTENTIAL REWARDS | Complete the Destroy the Drakeling Nests quest path
- +2,000 Experience Points
- +10,000 col
Requirements:
- Speak with NPC Mining Foreman.
-
The group as a whole must choose one of the following:
-
Hunt Drakelings
- Enter Mines and fight Drakelings.
- Collect 5 <<Drakeling Skin>> hides.
-
Lure Drakelings Away
- Gather 7 <<Iridescent Dragon Cap>> in nearby caves through typical gathering means.
- Take mushrooms to a separate cave to lure Drakelings.
- Blow the entrance and trap them inside.
-
Destroy Drakeling Nests
- Enter mines and destroy 2 Drake Nests.
- Kill 2 Drake Matriarchs (must be fought together)
-
Hunt Drakelings
- Return to Foreman to collect rewards.
Summary:
Mining is the lifeblood in the town of Tomoika, and were it to completely stop, then it’s residents would waste away. An infestation of Drakelings has disrupted operations after miners discovered a previously n undisturbed cave system. This area is not only rich with ores and gems, but with a mushroom dubbed the Iridescent Dragon Cap that the Drake’s devour like never before seen. After cleaning the material rich area out of the Dragon Caps, the beasts began to roost there permanently. The Foreman of the Mines has offered you payment in return for exterminating the Drakes, and even has a lead on a cave nearby with more of the Dragon Caps for you to use as bait.
Outline:
Players must speak with the Foreman of the Mines to begin the quest. They are tasked with ridding the mines of the infestation of Drakelings and have multiple options for how they might do so. Different outcomes and rewards will apply, depending on the option selected.
Hunt Drakelings
SpoilerHunting the Drakelings requires gathering their hides to show as proof of their defeat. The players need simply enter the mine and kill the beasts, after each Drakeling death the players receives one <<Drakeling Skin>> hide. Once 5 hides are collected the remaining Drakelings will flee and the party may return to the Mining Foreman for their reward.
Players may also choose to continue choose to continue their hunt for Drakelings through the cave systems, obtaining more hides for additional rewards.Lure Drakelings Away
SpoilerInstead of hunting and killing the Drakelings, a less confrontational approach is also available. The Foreman mentioned before that the beasts are attracted to the Dragon Cap mushrooms, it affects them like cats on catnip. Pointing you in the direction of a recently discovered area with a few Dragon Caps, the Foreman tells you to be careful, as there are some mushrooms that are more dangerous than they look.
The players must roll a LD (modifiers apply). An LD 15+ the Player receives one Dragon Cap, however on an LD 1-2 the players will stumble upon a Widows Cap. This mushroom will release a cloud of spores that cause the player to be stunned for one post as well as take 150 unmitigated damage. On their next post they may resume searching.
After the party collects at least 7 Dragon Caps, they may return to the Mining Foreman. He will lead them to an abandoned mining area rigged with explosives, "This area was due for demolition anyways, we could trap them inside and they'll starve after a time."
The players must create a trail of Dragon Caps leading to the old mines. A horde of Drakelings and Drake Matriarchs will follow it into the depths. Soon after the charges are detonated and the creatures are trapped for good. The Mining Foreman will then give the players their reward.
Destroy Drakeling Nests
SpoilerThe Foreman mentions seeing a few Drake Matriarchs in the cave, he's certain that if you destroy their nests and fight them off that the Drakelings will follow them. Players must enter the mines and locate a nest. On an LD 12+ (modifiers apply) the players can locate a nest and destroy it with a Post Action. The first nest will be unguarded. Once the second nest has been destroyed, two angry Drake Matriarchs will spawn and attack. Upon defeat, each Matriarch will drop a Matriarch's Tooth. The party can return and claim their rewards by handing the Matriarch Teeth to the Mining Foreman.
NPCs:
<<Foreman of the Mines>>
A rough and grizzled man that isn’t afraid to fight for himself. He does know when to ask for help when the safety of his workers are on the line.
Enemies:
<<Drakeling>>
Drakelings always spawn in groups of matching the size of the party (ex. Party of 2 vs. 2 Drakelings)HP: 350/350 | DMG: 200 | MIT: 15 | ACC: 2 | EVA: 1
Abilities:
- Breath of Fire | On their second turn, each Drakeling will attack with an AoE dealing 100 unmitigatable damage. After a 4 turn cooldown, each Drakeling will use Breath of Fire again.
<<Drake Matriarch>>
Drake Matriarchs will only spawn once their nests are destroyed.HP: 1250/1250 | DMG: 275 | MIT: 125 | ACC: 2
Abilities:
- Divide and Conquer | Drake Matriarchs will always move to surround their opponents and attack from both sides. Because of this behavioral pattern, it is impossible to attack both at the same time by way of AoE. Additionally, Hate acquisition skills and mods such as Howl and Focused Howl will only affect one Drake Matriarch at a time.
-
Metamorphosis | When one Drake Matriarch dies, the other will sprout wings and take flight. This provides +25 DMG and +3 EVA. This effect is permanent, once triggered.
Epilogue:
SpoilerUpon speaking with the Mining Foreman the players receive a hardy laugh, "Well I wasn't sure you could handle it at first, but I'm glad I was wrong. I can't say I would have handled the situation that way, but a job's a job." He grins and slaps a player on the back nearly knocking them over.
"Well, time for us to get back to work and for you to leave my work site. Get along now!" The Foreman shoos the players away and begins barking orders to his remaining workers.
-

Information Broker Society
"Oh hello! Welcome to Pumpkin's Delight! This is the little coffee store I started up in conjunction with the Information Broker Society. This was always a little dream of mine. Standing here now is surreal, but it's thanks to retirement that I truly get to enjoy this. Anyways, enough about me, I'm sure you're here for the rumors, no doubt. Well, you can find them over on the wall. Those rumors are some of the best leads we have about floors. Our scouts are sent as soon as the boss of a floor is defeated to start searching for clues and leads for players such as yourself to go and explore. Although, we have no idea what you'll find on your adventures, so make sure to bring some supplies to sustain yourself for the treks ahead."
Introduction
Every new floor, a list of rumors will be announced. These rumors will be short prompts that players can explore in PPs.Effect on Site
This is two-fold.
Changing Site Lore: When the thread is completed, players will write a summary of what happened in the last post. Really unique/creative/well-done threads will be incorporated into canon lore.
Allowing Non-Frontliners to Help Clear Floors: If each rumor is explored by two different groups, Hikoru will reward the players with a hint about the upcoming boss battle. Even non-combatants and low-level players can contribute in a unique way.Process
- Previous floor is cleared.
- Hikoru updates the rumor list.
-
Interested players create a PP to explore the rumor.
- Groups must include between two and four players.
- They must actually have an answer to the rumor - not just “we looked but found nothing.”
- All threads must reach at least 20 posts.
-
Players write a summary of what happened in the thread, and include it in their last post.
- The summary should be between 50-150 words.
- The thread is submitted via standard closing procedure (submitting to PSTs).
-
When all rumors have been explored by two unique groups each, a hint is given regarding the approaching boss.
- "Unique" is defined as different writers, not characters. Alts may participate, but they will not count toward the requirement.
- Thread summaries will be read, and the most creative ones will be made into actual lore.
- Threads chasing rumors will be given a small amount of additional EXP, so long as they meet the requirements and are deemed a “good effort.”
-
Players may investigate as many rumors as they'd like.
- The "two unique groups per quest" is a requirement for the bonus boss hint, but not a cap.
Example
This example pertains to a location on the ninth floor. For reference:Spoiler
The Profaned Peak is a flat-topped mountain, whose peak is covered in a lake of lava. Sitting in the middle of the lake is a large stone platform, along with a massive throne carved from a meteor. A long stone walkway connects the platform to the northern edge of the mountain peak, allowing players to approach the throne. A massive jeweled crown made from gold and silver sits atop the throne, its edged burnt by an evil flame.
Rumor: “The crown at the Profaned Peak has begun to hum with power, and hover a few inches above the throne. Both NPCs and Players sense that something is about to happen, but they can only speculate as to what it is.”
One Possible Summary: “The crown released a burst of dark magic, afflicting all NPCs and monsters in the area. They became enraged, and attacked everything, including each other. The effect continued until the crown was thrown in the lake of lava. It reappeared almost instantly on the throne, no longer floating or humming. The monsters and NPCs went back to normal.”
Change to Lore: Should staff determine that summary is unique enough to be added to the site’s canon, we could add to the floor nine write-up. “From time to time, the crown emits a powerful dark aura that enrages NPCs and monsters. This can be corrected by throwing the crown in the lava lake before it reappears once again atop the throne.”
Current Rumors
Floor Rumor Completions 3 A number of players have supposedly been kidnapped by the Fae, and are being held captive in the Cavern of Faeries. Should probably investigate, and see about getting them out. 0/2 6 Mysterious lights are appearing in the Ruins of Tsjericanth. They only appear at night, and all reports claim the lights are stationary (they don't move around). 0/2 7 NPCs keep talking about a new "threat" near The Eye. Not sure what it is, but it has them spooked. 0/2 8 The flowers at the Graveyard of the Willowed are starting to die. Since they're supposed to contain the souls of dead elves, that's an obvious problem. 0/2 9 The crown at the Profaned Peak has begun to hum with power, and hover a few inches above the throne. Both NPCs and Players sense that something is about to happen, but they can only speculate as to what it is. 0/2 27 The ghostly figure of a woman has reportedly been spotted in the Ming Garden. The sight has unnerved Players and NPCs alike. Who is she, why is she there, and can she be removed? 0/2 -
Floor 7
<<Case of Wurms>>
Party Limit: 3 | 20+ Posts
Repeatable for standard thread rewards.
Quest Rewards:
- 1,000 Experience Points
- Ability to use Rig as a safe zone.
Requirements:
- Speak with mayor of Rig
- Head to Rig and defeat the Amphis Serpens
Summary:
The outlying town of Rig has been infested with a horrible monster. None of the residents of town are strong enough to deal with the beast themselves. Refugees from the village, including the mayor, have come to Nimbus to find help.
Outline:
Once approached by the village mayor, players must travel to Rig and deal with the twin-headed serpents. After they have dealt with the serpents terrorizing Rig, the players can return to the mayor and claim their reward from him.
NPCs:
<<Cyrus, Mayor of Rig>>
A gentleman and great leader, Cyrus has led Rig to be prosperous even through their harshest times.
Enemies:
<<Amphis Serpens>>
A twin-necked serpent conjoined with the same body.
HP: 900/900 | DMG: 125 | MIT: 50Abilities:
- Serpent’s Poison | On MD rolls of 9 or 10, the boss will make two attacks; each will target one of the two players with the highest Hate. The attack poisons them, dealing normal attack damage in addition to inflicting an unmitigated DoT [15 DMG] effect that lasts 2 turns. Against a single player, both attacks will target the player.
-
Shifting Sand | Due to the shifting sands and movement of the boss, players take a -1 penalty to Accuracy and Evasion.
Epilogue:
SpoilerOnce players have eliminated the Amphis-Serpens, they can now use Rig as a safe zone.
-
Floor 22
<<King of Lakes>>
Party Limit: 4 | 20+ Posts
Repeatable for standard thread rewardsQuest Rewards:
- 2,000 Experience Points
-
POTENTIAL REWARD | If the players help <<Lotus>> win the contest, each receives:
-
Filet of King (T3 Perfect Consumable [Meal])
- Over Health Adds +135 HP to your maximum health points for a single thread.
-
Filet of King (T3 Perfect Consumable [Meal])
-
POTENTIAL REWARD | If the players win the contest without helping <<Lotus>>, each receives:
- 10,000 col
Requirements:
- Enter the Fishing Contest.
- Find, then catch, a “Red-King Salamander” to use as bait .
- Fish up and defeat the King of Lakes.
Summary:
On the twenty-second floor, players hear about an upcoming event at the Lake of Reflection. A fishing contest is going on for anyone wishing to participate. Players who do not have the fishing skill unlocked have access to it for free during this quest. Players who have already acquired the skill gain a bonus to the event. Upon arriving at the event, players are greeted by an older man mumbling to himself about how he needs live-bait known as a “Red-King Salamander” to fish up the biggest fish possible for the contest. The quest goers can decide to talk to the man and help him win, or collect a salamander for themselves and fish up the boss.
Outline:
The players will first have to find a Red-King Salamander in the nearby forests near the foot of a mountain.
- Players can spend post actions to search for a salamander, making LD rolls (modifiers apply). A result of LD 13+ is required to succeed.
- Once found, the bait must be caught. Player must spend post actions to attempt to catch their found salamander, rolling natural CD. A result of CD 6+ is required to capture it. If the party fails three catch attempts, the little critter got away and they will need to try finding another.
Once the bait has been acquired, the players must choose as a group whether to aid <<Lotus>> or attempt to win the contest themselves. <<Lotus>> will join the party as an ally only if they are aiding him win.
Attempting to fish up the King of Lakes requires post actions. Any player can make the attempt, succeeding on a modified LD of 15+. Players with the Fisher skill reduce the target number by 1 per rank.
Allies:
<<Lotus>>
An old man who loves his fishing and tea. Players can decide to fish with him if they so choose.
HP: 700/700 | DMG: 50 | MIT: 25Abilities:
- First Aid | Heals BD% HP of the lowest health player every round.
- Field Medic | Player heals the entire group for 10% on a CD 8+ (Instead of <<First Aid>>)
-
Jasmine Tea | Lotus prefers not to fight. Unless the players are 100% on their health points, he will prioritize healing.
Enemies:
<<King of Lakes>>
A giant fish with webbed-feet. It charges wildly at the first target it sees, using it’s sharp teeth to attack.
HP: 1250/1250 | DMG: 175 | MIT: 20Abilities:
- Body Slam | On an MD of 9, the boss will jump high into the air and crash down in the center of the players, sending out a shock-wave that automatically deals 120 AoE damage to each player. This effect is subject to mitigation.
-
Dive | On an MD of 10, the King of Lakes will take the player with the highest hate in its teeth and drag it back into the lake. The player will take 150 unmitigated damage and need spend their next post action swimming back to the shore.
Epilogue:
If the players helped <<Lotus>> win the contest:
SpoilerOnce the <<King of Lakes>> has been defeated, a panel appears, informing the players of the quest's completion, listing quest rewards and experience gained. Lotus will breathe a sigh of relief before returning to his usual calm self, thanking the party for their assistance and offering the players tea.
If the players won the contest for themselves:
SpoilerOnce the <<King of Lakes>> has been defeated, a panel appears, informing the players of the quest's completion, listing quest rewards and experience gained. <<Lotus>> congratulates them on their win and returns to his favorite fishing spot.
-
Floor 4
<<The Night's King>>
Party Limit: 5 | 20+ Posts
Repeatable for standard thread rewards.

Quest Rewards:
- 2,500 Experience Points
- Each player receives: Winter's Heart - 3 charges. Provides the Player with T3 Frost Thorns and Freeze enhancements, and an aura that reduces an attacker's ACC and EVA by 1 for one turn following a successful non-critical attack against the Player. Player will take double damage from any fire-based enhancements or abilities while receiving benefits from this consumable. Remains as vanity item/trophy after charges consumed)
Requirements:
- Roleplay traveling to the Frozen Castle.
- Roleplay exploring the Frozen Castle.
- Must defeat at least 1 squad per player before encountering the boss.
- Must roleplay interaction with the boss.
- Must defeat King Modgul Frostblade.
Summary:
As the sun rises on the third day, little sound is heard in the town. All the NPCs that are found on the road move in a silent hurry, collecting firewood, food and supplies for their homes (or in tents if their homes were destroyed). Hiding in the hopes that the dreaded Night's King does not return himself. Despite it being the warm sun solstice, the morning wind blowing from the frozen castle on the mountain blows colder than it ever has before, creating an eerie whistling through the air, and leaving an uneasy feeling on everyone. Elder Mark can be found standing at the edge of the town looking at the blizzard building up on the mountain, and shares his thoughts on the king, his methods and history, if asked. He warns the player(s) that before the king was destroyed it was rumored that he wasn't just aiming to defeat <<Snowmaw the Carnivorous>>, the old floor boss, but was instead looking for something. Levi returns from Darian's tent and wielding a lightweight hatchet, a wooden shield and a modified slingshot, stating that he wants to help however way he can against the king, and that while he's not an expert at it he can use an axe, and shows the slingshot which Darian had given to him as a gift.
The trek towards the frozen castle starts out easy, albeit also eerily quiet. No monsters will be encountered for the crossing. As the party gets closer to the castle, the swelling blizzard coming from the mountain grows stronger, as if it seeking to resist their approach. Eventually reaching the castle, the player(s) find it buried beneath a massive drift of ice and snow that spills into every available nook and cranny. The interior of the castle is filled with empty hallways and rooms made of masonry decorated by occasional mosaic floors. The entire castle is lit by torches burning with blue flame hanging on sconces, giving off just enough light to see. Details are hard to make out. Squadrons (4 frost skeletons and 1 ice skeleton) wander the halls and guard chests in rooms. As the player(s) explore, they encounter fully furnished rooms, some half-buried in rubble, but all frozen by the most biting cold they have every experienced. Murals, runes and other decorations depict historical events from Fourth Floor.
When the players reach the throne room, they immediate notice the absence of any blizzard inside. Sitting in his throne is the Night's King, Modgul Frostblade. Resting on a stone pedestal in front of him is a glowing white orb, almost like a translucent pearl. It is clear that Modgul has just recently thawed from his algid tomb, the last of the frost still falling off of his shoulders as he reaches his left hand out, taking the orb. Standing with it in hand, he glares maliciously at the party, stoking his thirst for conquest.
"I have long awaited this day. Every movement was calculated and contingency accounted for. And yet, you think to stand in my way? No. I who delved into the heart of winter, have claimed powers over ice and snow itself, and shall never fall to the likes of you." He raises the orb into the air. It flashes brightly, shattering nearby ice sculptures to reveal skeletal minions. "When I add your frozen corpses to my army, I shall lay waste to this pitiful town and establish my eternal kingdom!" Drawing his blade as he finishes speaking, it glows a frosty blue with an icy aura drifting off from it. His minions surge towards you and the battle commences.
Outline:
Dungeon Mechanics: The player(s) must roleplay their exploration of the castle, and must defeat at least one squadron per player before the boss fight can begin. Resting between battles is permitted. After a squadron is defeated, the players must roleplay leaving the hallway or room they fought in and entering a new room/hallway before they can spawn another squadron (in other words the player cannot stay in one room and constantly fight all the squadrons at once). Additionally players can search for chests once every five posts while in the castle. When found the player can roll to open the chest in the same post using the table below:
LD 1 - A frost skeleton leaps out and attacks!
LD 2-4 - Chest is empty, lock won't open, or is frozen shut.
LD 5-10 - Chest contains 250 * (# of players) col, 1 Material.
LD 11-15 - Chest contains 500 * (# of players) col, 4 Materials.
LD 16-18 - Chest contains 1000 * (# of players) col, 8 Materials.
LD 19+ - Chest contains 2000 * (# of players) col, 12 Materials, 1 Frost Heart Fruit (only usable in this quest, vanishes when quest ends. Consumer becomes immune to the Freeze and Frostbite effects of the monsters and the boss).
*NOTE 1 - Lockpicking modifiers apply to this table.
**NOTE 2 - Loot obtained from chests must be split among the players in a way that all of the players agree upon, unless running solo.Dungeon Modifiers:
Each room has one of the following debuffs of the player(s) choice, that must be declared as part of the first post of each squadron combat:
Snow - The snow is thick enough to slow the player(s) down, increasing energy consumption of all sword arts by 2.
Ice - On a BD 1-2 the Player slips on the ice and stunned for 1 turn unless another player uses their post action to lift them back up. Abilities that prevent or negate stun (e.g. parry, etc.) will not prevent this effect, but are also not expended by it.
Dim Vision - When searching for chests, players, monsters, materials, or anything that requires an LD to detect, players have a -2 to their roll. This debuff is nullified if the player has the Night Vision mod.
Allies:

<<Levi>>
After obtaining a modified sling shot with sling bullets (as opposed to simple stones), Levi will insist on traveling with you to fight against the king and his forces. When in combat Levi will start with 0 hate and fight from behind the player(s), only using his slingshot. Should monsters gain hate on him however and attack him, he will switch to using his hatchet and wooden shield, in which case his damage will be altered from the default to the Hatchet and Shield ability. Levi's attacks generate 1 hate per hit.Unlike before Levi, will not flee unless the player(s) press him to. In order to get Levi to flee, more than half of the players must attempt to persuade and convince him to go. For example, a party of 6 will require 4 players to talk to him. If there is only one player, the player must spend two posts persuading him. These attempts must be made during combat, and count as a free skill use. Levi is determined to help the player(s) and keep his country safe, and will not easily be convinced otherwise.
HP: 500/500 | DMG: 150 | ACC: 1
This ally uses its own BD roll when attacking.
Use of any of Levi's abilities must be declared in roll description.Abilities:
- Focus Shot | Levi makes a focused shot which has an additional +1 ACC. If the shot hits the target, it will reduce the opponent's ACC by -2 during its next attack. If Levi's BD roll is 9-10 during this attack, the target of his attack will also be stunned for 1 post (The King's accuracy will only be reduced by -1 for one turn if hit by this attack and the King cannot be stunned by Focus Shot). 1 post Cooldown. +2 additional hate.
- Multi-Shot | Taking 3 sling bullets, Levi fires three shots at once allowing him to strike three targets rather than one. 3 post Cooldown. +2 additional hate.
-
Hatchet and Shield (Combat Mode) | Only used when monsters attack him directly, Levi 's ACC is reduced to -1. Levi can either use his hatchet which deals 200 DMG and generates 1 hate, or use his wooden shield which grant him MIT 100. If his shield receives 5 hits however, it will break and no longer be usable for the rest of the quest. While in <<Hatchet and Shield>> Combat Mode, Levi will have his slingshot pocketed, and be unable to use <<Focus Shot>> or <<Multi-Shot>>. If Levi has not been attacked since his last action he reverts to his usual slingshot Combat Mode.
NPCs:

<<Elder Mark>>
A rather loud and carefree man who always seems to find a bright side to things. Enjoying booze and smoking a pipe he gives off a lively and youthful spirit. Whenever the need arises however his personality becomes that of a hardened veteran. Focused, quick to the point, and a serious look on his face. Although too old to fight, he is encouraging and empathetic, and will give advice when needed.
Enemies:
<<Frost Skeleton>>
The frost skeletons move with surprising speed and agility. They tend to attack with hit and run patterns, switching between stabbing and slashing tactics. When they block a blow they spin their weapon in front like a shield, or will attempt to parry. However even then they are simple minded and are not very good strategists, acting more like mindless guard drones than experienced fighters. Their eyes glow with a blue flame, and a frosty mist floats down from their skulls.
Lore: Frost Skeletons are soldiers and captured prisoners who've been frozen in the castle long enough for their willpower to be sapped. Their only thoughts focus on serving and obeying their king. They don't respond to anything but orders given to them by their superiors.There will always be 3 <<Frost Skeletons>> per squadron.
HP: 500/500 | DMG: 75 | EVA: 1
This mob uses its own roll when attacking.Abilities:
- Chilling Wounds | On a 9-10 roll on the MD, the Frost Skeleton cuts the player deep with their weapon, causing the player to be coated in a layer of frost which chills them and slows them down, reducing their EVA and ACC by 1. This lasts for 2 rounds and can stack (but not refreshed)
- Double Edged | Frost Skeletons attack twice in a single post, using both the BD and the MD. The BD roll cannot trigger <<Chilling Wounds>>.
- Heart of Ice | Frost Skeletons suffer no ill effects from the Freeze, Frostbite, Frost Thorns or Frost Aura enhancements. Instead, each time it is subject to any of these enhancements the Frost Skeleton regains 100 HP and gains 25 dmg on its next attack. If subjected to multiple effects, these benefits stack. Additionally, fire enhancements like Burn, Flame Aura and Flame Thorns deal double damage against Frost Skeletons.

<<Ice Skeleton>>
Unlike the Frost Skeletons, Ice Skeletons wear metal armor and do not move with the same speed and agility. Commanding the lesser Frost Skeletons, they use their numbers to create formations and focused attacks, commanding them telepathically and in unison. When Ice Skeletons fight it is with a war axe and shield, carefully blocking and parrying attacks while counter attacking whenever possible. It is evident very quickly that they retained their intelligence and can prioritize their squadron's needs accordingly. Under the metal armor their skeletal bodies can be seen, a blue flame coating it.
Lore: Ice Skeletons were once experienced soldiers who had pledged their allegiance to the king and his cause, frozen in the castle and blessed with powers similar to that of their king, entrusted to lead his forces when the day of reckoning came.There will always be 1 <<Ice Skeleton>> per squadron.
HP: 1000/1000 | DMG: 150 | MIT: 75 | ACC: 2
This mob uses its own BD roll when attacking.Abilities:
- Tactical Leadership | While the Ice Skeleton lives, all Frost Skeletons in the area gain an additional +1 ACC. Additionally, every third post he will grant them one of the following effects: +1 ACC (LD 1-5, lasts 2 rounds) | +1 EVA (LD 6-10, lasts 2 rounds) | +50 MIT (LD 11-15, lasts 2 rounds) | +100 HP (LD 16-20)
- Cold Flame | On an BD of 9-10 the Frozen status is applied to the Player, making them unable to make post actions for 1 round.
- Heart of Ice | Ice Skeletons suffer no ill effects from the Freeze, Frostbite, Frost Thorns or Frost Aura enhancements. Instead, each time it is subject to any of these enhancements the Ice Skeleton regains 125 HP and gains 50 dmg on its next attack. If subjected to multiple effects, these benefits stack. Additionally, fire enhancements like Burn, Flame Aura and Flame Thorns deal double damage against Ice Skeletons.
<<Modgul Frostblade>>
<<The Night's King>>
Modgul Frostblade always begin the battle with a full squadron, which enters the room as soon as the battle begins. Modgul is a vicious and ferocious fighter, reminding players of a viking berserker as he attacks with powerful swings and charged thrusts, moving seemingly as fast as the player(s) and with equal, if not better reaction timing. He wields a broadsword in his right hand and holds Winter's Heart in his left. When Modgul's health drops to below 500 HP, he will change tactics and instead command his Ice Skeletons to tank player damage while he consumes any available Frost Skeletons to heal himself.
Throughout the fight Modgul follows a unique hate system. In addition to the normal hate generation calculation, players who deal the most damage against him in a round generate an additional +1 hate for Modgul. Players who apply a debuff against him generate additional +2 hate from all mobs. And players who restore health to their party members or give their party members a buff automatically gain +3 hate from all mobs.HP: 2000/2000 | DMG: 250 | MIT: 150 | ACC: 3
This boss uses its own BD when attacking.Abilities:
- Winter's Heart | All successful hits against Modgul Frostblade deal 20 frost thorns damage to the player. Critical hits against him reduce the attacker's EVA and ACC by 1 for 1 round. On a BD 9-10, Modgul applies the Frozen status on his target, immobilizing them and causing them to take an additional 20 damage per hit sustained while immobilized. Modgul himself is immune to the Freeze, Frostbite, Frost Aura and Frost Thorns enhancements and is instead healed by 200 for each successful activation of each of these enhancements against him. Fire enhancements like Burn, Flame Aura and Flame Thorns deal double damage against him.
-
The King's Summons | Effect depend on current health:
- 500+ HP: Every fourth round, if there are three or fewer minions under his command, he will summon more to restore his ranks as a Post Action. If there is only one minion remaining he will summon more regardless of the ability's cooldown, which will then reset. He will always attempt to have 1 Ice Skeleton and 3 Frost Skeletons at his side.
- <500 HP: Modgul Frostblade absorbs every remaining minion he commands, healing himself for 100 HP per minion absorbed as a Free Action. Afterwards he reverts back to the pattern of summoning minions every fourth round if there are three or fewer minions under his command, or if his numbers fall below two minions. However this time he will only summon Ice Skeletons rather than Frost Skeletons. He can only absorb his minions once.
-
King's Rage | Should any player generate more than 8 hate from Modgul, he will fly into a furious rage, gaining +1 ACC and +50 DMG to his attacks, but in return his EVA drops by 2. He will attack the player with highest hate once and then make an AoE attack against the entire rest party during this state. King's Rage lasts for two rounds. When it ends all player hate values are reduced by 8 (to a minimum of 0.)
Epilogue:
SpoilerAfter slaying the king, the Winter's Heart releases a massive shockwave dispelling the blizzard and destroying all of the king's armies. Afterwards it falls to the ground. The players are then prompted by the quest to return to town where Elder Mark congratulates them and they resume their festivities despite any destruction, choosing to rejoice in the victory and savor the last day of the Sun Solstice. Mark talks to the party privately and tells them that his ancestor was one of the king's soldiers, and that he's grateful to them for putting him to rest.
If Levi is still alive by the end of the quest, he will give the player <<Winter's Heart>> which he kept in a bag with him. If Levi is dead, Mark will take the orb and with the help from the player(s), shatter the now thinned layer of ice over the frozen lake and toss the orb in, never to be seen again.
-
Floor 4
<<The Night's Shadow>>
Party Limit: 6 | 20+ Posts
Repeatable for standard thread rewards.
Quest Rewards:
- 2,000 Experience Points - reduced to 1,500 if town is destroyed
-
POTENTIAL REWARDS:
- Each player receives 5,000 col if the town is above 50% HP
- Each player also receives 500 bonus Experience Points and a (T1) Perfect DMG Potion if the town is above 90% HP
Requirements:
- Roleplay talking with Levi and Elder Mark.
- Roll to build defenses and roleplay barricading the town.
- Protect the town & prevent it from being destroyed.
- Defeat all Snow Soldiers and Frost Captains.
- Defeat the Ice General.
Summary:
Upon returning to Snowfrost, Levi requests to speak with Elder Mark, and tells him of Darian's death quietly so as not to disrupt the festivities. After asking around, Levi leads the player(s) into the tavern where they find the elder seemingly drunk on sake, gambling at a table with another group of people and winning. When Levi requests to speak with Mark he resists at first wanting to finish the game but concedes when it's shown that the situation is important. After hearing of Darian's demise, the scout's description and his last words Elder Mark tells Levi and the player(s) that the figure in the reference was King Modgul Frostblade. He goes on to recount Snowfrost's history, now spoken of only as myth and spooky stories meant to frighten children.
Around two hundred years ago there was indeed a tyrant king. He ruled with absolute authority and dominance, executing anyone who dared oppose him. Through the cruelty of forced labor, bordering on the people's slavery, he built a massive castle on a nearby mountainside. He planned on storming into the labyrinth and slaying the Snowmaw with an entire army of soldiers at his command, and an equally large force of sacrificial slaves to distract the beast. It was he who constructed those towers inside that cursed blizzard as outposts on the way there. Eventually one man rose up and rallied the people, starting a revolution. United behind his leadership, they fought against the king, using intellect over brawn to overcome the king's forces. In the end, Modgul was forced into hiding behind his castle walls for months. Day after day, week after week, a blizzard grew stronger over the fortress, until the king and his army were frozen forever in time. The people rejoiced and began a new life without a tyrant king, chief or ruler. Living a peaceful life ever since. It was said that the king and his forces never died, and in fact still live. Forever trapped in their castle, buried in ice and snow.
A traveling NPC rushes into town a little after the story finishes and screams in a panicked voice about a small army heading to the town, and that they will arrive within a day or two. Elder Mark immediately asks the player for their help in setting up traps and defenses, as well as helping him calm and lead the people. By nightfall the army comes into view. Multiple squadrons, each with their own captain, and a general standing on a lone raised stone behind them all, staring down at the town. At his signal, the army charges forward, each of them giving battle cries of reclaiming the land for their king, and slaying the blasphemers. Each of them proudly shout with all their might: "For King Frostblade!"
Outline:
Before the day ends, the player(s) have the opportunity to set up defenses, barricades, and traps for when the enemy army arrives. In order to do so, player(s) must use a post action to make a roll, succeeding on a CD of 9+. If successful will construct one properly. Each player may attempt one roll for each of the barricades and traps listed in the table below (max 4 rolls per player, never repeating the same type). For example, if the player attempts to build a wooden wall and fails, they cannot reroll to construct a wooden wall. A second player in the party, however, may make their roll to construct the wooden wall. The more players that make a successful CD rolls on the same barricade/trap, the greater it's benefits will be. CD Rolls are a post action and the construction must be roleplayed out.
At least one barricade or trap must be constructed before the players can skip to the actual fight. Or, if they wish, they can continue rolling for each barricade/trap until they have made every roll possible. Obtaining more than 3 successes for any one defense grants no additional bonuses.
Barricade/Trap 1 Successful CD Roll 2 Successful CD Rolls 3 Successful CD Rolls Wooden Wall: 500 HP * (Players participating) that must
be reduced to 0 before the Town can
be targeted.1000 HP * (Players participating) that must
be reduced to 0 before the Town can
be targeted.1500 HP * (Players participating) that must
be reduced to 0 before the Town can
be targeted.Trench: +1 EVA to Town on first
attack.+2 EVA to Town on first
attack.+3 EVA to Town on first
attack.Sharpened Stakes: +30 Thorns added to the Town.
This will apply on non-critical attacks
made by the Soldiers toward the Town,
even if attacking the Wooden Wall.+40 Thorns added to the Town.
This will apply on non-critical attacks
made by the Soldiers toward the Town,
even if attacking the Wooden Wall.+50 Thorns added to the Town.
This will apply on non-critical attacks
made by the Soldiers toward the Town,
even if attacking the Wooden Wall.Pitfall Trap: Enemy Soldiers Stunned*
upon rolling an MD 1
when attacking the Town.Enemy Soldiers Stunned*
upon rolling an MD 1-2
when attacking the Town.Enemy Soldiers Stunned*
upon rolling an MD 1-3
when attacking the Town.*Stunned applies to the entire squadron or captain. These entities cannot be stunned for 3 turns following the initial stun, but the Pitfall trap stun cooldown is considered separate from that applied by player skills and sword arts.
<<Town Stats>>
The townsfolk will not fight as they are not trained. Even the lumberjacks would only get in the way in this fight. Thus they all stay hidden inside of their homes. For every 5% of health depleted, 1 building is broken, frozen over or caught fire.
HP: 5000 * (Players participating)
Allies:
<<Levi>>
Yet again, despite him lacking any actual combat experience, Levi will insist on helping the players in the coming fight. He will stay behind the wall, if it was constructed. If the soldiers attack the town itself, Levi will retreat inside until all snow soldiers and frost captains have been slain. If the Ice General is still alive by then he will try and help, but will have a -2 ACC against the General.
Abilities:
-
Sling Shot | Once again Levi uses a slingshot in the fight, choosing to target the Snow Soldiers first, Captains second, and the General last. He will always attack soldiers assaulting the town before all else. His attacks reduce his target's ACC by -1 and can only target one enemy at a time. Requires 1 post to reload.
NPCs:
<<Elder Mark>>
A rather loud and carefree man who always seems to find a bright side to things. Enjoying booze and smoking a pipe he gives off a lively and youthful spirit. Whenever the need arises, however, his personality becomes that of a hardened veteran. Focused, quick to the point, and a serious look on his face. Although too old to fight, he is encouraging and empathetic, and will give advice when needed.
Enemies:

<<Snow Soldier Squadron>>
These soldiers, while lacking armor and covered in frost and frostbite like the scout, charge with determination and nerves of steel like their lives depend on it. Nothing said nor done will waver their conviction, and they will always fight for the glory of their king. While a hint of arrogance will show during their initial attack, if met with enough resistance it will be replaced with genuine pride for their king and their way of life instead, and take the fight seriously. Upon death their body cracks and shatter like ice before further crumbling into snow.
There will always be 5 Snow Soldiers per squadron, and 2 squadrons per Player.<<Snow Soldier>>
HP: 350/350 | DMG: 125Abilities:
- Priorities | Even if Howl is used, if there are squadrons not engaged in combat with the players, they will attempt to attack the town itself whenever possible. Aiming to break building supports, throw torches into the structures to burn them down, etc. Players can use the block mod <<Mark>> to protect the town from a squadron's assault, but only 1 squad can be affected per use of <<Mark>>.
.thumb.jpg.4e4fc680d1f43685ad9ca16de3074875.jpg)
<<Frost Captains>>
Unlike the Snow Soldiers, Frost Captains have chainmail armor with leather overlapping it, as well as a horse for increased speed and power. Frost Captains will always lead their squadron, fighting on the frontlines and always attacking before the Snow Soldiers do. Every Frost Captain will keep the morale of their squadron high, and will always be the first to initiate battle cries. Upon death their body cracks and shatter like ice before further crumbling into snow.
There will always be 1 Frost Captain per squadron.
HP: 500/500 | DMG: 150 | MIT: 50Abilities:
- Mounted Combat | While riding their steed, Frost Captains will have +1 ACC. Additionally, the Frost Captain's first attack is always rolled first before the players, before reverting to normal battle rotation rules. The Horse has 250 HP and if killed this ability is negated.
- Rallying Leader | Frost Captains will always give a +1 bonus to ACC to their squadron. Should the Frost Captain die this ability is negated for that Captain's specified squadron. (Bonus applies to attacks on the town.)
- Priorities | If their squadron drops below 3 soldiers, or if their squadron is not engaged in combat with any players, the Frost Captain will attack the town. Instead of throwing regular torches however, they will open a lantern on their belt and light it with the blue flame inside. This flame freezes everything it touches rather than burning it up. They will use these torches on the town when attacking.

<<Ice General>>
The Ice General does nothing but oversee the battle through most of the conflict. However once there are two squadrons remaining (or 1 if there's only 1 player), he will step in and fight the player(s) head on. He is fearless, quiet, cold and ruthless. Despite being encased in ice for over a hundred years, he fights with the same ferocious skill he did back then, and will not hesitate to destroy all in his path.
HP: 1500/1500 | DMG: 200 | MIT: 100 | ACC: 2
This boss uses its own BD roll when attacking.
This boss will never attack the Town, and will always remain focused on the player(s).Abilities:
- General's Might | Every other post, the Ice General will make an AoE attack, striking up to 4 players with the highest hate. Each target will receive its own roll, similar to usual AoEs.
- Armored Momentum | Every miss the Ice General makes, increase his next successful hit by 25 (damage stacks). Bonus damage is lost after a successful hit. Each miss during an AoE from <<General's Might>> contributes to these stacks. For instance, if this boss used an AoE at base damage and missed the first player targeted, the damage toward the second player would be increased by 25. If it were to then hit the second player, the damage toward the third player would revert to normal. If it were to miss also the second player, it the attack would gain an additional 25 damage toward the third Player. If the <<Ice General>> already has stacks of <<Armored Momentum>> prior to starting an AoE attack with <<General's Might>>, these stacks will act as the base damage for the entire AoE attack.
-
Power of the Ice King | Once at 600 health or lower, the <<Ice General>> will switch from his two handed axe to a two handed sword which has a frosty aura/mist. On an MD of 9-10, the target will receive the Freeze status effect.
Epilogue:
SpoilerGeneral Ending: The Ice General will never back down or surrender (even if disarmed). Upon his defeat, he taunts the player(s) by revealing to them that the king is coming. He will reign judgement upon them all, and bring forth law and order to this unruly land. With that he lays flat on the ground with his sword held over his chest, and his body quickly turns to ice but does not shatter like the others before him. Elder Mark walks out from the town and scoffs, a serious look on his face. "I think it's safe to say that this won't be over until the king himself has keeled over and died for good... That can only mean one thing." He turns to the players and with a goofy grin pokes the party leader's shoulder. "You're gonna have to go into that god-forsaken, frozen castle and finish him off for us! Have fun!"
Town Saved: If the players managed to keep the HP of the town from falling below 50% health, the NPCs will thank them for their protection and give them col as a reward. If the players managed to keep the HP of the town from falling below 90% health, Levi will personally thank the players and promise to make it up to them however way he can.
Town Destroyed: If the town was destroyed, the townspeople will complain for a bit, and possibly throw their grief and frustrations at the player(s), but Mark and Levi will calm them down, reminding them that the soldiers were slain and the people aren't going to be forced to live under their tyrannical rule. The player will receive no col from the quest however, and will receive 500 less experience points as well (receiving 1500 EXP from quest rewards instead of the standard 2000).
-
Floor 4
<<Harbinger of the Night>>
Party Limit: 4 | 20+ Posts
Repeatable for standard thread rewards.
Quest Rewards:
- 1,500 Experience Points
Requirements:
- Roleplay the player(s) interaction with the festival and the NPCs.
- Roleplay overhearing rumors & gathering information.
- Roll to find the camp & roleplay searching for it (each roll requires a post action)
- Roleplay encountering the soldier.
- Fight and kill the soldier.
Summary:
A rare phenomenon known as the warm sun solstice has finally arrived. Every two hundred years the land grows warmer and warmer over the course of a week until, for three whole days, it is warm enough for the snow to fall thin enough for the grass to be seen, the rivers to flow, and the ice to melt. While it isn't nearly warm enough to fully bring out a spring feeling, the sensation is nothing like any denizen of this floor will have ever known. Upon arriving at Snowfrost, the player(s) will find the entire town filled with energy as they prepare the night's festival. From decorating lanterns and putting up streamers, to setting up merchant and game stalls. Happiness fills the hearts and smiles of every NPC to the point where any player(s) who live in the village are caught up in the festival mood as well. When night arrives everyone enjoys themselves as dancers, singers, musicians, entertainers and much more move around the town to celebrate this three day festival.
However, during the middle of this festival the player(s) overhear two NPCs talking. "Never seen the guy before. Wore a strange wool and leather cloak with chainmail underneath it. Wore a helmet too. Looked like he got caught in a blizzard, all covered in snow and ice, even looked a bit frostbitten. But what was even more weird were his eyes."
"How could his eyes be more weird than his condition?"
"They were wild, almost like he was chasing something. It was like he saw everyone as a threat or something."
"Well what happened to him?"
"Ran away after he snuck around the festival a bit. I think he was heading towards Darian's campsite by the lake."
"Well if he's gonna run into Darian we've got nothing to worry about. That guy's as strong as they come." Should the player(s) choose to speak with the two NPCs, they will share any information they know freely. If the player(s) show concern about Darian's safety, Levi will share their worry and offer to come with them.
After gathering the general direction to Darian's campsite from the NPCs, the player(s) may choose to go and search for the campsite. As post actions, the player(s) must make an LD roll and on an 11+ they will succeed in finding the campsite by the frozen lake (which is still frozen despite the solstice). There, they will discover Darian's dead corpse on the outskirts of the camp, and the stranger eating roasted wolf meat by the campfire. The stranger will look at the players, his wild eyes filled with rage and disgust. The stranger stands up at the sight of them, dropping the meat onto the ground and drawing a spear and shield. "Good, I'll have the honor of slaughtering more of you blasphemers."
Outline:
Allies:
<<Levi>>
A generally cheerful but lean fellow who's not as strong as the other lumberjacks, and instead acts as lookout, using his slingshot to scare off wolves while the other men work. He isn't shy, but is embarrassed at his lack of strength and admits he's not much good in a fight.ACC: -1 | EVA: 1
Abilities:
- Sling Shot | If Levi is with the party during the fight against the scout, he will fire with his slingshot at the scout. If he succeeds in hitting the scout, it will be on the wrist with a surprising amount of force, resulting in the soldier's attack receiving a -1 to his accuracy for that post. Requires 2 posts to reload. If Levi is attacked by the Scout, he will turn and flee immediately, ceasing to help the Players so that he can live and fight another day.
Enemies:
<<King's Soldier>>
The scout is covered head to toe in snow, and the player(s) can even see remnants of frost on his skin, including splotches of pale and even black as signs of severe frostbite. Even in this condition he moves with fierce determination. His body movements will be rather wild and with more force than discipline, but when push comes to shove his military training becomes clear to everyone.
HP: 1000/1000 | DMG: 200 | MIT: 100Abilities:
- Soldier's Insight | Howl does not produce hate against the King's Scout. Instead it focuses his attack on the howler for one post. Afterwards he continues to attack those with the highest hate. If players hate values are equal, he targets the player with the least mitigation and lowest total health, in that order.
- Battle Fury | When his health reaches 500 or lower, every other post, his attacks deal 50 additional damage. On the turns he does not receive this bonus damage, he holds his shield up to mitigate 50 additional damage against him until his next turn.
-
Frozen Soldier | If the freeze enhancement is activated on him, he will not receive the frozen affect, but instead receive -1 EVA and -1 ACC for one post.
Epilogue:
SpoilerUpon killing the scout, the man collapses onto the ground. Before shattering, he starts to give a hoarse chuckle. "I am but the herald. The prophecy still stands. The king. My king... YOUR, KING. Shall return." Instead of shattering into crystals like the usual death effect, the man's body begins to crack and shatter into ice, before crumbling further into snow and blowing off into the wind. And as it does, a chilling wind stirs up for a moment, colder than one might ever feel on any night known before on the Fourth Floor.
-
Floor 22
<<Witch of the West>>
Party Limit: 4 | 20+ Posts
Repeatable for standard thread rewards, and <<Witch’s Brew>>Quest Rewards:
- 1,500 Experience Points
-
Each player receives:
-
Witch’s Brew (Unique Consumable [potion])
- Gain +1 to CD rolls for one thread, or for a day's allocation of crafting (including Crafting Respite)
-
Witch’s Brew (Unique Consumable [potion])
Requirements:
- Roleplay stumbling across the mysterious old tome.
- Roleplay being picked up by the tornado and brought to the Witch’s Castle.
- Defeat at least 2 Flying Monkeys and 1 Elite Flying Monkey per player participating in the thread
- Defeat the Witch of the West
- Walk out of the portal back to the Forest of Memories.
Summary:
Deep in the Forest of Memories, players suddenly get a quest objective telling them to investigate the area. After some searching, they find an old dusty tome left under leaves and ivy. When inspected, they find a recipe for a potion that allows for better crafting, however, most of the ingredients and processes have been removed from the pages. Once the book has been read, a storm suddenly and violently breaks out around them as a tornado touches down on top of them. After a few very turbulent and disorienting seconds, the wicked winds let up, tossing the players unceremoniously in a new area.
A dark and ominous castle looms overhead, perched precariously on the edge of a sheer cliff. The players immediately recognize it from mention in the mysterios book. All attempts to re-enter the forest or avoid entering the tower meet with failure. It becomes readily apparent that this particular story has them set on rails.
Outline:
Upon entering the Witch’s Castle, the player will be set upon by her loyal guards: The Flying Monkeys. They’re about what you expect, monkeys with giant wings that allow them to fly. Their nifty circus jackets and caps are a nice touch. Players may spawn the Flying Monkeys and Elite Flying Monkeys in groups of up to 4 mobs.
After making their way past the guards, exploring the castle and finding the witch’s lair, players must defeat her in order to return to Aincrad proper. The Witch of the West will not appear until the players have defeated at least 2 Flying Monkeys and 1 Elite Flying Monkey per player participating in the thread.
Once she has been defeated, a portal will open allowing players to return to where they came from originally. The book that sent them on their adventure will be gone, replaced by a single dose of the mysterious potion for each participant.
Enemies:
<<Flying Monkey>>
Evil experiment created by the witch to keep miscreants out of her mansion. They swarm players at every angle.
HP: 150/150 | DMG: 70(Minimum 35) | MIT: 20<<Elite Flying Monkey>>
HP: 220/220 | DMG: 90(Minimum 45) | MIT: 35
<<Witch of the West>>
HP: 1200/1200 | DMG: 150 (Minimum: 100 after MIT) | MIT: 75Abilities:
- Potion of Fireball | On a natural MD 9, the Witch of the West throws a vial of swirling flames the sprays to affect the entire party, engulfing them in fire. This ability automatically hits and deals 120 AoE damage, then applies T3 Burn to each target for 2 turns.
- Poisoned Dagger | On a natural MD 10, the Witch of the West paralyzes her target for one turn. The target is also poisoned, taking 20 unmitigatable damage per turn for 3 turns.
-
Unnatural Swiftness | When the Witch of the West's health is reduced to 400 HP or less, she will drink a potion as a Free Action on her next turn. This potion grants her EVA 3 for the rest of the fight.
Epilogue:
SpoilerOnce the <<Witch of the West>> has been defeated and the players have passed through the portal, returning them to the Forest of Memories, a panel appears to inform them of the quest's completion, listing quest rewards and experience gained.
-
Floor 6
<<The Gemini>>
Party Limit: 1 | 20+ Posts
Repeatable for standard thread rewards, and to switch which Extra Skill the player has access to.Quest Rewards:
- 1,500 Experience Points
-
POTENTIAL REWARD | Gain one of the following:
- Unlock <<Concentration>> Extra Skill. (Awarded by sparing <<The Gemini>>)
- Unlock <<Disguise>> Extra Skill. (Awarded by killing <<The Gemini>>)
- Cannot possess <<Concentration>> and <<Disguise>> at the same time.
Requirements:
- Be located by the Gemini and follow him/her to their desired destination.
- Defeat the Gemini in solo combat.
- Either spare the Gemini, or kill them.
Summary:
After spending some time in Krycim, the player is approached by a figure who is the same gender as them wearing a dark, hooded robe that covers their entire face. This person is easily noticed as an NPC, but they seem to act as though they know the player, saying they have been watching their progress up to now and wish to match skills in fair combat. Once the player agrees the Gemini will lead them out of the main settlement and a short walk into the forest near a pond. The Mirror Pond is a location special to the Gemini. When the player walks with them, they can begin to feel a slight change in the atmosphere, like things around them are shifting. None of these changes are readily apparent, but, no matter how hard you try, this location cannot be found again unless the player is with the Gemini.
Once there, they will reveal their primary skill <<Disguise>> and attempt to attack you by surprise! You and your Gemini must fight until there is a victor.
The pond itself is crystal clear and shallow. Nothing swims within its waters, but it gives off a feeling of serenity and calmness. The player may look into the water once the fight has concluded and reflect on their choice of victory or a bitter defeat.
Outline:
Once combat begins, the Gemini will start with a surprise attack that catches the player off guard in some way. It can be dodged, but the player cannot react to the first round of combat. The quest is simple: Defeat the Gemini in fair combat to learn its Extra Skill <<Concentration>>, or kill them and obtain their other Extra Skill <<Disguise>>. Only one can be taken.
Enemies:
<<The Gemini>>
The Gemini will test the player’s resolve, mocking the player’s fighting style and use its disguise ability to its advantage. They may remain quiet for most of the fight, but can taunt the player depending on how they respond. You cannot run from this fight, the Gemini will not allow you to escape until a victor is decided.HP: (Player's Level) x 30
DMG: (Player's Level) x 8
MIT: (Player's Level) x 2
ACC: Equal to player's ACC (Will raise in accordance with any buffs consumed throughout combat)
EVA: Equal to player's EVA (Will raise in accordance with any buffs consumed throughout combat)
Paragon Levels are not taken into account when considering these calculations.Abilities:
- Concentration | This boss gains +1 ACC for its first attack.
- Disguise | This boss will adopt the appearance of the player through the entire fight, mocking their appearance.
- Surprise Attack! | No matter what, this boss will attack first, before the player. The player may not act on the first turn. As this ruins any chance to put space between the player and the boss throughout the remainder of the fight. The <<Charge>> skill cannot be used against <<The Gemini>>
- Defy Death | During this fight, death can be avoided. Any attack that would leave either the player or the boss at zero will result in leaving either entity with 1 health point left. <<The Gemini>> will refuse to execute the player if they win, though the player may be much less merciful.
-
Fairness Check | For each consumable/temporary buff the player has when facing <<The Gemini>>, it will gain additional effects in accordance with the bullets listed below. For example, if the player has 3 buffs active, <<The Gemini>> will have Paralyze, Bleed, and bonus DMG. This ability will adjust mid-battle in the event that the player consumes buffs in the midst of combat.
- 1) Gain Paralyze: Removes player action for one turn on natural MD rolls of 9-10.
- 2) Gain Bleed: Deals (12 * Player's Tier) unmitigated damage every turn for two rounds on natural MD rolls of 9-10.
- 3) Gain Damage: Increases DMG by (Player's Level).
- 4) Gain Mitigation: Increases MIT by (Player's Level x 2).
-
5) Gain Health: Increases HP by (Player's Level x 5).
Epilogue:
SpoilerUpon death of the Gemini:
When the player defeats the Gemini, he or she will concede and accept defeat. If the player decides to kill them, they gain the <<Disguise>> extra skill as a result, and is left to wonder whether it was really worth it?
Sparing the Gemini:
If the player decides to spare the Gemini, the NPC will be grateful to you. They will leave you be from here on, but will promise to get stronger and perhaps challenge you again one day.
Upon failure:
If the player fails combat with the Gemini, they will spare you and the quest is failed. The will mention that you still have much to learn and leave you be, disappearing in the forest and leaving the player with a vial that can restore your health to full. It has a durability of thirty seconds and must be used before their next post action or it will disappear.
-
Floor 3
<<Search for the Hoya>>
Party Limit: 4 | 20+ Posts
Repeatable for standard page rewards, plus <<Hoya of Minos>>Quest Rewards:
- 500 Experience Points
-
POTENTIAL REWARDS | Each player receives:
-
Hoya of Minos - Only obtainable if both minotaurs were defeated and Larbrook accompanied the party.
- Vanity pendant that is often used as a gift for weddings.
-
Hoya of the West - Dropped by <<Govarron, the Western Hoya Minotaur>> when defeated. This reward is forfeited when traded to <<Larbrook>> for a <<Hoya of Minos>>.
- T1 Perfect Trinket with ACC/ACC/Prosperity.
-
Hoya of the East - Dropped by <<Kantaras, the Eastern Hoya Minotaur>> when defeated. This reward is forfeited when traded to <<Larbrook>> for a <<Hoya of Minos>>.
- T1 Perfect Trinket with EVA/EVA/Quality.
-
Hoya of Minos - Only obtainable if both minotaurs were defeated and Larbrook accompanied the party.
Requirements:
- Explore the labyrinth of the Hoya and locate one of the two minotaurs.
- Players must spend 5 posts navigating the labyrinth to find one of the two minotaurs. At least one of the two must be defeated.
- (Optional) Players may track the second Hoya by spending another 5 posts to find the enemy.
Summary:
Upon entering Aruyt, players are greeted by an NPC who looks out of place among the local Faune. Perhaps he belongs to a mercenary company operating in the area? The large man informs the player(s) that there is a tale among the Faune of the legendary Hoya - a hero renown for killing powerful minotaurs. It just so happens that two of those such minotaurs still linger in a labyrinth residing in the Forest of Wavering Mist. Like its name implies, the forest is full of mysteries. While visibility will be low, this will not affect anyone’s sight to the point that they cannot fight at maximum potential, but remains enough to makes navigation difficult.
Outline:
The player(s) will have the option to bring their greeter as a navigator through the Forest of Wavering Mist, as he knows the area. The party must travel from Aruyt to the Forest with or without Larbrook and find at least one of the two minotaurs residing in the Labyrinth. Larbrook is capable of fighting and will help if he is brought along, though his contribution to the fight will be as flavor one (i.e.: he will not influence the fight mechanically whatsoever). Once the player(s) have killed one of the minotaurs, they may elect to retrace their steps and leave, or spend more time in the maze to find the second minotaur. Collect their vanity pendant(s) and return to Aruyt.
NPCs:
<<Larbrook>>
Larbrook is a muscular man standing around 6'2" in height and wielding a single-headed battle axe. He has a thrill for combat and will urge the players fight on, no matter what. The Fae and Faune in Aruyt don't know what to make of the man, whose very presence exudes agitation that is so contrary to their own way of life.
Enemies:
<<Kantaras, the Eastern Hoya Minotaur>>
The more fierce and aggressive of the pair, Kantaras wanders the eastern half of the maze. If player(s) elect to fight this minotaur, it faces them with sword and board, fighting brutally and with reckless excess.
HP: 150/150 | DMG: 45 | ACC: 1<<Govarron, the Western Hoya Minotaur>>
The wiser of the two minotaurs, Govarron in the West is aged and will more thoroughly evaluate the battle, looking for openings in weakness to strike with its two handed greataxe.
HP: 150/150 | DMG: 45 | EVA: 1
Epilogue:
SpoilerIf Larbrook was brought with the team, he will collect the pendants from them and give them a reward for a thrilling battle, promising to sing songs of their grand adventure for months to come. In exchange for the pendants he takes, he will reward each player with a <<Hoya of Minos>> pendant. As they part ways back in Aruyt, he will commend the player(s) for their bravery and issue a quest completion prompt.
-
Floor 5
<<Butcher in the Sands>>
Party Limit: 4 | 20+ Posts
Repeatable for standard thread rewards.
Quest Rewards:
- 1,000 Experience Points
-
Each player receives one of the following:
-
Blade of the Sands
- T2 Perfect Weapon of Choice | DMG II | Keen I
-
Armor of the Sands
- T2 Perfect Armor of Choice | MIT II | [Light momentum or heavy momentum depending on the type of armor]
-
Blade of the Sands
Requirements:
- Roleplay entering the arena, accepting the quest, and the gates closing behind the player(s).
- Defeat <<Sando Satsu>>.
Summary:
The massive dust storms that periodically roll through the fifth floor are constantly uncovering long buried and forgotten artifacts, places, and secrets. One such discovery in recent memory was a colosseum-type arena of sorts, which had been buried for an untold period prior to a massive storm exposing it to the surface.
Curious travelers who have made the journey out to the site have reported a large circle of spears pointed toward the center of the arena serving as a roof, preventing immediate escape. When they entered the arena, they found it to be empty, though an alert prompted once they had made it a sufficient way into the structure. It gave them the option to accept a quest - though warned that if they did, they would be unable to escape, forced to fight or die.Outline:
Upon accepting the quest, the gates to the entrance will close and lock. Flee mechanics and teleport crystals will be disabled. <<Sando Satsu>> will then burst from the ground and the fight will begin. Once the battle has concluded, the gates will open once more, allowing the player(s) to escape.
Enemies:
<<Sando Satsu>>
Armored from head to toe, this armored alligator is no slouch. It attacks ferociously, and seemingly at random. Attempts to dodge or block seem ineffectual against this boss.
HP: 1000/1000 | DMG: 100 | MIT: 75
This boss uses its own BD roll when attacking.Abilities:
-
Untamable | This boss does not follow a standard aggro table. Instead, who it attacks will be based on the LD attached to its attack roll.
- If there are two players, LD 1-10 will attack the first player, and LD 11-20 will attack the second player.
- If there are three players, LD 1-6 will attack the first player, LD 7-13 will attack the second player, and LD 14-20 will attack the third player.
- If there are four Players, the chance will be split evenly across the participants following this same standard. The order of players targeted under this system is determined by the original attack order of the players during the first rotation of combat.
- Sorrowblade | Sando Satsu ignores players' EVA and MIT.
- Reign | Sando Satsu is immune to the effects of ACC debuff songs.
- Cull of the Meek | On an MD 10, he will spin with his weapon at maximum reach hitting everyone in the fight. He will replenish 75 HP per player hit.
-
Dominus | When his HP reaches 400 or lower, he grows to a massive size, upping his damage to 150 and mitigation to 100 for the rest of the fight.
Epilogue:
SpoilerOnce <<Sando Satsu>> has been defeated, the gates that trapped them within the arena will unlock and open automatically. A panel will populate in front of the Player(s) heralding the quest's completion, listing quest rewards and experience gained.
-
Floor 2
<<Let There Be Light>>
Party Limit: 4 | 20+ Posts
Repeatable for standard page rewards and extra col from quest rewards.
Quest Rewards:
- 500 Experience Points
- A Col Value of your Loot Dice multiplied by 25 [Party leader rolls LD. All players receive that amount.]
-
Each player receives: (1) Glow Stone
- Effect: While holding a Glow Stone, the area around you is illuminated. You and players near you do not suffer any penalties for darkness or low-light conditions. Cannot wield a weapon while holding a Glow Stone, but it can be swapped out and and back in to continue its effect. Effect lasts for one thread.
Requirements:
- Roleplay talking to the frantic Choshi (3+ posts)
- Defeat (1) Giant Bat upon entering the cave
- Find Koko on a LD of 15+ (each roll is a post action)
- Defeat (1) Giant Bat before exiting the cave
- Roleplay the Ending
Summary:
An erratic woman by the name of Choshi frantically approaches the player the moment they step foot in the town of Urbus. "Pl-please," she begs, "I've been trying to find someone to help me all day. My child--" she pauses, trying to regain her composure. "She-- she was playing in one of the caverns in the mountains with her friend. I-I told her not to go but she didn't listen to me!" Choshi exclaims hysterically, fat tears pouring from her eyes as she pleads for the player(s) to help her. "Her friend came back to me just this moment a-and said that they were attacked by monsters! T-the beast is still in there with her, please, I don't know how long my Koko can last in a place like that!" She sobs and any attempts to comfort or convince her that she is overreacting proves fruitless.
When the player(s) decide to help the woman, her face will brighten up considerably. "R-really? Thank you! Thank you so much, you have no idea how grateful I am," she will say with a wide and relieved smile. "Your e-efforts won't go to waste, I swear! I'll have something for you when you get back, I-I promise!" Once Choshi says this, the location of Koko will be pinned on the player(s) map, signalling the beginning of the quest.
Outline:
The player(s) must encounter Choshi, hear her tale of woe and roleplay agreeing to help find her missing child. They will be attacked by a Giant Bat upon entering the cave where the child is said to have been playing. Once defeated, each player may spend post actions to roll LD to attempt to locate Koko. This is a modified roll, with skills and consumable applicable. Another bat will arrive on the on the post immediately after Koko is found. Once it, too, is defeated, the player(s) can return Koko to her mother.
NPCs:

<<Choshi>> and <<Koko>>
A very warm and caring mother who lives happily with her daughter, Koko.
A very adventurous and passionate young girl who loves getting herself into trouble.
Enemies:
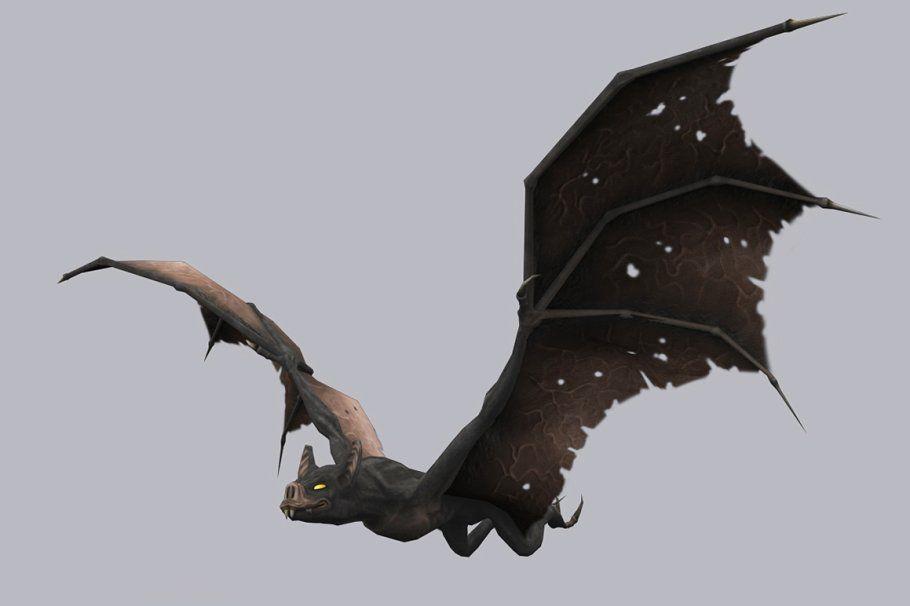
Giant Bat:
HP: 75/75 | DMG: 35Environmental Effect:
- It's Dark in There | Players without a glowstone, the Night Vision mod, or some other means to aid with sight will suffer a -1 to ACC.
Epilogue:
SpoilerKoko will run to Choshi the second she spots her when the player(s) enter Urbus. "I'm sorry, Mama!" She wails, her tiny arms wrapping around her mother's waist as she buries her face into her shirt. "I-I won't get into trouble again, I-I promise!"
Choshi's face slowly morphs from surprise to pure joy before she hugs her child back. "It's okay, sweetie. I know you didn't mean for it to happen," she murmurs, coaxing her child as she runs her hand down Koko's hair soothingly. She looks up at the player(s) and gives them a thankful smile. "Thank you... I cannot even explain how grateful I am to you. I am forever in your debt, both me and Koko are." The mother chuckled, tugging on the cheeks of her daughter before she reaches into her dress, pulling out a pouch. "I know it's not much, but please, take it," she says, handing the player(s) the pouch. "It's some money I scraped together... and a little something extra." She looks down at Koko and sighs. "Again, thank you for saving her. I have no idea what I would do if Koko was harmed... and speaking of Koko, what do we say?"
Koko lifts her face from her mother's clothes and gives the player a toothy grin. "Thank you for saving me!" The girl blurted, which will immediately end the quest, and all players will have their rewards transferred to them.
-
Floor 5
<<The Traveler>>
Party Limit: 2 | 20+ Posts
Repeatable for standard thread rewards.

Quest Rewards:
- 500 Experience Points
- 500 col
- Unlock <<Survival>> Extra Skill
Requirements:
- Roleplay speaking to <<Zamek>>.
- <<Zamek>> moves slowly, so it will take considerable time to travel the five miles through the desert.
- Encounter bandits at least once, and roleplay the interactions.
- Find protection from a sudden sandstorm.
- Safely escort <<Zamek>> to the hiding spot.
Summary:
"Are you an adventurer?" You turn to see a man with a long, white beard and a slight hunch to his back. Despite being wrapped in a heavy wool cloak, unusual given the floor's hot climate, his entire body shakes. "I am terribly sorry to bother you, but I need help. I-" the NPC, whose name appears to be Zamek, coughs violently for a moment. After a few long, shaky breaths, he continues. "I have a treasure chest of sorts, buried in the desert, at the base of some uniquely shaped rocks. The contents are incredibly important to me, but I am too ill to make the journey alone. Would you escort me there? Though I cannot offer you much col. But, should you offer your assistance, I would be eternally grateful."
Outline:
See 'Requirements' above, and 'Enemies' below.
NPCs:

<<Zamek>>
A bearded old man in a heavy wool cloak.
Illness and age have both taken their toll; he is often out of breath, and coughs frequently.
Enemies:

<<Bandits>>
You must encounter the bandits once during your quest. You may deal with them however you see fit.
Should you decide to use combat, the interaction will be strictly roleplay, and use no stats/rolls. There will be no additional loot.<<Sandstorm>>
An environmental effect.
Once in the desert, you lose 20 points of health every time you roll a 1 on your crafting die due to the wind and the sand.
Due to the sandstorm, all out of combat healing has been reduced to zero.
If you manage to survive this quest and find the cargo, you will be gifted with the <<Survival>> extra skill.
Epilogue:
Spoiler"Ah, here it is." The elderly man drops to his knees beside an impressive cluster of rocks. Despite his weakened state, he puts all the energy he has left into digging. Calloused hands trembling, breath coming in short gasps, he shoves sand aside until the top of a chest comes into view. The container is not large, nor is it ornate, but Zamek wheezes as he drags it into his lap. He slips a tiny key into the lock, turns it, then eases the lid back. All at once, a variety of emotions explode across his weathered face. Though he smiles, his dark eyes fill with tears as he lifts out a stack of letters. "These belonged to my late wife," he explains, "as did these." With his other hand, he shows you a pile of jewels. "Between the bandits that frequently raid our village, and our greedy family members, I knew my most valuable items would be taken from me. That's why I hid them."
He draws in a shaking breath, then cradles the handwritten notes to his chest. "But the years are passing," he explains, "and so I want my Dena with me as the end approaches." Zamek stares at his treasures, then glances up at you with a smile that is brighter than the desert sun. "Thank you. You've made an old man very happy."
-
<<Floor 13>>
Floor thirteen is a post-apocalyptic wasting nightmare created by a terrible corruption that has consumed everything except for the small settlement of <<Angel's Point>>. This mysterious affliction spread suddenly and quickly across the land, eating away at the minds and flesh of those that it infected. Angels in the form of massive armored flying knights were said to have fought to drive back the spreading wickedness, seeking to undo the damage it had wrought while ensuring humanity a foothold for survival. Their efforts were, at best, only partially successful.
The floor itself is eerily silent and empty at a glance. Plantlife grows everywhere, but only as a sickly, rotten imitation of its proper form. It has a slick, sludge-like quality to the touch, as if all life on the floor were trying to melt away. Only two settlements remain on the entire floor. It is obvious that they were once far larger and more populous. Several other smaller towns dot the landscape, along with the ruins of a large central city whose name has long since been lost. Outside of these rare safe zones, diseased humans and beasts shamble about mindlessly, springing into murderous rage at the slightest sound or provocation. They are but remnants of the civilization that once prospered here, now turned into soulless monsters.
NPC Inhabitants of this floor are normal humans. Most wear simple, undyed tunics, dresses and tabards as they go about their daily business. Priestly types are easily recognizable as fully clothed in bright white robes with religious hoods over their heads, covered in the symbols of their reverence for purity standing against corruption. They are a devout lot, though most cling to the church out of desperation and a total lack of other options. As fervent as the priests might be, they seem powerless to do more than hold the enemy at the gates of what little remains of their once-proud culture.
Before the floor boss was beaten, humanity here was on the verge of extinction. Angel's Point was their last, beleaguered stronghold, protected by angels and but a handful of brave souls to stave off the encroaching corruption. Unfortunately, the very angels who came to protect them were themselves corrupted and soon turned upon humanity. They were led by <<Avarious>>, the strongest among them. Through hard fought battle, and the sacrifices of many players, the last remnants of humanity were ultimately spared and the land slowly began to restore itself, though not in full. Life here has but a semblance of its former beauty, the corruption’s influence lingering upon it still, despite the purification of the angel.
Main Settlement:
<<Angel's Point>>

Angel's Point is the last true settlement of a dying people. Humanity made its last stand here, and held its ground, but barely. Though physically large, the town is underpopulated with barely 200 NPCs wandering about a place meant for many more. Many of the local buildings have large stained-glass windows depicting groups of people reaching up towards a light while shadows seek to pull them down into the darkness below. In the center of Angel's Point lies a massive Chapel that is conspicuously devoid of windows. Players have no access to this chapel, but NPCs can regularly be seen entering and exiting, at roughly six-hour intervals.
Three priests of note make these rounds. Zack Orphir, Uri Orphir, and Miraak Prodigus, as they are known, each take one turn daily. They can be found roaming the city offering prayers and blessings while also patrolling to protect against any insidious malignance of corruption. The people and priests here are uncannily generous, humble and kind, always willing to lend an ear for questions or concerns voiced by the players about the various pieces of the floor's history.
Sub-Settlements:
◉ « Breath of Life »
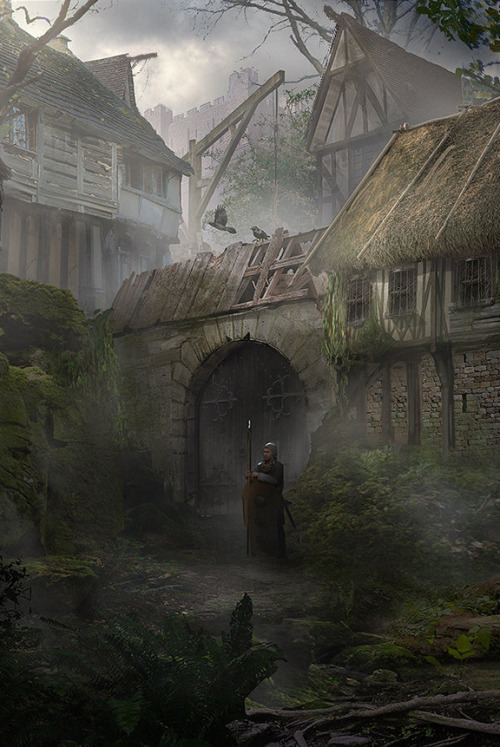
Little more than a tiny village, Breath of Life was created after the great cleansing that accompanied the defeat of the floor boss when a large group of NPCs moved out of Angel's Point in search of new land. They hoped to begin the steps needed in order to spread out once again across the floor. Quickly, they found just the spot and made a settlement out of it, a decent distance away from their previous home. It is nowhere as big or advanced as Angel's Point, but it survives and struggles to help bring a future back to the people of floor 13. Most of the buildings here have been reclaimed and repurposed from other previous uses, or else constructed from materials salvaged from nearby ruins.
A small militia protects the settlement and patrols the wooden palisade that surrounds it, lighting torches at night to keep the diseased at bay. Few of them have any true combat training, as most of humanity’s warriors were lost in the final confrontation with the fallen angels. A small status, too worn to be recognizable as anything other than humanoid, stands in the middle of the town square. Swords and spears of the fallen are laid as tributes at its base, and as a stash for final defense, were the worst ever to happen.
Other Locations:
◉ « Corrupted Lands »
Most of the thirteenth floor is blighted in some way and is considered corrupted to some degree. Much of the land had succumbed to the corruption spreading across it by the time the fallen angels were defeated. Most of the floor consists of open plains and low, rolling hills with small pockets of woodland scattered between now-derelict farms and fields. Much of it is barren, dry and desiccated. Some of it is strewn with wilted flora still pretending to live. Rare parts of the floor have seen new life and growth starting to return. Ruins and abandoned structures are everywhere here, often covered in a layer of green moss and vines. Thick, miasmic fog often rolls through, blanketing entire regions with a sickly pallor until it passes. The Diseased are rampant here, and in large numbers. Making camp without encountering at least a single monster is a very rare event.
◉ « Demon's End »
Spoiler
Located at the geographic centre of the floor are the desolate remains of what was once the largest settlement on Floor 13. Corruption remains widespread here, with diseased creatures infesting the entire area. The blight remains so strong that most refrain from going too far beyond the outer gates and broken battlements. Daring adventurers sometimes venture deeper in hopes of finding unclaimed treasures, but many never return. Some believe that this place still serves as a gathering place for the diseased, as well as a place where even more powerful agents of corruption reside. The fallen angels had ample time to twist other creatures to their service, some of which are reputed to still linger.
◉ « Valehaven »
Spoiler
Once a prosperous town famed for equestrian traditions Valehaven is now overrun by hordes of shambling dead, though those that wander here are considered more dangerous than the common zombies elsewhere on the floor. This has given credence to an outlandish rumour that the central chapel hosts a secret artifact that can be used to restore a recently deceased player to life. Sadly, those who have investigated claim that it is just another desperate rumour, if they were lucky enough to return at all.
◉ « Cathedral of Man »
Spoiler
On the 13th Floor, there exists a beautiful stone cathedral. A great many times larger than anything any player has seen in the real world, the building itself is large enough to fit a small town. Occupied primarily by the armored undead skeletons of knights who used to defend the area, it appears that a number of dangerous forms of wildlife has made its way into the monument.
Being so large the Cathedral quickly reaches labyrinthine complexity. Although the most outer segment is primarily open space, the tall ceiling being held up by marble columns, covered in greenery and overgrowth, moving further into the massive construct, the wide hallways begin to branch in every direction. Some lead to grand dining halls, other libraries whose books most likely held all the world's secrets to be read, were it not for the fact that they crumbled to dust at the merest touch. Others yet still lead to armories filled with weapons so large, no human could wield them, and some simply lead to living quarters, or the kitchens.
Near the rear of the Cathedral, however, lies a room with none of this. Just a massive marble throne, the gold inlays tarnished, and the crimson cloth frayed and torn. Surrounding this throne are hundreds of hunched over skeletons, hands pressed together in prayer, and all garbed in crimson. What they pray to? The skeleton of nothing less than a titan, upon whose head sits a golden jeweled crown larger than any man, glinting in the sunlight.
Whatever this Cathedral's forgotten history, players come here now to grind and farm, the not too cramped corridors providing a plethora of enemies and short respawn timers. Others come to see what secrets might be uncovered, what hidden dungeons and treasures such a massive building must hold.
Transportation
Due to the inherent dangers of the floor, the only form of transportation available would be personal horses. There are no traveling merchant wagons or caravans, as their inability to reach the two settlements within a day's travel renders their use too risky.
Common Mobs of Floor Thirteen
SpoilerWhile all of the monsters found on the thirteenth floor are diseased humans, their qualities will vary depending on the specific type encountered.
-
Diseased Villager - The most commonly encountered form of the diseased, formerly regular villagers that were overtaken by the corruption. These mindless monsters will attack any uninfected creature they encounter sight, swiping at them with claw-like fingernails. While one is not too problematic, they often swarm in great numbers and can easily overwhelm an unprepared target.
- Locations: <<Corrupted Lands>>
-
Diseased Watchmen - Many local defenders fell while attempting to hold off the corruption’s spread, only to arise as its twisted pawns themselves. Lacking the agency of many other creatures, they still retain some form of former combat skills and are often equipped with the weapons they used to carry, namely swords, spears and small shields. They are adept at signalling other nearby diseased to a target, unless defeated before they are able to do so.
- Locations: <<Corrupted Lands>>
-
Sludge Knight - A more powerful corrupted human found closer to Demon's End, they are considered by local NPCs to be the messengers of the Four Horsemen - powerful forces of corruption that still roam the lands. Some suspect that they had a hand in spreading the corruption back when it was most prominent. Wearing dark robes lined with blood red patterns, carrying a spellbook which allows them to cast dark magic. Within the bounds of Demon's End they attack on sight, all the while spouting various excerpts seemingly taken from some kind of foul religious text.
- Locations: <<Corrupted Lands>>, <<Demon's End>>
-
Doom Harbinger - Another powerful form of corrupted human, considered to be the guardians of the Four Horsemen. While they sport the same robes as the sludge knights, they also wear large armor pieces that fit over them, along with wielding massive two-handed swords that seem like they could cleave a man in two. These diseased humans will attack on sight, attempting to take down their targets as quickly as possible in order to protect their masters.
- Locations: <<Demon's End>>
Field Boss of Floor Thirteen
Spoiler
<<Eladriel the Corrupt>>
With the widespread corruption caused by Artamiel and Miraak, the minor angel, Eladriel, came down to purify Floor Thirteen. Unfortunately, he began to become corrupted himself as malevolence plagued his being. Without aid, he is sure to fall to corruption. Players must put him down before it becomes too late.
HP: 1230/1230 | MIT: 75 | DMG: 135 | ACC: 2 | EVA: 2
Abilities:
- Fallen From Grace | Eladriel is immune to Fallen Damage, but takes double Holy Damage (T1 Holy gives +4 base DMG per slot, T2 Holy gives +8 per slot).
- Smitten | <<Eladriel the Corrupt>> can be targeted by healing skills, which will deal twice the heal they’d inflict as damage. [Example: First-Aid will deal 8% of max HP per Rank.]
- Corrupted | On a CD 6+, <<Eladriel the Corrupt's>> attacks will gain +50 DMG if successful.
- False Prophet | On an MD 9-10, <<Eladriel the Corrupt>> will form a spear out of thin air, throwing it at the Player with the highest hate for 160 mitigatable DMG. The rest of the party will take 50 unmitigatable DMG from a swift slash.
- Tier Lock | For the duration of the fight, all of the participants’ stats that scale with Tier are calculated as though they’re Tier 2. [DMG/MIT/BLEED enhancements etc.] This skill only locks downward. Those at Tier 1 will still have T1 stats.
Drop:
“Light of the Fallen" (T2/Consumable/Single Use); Encases the user’s weapon with a dark light, providing them with two slots of T2 Fallen for a single thread. This effect does not circumvent the standard Fallen Damage enhancement cap.
« Floor Thirteen Labyrinth »
The Floor Thirteen Labyrinth is located in a partially ruined cathedral atop a low hill and surrounded by a large graveyard. A dense fog hovers over this graveyard, obscuring vision as effectively as it drains the spirit of the living who dare enter. Soft groans and moans fill the air, and shadows will start to form into humanoid shapes behind the fog's cover. The fog imposes a -1 penalty to Accuracy, increasing by 1 every five posts as it grows denser, to a maximum of -5. The fog lifts once the players enter the cathedral.
Reaching the cathedral requires searching for, locating , and defeating all three <<Diseased Lamplighters>>, all of which share the same stats and mechanics as a Diseased Watchmen. Each is also accompanied by two Diseased Villagers. When all three are defeated, the fog will part to reveal a path to the cathedral doors, allowing a direct access.
The sounds of the graveyard will vanish abruptly as the players enter the cathedral proper, bringing a reverent calm. The interior is lit via diffuse light streaming through a large skylight, broken when <<Avarious>> made his grand entrance. Below it, a massive greatsword can be found plunged into a patch of fresh newly grown grass, perfectly accentuated by streams of light filtering in from above. It is surrounded by the remains of the boss’ armor and the regalia of his four lieutenants, all immovably affixed where they fell.
Quests:
<<Cleansing The Corrupution>>
<<AN: Libel>>
Boss: Not all the Darkened Souls were Monsters [F13 Boss Fight] -
Diseased Villager - The most commonly encountered form of the diseased, formerly regular villagers that were overtaken by the corruption. These mindless monsters will attack any uninfected creature they encounter sight, swiping at them with claw-like fingernails. While one is not too problematic, they often swarm in great numbers and can easily overwhelm an unprepared target.
-
<<Floor 12>>
Floor twelve is an expansive marshland, all of it covered in dark murky waters that block all efforts to see down to the bottom. Most of the floor can be traversed on foot, but shallow lakes seem to move about randomly on a daily basis, just to make things more troublesome. The place feels like a big, stinky, sloppy mud-pit. Settling here is a challenge. Circumventing the ground shifts requires buildings to be propped up on stilts, atop which clustered homes and shops are delicately balanced. The entire floor is smothered under a thick and pervasive blanket of browns and greens, broken only by peeks of hazy blue sky, tinged a vibrant orange-brown by the passage of the sun. There is most often a dripping stillness to the place, that can be suddenly and violently broken by sudden gusts of hurricane-strength winds accompanied by instantaneous deluges of rain. These events cause the water levels to surge and just as quickly recede, often leaving behind a drastically altered landscape.
NPC Inhabitants of this floor are humans that have adapted to live with the swamp’s fickle nature. Most are tall and lanky, their almost skeleton-like frames being covered in drab green and brown cloaks to camouflage against their surroundings. They are survivors, accustomed to adapting to change with little or no notice at the mercy of their ever-changing environs. A strange, cult-like worship common among them regularly sees offerings made to the "God of the Swamp", in the form of goods and foodstuffs sent in rickety boats to whereabouts unknown in the deepest recesses of these strange and inhospitable lands.
Human curiosity being what it is, it didn’t take long for players to seek out this <<God of the Swamp>> once they reached this floor. What they found was a massive, winged alligator that attacked and sought to devour anything and everything it saw, including them. Very little seems to have changed since its defeat, but with the constantly changing terrain it’s doubtful that anyone would have noticed anyway.
Main Settlement:
<<Lazaro>>
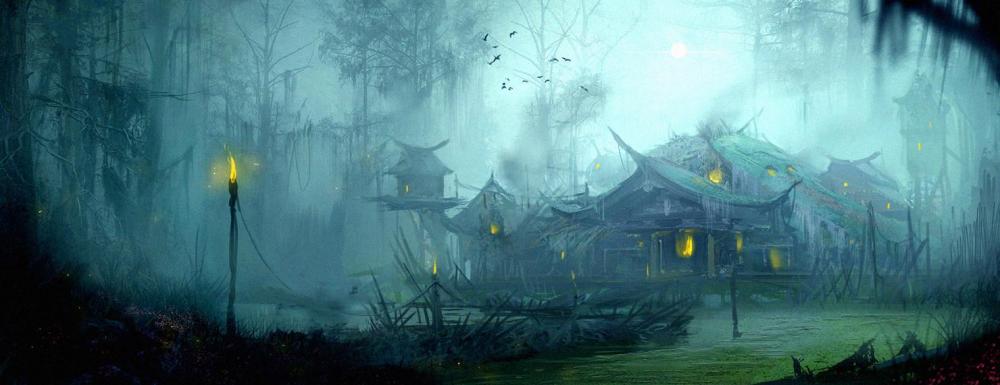
Lazaro is the largest of many stilt-towns found across the 12th floor and is notable as the only one to boast two-storey buildings, as well as the floor’s teleportation plaza. Bundled reeds and long grasses tied to rickety bamboo frames are the most common form of construction, everything floating at various levels above the bog and strung together with rickety rope bridges.
Some of the more creative NPCs have placed their homes on pontoons, allowing them to raise and lower with the water levels, and tethered in place by ties to anchor posts. Lazaro is also surrounded by a haggard-looking fence, lined with large weeping willows that cast looming shadows over nearby homes as the sun moves across the sky. Owls frequently nest in the trees, giving the entire barrier a haunting quality that helps reinforce its function as deterrence.
Travel between the different building clusters here is mainly accomplished by use of flat bottom boats and canoes, which move through canals left between the buildings. Lanterns on poles dot the settlement randomly lit. The teleportation plaza is housed on the roof of the town’s tallest building, and also the only one made of stone. Whenever disaster strikes, the locals know that safety can be found on high ground.
Sub-Settlements:
◉ « Dayurga »
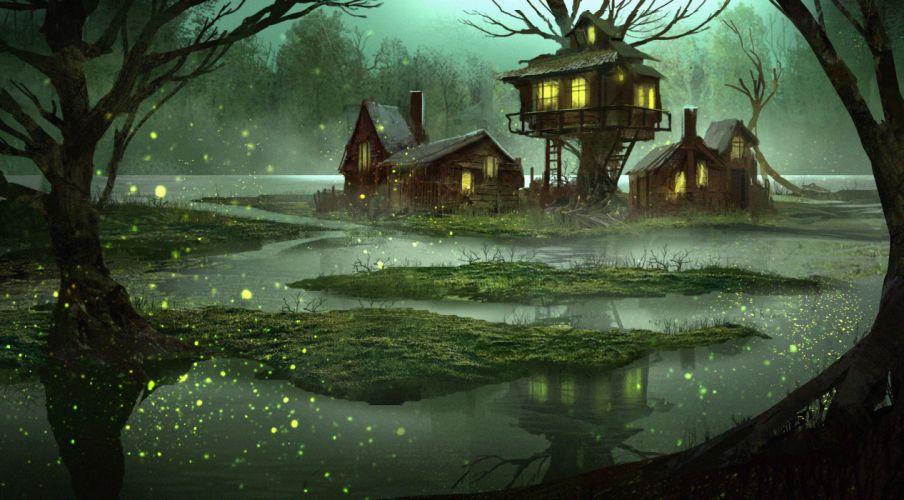
A significantly smaller village that happens to sit in an area immune to the more dynamic effects of weather and terrain found elsewhere on the floor. Its name is sometimes used by locals as slang for stable ground. Outside of the single tree-house that serves as the gathering hall/tavern for the settlement, the other buildings are built on a strange, mossy foundation. The humans found here are also stockier than the rest of the lanky locals, and are said to have come from another level at some point in the past. They are also extremely devout to the "God of the Swamp" as their village’s protector, despite the fact that the beast has been dead for years. This begs the question: who has been collecting all of the offerings they continue to send?
Other Locations
◉ « The Swamp »
The ever-changing environment that takes up the entirety of the twelfth floor. With its fickle weather, this place is a challenge for even the best scouts to navigate. Fierce winds and fiercer wildlife provide dangers at every turn, and the waters themselves can be perilous. What looks like a safe patch one instant can turn into a vat of soupy quicksand the next. Foot travel is possible but often discouraged. Local NPCs will often recommend opting for a single-person canoe or flat-bottom boat to get around, provided that you don’t mind the occasional portage.
◉ « Gator Grounds »
Like so many other things on this floor, the greatest challenge linked to the Gator Grounds is that they move unpredictably. Indistinguishable from other areas of the Mire, this is more of a phenomenon than a true location. Within the Gator Grounds, wildlife becomes crazed and highly aggressive, particularly towards players. Some of the larger beasts will even go so far as to tip boats and attack buildings while under the influence of water drives this strange effect.
◉ « Sunken Forest »
SpoilerA unique patch of always-shallow swampland, the waters here are never more than knee-deep in elevation, except to the most vertically-challenged. Supported by a network of deeply interconnected roots, the trees in this area stand especially tall, reaching nearly double the height of those found elsewhere on the floor. Legends tell that this part of the floor was once an enchanted woodland that devolved into its present condition as a result of some ancient curse. All of the animals here are undead, including a mysterious abundance of deer.
Transportation
Outside of Lazaro and the other settlements, most of the floor is capable of being traversed by foot. That being said, for traveling to parts much farther away, it is recommended by the residents to a personal canoe, as it conserves energy for defense or other dangerous tasks.
Common Mobs of Floor Twelve
Spoiler-
Monster Catfish - Gigantic catfish that lurk beneath the murky depths of wider expanses of water. They are also the most common creature found anywhere on the floor. Their long dark bodies easily blend into the brackish waters. Many have mistaken schools of the creature to be simple water currents flowing beneath the surface.
- Locations: <<The Mire>>, <<Gator Grounds>>
-
Frenzied Alligator - Oversized alligators that tend to frequent the swamps much farther away from the settlements, where they find the catfish to be their main source of food. While they will normally leave players alone, they can suddenly and spontaneously lash out, attempting to bite onto whatever limb they can get a hold of and spinning to drag it beneath the water..
- Locations: <<Gator Grounds>>
-
Zambies - Strange, undead deer frequent the area know as the Sunken Forest. Their origins are unclear, but many NPCs believe that they are echoes of a long-distant past before this level fell into its current state. From a distance, they are normally docile, but should a target come into its sight, they will charge and attack with decayed horns and small sharpened, bloodthirsty teeth.
- Locations: <<Sunken Forest>>
-
Deep Swamp Dire Gator - Extremely large reptiles that dwarf most other beasts on the floor, they are said to be capable of swallowing a Zambie whole and with room to spare. These are dangerous predators that stalk prey from the dark shadows of the deep swamp before swiftly attacking from surprise, attempting to consume its target in a single bite.
-
Locations: <<Gator Grounds>>, Deep Water Regions
-
Locations: <<Gator Grounds>>, Deep Water Regions
Field Boss of Floor Twelve
Spoiler
<<Sea Wyvern>>
Lurking in murky waters below Lazaro, the lord of the sea rests in wait for unsuspecting prey. A threat both in water and on land, this is a battle that players must prepare for. With rough skin and powerful jaws, this massive predator is as good a match as any. Rumors speak of an underground lair that it lives within, and its only motive is to protect its offspring.
HP: 1130/1130 | MIT: 70 | DMG: 125 | ACC: 2 | EVA: 1
Abilities:
- Thick Hide | The scales of the <<Sea Wyvern>> are tough, causing 1H weapons to deal -20 DMG per hit (before MIT reduction).
- Chain Lightning | On an MD 9-10, every player is struck by the <<Sea Wyvern’s>> lightning breath, dealing 110 mitigatable DMG.
- Tail Swipe | On a CD 9+, the boss will use its tail to send a wave towards everyone, dealing 125 mitigatable DMG to the Player with the highest hate and reducing everyone’s EN by 5. Cannot happen on an MD 9-10, at which point <<Chain Lightning>> will take priority.
- Tier Lock | For the duration of the fight, all of the participants’ stats that scale with Tier are calculated as though they’re Tier 2. [DMG/MIT/BLEED enhancements etc.] This skill only locks downward. Those at Tier 1 will still have T1 stats.
Drop:
“Lightning Rod" (T2/Consumable/Single Use); Consumes the item as a Post Action in order to draw in all attacks for the next turn, regardless of Hate values.
« Floor Twelve Labyrinth »
The Floor Twelve Labyrinth is found in the farthest reaches of the swampland, deep into the Gator Grounds territory, farther than any of the villagers dare to travel. As the Gator Grounds move, the best known way of finding its present location is to follow the offerings sent by locals to the long-departed "God of the Swamp." The border of the labyrinth is marked by dense fog and densely growing trees that make passage difficult. Vision is limited to just a few yards in any direction. Various paths will inevitably open up, offering the players an assortment of options for travel. They must choose a path. Progress is dependent on making the correct choice.
Mechanics:
SpoilerAll players in a party roll LD and total their scores. The grand total will determine the results.
Results Table:
1-5: You have selected a path that leads far off in the wrong direction. -2 to progress
6-10: You have selected a path that leads a bit off the correct path. -1 to progress
11-15: You have selected a path that leads a bit in the right direction. +1 to progress
16-20: You have selected a path that is a shorter route to the lair. +2 to progressPlayers must reach a total progress of 15 or more to reach the central lair.
Upon reaching the end of the labyrinth's maze, players must fight four monsters meeting loot minimum requirements for the party before they are able to reach the floor boss room. The fog will fade as they enter the clearing, revealing the nest of the former floor boss, with numerous broken eggs and a sticky viscous substance still attached to various bits of flora growing all about. Numerous immortal objects are strewn across the nest, in the form of immovable and massive feathers from the floor boss that were shed during its defeat.Quests:
<<Just For The Halibut>> -
Monster Catfish - Gigantic catfish that lurk beneath the murky depths of wider expanses of water. They are also the most common creature found anywhere on the floor. Their long dark bodies easily blend into the brackish waters. Many have mistaken schools of the creature to be simple water currents flowing beneath the surface.
-
<<Floor 11>>
Floor eleven is a temperate floor blanketed in a lush, dense forest and ringed by a dense mountain range that encircles the entirety of the perimeter. The woodlands are steeped with deep green hues and dotted with pockets of sunlight that struggle to pierce the thick canopy. Only the clearing around the main settlement is of any significant size. Extensive cave networks dot the ringing mountains and serve as hives for the antmen that are commonly found throughout the floor.
NPC Inhabitants of this floor are human and mostly concentrate in and around the city of Taft. Devout and religious folk, they worship the local deity which is rumoured to have some connection to the altar in Taft's Grand Cathedral. Long garbs of various natural colors are standard, and most are adorned with a soft white hood that shadows the wearer’s eyes. One notable exception to the dress code are a local order of knights that protect the citizenry. All wear full-plate metal armor of great quality, emblazoned with variations on a common crest. Known as The Crusaders, they have reputedly been blessed by the priests of the cathedral and are heroes among the people.
Once, The Crusaders patrolled the entire floor and even ventured regularly into the hives ringing mountains. Somehow, one of their knight-commanders became corrupted when he came into contact with a rare queen. This <<Forsaken Champion>> spread this curse to his closest lieutenants. Collectively, they assumed control of the brood and marshalled its power back against their brethren. Players later killed the twisted knight and his minions, but not before they had pushed the Crusaders to the brink. Now, they rarely leave the confines of Taft, fearing that the taint might somehow have lingered in the wilds and that to wander afar from the walls might mean the doom of their wards. Without the black paladin to lead them, the antmen have fallen back into disarray, though left unchecked they have swarmed throughout the rest of the floor.
Main Settlement:
<<Taft>>
Taft is a large castle city found in the heart of the Reverent Forest, outlined by a large clearing before the edge of the tree line. Cobblestones cover its wide and winding avenues, with multiple buildings of varying sizes reaching high up towards the sky, like the towers of the central keep. None of these structures compare in size or grandeur to the colossal Grand Cathedral which stands at the very center of the city. In its central courtyard lies a large fountain, along with the floor’s only teleportation plaza, greeting players with a wondrous sight upon their arrival in the settlement. The Grand Cathedral is a masonry masterpiece in high Gothic style made of pristine white limestone contrasting against massive stained-glass windows that reflect rainbows of colors onto the city streets below. Every four hours, the cathedral's bells chime as the sun changes position. This in turn illuminates the streets of Taft in different colored patterns, which is said to offer clues to various mysterious locations hidden throughout this floor.
A thin ring of farmland lies between Taft and the edges of the surrounding woods. Players are frequently hired to clear it of antment and other hazards in order to maintain the safety of the city. While life goes on in blissful ignorance for the citizens and nobility, within the walls, merchants and knights alike fear for the future of their settlement if control cannot be reasserted over the wilds.
Other Locations
◉ « Reverent Forest »
SpoilerDense forest covers most of the eleventh floor, save the outer mountains within which rest the antmen’s hives. It can be difficult to keep your bearings while traversing this area, as all the foliage tends to blur together into one homogenous green and brown mass. Antmen roam the forest in search of prey and materials and are generally hostile toward other lifeforms of any kind. Remnants of clashes between the Crusaders and antmen dot the landscape, usually identified by broken weapons, chips of metal and a scattering of shattered chitin.
◉ « Antmen Hive »
SpoilerContained entirely within the mountain range that surrounds the perimeter of the floor, the Antmen’s caverns are perilous to explore. Crawling with giant insect life, dangers lurk around every corner, pit and shaft that penetrates this winding series of warrens. There are four primary entrances to the antmen hive, all distributed evenly around the edges of the forest, protected by guardian antmen which must either be defeated or cunningly bypassed in order to even enter into the network. Within the system is where one can find the more powerful antmen, the protector type. The entrance to the labyrinth can also be found within.
◉ « Devoted's Reprieve »
Spoiler
Located across from the main keep in the center of Taft, the Grand Cathedral is the dominant cultural site of the floor and influences every aspect of society in the city. Run by a series of caste-like religious orders united under a common belief that this settlement and floor is theirs by divine right, the entire NPC civilization on this floor abides by its tenets. The elders of the church are widely considered to have greater influence over Taft’s affairs than the Lord Regent, as the formal head of government. They also control the Crusaders, whose talents surpass those of the local militia and guards by orders of magnitude.
The Devoted’s Reprieve is the Grand Cathedral's inner sanctum, where Taft’s citizens gather to pray. Players and NPCs alike experience a palpable sense of relief upon entering this space, as well as the sacred reverence commonly found in places of worship. It is extremely quiet, with the sound of footsteps echoing through the massive hall. Long benches are placed along the length of the interior, with a few long carpets laid towards the altar for a clear path forward. The pearl white interior brightly reflects the colors of the stained-glass windows, which decorates the walls as if they were painted in extreme detail.
◉ « Mystery Locations »
Spoiler
Anyone who deciphers the various stained-glass patterns which Taft's Grand Cathedral casts onto the streets below, they will have the chance of discovering unmarked locations scattered throughout the floor. These locations appear to be partially detached from the rest of the world and can only be accessed when the reflections from the Grand Cathedral are in the corresponding alignment. Once the bells chime, the current location closes and the next manifests. Sights that are rumoured to be hidden include:
- A tall glistening white castle at the edge of a cliff, with bright blue skies with fluffy white clouds.
- A vast deep blue lake during the day, the sunlight reflecting off of the surface like a mirror.
- A meadow at sunset, blossoming with flowers of many varieties as far as the eye can see.
- A hill overlooking a lively village in the morning, with the first signs of the place coming alive with activity.
- A field with a single tree at its center at nighttime, with fireflies illuminating the branches.
- A woodland clearing at sunrise, with the settlement of Taft far in the distance embracing the sun's first light.Transportation
Wagons, horses, oxen and other forms of agricultural transport can be commonly seen travelling between the fields of Taft and the city proper. No roads lead into the Revenant Forest, though footpaths and trails are said to crisscross the forest wilderness.
Common Mobs of Floor Eleven
SpoilerMost of the monsters found on the eleventh floor are antmen. Their abilities and common spawn points vary by type.
-
Scout Antmen - Mobile and lightly armed the scouts frequently reach the fields surrounding the city and need to be chased off before they lead more of their kin there in search of resources. They strike at their target with their claws and knives, but are more likely to flee than fight when facing tougher opponents. Should they escape, they will also likely to return with stronger reinforcements.
- Locations: <<Reverent Forest>>, <<Antmen Hive>>
-
Soldier Antmen - Among the most plentiful and common of the ranks of the formian colonies, they are also considerably more fearsome than workers and scouts. Lightly armored for speed, and sporting swords and shields taken from fallen Crusader knights, they will actively engage in combat with any opponents they encounter.
- Locations: <<Reverent Forest>>, <<Antmen Hive>>
-
Guardian Antmen - Most often found guarding one of the four entrances to the Antme hives, or at other sensitive locations, the Guardians are the largest and strongest of the colony. Their massive size serves as a natural deterrent against those that would try to force their way in. Heavily armored with massive shields, they specialize in grappling with their numerous arms while protecting themselves simultaneously. Anyone challenging a Guardian alone is either very brave, or extremely foolish.
- Locations: <<Antmen Hive>>
-
Worker Antmen - Usually found within the depths of the hive, these antmen are unarmored and not inclined towards combat, they can also be found foraging in the woods or fields of Taft. Workers will not actively engage potential targets, but if left alone they will alert their kin to the intruder's location. If attacked, they will defend themselves with their numerous arms, but are most likely to try to withdraw.
- Locations: <<Antmen Hive>>
-
Protector Antmen - The main type of combat-oriented antmen found inside the hive system, it is they who respond to any alerts of intrusion. They are the strongest of the antmen varieties, wielding weapons of defeating the vaunted Crusaders by using their multiple arms in combat.
-
Locations: <<Antmen Hive>>
-
Locations: <<Antmen Hive>>
Field Boss of Floor Eleven
Spoiler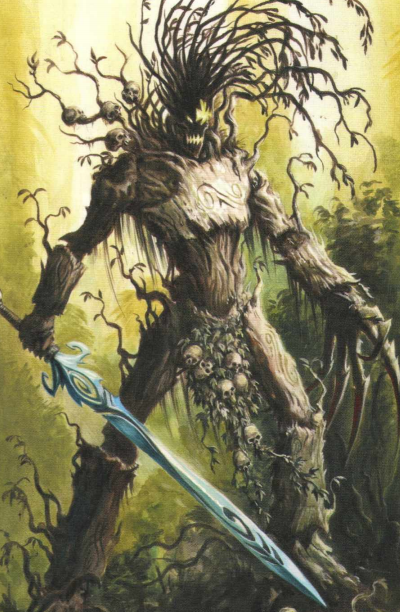
<<The Wicked Wood>>
A nasty creature of root and rage, <<The Wicked Wood>> attacks anyone who dares enter its territory. Though it is weak to flame, this Field Boss has the unique ability to draw health from the forest itself.
HP: 1050/1050 | MIT: 75 | DMG: 110 | ACC: 2 | EVA: 0
Abilities:
- Burning Timber | BURN effects applied to the Wicked Wood won’t run out.
- Set Aflame | While afflicted with BURN, the boss’ MIT will be reduced to 50, and its DMG increased to 125.
- Ingrain | On a CD 9+, the boss will root itself in the ground instead of attacking. This will heal it for 120 HP, and it will roll again to attack. However, its EVA will be reduced to -2 until its next turn.
- Tier Lock | For the duration of the fight, all of the participants’ stats that scale with Tier are calculated as though they’re Tier 2. [DMG/MIT/BLEED enhancements etc.] This skill only locks downward. Those at Tier 1 will still have T1 stats.
Drop:
“Blessing of the Wood" (T2/Consumable/Single Use); The user roots themselves into the ground, providing a party wide shield that will absorb up to 250 DMG before breaking at the cost of the user’s EVA being reset to 0 while the shield is up.
« Floor Eleven Labyrinth »
The Floor Eleven Labyrinth is found in the heart of the Antmen Hive, deep into the network of caves and past numerous twisting tunnels and trap-filled dead ends. With the defeat of the Forsaken Champion, the antmen have drawn their strength back into the hive proper, leaving most of the outer tunnels unprotected. This eases entry to the labyrinth considerably.
Once through the massive outer doors of the labyrinth, visitors are greeted by a rather disorienting sight: The first room in the labyrinth is from the interior of a castle, with windows to each side. Looking through them, players who deciphered the mysteries of the Grand Cathedral would recognize this to be the castle at the edge of the cliff. Traversing the castle will lead to challenges from different castle guards, ranging from common foot soldiers to powerful paladins. Entering the throne room will trigger another juxtaposition. The illusory castle instantly vanishes and the players discover that they have been fighting antmen all along. The throne room itself is tall and wide, and worn smooth with frequent travel. Countless niches and pockets line the walls, each filled with necessities to support the hive.
Upon entering the castle illusion, player will need to defeat two of each type of illusion knights before they are able to reach the throne room entrance. The corresponding types are as follows:
- Scout Antmen > Foot Soldier
- Soldier Antmen > Castle Watch
- Guardian Antmen > Iron Guard
- Worker Antmen > Castle Help
- Protector Antmen > Knight Commander
Upon reaching the former floor boss room, players will be met with a quiet cavern, where at the very center lay shattered pieces of armor that once belonged to the Forsaken Champion, as well as a massive greatsword planted permanently into the ground. Surrounding the boss' resting place are four other similar sets of knightly accoutrements that belonged to his corrupted lieutenants. None of these items can be removed.
Quests:
-
Scout Antmen - Mobile and lightly armed the scouts frequently reach the fields surrounding the city and need to be chased off before they lead more of their kin there in search of resources. They strike at their target with their claws and knives, but are more likely to flee than fight when facing tougher opponents. Should they escape, they will also likely to return with stronger reinforcements.
-
Floor 8
<<Elvish Treaties>>
Party Limit: 4 | 20+ Posts
Prerequisite: Must have completed <<Elvish Rivalries>>
Repeatable for standard thread rewards.

Quest Rewards:
- 1,000 Experience Points
- 450 col
Requirements:
Players must, as a group, choose to take the Confrontation route or Lore route:
Confrontation Route
- Speak with Haela, the Queen of Elves
- Travel to the grove of Baobab
- Set Fire to 3 of the Trees surrounding Baobab while remaining undetected.
- Confront the King of Treants, Ned, and convince him to stop the war.
- (Option) Attempt to persuade the Treants to surrender
- If the players fail to convince the key, or attack, they must defeat Needlewood, the Prince of Treants.
- Roleplay the Treant's surrender
- Travel back to Ellesmera and roleplay the ending.
Lore Route
- All participants must link thread closure from <<Elvish Rivalries>>, confirming that the Treat was spare, for this option to be available.
- Speak with Haela, the Queen of Elves
- Roleplay traveling to the sacred grove of Baobab
- Roleplay speaking to the King of the Treants, whose name is really hard to pronounce so he goes by Ned.
- Earn the trust of the Treants by agreeing to retrieve the <<Cypher Rune of Wood>> from a ruined Elven War Camp.
- Roleplay traveling to the Elven War Camp
- Choose to fight or spare the Mourning Guard
- Return the Cypher Rune of Wood to Ned.
- Travel back to Ellesmera and roleplay the ending
Summary:
Standing in the throne room of Haela, she addresses the players directly. "While I would prefer a peaceful resolution to this war, any ending short of defeat has become acceptable. We are desperate, having suffered hundreds of losses in the last few years alone. While it might not sound like much to humans, children are a rare blessing among the elves. If you have ever killed any of the Treants, they are unlikely to heed your words. It is almost as if they can smell the blood of their fallen upon you and your weapons. You may have no choice but to use the fire spirit Arun will provide you and set their lands ablaze. Once you show that you have power over the flames that they fear, they should me much easier to convince. If your hands remain unblemished, perhaps they might actually hear you out."
Commander Arun provides each player with an <<Aga>> to aid them, urging them to keep it hidden if they intend to negotiate. The players are sent from the city of Ellesmera to Baobab by the Queen of the Elves to put an end to the ongoing conflict, by peaceful means or force of arms.
There, they must either confront the Treants' champion or negotiate with their king, if he is willing to hear them out.
Outline:
After conversing with Queen Haela, the players must determine a course of action. The party as a whole must pick one of the following two options. All players must have spared the Treat in <<Elvish Rivalries>> for the group to Lore Route to be open to them.
Confrontation Route
Upon arrival at Baobab, the players quickly get the sense that peace may no longer be a viable option, or is a distant long shot. They must convince or compel the Treants into surrender, but a direct confrontation isn't an option with over ten of the tree creature standing watch over the sacred grove. Using the <<Aga>>, the players must set fire to the area without being caught and kill any sentries who discover them before they alert the other Treants.
- Burning a Tree with <<Aga>> takes a post action. A Treant will spot the player if the player rolls a Stealth Rating of 9 or Lower. The Treant will act first in combat. With each tree successfully set on fire the Treant's detection rating increases by 1. Stealth rolls may resume on the post after the Treant is defeated. Use of <<Aga>> to burn more trees cannot occur during combat.
- If a player fails in a stealth attempt they must kill the Treant that spotted them to silence them. Treants spawned in this manner use Loot Minimum stats for the highest level player in the group.
With the fires set, the players then confront Ned, the King of Treants, who is less than pleased. "I can feel the stench of death on your soul, human. I believe it is safe to also assume that you caused these fires. Tell me, what is your purpose for coming here? I hope you have more reason than just causing problems." Ned's voice, while calm, holds its own silent rage. The players can attempt to convince the King to surrender. If war or else the player will have to deal more damage.
(Optional) Players Attempt to Persuade Ned to Surrender
Only one player in the group may attempt this roll. LD modifiers from consumables apply. LD bonuses from the Searching skill and mods do not. An LD result of 15+ is required to succeed.
SpoilerAfter listening to the players' words, he shall raise his hands in defeat. "After seeing you in action with the fire magic you possess, I don't wish to endanger the lives of my people any further. I will withdraw from the war... for now. I can't say that things will stay this way forever. But for now, the Elves have my word that we shall stop our attacks. Leave at once, human. Return to Haela and let her know she has won. I never expected her to use one like you to do her dirty work. Afterwards, do not return to Baobab. You will not be welcomed. My brethren and I are finding it hard enough to gather strength without you destroying more of the forest. With each day that the Elves control the Great Tree and its Cypher Rune, the less energy we have. We have to hibernate for longer and our numbers are dwindling.... We were fighting a losing war. Of course it would come down to this."
The players will then leave Baobab, return to Ellesmera to roleplay the <<Elf Victory>> Ending.
Players Fail to Persuade Ned or Attempt to Attack Him
The Prince of the Treants, Needlethorn, steps forward angrily. "We Treants will not be frightened by a mere human like you. You may have the Elves backing you, but we have been fighting this war for a thousand years. No way would we be driven off by a mere flesh-bags such as yourselves. You aren't even as strong as the Commander of the Elves, Arun. I am the prince of the Treants, and the next in line to become king! None shall stand against me!!!"
The players must fight Needlethorn and come out victorious to continue.
SpoilerAfter the death of his son, Ned raises his wooden hand to prevent anymore violence. "Besting you is impossible, it seems, and after seeing you in action with the fire magic you possess, I do not wish to endanger the lives of my people any further. I will withdraw from the war... for now. I can't say that this will stay this way forever. But for now, the Elves have my word that we shall not attack. Leave at once, human. Return to Haela and let her know she has won. I never expected her to use a human to do her dirty work. Afterwards, keep clear of Baobab. I do not wish to see you in my city again. My brethren and I are finding it hard enough to gather strength without you destroying more of the forest. With each day that the Elves control the Cypher Rune, the less energy we have. We have to hibernate for longer and our numbers are dwindling.... We were fighting a losing war. Of course it would come down to this."
The players leave Baobab, return to Ellesmera to roleplay the <<Elven Victory>> Ending.
Lore Route
Upon arrival at Baobab, they can walk in without being halted by any sentries or guards. They may even spot a few other players in the settlement. The players must address Ned and inform him that they have come to forge a peace treaty between the warring nations. Having been close by and managing to speak before the King, the Prince of Baobab, Needlewood, shall reply, "We Treants must return to our homelands. In fact, if you are working with the Elves we have no reason to speak wi-"
The Treant that the players spared in the previous quest shall step forward and say, "You... humans... spared... me. Humans... friends... to... treants." The King of the Treants shall raise his hand in silence to both his son and the spared Treant.
"The humans seem to have already proved their worth. But, as my son says, I cannot afford to share the land of my mother. It is we Treants who deserve to tend to our mother, not the Elves. It is because of them that The Great Tree is dying. They robbed her of her ability to gather life for the forest when they took the Cypher Rune of Wood a decade ago for their experiments with magic. Now it lies under the Earth in a ruined war camp of the elves. Hrmmmpf. That gives me an idea..."
"Retrieve the Cypher Rune from the camp, and return it to me. Afterwards, you will take it back to the roots of The Great Tree and return it to where it belongs. I will know when it has been done. Do this, and you will prove to me that the Elves care enough about the forest. If they allow it, we will coexist with them in the land of my mother. Their camp should be just east of here. Find it, find the underground entrance, and make your way down there."
After traveling there, the players will see that that entire camp was destroyed and is now overrun with tree roots that scatter over the rubble of buildings. An LD 14+ roll, as a post action, is required to find the trap door that leads to the secret cavern below.
At the bottom, the players will find a seemingly impossible world: an underground cavern has its own artificial sunlight shining down on a field of beautiful flowers and grass. A small pond gathers from springs and rivulets of water pool at the lowest point. Butterflies flap curiously around the room, oblivious to the outer world. In the center of this underground cavern lies a hollow tree with a hole leading inside and down to its roots. As they approach the tree, a wooden figure intercepts them, with spear and stakes in hand. "None shall near the Tree of Mourning! Not while I still have life to give!" From there, the <<Mourning Guard>> attacks.
The party as a whole must pick one of the following two options:
Spare the Mourning Guard
If the players choose to not fight, each must willingly endure two attacks from the guardian. Only then will the Mourning Guard accept that the players mean no harm to its ward and end his attacks. Normal combat rotations are modified for this option, where each player is subjected to an attack on their post. Damage is automatic (treat as automatic hit), but mitigation applies. Thorns and other similar damage-reflecting effects have no effect on the Mourning Guard under this option. If any player attacks the Mourning Guard, proceed with the 'Slay the Mourning Guard' option instead.
Spoiler"If you are not here to harm the Tree of Mourning, why have you come?" Once the players explain their purpose, he nods. "The Cypher Rune is what gives the power to the forest. The Great Tree was born from it. They know naught of it, but the Elves' magic also comes from it."
The Mourning Guard gestures to the surroundings.
"The Cypher Rune gave life to the Tree of Mourning which, in turn, gave life to this cavern. It is the younger sibling to the Great Tree that struggles to sustain the forest above. It even created its own light using this magic. The Cypher Rune even created me to protect it. Take the rune and reunite the fractured spirits of nature, whose separation wrought war. This will end the conflict." The Mourning Guard will walk over to the Tree of Mourning and long branches will sprout from its body to create a ladder down into the hole where the Cypher Rune lies. "This is the last thing I can do for you and the Cypher Rune until I am reborn." As the players retrieve the Cypher Rune, they will climb back and find that the body of the Mourning Guard is nothing more than a husk.
Slay the Mourning Guard
This option is automatic if any player attacks the Mourning Guard.
SpoilerWith the Mourning Guard defeated, its body decays into nothingness as its health bar reaches zero. The players move to the edge of the drop, seeing the Cypher Rune glowing brightly and nestled deep in the roots of the Mourning tree. It appears to be about a fifty foot drop. At least one of the players must roleplay retrieving the artifact, requiring at least 1 post action, and then climbing back up.
The players will then return to The King of the Treants who will confirm what they gathered was indeed the Cypher Rune. "I see you have managed to retrieve it. Return it to its proper place. Haela should know quite well where it goes. Do so, and I will call off all of my forces and will allow a real representative from the Elves to begin making proper peace treaties so that my people may return to their home and live in harmony with that of the elves."
The players shall then be able to roleplay the <<Forest Restored>> Ending.
Allies:

<<Aga>>
A small fire spirit granted to the player(s) by the elves who brought it to life. While it isn't intelligent enough to come up with its own ideas, it follows commands quite well making it a great addition to fighting any wooden opponents or needing to start a fire.Abilities:
-
Blessing of Fire | <<Aga>> makes no attacks, but grants the player it is assigned to 1 Slot of T1 Burn and the RP ability to start fires on command.
NPCs:
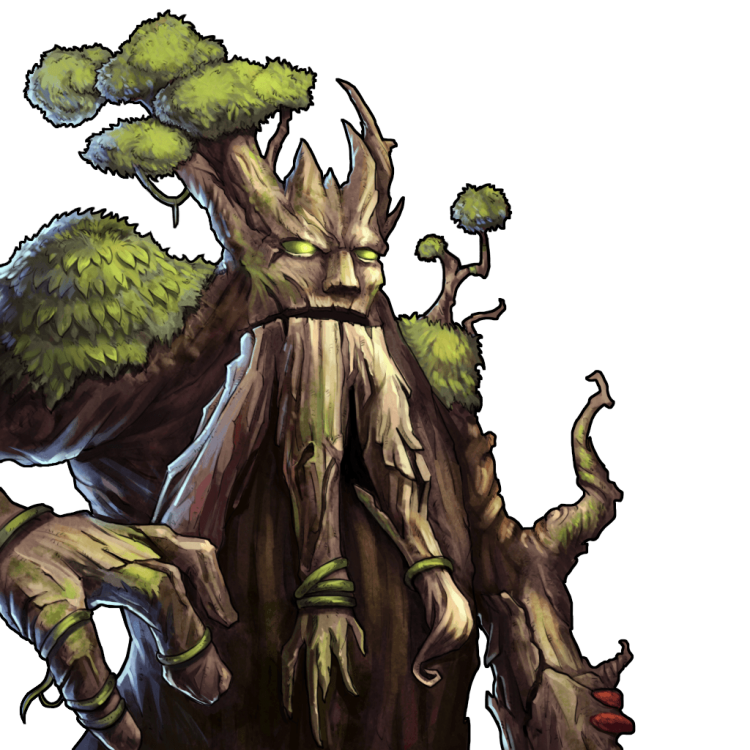
<<Ned, King of the Treants>>
A being having existed for over 10,000 years and having presided as the ruler of the treants for a few thousand. Standing at fifty feet tall, none are larger save for the Great Tree itself. His voice carries a deep wisdom and care for the Forest as well as rumbles the ground with every word.
Enemies:
<<Needlethorn, Prince of the Treants>>
A few hundred years old, the Prince of the Treants stands at nine meters tall, towering over all players my a large margin. Many find it hard to believe that he is the son of the Treant King due to his explosive nature. Covered in large thorns, Needlethorn could be a tough opponent for fleshy opponents.HP: 700/700 | DMG: 150 | MIT: 150 | ACC: 3 | Thorns: 35
CAN ONLY BE FOUGHT ON CONFRONTATION ROUTEAbilities:
- Wooden Body | Needlethorn is not affected by any DoT effects other than Burn and Blight. Treant is also immune to Stun attacks
- Burning Timber | Should Needethorn be affected with a Burn status effect: its Mitigation shall become 0, its DMG will increase by 100, its Thorn damage will also become 100, and it will take 10 unmitigated damage every turn in addition to the damage from Burn.
- Shockwave Punch | All attacks from this monster are AoE.
<<Mourning Guard>>
The Mourning Guard is the being created to protect the Cypher Rune while it rests at the base of the Mourning Tree. While it is only a few years old, it is still quite capable of fighting to protect the tree. Initially hostile when approached, it will hold its attacks if the intruder displays no intent to harm the tree.
HP: 550/550 | DMG: 165 | MIT: 125 | ACC: 3
CAN ONLY BE FOUGHT ON THE LORE ROUTEAbilities:
- Wooden Guard | Reduces all final damage by half.
- Wooden Body | Not affected by any DoT effects other than Burn and Blight. <<Mourning Guard>> is also immune to Stun.
-
Flammable | Receives double damage from the Burn enhancement and the Wooden Guard ability becomes inactive while <<Mourning Guard>> is suffering from the Burn ailment.
Epilogue:
Elven Victory (if the players completed the Confrontation Route):
SpoilerUpon returning to Ellesmera, the players find both Commander Arun and Haela awaiting them in the throne room. As the party approaches, Haela will be the first to speak. "I presume you bring good news?" As the story of how the Treants surrendered came to light, it is obvious that Haela is uneasy. "I see. Well, the problem with the Treants has ended, if even for a few years. We can take extra time to rebuild and strengthen our numbers. I doubt they shall remain content forever. You have done us a service, and for that we are grateful. Not only have you ended bloodshed for a time, you have also ensured that we remain in control of our home. I must go and begin preparing to shift our focus from battle to recovery. You have my thanks." The Queen shall leave, leaving the player(s) with Commander Arun.
"You have done well, single-handedly managing to end a centuries old feud that has brought much death and discontent to the forest. I may see humans in a different light, as a result, no longer believing that all of you seek only to satisfy your endless greed. You proved your honor and selflessness today, displaying the courage of true warriors. Despite the risks, you went out there and faced off against dangerous odds. I couldn't have asked for anything more and will ensure that your names are engraved alongside those of our finest warriors."
Arun will present the rewards for the quest and it will effectively end.
Forest Restored Ending (if the players completed the Lore Route):
SpoilerUpon returning, the players find both Commander Arun and Haela awaiting them in the throne room. As the party approaches, Haela will be the first to speak. "I presume you bring good news?" As the story is explained and the Cypher Rune is produced, Queen Haela nods her approval. "In return for bringing the Rune to its proper place, the Treants will be willing to work with us? This is an unexpected conclusion to our long conflict, but a welcome one. Come, you brought it. You can be the one to return it."
Haela steps to a small circular pattern directly in front of the throne which previously appeared to be nothing more than a part of the intricate etchings to the throne room. Before the players follow, Arun pulls them aside. "You have done well. Single-handedly you managed to end a century old war that has brought only death and destruction to our forest. I may see humans in a different light, as a result, no longer believing that all of you seek only to satisfy your endless greed. You proved your honor and selflessness today, displaying the courage of true warriors. Go now, The Queen commands it." Arun mutters an arcane phrase, summoning the Aga will return to him before turning away and leaving the throne room.
As the players stand on the platform, Haela will ask, "Ready? Prepare yourself. I remember my first time seeing it with my mother several hundred years ago." She pulls an ornate rapier from the air at her side, thrusting it into a small hole in the floor before twisting it. A clicking sound echoes throughout the room before the platform sinks down into the ground. The group shall slowly descend some distance before anything is visible.
Similar to the cavern where they found the Tree of Mourning, an underground cavern is revealed to them. Massive root structures from the Great Tree, above, spread out across the space, as if forming this unusual void. The area is lit by flowers that emit a warm yellow light into the air. Blue butterflies fly about, flitting from plant to plant.
"I have been down here several times but I will never get over its beauty."
Haela steps lightly through the clearing, careful not to damage the flowers. Butterflies will flutter around the group as they walk to the hollow entrance to the deepest roots of the Great Tree. An intricate staircase awaits them, leading to the setting stone for the rune.
"Replace the Cypher Rune and restore the trust between the Elves and the Treants."
As the rune is restored, a bright purple light shall shines from it, sending pulses up into the branches of the Great Tree. The area momentarily shudders, like a refreshing chill flying up the massive tree's trunk, before settling still again. Returning to the surface, you find the an increased vibrancy and glow about the landscape, where everything seems brighter and more verdant than before. It as if nature itself has been rejuvenated. Most noticeably, a very large wooden dragon has wrapped itself around the base of the Great Tree, its gaze peering curiously upon them.
"Amazing. I had no idea the Cypher Rune had such an impact on the life of the forest itself. We took the Rune a few years ago trying to find some way to defeat the Treants. The Mother Dragon vanished, in her displeasure. It is good to see her returned."
Haela returns to the throne room where she presents the players with their rewards and the quest ends.
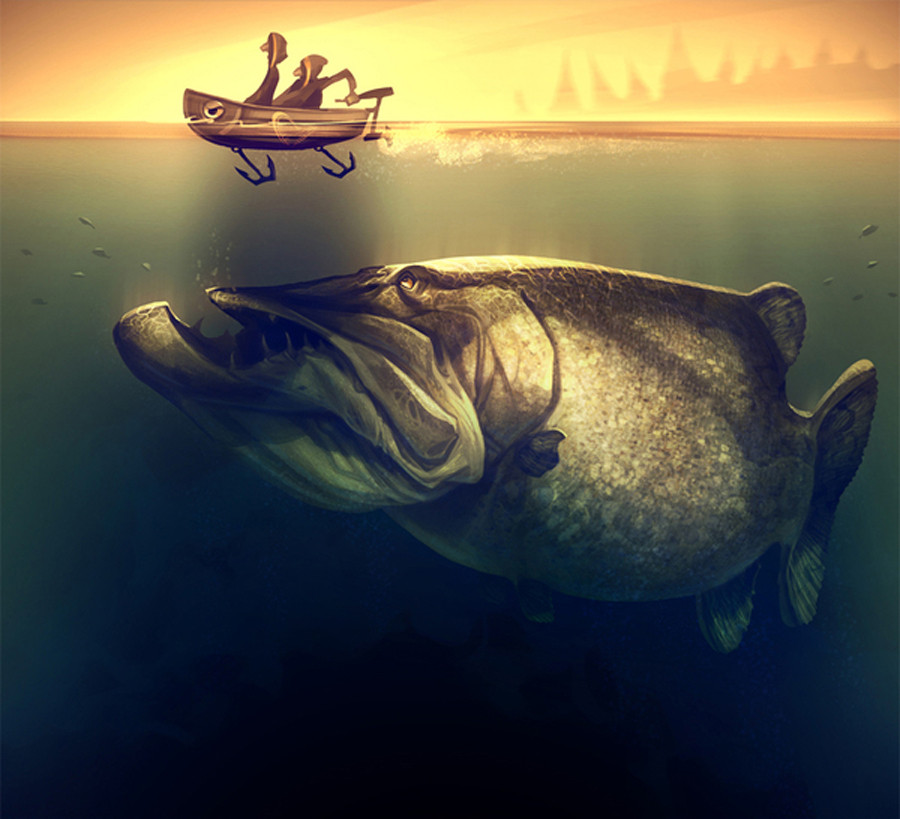
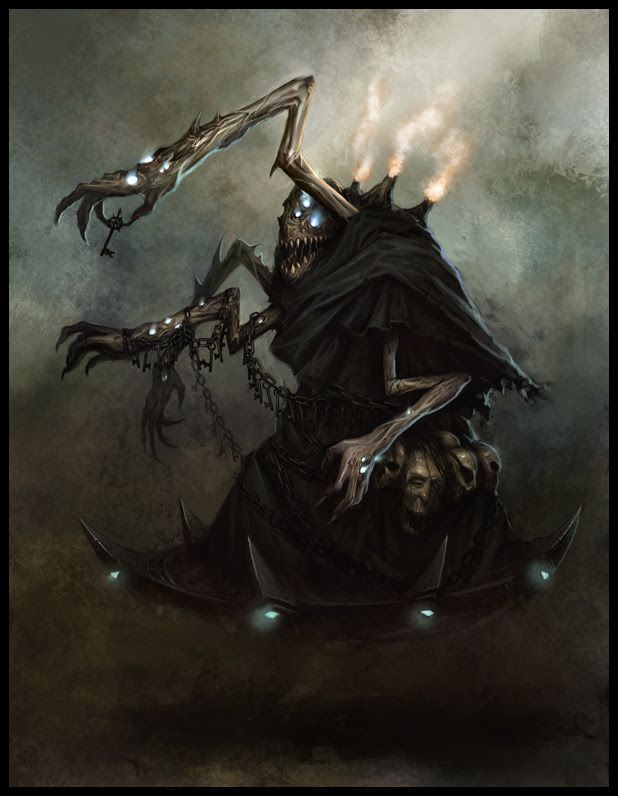

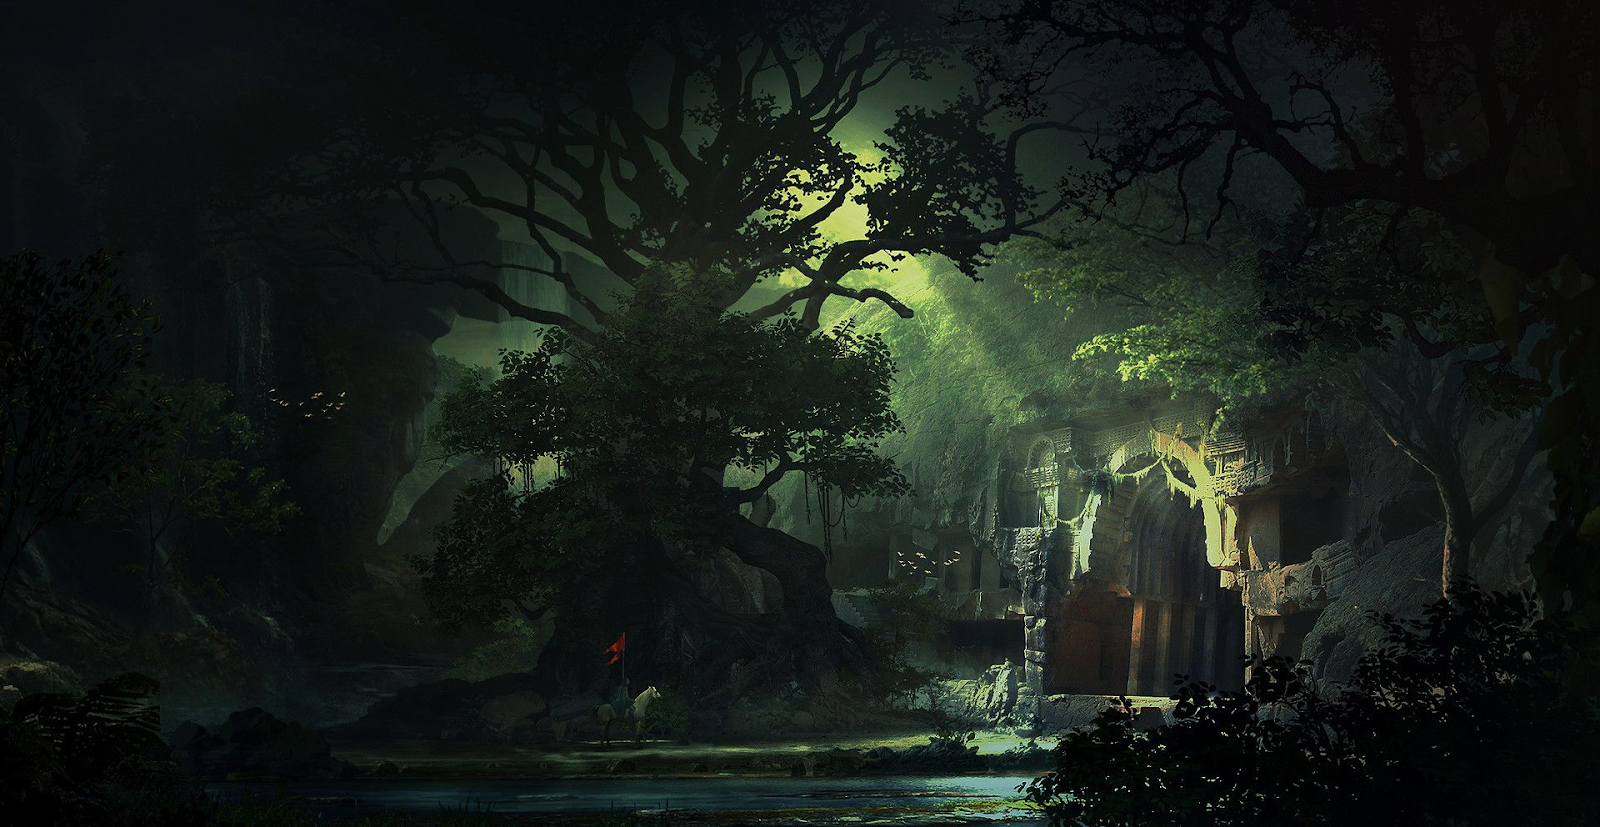


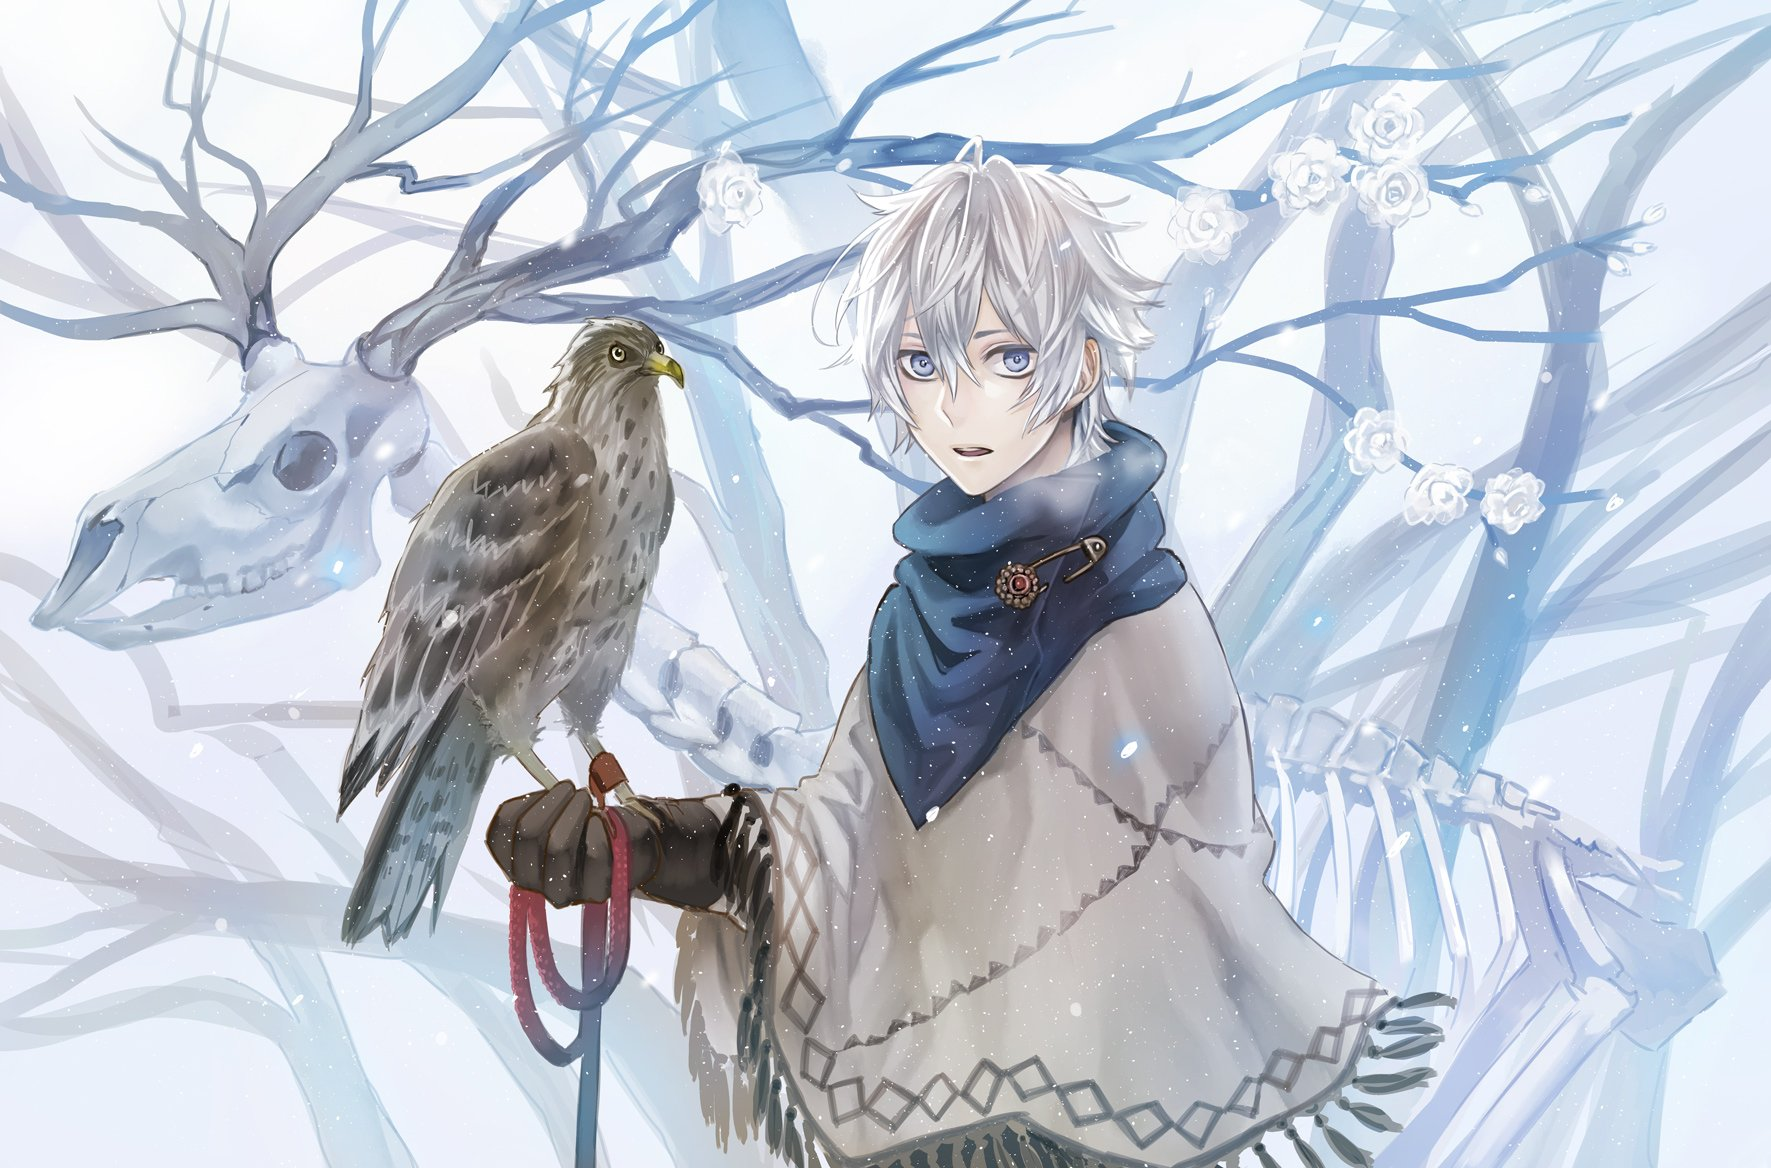

.jpg.e98cb90b396e918e9656f323aca0c0b7.jpg)


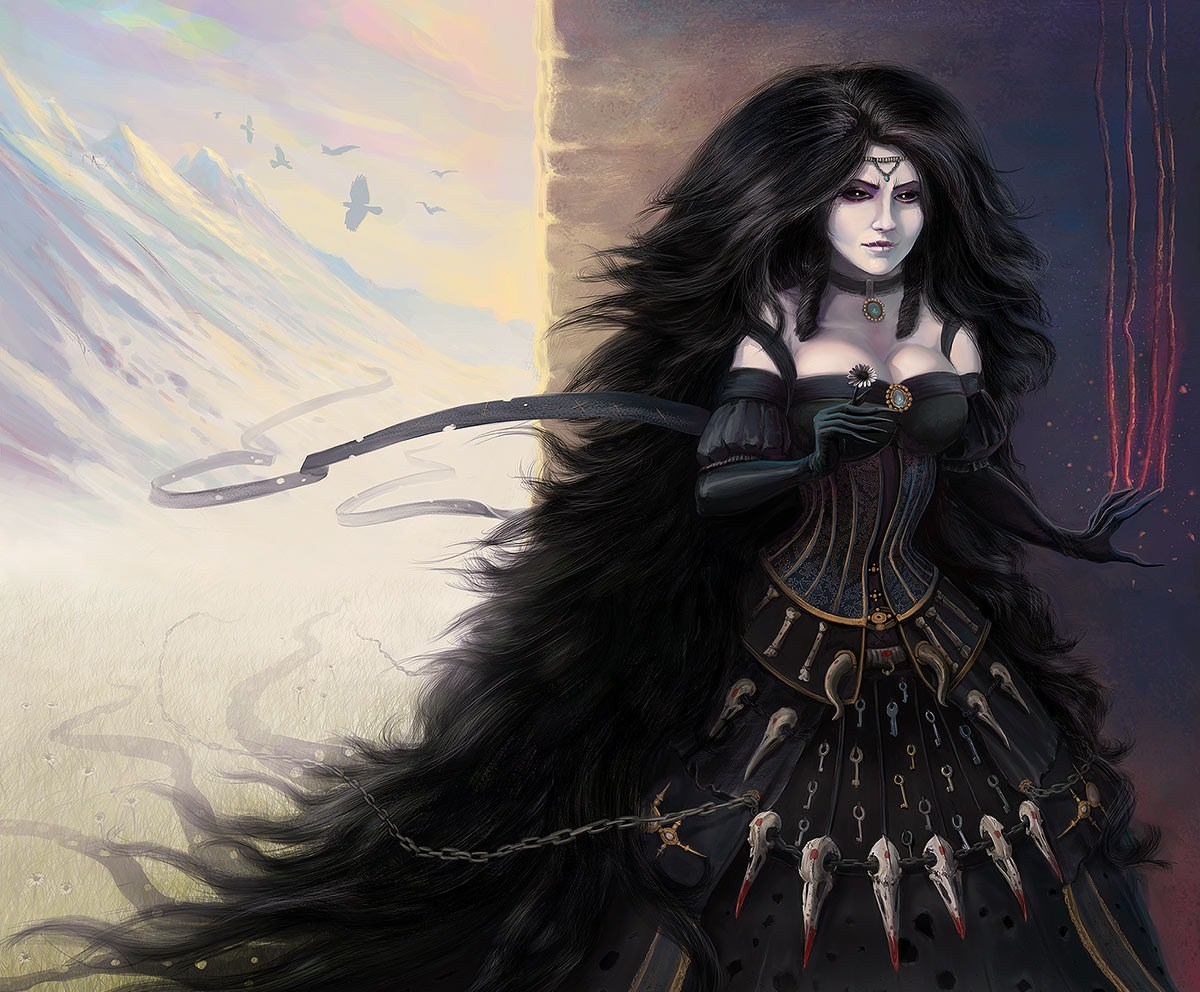


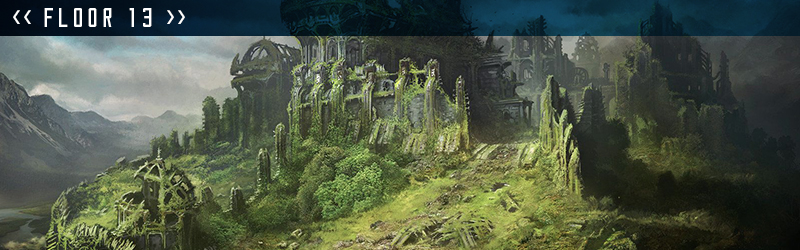
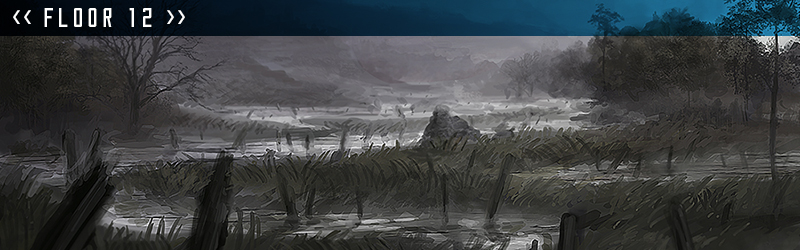

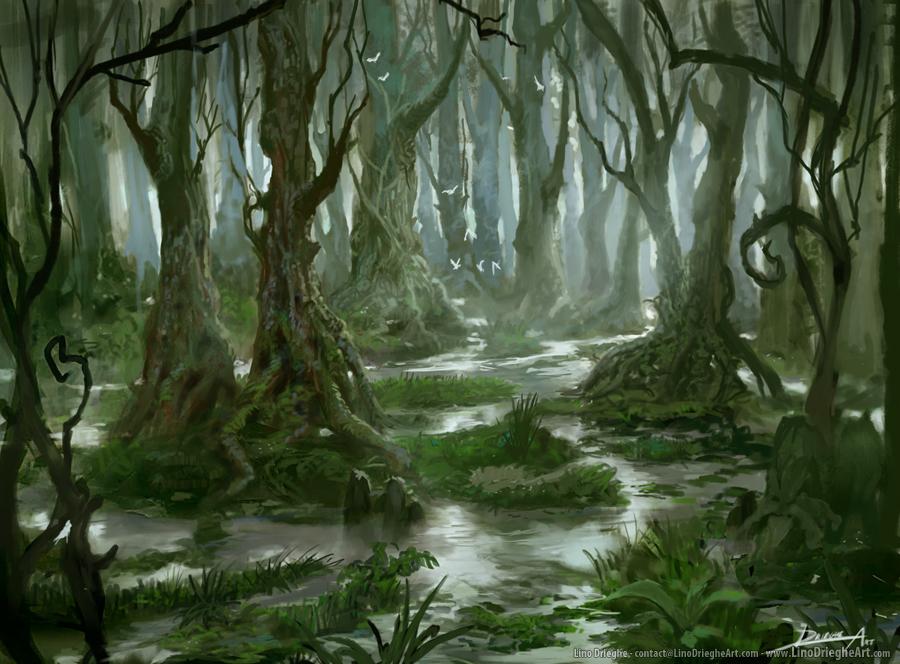


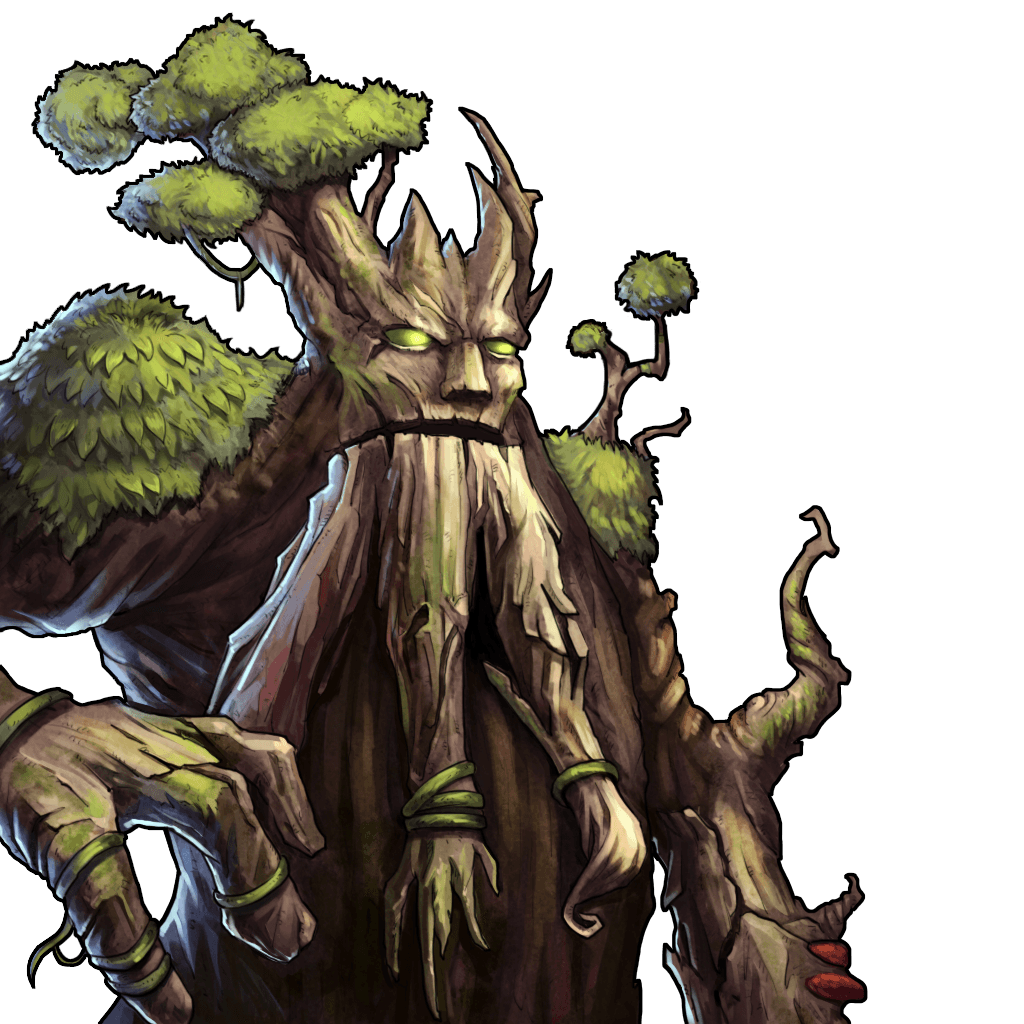
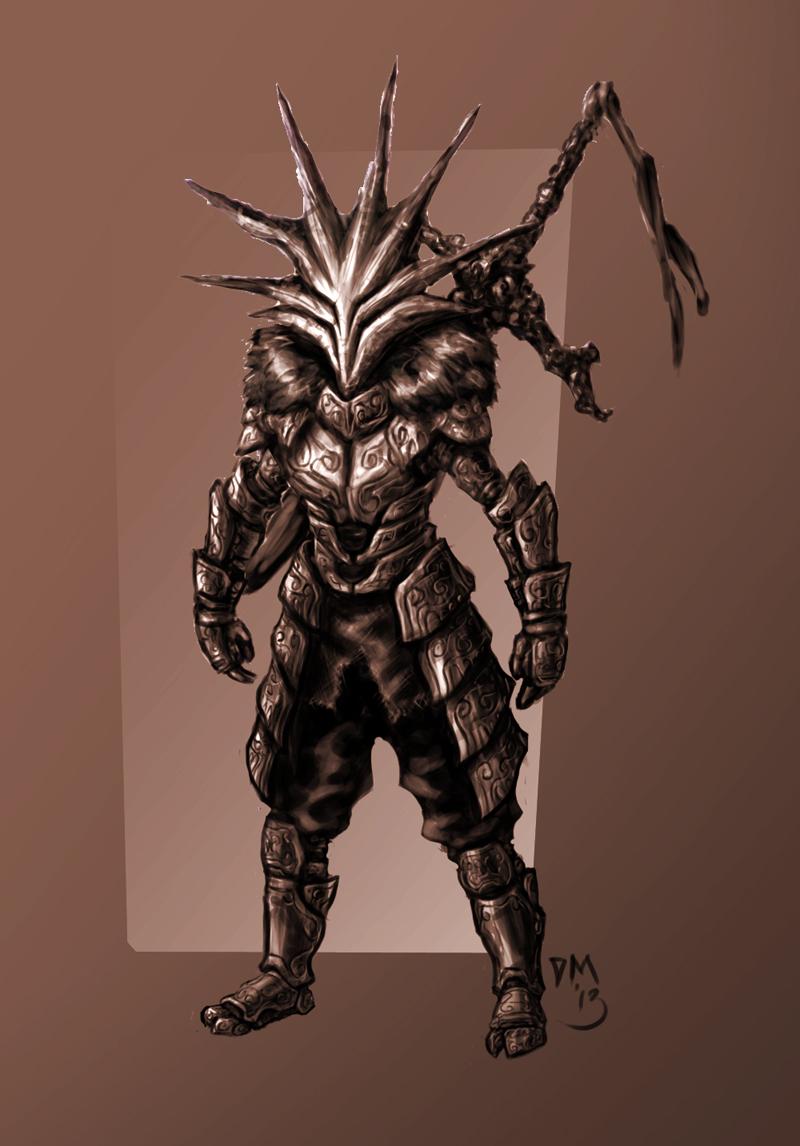
[F01-F22] <<Scents of the Wild>>
in Quests
Posted
Floor 20
<<Scents of the Wild: Pouncing Puma>>
Party Limit: 2 | 20+ Posts
Prerequisite: Must complete <<Scents of the Wild: Keepers of Nature>>.
Repeatable for standard page rewards.
Quest Rewards:
Requirements:
Summary:
A rival to the Kumatetsu for the Keeper of the forest, Suterusu is the fifth and second most powerful of the Guardians of Nature. A sly fighter by nature, it jumps from the shadows and eliminates anything that thinks of challenging it. Be cautious and watch your back.
Outline:
The panther of the forest will use the trees as cover to hide and pounce. This will make it incredibly hard to catch it off guard, and harder to hit. Do not underestimate this guardian unless you want to be returned to nature yourself.
Enemies:
<<Suterusu>>
HP: 1250/1250 | DMG: 225 | MIT: 75 | ACC: 2 | EVA: 3
This boss uses its own BD roll when attacking.
Abilities:
Epilogue:
Hanging within the vines of jungle, the Mothra key shines on the one ray of light seeping though the canopy of trees. Yet another forest creature has met it's end to your weapon. The Suterusu has bowed to you're ferocity. The fifth piece of the tablet does not break, merely chipping to show the demise of the panther.