Cardinal
-
Content Count
94 -
Joined
-
Last visited
Content Type
Profiles
Forums
Calendar
Blogs
Posts posted by Cardinal
-
-
Floor 9
<<The Iron Guardian>>
Party Limit: 4 | 20+ Posts
Repeatable for standard thread rewards, and <<Crystal of Support>>.
Quest Rewards:
- 1,000 Experience Points
-
Each player receives:
-
Crystal of Support (Unique consumable, 3/3 charges)
- A mass healing crystal that heals the user and each party member for (50 * Target's Tier) HP. Requires a Post Action to use.
-
Crystal of Support (Unique consumable, 3/3 charges)
Requirements:
- Roleplay speaking to the <<Mysterious Broker>> for intel on the boss.
- The party must defeat 1 <<Iron Knight>> per player.
- Defeat the <<Iron Guardian>>.
- Defeat the <<Mysterious Broker>>.
- The thread summary must state whether the <<Mysterious Broker>> was killed or spared.
Summary:
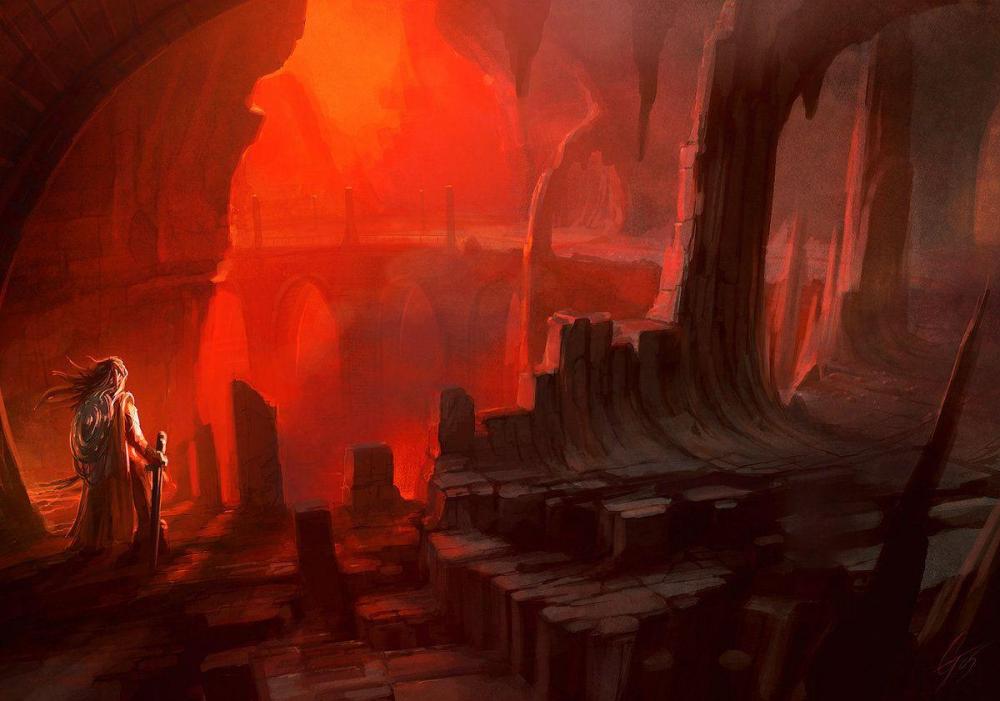
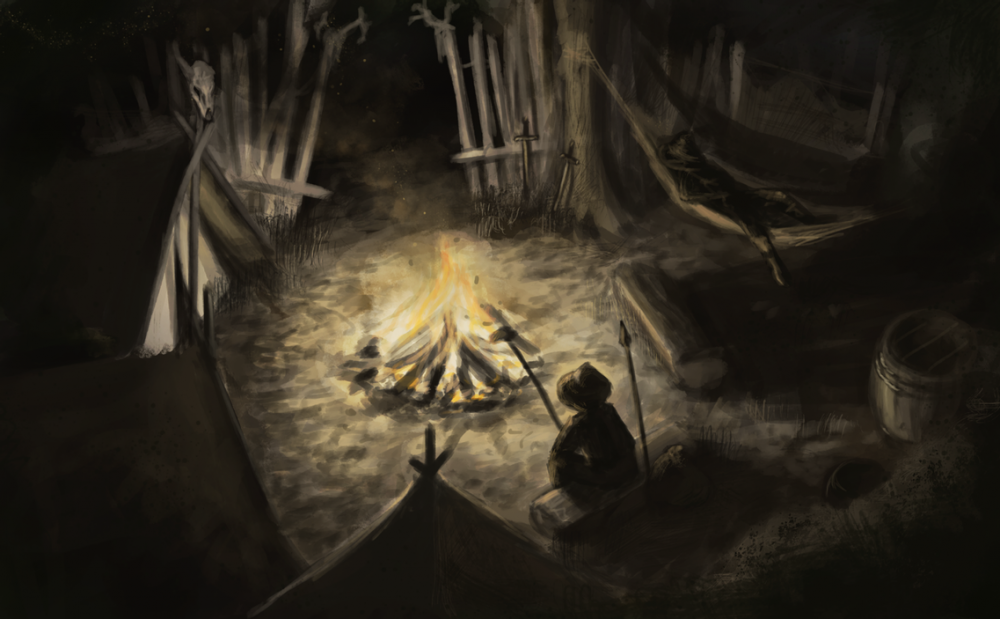
The players receive word of a quest where, after defeating a notorious knight and his followers, a rare healing item will drop. After meeting with a <<Mysterious Broker>> they are directed west, to a grotto leading down to the Guardian’s throne where they fight and defeat the knights and Guardian. Once the Guardian is defeated and the item is dropped. The <<Mysterious Broker>> will attack the Player(s) in an attempt to steal the item. The players can choose to spare the broker’s life or kill him for his treachery.
Outline:
After arriving at Yōgan Village the players are approached by a hooded figure. “Are you the one that accepted the quest to kill the Guardian?” they ask. They offer information on the quest’s starting location in exchange for a portion of the col they make for completing the quest. Upon agreeing, the hooded figure, now identified as a <<Mysterious Broker>>, tells the player of a grotto to the west that houses the throne of the Guardian.
The player may roleplay the trip to the grotto if they wish, once they arrive and enter the caves they must travel deep into the depths. When they arrive at a large iron double door they must fight the knights that guard it. The player must each defeat one <<Iron Knight>> (If there is more than one player they must each defeat their own knight), but may fight more if they wish. Once the knight(s) are defeated they may enter the throne room where the <<Iron Guardian>> resides.
Sitting atop an ornately carved stone throne, the Guardian is surrounded by treasures and fallen warrior’s armor and weapons. Once defeated, the Guardian’s sword will shatter, leaving the crystal that once rested in its pommel. The <<Mysterious Broker>> from before will emerge from the shadows and engage with the player in an attempt to steal the crystal that the Guardian dropped.
Upon his defeat he will drop to 1 HP and plead for his life. “Please, please don’t kill me! I only did it because I’m weak and needed the crystal to make some col! I wasn’t going to kill you really, just scare you a bit! My boss made me--” the broker sobs cutting himself off at the end. The player can make a decision to end his life or not. As he is an NPC, players will not gain a strike or orange marker, but may suffer narrative effects as a result of their choices.
Enemies:
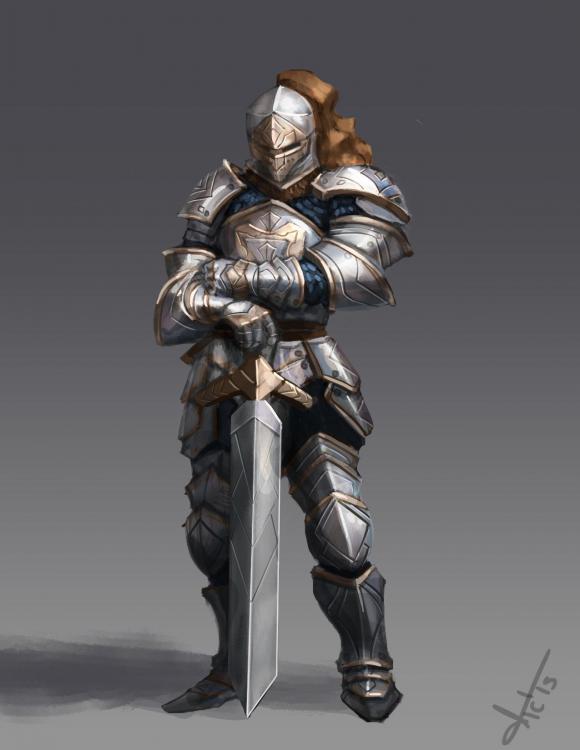
<<Iron Knight>>
The <<Iron Knights>> swear fealty to their lord, the <<Iron Guardian>>. Though they are not powerful alone, their strength grows in numbers.
HP: 250/250 | DMG: 100 | THORNS 24 | BLEED 24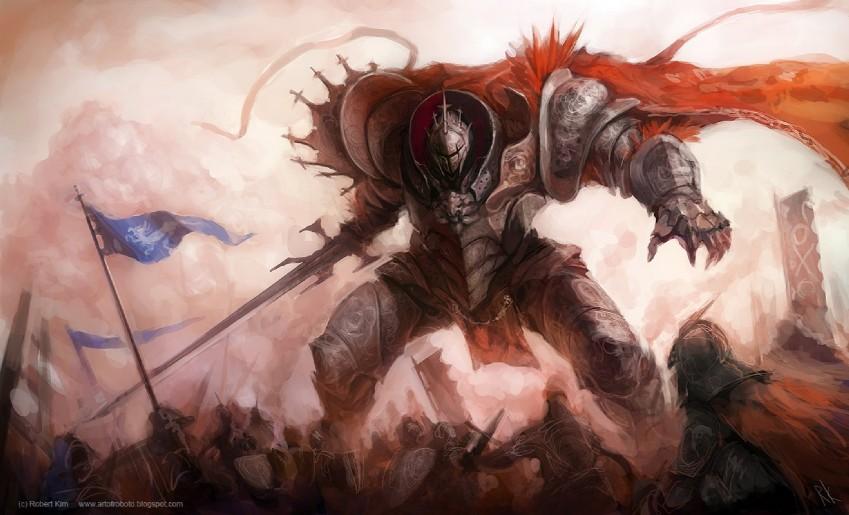
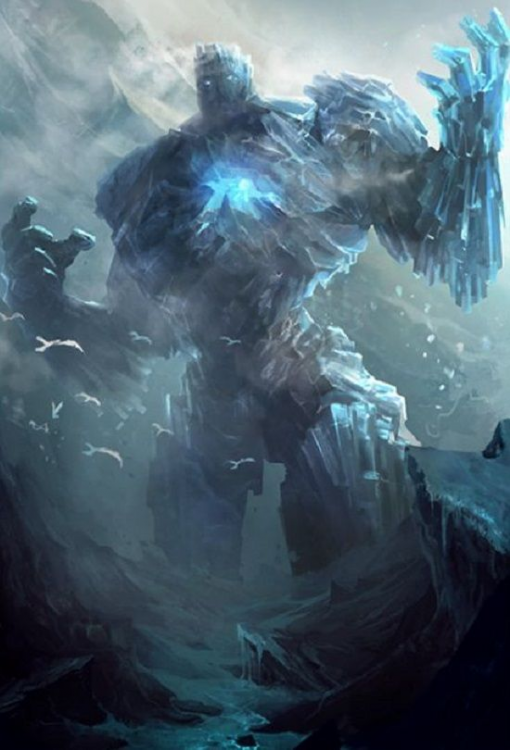
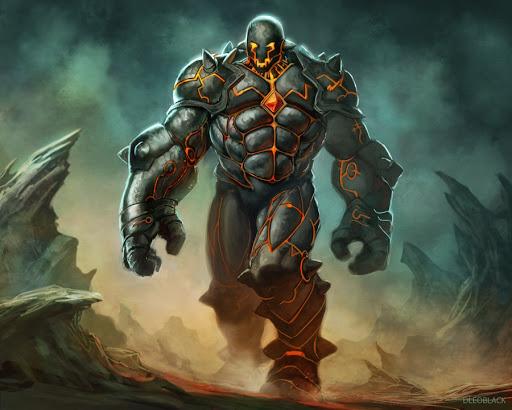
<<Iron Guardian>>
The <<Iron Guardian>> is a respawning quest boss which has been terrorizing the inhabitants of the ninth floor for as long as anyone can remember. Strangely enough, it only seems to rear its ugly head when a <<Mysterious Broker>> rolls through the floor.
HP: 600/600 | DMG: 150 | THORNS 24 | BLEED 24

<<Mysterious Broker>>
Not much is known about this elusive entity. Those who meet him are usually wary, and take care to keep their interactions short.
HP: 450/450 | DMG: 150 | PARALYZE IAbilities:
- Battle Healing | On a CD of 10+, the <<Mysterious Broker>> heals himself for 100 HP.
-
First Strike | The <<Mysterious Broker>> has the element of surprise, and will strike first in every rotation. Its first attack of the battle will automatically hit.
Epilogue:
When dropped to less than 1 HP, the <<Mysterious Broker>> breaks down and pleads for his life. The players must choose as a group whether or not to spare him.
The <<Mysterious Broker>> is slain:
SpoilerThe crystal feels heavy in your hands. The broker, if he really was one, must have been tricking others into farming this item for him. Someone has been using players as fodder to make extra col. This item carries the weight of who knows how many lives, sacrificed for his greed along the way. Did you make the right decision?
A panel appears to the players, informing them of the quest's completion, listing quest rewards and experience gained.
The <<Mysterious Broker>> is spared:
Spoiler"Yes! YES! Thank you for your mercy! My sister was taken by a group of malcontents who kidnap and torture others to do what they should undertake for themselves. Please, I beg of you! Help me save her." Despite his treachery, the man seems genuine in his anguish, pulling back his hood to reveal a young boy in his early teens. Though an NPC, his story is compelling. More investigation may prove necessary to unravel the truth.
A panel appears to the players, informing them of the quest's completion, listing quest rewards and experience gained.
-
Floor 16
<<The Swashbuckling Buccaneer>>
Party Limit: 4 | 20+ Posts
Repeatable for standard thread rewards and <<Pirate's Treasure>>

Rewards:
- 2,000 Experience Points
- 10,500 col
-
Each player receives:
-
Pirate's Treasure
- A lucky coin that will grant the user +2 Prosperity for the duration of one thread. Consumed upon use.
-
Pirate's Treasure
-
POTENTIAL REWARD | If Burlock, the Quartermaster, used <<Lady Luck>>
- Unlock <<Lady Luck>> Extra Skill
Requirements:
- Roleplay meeting the <<Frantic-looking Sailor>> and accepting the quest
- Roleplay traveling to Ill Man's Cove
- Defeat all 5 <<Pirate Deckhands>>
- Defeat <<Boatswain Amir>> and <<Boatswain Jessamine>>
- Defeat <<Burlock, the Quartermaster>>
- Roleplay returning to the <<Frantic-looking Sailor to obtain your reward
Summary:
A <<Frantic-looking Sailor>> sits hunched atop a wooden crate, his feet dangling idly over the pier’s edge. He turns as you approach, a look of hopelessness in his eyes.
"Y-you there! Have you the heart to aid a foolish sailor? You see, this shipment is due for departure come morn… and my ship’s been thieved! It’s those purloinin’ pirates, Greybeard’s lot or something-or-other. I would lead an effort to retrieve it but folks round ‘ere pay no mind to the business of others. Don’t suppose you could lend a hand?”
Should you choose to accept, the sailor turns Eastward and points across the water. He tells you the ship was last spotted near <<Ill Man’s Cove>>, a pier with two run-down shacks built into the adjoining cliff face, reputable for its shady dealings. He also shares details of the crew who stole his ship, including that of a burly man wearing a Captain’s hat. He marks the coordinates on your map and tells you to meet him where you stand by nightfall, making brief mention of his uncle’s rowboat.
Outline:
Participants must roleplay meeting the <<Frantic-looking Sailor>> and his uncle at the docks, but must roleplay arriving at <<Ill Man’s Cove>> on the uncle’s rowboat. The sailor’s uncle will remain after dropping off the party.
Participants may choose where and how to combat the pirates; however, 2 Deckhands will always try to fight alongside each Boatswain, spawning as other Deckhands are defeated, until the party has defeated 5 Deckhands. If 5 Deckhands have already been defeated, none need spawn with the Boatswains.
Once all Deckhands and Boatswains have been defeated, <<Burlock, the Quartermaster>> bursts out from below deck of the stolen ship and howls, “Arrggh! Who dares provoke the ire of Greybeard’s Quartermaster?!” Players may rest and recover energy before Burlock's arrival, if need be. Burlock, like the other mobs, requires a separate BD roll from the players.
Upon defeating <<Burlock, the Quartermaster>>, the sailor climbs aboard his reclaimed ship and imparts a word of thanks, and offers the participants transport back to port.
NPCs:

<<Frantic-looking Sailor>>
Expression seemingly locked in a perpetual state of peril, the <<Frantic-looking Sailor>> is the NPC that will grant the players the quest. Upon arriving at <<Ill Man's Cove>>, this NPC will depart from the rowboat alongside the players. Despite accompanying them through the entirety of the journey, he will find himself too fearful to actually engage in combat with the pirates. He will frequently express his shame for being so cowardly and vow to assist in the next quarrel, but never will.
Enemies:
<<Pirate Deckhand>>
The Pirate Deckhands are the grunts of the pirate forces, risking life and limb for the sake of their crewmates and treasure. Though their loyalty will prevent them from turning on their crew, they will at least ponder for a moment if the players offer them coin in return for leaving the cove.
HP: 250/250 | DMG: 85 | MIT: 40
This mob uses its own BD roll when attacking.Abilities:
- Hornswaggle | On a natural CD of 11 or 12, the Pirate Deckhand will land its hit regardless of BD and stun the target. This attack will bypass 50% (rounded up) of the target's MIT.
<<Boatswain Amir>>
Amir is one of Burlock's most trusted mates - and for good reason. He's as elusive as he is intimidating, carrying his burly frame with surprising speed and elegance. He will not respond to any threats or bribes, instead attacking intruders silently on sight.
HP: 700/700 | DMG: 125 | MIT: 100 | EVA: 2
This mob uses its own BD roll when attacking.Abilities:
- Chain of Command | When first engaged, two <<Pirate Deckhands>> will instantly spawn and attack the player once regardless of Hate. If all 5 <<Pirate Deckhands>> have already been previously spawned (and/or defeated), none will spawn upon engaging the <<Boatswain>>.
- Freeboater | On a natural BD of 9 or 10, <<Boatswain Amir>> raises his boot. If the CD is 1-6, he kicks high and attacks the entire party with 150 AoE damage. The original target is automatically hit. Make separate rolls for the rest of the party. If the CD is 7-12, he sweeps low and knocks his target off their feet, lowering their EVA by 2 for their next turn in addition to standard damage.
- Luck of the Pirate | If <<Boatswain Amir>> and <<Boatswain Jessamine>> are battled at the same time while accompanied by one <<Pirate Deckhand>> each, loot will drop when all four mobs have been defeated. It will be a number of weapons matching the number of players in the quest, with weapon types conveniently corresponding with each player's preference. These weapons will be labeled <<[Weapon Type]'s Luck of the Sea>>. Each player may equip this weapon, requiring a post action. The weapon's enhancements are determined via the roller, based off of the Appraiser's max level Identification roll chart. This weapon will disappear from inventory upon quest completion.
<<Boatswain Jessamine>>
If Amir is Burlock's right-hand man, Jessamine is his left. Sporting unexpected strength and ferocity, Jessamine is feared by seafarers far and wide as an unrelenting force of fury and mayhem. She willingly engages in banter with the players, but will not take any threats or bribes seriously.
HP: 550/550 | DMG: 200 | MIT: 50 | ACC: 2
This mob uses its own BD roll when attacking.Abilities:
- Chain of Command | When first engaged, two <<Pirate Deckhands>> will instantly spawn and attack the player once regardless of Hate. If all 5 <<Pirate Deckhands>> have already been previously spawned (and/or defeated), none will spawn upon engaging the <<Boatswain>>.
- Crow's Nest | On a natural BD of 9 or 10, <<Boatswain Jessamine>> rears her boot. If the CD is 1-6, she sweeps low and knocks the target over, lowering their ACC by 3 for one turn. If the CD is 7-12, she aims high and launches an attack that bypasses 66% (rounded up) of the target's MIT.
- Luck of the Pirate | If <<Boatswain Amir>> and <<Boatswain Jessamine>> are battled at the same time while accompanied by one <<Pirate Deckhand>> each, loot will drop when all four mobs have been defeated. It will be a number of Perfect Quality weapons matching the number of players in the quest, with weapon types conveniently corresponding with each player's preference. These weapons will be labeled <<[Weapon Type]'s Luck of the Sea>>. Each player may equip this weapon, requiring a post action. The weapon's enhancements are determined via the roller, based off of the Appraiser's max level Identification roll chart. This weapon will disappear from inventory upon quest completion.

<<Burlock, the Quartermaster>>
Burlock is quartermaster to Greybeard, and largely considered to be the man in charge when the latter is absent. Offered comparable respect to Greybeard himself, Burlock has secretly been planning a mutiny, and may let slip during battle that the players thwarted his plans by killing his most loyal underlings.
HP: 1000/1000 | DMG: 175 | MIT: 80 | ACC: 2 | EVA: 2
This boss uses its own BD roll when attacking.Abilities:
- All Hands on Deck | Immune to Paralysis, Paralytic Venom, Freeze, and Stun.
- Black Spot | Burlock’s cutlass is coated with a poison. On a successful hit, with a natural CD of 10-12, the target suffers 30 Poison Damage for their next two turns.
- Davy Jones' Locker | On a natural BD of 9, Burlock deals 50 additional damage. On a natural BD of 10, Burlock deals 100 additional damage. On a natural CD of 10-12 with either of these BD outcomes, the attack will bypass 50% (rounded up) of the target's MIT in addition to the effects of <<Black Spot>>.
- Lady Luck | If all participants face Burlock while wielding a <<[Weapon Type]'s Luck of the Sea>> acquired during the quest, <<Burlock, the Quartermaster>>'s behavior will change. Every turn, his weapon will gain a random enhancement in accordance with the chart below. The LD from his attack roll decides the enhancement, and will be applied before the attack.
LD Enhancement Effect 1-4 Damage Burlock gains 100 Damage for this turn. Can stack with bonus critical hit damage 5-8 Paralyze Burlock will Paralyze the target if his attack is successful this turn. 9-12 Bleed Burlock will inflict Bleed on the target if his attack is successful this turn.
24 Unmitigatable Damage / 2 Turns13-16 Accuracy Burlock gains 3 additional Accuracy for this turn. 17 Freeze Burlock will Freeze the target if his attack is successful this turn.
Target will take 50 Unmitigatable Damage from Freeze.18 Vampiric (Offensive) Burlock will recover 300 HP if his attack is successful this turn. 19 Fallen Burlock gains 135 Damage for this turn. 20 Phase Burlock's attack this turn will bypass 50% (rounded up) of the target's MIT.
This effect can stack with the MIT bypass from <<Davy Jones' Locker>>.
Epilogue:
If <<Burlock, the Quartermaster>> did not use <<Lady Luck>>:
SpoilerOnce Burlock has been defeated, a panel appears, informing the players of the quest's completion, listing quest rewards and experience gained. The <<Frantic-looking Sailor>>'s face will relax for the first time since the start of the quest, and he will quietly thank the party before proceeding to reclaim the ship. The sudden shift in his demeanor and sharp look in his eye will give the players pause. Had they been aiding the real pirate the whole time?
If <<Burlock, the Quartermaster>> did use <<Lady Luck>>:
SpoilerOnce Burlock has been defeated, a panel appears, informing the players of the quest's completion, along with an alert beneath the quest rewards that indicates the <<Lady Luck>> skill has been unlocked in their skill tree. The <<Frantic-looking Sailor>>'s face will relax for the first time since the start of the quest, and he will quietly thank the party before proceeding to reclaim the ship. The sudden shift in his demeanor and sharp look in his eye will give the players pause. Had they been aiding the real pirate the whole time?
-
Floor 19
<<Keep Calm and Ki'Raion>>
Party Limit: 4 | 20+ Posts
Repeatable for standard thread rewards and to obtain the <<Photosynthesize>> Extra Skill.

Quest Rewards:
- 2,500 Experience Points during the daytime / 1,500 Experience Points during the nighttime
- 8,000 col
- (15) Materials
-
POTENTIAL REWARD | Defeating Ki'Raion during the day
- Unlock <<Photosynthesize>> Extra Skill
Requirements:
- Roleplay encountering the elder who recounts the legendary tales of Ki'Raion, accepting the quest, and then seeking out the beast.
- Roleplay crossing through the Bastion Wall Shrine and entering the Forbidden Lands.
- The group as a whole must choose whether to engage Ki'Raion during the day, or at night.
- Defeat Ki'Raion
Summary:
Rumour spreads of an exceedingly powerful monster, hidden deep in the far Eastern reaches of the 19th floor. The residents of Home say that a beast roams the high hills and barren plains, laying waste to entire settlements and demolishing every creature unfortunate enough to find itself in its path. Several groups of players have set out to find and defeat it, though only one returned, and their injuries were grave.
A local elder heard their tale and connected their tale to the legends of the <<Ki'Raion>>. The players reported escaping with their health bars in tatters and the beast’s practically untouched, dubbing it aggressive, territorial and extremely dangerous. For fear of provoking the <<Ki'Raion>>'s true strength, they suggest no lone player trek within a thousand yards of the floral lion’s territory and that parties remain vigilant in an encounter. Even among a full party, survival is not guaranteed.While the elders of Home find some solace in the notion of a powerful living creature surviving in the wilds of the Forbidden Lands, the very power of the same creature could prove a threat to their settlement, which barely subsists as things are.
Outline:
This boss is unique in that it draws its power from the sun. During the daytime, it is considered "Charged," and becomes more durable and dangerous. During the night, it loses its Charged status and becomes more vulnerable. It is up to the players to decide, as a group, what time of day they wish to fight it - though there are pros and cons to each. Fighting it during the day will prove considerably more challenging, with greater rewards to show for it. A battle at night will be easier, but the low-light conditions will reduce vision.
Players suffer a -1 to BD if they fight <<Ki'Raion>> at night, unless they have the Night Vision mod active, a glow stone or some other means to counteract the debuff, and the rewards will be less tantalizing.
Enemies:
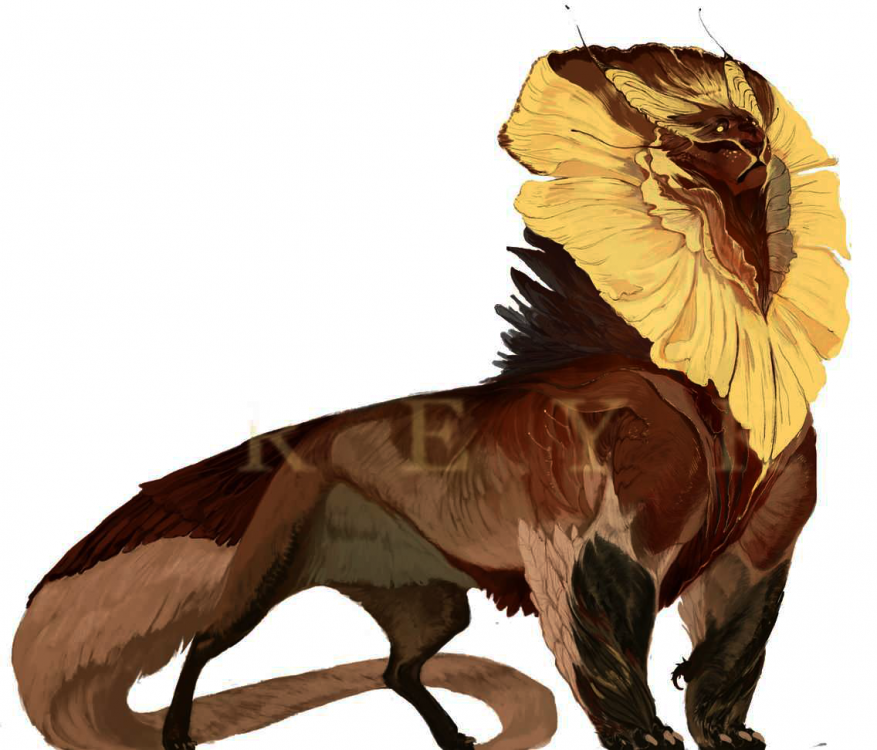
<<Ki'Raion>>
This creature feeds off of nature, and will condemn any that sully its domain. Drawing the majority of its power from the UV light, it is vulnerable when the sun sets.
Daytime Stats
HP: 1000/1000 | DMG: 200 | MIT: 100 | ACC: 3 | EVA: 2
This boss uses its own BD roll when attacking.Nighttime Stats
HP: 800/800 | DMG: 175 | MIT: 75 | ACC: 2 | EVA: 1
This boss uses its own BD roll when attacking.Abilities:
- Tail Swipe | If BD 9-10 and MD 1-5 is rolled simultaneously, <<Ki’Raion>> unleashes a powerful tail swipe that can strike a whole party. Deals 150 AoE damage to all party members as well as normal damage to the player with the most hate.
- Venus Fly Trap | If BD of 9-10 and MD of 6-10 is rolled simultaneously, <<Ki’Raion>> lunges at the player with the most hate and encases them in its floral mane. They experience 50 additional damage and will take 50 additional damage for each following turn that they're trapped. They are freed when at least 200 HP damage has been dealt to "Ki’Raion" or another player achieves greater hate. A trapped player may still attack.
-
Photosynthesize | Absorbing the Sun’s energy, every second attack <<Ki’Raion>> makes will be damage boosted by 50. On turns when this damage boost is not active, <<Ki'Raion>> will heal 100 HP. This ability is only available to <<Ki'Raion>> if fought during the day.
Epilogue:
If killed during the nighttime:
SpoilerA panel appears, informing the players of the quest’s completion, listing the quest rewards and experience gained.
If killed during the daytime:
SpoilerA panel appears, informing the players of the quest’s completion, along with an alert beneath the quest rewards that indicates the <<Photosynthesize>> skill has been unlocked in their skill tree.
-
Floor 21
<<Betrayal of the King>>
Party Limit: 4 | 20+ Posts
Repeatable for standard thread rewards, and LD bonus reward.
Quest Rewards:
- 5,000 Experience Points
- 10,000 col
- Unlock <<Forgotten King's Authority>> Extra Skill
-
Party Leader (Only) receives:
-
Roll LD on last post of the thread:
- 1-8: No additional rewards
- 9-15: 1 Additional Equipment Reward
- 16-18: 2 Additional Equipment Rewards
- 19: All 3 Additional Equipment Rewards
-
20: Gain Forgotten King's Spite
- [T3 - Demonic Weapon of Choice]: Fallen | Paralyze | 2 Normal Enhancements of the Player's choice
-
Potential Rewards | Based on LD roll, choose from the following:
-
The King's Betrayal
- [T3 - Perfect Weapon of Choice]: (Paralyze 2 OR DMG 2) | ACC 1
-
Envious Betrayal
- [T3 - Perfect Heavy Armor]: MIT 2 | Thorns
-
Light Betrayal
- [T3 - Perfect Light Armor]: EVA 2 | Recovery
-
The King's Betrayal
-
Roll LD on last post of the thread:
Requirements:
- Defeat the Forgotten Time King
Summary:
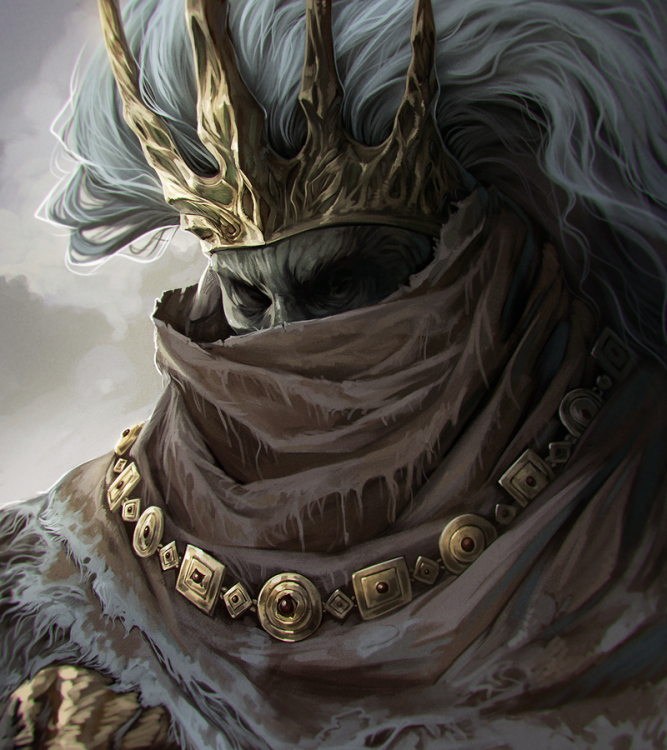
Back in a world of flame, humanity fought against the dragons in a great war. Their greatest advantage was a wise and powerful king who was peerless as a warrior, a brilliant and daring tactician, and considered a savior by his people. The war raged on for countless years until the king was lost in battle, though his corpse never found. Humanity fought on without their brave leader, only to later discover that he had betrayed them. Twisted in undeath, he led the forces of their enemies and cut down his former vassals with the same determination that he had once used to defend them. Humanity never stood a chance. Their realms were scattered and broken, and the story lost to time.
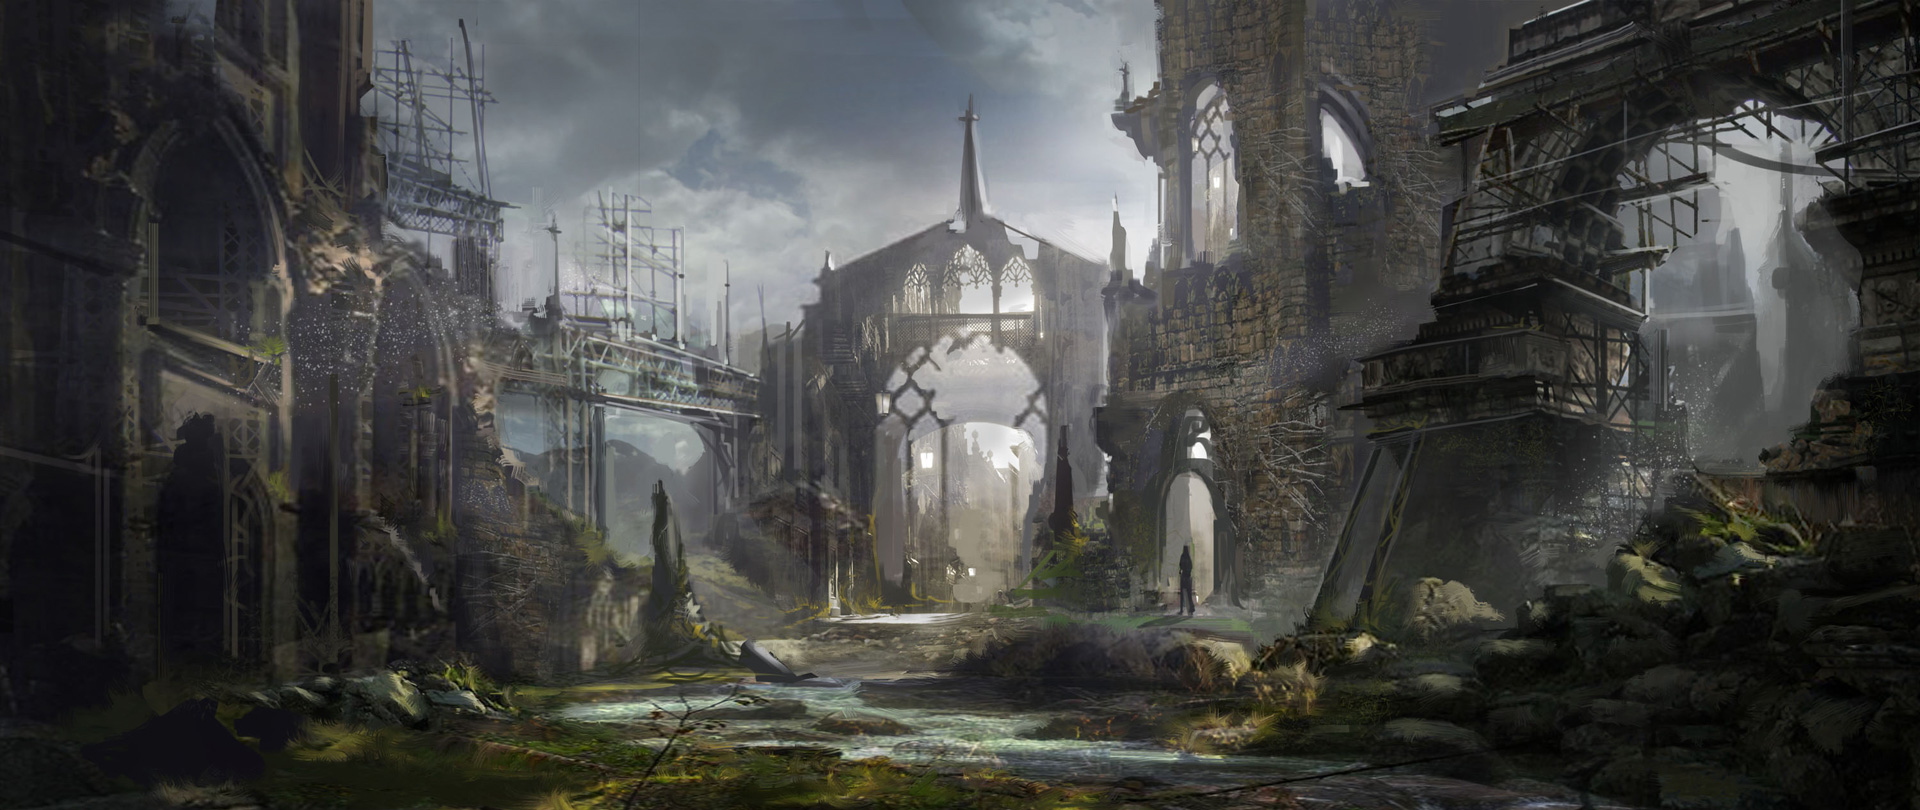
Long since buried, entombed by the consequence of his victory and surrounded by the corpses of those felled under his authority, the ancient monarch slumbered. Recent rumors tell that the forgotten king stirs anew, awakened by the presence of players near his fallen fiefdoms. Should he regain his strength and raise his undead legions once more, all of Aincrad would face unparalleled danger. The players must enter his Grand Necropolis and lay him low, before it is too late.
Outline:
Players over the years have characterized the Forgotten Time King in a variety of ways. As such, it has been decided that this quest boss' mannerisms and flavor abilities are in the eye of the beholder. So long as it can reasonably fit within the lore and power level of the entity, it shall be allowed. This is a hard boss, and the battle will be lengthy - bring your best to the fight.
Enemies:
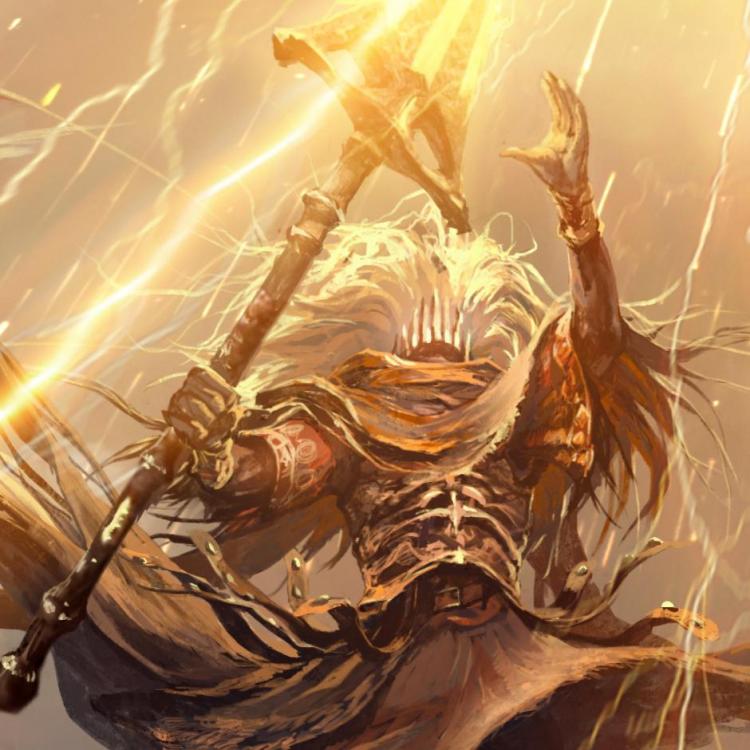
<<The Forgotten Time King>>
This fearsome entity strikes as quickly as the lightning it commands. It will wield a gargantuan spear as its primary weapon, but there is no telling what tricks it may have up its sleeve.
HP: 3000/3000 | DMG: 275 | MIT: 100 | ACC: 3Abilities:
-
Forgotten King's Authority | This boss is immune to debuffs and disablements.
Epilogue:
Upon defeating <<The Forgotten Time King>>:
SpoilerA panel will appears, informing the players of the quest’s completion, along with an alert beneath the quest rewards that indicates the <<Forgotten King's Authority>> skill has been unlocked in their skill tree.
-
Floor 4
<<Absolute Zero>>
Party Limit: 4 | 20+ Posts
Repeatable for standard thread rewards, plus attempts at unlocking the <<Frozen Hide>> extra skill.

Quest Rewards:
- 1,500 Experience Points
- 2,500 col
-
Each player receives:
-
Zero Degree Icicle
- T2 Rare Weapon of Choice | Freeze | Accuracy I
-
Zero Degree Icicle
-
POTENTIAL REWARD | If completed without any party member including <<Survival>> in their extra skill slots
- Unlock <<Frozen Hide>> Extra Skill
Requirements:
- Speak with Alexander at White Rabbit Tavern.
- Defeat Absolute Zero.
Summary:
The defeat of the Mortha the Magnificent, Twentieth Floor Boss, sent a ripple through the whole of Aincrad. Mobs began changing, and even earlier floors became far more treacherous than they had originally been. It wasn't long before quest mobs were also affected. Absolute Zero is the first of a series of mutated beasts, amalgamated with their environments into fearsome creatures capable on inconceivable feats. It will emerge from beneath a sheet of frozen ice blanketing a smooth lake on the fourth floor at random, taking the place of its counterpart - Avalanche.
This change hasn't gone unnoticed. The locals are increasingly worried that, at some point, Absolute Zero may become uncontainable and make its way into Snowfrost. Were that to happen, the NPCs of the floor would be no match. They were hardly able to ward off Avalanche, once before, so how would they handle a monster like Absolute Zero?
A respected resident of the town has been tasked with seeking the help of player(s) whenever Absolute Zero is known to have re-spawned. Alexander, barkeep and proprietor of the White Rabbit Tavern, has assumed this mantle of responsibility. His business sees regular traffic from all manner of players, and he frequently has the opportunity to fill their ears with whispers of adventure, treasure, and glory. While he can usually guide the players into making a voluntary decision to confront Absolute Zero through subliminal dialogue routes, sometimes he will opt for a more direct approach for those he perceives as more dense.
Outline:
Absolute Zero is a respawning quest boss, and a mutated version of Avalanche. It is bigger, stronger, and more durable. Players who speak to Alexander at the White Rabbit Tavern may notice him hinting that Absolute Zero has been spotted again, and that this is worrisome to the residents of Snowfrost. If the Player(s) don't immediately catch on, a panel that populates with the quest acceptance will certain send the proper message.
NPCs:
 <<Alexander>>
Alexander is a rare breed among NPCs. He is polite, clever, and most importantly - adaptable. With advanced AI that sets him apart from the other residents of Snowfrost, Alexander can seem, at time, indistinguishable from an actual human player. That being said, there are time when his dialogue routines will fail him. When this happens, he will improvise and seldom makes the same mistake twice. With years of interactions with players piling up behind him, his arsenal of dialog options ensures that no two encounters with Alexander will ever be truly alike.Though not particularly thrilled with having been tasked as the town's quest lackey, he recognizes it as an inevitability. After the Players arrived on the fourth floor and his behavior started changing he too began noticing the limitations of his peers. He has, to at least some peripheral degree, become aware that the players are an entity far more advanced than himself and the other NPCs, and is unafraid to use this to his advantage. Even though he seems clued in to the fact that he's likely not "real," he does not desire death more than any other mortal.
When explaining the situation to the player(s), he will first try subtly alluding to the fact that the residents of Snowfrost could use some help. He will gradually become more heavy-handed with his hints, before finally relenting and asking for help straightforwardly if he must. However, he will often make remarks about how he hadn't imagined "real players" could be so dense as to ignore his hints, which he considers obvious.
Enemies:
<<Absolute Zero>>
Absolute Zero is a fearsome beast that has been terrorizing the residents of the fourth floor. Leagues beyond the power of its lesser cousin, Avalanche, the NPCs of the floor cannot hope to thwart its efforts to flatten their towns should it ever choose to do so. Players are advised not to take this boss lightly - it will prove dangerous to the unprepared traveler.
HP: 1000/1000 | DMG: 200 | MIT: 200 | ACC: 3 | EVA: -2 | Freeze (8-10)
(+50 DMG on natural 9, +100 DMG on natural 10)
This boss uses its own BD roll when attacking.Abilities:
- Grand Slam | On a natural CD of 12, this boss will raise its arm and crash it against the ice of the lake, sending a ripple through toward all of the players, dealing 200 mitigatable damage and Freezing everyone in place. This attack automatically hits.
- Zero-Degree Weather | This boss changes the weather of the area into a blisteringly cold blizzard, lowering the EVA of all Players by -2. This effect can be ignored with the <<Survival>> skill.
-
Frozen Hide | If this boss is faced without Survival, the Player(s) will find it biting cold to the touch. It will gain 50 mitigation against attacks made by players without <<Survival>>, and deal 50 Frost Thorns damage on successful attacks - regardless of critical status.
Epilogue:
For Players who used <<Survival>> during the fight:
SpoilerThe storm ceases, and peace returns to the glossy surface of the lake. A panel spontaneously appears before the player(s) heralding the quest’s completion, listing the quest rewards and experience gained.
For Players who did not use <<Survival>> during the fight:
SpoilerThe storm ceases, and peace returns to the glossy surface of the lake. A panel spontaneously appears before the player(s) heralding the quest’s completion, along with an alert beneath the quest rewards that indicates the <<Frozen Hide>> skill has been unlocked in their skill tree.
-
Floor 5
<<Bloodstained Land>>
Party Limit: 4 | 20+ Posts
Repeatable for standard thread rewards, plus the <<Terra Firma Scale>>.
Quest Rewards:
- 2,500 Experience Points
- 5,000 col
-
Each player receives:
-
Terra Firma Scale
- T3 - Unique Consumable - Gain additional Mitigation equal to one T3 slot of the Mitigation Enhancement. This can exceed Mitigation Enhancement caps. The effect lasts one thread.
-
Terra Firma Scale
-
POTENTIAL REWARD: If <<Terra Firma>> uses Assault Mode
- Unlocks <<Assault Mode>> Extra Skill
Requirements:
- Speak with Abdullah in the Fortaleza town square.
- Defeat <<Terra Firma>>.
Summary:
The defeat of the twentieth Floor Boss sent a ripple through the whole of Aincrad. Mobs began changing, and even earlier floors became far more treacherous than they had originally been. It wasn't long before rare field mobs began to change as well. While Absolute Zero is the first of a series of mutated field bosses, Terra Firma was discovered not long after. It skulks about the hunting grounds of the Land Shark, searching for unsuspecting prey that would be great enough to overcome its lesser cousin, but not itself.
Terra Firma's emergence has the residents of the fifth floor worried. While it hasn't shown any sign that it will invade the settlements yet, what's to say that it would never take that plunge? They already feared the Land Shark, so what reason did they have to believe that they could contend with the likes of Terra Firma?
A respected resident of Fortaleza has been tasked with seeking the help of the players whenever Terra Firma should surface. Abdullah, a merchant that travels between the settlements of the fifth floor, has experienced the creature's wrath firsthand. Though he lost the majority of his stock while fleeing, he now possesses valuable intel that players can use to better understand the monster's habits and prepare for the fight ahead.
Outline:
Terra Firma is a respawning field boss, and mutated version of Land Shark. It is bigger, faster, and more durable. Players who speak to Abdullah in the Fortaleza town square will be provided with intel on the mob's behavioral patterns, as well as given an idea of the raw power it possesses. Upon concluding the conversation with Abdullah, a panel will populate with the quest acceptance prompt.
NPCs:

<<Abdullah>>
Abdullah is a man who wants for nothing. While not a fighter, the hired muscle he surrounds himself with is enough of a deterrent for any would-be muggers unfortunate enough to cross his path. While he is uninterested with the politics of the fifth floor, he has paid people much more politically savvy than himself to "earn" certain privileges over the general populace. As a consequence, he has garnered an unflattering infamy with the majority of the floor's residents.Despite this, he is still frequently sought out for favors, information, or any of the various goods he has hoarded over the years. He is valuable, and he knows it. As such, he is rather terse and straightforward in his conversations and negotiations. Abdullah sees himself as a figure that has little time for the concerns of the general rabble, and will oftentimes charge NPCs and players alike simply for the luxury of a short conversation. Though his lack of respect for others is readily apparent, he will not tolerate any form of disrespect from those he speaks with. Should the player(s) be rude toward Abdullah, he will dismiss them from his presence, going so far as to command his guards to remove them by force if need be. Should this happen, the quest will immediately be failed.
During the conversation regarding Terra Firma, Abdullah will stress that the only reason he is not charging the player(s) for his time is because slaughtering the monster is of great benefit to him. It will open faster and more direct trade routes that do not require the detours he has been forced to implement as a consequence of its presence. By providing you with the intel, he sees it as a verbal contract that demands you slay the beast and return order to the desert.
He will describe the beast as much more mobile, choosing to stay above ground for the most part and utilize its speed to rush down its prey. At certain parts during the skirmish, it would suddenly slow down before striking with razor sharp precision. Using this technique, it was able to reduce his last two bodyguards to fractals instantly, as though their armor meant nothing. Abdullah will describe its hide as stronger than diamonds, and impervious to their efforts to paralyze it.
Enemies:
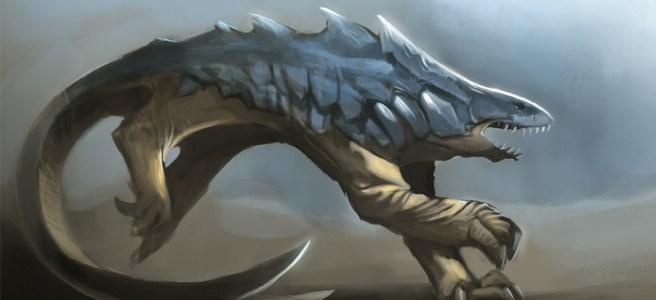
<<Terra Firma>>
This boss will erupt from the idle sands without warning and relentlessly chase down its target. Regardless the danger presented by its foes, it will only view them as prey. With a row of razor sharp teeth, thick claws, a hide tougher than diamond, and a bladed tail, it has no shortage of tools in its arsenal to ravage any foe. Its entire body is a weapon, and it will use it as such.HP: 950/950 | DMG: 300 | MIT: 150 | ACC: 1 | EVA: 4
This boss uses its own BD roll when attacking.Abilities:
- Move Swiftly | This boss is impervious to benefits provided by the Concentration skill. Additionally, all players suffer a -1 penalty to BD when attacking this boss.
- Hard-Scaled | Paralysis, Paralytic Venom, and Freeze are ineffectual against this boss.
- Deaf | This mob has no ears, and therefore is immune to the effects of debuff songs.
- Weak Spots | On a Player's natural BD of 9 or 10 when attacking this creature, they will gain 50% Phase for that attack. This does not stack with the Phase enhancement.
-
Assault Mode | If a Player has exploited one of Terra Firma's <<Weak Spots>> during the battle, Terra Firma will activate <<Assault Mode>>. On an LD of 11+, this mob will identify stealthed Players. Its ACC and EVA will swap for the duration of its attack, then revert to normal. It will gain 50% Phase on a BD of 9, and 100% Phase on a BD of 10 or higher. BD modifiers such as ACC can activate these Phase attributes.
Epilogue:
If <<Terra Firma>> did not use <<Assault Mode>>:SpoilerA panel will populate before the player(s) heralding the quest’s completion, listing the quest rewards and experience gained. The player who delivered the killing blow will find a <<Terra Firma Scale>> item in their rewards. The party leader will receive a message from Abdullah congratulating them on a job well done. How did he already know Terra Firma was defeated?
If <<Terra Firma>> used Assault Mode:
SpoilerA panel will populate before the player(s) heralding the quest’s completion, along with an alert beneath the quest rewards to indicate that the <<Assault Mode>> skill has been unlocked in their skill tree. The player who delivered the killing blow will find a <<Terra Firma Scale>> item in their rewards. The party leader will receive a message from Abdullah congratulating them on a job well done. How did he already know Terra Firma was defeated?
-
Floor 24
<<Incognito Analysis>>
Party Limit: 1 | 20+ Posts
Repeatable for standard thread rewards.

Quest Rewards:
- 2,000 Experience Points
- 5,000 col
- Unlock the <Incognito Assassination>> Quest
Requirements:
- Speak with the Chief regarding Uso-Tsuki's betrayal.
- Succeed in gathering enough information to identify the details of the assassination.
- Return to the Chief with the intel.
Summary:
The Chief of Marsonia recently discovered the betrayal of Uso-Tsuki's, once his most trusted lieutenant. He attempted to have him arrested, but the cur ran and was able to escape the guards. Now, knowing that he was a wanted man, Uso-Tsuki has decided to make an even bolder move: killing the Chief and taking his throne by any means possible. An agent has sent word that Uso-Tsuki is on his way to kill his former liege. By accepting the quest, the player is pressed into service to locate Uso-Tsuki and learn how he intends to bypass the Chief's defenses.Outline:
There are two ways to gather information:
Using Stealth, Players must attempt this option before moving onto the next one.
You must make 3 successful Stealth checks against Uso-Tsuki. Uso-Tsuki has a has a Detection Rating of 12, meaning a player must roll a 13+ for their Stealth checks after bonuses. If you fail 3 times before achieving 3 successes, Uso-Tsuki discovers you and runs off, and you must move to the Intercept option. However, if you succeed 3 times before this occurs, you gather enough information to know what his route is to kill the Chief. You may return to the Chief with this information without moving on to the Intercept option.
Intercept
If a player fails to trail Uso-Tsuki with Stealth, they must fight Hogo-Sha. Upon engaging Hogo-Sha, Uso-Tsuki will flee. When Hogo-Sha is defeated, he drops a Coded Missive. The player must perform post actions to roll LD, completing three crucial tasks to complete the mission:
- First, they must decode the message (LD 15+).
- Then, they must locate a translator as the decoded message is written in a foreign script (LD 13+).
- Finally, they must roll a value to read the message (LD 11+).
Bonuses apply to these rolls.
NPCs:

<<The Chief of Marsonia>>
The Chief of Marsonia is a straightforward man who is widely considered equally wise and cunning. Every move is calculated, and he leaves little to chance. Having earned his position through enduring several gauntlets of war and strife, he is hardened to the consequences of trust and betrayal. He will express to the player that he once saw Uso-Tsuki as a son, but now realizes his pseudo-nepotism was a vehicle that now risks his untimely demise. Though not the sort to plead, he requests the player's aid in thwarting Uso-Tsuki's attempt on his life.
Enemies:
<<Hogo-Sha>>
With an ever-wary and keen eye, Hogo-Sha is Uso-Tsuki's right-hand man, and will defend the latter to his dying breath, if necessary. Though he prefers a more straightforward fighting style, he is adept in the ways of assassination, and will see through any stealth attempts made by the player. He is quiet, but this should not be mistaken for weakness - nothing makes it past his inordinate sense of perception.
HP: 1000/1000 | DMG: 175 | MIT: 75 | ACC: 2 | EVA: 1
This boss receives its own BD roll when attacking.Abilities:
- Expecting Eye | <<Hogo-Sha>> is expecting someone to attack him, as the conspiracy has made him paranoid. He is immune to the Surprise Attack mod, and will always Parry your first attack.
-
Parry | On a roll of CD 9+ (on your attack roll), <<Hogo-Sha>> will <<Parry>> your attack, blocking 50% of the final damage. He will still attack normally on this turn.
Epilogue:
If the Player succeeded in gathering the information via Stealth:
SpoilerUpon returning to <<The Chief>>, he will inquire as to the outcome of the mission. After hearing that the player was able to retrieve the information without revealing themself, he will let loose a sigh of relief. As Uso-Tsuki has not been made aware that his plans were intercepted, it is unlikely the assassination plans will be altered prior to their execution. A panel appears, informing the player of the quest’s completion, listing the quest rewards and experience gained, along with an alert that states the <<Incognito Assassination>> quest is now available to undertake. <<The Chief>> will then ask the player for their aid in intercepting Uso-Tsuki's assassination attempt and putting a stop to his mad schemes once and for all.
If the Player was forced to Intercept <<Hogo-Sha>> to retrieve the information:
SpoilerUpon returning to <<The Chief>>, he will inquire as to the outcome of the mission. After hearing that the player was forced to battle <<Hogo-Sha>> in order to gather the information, he will become visibly nervous. As Uso-Tsuki now knows it is possible somebody has his plans, he will be more cautious and possibly alter them prior to their execution. A panel appears, informing the player of the quest’s completion, listing the quest rewards and experience gained, along with an alert that states the <<Incognito Assassination>> quest is now available to undertake. Though he is skeptical of the player's competence, out of sheer desperation, <<The Chief>> will nonetheless request the player's aid in intercepting Uso-Tsuki's assassination attempt.
-
Any Floor
<<Feeding Your Enemy>>
Party Limit: 2 | 20+ Posts
Repeatable if you no longer have a Familiar, or to accompany someone else while they attempt to tame one.

Quest Rewards:
- 300 Experience Points
- A Familiar of your choice (within guidelines).
- Unlocks the <<Training Your Friend>> Quest
Requirements:
- Talk to the Traveling Gypsy and obtain the Familiar Food from her.
- Successfully tame a Familiar.
- Return the remaining Familiar Food to the Traveling Gypsy.
- Submit your familiar's description for evaluation, including the link to your thread summary.
Summary:
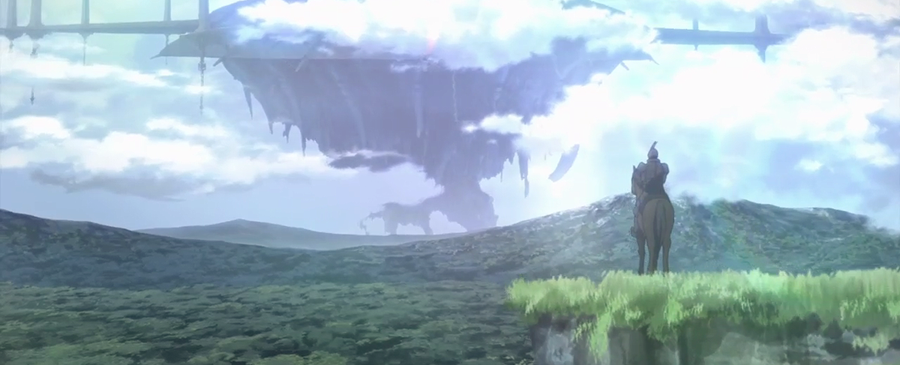
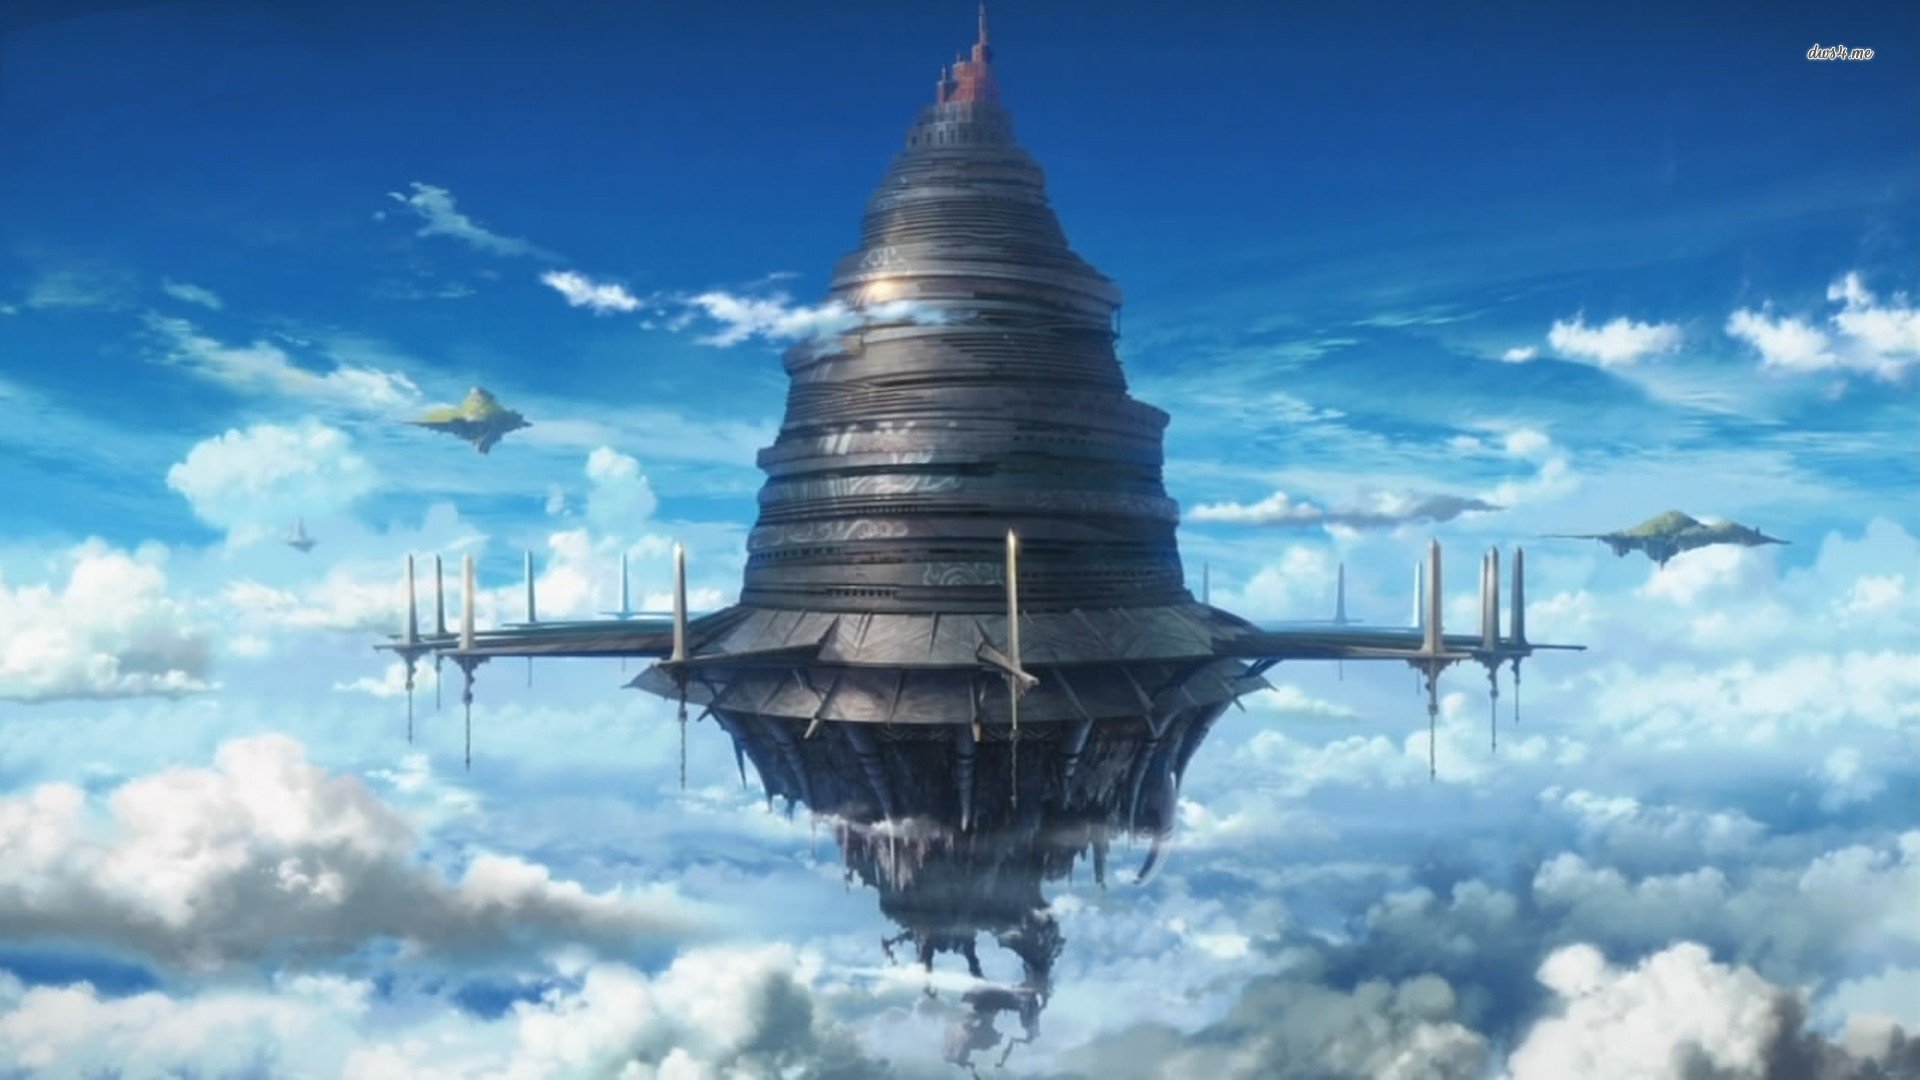
Legend tells of an old beast tamer who roams the floating castle Aincrad, unattached to any particular floor or location. Should a player find themselves fortunate enough to stumble upon her, they may ask to borrow the <<Familiar Food>> she uses to tame the beasts of the land. She will typically oblige, though players have reported getting an eerie feeling while accepting the <<Familiar Food>> she offers. As though they are now indebted to her in the form of a favor, and have no way of knowing how or when she will cash in.
Outline:
Every 15th post (post #15, post #30, post #45, etc), the party leader may roll to search for a familiar as a post action. On a roll of LD 15+ (modifiers apply), the player will successfully locate a potential familiar. Because the player will gradually become accustomed to tracking potential familiars with each attempt, for every failed attempt to locate a potential familiar, the LD requirement is reduced by 3. The <<Tracking>> mod will also allow a player to bypass this step after they have encountered a potential familiar and failed to tame it.
Once a potential Familiar is found, the party leader has 4 attempts to tame it using the <<Familiar Food>>. Taming is a post action that is successful on a CD roll of 9+. If the party leader fails all 4 attempts, the potential familiar will flee, and the player will need to wait until the next corresponding available post (post #30, post #45, post #60, etc) to search again.
If the requirements for the tame roll are met, the player has successfully tamed the familiar. Return the <<Familiar Food>> to the <<Traveling Gypsy>> to complete the quest. Only one Familiar may be tamed per thread.
NPCs:

<<Traveling Gypsy>>
The <<Traveling Gypsy>> is a legendary NPC that is capable of traversing the floors of Aincrad, untethered to any particular location. There is no telling where one might find her - but for those who do, an opportunity to tame a familiar presents itself.With a natural affinity for the wildlife of Aincrad, the <<Traveling Gypsy>> is warm, gentle, and kind. Though she will speak softly and avoid sharp language, many who have encountered her had reported a strange feeling on unease that lingers far after she has gone. Though she will never claim as much, many swear that she keeps track of the players she has helped over the years, and aims to collect on the debt they owe her at an unknown time in the future. Many dismiss this as folklore, but some are so convinced that they will go out of their way to avoid the mysterious NPC and never accept favors from her, however small.
Epilogue:
Upon returning the <<Familiar Food>> to the <<Traveling Gypsy>>:
SpoilerThe <<Traveling Gypsy>> will thank the player for being so kind as to return what is rightfully hers. Though she won't say anything more, she will eye the player expectantly, as though desiring something in return. When it becomes clear that she will not get anything, she will dismiss herself and continue roaming the expanse. A panel then appears, informing the players of the quest’s completion, listing the quest rewards and experience gained, and with an alert that states the <<Training Your Friend>> quest is now available to undertake.
-
Any Floor
<<Training Your Friend>>
Party Limit: 2 | 20+ Posts
Prerequisite: Must have completed <<Feeding Your Enemy>> and have a familiar eligible to receive training
Two players may train their familiars at the same time, or a second player may accompany the first to provide company.
Repeatable for standard thread rewards.

Quest Rewards:
- 300 Experience Points
-
Each eligible player receives:
- Familiar Skill of your choosing. (Only one Familiar Skill may be unlocked at a time. SP will still need to be paid to activate the skill. If one wishes to retrain their familiar, they must first refund the skill, then take this quest to train their familiar a second time.)
Requirements:
- Roleplay training your Familiar. The training should relate to the Familiar Skill you are attempting to unlock.
- SP must be spent to obtain the preferred Familiar Skill. You may only have one Familiar Skill at a time.
Summary:
You have succeeded in taming a familiar with the aid of the <<Traveling Gypsy>>. Now that it has chosen to join you on your journey, you are burdened with training it to survive the throes of battle. There are many ways to train your familiar, and each familiar is unique in the way that they will learn. It is up to you as its master to work around its strengths and weaknesses to bring out its true power. This is the responsibility you have chosen to carry.
Players that train their familiars together have found it much easier to unlock their respective skills. By being around their peers and picking up techniques from two players, familiars seem to be capable of learning at a faster rate. As a result, it has become commonplace for players to pair up to help familiars realize their full potential. Getting in groups larger than two players often seems to prove overwhelming for the familiars, and little progress can be made.
Outline:
Solo
Every 5th post (post #5, post #10, post #15, etc), the player may roll to train their familiar as a post action. On a roll of CD 7+, the player succeeds in teaching their familiar something related to the Familiar Skill they are attempting to unlock. Because even failed attempts possess glimmers of insight, for every failed attempt to train the Familiar, the CD requirement is reduced by 2.
After 3 successful successes, the Familiar will be considered trained.
Party
Every 3rd and 4th post (posts #3 & #4, posts #6 & #7, posts #9 & #10, etc) of the party leader and their companion respectively, the players roll to train their familiars as post actions. On a roll of CD 7+, the player rolling will succeed in teaching their familiar something related to the Familiar Skill the individual player and familiar pair are attempting to unlock. Because even failed attempts possess glimmers of insight, for every failed attempt to train a familiar, the CD requirement for its respective player is reduced by 2.
After 3 successful successes, the Familiar will be considered trained.
Other players who may have their Familiar already trained may attempt to roll for successes as well. These rolls will not count towards the successes of Players who are attempting to unlock a Familiar Skill. However, failed attempts from trained Familiar/Player pairs will reduce the CD requirement for other Players attempting to unlock a Familiar Skill. Players will only need to keep count of their successful training attempts should they want to unlock a Familiar Skill.
Epilogue:
Upon successfully training the Familiar:
SpoilerYour Familiar will flash a bright light for only a moment, signifying that the training has been a complete success. A panel appears, informing the players of the quest’s completion, listing the quest rewards and experience gained, and with an alert that states the corresponding Familiar Skill has been unlocked in the Player's skill tree.
-
Floor 25
<<The Essence of Titanium>>
Party Limit: 4 | 20+ Posts
Repeatable for standard thread rewards, and <<Essence of Titanium>>.

Quest Rewards:
- 3,000 Experience Points
-
Each player receives:
-
Essence of Titanium (Tierless Unique Consumable)
- A Player may apply this consumable to one weapon, armor, or trinket in their evaluation thread to enhance its quality by one stage. This would enhance an Uncommon item to Rare quality, or a Rare item to Perfect quality. This consumable cannot enhance an item beyond Perfect quality.
- If applied to an item that is already of Perfect quality or higher, it can be used to reroll an Enhancement present on the item using the Appraiser's Identification chart. When using this method, the reroll is eligible for producing Unique Enhancements based on the parameters established for a Rank 5 Appraiser.
-
Essence of Titanium (Tierless Unique Consumable)
Requirements:
- Roleplay entering the <<The Endless Maze>>.
- Locate the <<Titanium Warden>>.
- Defeat the <<Titanium Warden>>.
- Find your way back to the maze entrance.
Summary:
With the most recent system update, many changes affected both floors and quests alike. One such change was the removal of <<The Essence of Steel>> quest from the fourth floor. Confused players scoured the snowy plains, forests, and lakes for weeks searching for any sign of the frozen skull that once served as its trigger and prompt, but were unable to locate it. It wasn't until an adventurer from the higher floors uncovered some surprising information that the mystery of missing quest was resolved.
Within the bowels of the Maze on Floor Twenty-Five lurks a particularly durable mob that the majority of players have been avoiding. Its insane mitigation and high health makes it quite the force to be reckoned with, presenting a challenge to even the most fearsome players. For the longest time, nobody was capable of overcoming its might. When one well-balanced group finally succeeded in accomplishing the feat, and was rewarded with an <<Essence of Titanium>>, everything started to click into place. <<The Essence of Steel>> hadn't been removed from the game - it had simply been shifted to a higher floor and upgraded to "<<The Essence of Titanium>>."
Now, more than ever, an influx of adventurers to the twenty fifth floor have left the NPCs weary. As one of the most challenging floors that players have experienced to date, hunts for the <<Titanium Warden>> have not gone without their casualties. Despite knowing that death is a possibility, players still flock to the floor for the opportunity to collect one of the game's most valuable renewable resources.
Outline:
Players entering <<The Endless Maze>> are subject to all of the normal conditions in accordance with the Floor 25 description.
While exploring <<The Endless Maze>>, players will roll to locate the <<Titanium Warden>>. This search attempt requires a post action, and will be successful with a roll of CD 7+ & LD 11+. Standard buffs to CD and LD count toward this roll requirement.
Once the <<Titanium Warden>> is located, combat begins immediately on the following post.
After defeating the boss, the party must still navigate its way back to the Labyrinth entrance before ending the quest.
Enemies:
<<Titanium Warden>>
This boss monster is revered as one of the most durable respawning mob in all of Aincrad, boasting an insane Mitigation value and a health pool that just seems to soak up whatever damage makes it through. It is slow, and therefore easy to hit, but that should not be confused with easy to kill.
HP: 1250/1250 | DMG: 200 | MIT: 200 | ACC: 3 | EVA: -3 | Battle Healing: 50 | Thorns: 50 | Fireproof
This boss uses its own BD roll when attacking.Abilities:
- Methodical | The <<Titanium Warden>> is in no rush, only attacking once every other turn. During the turns that it does not attack, any debuffs active on the creature are ineffective.
- Magma Jolt | On attack rolls of BD 9+ and CD 9+, this boss will issue an AoE attack that fires a blast of molten steel at each player for 175 damage, ignoring 50% of Mitigation. Additional rolls for this AoE are unnecessary - it will strike each target without fail.
-
Deteriorate | For each critical hit dealt to this boss, its Mitigation is permanently reduced by 50.
Epilogue:
Upon defeating the <<Titanium Warden>>:
SpoilerA panel appears, informing the players of the quest’s completion, listing the quest rewards and experience gained. The player who delivered the killing blow will find an <<Essence of Titanium>> item in their rewards.
-
Floor 17
<<Challenge of Olympus: Tailor>>Quest Rewards:
- 500 Experience Points
- Athena’s Needle | Crafting Tool | Meticulous: +1 CD when crafting in one’s workshop.
Requirements:
- Player must be at least a Rank 2 Tailor.
-
Roleplay the following:
- Receiving an invitation to visit Olympus, on Floor 17.
- Meeting a satyr guard, often acting as an escort for the player.
- Speaking with Athena, goddess of wisdom and the arts.
- Initiating a challenge set out by Athena.
- Overcoming said challenge.
- Players are given reign to craft the challenge on their own accord. They are also welcome to alter Athena’s demeanor and appearance to better fit the story they want to tell.
- Players are encouraged to set a difficult challenge for their characters to overcome, be it through wit, strength or sheer willpower.
- Gods in these quests are NPCs solely for RP flavor. They are unable to engage in combat nor affect the setting of Aincrad in any way.
Summary:
Most players receive a message in their system mail at the ding of their profession reaching Rank 2. Sent on behalf of his pantheon by ‘Zeus’, players around Aincrad are invited to visit Olympus on Floor 17 to test their skills against the gods of their respective crafts themselves. Succeed and receive a limited edition trophy that’s guaranteed to boost your skills even further. Fail, and…
Well, Zeus was occasionally known to waste one’s time, now wasn’t he?
The road to Olympus is guaranteed to be safe when undertaking this quest. A ‘Blessing of Olympus’ buff seems to repel most monsters away from the player, should they stick to the main road leading to the mountain. And as though that wasn’t enough, the gods have sent a satyr to lead them to their abode, ‘just in case’ the player got lost. Anyone even remotely versed in Greek mythology might be able to tell that it is Hera’s handiwork that lends them safe passage. Zeus isn’t the kind of entity to have taken precautions.
Athena’s disposition is awe-encompassing at first sight: her voice commands respect even as she extends the same courtesy to the player. A refined and confident individual, she often holds the thread of the conversation throughout her talks with the player, maintaining both wit and charm in her lines whilst upholding an air of professionalism. Truly, Athena depicts an exemplary and dependable figure that all mortals can seek to rely on.
Each god’s challenge differs from player to player, so rarely would one’s preparation lend them aid in the upcoming trial. The goddess often strives to test one’s intelligence, wisdom and logic thinking skills, though deviations are likely to occur. Many have reported taking away a bit of knowledge of history or quantum physics from interactions with the goddess -- albeit, their success in their respective challenges are almost always a struggle, and they find themselves better for it, brimming with new ideas for creations in their mind. Though this may scare off prospective challengers, be rest assured: Athena will be there to guide the player at every step of the way. It is their cunning and resourcefulness that she acknowledges and admires the most.
Should the player prove their worth to the deity, they are awarded a golden needle, alongside the goddess’ own blessing and appreciation.
Outline:
This quest is strictly a roleplaying exercise. There are no mandatory mechanics, save the general rules of the game.
NPCs:
<<Athena>>
Kind and rational, Athena speaks with courtesy, not selling the player short on their wisdom as mortal beings. She offers advice quite often, lending the player hints at succeeding at their own challenge should they find themselves stuck. The one thing she can’t forgive is arrogance; especially not in ignorance.
Epilogue:
SpoilerNot many players get to experience being one of the gods’ favored, and here another one of their numbers stands strong. Athena’s extension of congratulations is formal, requiring a firm shake of the player’s hand and a gift of a woven laurel as a token for undergoing her tribulation. Even her offer to the meet in the evening comes rolled up in a scroll, written and signed in cursive, for a chance to mingle with the other gods of the pantheon. Should the player accept, her expression is one of tenderness and joy.
The mess hall is abundant with mythical beasts and other championed challengers of the other gods present that day, and Athena walks with her crowned ahead of her, almost as if to show them off. At a resounding call for a toast, everyone celebrates the victories of the players who’ve bested their trials, before the feast begins proper. As always, the player is offered to partake.
-
Floor 17
<<Challenge of Olympus: Blacksmith>>Quest Rewards:
- 500 Experience Points
- Hephaestus’ Hammer | Crafting Tool | Meticulous: +1 CD when crafting in one’s workshop.
Requirements:
- Player must be at least a Rank 2 Blacksmith
-
Roleplay the following:
- Receiving an invitation to visit Olympus, on Floor 17.
- Meeting a satyr guard, often acting as an escort for the player.
- Speaking with Hephaestus, god of the forge.
- Initiating a challenge set out by Hephaestus.
- Overcoming said challenge.
- Players are given reign to craft the challenge on their own accord. They are also welcome to alter Hephaestus’ demeanor and appearance to better fit the story they want to tell.
- Players are encouraged to set a difficult challenge for their characters to overcome, be it through wit, strength or sheer willpower.
- Gods in these quests are NPCs solely for RP flavor. They are unable to engage in combat nor affect the setting of Aincrad in any way.
Summary:
Most players receive a message in their system mail at the ding of their profession reaching Rank 2. Sent on behalf of his pantheon by ‘Zeus’, players around Aincrad are invited to visit Olympus on Floor 17 to test their skills against the gods of their respective crafts themselves. Succeed and receive a limited edition trophy that’s guaranteed to boost your skills even further. Fail, and…
Well, Zeus was occasionally known to waste one’s time, now wasn’t he?
The road to Olympus is guaranteed to be safe when undertaking this quest. A ‘Blessing of Olympus’ buff seems to repel most monsters away from the player, should they stick to the main road leading to the mountain. And as though that wasn’t enough, the gods have sent a satyr to lead them to their abode, ‘just in case’ the player got lost. Anyone even remotely versed in Greek mythology might be able to tell that it is Hera’s handiwork that lends them safe passage. Zeus isn’t the kind of entity to have taken precautions.
One might be taken aback the moment their eyes rest on Hephaestus -- should they try to leave, both their satyr accompaniment and the god will attempt to soothe their concerns. His form is a husk of divinity. The blacksmith has sought to hide his deformities from the world after one too many taunts from outsiders about them. Whether or not his injuries were caused by careless work, long exposure or defects from birth, he choose not to say. Nevertheless, he would appreciate any player’s tolerance and composure should they offer it to him.
Each god’s challenge differs from player to player, so rarely would one’s preparation lend them aid in the upcoming trial. Hephaestus prefers to focus on the player's perseverance, as well as their ability to adapt their crafts to certain environmental or accessibility factors. The god enjoys watching his fellow crafters build upon their latent talents, forged in a similar manner to the layering of Damascus steel. He limits any direct contact with the player, avoiding proximity due to his own insecurities, though he is willing to offer his assistance and advice to any player wanting his suggestions on improvements.
Should the player prove to be his champion, they are awarded an unbreakable cross-pein hammer, alongside the god’s own gratefulness and good will.
Outline:
This quest is strictly a roleplaying exercise. There are no mandatory mechanics, save the general rules of the game.
NPCs:
<<Hephaestus>>
Patient, wise and insightful. Hephaestus is a pleasant figure to work with, as long as you stay clear from the topic about his physical deformities. He is willing to teach just as long as the player is willing to listen and practice his advice.
Epilogue:
SpoilerNot many players get to experience being one of the gods’ favored, and here another one of their numbers stands strong. Hephaestus is proud, picking up the player's craft with some hesitance, and ultimately orders a satyr to store it alongside his other challengers’ trophies. With some assistance from another attendant, he delivers the player a invitation to a banquet of the gods -- all part of formalities, he assures them, and wishes to receive their response at that moment. Should the player be willing to stick around, Hephaestus may not be able to show the delight blooming on his face, but he most certainly voices it best he can.
The god has a hard time moving, only able to limp, hop, or on bad days roll himself around the courtyard with the aid of a wheelchair. The smithing pair make their way towards Olympus’ mess hall, where a variety of mythical beasts and gods await them, alongside other respective champions who have also bested their trial that day. A toast is always made in celebration for those who’ve succeeded and, as always, the player is offered to partake in the feast once it properly begins.
-
-
Floor 23
<<Search & Rescue>>
Party Limit: 2 | 20+ Posts
Repeatable for standard thread rewards.
Quest Rewards:
- 1,500 Experience Points
- 2,000 Col
- Unlocks access to <<Escaping the Underdark>> Quest
Requirements:
- Roleplay accepting the quest from Tythen.
- Players must roll the LD to find Fonsa, and pair with the CD to find the result (see table below).
- If the roll requires it, the party must defeat 2 Cursed Stags per player in party (4 max).
- Roleplay returning Fonsa to Tythen. If Fonsa is killed, bring back her wedding ring as proof that she is no longer alive.
Summary:
The majority of the Dark Elves in Kalanaes couldn't care less about your visit to their glum and gloomy town. Many openly scowl at you as you pass by, contempt clear on their unnaturally attractive faces. One man, however, wears an expression of utter devastation. Unlike the others, who pass by without a word, he approaches you directly. With desperation in his dark eyes, Tythen introduces himseld and explains that his wife was sent to the Kriit Wastelands. A high-ranking official in what little remains of the Dark Elves' army, Fonsa was tasked with retrieving an artifact from Queen Lun’Rael's ruined tower in what little remains of their former capital on the surface - now known as the Vale of Ruin. Tythen begs you to travel to the surface and search the Vale of Ruin for his lost wife.
Outline:
After accepting the quest from Tythen, the party must travel to the surface to look for his wife, Fonsa, in the wreckage of the Queen’s Tower and the surrounding Vale of Ruin. Players must take four (4) posts combined travel and exploring, before they may start rolling to find Fonsa.
Players take turns rolling the LD, and will find Fonsa on a roll of 15+ (modifiers apply). In the event it takes more than five rolls (per player), she is automatically found on the next post. Fonsa's condition and circumstances depend on the CD result of the roll that succeeds in finding her. If she is found automatically, assume a CD result of 1.
CD Roll Result CD 1 Fonsa is found barely alive, fight off Cursed Stags and keep Fonsa alive.
(She can sustain only 2 more hits)CD 2-3 Fonsa is found barely alive, fight off Cursed Stags and keep Fonsa alive.
(She can sustain only 3 more hits)CD 4-7 Fonsa is found barely alive, fight off Cursed Stags and keep Fonsa alive.
(She can sustain only 4 more hits)CD 8-11 Fonsa is found alive, fight off Cursed Stags and keep Fonsa alive.
(She can sustain only 5 more hits)CD 12 Fonsa is found alive, no Cursed Stags to be fought.
(She can sustain 6 hits)Whether encountered when Fonsa is found, or afterwards, the party must fend off attacks from, and defeat, 2 Cursed Stags per player in party (4 max).
Players must then roleplay returning her to Kalanaes, though she will insist that her identity remain secret. Fonsa will not reveal anything of her original mission or its results to the players, glaring suspiciously at anyone who asks. But, she's a soldier, not a spy, and it is readily apparent that she no longer trusts her fellow Dark Elves.
NPCs:
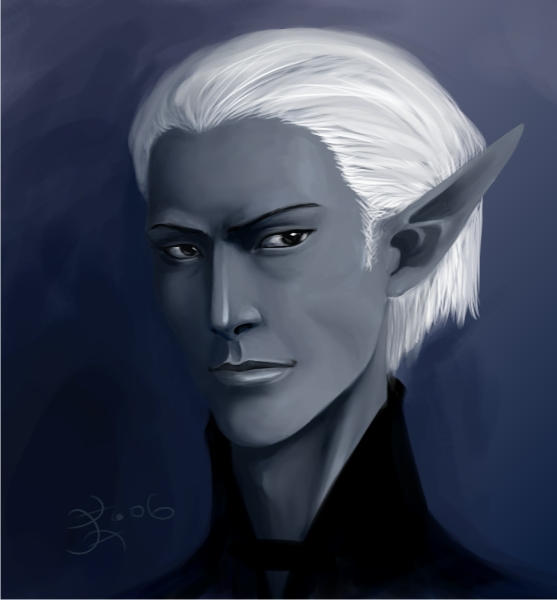
<<Tythen>>
A handsome Dark Elf who has aged considerably with concern for his missing wife.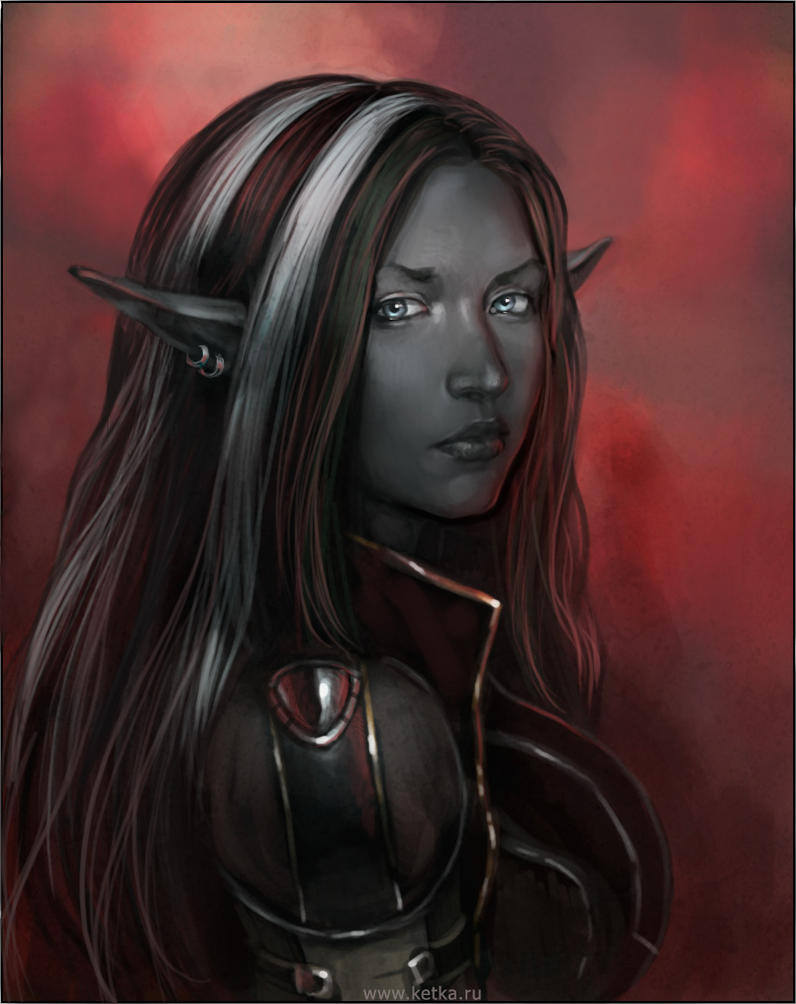
<<Fonsa>>
A powerful warrior who was sent on a secret mission, and has not been seen since.EVA: 1
Fonsa’s armor and weapon are damaged beyond use, making her unable to fight or defend herself aside from trying to dodge the Cursed Stags’ attacks. This does not require a roll.
Note: Fonsa can only take so many hits depending on the initial CD roll from when she is found. Refer to table above for more information.
Enemies:

<<Cursed Stag>>
Once the pride of the Kriit Woodlands, these creatures have been twisted by dark magic into something menacing.HP: 350/350 | DMG: 150 | MIT: 75
Abilities:
- Bloodthirst | The Cursed Stags will attack anything with reckless abandon. Fonsa will automatically generates one hate on each Cursed Stag every turn.
-
Crazed Swing | On a MD roll of 9-10 the Cursed Stag will swing their horns wildly, turning their attack into an AoE that automatically hits every party member, including Fonsa. Players take standard numerical damage, Fonsa takes 1 hit.
Epilogue:
If Fonsa and Tythen are reunited:
SpoilerThe moment he sees her, Tythen draws his weary wife into fierce embrace. Over her shoulder, he mouths "Thank you," to the waiting players. When they finally draw apart, the grateful elf wraps an arm around Fonsa's shoulders, holding her tight to his side. "I cannot thank you enough for bringing my Fonsa back safely. You have already done so much, but if you would be willing, there is one more way that you could help us before taking your leave of this place."
If Fonsa is killed:
SpoilerTythen studies the slim golden ring in the palm of his hand. Though tears threaten to spill over, he blinks them back in a fight to regain composure. When he finally does so, he turns to the waiting players. "My wife was a warrior," he tells them, "and she died a warrior's death. She would have no regrets, so neither will I." Drawing a ragged breath, he closes his hand around the ring. "Thank you for returning Fonsa's ring. If you would be so kind, there is one more thing that you could do for me."
-
SAO-RPG would not be the incredible roleplay community that it is without the efforts of countless people. Over the course of nearly a decade, the site has seen countless overhauls, staff iterations, and contributions from players. It is important that these past accomplishments, and all those still to come, be celebrated. All those who contributed in a meaningful way will be noted here. This includes those who balanced numbers, made graphics, and did the proofreading/editing. The first name listed will be the main creator, and those who supported will come after. If you don't see your name here, and you'd like it added, just alert a staff member.
Floors
Floor Original 3.0 Rework One ? Morgenstern, Freyd, Lessa, Bahr, Elora, Snow, ChaseR Two ? Morgenstern, Freyd, Lessa, Bahr, Elora, Snow, ChaseR Three ? Morgenstern, Freyd, Lessa, Bahr, Elora, Snow, ChaseR Four ? Morgenstern, Freyd, Lessa, Bahr, Elora, Snow, ChaseR Five ? Cordelia, Freyd, Lessa, Bahr, Elora, Snow, ChaseR, Morgenstern Six ? Morgenstern, Freyd, Lessa, Bahr, Elora, Snow, ChaseR Seven ? Morgenstern, Freyd, Lessa, Bahr, Elora, Snow, ChaseR Eight ? Morgenstern, Freyd, Lessa, Bahr, Elora, Snow, ChaseR Nine ? Calrex, Freyd, Lessa, Bahr, Elora, Snow, ChaseR, Morgenstern Ten ? Morgenstern, Freyd, Lessa, Bahr, Elora, Snow, ChaseR Eleven ? Calrex, Freyd, Lessa, Bahr, Elora, Snow, ChaseR, Morgenstern Twelve ? Calrex, Freyd, Lessa, Bahr, Elora, Snow, ChaseR, Morgenstern Thirteen ? Calrex, Freyd, Lessa, Bahr, Elora, Snow, ChaseR, Morgenstern Fourteen ? Freyd, Lessa, Bahr, Elora, Snow, ChaseR, Morgenstern Fifteen ? Lessa, Freyd, Bahr, Elora, Snow, ChaseR, Morgenstern Sixteen ? Mina, Freyd, Lessa, Bahr, Elora, Snow, ChaseR, Morgenstern Seventeen ? Calrex, Freyd, Lessa, Bahr, Elora, Snow, ChaseR, Morgenstern Eighteen ? Calrex, Freyd, Lessa, Bahr, Elora, Snow, ChaseR, Morgenstern Nineteen Baldur Itzal, Lessa, Bahr, Elora, Snow, ChaseR, Morgenstern Twenty Baldur Itzal, Freyd, Lessa, Bahr, Elora, Snow, ChaseR, Morgenstern Twenty One Hikoru Freyd, Lessa, Bahr, Elora, Snow, ChaseR, Morgenstern Twenty Two Mack Pinball, Lessa, Freyd, Bahr, Elora, Snow, ChaseR, Morgenstern Twenty Three Ariel, Teion Freyd, Lessa, Bahr, Elora, Snow, ChaseR, Morgenstern Twenty Four Hikoru Itzal, Freyd, Lessa, Bahr, Elora, Snow, ChaseR, Morgenstern Twenty Five Beatbox Itzal, Freyd, Lessa, Bahr, Elora, Snow, ChaseR, Morgenstern Twenty Six - Morgenstern, Freyd, Lessa, Bahr, Elora Quests
Quest Original 3.0 Rework Absolute Zero Beatbox Bahr, Freyd, Lessa Arabian Nights Trilogy Ariel NIGHT, Freyd, Lessa, Bahr Bandit Camp Daeron Bahr, Freyd, Lessa Betrayal of the King Ryo Bahr, Freyd, Lessa Bloodstained Land Beatbox Bahr, Freyd, Lessa Breaking the Unbreakable Shark Katoka, Freyd, Lessa, Bahr Butcher of the Sands Zero Cordelia, Freyd, Lessa, Bahr Calming the Soul Zero, Oikawa Bahr, Freyd, Lessa Captured (Previously Escape) Lowenthal Yuki, Freyd, Lessa, Bahr Case of Wurms Mack Yuki, Freyd, Lessa, Bahr Challenge of Olympus Hestia, Itzal NIGHT, Freyd, Lessa Cleansing the Corruption Morgenstern Oscar, Lessa, Freyd, Bahr Dragon Hunter Anthology Saga Beatbox Itzal, Bahr, Freyd, Lessa Earning a Living Itzal, Spencer Lessa, Freyd, Bahr Elvish Rivalries Oikawa Morgenstern, Freyd, Lessa, Bahr Elvish Treaties - Morgenstern, Freyd, Lessa, Bahr Escaping the Underdark ? Lessa, Freyd, Bahr Feeding The Enemy Shark Bahr, Freyd, Lessa Guardian of Fire Mari Yuki, Freyd, Lessa, Bahr Incognito I & II Hikoru Bahr, Freyd, Lessa Just for the Halibut Hikoru Yuki, Freyd, Lessa, Bahr Keep Calm and Ki'raion Birdie Bahr, Freyd, Lessa King of Lakes Jomei Yuki, Freyd, Lessa, Bahr Let There Be Light Daeron Cordelia, Freyd, Lessa, Bahr Making Vows Oske, Itzal Bahr, Freyd, Lessa Monkey King Mack Bahr, Freyd, Lessa Nature's Treasure Itzal Mina, Freyd, Lessa, Bahr Night King Trilogy Oikawa Itzal, Freyd, Lessa, Bahr Redemption Shark Itzal, Freyd, Lessa, Bahr Saying Vows Oske Bahr, Freyd, Lessa Search and Rescue Jomei Lessa, Freyd, Bahr Search for the Hoya Zero Yuki, Freyd, Lessa, Bahr Scents of the Wild Saga Hikoru Yuki, Freyd, Lessa, Bahr The Essence of Steel Saix Bahr, Freyd, Lessa The Gatekeeper of Fire Gladiator Bahr, Freyd, Lessa The Gemini Oske Yuki, Freyd, Lessa, Bahr The Hidden Village Hikoru NIGHT, Lessa, Freyd, Bahr The Iron Guardian Daeron Katoka, Freyd, Lessa, Bahr The First Lessons Baldur, Hikoru Lessa, Cordelia, Freyd, Bahr The Swashbuckling Buccaneer Birdie Bahr, Freyd, Lessa The Traveler Oske Lessa, Freyd, Bahr The Venomous Warg Morgenstern Morgenstern, Freyd, Lessa, Bahr Training Your Friend ? Bahr, Freyd, Lessa Treant Rivalries Oikawa
Morgenstern, Freyd, Lessa, Bahr Treant Treaties - Morgenstern, Freyd, Lessa, Bahr Trouble in the Mines Ryo Katoka, Freyd, Lessa, Bahr What We Fight For Hestia Yuki, Freyd, Lessa, Bahr World of Corrupted Fire - Morgenstern, Freyd, Lessa, Bahr Witch of the West Itzal Yuki, Freyd, Lessa, Bahr -
Floor 9
<<Bandit Camp>>
Party Limit: 4 | 20+ Posts
Repeatable for standard thread rewards, and bonus col reward.
Quest Rewards:
- 1,000 Experience Points
-
Each player receives:
- Col equal to the number of Bandits defeated multiplied by 250. There is no limit to this reward.
-
POTENTIAL REWARD | If the Bandit Boss is defeated
- Unlock <<Brawler>> Extra Skill
- Each player received 5,000 additional Col
Requirements:
- Defeat four Bandits.
- Stealth mechanics may be used to fight the Bandits one-on-one. Otherwise, the Bandits will always spawn in groups of four.
- (Optional) Once the initial four Bandits have been defeated, the quest requirements will have been fulfilled. However, there will still be Bandits skulking around the camp. You may choose to continue fighting through the camp on your way to the Bandit Boss in an effort to squash the Bandit occupation for good.
Summary:
A group of Bandits has been terrorizing the miners of the floor, hoarding all of the precious ores for themselves. If something doesn't change, the miners of the floor, and their families, will starve. The people of the floor have come to realize that the only way to get the Bandits to stop is to send a clear message; continue to mess with us, and we will mess with you twice as hard.
The players will be approached by Kirk at random while wandering through Yōgan Village, who will ask for assistance in dealing with the Bandits. Upon acceptance, the players will be presented with map data leading them to the Bandit Camp, where they square off against the miners' enemies.Outline:
NPCs:
 <<Kirk>>
Kirk is the leader of the miners in Yōgan Village. A strange breed among the people, Kirk was born with a skin defect that left his skin lighter than the other inhabitants of the floor. This defect also unfortunately left him more susceptible to burns, hence the scar across the left side of his face. He is forced to wear thicker clothing that covers more of his body so as to avoid extraneous burns.In spite of everything, the residents of Yōgan Village have been continually impressed by Kirk's resolve, ability to push ahead and continue working far beyond the limitations of most miners. Through sheer willpower alone, he has proven himself among the ranks of the workers, and earned himself the position of foreman at a very young age. While one might think that this would be to the chagrin of the older miners, everyone seems honored to work for such a visionary of the trade.
All but one.
Kirk will express to the players a deep regret in regards to the Bandit situation. The leader of the Bandits is none other than the previous foreman of the miners. Though he was lazy and drunk most of the time, and by all means deserved his demotion, the former foreman was furious when the mantle of leadership was handed down to Kirk. Humiliated and dejected, the man decided that if he couldn't be the boss, he would make himself the boss.
As Kirk feels personally responsible for the way that the situation has unfolded, he practically pleads with the players to right the wrongs that he cannot, and put an end to this madness by any means possible. He stresses that he cannot offer much, but will compensate the players in any way that he can, upon completion of work.
Enemies:
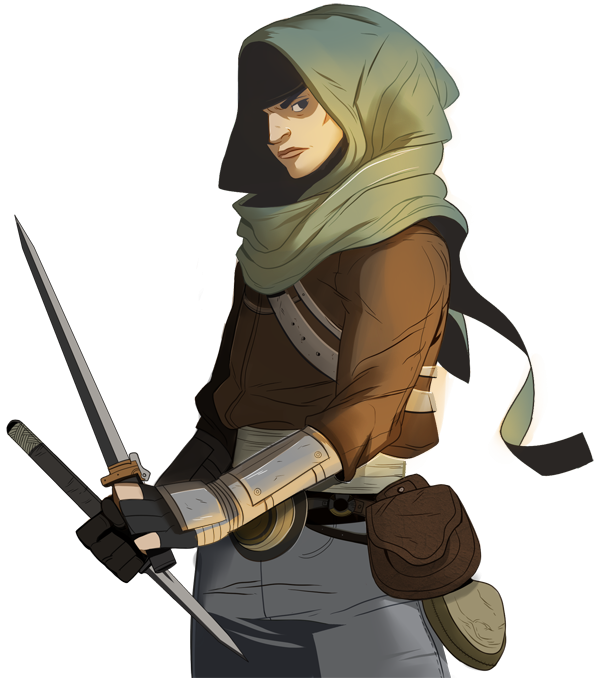
<<Bandit>>
This mob is not particularly difficult to defeat on its own, but Bandits become quite savvy in a pack. They behave in a way that allows them to play off of the actions of one another, almost as though they form a single, powerful entity.
HP: 250/250 | DMG: 75/100/125/150Abilities:
- Better Than One | The damage of this mob is determined by the total number of players that are present at once. When four are present at once, the damage is at its maximum. When only one remains, it is weak.

<<Bandit Boss>>
Prideful and with nothing to lose, this boss will attack the Player(s) with wild abandon. He will boast often, and usually about taking down Kirk and restoring his rightful place as the foreman of the miners.
HP: 1100/1100 | DMG: 125 | MIT: 100 | ACC: 3 | EVA: 2Abilities:
- Competitive | This boss gains additional damage equal to the highest leveled player's tier in the party multiplied by 25, and addition health points equal to the highest leveled player's tier in the party multiplied by 50.
- Well Protected | This boss will not appear unless 20 Bandits have been defeated.
- High Value Target | Defeating this boss adds an additional 5000 col and 500 EXP to the quest rewards.
- Brawler | This boss gains 75 mitigation when attacked by a Rank 5 Sword Art until the end of the rotation. Damage calculation for the attack will take place after the buff is issued. This effect can stack.
Epilogue:
If the <<Bandit Boss>>: was not defeated:
SpoilerA panel appears, informing the players of the quest’s completion, listing the quest rewards and experience gained.
If the <<Bandit Boss>>: was defeated:
SpoilerA panel appears, informing the players of the quest’s completion, along with an alert beneath the quest rewards that indicates the <<Brawler>> skill has been unlocked in their skill tree.
-
Floor 1
<<Making Vows>>
Party Size 2 | 20+ Posts
Repeatable only if divorced.

Quest Rewards:
- 300 Experience Points
Requirements:
- Roleplay speaking with James to declare that the pair wishes to be married, then discuss the wedding plans with him.
- Required wedding details must be declared and taxes paid. (Expenses paid to the Banker account. This must be completed before quest completion can be issued and the thread is considered closed.)
- Ring details must be declared.
Summary:
Marriage is not only an institution in real life. Players who wish to marry their sweetheart in Aincrad have a means to do so. Whether for the sake of love, or the shared inventory and buffs from the rings, marriage has been a long time tradition among the captives of the floating castle. Players who wish to take advantage of this system must travel to the first floor and speak with James Aria, a priest with the power vested by Aincrad to officiate the wedding services and produce the rings for the happy couple.
Outline:
Players who wish to marry must first speak with the priest James Aria, who resides in the central cathedral of Floor One. James guides the players through the different topics that must be decided on before they can finalize their intent, pay the taxes, and move on to prepare the wedding. It is encouraged that players roleplay writing their vows for one another in private, however, this is not a requirement.
Wedding Plans
The Thread Summary must include the following parameters for the couples' wedding: Location, PK access, number of guests, the option of providing stat-boosting food, wedding ring abilities, and the combined cost of all taxes. The total col owed must be paid to the @Banker account before the thread can be completed.
- Private Wedding (no guests): 0 col
- Small Wedding (Few invited guests, 1-5 additional players PP): 1,000 col
- Medium Wedding (Invited guests, 1-10 additional players PP): 2,000 col
- Large Wedding (Invite only/any number guests, PP/OP, player's decision): 3,000 col
- PK Access: 1,500 col
- Snack Table* (+1 food buff): 1,000 col per Player in attendance (including the marrying couple)
- Feast Table* (+2 food buffs): 1,500 col per Player in attendance (including the marrying couple)
- Banquet Table* (+3 food buffs): 2,250 col per Player in attendance (including the marrying couple)
*Players may select any cook enhancements to apply, which must be declared in the Thread Summary. Any players who eats from an enhanced table receive the listed buff(s) for a single thread they participate in afterwards within 30 days of the wedding's closure. Threads that benefit from this buff must have been started after the wedding's thread begins, and players claiming a buff must declare these buffs with a link to the wedding thread in their first post. Wedding food buffs do not stack with other food buffs.
The Rings
Players can either purchase a basic gold band (1,500 col each) or a custom ring with any appearance they desire (5,000 col each). Ring choices (appearance and ability) do not have to be identical between the two players. Each ring has one ability which must be declared in the Thread Summary. The abilities will not be active until the couple completes the <<Saying Vows>> Quest. Wedding Rings do not take up an equipment slot. Ring abilities are only active when a player is in the same thread with their spouse.
- Resolve: +(10*Tier) base health
- Driven: +(3*Tier) base energy
- Strong Will: +1 base damage
- Resilient: +(3*Tier) base mitigation
- Purity: (1) Safeguard Active at beginning of the thread (Cannot stack with Safeguard potion) | Safeguard blocks damage from the first successful attack that hits the player.
- Affectionate: Transfer 5% of your max health to your spouse (1 post cooldown)
NPCs:
<<James Aria>>

James Aria is the priest of one of the few uncorrupted, undefiled churches in Aincrad. His position on the first floor should come as no surprise. It seems that the developers wanted marriage to be an option even at the beginning of the game. Whether this was for gameplay or psychological reasons, nobody can say for sure.When players approach James about getting married, he will reply, "So you two wish to be married? That is wonderful to hear! We will need to discuss the details of your wedding such as location, the size of the wedding, food, as well as the wedding rings. I can also help you find someone to wed you, or I could do it myself if you'd like." Throughout the process, he will largely be a standard and non-combatant NPC. He will politely guide players through the decisions they will need to make in regards to the wedding, albeit with a slightly giddy attitude all the while.
Though a man of Cardinal, James is a stickler about payment. He will not haggle, and will not follow through with the plans without proper payment.
Epilogue:
SpoilerOnce James has been paid, a panel will populate before the betrothed couple heralding the completion of the quest, along with an alert that states the <<Saying Vows>> quest is now available to undertake.
-
Any Floor
<<Saying Vows>>
Party Limit determined by wedding size | 20+ Posts
Prerequisite: Must have completed <<Making Vows>> with the same players intending to wed
Repeatable only if divorced or attending another wedding.

Quest Rewards:
The Married Couple Receives:
- 300 Experience Points
- 1 Wedding Ring each (purchased during the <<Making Vows>> quest)
- Any presents or gifts received from the other players
POTENTIAL REWARDS | By partaking of buff foods at the reception
- Food buffs based on which food was consumed
Requirements:
-
Must have completed the <<Making Vows>> quest with the same two players intending to wed
- A link the the specific <<Making Vows>> quest being used as a prerequisite for this quest must be included in the first post.
- Roleplay the wedding ceremony.
- Identify any food (and corresponding buffs) offered at the reception, based on choices made in <<Making Vows>>
-
The thread summary must include:
- Any gifts presented to the happy couple
- Any lingering buffs received by each player from the reception
Summary:
The preparations have been made, and you're ready to present your love to the world. A ceremony has been called where you and your friends can celebrate this love together. There will be merriment, camaraderie, and joy to be shared among all - along with some snacks. James Aria or another qualified NPC stand waiting to officiate the marriage in front of all in attendance. A player can also officiate, if so requested. Following the ceremony, there is generally a reception where food is shared among the attendees and gifts are given to the happy couple.
Outline:
The floor, location, and number of guest players allowed in the thread depend on how large a wedding players bought during the <<Making Vows>> quest. Players are urged to roleplay the wedding out and strongly urged to read out their characters' vows. Upon receiving the rings, the officiator will activate their abilities, and they will be active from that point onward. Wedding rings do not take up an equipment slot. Married players share an inventory space so it is suggested that players work out how they wish to keep track of said inventory.
Epilogue:
SpoilerOnce the marriage has been officiated and the rings have been activated, a panel appears, congratulating the players and informing them of the quest's completion and any applicable rewards. Additional information will explain the shared inventory system.
-

<<Floor 04>>
The 4th Floor of Aincrad consists entirely of a snow-covered forest with massive evergreen trees that grow to be as tall as twenty five meters. Smaller cedar trees and countless other breeds of pine litter for the forest floor, creating a dense, snowy woodland. Generally speaking, the topography is a mixture of rolling hills and flatlands interspersed with rugged, snow-covered peaks along the outer rim of the floor. Those who manage to climb them, which is no small feat, are rewarded with a fantastic overview of the icy landscape that covers the entire floor.
Small rivers and lakes dot the floor's many valleys, but are nearly all frozen over. Frozen waterfalls, ice flows and dams are all common. Anyone who spends any time here quickly learns to test their footing before bearing weight, lest the very ground crack and break beneath their feet, or they suddenly find themselves swallowed by an unexpected drift of fine powder. Snow often falls several times a day, and the cloud-cover is near constant. The rare clear skies are taken by locals as omens of good times ahead. Blizzards are frequent and can swallow such hopes just as quickly. Though much of the underlying rock and stone is unchanging, the snow and ice atop it moves frequently making it hard to find your bearings or track a quarry.
The NPC inhabitants of this floor are all human. There is no centralized government here, and no defining social class structure. Everyone here lives in a state of isolation, with sparse houses and homesteads dotted throughout the landscape. The environment is harsh, but it has made the people hearty and resilient. The infinite winter forces a dependency on hunting and logging. Local trade is dominated by skins and furs, cured and smoked meats, and a wide variety of wood products. Despite the harsh environment, floor four seems especially popular among players looking to build their own home. NPC children split their time between chores and play, while their parents toil. Warm hearths and strong family bonds are commonplace, fueled by strong traditions of song and oral histories.
Many tales and local legends tell of <<Snowmaw the Carnivorous>>, a massive white-furred beast said to have stalked the forest, walking on two legs. Its strength was greater than a titan's and it had a mouth large enough to eat a human whole. It is said that no other villages exist on this level because Snowmaw devoured them all, laying was to all but Snowfrost. Only a warm fire and blanket, and going straight to sleep when your parent told you, could protect you from the beast. Parents tell the story, still, to keep their little ones from straying into the woods.
Main Settlement:
<<Snowfrost>>
Floor four's main settlement is known as "Snowfrost." It is a cozy collection of buildings and cottages that form a small village on the eastern side of the floor. Despite the frigid weather, the town is still rather lively. Many NPCs can be found wandering about. Shopkeepers, tradesmen and wandering merchants abound, especially given the small size of the town. Child NPCs often skate on the large frozen stream that cuts through the town, fed from nearby Frostbite Lake. Snowfall in Snowfrost is all but constant, littering the streets and buildings with a new layer of snow on the hour. The number of guards here is low, but they are all master huntsmen and not easily dismissed if challenged. Most shops sell common wares and essentials, but there is a strange shop located near the center of the town named Frosty's Cafe which sells hot chocolate and is reputed to offer Aincrad's best selection and favors of ice cream.
Other Locations
◉ « Frostbite Lake »
SpoilerThe Frostbite Lake is located approximately five hundred meters northwest of Snowfrost, nestled between the bases of two large mountains, nearly one hundred meters long and seventy five wide. Players favor the location as a spot to ice fish, skate, or even simply relax and enjoy the picturesque view of the mountains. Despite the area not being a safe zone, monsters rarely spawn in this area, allowing players to relax and enjoy themselves. That hasn't stopped a plethora of rumors from sprouting up over time. Some say that an amazing treasure lays beneath the ice, while others say a terrible beast lurks in the frozen waters.
◉ « Winter Wood »
Spoiler
A Snowy Forest, covering most of the fourth floor. Inhabited by many different kinds of animals and monsters, players spend most of their time within the Winter Wood while traveling. The ground is covered in a thick layer of snow as well as the Evergreen trees that blanket the massive area. a player might find the occasional NPC here, chopping wood or just walking around, but that is normally around Snowfrost Town where the monsters are scarce.
◉ « The Starglades »
Spoiler
The Starglades are an unguarded Safe Zone located approximately two hundred meters directly north of Snowfrost. It is, as its name would suggest, a glade in the middle of the otherwise dense forest. Although it seems unremarkable in the day, the true beauty of the location makes itself apparent at night, when openings in the forest canopy present players with a fantastic view of the night sky. No monsters spawn in the Starglades or immediate surrounding area, allowing it to be used for a place of respite during long hunting sessions in the wilderness.
◉ « Glacial Cove »
Spoiler
The Glacial Cove is an unusual, out of the way gem whose existence is not widely known. In its frozen state, the cove becomes something of an ice cave that glows a fluorescent shade of blue during the day due to incoming sunlight. It becomes a much darker shade when illuminated by moonlight during the night. The cove is home to large numbers of elite and high-level monsters, making it a relatively unsafe place to tread, but is rumored to contain many lost and valuable treasures.
Transportation
Snowshoes and sleds are the only truly reliable form of travel. While some of the locals have horses, the ever-shifting snow drifts cover any roads and paths and are too treacherous for riding animals, save for short journeys on rare clear days.
Common Mobs of Floor Four
Spoiler-
Ice Wolves - Wolves with pelts of pure white, normally hunting the Winter Woods with a small group. Their normal approach is to sneak up on players and ambush them from all sides. Many of the stronger ones have the ability to freeze an opponent.
- Locations: Anywhere
-
Bears - Roaming the woods are a few large bears that occasionally come out of their dens in search of food. Many of them can be found hunting for fish in the area where streams aren't frozen.
- Locations: Anywhere
-
Rabid Moose - Very strange creatures found within the woods which randomly charge in, attack players and then flee the scene. If a player rolls a LD lower than five, the Moose manages to escape and is unable to be attacked.
- Locations: Anywhere
-
Ice Drakes - Young scaled reptiles with sharp talons and the ability to spread an icy mist from their mouth. The scales covering their body are hard and provide surprisingly strong protection.
- Locations: <<Glacial Cove>>
-
Ice Elementals - A floating ball created purely of ice and magic. It floats around, attacking players by pelting them with large chunks of ice. All elementals have the ability to freeze players and are immune to Freeze effects and damage themselves. However, it is said that they take double damage from burn effects and Flame Auras.
- Locations: <<Glacial Cove>>
-
Frost Trolls - Large primal beasts conditioned to survive within the harshest conditions. They have extreme strength and fight by pummeling their opponents into the ground. However, they lack speed and intelligence.
- Locations: <<Glacial Cove>>, <<Labyrinth>>
Field Boss of Floor Four
Spoiler
<<Avalanche>><<Avalanche>> is an ice elemental found in the frozen tundra during a heavy snowstorm. While its origins are unknown, it is said to be slow but extremely powerful. Constructed entirely of ice, many have questioned how its existence is even possible. Towering at 15 feet tall, it is advised that only the most well-equipped Players dare take on this beast.
HP: 525/525 | MIT: 50 | DMG: 45 | FROSTBITE: 2 slots of T1 | ACC: 0 | EVA: -1
Abilities:
- Crystal Form | Avalanche will take no burn damage, but instead lose 5 MIT every time it would get burned. This effect stacks up to 3 times.
- Shard Sweep | On CD 6+, Avalanche will throw shards in a sweeping motion at its opponents, hitting everyone for 30 unmitigatable DMG.
- Clear Body | Immune to status conditions.
- Weapon Lock | Only Sword Arts of Rank 4 or lower may be used against this boss.
- Tier Lock | For the duration of the fight, all of the participants’ stats that scale with Tier are calculated as though they’re Tier 1. [DMG/MIT/BLEED enhancements etc.]
Drop:
“Snowfrost" (T1/Consumable/Single Use); Apply a slot of FROSTBITE to the user's weapon for a single thread.
<< Floor Four Labyrinth >>
The fourth floor's Labyrinth can be found at the northern edge of the level, where the Winter Wood ends. Here sits a massive mountain with a single opening that appears to lead directly to its heart. Unlike most other labyrinths, this one is a single large cavern carved out of the mountain's core. Visibility is dreadfully poor, limited as a powerful and eternal magical blizzard that blankets the entire chamber in a heavy white veil of blowing snow. Crosswinds batter anyone who enters the space, disorienting them and threatening to steal away their footing. Five tall, granite obelisks stand at equidistant points in the circular cavern. They can be climbed, with some skill and effort, to gain vantage over the strange magical storm and make their way back to the exit.
<<Snowmaw the Carnivorous>> is long dead, but many of his <<Frost Troll>> minions still wander through the storm seeking unsuspecting victims to be offered as sacrifices to their departed master. Little else remains here, save death and a lingering sense of devouring hunger that still howls in the winds.
Quests:
<<The Night's King Trilogy>>
<<Absolute Zero>>
<<DHA: True Family>>
Boss Fight: Crimson Flames Ascending to F5 -
Ice Wolves - Wolves with pelts of pure white, normally hunting the Winter Woods with a small group. Their normal approach is to sneak up on players and ambush them from all sides. Many of the stronger ones have the ability to freeze an opponent.
-

<<Floor 03>>
The 3rd Floor of Aincrad consists primarily of expansive plains and dense forests, laced together by long winding rivers. Because the third floor is so close to the bottom of the Castle, it is similar to its predecessors in that it is primarily round in shape and rivals them in size, measuring just shy of ten kilometers in diameter. Most of the floor's central areas are flat, with the occasional grassy knoll breaking up the topography. High mountains ring the outer edge of the floor, but even the most acrobatic players would find their slopes too sheer to scale. Roughly half of the flat lands are covered by thick and ancient deciduous forests that change to coniferous trees as they climb up into the mountains. Dozens of smaller streams run from the surrounding mountains into slow moving rivers that pool into a large central lake. No one seems to know where it lets out from there.
Two different races of NPCs dominate the third floor. The first kind is known as the Faune, who are human-like in appearance, save that they have the long fur-covered ears of a rabbit. These provide them with heightened hearing, making it nearly impossible to sneak up on them. Faune also have long fingers with claw-like nails for self-defense and a distinct ability to communicate with the entire forest using some form of six sense. Their connection to their forest realms enable them uncanny ability to detect uninvited guests within their forest. They also have some manner of nature-based magic that allows them to manipulate plant-life. Ordinarily friendly, they have become cautious of the human players. The Faune live a quiet lifestyle in communion with nature. Harming the forest in any way is a crime equal to that of murder in their eyes.
The second race of NPCs is far less friendly than the first. The insidious Fae are creatures with a spiritual connection to nature and dark magics. Their appearances vary greatly, possibly including bark-like hide, wings, horns, and a wide range of oddly colored skin. Generally slighter of build and stature than humans, their most notable feature are their eyes: one is always brightly-colored and the other dark. Fae are often considered beautiful and graceful creatures, but they are also equally cruel and wicked. They seek only to benefit themselves and their king, and are not above using their wiles to get whatever they want. Fae often lurk outside of the floor's settlements where they prey on the unsuspecting players, tricking or provoking them to lure them into the woods, where than can more easily be ambushed. Unable to knowingly lie, they have mastered the art of double-speak, using cunning and clever deceit to achieve their goals.
The King of the Fae, Nyx, once plotted to take over the entire floor. He and a large group of his Fae followers used their blood to awaken a thousand-year-old treant named <<Blightwood the Maverick>>. The creature was set loose to destroy their enemies, with the arrogant expectation that they could subdue it and make it slumber again once their goals were achieved. Blightwood had no intentions of being their puppet. He drove the Fae from their homeland in the Dark Thicket and crushed any who sought to remain or return. Nyx moved his court from the Dark Thicket and created another home that he called Faerie. His people kept a sentinel watch over the Dark Thicket to conceal their lord's shame and embarrassment and prevent its revelation. Blightwood has since been slain, but the Fae have yet to reclaim their ancestral lands.
Main Settlement:
<<Aruyt>>
The floor's main settlement is known as "Aruyt", a large community found up in the trees in the eastern forests. It is the home to the Faune. Many small huts are open and available for players to stay the night, offering modest comfort and simple amenities. Large branches and rope bridges grant access to other areas of the town. Most are only are wide enough for two people to walk abreast. The locals frequently caution new arrivals, lest they inadvertently find themselves falling into the shallow pools below. Aruyt had only two direct access points: one a the north and the other to the south. These entrances are large bridge-like trunks that access for carts and wagons onto larger trading platforms near each bridge. Both are heavily guarded by armed Faunes who wield daggers and hunting bows. Crafts and wares sold in the markets tend to be made of wood and other forest products, reflecting local resources and Faune cultural stylings. Humans are relatively rare here, and often treated as bit of an exotic oddity attracting curiosity and scorn in measure equal to the NPCs' experiences or programming.
Sub-Settlements:
◉ « Town of Flora »
SpoilerA homely village situated in the southern part of the floor. The settlement gets its name from the colorful fields of delilahs that surround it on every side, only broken by barely cobbled roads leading towards other nearby points of interest. The village is quaint and reminiscent of an old medieval town. Buildings are tightly packed around a central square, then quickly become sparse beyond it. Most are made of heavy timbers with some aged stonework covered in moss and vines. Thatch roofs and wattle and daub are commonplace, with clay tiles reserved for the most important structures. Faune and Fae both live here, most being exiles or the descendants of exiles from their ancestral homes. The Fae living here mostly keep to themselves, but unsurprisingly they are among the wealthiest in the town.
◉ « Faerie »
Spoiler
Faerie is the recently-established center to the relocated Fae court. After fleeing from Blightwood's takeover of the Dark Thicket, the Fae fled north in search of a new home. Hidden beyond the eponymously named 'Gates of Fae', players will find a beautiful place unlike any other on this floor. During the day, the sun reflects off a beautiful stream that flows through the center of a town that might be more aptly called a marvel. Beauty abounds in every corner of Faerie. Nightly, the unique Nightingbloom flowers open and emit a soft blue light that shed a twilight radiance about the entire area. The Fae dance gracefully amidst their realm throughout the night, eating, drinking and playing merrily. Players who manage to reach this realm may join in the nightly rituals and celebration, but the Faune warn against eating or drinking any from any Fae feasts. If consumed, a player may fall asleep for days at a time depending on how much consumed. When they awake again, they will find themselves in a dark cavern found in the deepest reaches of Faerie. Above those caverns, at the center of the Fae realm, lies a small castle where the Fae King Nyx rules over his people. He is rumored to have served as king for over two centuries, as Fae do not die of old age and remain young forever, unless slain.
Other Locations
◉ « Forest of Wavering Mist »
Spoiler
A large forest stretching the span East of Flora to the outskirts of Aruyt. This section of the floor is made up of huge and ancient trees that are perpetually surrounded by thick and heavy mists. Temperatures here are typically much colder than throughout the rest of the floor. The forest is also strewn with treacherous paths that move with a random malevolence, seeking to confuse and misdirect any to unfortunate enough to wander them. Monsters within the forest then prey upon the lost. The occasional Fae can also be found here as well, joyfully toying and tricking visitors without ever engaging with them directly. Some claim that an ancient pact between the Fae of the forest's fouler spirits is the source of their dark magics.
◉ « Spider Queen's Nest »
Spoiler
In the deepest, darkest reaches of the Forest of Wavering Mist is an area with large spiderwebs blanketing the trees. They are barely visible through the lingering fog and often discovered too late. At the center of this, players can find a very large respawning mob called the <<Spider Queen>>. As soon as a player kills this mob, an egg in the nest will hatch and within the hour a new full grown Spider Queen will have grown.
◉ « The Lake Below »
Spoiler
A shallow lake found at the base of the giant trees below Aruyt. Players unfortunate enough to misstep on one of the upper branches or fall from a platform or rope bridge may soon find themselves plunging into it. The lake is actually more of a lagoon on the eastern edge of the floor's central body of water, where all of the floor's river pool. It is home to many different forms of wildlife and a popular location for fishing. Players will scarcely find any mobs here and will never find a Fae. However, the materials gathered here are in abundance and they may occasionally find items dropped by the Faune that fell into the lake.
◉ « Cavern of Faeries »
Spoiler
A very large, dimly lit cavernous area found in the deepest reaches of Faerie. Any players who awaken after consuming Fae food or drink will find themselves in the depths of this cavern. As they try to find their way out, players will discover the less appealing side of the Fae. Numerous Faune captives are held here, locked in magically sealed cages and cells. Fae regularly patrol the area, knowing full well that those who partook of their feasts will inevitably appear here. They attack and capture anything and anyone they find. Exploring the tunnels can reveal abominations of magic as the Fae prey upon their captives, warping their bodies and minds into hideous creatures of destruction. These creatures are known as the Twisted. What part they play in the Fae King's malefic machinations remains to be seen.
Transportation
Faune would heavily frown upon using any animal for any form of work, so mounts and beasts of burden are rare here. Teams of Faune sometimes pull carts and wagons themselves, but woven baskets are preferred for transporting goods. Roads and trails are plentiful in the open plains, but grow significantly scarcer in the wooded regions.
Common Mobs of Floor Three
Spoiler-
Roaring Wolf - Medium sized yellow wolves that often hunt in packs. When they reach half health they howl out a cry for help, attracting even more wolves to the area.
- Locations: Anywhere, most often at night or in dark places.
-
Thicket Spider - A type arachnid who is known to ambush players by falling down on top of them from trees and biting them with their venomous fangs.
- Locations: <<Forest of Wavering Mist>>, <<Dark Thicket>>
-
Mountain Lion - Feline monsters known for hiding in waiting for susceptible prey to pass through.
- Locations: Anywhere near the outer ring of mountains.
-
Fae - While they can be non-hostile, many Fae out of settlements can be very hostile. Some may try to poke fun by tricking and deceiving players, other take a more direct approach. Brilliant, quick, and strong, Fae are very hard mobs to deal with. They wield long, slender blades much like those used by the Faune. They also are known to occasionally use dark magic to spin a battle into their favor.
- Locations: <<Forest of Wavering Mist>>, <<Dark Thicket>>, anywhere in or near Faerie.
-
Twisted - Once Faune, these creatures are hideous creations warped by the use of dark magic. The Fae have captured Faune and used magic to twist their mind and bodies into creatures whose only intent is to destroy. They are very powerful and fast, using their bare hands and claws to rip through opponents.
- Locations: <<Cavern of Faerie>>
Field Boss of Floor Three
Spoiler
<<Dark Elf>>
<<Dark Elf>> is an elf, a fugitive to his own kind. He was cursed with darkness for meddling in the shadows and has been dishonored by his tribe that fled far away as mass numbers of players began to move into the area. Leaving him behind, he lives in spite to kill all who cross him. He moves swiftly and fights with great precision and his talent is notable. However, he has poor vitality.
HP: 400/400 | MIT: 30 | DMG: 30 | ACC: 1 | EVA: 0
Abilities:
- Elf’s Wit | On LD 15+, the Dark Elf will attack the target with the lowest hate instead.
- Parry | On CD 6+, Dark Elf will prepare to parry the next attack, taking 50% less damage (rounded down).
- Weapon Lock | Only Sword Arts of Rank 3 or lower may be used against this boss.
- Tier Lock | For the duration of the fight, all of the participants’ stats that scale with Tier are calculated as though they’re Tier 1. [DMG/MIT/BLEED enhancements etc.]
Drop:
“Elven Armor Salve" (T1/Consumable/Re-usable); Once applied to the user’s armor, all attacks they perform will generate +1 hate. Does not stack with Fighting Spirit. [Misses generate 1 hate, hits 2 hate, and crits 3 hate.]
<< Floor Three Labyrinth >>
Called <<The Dark Thicket>> by all inhabitants of the floor, this place use to be the home to the Fae before Nyx had <<Blightwood the Maverick>> summoned. The labyrinth itself is a rather large maze. As the name suggests, the walls of the labyrinth are made of tightly woven together trees with thorns. The boss room remains at the center of the thicket, inside what use to be Nyx's castle. The place once looked much better, but the Fae used magic to make it harder for anyone to get to the center of the thicket. The many winding turns now lead wandering adventurers in the wrong direction or into a Fae ambush.
The ceiling of the labyrinth is covered in a layer of dead grass that blocks most sunlight from reaching to ground level. The air is cold and dry and becomes even colder as you near the center. Illusions are commonplace and actively seek to delude, deceive and defeat those wandering the grounds. Fae still actively patrol the area. Anyone unfortunate enough to be captured will be sent to the Caverns of Faerie for 'repurposing.'
Quests:
<<Captured>>
<<Search For The Hoya>>
<<DHA: Lost Blessings & Ancient Evils>>
Boss Fight: << Escape from 3rd >> -
Roaring Wolf - Medium sized yellow wolves that often hunt in packs. When they reach half health they howl out a cry for help, attracting even more wolves to the area.
-
<<Floor 02>>
The 2nd Floor of Aincrad is vast and mountainous. Being close to the base of the game's overall tower structure means that it is very close in size and breadth to the first floor. It is likewise circular and nearly ten kilometers in diameter. The majority of the mountains include lush plateaus, tablelands and mesas with countless rivers of varying sizes cutting through and between them. The flora and fauna are not quite as diverse as those on the first floor, and most of the wilder areas are also overrun by various forms of giant insect. Tall pine forests cover the mountains and define large valleys and open plains near wide-flowing rivers.
NPC Inhabitants of this floor are all human and the majority of them keep to themselves. While considered to be generally safe, bandits and thieves remain plentiful in poorer areas and along isolated stretches of road. Most NPCs work on farms or tend market stalls and shops, but the overall sense is one of rural comfort and subsistence living. Wealthy NPCs are rarely seen beyond their palatial houses, if they bother to come out at all. Guards patrol the settlements and major highways, always on high-alert searching for hostile monsters and players alike. Minor scuffles, squabbles and entanglements are not unusual, but local authorities respond quickly before things can get out of hand.
There is one place where the NPCs still fear to tread: the spiral mountain. According to rumors, a great beast lives upon the summit, capable of crushing an entire town flat. The locals built their cities of stone and surrounded them with walls in case the ever beast decided to leave its mountain. <<Armadelon the Crusher>> was an insanely large armadillidiidae that created the ruts of the spiral mountain. Foolishly, the NPCs attacked it themselves once before. They were defeated by its near-impregnable defenses and crushing power. Local NPCs still do not believe the players defeated such a monster and remain in constant fear of the "Day of the Crusher" a day where the Crusher decides to destroy every human civilization.
Main Settlement:
<<Urbus>>
The main settlement of the 2nd Floor is known as "Urbus". The three hundred meter wide city finds itself on a butte surrounded by a small forest. With only one entrance, it is easily defended from monsters and hostile players by the guards. There are several different amenities in the city, including inns, marketplaces, and even a church for players of a more spiritual mien. In the center of the town there is a large open ring of hard-packed dirt, limned by the edges of the cobblestone streets. This area is well-known for hosting duels and wide enough to accommodate the crowds that often gather to watch.
A concealed passage through the wall, located at the rear of the town, allows for more clandestine access, though reaching it up the cliff face can be a daunting task. Most of the guards of the town watch the main entrance and center, so orange-flagged players can easily move around in the back alleys and even enter less scrupulous locales. The Rusty Dagger tavern is known for being such a hangout for rogue type players and information brokers. The tavern is owned by a man named Rex - an NPC - who serves the drinks and keeps the patrons in order. Rex does not tolerate rough housing and will kick out any players who cause problems. As long as one treats and pays him well he will serve you well.
Sub-Settlements:
◉ « Marome Village »
Spoiler
The closest settlement to Urbus is known as Marome. Although it is a guarded safe zone, it does not offer the same commodities as typical villages do. In reality, Marome is a large stone fortress, complete with a moat and drawbridge, surrounded by a small farming hamlet with long rolling fields of crops. The outermost ring of the fortress is typically open to the players and offers a small armorer and tailor's shop, but the innermost layers remain unseen and locked up.
◉ « Taran Village »
Spoiler
The furthest settlement from Urbus is Taran, a village comprised entirely of stone huts with slate roofs and lots partitioned with low rubblestone walls. The only exclusion to this design choice is the furniture, which are made from various types of wood and other materials. The small village is surrounded by large stone pillars, with heavily armored guards standing watch. The village, being a guarded safe zone, prevents player-killers from entering. Players can expect to be questioned of their business before entering the town.
Other Locations
◉ « Tablelands »
Spoiler
A series of large flatland areas to the West of Urbus, located atop high cliffs and nestled between surrounding hills. Each tableland is separated from its neighbors by deep gorges or sheer cliffs. Typically arid and rocky with sparse vegetation, the high ground area offer little refuge for mobs or players alike. Water sources here are scarce and the terrain has an especially hardy appearance as everything present must fight stubbornly to survive. Monsters in the tablelands are often much stronger than their counterparts elsewhere on the floor, as they struggle to survive in this near wasteland. Lower-leveled players can farm these areas, but should avoid the areas nearest the cliffs and gorges, where a simply slip and fall might easily prove fatal.
◉ « Rough Mountains »
Spoiler
Most of the floor's terrain consists of a chain of table-top mountains, many of them covered with vegetation. They include the Spiral Mountain, which rises high above the rest. Small paths and trails can be found throughout, but are often rocky and hard to traverse. The mountains are dotted with neutral critters and lower-leveled monsters, but are also known to conceal small bandits camps and the occasional elite animal mob. The easiest way for a player to scale up the side of the mountains is to use the indentions made by climbers pickaxes, rope ladders or the rare lift operated for a toll.
◉ « High Fields of Crossing »
Spoiler
The High Fields of Crossing is located atop one of the numerous tablelands, approximately half an hour's walk north of Urbus. The area itself is widely regarded as a safe zone devoid of monsters, although there are no NPC guards to enforce this status. Orange players can roam freely, though they may bear judgement and discomfort under the watchful gaze of their fellows. The mountaintop is covered in a wide variety of flora, and is incredibly colorful and peaceful. It is the location of the Flora Festival every spring, and sections of the area can be rented by players for events.
◉ « Crystal Cave»
Spoiler
A large cave of glowing colored crystals can be found a short distance from Urbus. The air inside is cool and damp. Despite being visually appealing, the paths in the area are often rocky and slick. The cave is spacious, allowing players to easily move inside and travel about. Many pools of fresh water can be found inside, unhabituated by monsters or fish. The only creatures that can be found inside are goblins and the occasional large spider. The crystals are known to be mined and used as colorful light sources.
Transportation
There is protected transportation to every settlement of the Second Floor; however, there is not transportation to any other area of the floor. Protected Transportation is provided by ostrich-drawn carriages. The carriages can pull up to 4 players and The carriage is covered protecting players form the elements.
Common Mobs of Floor Two
Spoiler-
Giant Insects - Giant bugs can be found almost everywhere on the floor, either crawling around on the ground or flying in the air. Ants, beetles, cicadas, and many other bugs.
- Locations: Throughout the floor.
-
Windwasps - Wasps that measure two feet in length. They are dark in color with green stripes and a stinger about half a foot in length. They are known for being essential to awakening the <<Windwasp Queen>>.
- Locations: <<Rough Mountains>>
-
Wild Ox - Powerful bull-like beasts capable of breaking through solid-stone while charging. Luckily, they are non-hostile unless provoked.
- Locations: <<Tablelands>>
-
Goblin - Small, green, humanoid creatures lacking in technological advancement. While individually they are quite weak, they often travel and fight in groups. Wielding small daggers and spears, they are known to occasionally travel from their caves and hunt wildlife, harass players and even occasionally challenge players.
- Locations: Throughout the floor.
Field Boss of Floor Two
Spoiler
<<The Wasp Queen>>
<<The Wasp Queen>> is a large wasp measuring four feet in height. With quick speeds and a stinger that can provide flurries of attacks, this field boss is more than capable of taking out scores of lower-levelled Players. It assaults Players after its very large hive is disturbed.
HP: 315/315 | MIT: 20 | DMG: 35 | ACC: 0 | EVA: 1
Abilities:
- Royal Stinger | On CD 6+, the Queen’s attacks will ignore 50% of the target’s MIT (rounded up).
- Authority | Every two turns, the Queen’s DMG will increase by 5.
- Weapon Lock | Only Sword Arts of Rank 3 or lower may be used against this boss.
- Tier Lock | For the duration of the fight, all of the participants’ stats that scale with Tier are calculated as though they’re Tier 1. [DMG/MIT/BLEED enhancements etc.]
Drop:
“Matriarch’s Stinger" (T1/Consumable/Single Use); Increases Multiplier of SA attacks by 1 for the duration of one thread. ([DMG*(SA Multiplier)] becomes [DMG*(SA Multiplier + 1)])
« Floor Two Labyrinth »
The floor's labyrinth is contained within the Spiral Mountain. It appears to be a series of natural caverns with connecting burrows and tunnels created by the native giant insects. They vary considerable in size, finish and stability, occasionally forcing players to squeeze through in single file or on their hands and knees.
Players may choose one of two ways to scale to the top of the labyrinth. They can climb up the spiraling slope created by the rolling of the giant armadillidiidae monsters that infest the peak. If the players choose this route, they will be will have a direct path upward, but constantly have to find shelter from the rolling rocks or enormous pill bugs that come down the slope from the top of the labyrinth. The second option is to take the small tunnels created by the burrowing monsters. If players take the correct tunnels, they should find upward slopes that will eventually lead them to the peak of the mountain.
The labyrinth contains no traps for players to stumble into, but many dead ends within the tunnels. Luckily, the tunnels are lit with the same glowing crystals found inside the crystal cave, though these are far too large for players to take, and are immortal objects immune to damage. Mobs scuttle about the tunnels, but are attracted to sound and vibrations. If a player were to be wearing metal armor and scrape against a wall or allow their weapon to clang against something it could draw unwanted attention to the area. The same pitfall can be used to create clever distractions by clever players.
Quests:
<<Let There Be Light>>
<<Breaking The Unbreakable>>
<<DHA: The Demon Of The Mountains>>
Boss Fight: The Second? 'Cloaked man' Revealed -
Giant Insects - Giant bugs can be found almost everywhere on the floor, either crawling around on the ground or flying in the air. Ants, beetles, cicadas, and many other bugs.
-

<<Floor 01>>
The first floor of Aincrad is geographically the largest floor. It is almost completely circular with a diameter of ten kilometers, or about eighty square kilometers. Unlike the higher floors of Aincrad, the first floor does not have a particular theme or dominant geography. As the starting location of all new players, the great expanse of the first floor is quite diverse, with biomes stretching from large plains and grasslands, to low mountains, to lakes of varying size and shape, and large deciduous forests that change with the seasons.
The initial NPC inhabitants of this floor are average humans, many dedicating their life to their work. Due to their way of life, there are few NPCs who live in poverty. Hardly ever will any player find an NPC roaming around without any goal in mind. They are known for running many shops and inns located around the starting city. NPCs from the <<Town of Beginnings>> will not be found outside the city, but a player may occasionally find a stray hunter from <<Horukna>> in the fields. Overall the NPCs of this floor are very warm and welcoming of players of all sorts. Conflict is rare on this floor, though guards do have a heavy presence in the two towns, ensuring that the peace is kept within their walls. Despite the heavy security, there are rogue NPCs who help orange players hide in the cities; as long as they don’t do anything foolish or make themselves known, they are safe.
Perhaps Kayaba had a sick sense of humor, or perhaps it was simply a coincidence, but the bane of low-level players everywhere ended up as the first floor's labyrinth guardian. The enormous Grath guarded the way to the floor boss's room, but NPCs and players alike swore they saw him roaming freely across the plains. Some even insisted the beast traveled with a sounder of smaller boars, all obeying his will, though that was never proven. When brave adventurers finally slain Grath, a monument was erected in his honor. Despite his death, old-timers enjoy swapping stories of this mysterious creature, affectionately nicknamed "Swine God."
Main Settlement:
<<Town of Beginnings>>

The Starting City, more commonly known as the "Town of Beginnings", is located on the southern end of the floor. It rests over the edge of the floating castle. The metropolis has a diameter of approximately 1 kilometer and is the focal point of the floor, featuring the teleport gate in the central plaza. The city wall forms a semi-circle to the north. Grasslands surround the Town of Beginnings on all sides, and are populated primarily by boar and wolf-type monsters. The city itself houses nearly all commodities that a player could ever find themselves needing, but offers little in the way of comfort. Inns and taverns are plentiful though cheap and cramped. Markets are vast and shops are in generous abundance, yet the products they sell are often low quality and inexpensive. To the northwest of the Town of Beginnings, there is a large deciduous forest region. To the northeast is a lake region, filled with bodies of water of varying size and shape. Players must pass through either of the two areas before reaching a significantly more dangerous mountainous region containing ruins, valleys, and more difficult monsters.
Sub-Settlements:
◉ « Horunka »
Spoiler
Horunka is a village located to the northwest of Starting City. It consists of ten buildings, including an inn, weapon shop, and tool shop, so it can serve as a hunting base. The town is surrounded by a dense forest, with one path leading into the village from the Town of Beginnings to the south, and one path leading out of the village and to the north. There are seven private NPC houses, one of which is a two-story building that offers the «Secret Medicine of the Forest» quest.
◉ « Tolbana »
Spoiler
Tolbana is the second largest town on the 1st Floor of Aincrad with a size of 200 meters from edge to edge. The city is surrounded by large castle walls, and is known for its white-walled windmill towers. Tolbana is also the closest town to the 1st Floor's Labyrinth, situated in a valley at a walking distance of thirty minutes. The settlement is made up of several NPC houses, eateries, and lodging accommodations for players. It is filled with water fountains of varying sizes, although the main plaza, known as «Fountain Square», has the largest. Tolbana also houses an amphitheater-like meeting place, which is a common venue for duels and party gatherings.
Other Locations:
◉ « The Stone Valley »
Spoiler:max_bytes(150000):strip_icc()/GettyImages-545876095-59b71fb603f4020010db63b2.jpg)
When adventuring to the west of the Floor, players can find a valley consisting of rivers and forests surrounded by a low mountain range. The NPCs normally stay out of this area, as it is ripe with monsters. However, the area is full of vegetation and life perfect for wildlife to thrive. On the top of the mountain ranges, players may find that the temperature has hardly dropped, though the rocky area makes it harder to trek. In the westernmost area of the Stone Valley, one will find a large waterfall, filling the rivers that branch throughout the valley. The main stream from this waterfall cuts through the largest forest on the floor. This is widely known for being the location of the <<Secret Medicine of the Forest>> quest. This area takes up a large portion of the floor, and consists of many ecosystems.
◉ « Plains »
Spoiler
Plains stretch over much of the floor, starting from just outside the walls of the <<Town of Beginnings>>. Many low-leveled players spend their time farming the weakest monsters in these areas. The grasslands contains many different attractions, such as ponds, caves, and incredible views of the sky itself. Floating chunks of land provide varying elevations for hunting opportunities.
◉ « Titan's Peak »
Spoiler
Titan's Peak is the summit of Mount Katen. The altitude makes movement a bit sluggish, but there are no monsters on this summit. It is extremely high up, which gives a grand view of the entire floor. For those brave enough to lean over the edge, ledges jut haphazardly out of the cliff-face. Reaching one of these platforms will likely cost a player health, but will save them from dying to fall damage. It is said that duels have taken place on these small, dangerous platforms.
◉ « Monument to Grath »
Spoiler
This enormous statue stands at nearly twenty feet tall, and can be found a short distance from the Town of Beginnings. It gazes over the plains where many claimed to have seen it before it's untimely demise. The monument was built to celebrate the fall of Grath, the players' first labyrinth guardian. Certainly an odd creation, many consider it a reminder to low-level players to be wary of boars.
Transportation
Both Protected and Unprotected modes of transportation can be found from the <<Town of Beginnings>> and <<Tolbana>>, but there is only unprotected transportation coming from <<Horunka>>. Protected Transport is a horse-drawn carriage capable of transporting up to 6 players at a time. The carriage is covered, also protecting players from the elements. Unprotected Transport is provided by a lone horse, capable of taking two players at a time.
Common Mobs of Floor One
Spoiler-
Boar - Boars are by far the weakest monsters on the floor. They tend to mind their own business until a player comes close enough or provokes them. They primarily attack by charging their foe, and if in a group, they can sometimes create a stampede.
- Locations: <<Plains>>
-
Wolf - Wolves are the primary predator within the forests, as they hunt wildlife, boars and players. They will keep their distance from players who are a very high level, as they tend to prey on the weaker targets. They rarely travel alone, and prefer to strike as a pack.
- Locations: <<Plains>>, <<The Stone Valley>>
-
Wargs - Wargs are larger and stronger than normal wolves, and tend to have a more monstrous look to them. Unlike wolves, Wargs will attack anyone and anything, regardless of level. They also travel either alone, or with a very small group.
- Locations: <<The Stone Valley>>
-
Giant Worms - Giant worms typically live in the mountains and stone valleys, burrowing through the rock, and grinding it into soft dirt. This has caused certain areas to become dangerous to walk on. Normally, they don’t interact with players unless they are in the worm's way.
- Locations: <<The Stone Valley>>
-
Giant Insects - Along with wolves, wargs, boars and other wildlife, giant insects can be found crawling around the first floor. Examples include beetles, ants, centipedes, etc. These insects usually target each other, but there is a small chance they will target the players instead.
- Locations: <<The Stone Valley>>
-
Slimes - Found only in the wetlands, slimes hide in the muddy ground, or in the water itself. They tend to try and latch onto players, and will cause damage if they make contact with skin. While they do not appear to be affected by physical attacks at first, they are relatively weak creatures.
- Locations: <<The Stone Valley>>
Field Boss of Floor One
Spoiler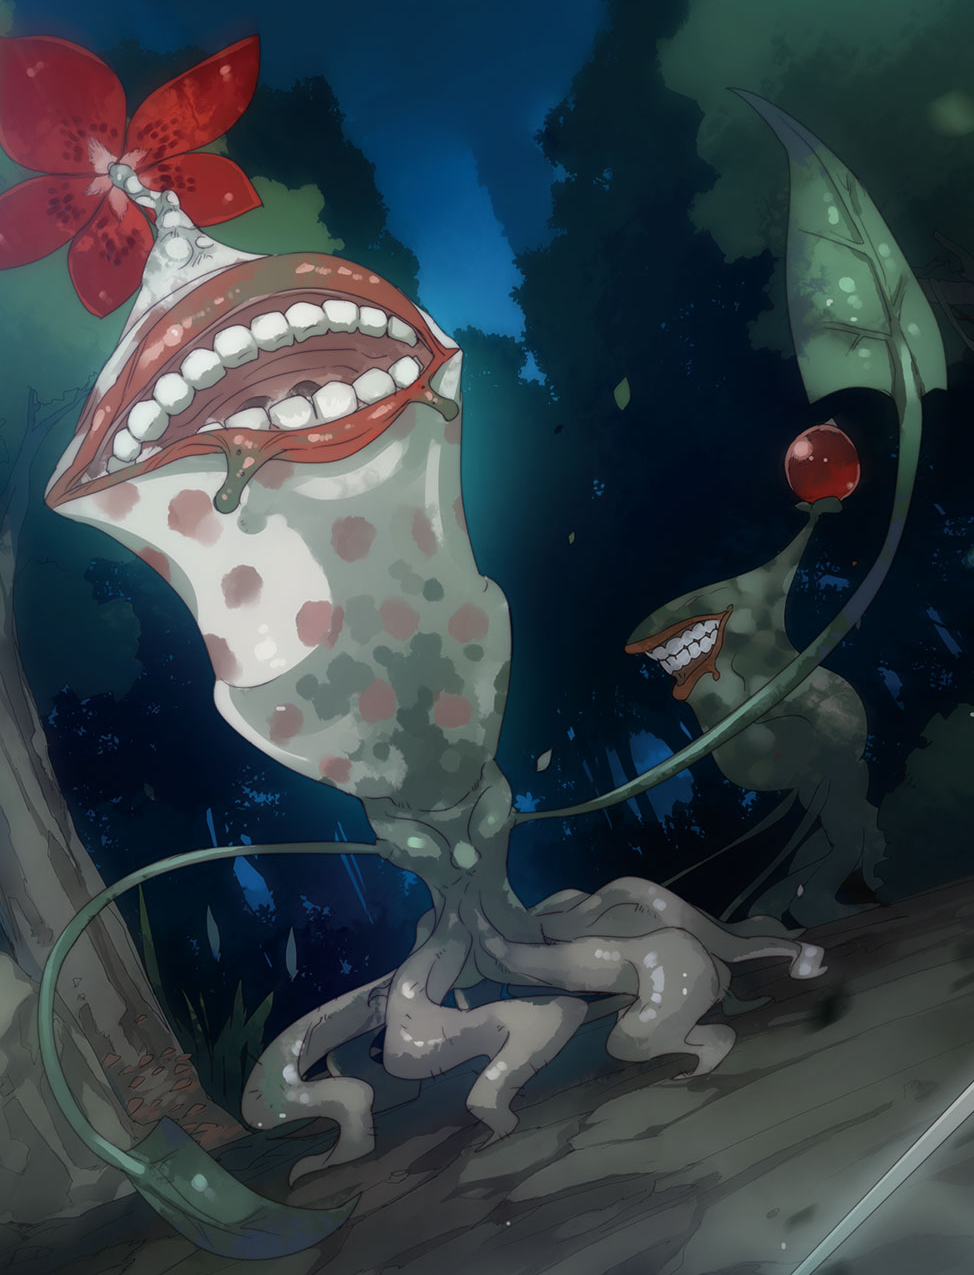
<<Nepent Variant>>
The <<Nepent Variant>> is a one and a half meter tall man-eating shrubbery consisting mostly of vines. It uses two long vines with razor sharp leaves at the ends as weapons to cut its opponents. They are rare and usually travel in groups of normal nepents without the large red flower or fruit atop of their head. Such flowers and fruits can be used to make potions to heal injuries.
HP: 200/200 | MIT: 10 | DMG: 25 | ACC: 1 | EVA: 0
Abilities:
- Plant Frenzy | On MD 9-10, the Nepent will strike all party members for 35 DMG.
- Photosynthesis | On CD 9-12, the Nepent will restore 15 HP and gain 5 MIT until its next turn.
- Weapon Lock | Only Sword Arts of Rank 2 or lower may be used against this boss.
- Tier Lock | For the duration of the fight, all of the participants’ stats that scale with Tier are calculated as though they’re Tier 1. [DMG/MIT/BLEED enhancements etc.]
Drop:
“Nepent’s Ovule" (T1/Consumable/Re-usable); Generates +1 hate for up to 4 mobs as a post action. Unaffected by Taunt and Fighting Spirit. Must be equipped in a Battle Ready slot.
« Floor One Labyrinth »
A dungeon consisting of twenty floors, with the boss room waiting at the end. The dungeon itself is 300 meters wide and 100 meters tall, providing plenty of space for fighting. Each floor consists of a maze-like structure, many paths leading to a dead-end and only one coming to the staircase up to the next floor.
The layout of each of the Labyrinths floors remains relatively the same throughout it. The floors are covered in a lush green grass and the paths are made out by hallowed trees. These trees are close enough together so that players can't make it around them and must stick to the given path. Although the sun isn't visible, in every floor there appears to be natural lighting. A cool breeze wafts through the labyrinth and despite there being a floor above the players can always see a sky. Occasionally, a player will find a large tree in the center of a path. More powerful versions of the floor's various enemies spawn here, including an unusually high number of boars.
Quests:
<<The First Lessons>>
<<Earning A Living>>
<<Feeding Your Enemy>>
<<Training Your Friend>>
<<Making Vows>>
<<Saying Vows>>
<<Nature's Treasure>>
<<Scents Of The Wild: Keepers Of Nature>>
<<SOTW: Mother Nature>>
<<Dragon Hunter's Anthology: Diary Of The Dragon Huntsman>>
<<Redemption>>
Boss Fight: The First? Dealing with Bandits -
Boar - Boars are by far the weakest monsters on the floor. They tend to mind their own business until a player comes close enough or provokes them. They primarily attack by charging their foe, and if in a group, they can sometimes create a stampede.
-
«Teleport Gate»


Note: ◉ & ◉ signify whether or not mobs spawn in a location, and if a player can be killed there.
Orange Players are only hindered by the guards in established cities. They may still enter these "safe zones." -
Floor 1
<<Redemption>>
Party Limit: 1 | 20+ Posts
Be advised, this quest is non-repeatable. You cannot revert an Orange Cursor back to Green more than once.

Quest Rewards:
- Player's Orange Cursor reverts to Green.
Requirements:
- Player must have an orange cursor and be above level fifteen or the events won't trigger.
- Player must roleplay the conversation with <<Void>>.
- Player must roleplay reliving their past crimes, those they've wronged and hurt, and the guilt they feel.
Summary:
Originally just rumor, the quest known as <<Redemption>> has now become publicly common knowledge to most players. The quest in which a player can be rid of their orange cursor, at long last. The player travels to a specific set of coordinates and finds themselves in a graveyard. The sky quickly grows dark as clouds gather the closer the player is to the cemetery, until the land becomes dark and gloomy. Sometimes it rains, and sometimes it doesn't. Rumor has it that the quantity and manner of rain is based on how guilty and sad people are while they're there. In the center of the graveyard, a cloaked figure can be found. Its hands are folded together inside its sleeves, and its face is blocked by darkness. To most players, it is silent and does not respond to their statements or questions. To players with orange cursors, however, it will turn to look upon them, knowing why they came. Speaking with an echoing, distant voice, it asks them the crucial question: "Do you seek redemption?" Should the player accept the quest, <<Void>> will lead the player down a lonesome cobblestone path to an another location.
The journey down the path is a dreary, depressing, ominous and foreboding one, and takes far longer than the player feels it should. The lifeless trees and withered flowers reek of death. The night sky is devoid of any star or moon, and a thick, dark fog hugs the path as a warning to not stray from it. The air will feel ice cold, and occasional whispers can be heard. As the player makes their way down this path, a feeling of nervous anxiety fills their being. It feels as if the very earth beneath their feet resented their passage.
As the player nears the end of this path, the scenery slowly and gradually alters, until it resembles the location of the player's very first crime. By the time the player reaches this location, <<Void>> will have slipped away unnoticed. Searching for the mysterious figure, the player will instead see the victim(s) of their first crime(s). They will also see themselves, preparing to steal, assault or murder the victim(s). The scene will play out with the player helpless to change anything. If they attempt to stop, alter or escape the scene before them, the scene will reset (or the player will find themselves in the same location again) stuck in a loop until they have witnessed their transgressions from the outside. This will occur for each and every crime the player has committed within Aincrad, the scenery, figures and events appearing exactly as they occurred, and with each scene <<Void>>'s voice will echo from the player's surroundings, exploiting their fears, exposing the truth behind their excuses, and cutting deep into their shame and guilt. Its words are designed to make them acknowledge what they've done and bring them to convey honest repentance.
Once each and every scene of their criminal history in Aincrad has played out before them, and <<Void>> no longer speaks, the final scene will fade away and the player will find themselves at the edge of a circular courtyard. It is surrounded with hundreds upon thousands of graves. Thick, dark cloud hug the surface of the pavement. Many individual, narrow cobblestone paths make their way out into the fog from the courtyard's edges. Opposite to the player appears a monument similar to the one in the Town of Beginnings, but not nearly as large. On it are recorded the names of each player the quest taker had killed, assaulted or otherwise wronged, whether as a green player or orange. Sitting in the center of this monument is an eight foot tall stone angel with a massive sword resting in its hands. After the player has finished observing their surroundings, the angel will stand up and hold its sword upright. It will step down from the monument, revealing one last name which had been concealed beneath it.
The name, is the name of the quest taker. With this, the angel known as <<Redemption>> advances.
Outline:
NPCs:
<<Void>>
Void is a mysterious and seemingly otherworldly entity cloaked in charcoal garbs, that never reveals its identity or true appearance. It rarely speaks, but if it does its words cut mercilessly deep. <<Void's>> voice echoes, seemingly distant and sometimes distorted. You feel a chill when it speaks, and almost freeze up when it stares at you, as if you were staring at the Death itself...
Enemies:
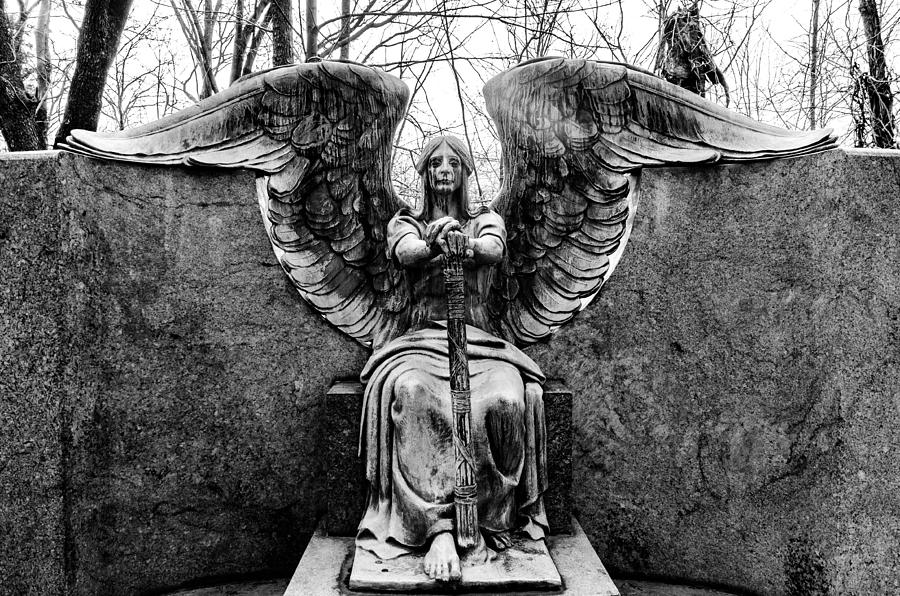
<<Redemption>>
Redemption's fighting style mimics that of the player taking the quest, including skills, level and personality. The more DPS-based skills the player has, the more aggressive and ferocious Redemption will be. The more tank based skills the player has, the more precise and calculating it will be. The more support skills the player has, the more consistent it will be. Depending on how high a level the player is, will also affect its strategy due to its corresponding stats. However, the Player's personality will have more impact than any other factor. For example: If the Player is confident and reckless, Redemption will focus on luring the Player into a trap, and counter attacking where the player is weak. If the player is cautious and doubtful, its strategy will focus on slipping past their defenses and not giving the player time to analyze, calculate or wait for an opening. If the player lacks confidence or is shrouded by fear, it will act specifically to keep that fear heightened.The fighting styles stated above can change mid-battle. Redemption is fully capable of adapting to the player's personal growth during a fight, as well as the player's change in tactics. Redemption will always seek victory, and will always attempt to reduce the player's health down to one point. If the player is not attempting to clear the <<Redemption>> quest for the sake of seeking genuine redemption, and is merely doing so to deceive others, or if the player believes they deserve redemption, the stone angel will utilize the skill 'Illusionary Field' in order to 'test' the Player. Redemption never actually speaks. It makes no sounds other than its movements, which will be shockingly quiet.
While fighting Redemption, the player cannot damage, move or alter anything in the cemetery, but Redemption can alter the terrain as it sees fit. Additionally, if the player follows one of the cobblestone paths away from the courtyard they will find themselves returning to it from a random angle while Redemption can move down any path and return down any other path it desires. Redemption can also urge specific memories of the player in Aincrad to resurface but cannot force the memories forward. It can also modify the battlefield to look like anywhere the player has ever been in the game, as well as conjure up monsters, NPCs, and players (dead or alive) and make itself look like a boss, NPC, or player. It will use these abilities for both fear tactics, and to make the players feel a strong guilt for their actions if they had none originally.
<<If the Player fails to defeat Redemption, or if they do not use a teleport crystal, Redemption will kill them.>>
HP: (Player Level + Paragon Level) * Tier * 10
DMG: Tier * 40 | Tier * 55 | Tier * 70 | Tier * 85
[Redemption's damage stages based on its own HP: 100-80%, 79-50%, 49-20%, 19-1%]
MIT: 50 * Tier
EVA: 3
This boss uses its own BD roll when attacking.Abilities:
- Body of Stone | <<Redemption>> is immune to all status effects except for the following: Incarceration, Perpetuate, Misperception, Hypnosis, Lullaby, Blight and Freeze. Eligible debuffs last no more than two rounds. Holy and Fallen Damage cannot deal more than 3*tier damage maximum (meaning Players with two slots of either will find the second slot working at half its usual efficacy). Additionally, the Phase enhancement and all Thorns enhancements will have no effect against <<Redemption>>. Paralyze will not immobilize <<Redemption>>, but will reduce its accuracy by -2 on it's next post. Stun sword arts will reduce its accuracy by -1 on its next post.
-
Reckoning | Each attack Redemption makes and misses against the player increases its accuracy by +1 and reduces the player's effective mitigation against its attacks as follows:
- 1 miss = +1 ACC and ignores 25% Mitigation | 2 misses = +2 ACC and ignores 50% Mitigation | 3 misses = +3 ACC and ignores 75% Mitigation.
- <<Reckoning>> cannot exceed 75% Mitigation Phase, but ACC continues to stack indefinitely. After a successful hit is made, <<Redemption>> loses ACC and Phase buffs, resetting this ability.
-
Angel of Judgement
-
For each Player killed by the quest taker, <<Redemption>> gains the following buffs:
- +1% per PK to Damage (capping at +10%) | +2% per PK to Mitigation (capping at +20%)
-
As well as the following abilities:
- If the player has 3 or less player kills, <<Redemption>> will have Thorns which deal 12 * Tier unmitigatable damage against successful non-critical attacks.
- If the Player has at least 6 player kills, <<Redemption>> will always ignore 25% mitigation at all times (doesn't stack with <<Reckoning>>).
- If the Player has at least 9 player kills, <<Redemption>> will apply a Burn status on a natural roll of 8-10 with damage matching the player's Tier, lasting 2 rounds.
-
For each Player killed by the quest taker, <<Redemption>> gains the following buffs:
- Flash Step | (2 Post Cooldown) - On a successful attack with an LD of 15+, <<Redemption>> seemingly vanishes as it dashes around the player at unimaginable speeds to attack from behind with +3 accuracy. Redemption gains no bonuses from <<Reckoning>> during this attack, and a hit/miss from this attack is not considered for <<Reckoning>> tracking.
- Judgement Spear | (4 Post Cooldown) - On a successful attack with a CD of 11+, <<Redemption>> leaps backward to the edge of the battleground before setting its sword and charging forward. If the attack is successful, it ignores 25% mitigation and deals an additional 5% damage (stacks with <<Reckoning>> and <<Judgement>>).
- Condemning Force | (6 Post Cooldown) - On an attack with BD 9+, CD 11+, and LD 15+, <<Redemption>> lunges into the air where it hovers over the player for a moment before charging down again, gaining 15% increased Damage and ignoring all Mitigation. Redemption gains no bonuses from <<Reckoning>> during this attack, and a hit/miss from this attack is not considered for <<Reckoning>> tracking. This attack will take precedence over <<Flash Step>> and <<Judgement Spear>>, and these two abilities cannot activate at the same time as <<Condemning Force>>.
Note: Round all effects in favor of <<Redemption>>.
Epilogue:
SpoilerRedemption Defeated: The player finds themselves back in the cemetery. This time, without their orange cursor. <<Void>> will be standing in the cemetery, back where it stood at the beginning and tell them that they were successful. If the player needs it, he will give short words of advice, before he bids them farewell. Should <<Void>> be asked who or what it is, the NPC will simply remain silent, and fade away. As the player leaves the cemetery they will notice two things. The clouds in the skies have parted, allowing the sun/moon to shine their light down on the landscape, and they will feel a weight lifted off of their shoulders, and a newfound joy filling their hearts.
Teleport Crystal Used: The player uses the Teleport Crystal, but instead of their destination finds themselves back in the cemetery, with their cursor still orange. <<Void>> will be standing in the cemetery where it stood at the beginning and tell them that they have failed. <<Void>> will proceed to give the player advice for becoming stronger and smarter in combat, and urge them to insight by providing a vague and cryptic hint which they will need to ponder. It will then bid the player farewell and hint at their future meeting. Should <<Void>> be asked who or what it is, the NPC will simply remain silent, and fade away. As the player leaves the cemetery, the path they had chosen and what came after will linger in their mind.
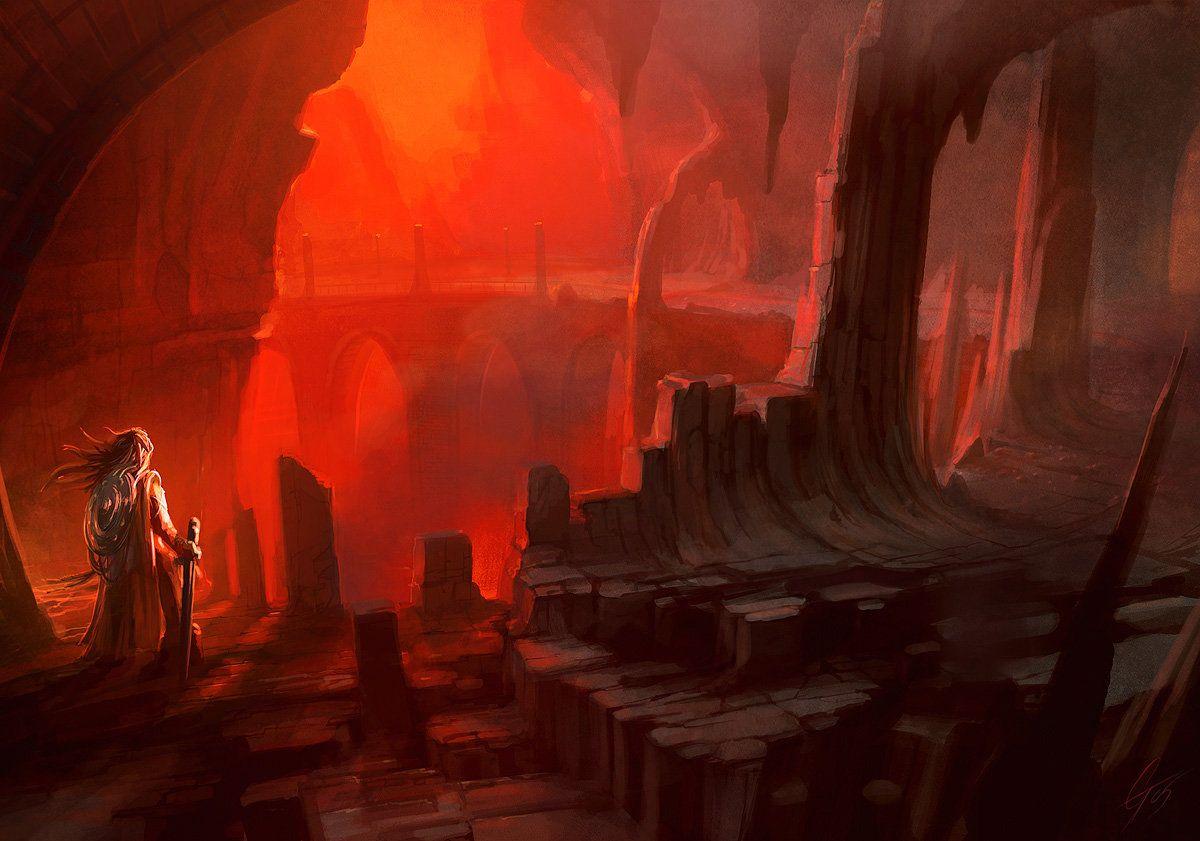

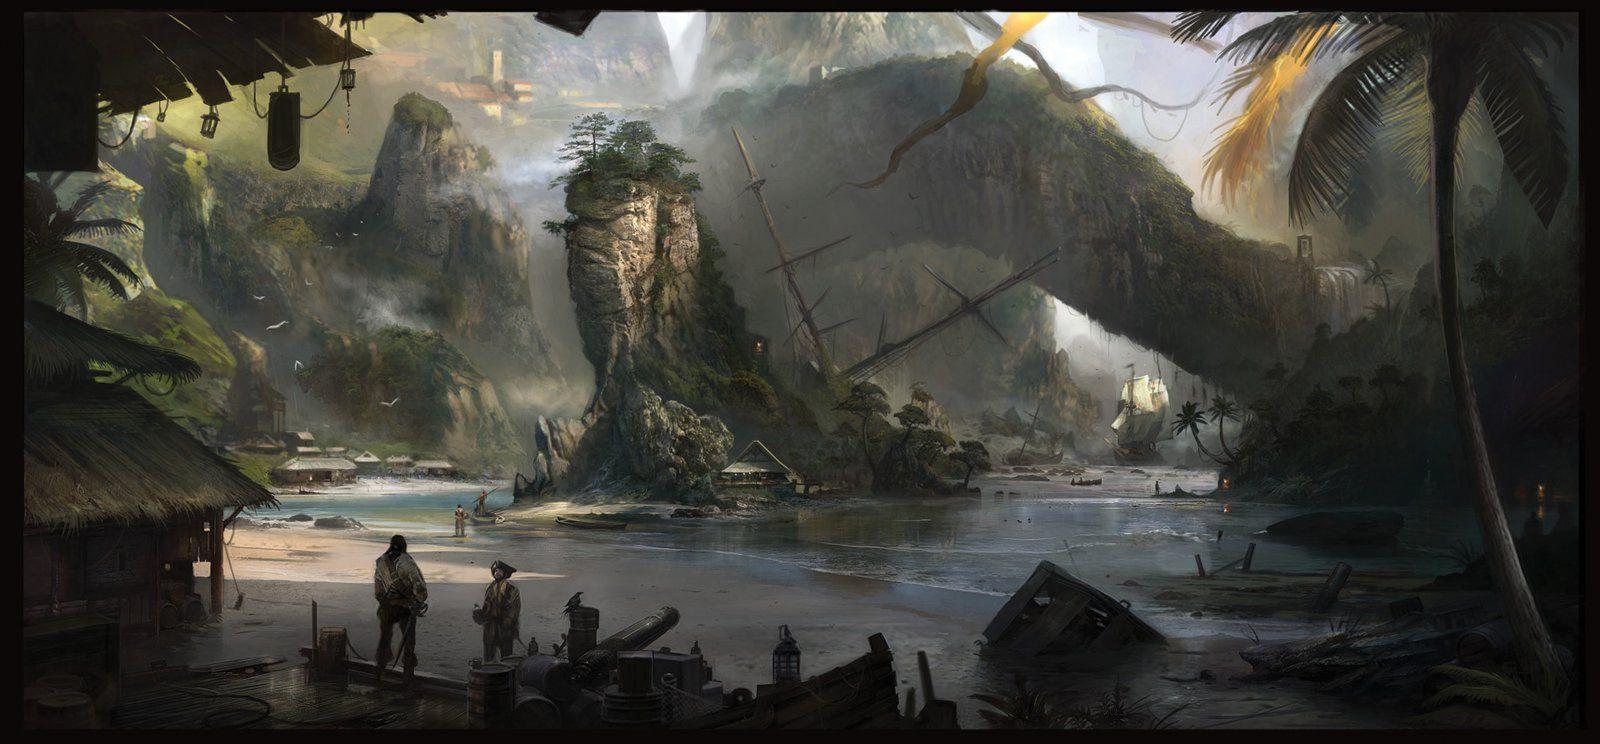
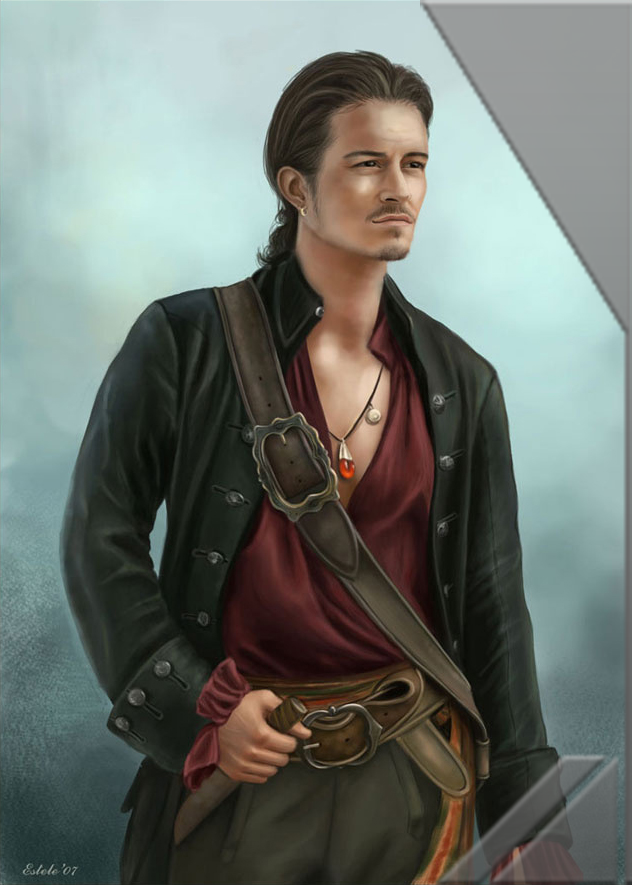
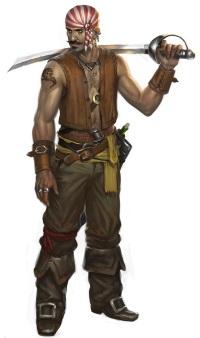


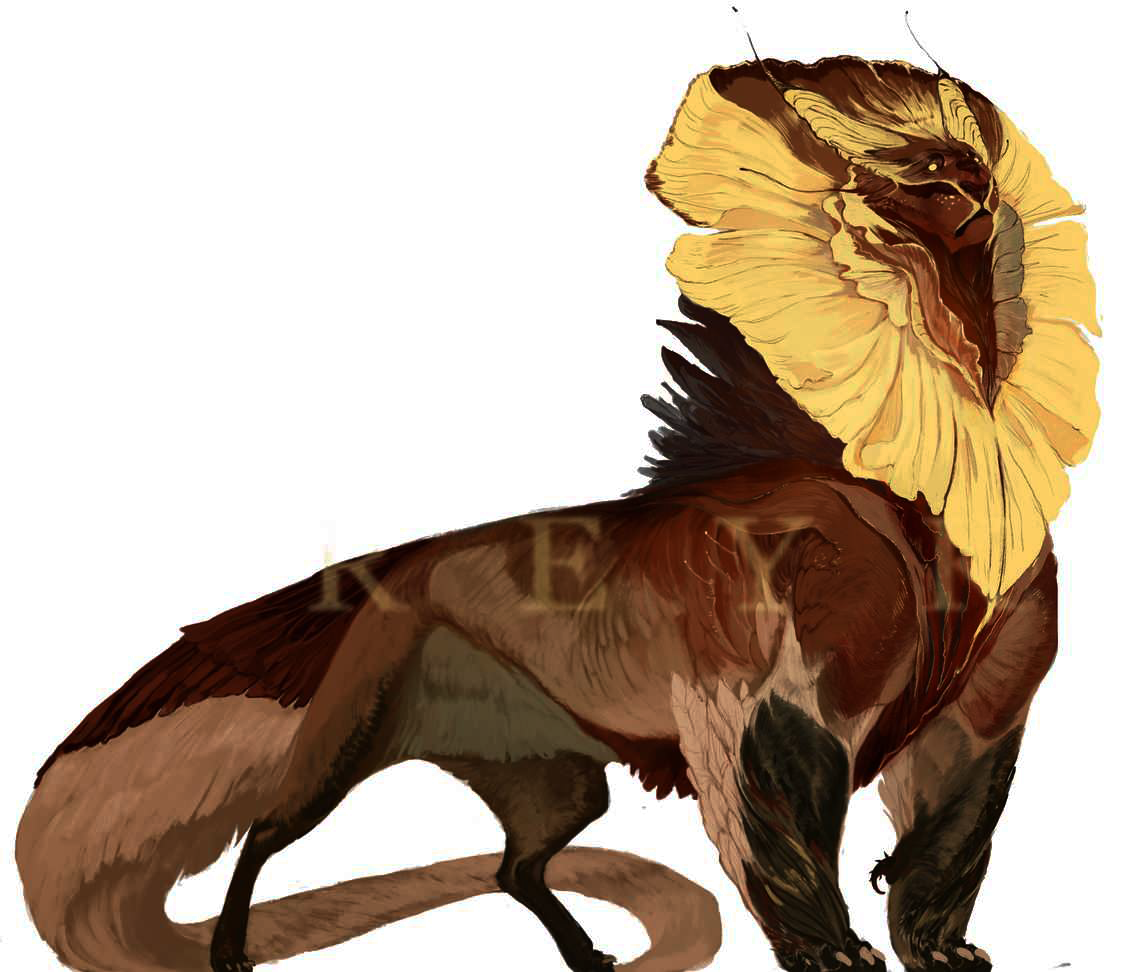
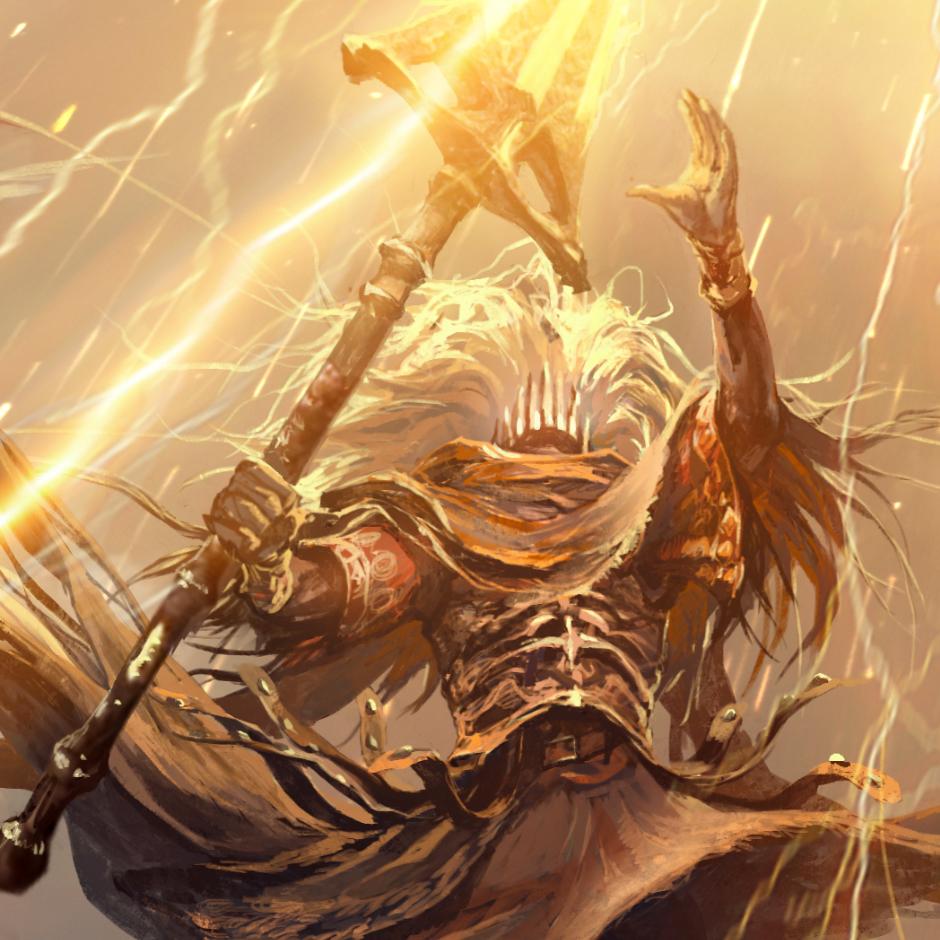
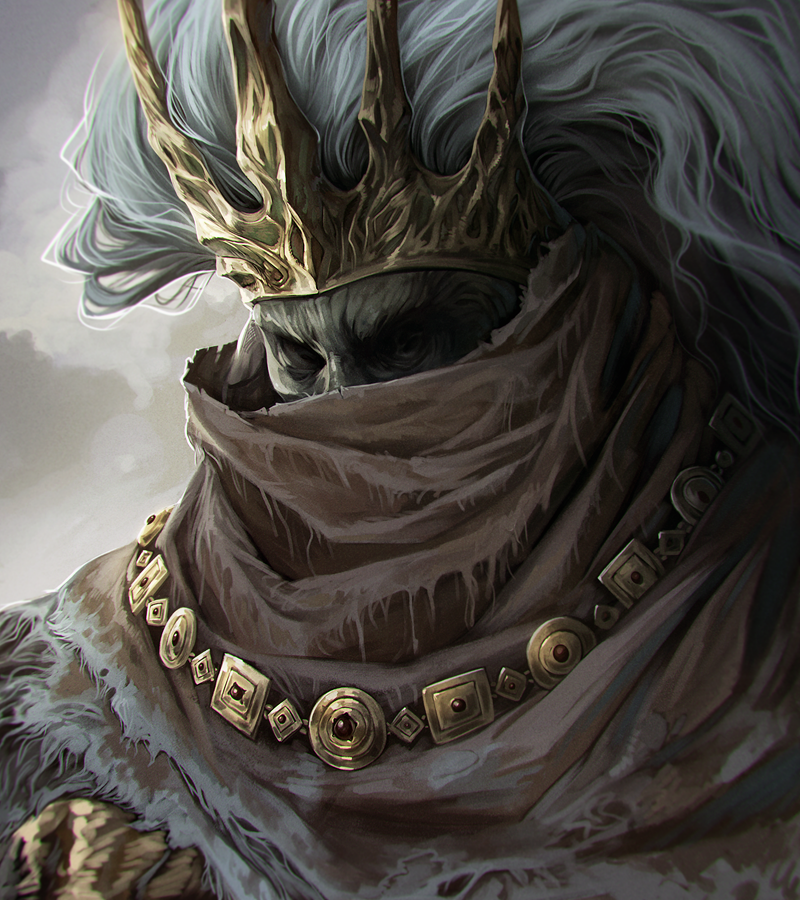

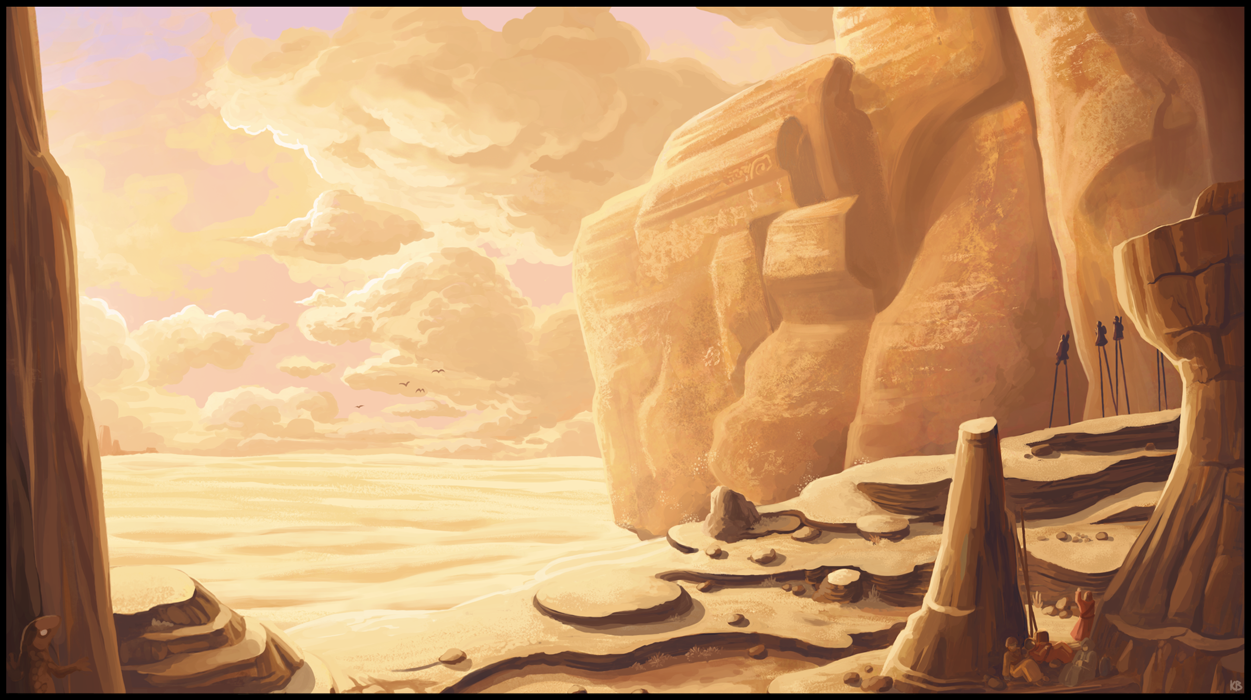
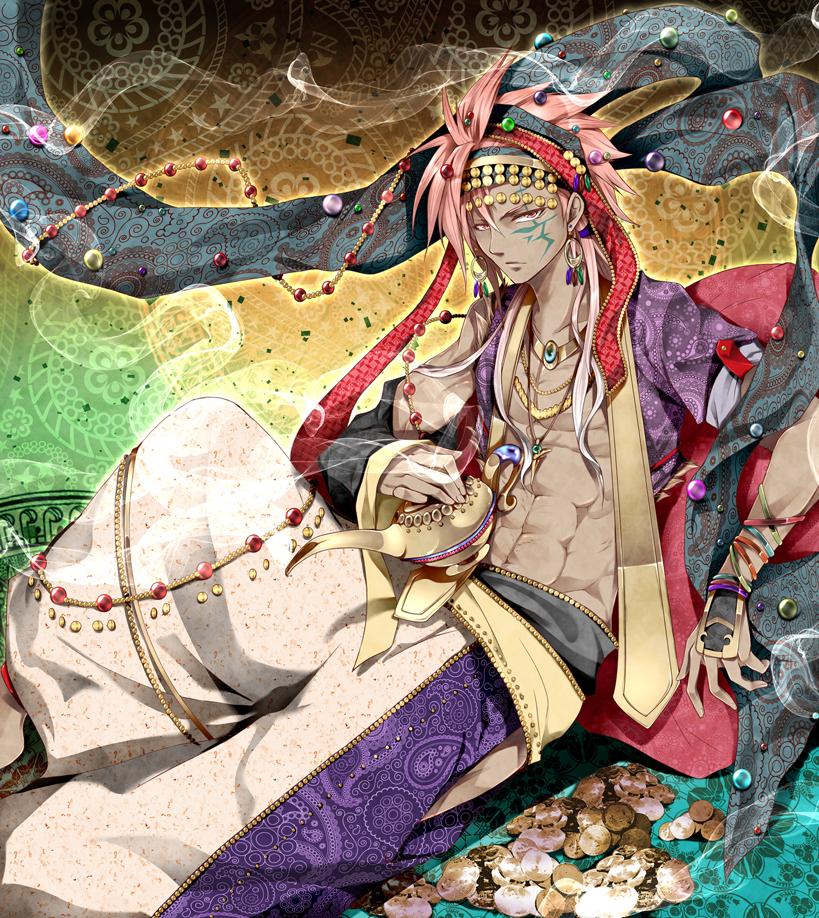
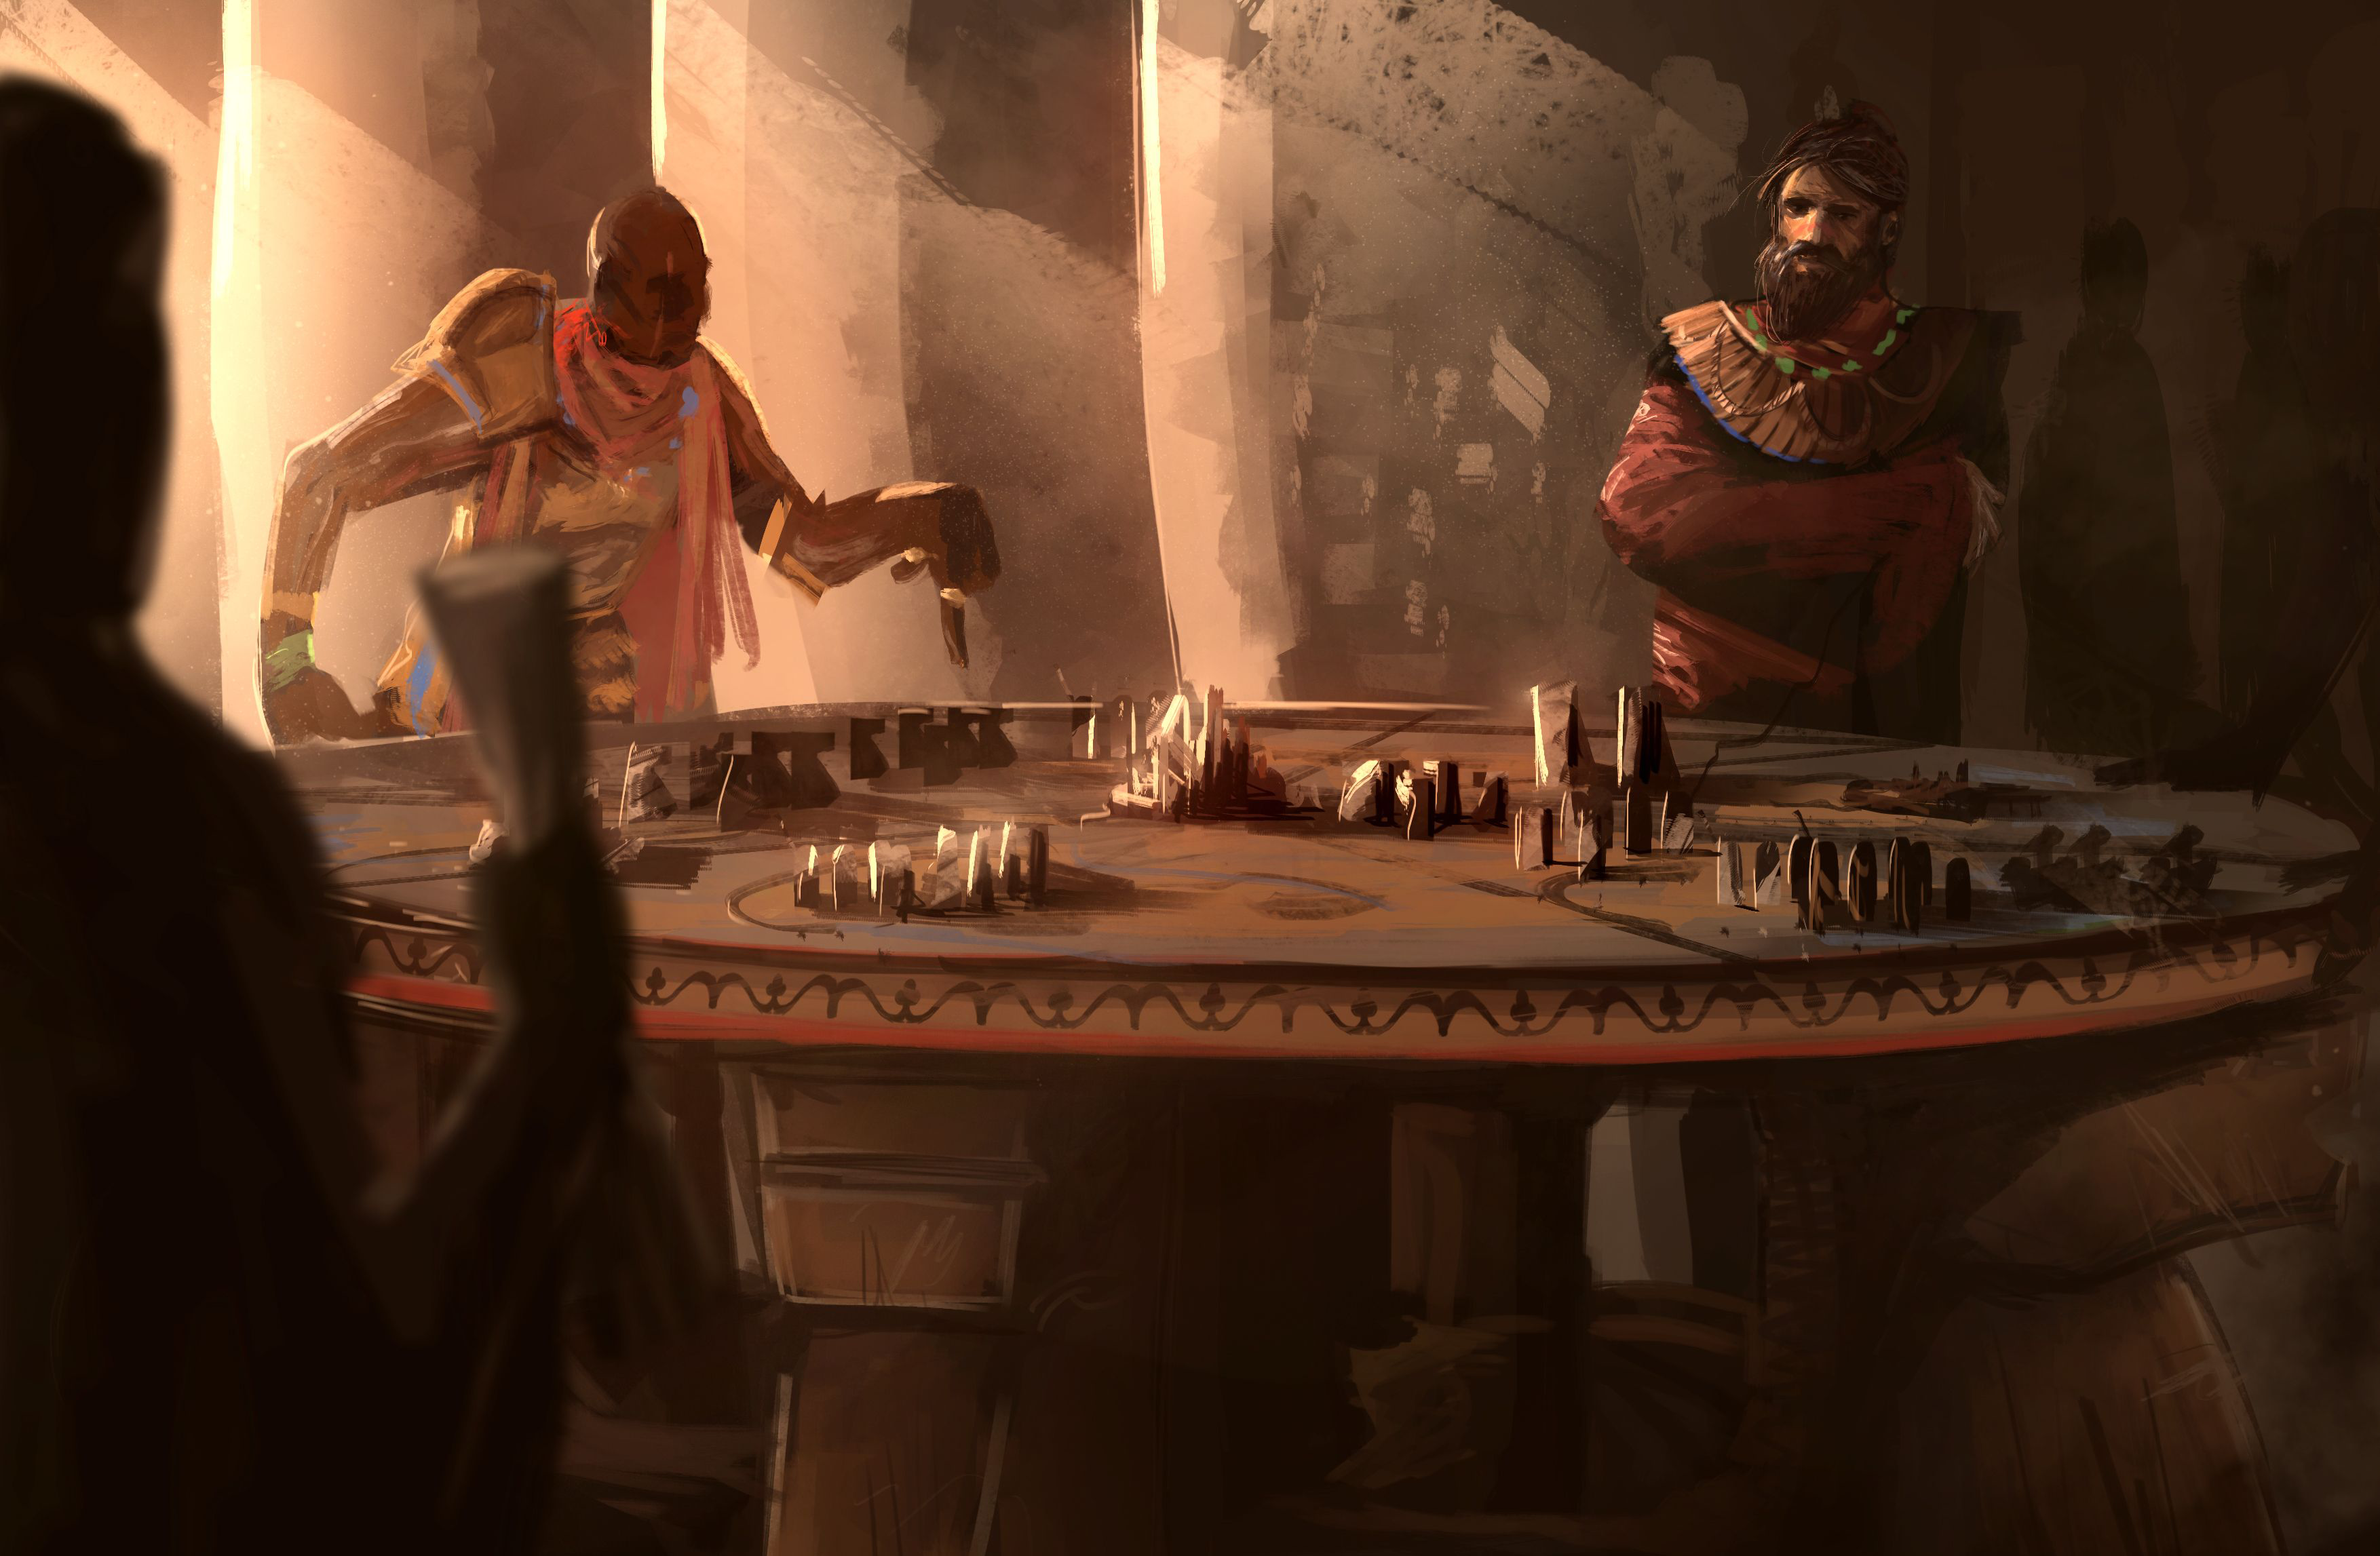
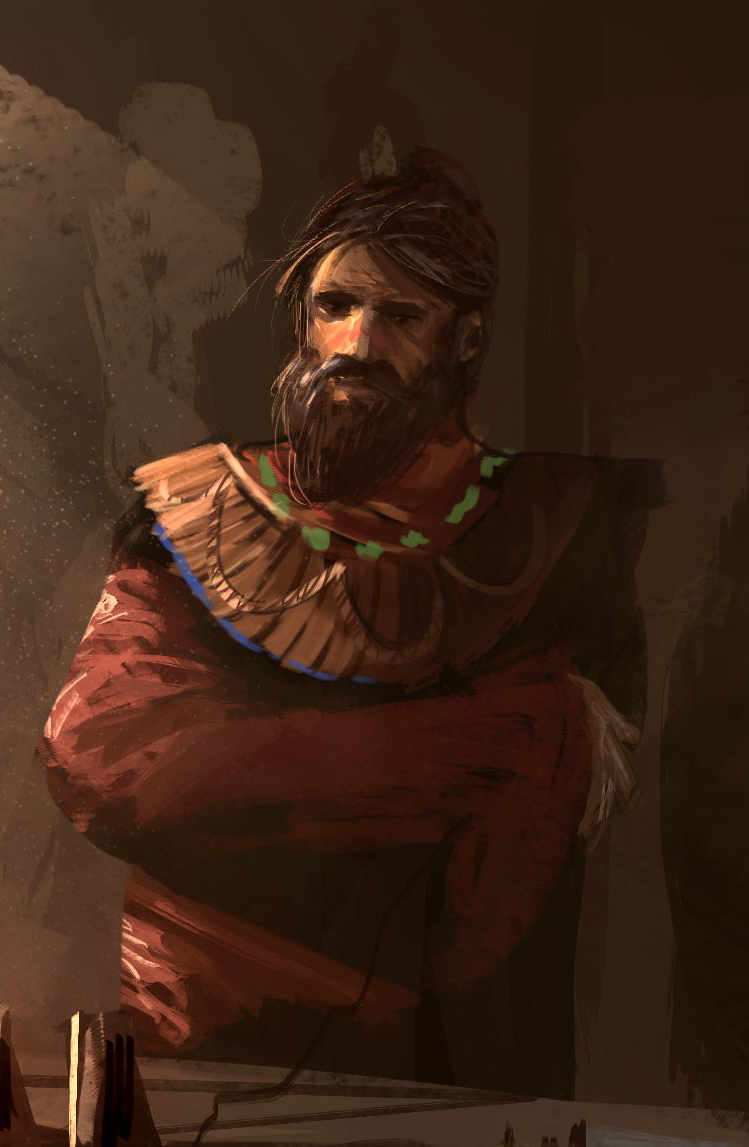


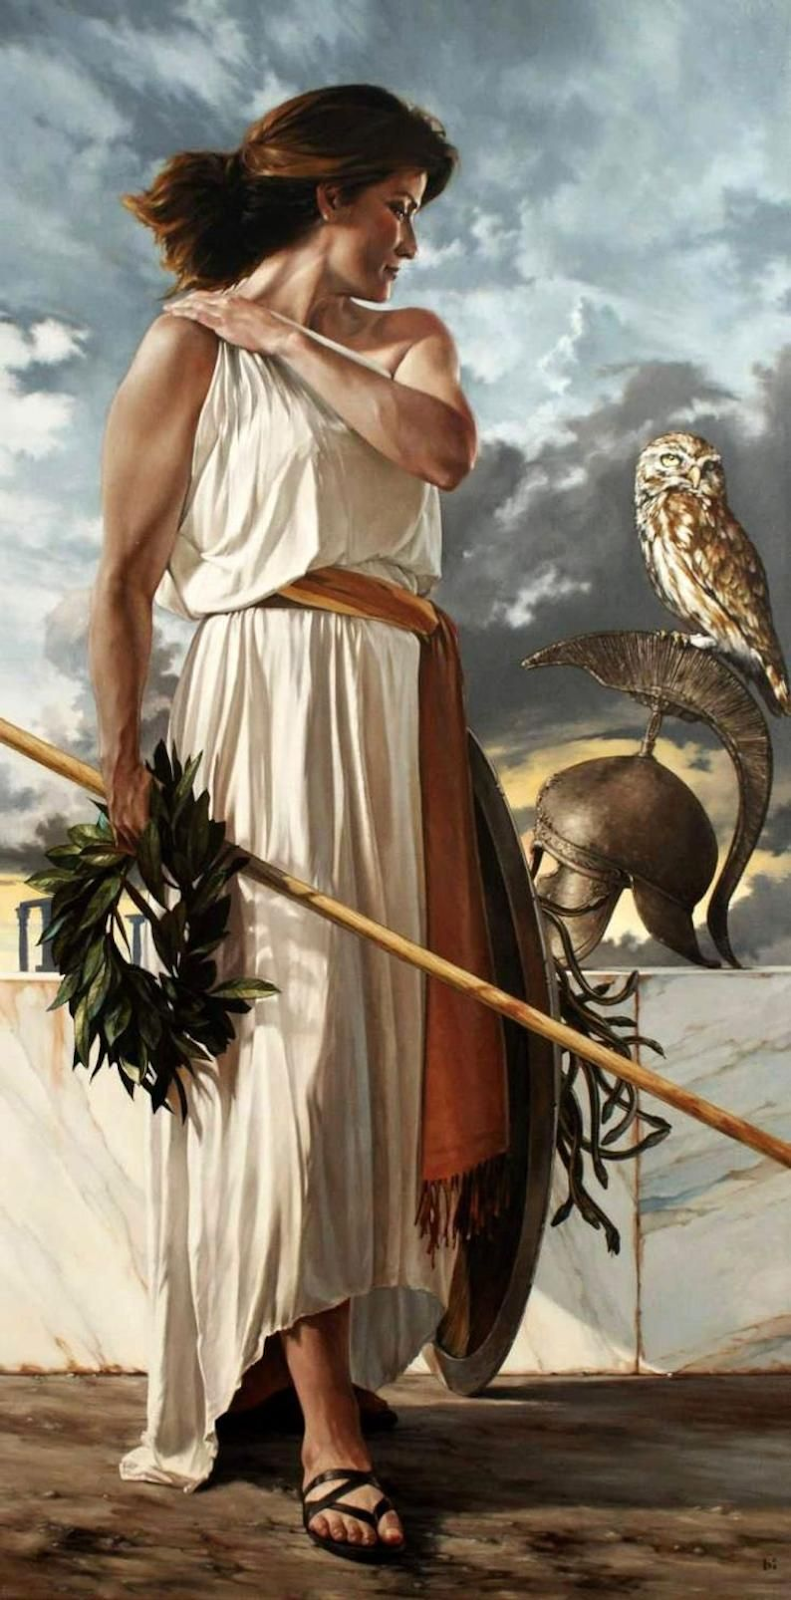
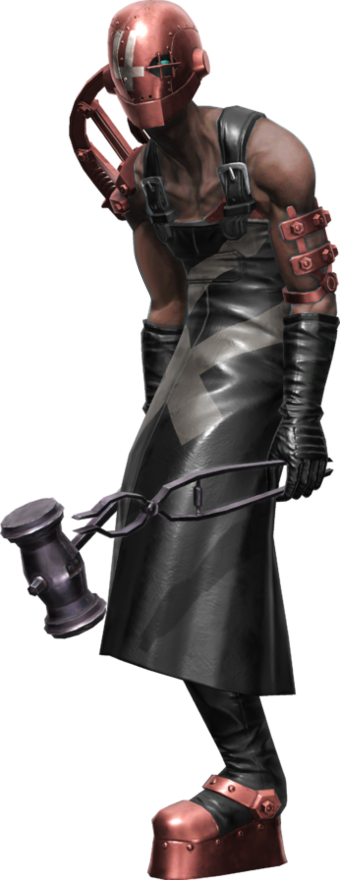
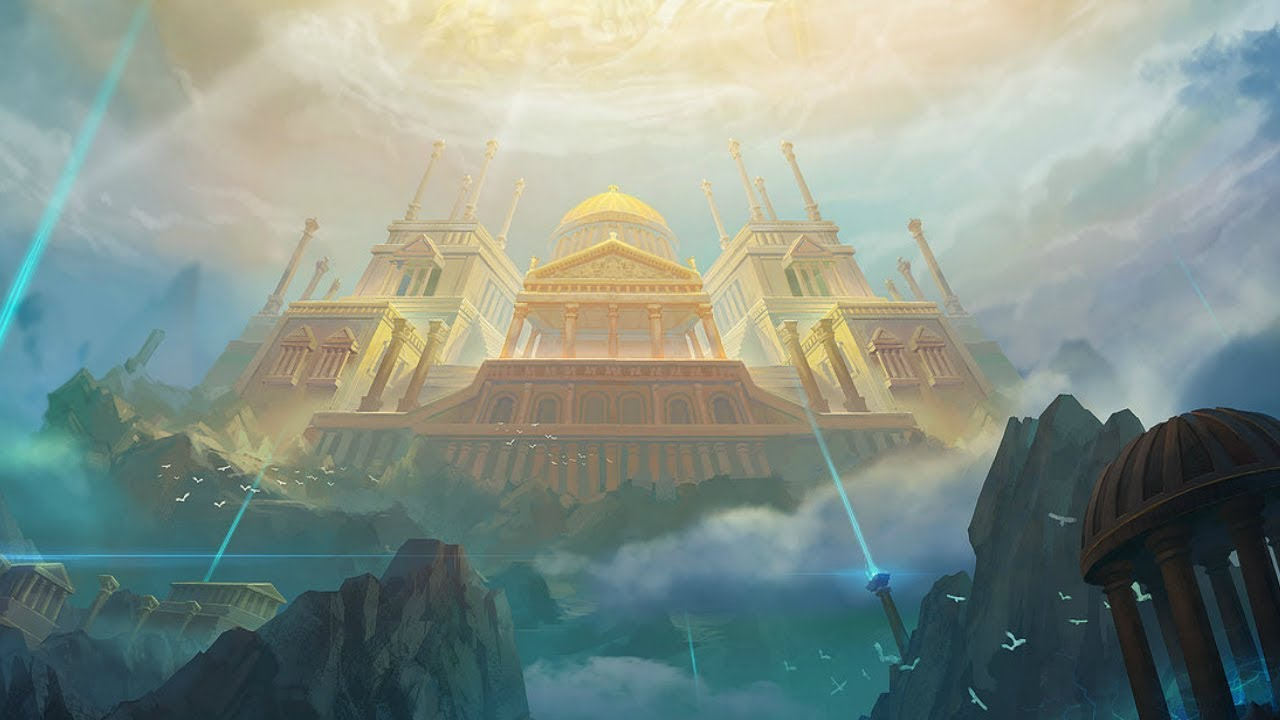


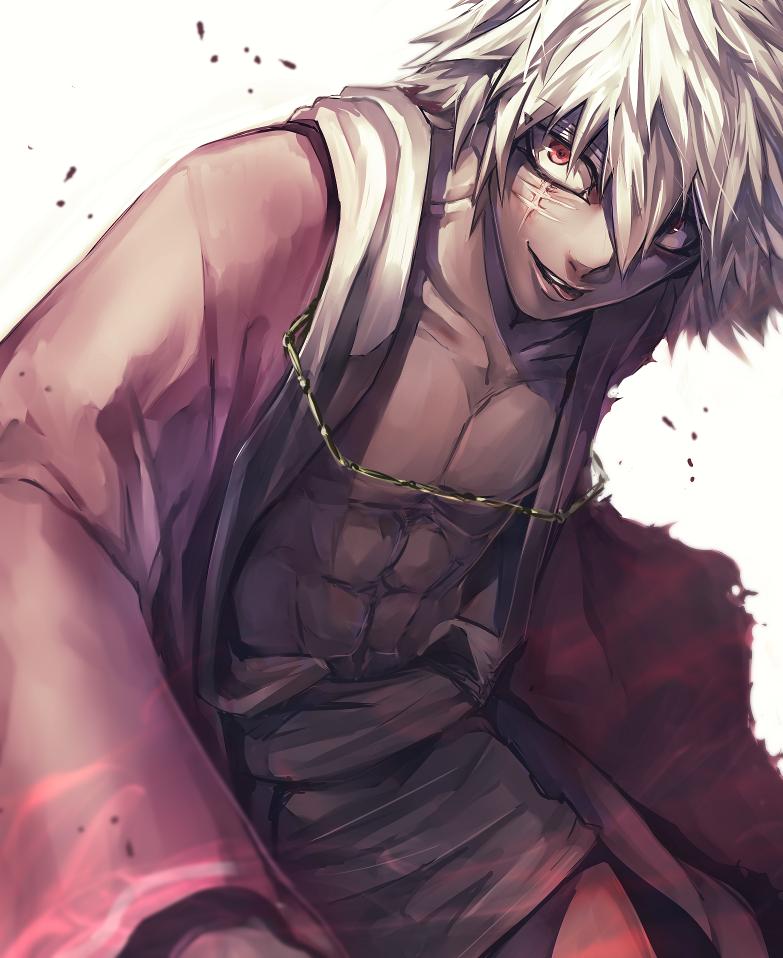


[F08] <<Monkey King>>
in Quests
Posted
Floor 8
<<Monkey King>>
Party Limit: 3 | 20+ Posts
Repeatable for standard thread rewards and <<Monkey Agility>>
Quest Rewards:
Requirements:
Summary:
For years, the residents of Florenthia Village have feared a legendary creature that skulks about the forest below. Dubbed the Monkey King, this monster has claimed the forest as its own, its territory stretching far and wide. It is rumored to be utterly gigantic, with glowing scarlet eyes and intimidating musculature. Its menacing appearance isn't just for show - the Monkey King is capable of striking with such force and tenacity that the denizens of the floor built their homes into the canopy of the forest, lest it find their camp and decimate it in a furious rage.
When the citizens of Florenthia caught wind that powerful travelers had their made way into the eighth floor, they reached out for help. Though they imagined even the most powerful of warriors would succumb to the likes of the Monkey King, their desperation forced them to swallow back their morals and ask the unthinkable; go out and risk death to bring about peace for our people. Will you accept the challenge and put your longevity at stake for the NPCs of Florenthia?
Outline:
NPCs:
<<Remington>>
Remington is the zoologist of Florenthia, tasked with studying and categorizing the seemingly endless fauna that populates the eighth floor. While Remington is sarcastic and will usually act as though the Player is wasting his time, he is actually quite talkative and enjoys the rare company. He is a habitual smoker, and will puff away regardless of whoever it may annoy. He is intelligent, but has taken this to mean he is always the smartest person in the room.
He will explain to the character his encounter with the Monkey King alongside Sewallus, and his observations of the oversized ape as they fled. The Monkey King's behaviors can be best described as ape-like and overly aggressive. When it has a target in its sights, it will not relent under any circumstances, and will let nothing stand in its way.
If asked how strong or fast the Monkey King was, Remington will always reply with, "All I know is no matter how far or fast we ran, it was never enough. There are now craters instead of trees where we were attacked, and rivers instead of forest where it moved."
Remington will make it abundantly clear to the players that he refuses to leave the village while the beast still lives, which has put his very important research on hold. He urges the players to discover the Monkey King's weakness - or better yet, put it to an end. Only then will the citizens of Florenthia know peace, and he will be able to return to his passion.
When his dialogue has been exhausted, Remington will direct the players to Sewallus for more information.
Allies:
Sewallus is charged with the duty of acting as the leader of Florenthia's Guard. Though not rude in his speech or mannerisms, he is not overly friendly, and will always stick to the point. A man of few words, he'd rather save his breath for combat than waste it chattering away with the citizens or players. He wields a two-handed battle axe as his weapon, and those with a high aptitude for speech and clever dialogue navigation will prompt Sewallus to reveal that he was a lumberjack before being convinced to join the Guard. His pride and sense of responsibility won't allow him to say so, but he secretly wishes he could return to those simpler times.
If the players asks Sewallus how he and Remington escaped from the Monkey King, he will reply with, "It is difficult to say. It was not by the grace of our fleet feet, that much is certain. The beast either became distracted, or was otherwise disrupted in some way." He will leave it at that, offering no more details.
Sewallus will offer to aid the players in their hunt for the Monkey King, expressing shame for having fled originally, and a desire to extract revenge from the creature. The Player(s) may either accept or deny adding Sewallus to their party. If they choose to accept, Sewallus will not engage in combat with any mobs aside from the Monkey King, and will use Florenthian Howl as a post action for his first turn. He will attack any turns he is not using Florenthian Howl. Should he become stunned at any point, he will resume his order with the action that would have occurred on his stunned turn.
HP: 400/400 | DMG: 75 (100 on crit) | MIT: 50 | EVA: -1
Abilities:
Enemies:
<<Monkey King>>
Players don't find the Monkey King - the Monkey King finds them. It is aggressively protective of its domain, and will ferociously hunt down any entities that trespass within its territory. Once it has its prey in its sights, it will stop at virtually nothing in its pursuit to annihilate them. So fearful of this creature are the residents of the eighth floor that not even mobs are willing to exist in any locale in which the Monkey King claims ownership. Wild and animalistic, this boss seems to go full offensive with wild abandon.
HP: 650/650 | DMG: 150 | MIT: 60 | ACC: 2
Abilities:
Epilogue:
If Sewallus did not accompany the party:
Once the Monkey King has been defeated, a panel appears, informing the players of the quest's completion, then listing quest rewards and experience gained.
If Sewallus accompanied the party, but died during combat:
Once the Monkey King has been defeated, a panel appears, informing the players of the quest's completion, listing quest rewards and experience gained. The players will also get a message from Remington stating that he can't get in contact with Sewallus and asking for an update on his status.
If Sewallus accompanied the party, and survived:
Once the Monkey King has been defeated, a panel appears, informing the players of the quest's completion, listing quest rewards and experience gained. Sewallus will approach the players and give thanks for assisting against the Monkey King. In a rare expression of gratitude, he teaches the players the <<Shatter> ability, unlocking it in their skill tree.