Cardinal
-
Content Count
94 -
Joined
-
Last visited
Content Type
Profiles
Forums
Calendar
Blogs
Posts posted by Cardinal
-
-
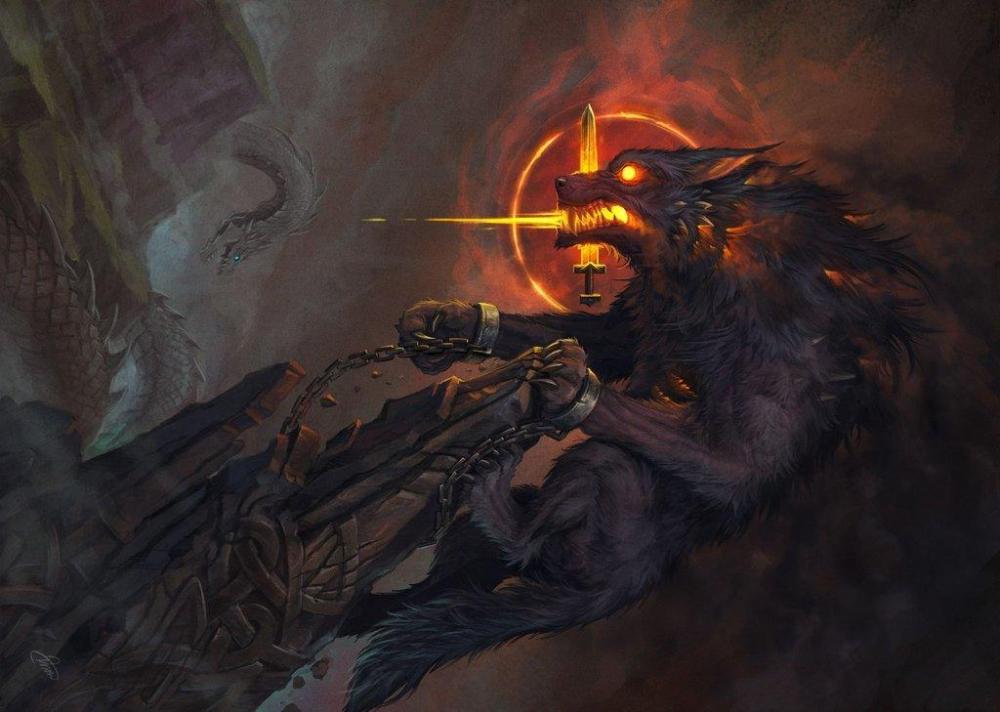
Fenrir
HP: 1000/2000/4000
DMG: 125/200/300
ACC: 2
EVA: 1
MIT: 25/75/125Hati and Skoll - Upon being freed from his bonds, Fenrir’s howl calls his progeny Hati and Skoll. Together, the wolves attack the party. Hati and Skoll have no health pool, but will deal an additional 125/200/300 DMG [mitigable] to Fenrir’s target each. Hati and Skoll flee once Fenrir is reduced to half health.
*Attacks made by Fenrir, Hati, and Skoll are considered separate attacks; Mitigation applies to each individual attack.Ragnarok - Fenrir’s freedom from bondage heralds the end times. Upon being reduced to half health, Fenrir will devour the sun as his post action. The sun’s boundless energy restores Fenrir to full health and will improve his stats:
DMG: 200/350/750
ACC: 4
EVA: 3
MIT: 40/100/150
*Hati and Skoll return during Ragnarok once Fenrir is reduced to half health a second time.Weeping Wounds - Every target that attacks Fenrir will suffer 20/50/75 Thorns damage.
The Allfather - If needed, Odin will aid you in fighting foul Fenrir. He will take all Hate from Fenrir, Hati, and Skoll.
------------------------------------------------------------------------------
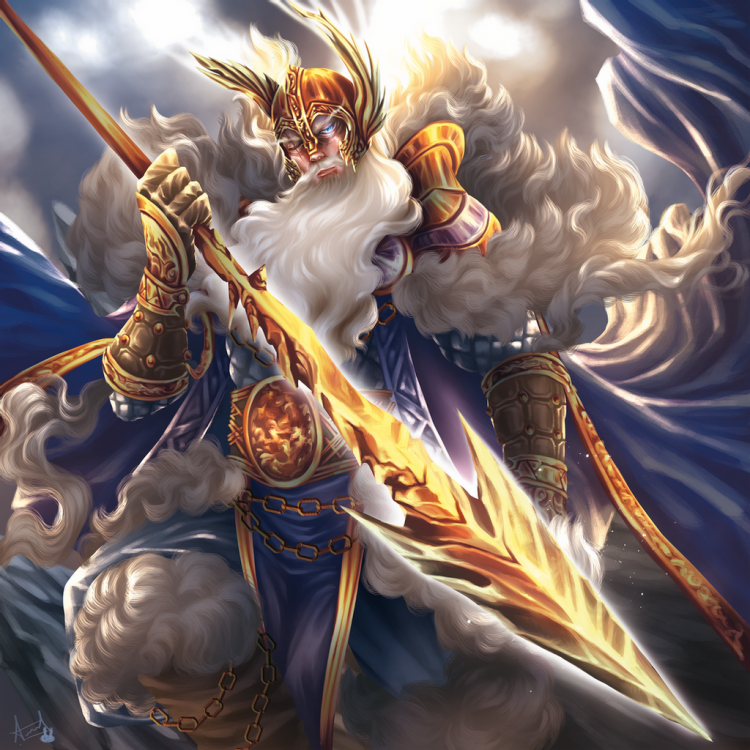
Odin
HP: 2000/4000/10000
DMG: 150/300/500
ACC: 4
EVA: 2
MIT: 100/150/250Rewards
7 SP
50,000 Col
[If Fenrir is defeated without Odin’s assistance] Gungnir’s Shard (consumable, reusable, untradeable) - Use this item to “store” a standard [i.e. “crafted”] consumable, allowing that consumable to be used infinitely.
Huginn and Muninn [Consumable] - Allows players to skip the “finding” phase of <<Feeding Your Enemy>> once during the quest.
Spirit Shard - Proof you have slain a mighty foe. Combine three spirit shards to choose a reward at the end of the dungeon -
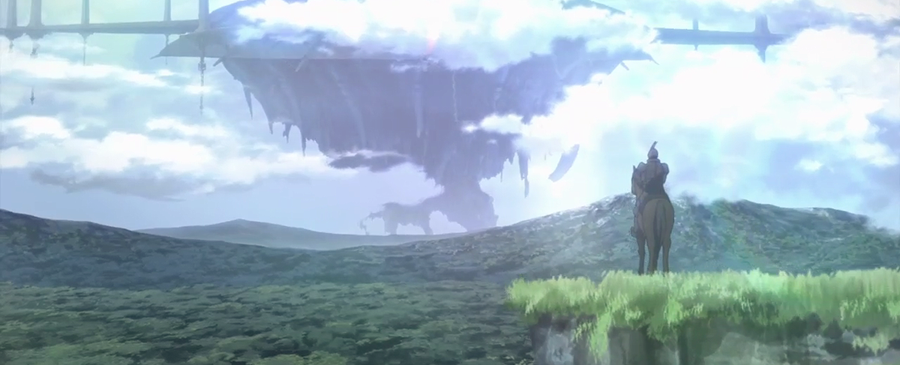
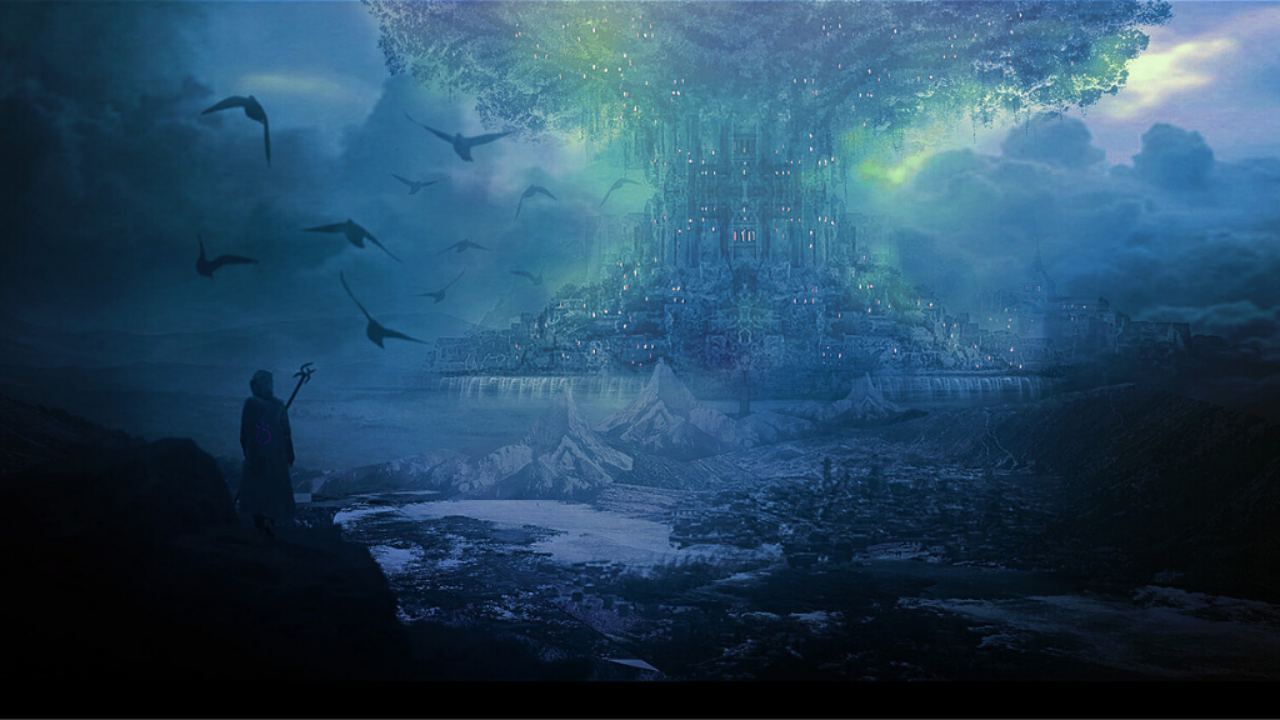
Upon defeating Hel, she returns to her throne. Whatever sudden violent outburst that had inspired her to attack you is now gone. She looks grateful to you, but before you can ask her how to return from where you came, a brilliant rainbow-colored light engulfs you. You feel yourself whisked away, your body traveling at breakneck speeds through the ether. Soon, you feel firm ground beneath your feet. You look up at a one-eyed man towering above you. On his shoulders are perched two ravens. He regards you with a nod.
“I am Odin. You have freed my warriors from foul Niflheim. I am in your debt. I would send you home, but before I do, I have a matter that you might aid me with.”
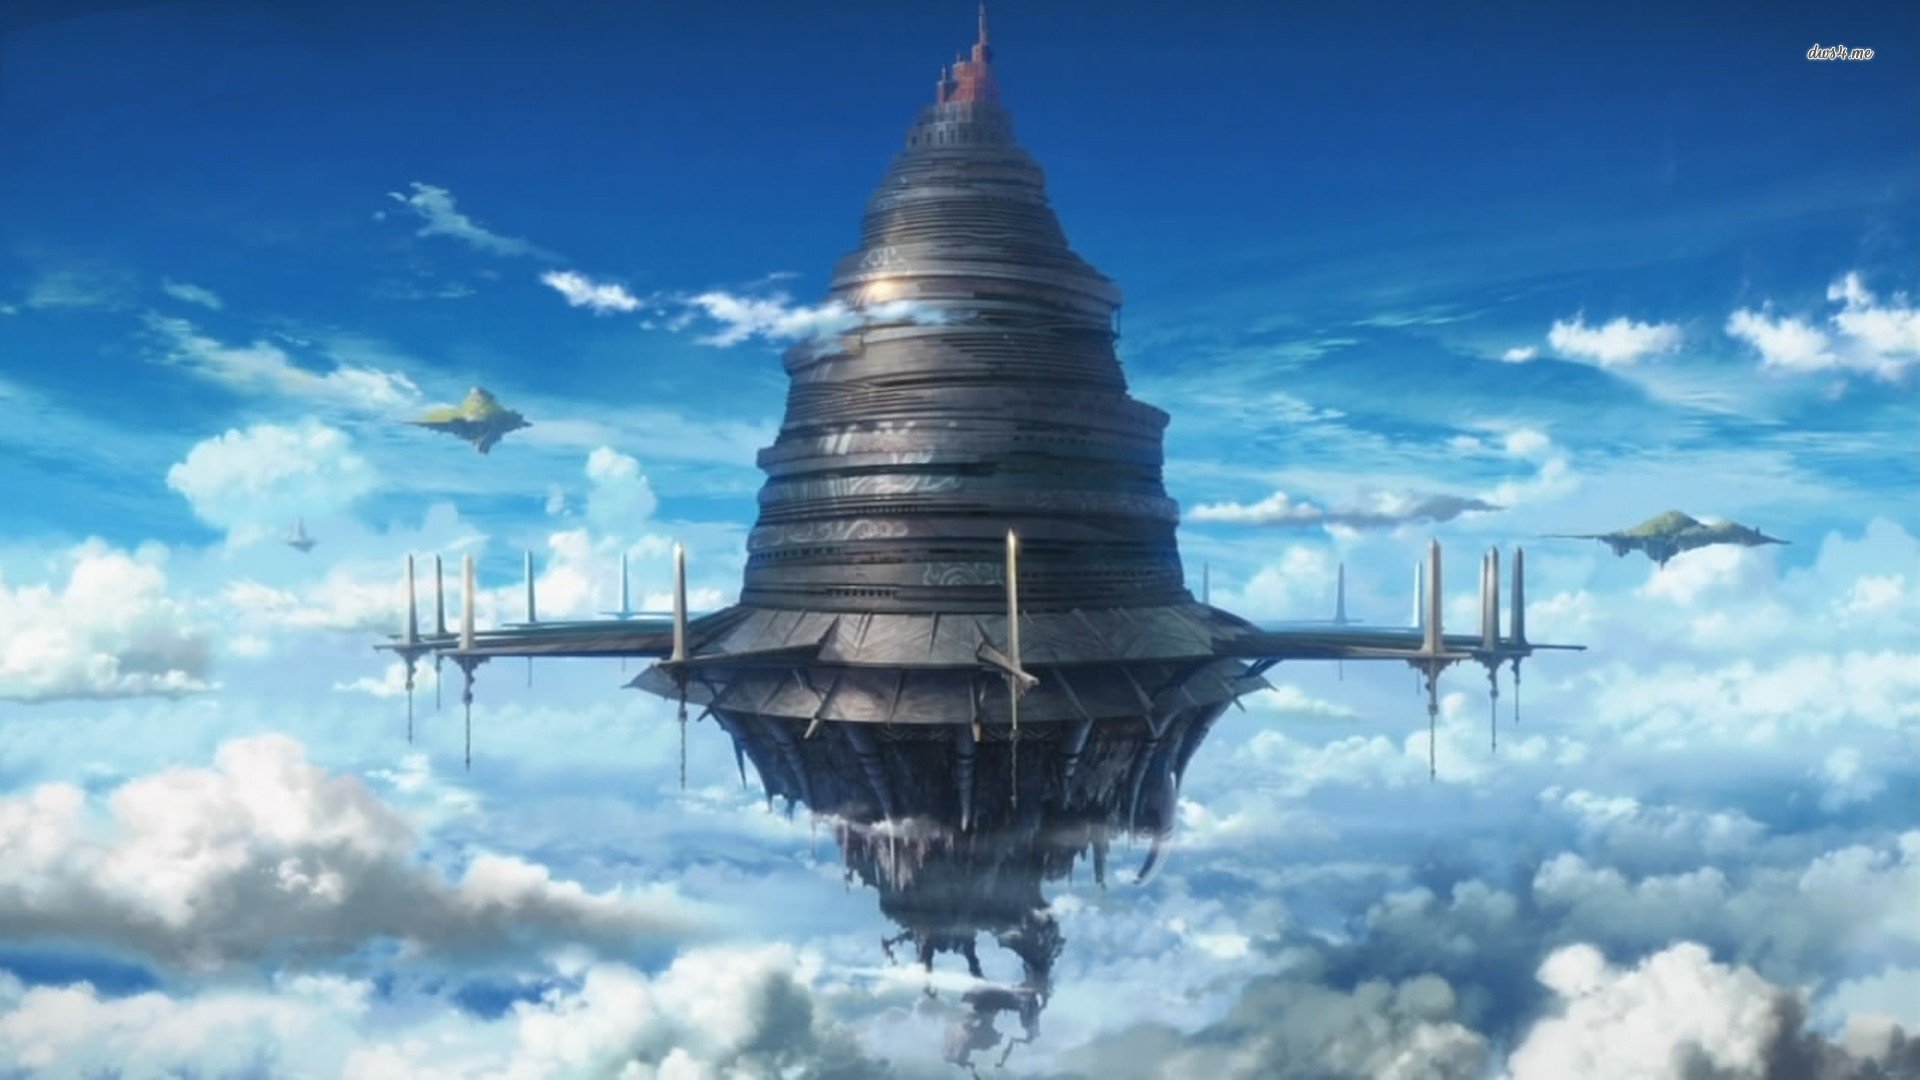
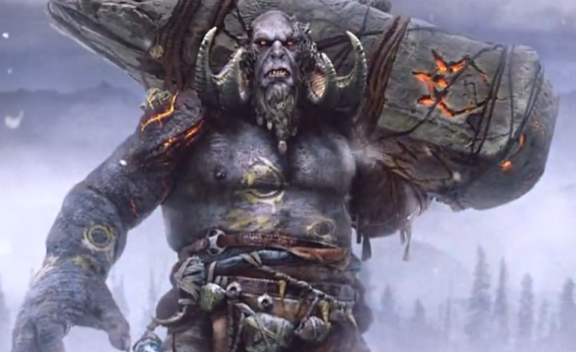
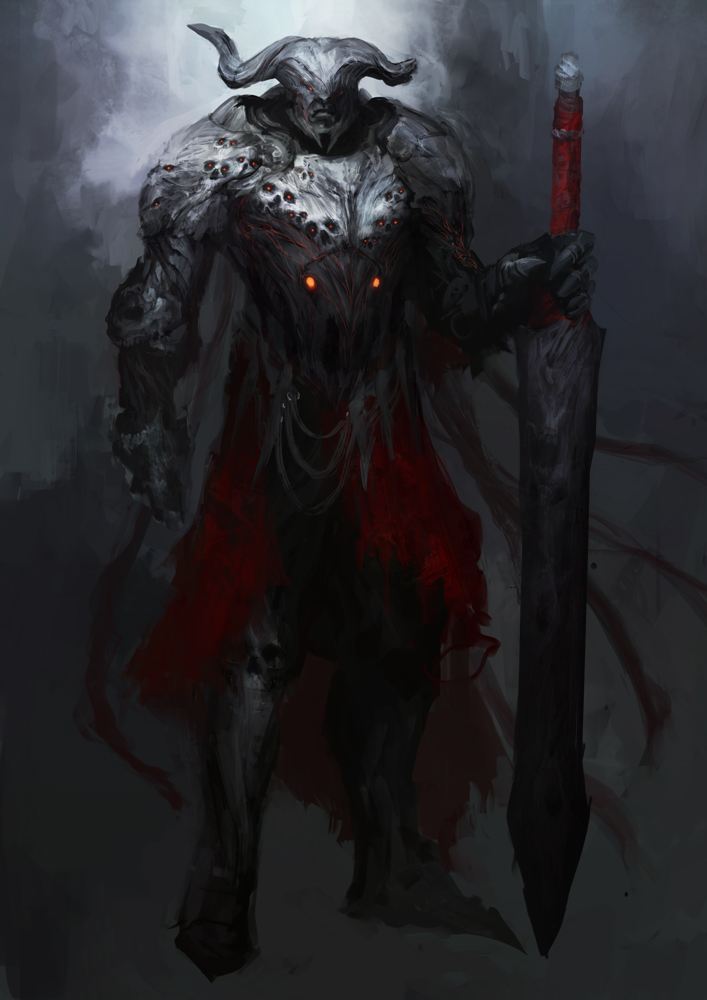
Odin brings you to a dark chamber deep under the surface of Asgard. Before you rests a hulking behemoth of a wolf. Though, perhaps “hulking” is understating it. This wolf is absolutely titanic. Even the mere wisps of breath from its snout is enough to kick up a stiff wind. It’s bound to a stone by a simple ribbon. Odin gestures towards the wolf.
“This is Fenrir. He is destined to one day bring about the end of all things. Having proven your worth against malicious Hrym and duplicitous Hel, I believe you are mighty enough to slay this beast. Tell me when you are ready, warriors. If you wish, I will fight at your side.”
When you signal that your preparations are made, Odin will cut the ribbon, freeing Fenrir. The beast then busts through roof of the cavern, taking the battle to the streets of Asgard.

-
Hel
HP: 750/1500/3000
DMG: 100/250/400
ACC: 3
EVA: 2
MIT: 10/30/50Jailer of the Damned [Passive] - Hel begins the battle with three spectral soldiers - spirits that belong in Valhalla - chained up around her throne. So long as one soldier is bound, Hel will restore herself to full health upon reaching 50% or lower as a post action. Hel cannot be defeated so long as there are any bound soldiers.
To Valhalla - To free the soldiers, Players must distract Hel by forcing her to heal herself or by applying a disabling effect (stun, paralysis, freeze). Then, while distracted, they must roll a collective LD of 40 in order to free a soldier. After all soldiers are freed, Hel can no longer heal herself.
Rewards
3 SP
20,000 Col
Duality [Consumable] - Choose from the following:
+30 MIT, -3 DMG
+3 DMG, - 30 MIT
These are considered unique effects and thus stack with other buffs.
Spirit Shard - Proof you have slain a mighty foe. Combine three spirit shards to choose a reward at the end of the dungeon -
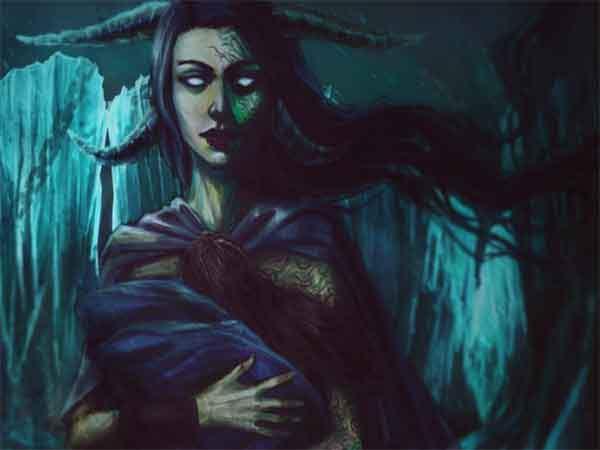
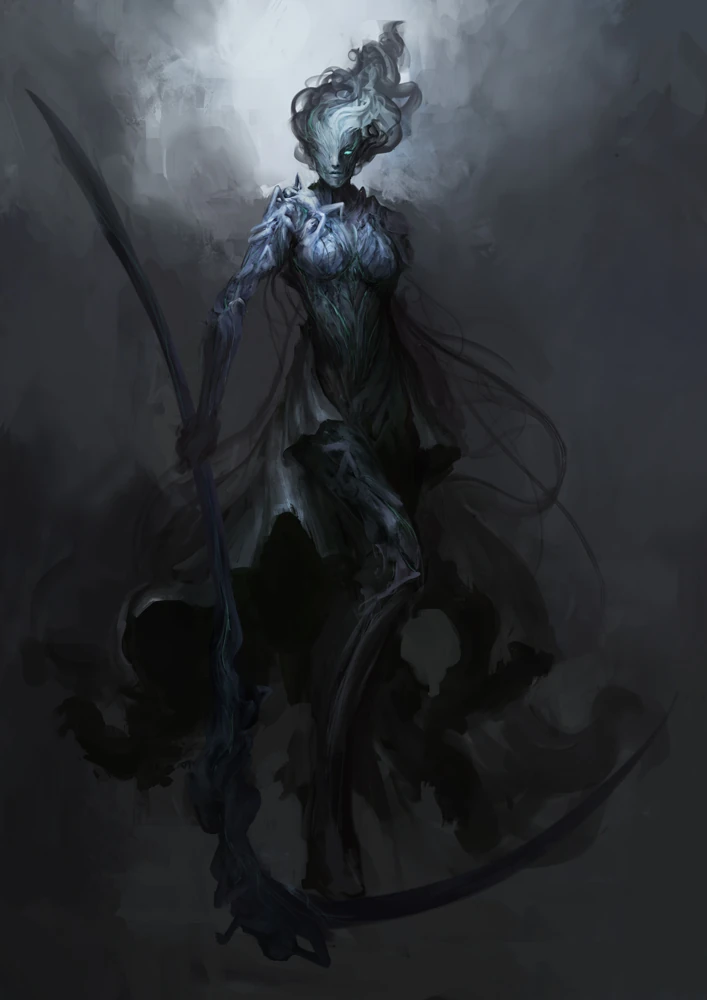
Upon defeating Hrym, there’s no one to steer the Naglfar. You’re tossed about on the top deck as the ship becomes trapped in a whirlpool. As you descend lower into the maelstrom, you can make out a massive serpentine presence in the waters. You don’t have the time to consider what it might be as your vision darkens and you black out. You awake some time later in a land of fog. Still, you are harassed by the screams of spirits. This dead land you’ve awoken in feels like something out of a nightmare. But still, you press on. Eventually, you come to a large open chamber, directly opposite you is a throne. Sitting upon it is a beautiful woman, the right side of her face obfuscated by shadow. She greets you warmly, as if your presence here was a pleasant surprise.
Such warmth is short-lived, however. She leans forward, revealing the right half of her face. The skin is discolored, deformed. More corpse than woman. Hate-filled eyes bore straight into your soul. It quickly becomes clear that this being has no intention of helping you. In fact, quite the opposite.

-
Hrym
HP: 1000/1500/2000
DMG: 125/200/300
ACC: 3
EVA: 0
MIT: 25/50/75Unshakable [Passive] - Hrym cannot be affected by any disabling effects. (stun, paralysis, etc)
Horn of Battle [Passive] - Every 2 turns, Hrym calls an allied Jötunn to his side. For every Jötunn that remains alive on Hrym’s turns, Hrym gains an extra attack. Summoned Jötunn do not attack, but cannot be attacked themselves.
Solidarity [Passive] - Final damage to Hrym is reduced by 50% so long as one Summoned Jötunn as alive.
Tortured Spirits - Players may use a post action to commune with the spirits trapped aboard the Naglfar. By using the natural LD value, players convince the corresponding number of spirits to attack summoned Jötunn. 20 Spirits attacking the Jötunn will slay it.Rewards
2 SP
10,000 Col
Horn of Battle [Consumable] - Sound this horn to grant yourself and your party +2 increased energy regen for a single thread.
Spirit Shard - Proof you have slain a mighty foe. Combine three spirit shards to choose a reward at the end of the dungeon -
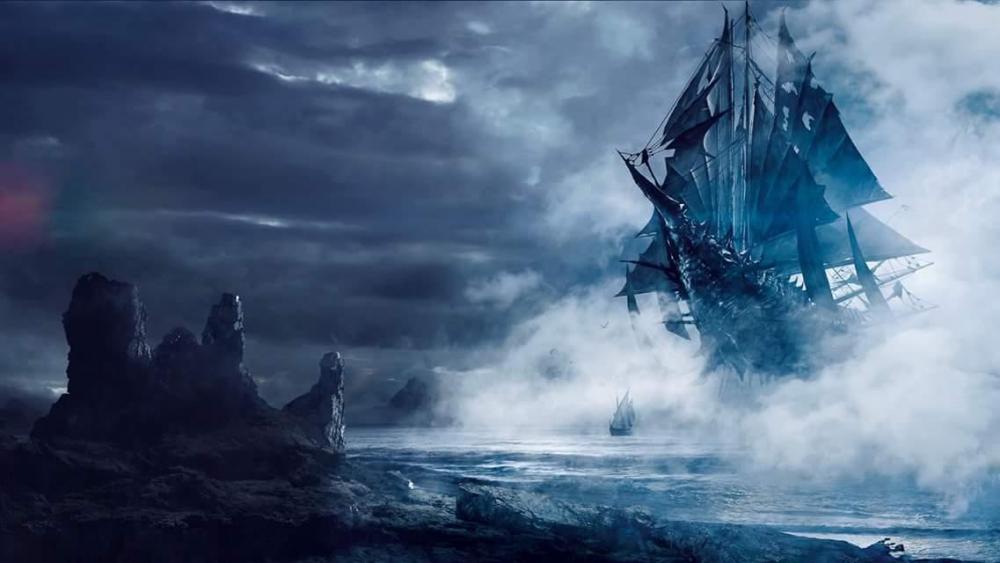
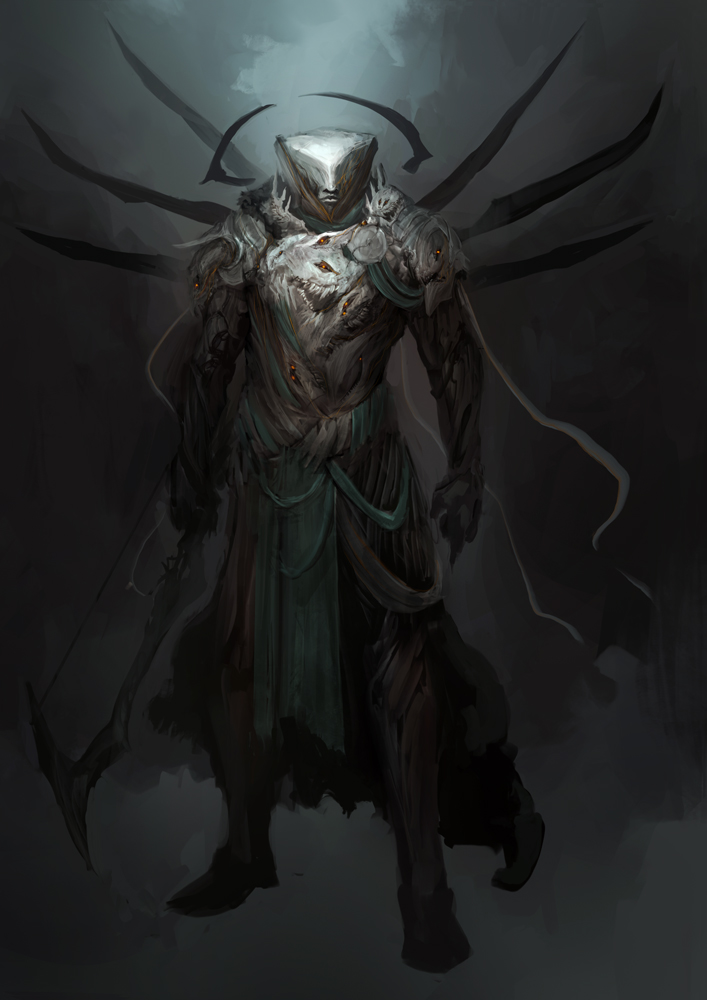
You begin your encounter on the banks of the Stygian River at dusk. An eerie fog has rolled in, making it difficult to see. As you reach the banks, you see a dim light out over the waters. It floats erratically, up and down, side to side. Eventually, a silhouette of a boat appears. It rows ever closer and closer. Before the light - and the boat - leap from the waters to reveal a larger craft. It glows with an ominous purple light, the wails of damned - drowned out by the waters - now carry far and loud upon the air. It beaches itself before you. The prow of the boat then descends, forming a ramp into its dark hold. Upon entering the boat, you notice that the hull isn’t made of wood or metal. It consists of a strange, chitinous material.
You make your way through the macabre hold - all the while spirits of the damned harass you. They fly past you, their spectral wails chilling to your very core. But, you push through and reach the top deck. Once there, a thunderous clap cracks through the air. You turn your head towards the noise only to see a massive giant descending the stairs from the helm. His mouth turns into a malicious sneer as he regards your presence aboard his ship. You look out over the waters to see that the shore is long gone.
“Welcome, mortals! To the Naglfar!”
-
Floor 24
<<Incognito Analysis>>
Recommended Level: 30 | Non-Repeatable
Restrictions | Party Limit: 1
Credit goes to @Hikoru Rewards:
Players may only receive the following rewards once:
- 5 SP
- 5,000 Col
Requirements:
- At least 1 page (20 posts)
- Succeed in gathering enough information to bring to the Chief.
Summary:
After the Chief found out about Uso-Tsuki's betrayal, he attempted to have him arrested, but he ran and was able to escape the guards. Now knowing that he was a wanted man, Uso-Tsuki decided that he would kill the Chief and take his throne by any means possible. But, he knows of a person who is taking his knowledge to the Chief, and he is extra wary of those around him and his settings. It'll be much more difficult to gather information, but the Chief is relying on you for his life, and it's up to you to keep him safe.
Outline:
There are Two Ways to gather information:
Using Stealth Players must attempt this Route before moving onto the next one.
You must make 3 Successful Stealth checks against Uso-Tsuki. Uso-Tsuki has a has a Detection Rating of 12, meaning a player must roll a 13+ for their stealth checks after bonuses. If you fail a total of 5 Times, Uso-Tsuki discovers you and runs off, and you must move to the Intercept route. However, if you Succeed in a total of 3 Times, you gather enough information to know what his route is to kill the Chief.
Intercept
If a player fails to trail Uso-Tsuki with Stealth, one must fight Hogo-sha. Upon his defeat, he drops a coded missive. Players must use Post Actions perform three tasks upon picking up the Missive. First, they must decode the message (LD17+). Then, they must locate a translator as the decoded message is written in a foreign script (LD15+). Finally, they must roll a value to read the message (LD13+). Bonuses do not apply to these rolls, but you are allowed to roll multiple times in a single post for each task until you succeed.
[Note: Hogo-sha receives his own separate roll from the player]
<<Hogo-sha>> is a respawning field boss with the following statistics:
HP: 1,000
DMG: 100
MIT: 50
ACC: 3
EVA: 1Abilities:
Expecting Eye: Hogo-sha is expecting someone to attack him, as the conspiracy has made him paranoid. He is immune to Sneak attack, and he will parry the first attack you do.
Parry: On a roll of CD 9+, Hogo-Sha will block your attack, blocking 50% of the damage and dealing half of your damage back instead of his normal damage, along with getting to attack you
-
Floor 24
<<Incognito Assassination>>
Recommended Level: 40 | Non-Repeatable
Restrictions | Party Limit: 1
Credit goes to @Hikoru Rewards:
Players may only receive the following rewards once:- 7 SP
- 7,500 Col
- <<Blade of the Warrior>> [T3 Weapon of Choice] - Abs. ACC | ACC | ACC
Requirements:
- At least 1 page (20 posts)
- Killing Uso-Tsuki and his bodyguards
Summary:
You've gathered enough information to know the new route that Uso-Tsuki is taking to kill the chief, and it's up to you to stop him. Find a way to take him out before he makes it to the chieftain. Uso-Tsuki has hired two of his strongest guards to help protect them, so you will need to take them out before you can take out Uso-Tsuki.
Outline:
Guard's Stats:
SpoilerYou fight the guards simutaneously, but Uso-Tsuki will run away while your fighting them, giving you time to rest inbetween fights.
[Note: Difendā receives his own separate roll from the player]
<<Difendā>> is a respawning field boss with the following statistics.
HP: 1,100
DMG: 25
MIT: 75
ACC: 2
EVA: -1Abilities:
Defender: Difendā does what his name implies. He will defend Uso-Tsuki from any oncoming attacks. If you try to attack Uso-Tsuki, Difendā will take the damage instead
Wild Charge: Every 3 Rounds (Starting with his first turn), Difendā will wildly charge the attacking the player, losing his accuracy, but gaining 25 damage and stunning the opponent.
[Note: Purotekutā receives his own separate roll from the player]
<<Purotekutā>> is a respawning field boss with the following statistics.
HP: 1,000
DMG: 75
MIT: 25
ACC: 1
EVA: 2Abilities:
Eagle-Eye: Purotekutā is fully expecting an attack from an enemy of some sorts. This negates all auto-attack bonuses and Purotekutā will parry the first attack by the player onto any opponent, blocking the damage and dealing 25% of your attack back at you
Well-Trained: Every 5 Rounds (Starting on his first turn), Purotekutā will go into the way of the oncoming successful attack, blocking all of the damage and dealing half of it back to the player. Purotekutā will not reflect any status effects that may incur on a critical attack.
Uso-Tsuki's Stats:
Spoiler[Note: Uso-Tsuki receives his own separate roll from the player]
<<Uso-Tsuki>> is a respawning field boss with the following statistics.
HP: 1,200
DMG: 100
MIT: 25
ACC: 2
EVA: 2Abilities:
Master's-Eye: Uso-Tsuki knows that you are coming, and is already prepared. Uso-Tsuki negates accuracy and auto-hit bonuses.
Warrior-Trained: On his first roll, if Uso-Tsuki gets a natural 1 on their attack roll, they make a second attack [with 0 ACC].
Ultimate Warrior: Every 5 Rounds (Starting on his second turn) Uso-Tsuki will gain a charge against you, getting +25 Damage on a successful hit against you that turn
-
Floor 13
<<Cleansing the Corruption>>
Credit goes to @Morgenstern
Recommended Level: 35+
Repeatable | 4 players maxRewards:
- 3 SP -First time Only-
- 8,000 col each -2000 Col for repeats-
-
Rune of Cain - A smooth stone rune inscribed with the Mark of Cain. Must be T2+ to use.
- Deals 50 Thorns DMG to anything that deals a critical hit against the user. Lasts for one thread. Ignores passive abilities that would otherwise negate this effect.
- Last Hit Reward from Boss. May obtain drops multiple times from each boss.
- 3,000 Extra Col + extra possible rewards if Long Route is Taken
Requirements:
- 20+ posts required.
- Must Roleplay speaking a receiving the request from Miraak the Priest.
-
Must Roleplay and fight through the desolate wastelands of F13.
- Fight 4x Diseased Ones with Loot Minimum or Max Floor stats (Whichever is lower). X = the number of players
- Roleplay entering Demon's End.
- Complete either option Route. Short or Long Route
-
Roll the dice to find which Boss to fight (Unaffected by LD bonuses)
- LD:1-5 - Famine
- LD:6-10 - War
- LD:11-15 - Death
- LD:16-20 - Pestilence
- Defeat Boss and Roleplay the ending.
- Don't Let Miraak's HP reach 1 or Quest is failed.
Summary:

After the Fallen Event, Miraak is found outside the inaccessible chapel if this specific quest is taken. After being confronted, he explains to the players, "I require your assistance. Some time ago when I was under Artamiel's influence, I placed a powerful seal of corruption in what once was the largest city of this world. I understand now that it must be destroyed if we plan to put an end to the Corruption of this world. It seems that the Angel's power didn't lift it and we require to remove it directly" Once the player accepts, another Health Bar will appear under the party leader's with the username Miraak. He will give the player time to prepare before setting out into the desolate floor.
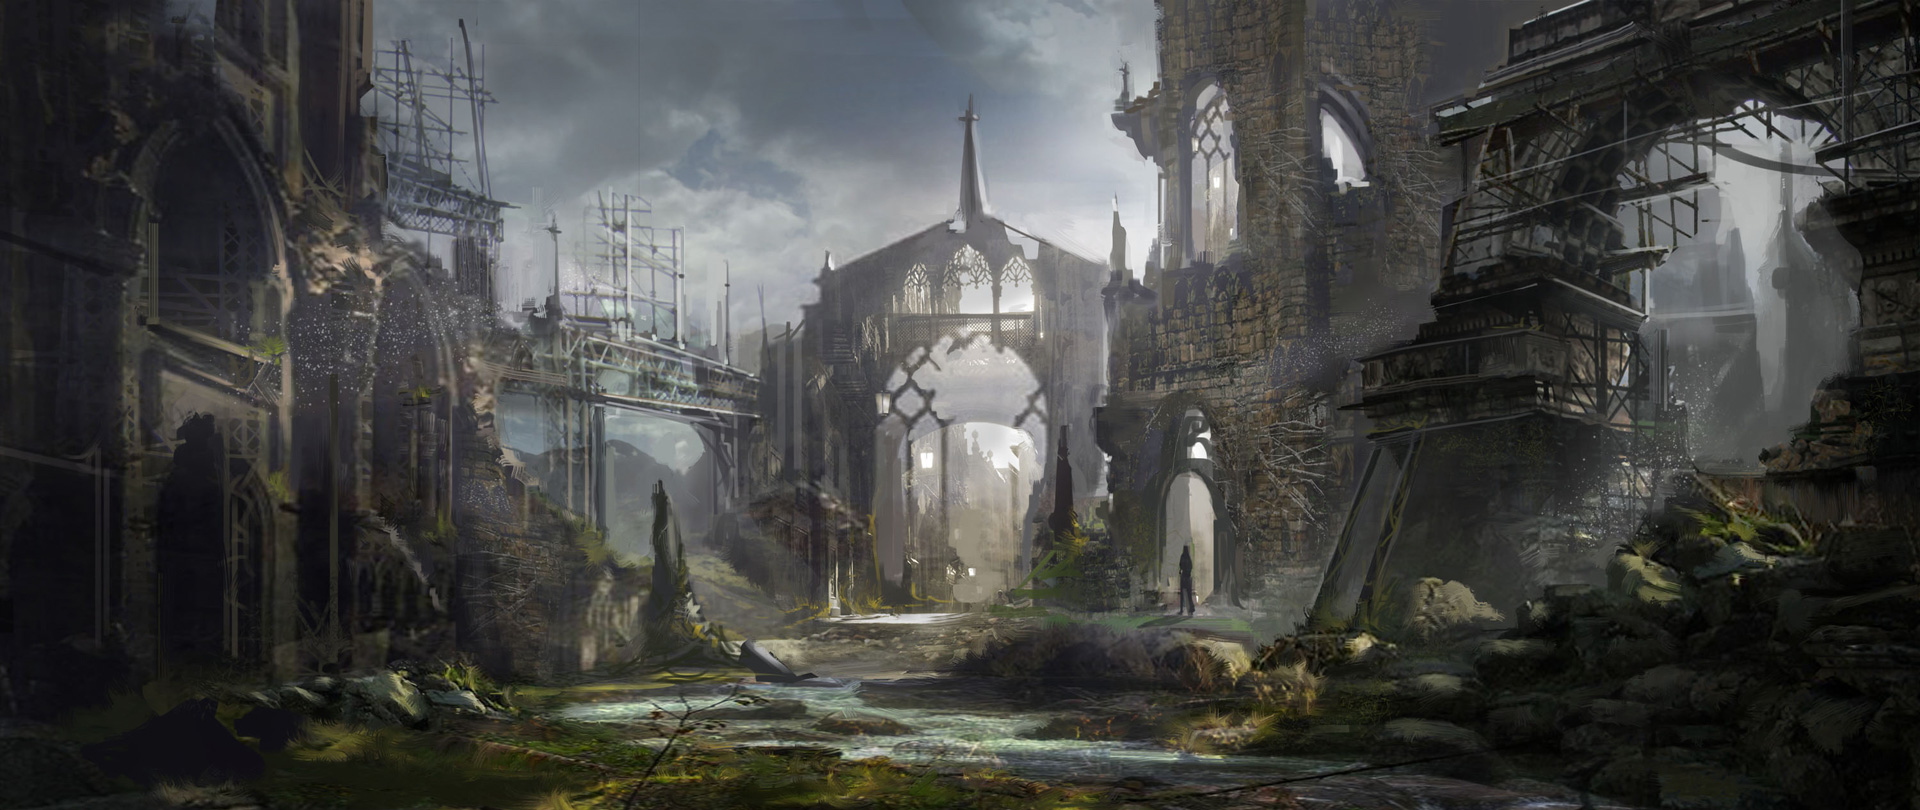
After the players and Miraak make their way through the wasteland and arrive at Demon's End he will explain to them that they have two options. They could either charge straight ahead to the problem at hand, or make their way around, searching for anything not destroyed by the corruption.
Once the players reach the center of town, they will find their way to the largest building in the city. He will lead them to a side entrance where he will use his magic to temporarily lift the rubble blocking the door. Once inside, players will find themselves in a very large open room where everything has been thrashed. A malevolent aura rests within the room, even though none of the diseased are inside. Miraak, who is shaking, tells you to stay put as he moves to the center of the room. He kneels to the floor to examine a large red glowing seal that covers the center of the floor, a circle with a 10 meter diameter. As soon as he goes to use an incantation to remove it, it explodes, throwing Miraak back to your side. While Miraak appears okay, a shadowy figure now stands in the center of the room. Miraak will gasp as he says the name of the being, sounding frightened.
Ending:
After the boss has been defeated, instead of shattering, it will crumble to dust and float away in the air, any remaining Diseased will flee. Miraak will take one last look at the seal before turning to the players. "I am afraid there is nothing to be done. I set this powerful seal, but it has been festering here ever since, growing in strength. While I believe it is at its limit and will progress no further, there is nothing we can do with it. It would be best to leave and never return. While we may have defeated it, it will simply return. Famine, War, Death, and Pestilence will always remain. I am afraid to say there is nothing we can do, it would be best to return. Come, place your hand upon me and I will return us to Angel's Point" Miraak will wait until each player places a hand on him, and once done so shall teleport all of them to Angel's Point.Failed Ending
As Miraak's HP would normally fall to zero, a white light flashes and it remains with a sliver of health. He looks to the players that fight with him, worry in his eyes. He looks to them and says, "Sorry, but we must retreat." He raises his staff and slams it into the ground, each of the players being engulfed in a blue light. When the light fades, they are in front of the chapel in angel's point. "I am afraid each of us were unprepared. Now that we know what we are up against, we should take time and prepare for another excursion some other time" With that, Miraak would turn and leave, entering the inaccessible chapel.Routes:
After reaching Demon's End, a player may decide from one of two routes. Short, and Long Route.Short
SpoilerThe players decide to keep the short but quick route and Miraak will nod. "It is best to not waste, but make haste" You will take the road straight ahead. Going on this route, there will be less Diseased encounter, but less rewards.
-Going on this route, players must fight 4x Diseased Ones with Loot Minimum or Max Floor stats (Whichever is lower). X = the number of players.
Long Route
SpoilerDeciding on the Longer way around Miraak will nod. "I too am curious about what remains after the corruption. Little is known of the diseased ones, so I wonder if they left much" Taking the longer route, players must fight more diseased ones, but receive more col and the potential for better items... at a certain risk.
Before anything else players must fight 8x Diseased Ones with Loot Minimum or Max Floor stats (Whichever is lower). X = the number of players.
Party Leader may make a roll,depending on the CD they might find additional Col or Unique Item.
CD:1 ~ Incarnation of Greed is Found and must be destroyed to proceed.
CD:2-10 ~ Nothing
CD:11-12, BD:1-9 ~ Additional 5,000 Col
CD:11-12, BD:10 ~ x1 T2 Weapon of Choice - Corrupted Justice - 2 DMG, 1 FallenIncarnation of Greed

As it appears before the player, Miraak will look at it and gasp. "Careful! This being is very powerful and is known as the Incarnation of Greed. Unless you believe yourself strong enough, it would be best to avoid this fight and retreat now!" If the player insists on staying a grumbling voice would be heard. "You are here for the rewards, are you not? They are much more significant than the worth of your own lives"
Receives its own Roll
HP: 2000
DMG: 300
MIT: 50
ACC: 3
Incarnation of Greed(Passive) - Heals itself for 50 HP if it lands a successful hit. Passively restores HP equal to all players added up Battle healing.
Spite of Greed - On a BD:9-10, it sends a blast of pure energy, hitting the player for full damage, ignoring Mitigation.
Sin's Destruction - On a CD:11-12, Incarnation of Greed will send a blast wave to hit all players. Deals 50*Hate Unmitigatable DMG. Takes priority over Spite of Greed.
Last Hit RewardLD:1-21, 10,000 Col
LD:22+ - Greed's Spite - T2 Weapon of Choice - Phase, ACC, ACC (Can Only be obtained once per player)<<Miraak>>
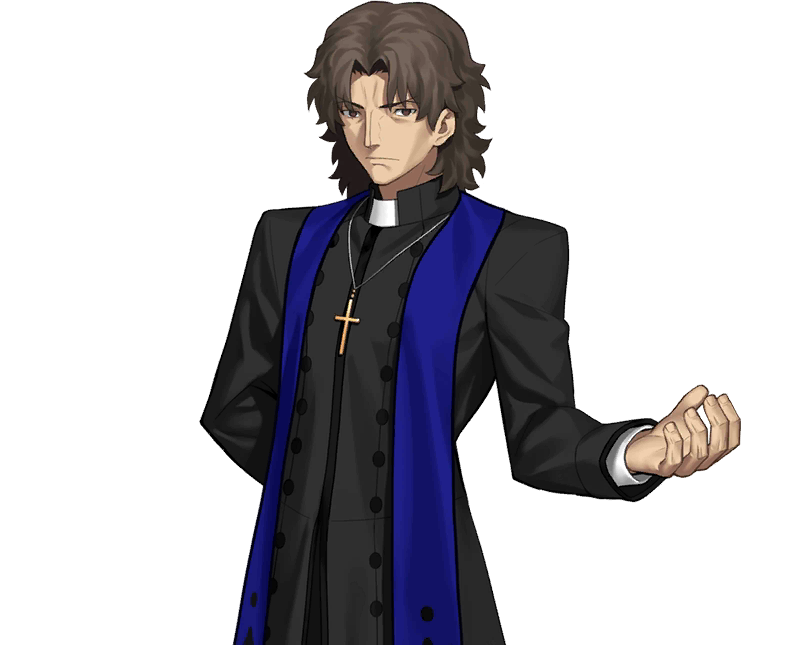
A support to the players within the quest aiding them. His purpose is to help cleanse the corruption of the world to atone for the Sins he had previously made. He is found to be wielding a staff with a golden cross at the top of it. He is kind and patient, but quite cocky when it comes to a normal battle.Dialogue
- If a player mentions the Fallen Event or attacking players, he will bow his head and apologize. Afterwards, he will say he has learned an grown from those past mistakes.
-
If a player mentions doing the quest previously with him on repeat runs, he will have no memory of doing so and frown at the player.
- For RP purposes, Miraak will have no reaction to anything given to him in terms of information about the quest.
- If a player were to attack him, he would say that he forgives them and teleport out. He can dodge any attack at him by a player.
Stats
800 HP
50 MIT
2 EVA
Actions
CD:1-3, Heals the player (Or himself) with the lowest HP% for 200 HP.
CD:4-6, Heals all players in party, including himself for 100 HP.
CD:7-9, Increases all players in party's DMG by 2 for 2 Turns.
CD:10-11, Removes all status effects from players in the party and himself.
CD:12, Uses Lord's Light - An AOE attack that hits all enemies with a wave of light, dealing 300 unmitigatable DMG.Passive Abilities
Lord's Protection - HP can not drop below 1 ~ Will Teleport out and quest will fail if this happens.
Holy Breath - On a BD:9-10, whatever action used, it doubles its effect. CD:1-3 will heal player for 400 HP instead of 200. Etc, etc.
Silent Night - If all players in party are in stealth, Miraak will shroud himself in magic, making him unable to be seen until a player comes out of hiding.
Boss Fights
<<Famine>>

One of the Four Horsemen of Apocalypse. It is the living incarnation of starvation and scarcity. Its only purpose is to spread famine and starve out humanity. Its very aura seems to drain players of all additional help. It fights players with a spear as dark as night.
Receives its own Roll
HP: 1500
MIT:50
DMG:200
ACC:2
EVA:2
Famine (Passive) - Buffs are made Ineffective for this battle, this includes Sharpness and Barrier but doesn't include buffs granted by Miraak. Debuffs still work.
Corruption (Passive) Will always deal at least 100 DMG after MIT
Devil's Pierce: On a MD:9-10, deals double damage.
Hell Blast: On a CD:10-12, Blasts a black wave of energy, hitting all players in the room. Deals 300 DMG to all players and Miraak. 2 Turn Cooldown.Last Hit Reward:
Song of Famine - T2 Debuff Song. Decreases a single targets ACC and EVA by 2 for Four turns.
<<War>>
One of the Four Horsemen of Apocalypse. It is the living carnation of war and bloodshed. Its only purpose is to spread its violence on humanity. Its violent tendencies sometimes allow it to make multiple actions. It fights players with a Two-Handed sword as cold as night.
Receives its own Roll
HP: 2000
MIT: 75
DMG:300
ACC:3
EVA:1
War (Passive) - On a CD:10-12, Receives another Attack. Can only activate once per turn. This CD is determined on his first attack's roll.
Corruption (Passive) - Will always deal at least 100 DMG after MIT.
Cleave(Passive) - Hits main target for normal damage and every other player and Miraak for half of that damage. Attacks not against main target don't receive additional ACC. Each part of Cleave uses the same MD determined from main attack.
Devils Smite - Will deal an extra 100 DMG on MD:9-10.Last Hit Reward:
T2 Crystal - Bloodcrystal of War: +4 DMG, -20* Player's Tier Mitigation
<<Death>>
One of the Four Horsemen of Apocalypse. It is the living carnation of Death. Its only purpose is wipe out humanity as it is own. Its very presence prevents the creation of life and healing. It fights players with a scythe as eerie as a crow.Receives its own Roll
HP:1500
DMG: 175 Unmitigatable DMG
MIT: 25
ACC:3
EVA:2
Death (Passive) - After hitting an opponent, the opponents current HP becomes its Temporary Max HP until the battle is over.
Battle Killing (Passive) - Players don't receive Battle Healing and take half of their Battle healing as DMG every turn. Emergency Recovery is ineffective.
Devil's Sweep - Attacks with an AOE on a MD:9-10. Does not have to roll again for attacking other party members or Miraak.
Last Hit Reward:
Death's Song ~ T2 Debuff Song - Target is unable to heal for the next two turns. Includes, Battle Healing. Can be removed by Purify. Doesn't affect Floor/Event Bosses.
<<Pestilence>>
One of the Four Horsemen of Apocalypse. It is the living carnation of plague. Its only purpose is to spread disease and the corruption. It constantly lands status effects to all. It fights players with diseased arrows that it repeatedly uses to sprout arrows into its opponents chest.Receives its own Roll
HP: 1,750
MIT: 50
DMG: 200
ACC:3
EVA:1
Pestilence (Passive) - On any landed hit, add a Blight effect dealing 24 DMG for the next three turns. These effects don't refresh but stack up to 3 effects in total. After reaching 3, it will refresh the oldest effect.
Corruption (Passive) - Will always deal at least 50 DMG after mitigation
Cleave (Passive) - Hits main target for normal damage and every other player and Miraak for half of that damage. Attacks not against main target don't receive additional ACC. Each part of Cleave uses the same MD determined from main attack.
Call of Corruption : On CD:11-12, Will summon forth 2 Diseased Ones with the same stats as previously. Will attack afterward using the same roll.
Disease: On MD:9-10, Deal 100 Extra DMG, and apply two Blight effects instead of one.
Last Hit Reward:
Essence of Corruption - Adds a Blight effect to a weapon for one thread. (36 DMG for 2 turn on a BD:9-10) -
Any Floor
<<Training your Friend>>
Recommended Level: Any
Repeatable, must have a familiar to attempt | Solo or in a party of twoRewards:
- Familiar mastery skill. (May only have one unlocked at a time. Only unlocks first level of the mastery skill free of SP charge.)
- 1 SP (First completion only).
Requirements:
- Role-play training your familiar in its task (relate it to the familiar mastery you plan to take).
- At least one page (20 posts) of RP.
Summary:
You have a new friend! Now to train it to help you out.
Outline:
Once every 5 posts, attempt to train your familiar (CD 7+). After three successful attempts, you have successfully trained your familiar. Rolling to train your familiar is a post action.
-
Any Floor
<<Feeding your Enemy>>
Recommended Level: Any
Repeatable if you no longer have a familiar | Party Limit: 2Rewards:
- A familiar of your choice (within guidelines).
- 1 Skill Point (first completion only).
Requirements:
- RP meeting the gypsy and obtaining the food from her.
- Obtain a familiar.
- At least 1 page (20 posts).
Summary:
An old gypsy NPC approaches you, telling tales of how she tamed monsters. Giving you some food, she tells you how to tame your own familiar.
Outline:
Once every 15th post, the party leader may roll to search for a familiar. On a roll of 15+ LD (normal LD enhancements apply), you successfully find a potential familiar.
Once a potential familiar is found, that party leader has 4 attempts to tame it. Taming is a post action that is successful on a CD roll of 9+. If the party leader fails all 4 attempts, the potential familiar becomes untamable and a new one may be searched for in 15 posts.
If the roll to tame is met, you have successfully attained a familiar. Return the <<Familiar Food>> to the Gypsy NPC to complete the quest. Only one familiar may be found per thread.
-
Floor 24
<<Raging Rhino>>
Recommended Level: 40
Repeatable | Party Limit: 4
Credit Goes to @Hikoru and @NeopolitanRewards:
- 5,000 Col
- 5 SP
- Rhino's Horn [Consumable]: (Applied to a Weapon. When attacking, on the First Crit, the attack ignores 40% Mitigation of the target it's attacking. If it is an AoE it only applies to the first target hit, not all 4. If this item is stacked with a Phase Weapon, the 40% Phase ONLY affects Block instead of overall Mitigation.) [This Item drops Once Per thread]
Requirements:
- Defeat Piasuhōn
- At least 1 page (20 posts)
Summary:
On Floor 24, respect is earned through combat in the Colosseum. People gather from all around to see people compete and fight against creatures big and small. Here, the people like bloodshed and the violence and gore that the Colosseum brings with it. The Chief of the people here wants to see if you can truly hold your own against one of the scariest creatures they have, Piasuhōn. Piasuhōn, or Piercing Horn, is one of the mightiest, and craziest, beasts they have available in the Colosseum. If you win, you earn fame and glory amongst the people and a large sum of money. But if you lose, The beast will devour you whole, and the people will forget your name as if it was nothing but a spec of dust under their boot. The choice is yours to make.
Outline:

[Note: receives his own separate roll from the player]
<<Piasuhōn>> is a respawning field boss with the following statistics.
HP: 1,100
DMG: 300
MIT: 50
ACC: 2
EVA: 2Abilities:
Piercing Horn: When Piasuhōn crits, Piasuhōn's attack goes through armor easily, dealing 50% Phase, including block.
Trained Eye: Piasuhōn is able to land critical hits more easily. His Crit scale is 8-10 instead of 9-10
Pure Rage: When Piasuhōn's health reached 550, he is overcome by a fit of rage, aiming to kill. He gains +100 Damage to his base attack but loses 1 Accuracy in his blind rage
-
Floor 23
<<Escaping the Underdark>>
This quest is Part 2 of <<Breaking the Chains>>
Recommended Level: 35+
Non-Repeatable | 4 players max
Can only take this quest if Fonsa was alive at the end of <<Search and Rescue>>Rewards:
- 2 SP
- 8,000 col each
-
March of the Rebellion - Debuff Song.
- Hypnosis: When played, reduces a single enemy’s Accuracy by 2 Effect lasts for one battle.
Requirements:
- Must role play receiving the message from Tythen and speaking with the couple at their house.
- After choosing a plan, must role play the trip to the Vale of Ruin
- Fight the required number of enemies per plan.
Summary:
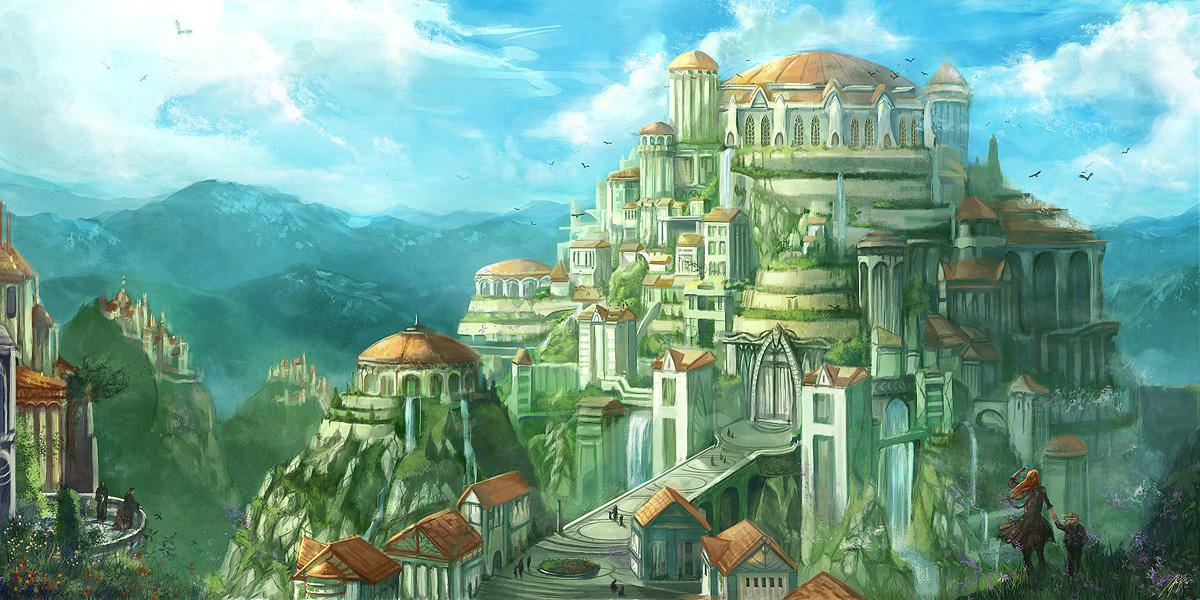
A few days after returning Fonsa safely to her husband, Tyhten, in the Underdark, you receive a message from the Dark Elf couple to come and meet them immediately in their home. Upon arriving, he tells you that he was wrong to not believe Fonsa about the state of the surface and the outcome of the war. They also express that they believe there is something else at work here, and they no longer wish to be a part of it. They speak word of a rumored city known as the Vale of Ruin that lies far out of the Dark Elves' hold, where they would be safe and welcomed.
The dark elf couple tell you that they have come up with two plans to get them out of the Underdark and to the Vale of Ruin. The first plan is the use a covered wagon and horses, leaving through the main road out of the city, and traveling upon the Surface - A faster route, but would catch more attention. The second plan, is to move through the tunnels of the Underdark to a secret exit that lets them out just out of the Dark Elves' hold - Would draw less attention, but would take more time.
Outline:
Traveling on the Surface
SpoilerThe horses and wagons held at the stables on the other end of town are not used very often, though they are rented out to players who truly want to traverse the Surface. Tythen and Fonsa pay for the horses, and fill the wagon with their belongings - hiding among their possessions as well. The guards at the front gate will check the wagon, but not thorough enough to find the two stowaways. They will ask where you are traveling to, however.
Upon exiting the Underdark, the trip will take about a day. Traveling by horseback, however, will easily draw the attention of beasts roaming the fields, as well as the Dark Elf hunters sent after you once word got out of the couple's plans to escape.
Before reaching the Vale of Ruin, you must fight 3 Monsters per player, and 4 Dark Elf Hunters
Traveling through the Underdark
Spoiler::Traveling through the Underdark means players receive a -1 to all BD rolls (Unless Night Vision is active)::
The tunnels that stem out from the main settlement are narrow and uneven, so traversing this path would mean making the trip on foot.
The deeper you move into the tunnels, the darker it becomes, making it quite difficult to continue forward. Fonsa and Tythen, however, are able to lead the way with their Night Vision.The trip through the tunnels would take about a day and a half, with the group needing to set up camp at some point before finishing the journey. This path, however, draws much less attention. The trip, however, is still treacherous, as dangers lurk within the darkness of the caverns, and the Dark Elf Hunters who learned of the couple's escape would not be far behind.
Before reaching the Vale of Ruin, you must fight 2 monsters per player, and 2 Dark Elf Hunters
<<Monsters>>
Players get a choice of what monsters they fight on the Surface/Underdark, as long as they follow these stats:
HP: 250
DMG: 80
MIT: 15<<Dark Elf Hunters>>

HP: 575
DMG: 150
MIT: 30
EVA: 1
ACC: 2<<Blow Dart>> On a BD of 9-10, The Dark Elf Hunter throws a dart at the player with the most hate, dealing 175 DMG and Paralyzing them.
-
<<Search and Rescue>>
This quest is Part 1 of <<Breaking the Chains>>Floor 23
Recommended Level: 30
Non-Repeatable | Party Limit: 4Credit: @Jomei
Rewards:
If Fonsa Dies
2 SP
750 col per player
Quest Line is locked, participating players cannot continue to Second partIf Fonsa is brought back alive
1 SP
600 col per player
Participating players may continue to << Escaping the Underdark>>Requirements:
-
At least 1 page of RP content (20+ Posts)
-
Must role play taking the quest from Tythen in the Underdark.
-
Players must roll the LD to find Fonsa, and pair with the CD to find the result (See table below)
-
If the roll requires it, players must fight off 2 Beastmen x players in party before being able to return to the Underdark.
-
If Fonsa is killed/has died, bring back her wedding ring as proof that she is no longer alive.
Summary:
The majority of the Dark Elves in Kalanaes could care less about your visit to the town, many of them flashing you dirty looks and scowles, simply hoping that would will not talk to them. One man, however shines you a different look, one of desperation and sorrow. Unlike the others who pass by without a word, he directly approaches you and asks for your help. He claims that his wife had gone off to war against the Forest Elves on the surface, and her failure to return only hinted that she would no longer be living. The man clings on to a small string of hope, however, and asks if you could travel to the surface and search through the Queen’s Tower to find out if she still lives, or if she perished during the fighting.
Note: Tythen, nor any of the other Dark Elves, do not know of the destruction of the Queen’s Fortress and the land around it on the floor above. They speak as though the Tower still stands tall, and that the land is not scorched from battle. Upon returning, none will believe you if you tell them of the damage done.
Outline:
- After taking the quest from Tythen, you must travel to the surface to look for his wife, Fonsa, in the wreckage of the Queen’s Tower.
- Players must take four (4) posts combined exploring the wreckage, before they could start rolling to find Fonsa.
- Players take turns rolling the LD, and will find Fonsa on a natural roll of 13+
- Depending on the Natural CD paired with the LD that finds her, the quest will produce different outcomes:
CD Roll
Result
CD 1
Fonsa is found dead, defend yourself from Crazed Beastmen.
CD 2-3
Fonsa is found dead, no Crazed Beastmen to be seen. For now.
CD 4-7
Fonsa is found barely alive, fight off Crazed Beastmen and keep Fonsa alive. (3 Hits)
CD 8-11
Fonsa is found alive, fight off Crazed Beastmen and keep Fonsa alive. (4 Hits)
CD 12
Fonsa is found barely alive, no Crazed Beastmen to be fought.
<<Fonsa>> (Ally)
EVA: 1
Fonsa’s armor and weapon are damaged beyond use, making her unable to fight or defend herself aside from trying to dodge the Beastmen’s attacks. (Does not require a roll)
Note: Fonsa can only take so many hits depending on the CD roll. On a roll of 4-7, Fonsa can only be hit 3 times before dying. On an 8-11, she can take 4 hits.
<<Crazed Beastman>>

HP: 300
DMG:85
MIT: 20
<<Bloodthirst>> The Crazed Beastmen are returning to finish what they started. Fonsa will always have 1 Hate automatically generated for each Beastman.<<Crazed Swing>> On a MD roll of 9-10 the Crazed Beastman will swing wildly, hitting every party member, including Fonsa. (players take numerical damage, Fonsa takes 1 hit) This attacks Deal 100 damage to players.
-
-
Floor 23
<<Ugzeke The Mighty>>
Recommended Level: 35
Repeatable | Party Limit: 4
Credit Goes to: @HikoruRewards:
- 2.500 Col
- 3 SP
- Troll's Blood: A unique consumable that, when applied to a weapon, adds +2 DMG for the thread
Requirements:
- Defeat Ugzeke
- At least 1 page (20 posts)
- Players receive -1 to all BD rolls due to lack of light in the Underdark (Unless Night Vision is activated or a Glow Stone is used)
Summary:
A powerful enemy lurks in the shadows of the Underdark, causing the ever so stoic dark elves to shiver at the thought of it. Its groans could be heard echoing through the caverns surrounding the town, each step causing the ground to rumble the closer it gets. Despite the dark elves not trusting humans such as yourselves, they beckon you to go and find the beast and rid it before it finds a way into their town. At least, if you fail, they won't have to see you around anymore.
Outline:

[Note: Ugzeke receives his own separate roll from the player]
<<Ugzeke>> is a respawning field boss with the following statistics.
HP: 1,500
DMG: 200
MIT: 35
ACC: 2
EVA: 0Abilities:
Ugzeke Smash!: On a CD roll of 10+, Ugzeke uses his large wooden club and smashes it on top of the player with the most hate, dealing 175 Damage and Stunning the player.
Ugzeke Mad!: When Ugzeke loses half of his health, his body overheats, his skin taking on more of a red color. His damage raises to 250, but loses 2 Accuracy
Ugzeke Confused?: If Ugzeke rolls a CD of 3 or below, he has no action, despite his roll as he has difficulty seeing his enemies, and thinks that they are just stone
-
Thank you to all who participated
Couples Contest Results:
1st Place: Jomei and Telrenya
- 2x Masks of the Lovers (Unique Item, Cannot be traded. Grants +1 LD, +(30*Tier) Overhealth. Does not take up an equipment slot. Masks of the Lovers' enhancements are only active when both players are in a thread together and both are equipped.)
- 15,000 Col to be shared
-
4 extra Red Velvet Cakes to be shared
2nd Place: Kimi and Hestia
- 10,000 Col to be shared
-
2 extra Red Velvet Cakes to be shared
3rd Place: Beat and Shield
- 5,000 Col to be shared
- 1 extra Red Velvet Cake to be given to one player
Every player receives 1 Red Velvet Cake for participating
Unique Consumable: +1 LD, +1 Prosperity for the thread
Hestia 10 SP
Kimi 9 SP
Telrenya 2 SP
Macradon 8 SP
Froppy 3 SP
Jomei 3 SP
Spencer 2 SP
Kairi 8 SP
Ruby 1 SP
Itzal 3 SP
Eatos 2 SP
Pinball 1 SP
Simba 0 SP
Krysta 5 SP
Jevi 1 SP
Hidden 0 SP
Vigilon 5 SP
Dazia 3 SP
Minako 1 SP
Hei 2 SP
Fae 1 SP
Saphira 1 SP
Lee 2 SP
Kaiser 0 SP
Piera 2 SP
Shield 6 SP
Benjamin Bookworm 3 SP
H3LLO 1 SP
Steel 2 SP
The Black-White Human 5 SP
Beat 4 SP
Paglikha 1 SP
Illure 9 SP
Calypso 2 SP
Zandra 2 SP
Avilon 2 SP
Sey 0 SP
Reinka 3 SP
Hikoru 2 SP
Sorra 1 SP
Jiro 0 SP
Spangie 0 SP
Domarus 0 SP
-
Floor 1
<<Earning a Living: Merchant>>
Recommended Level: Any | Party Limit: 4
Repeatable Only to Change ProfessionsBilly (Master Merchant NPC)
"Hey you wanna learn how to cheat the sy- I mean make good sales? Follow me." You almost don't notice him, the child that is standing in front of you. He is around the age of 12 or 13, but almost seems more mature for his age than other young kids that you have met. He beckons you forward, and considering it's a kid, nothing really seems that suspicious about him. He enters a small room next to a bigger inn, looks very small to be a shop, but a shop still exists some how. He has you follow him into the back, where he has items littered all around, the combined stats on all of them are astronomical. "If you really want to learn how to be a Merchant, you have to be crafty and smart for this. You best know what you are doing. I'll show you how to identify an it- No! I'm all out." The kid pouts for a bit, then stops and turns to you."Go get me some more, around 3, so I can show you how to do this." The kid pouts again and crosses his arms.Rewards:
- 1 Additional SP (First Completion Only)
- <<Merchant>> Profession
- Successfully Identified Item (Choose 1 from the three that are identified)
- Standard <<Merchant>> Shop (Able to have a Merchant thread in the Merchants & Shops section)
- (1,000) Col
Objectives:
-
Gather (3) items and bring them to Billy's Shop.
-
Go into the wild and find 3 Unidentified items. Use a combination of LD/CD on three separate rolls to determine what you find:
- Loot Dice (1-10) = Uncommon Item
- Loot Dice (11-17) = Rare Item
-
Loot Dice (18-20) = Perfect Item
- Crafting Dice (1-3) = Weapon
- Crafting Dice (4-6) = Armor
- Crafting Dice (7-9) = Shield
- Crafting Dice (10-12) = Consumable
-
Go into the wild and find 3 Unidentified items. Use a combination of LD/CD on three separate rolls to determine what you find:
-
Identify (3) items in Billy's Shop.
-
Make a standard Loot Roll (Dice Roller Tutorial). Specify the item type in the Roll Purpose (must be a Tier 1 item). Use the Loot Die Chart for a Rank 1 Merchant
-
Weapons
- [1-2] = Taunt
- [3-6] = Accuracy
- [7-10] = Paralyze
- [11-14] = Bleed
- [15-20] = Damage
-
Heavy Armor
- [1-4] = Regen
- [5-8] = Heavy Momentum
- [9-13] = Thorns
- [14-20] = Mitigation
-
Light Armor
- [1-3] = Regen
- [4-6] = Recovery
- [7-10] = Light Momentum
- [11-15] = Evasion
- [16-20] = Mitigation
-
Shields
- [1-2] = Recovery
- [3-5] = Taunt
- [6-8] = Regen
- [9-11] = Paralyze
- [12-15] = Thorns
- [16-20] = Mitigation
-
Consumables
- [1-3] Vitality
- [4-6] Protein
- [7-9] HP Recovery
- [10-12] Mitigation
- [13-15] Damage
- [16-18] Over-health (Crystal)
- [19-20] Mass HP Recovery (Crystal)
-
Weapons
- Pick and submit one of the successfully identified items for Evaluation.
- NOTE: You keep the item you identify as a reward for completing the quest.
-
Make a standard Loot Roll (Dice Roller Tutorial). Specify the item type in the Roll Purpose (must be a Tier 1 item). Use the Loot Die Chart for a Rank 1 Merchant
Requirements:
- At least one [1] Page (20 or more posts)
- Players must RP searching for items and identifying their items.
- If a party of players undertakes this quest together (as in, each player wishes to become a merchant), each must succeed on their own objectives (e.g. each must find and identify 3 items).
- Accompanying players who are not undertaking the quest do not have to gather their own items and are ineligible for quest rewards.
-
Floor 17
<<Challenge Of Olympus: Merchant>>
Recommended Level: Any | Party Limit: 1 (Solo Only)
Must be Rank 2+ Merchant | Non-RepeatableRewards:
- 1 Additional SP
- (+1) CD Tool, Hermes' Scale
Objectives:
-
Roleplay The Challenge:
- Meet with the satyr on Floor 17.
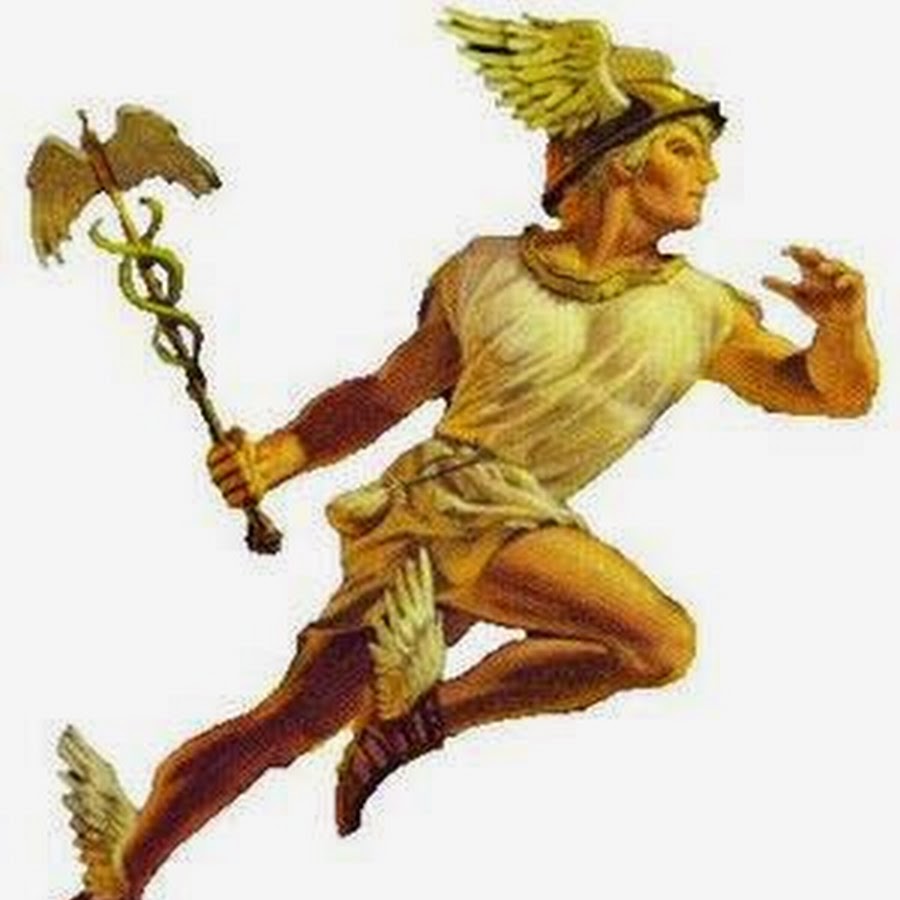
- Meet with Hermes outside of Mt. Olympia and accept his challenge.
- Describe the details of the challenge, face-off with Hermes and roleplay out how you best the Emissary of the Gods.
Summary:
Disclaimer: The God(s) in this quest are NPCs for RP flavor only and cannot engage in combat nor affect the world in any way other than what’s described.Merchants who have reached rank 2 in their profession receive a notification stating that a rare quest is available to them on floor seventeen. Upon arriving to the floor, a satyr's sudden appearance will easily startle nearby NPCs, and he promptly inform you that you have been invited to the gates of Mt. Olympia. It seems that Hermes himself would like to challenge you to a Battle of Crafts.
Players must RP meeting with Hermes, and they are free to describe the details of the challenge that is issued however they like as long as it pertains to merchants. They must RP the challenge out appropriately, encouraged to make the crafting battle very difficult, though not impossible.
Requirements:
- At least one [1] Page (20 or more posts)
- All crafting done in this quest is RP only--no rolls required, and items cannot be given stats or submitted for evaluation.
-
Floor 22
<<What We Fight For>>
Recommended Level: Any
Non-Repeatable unless taken as a secondary party member. Secondary party members to not receive quest rewards
Party Limit: 2
Credit: @HestiaRewards:
- A framed picture containing the player(s) most missed memory from the real world.
Requirements:
- At least 1 page of RP content (20+ Posts)
- Must roll LD: 17+ to find the memory Chamber
Summary:
Within the Forest of Memories, there have been hazy anomalies all throughout the forest that provide a feeling of familiarity. If the player would travel deeper into the forest, they will discover a set of stairs that lead down into the ground. The stairs eventually level out into a simple stone chamber, the doors creaking as they close behind them. The walls of the chamber soon reveal to be lined with reflective mirrors that show the player what they miss most from the real world. If the person has a strong connection with this desire, a scene pertaining to that memory will show itself upon the mirror they look into. After that the player will then receive a picture of the thing they miss most about the real world.
-
Floor 22
<< The King of Lakes >>
Recommended Level: 35
Repeatable for "Filet of King" Only | Party Limit: 4
Credit: @Jomei
Rewards:
- 3 SP
-
Filet of King: T3 Perfect Meal
Over Health Adds +135 HP to your maximum health points for a single thread.
Requirements:
- At least 1 page of RP content (20+ Posts)
- Must role play hunting down the "Red Salamander" and bringing it back to Lake of Reflections
- Must fish up and defeat the "King of Lakes"
- Players with the Fishing skill will receive +3 LD when fishing up the King of Lakes.
Summary:
Upon a small, wooden dock stretching from the shore along the Lake of Reflections, a middle-aged man sits with a line cast out into the lake, trying to fish up his dinner. He tells you that most of the fish he brings home are large, but he had heard stories of an even bigger fish that lurks around the bottom of the lake, one that could be called monstrosity. However, where fishing up this beast is rare in itself, it will only be attracted to a certain type of bait found along the base of a nearby mountain. The fisherman tells you that if you can find the "Red Salamander" and bring it back to use as bait, that anything the King of Lakes drops is yours to keep.
Outline:
- From receiving the quest from the fisherman at the Lake of Reflections, the player(s) must write three posts (combined) of travel to the base of the mountain.
- The player(s) then take turns rolling the LD as a post action to find the Red Salamander (LD 13+). Players with the Tracking mod active may use a post action to automatically pass this roll.
- Once the Red Salamander is discovered, it will try to run from you. Use a post action to roll a CD (6+) to capture it alive before it gets away. The Red Salamander escapes after 5 failed attempts to capture it, and players must go back to searching.
- Travel back to the Lake of Reflections with the Red Salamander, and take turns rolling the LD (15+) to fish up the King of Lakes. This does not count as a post action (the player who fishes up the King of Lakes may then initiate combat by attacking in the same post).

<< The King of Lakes >>
Statistics:
HP: 1200
DMG: 125
MIT: 20
Abilities:
<<Body Slam>> On an MD of 9, the boss will jump high into the air and crash down in the center of the players, sending out a shock-wave dealing 120 AoE damage.<<Dive>> On an MD of 10, the King of Lakes will take the player with the highest hate in its teeth and drag it back into the lake. The player will take 150 unmitigatable damage and need to swim back to the shore, missing their next attack.
-
Floor 19
<<Keep Calm and Ki'Raion>>
Recommended Level: 40
Non-Repeatable | Party Limit: 4
Credit Goes to: @BirdieRewards:
- 3 SP if it's Daytime / 1 SP if it's Nighttime
- 8000 Col
- 15 T3 Materials
- Daytime Last Hit Reward: Ki'Raion's Tail [Perfect T2 or T3 Weapon of Choice] - Enhancements: Accuracy/Accuracy/Paralyze
Requirements:
- At least 1 page of RP content (20+ Posts)
- Defeat "Ki'Raion"
Summary:
Rumour spreads of an exceedingly powerful monster, hidden deep in the far Eastern reaches of the 19th floor. Locals say that the beast roams high hills and barren plains, laying waste to entire settlements and demolishing every cursed fauna that stands in its path. The scouting party who encountered <<Ki'Raion>> have reported escaping with their health points in tatters and the beast’s untouched, dubbing it extremely aggressive, territorial and dangerous. For fear of the <<Ki'Raion>>'s true strength, it's suggested no lone player trek within a thousand yards of the floral lion’s territory and that parties remain vigilant in an encounter.
Outline:

<< Ki'Raion >>
[Note: Ki'Raion uses his own dice roller for this fight]Statistics:
HP: 850
DMG: 175
MIT: 100
ACC: 3
EVA: 2
Abilities:
<< Tail Swipe >> : If BD 9-10 and MD 1-5 is rolled simultaneously, "Ki’Raion" unleashes a powerful tail swipe that can strike a whole party. Deals 150 AoE damage to all party members as well as normal damage to the player with the most hate.
<< Venus Fly Trap >> : If BD of 9-10 and MD of 6-10 is rolled simultaneously, "Ki’Raion" lunges at the player with the most hate and encases them in its floral mane. They experience 150 additional damage and will take 100 additional damage for each following turn that they're trapped. They are freed when at least 200 HP damage has been dealt to "Ki’Raion" or another player achieves greater hate. A trapped player may still attack.
<< Photosynthesize >> : Absorbing the Sun’s energy, every second attack "Ki’Raion" makes will be damage boosted by 150.
<< Moonlight Aversion >> : During nighttime, the boss does not use Photosynthesize and its damage-boosting conditions deal half as much damage. However, the quest rewards are significantly poorer. -
Floor 16
<< The Swashbuckling Buccaneer >>
Recommended Level: 35
Repeatable only for "Pirate's Treasure" | Party Limit: 4
Credit Goes to: @BirdieRewards:
- 3 Additional SP
- 10,500 Col
- Pirate's Treasure (Unique Consumable): A lucky coin that will give the user +2 Prosperity, for the duration of a thread. One time use!
Objectives:
- At least 1 page of RP content (20+ Posts)
- Defeat all 5 <<Pirate Deckhands>>
- Defeat <<Boatswain Amir>> and <<Boatswain Jessamine>>
- Defeat <<Burlock, the Quartermaster>>
Summary:

A <<Frantic-looking Sailor>> sits hunched atop a wooden crate, his feet dangling idly over the pier’s edge. He turns as you approach, a look of hopelessness in his eyes.
"Y-you there! Have you the heart to aid a foolish sailor? You see, this shipment is due for departure come morn… and my ship’s been thieved! It’s those purloinin’ pirates, Greybeard’s lot or something-or-other. I would lead an effort to retrieve it but folks round ‘ere pay no mind to the business of others. Don’t suppose you could lend a hand?”
Should you choose to accept, the sailor turns Eastward and points across the water. He tells you the ship was last spotted near <<Ill Man’s Cove>>, a pier with two run-down shacks built into the adjoining cliff face, reputable for its shady dealings. He also shares details of the crew who stole his ship, including that of a burly man wearing a Captain’s hat. He marks the coordinates on your map and tells you to meet him where you stand by nightfall, making brief mention of his uncle’s rowboat.
Outline:
Participants may choose to roleplay meeting the <<Frantic-looking Sailor>> and his uncle at the docks, but must roleplay arriving at <<Ill Man’s Cove>> on the uncle’s rowboat. The sailor’s uncle will leave after dropping off the participants and the sailor.
Participants may choose where and how to combat the pirates; however, 2 Deckhands will always try to fight alongside each Boatswain. Boatswains receive individual BD rolls, Deckhands may share (though they still require a separate roll from the player).
Once all Deckhands and Boatswains have been defeated, <<Burlock, the Quartermaster>> bursts out from below deck of the stolen ship and howls “Arrggh! Who dares provoke the ire of Greybeard’s Quartermaster?!”
Upon defeating <<Burlock, the Quartermaster>>, the sailor climbs aboard his reclaimed ship and imparts a word of thanks, and offers the participants transport back to port. All mobs below receive separate dice rolls each!
<<Pirate Deckhand>>
HP: 250
DMG: 85
MIT: 40Hornswaggle: On a nat. CD of 11-12, stuns the player for one turn and the pirate's attack bypasses 1/2(rounded up) of the target's mitigation.
 <<Boatswain Amir>>
HP: 400
DMG: 125
MIT: 60
EVA: 2Chain of Command: When first engaged upon by a player, two <<Pirate Deckhands>> will instantly spawn and attack the player once regardless of Hate. If all 5 <<Pirate Deckhands>> have already been previously spawned (and/or defeated), none will spawn upon engaging the <<Boatswain>>.
Freebooter: On nat. BD rolls of 9-10, <<Boatswain Amir>> raises his boot. If the CD is 1-6, he kicks high and hits with 150 AoE damage. If the CD is 7-12, he sweeps low and knocks the target's party off their feet, lowering their Evasion by 2 for their next turn.

<<Boatswain Jessamine>>
HP: 350
DMG: 175
MIT: 50
ACC: 2Chain of Command: When first engaged upon by a player, two <<Pirate Deckhands>> will instantly spawn and attack the player once regardless of Hate. If all 5 <<Pirate Deckhands>> have already been previously spawned (and/or defeated), none will spawn upon engaging the <<Boatswain>>.
Crow’s Nest: On nat. BD rolls of 9-10, <<Boatswain Jessamine>> rears her boot. If the CD is 1-6, she sweeps low and knocks the target over, lowering their Accuracy by 3 for one turn. If the CD is 7-12, she aims high and launches an attack that bypasses 2/3(rounded up) of the target's mitigation.

<<Burlock, the Quartermaster>>'s Stats
HP: 600
DMG: 165
MIT: 80
EVA: 2
ACC: 2All Hands On Deck!: Immune to Paralysis/Stun.
Black Spot: Burlock’s cutlass is coated with a thin poison. On a successful hit, with a nat. CD rolls of 10-12, the target suffers 30 Poison Damage for their next two turns.
Davy’ Jones Locker: On nat. BD rolls of 9, Burlock deals 50 additional damage. On nat. BD rolls of 10, Burlock deals 100 additional damage.
-
Floor 15
<<Bane of Blood>>
Recommended Level: 35
Repeatable only for "Bane of Blood" | Party Limit: 4
Credit Goes to: @MorgensternRewards:
- 4 SP
- 5000 Col
- 15 T3 Materials
- Last Hit Drop: Bane Of Blood - Vial of blood received from <"Blood Bane". Upon Consumption, the Player will regenerate 15 HP per turn for the rest of the thread.
Requirements:
- At least 1 page of RP content (20+ Posts)
- Must defeat 2 "Warg Wolves" per player before challenging "Blood Bane"
- Must defeat "Blood Bane" and 3 "Warg Wolves" in the same fight.
Summary:
Word has been received that upon the fifteenth floor, a new more vicious wolf alpha has been terrorizing travelers and merchants. Bulletins of the beast are posted on exits to the city. Many merchants are fearful to travel around, and the city is becoming more afraid of not being able to get the supplies they need. Towns have gathered col and a few other rewards for the person or party who hunts down these powerful beasts and returns for the reward alive.
Outline:
<< Warg Wolves >>
Statistics:
HP: 500
DMG: 175
MIT: 20
ACC: 2
EVA: 1
Abilities:
<< Sonic Fangs >> : Many Rapid Bites inflicted on the Player with the most hate. Deals 225 DMG on CD:10+
<< Protect the Alpha! >> : Warg Wolves place themselves in a position to protect their leader. <<BloodBane>> [if present] may not be targeted or hit while at least 1 <<Warg Wolf>> still lives.
<< Blood Bane >>
[Note: Blood Bane receives his own dice roll]
Statistics:
HP: 1250
DMG: 225
MIT: 50
ACC: 3
EVA: 0
Abilities:
<< Fenrir Fang >> : Blood Bane bites the player with the highest hate with magnificent force. Deals 200 Mitigatable DMG and Leaves a 2 Turn Bleed of 36 DMG on a attack roll of 9-10.
<< Call to Hunt >> : Blood Bane creates a howl that rips through the battlefield and invigorates itself and its allies. Raises all enemies DMG and MIT by 25 for 2 turns on a CD rolls of 10-12. Has a cool down of 2 turns, does not stack.
<< Feast of Blood >> : Blood Bane consumes enemy blood, healing itself. Blood Bane heals itself by 25% of the Damage it deals to its foes after mitigation. If Blood Bane attacks someone under the effects of Bleed, then it heals itself for an extra 200 HP. -
Floor 17
<<Challenge Of Olympus: Performer>>
Recommended Level: Any | Party Limit: 1 (Solo Only)
Must be Rank 2+ Performer | Non-RepeatableRewards:
- 1 Additional SP
- (+1) CD Tool, Apollo's Lyre
Objectives:
-
Roleplay The Challenge:
- Meet with the satyr on Floor 17.
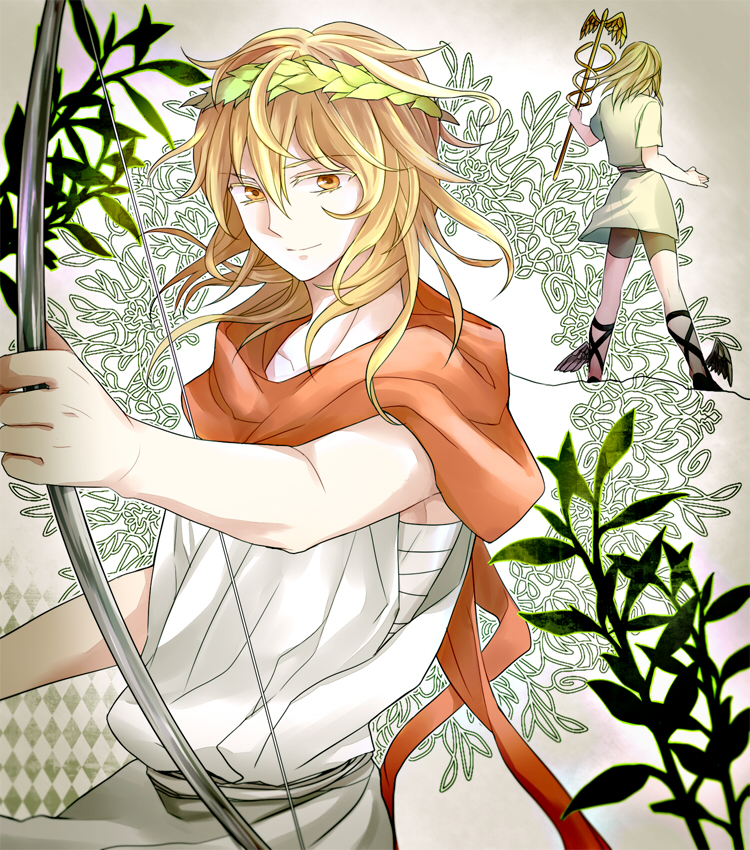
- Meet with Apollo outside of Mt. Olympia and accept his challenge.
- Describe the details of the challenge, face-off with Apollo and roleplay out how you best the God of Music.
Summary:
Disclaimer: The God(s) in this quest are NPCs for RP flavor only and cannot engage in combat nor affect the world in any way other than what’s described.Performers who have reached rank 2 in their profession receive a notification stating that a rare quest is available to them on floor seventeen. Upon arriving to the floor, a satyr's sudden appearance will easily startle nearby NPCs, and he promptly inform you that you have been invited to the gates of Mt. Olympia. It seems that Apollo himself would like to challenge you to a Battle of Crafts.
Players must RP meeting with Apollo, and they are free to describe the details of the challenge that is issued however they like as long as it pertains to performing. They must RP the challenge out appropriately, encouraged to make the crafting battle very difficult, though not impossible.
Requirements:
- At least one [1] Page (20 or more posts)
- All crafting done in this quest is RP only--no rolls required, and items cannot be given stats or submitted for evaluation.


A Val-halla of a Time. [Halloween Special Dungeon]
in Intermediate Floors
Posted
Spirit Shard Shop
Trade 3 Spirit Shards for 1 of the following:
[Weapon Type] of Asgard [Tiered Demonic Weapon]
1 Slot Guaranteed Unique Enhancement (must still be rolled) | 3 Normal Enhancements of Choice (can also be rolled, if desired)
[Armor] of Niflheim [Tiered Demonic Armor]
1 Slot Guaranteed Unique Enhancement (must still be rolled) | 3 Normal Enhancements of Choice (can also be rolled, if desired)
Shard of the Naglfar [Tiered Demonic Trinket]
1 Slot Guaranteed Unique Enhancement (must still be rolled) | 3 Normal Enhancements of Choice (can also be rolled, if desired)
Asgard’s Finery
Reroll a single enhancement on an existing item using only the Merchant’s Unique Enhancement Table OR Increase the Rarity of a single item once, up to Demonic, rolling the new slot at a merchant as normal.
Rules