Cardinal
-
Content Count
94 -
Joined
-
Last visited
Content Type
Profiles
Forums
Calendar
Blogs
Posts posted by Cardinal
-
-
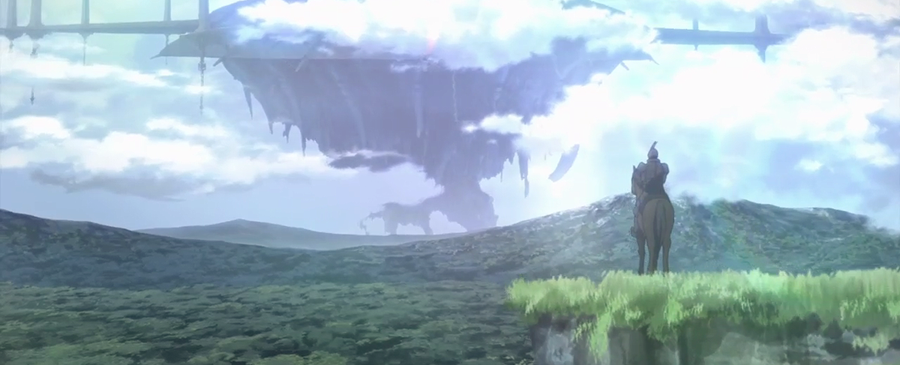
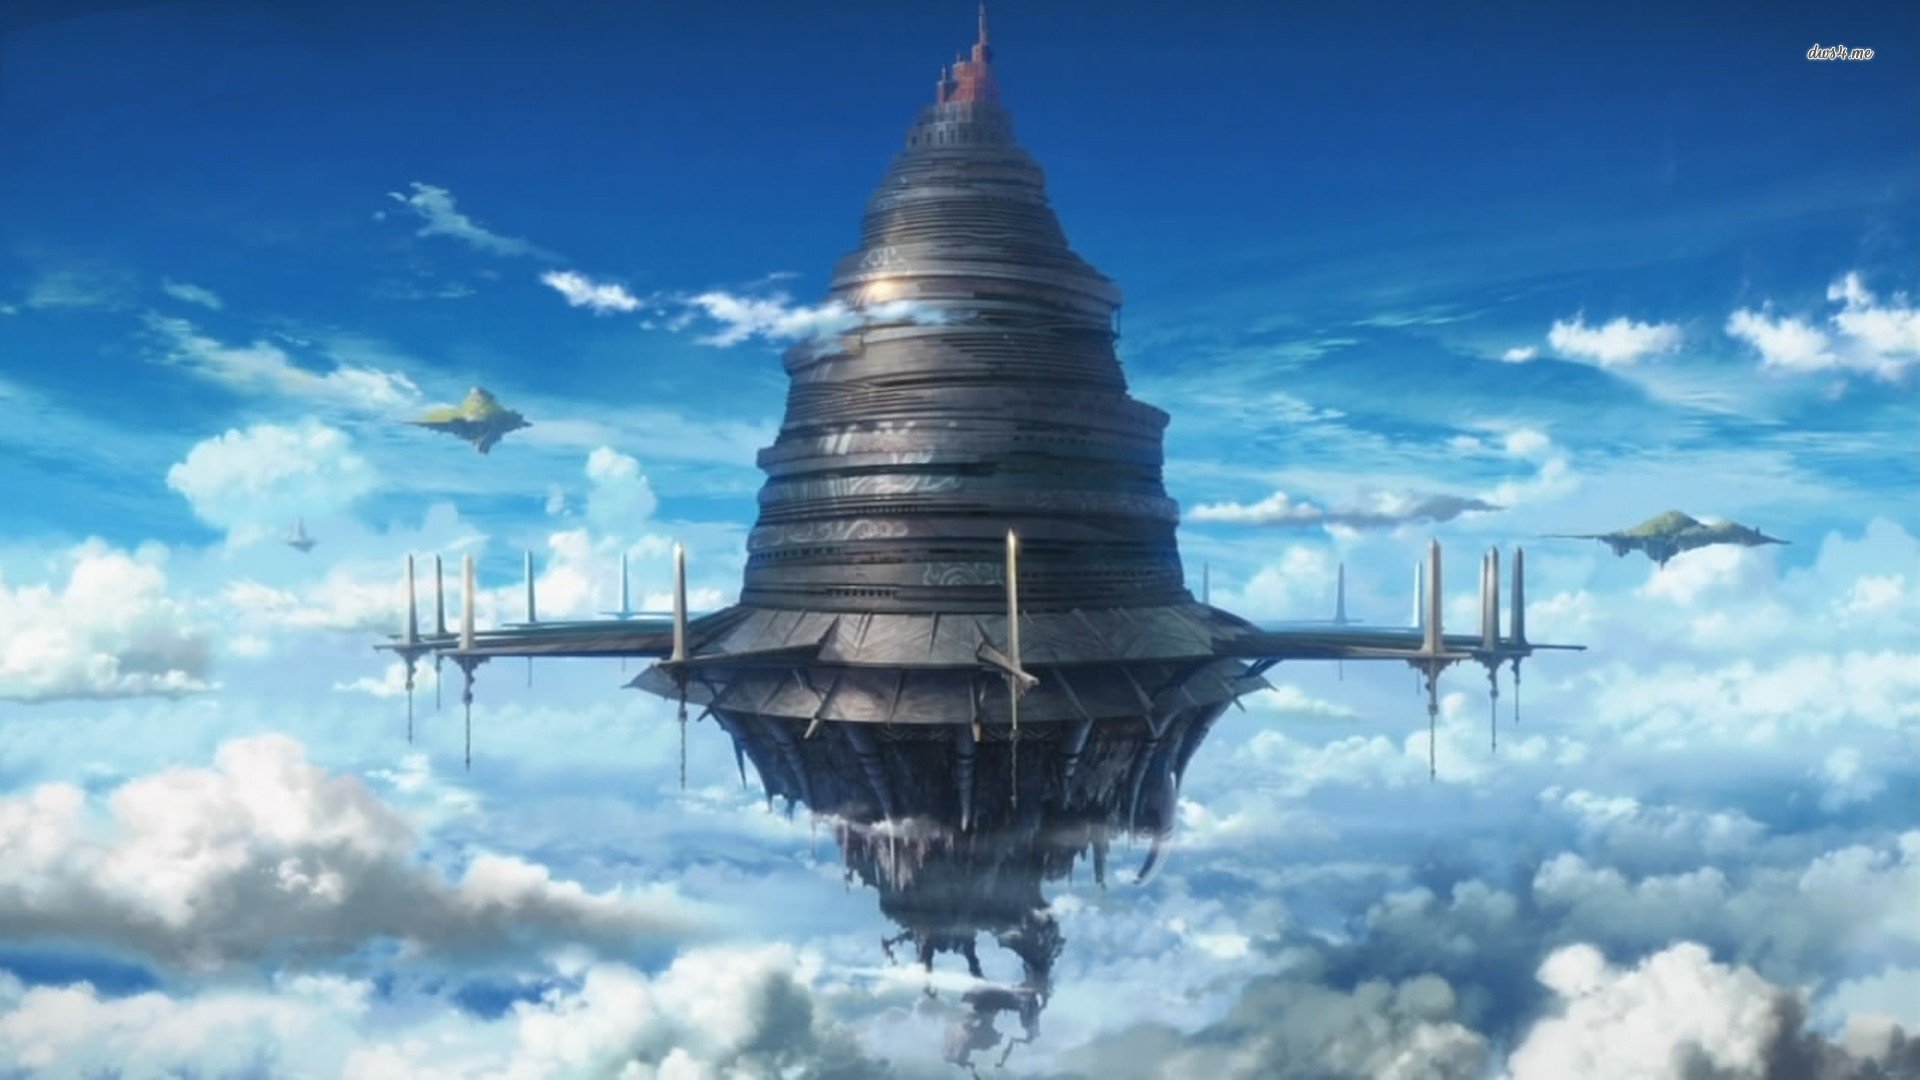
<<Floor 10>>
The 10th Floor of Aincrad appears to be located entirely underground, and is utterly devoid of sunlight. Its seemingly endless network of caves and caverns is home to several unique features including: forests of giant glowing mushrooms, mazes of glowing crystals, and massive ravines with roaring waterfalls. The floor has a distinct sense of beauty with the dim-blue lighting that comes from a wide variety of phosphorescent mosses, fungi and crystals. Silence is among its most distinguishing characteristics, where the stillness of the air is suddenly shattered by distant screeches, and the dancing, disfigured forms of visitors’ own shadows playing tricks with them. Even the rivers cast off an eerie glow, their waters laced with assorted chemicals that can easily prove toxic and fatal to the unwary who drink from them. Gaunt and skeletal creatures haunt the floor, the rarest and most dangerous among them locally referred to as ‘the Shadowed’. Skeletal beasts and the animated remains of humanoids are most common. Their Shadowed equivalents are little more than shades cast upon various surfaces who grow stronger in proximity to sources of interrupted light or outright darkness.
The NPC inhabitants of this floor are the lingering spirits of dead souls still lamenting the loss of bright and vibrant lives. They are the memories of lives long lost, still somehow anchored to the things, places and feelings that once made this a paradise. Each one emanates a strong glow that grows brighter when their passions are stirred and dims as they lose hope or interest. The brightness of each spirit stands in direct opposition to the Shadowed creatures that haunt the rest of the floor. Whatever happened here was centered around the City of Yomi, which lingers like a giant, complex memento to a much better existence that is long since lost. Players who visit this floor find themselves afflicted by an oppressive malaise that can quickly sour into full blown depression. Some reports suggest that prolonged exposure can lead to dementia, or even outright insanity and the negative thoughts and emotions that pervade the entire floor relentlessly assault the minds and convictions of those who come to visit. It is possible to interact with many of the spirits. Some offer sage advice or information, but be wary. Many have been driven mad by grief and loss and cling to existence only to fulfill some deep-seeded longing, that might range from finding a lost dolly to slaughtering anything that dares enter their home.
The entire floor is replete with mentions of <<Kagenomura>>. Spirits show distaste to the name, but also remain fearful of it. It is an apparent reference to a samurai lord who once wielded a blade that fumed with a heavy darkness. He was said to rule over a land of shadows, home to creatures of pure darkness, and that he was drawn to this floor by the ambitions of a local warrior obsessed with researching his tale and lore, eventually succumbing to madness in its pursuit. Players found and defeated Kagenomura long ago, stilling his terrifying blade. Despite the Samurai's death, the shadow realm has kept its hold on the rest of the floor with no sign of relinquishing its dominion.
As an important note, tracking does not work on this floor.
Main Settlement:
<<Yomi>>
Yomi was once a large city heavily influenced by traditional Japanese culture and architecture. The buildings are still in surprisingly good shape, but only echoes of those who once lived here remain. The stillness of the air and lack of any markets blankets the city in near-constant and oppressive silence. Twisted and withered trees line abandoned streets, glowing with a subtle pink haze at all times and acting as the common source of lighting for the settlement. The lanterns that still dot the streets offering only cold and dark despair. Players can find shops here, but are unable to purchase any of the items on display. Any items they attempt to manipulate dissolve into spectral dust eerily akin to the shards cast off by dying mobs. The town is populated by spirits whose spectral bodies provide a dim light-blue glow and casting a sorrowful aura about them.
Two skeletal dragons protect the town, one chained to each of the heavy archways that mark the entry gates. Any monsters that wander too close are instantly vaporized by a spray of cold and acid emanating from random points in the guardian’s bodies. Being the only settlement and safezone for the floor, Yomi is the closest thing to a gathering place for players on the floor. Inns and taverns can be found, but they offer no amenities beyond a cold bed and empty hearth.
Other Locations
◉ « Endless Caverns »
Spoiler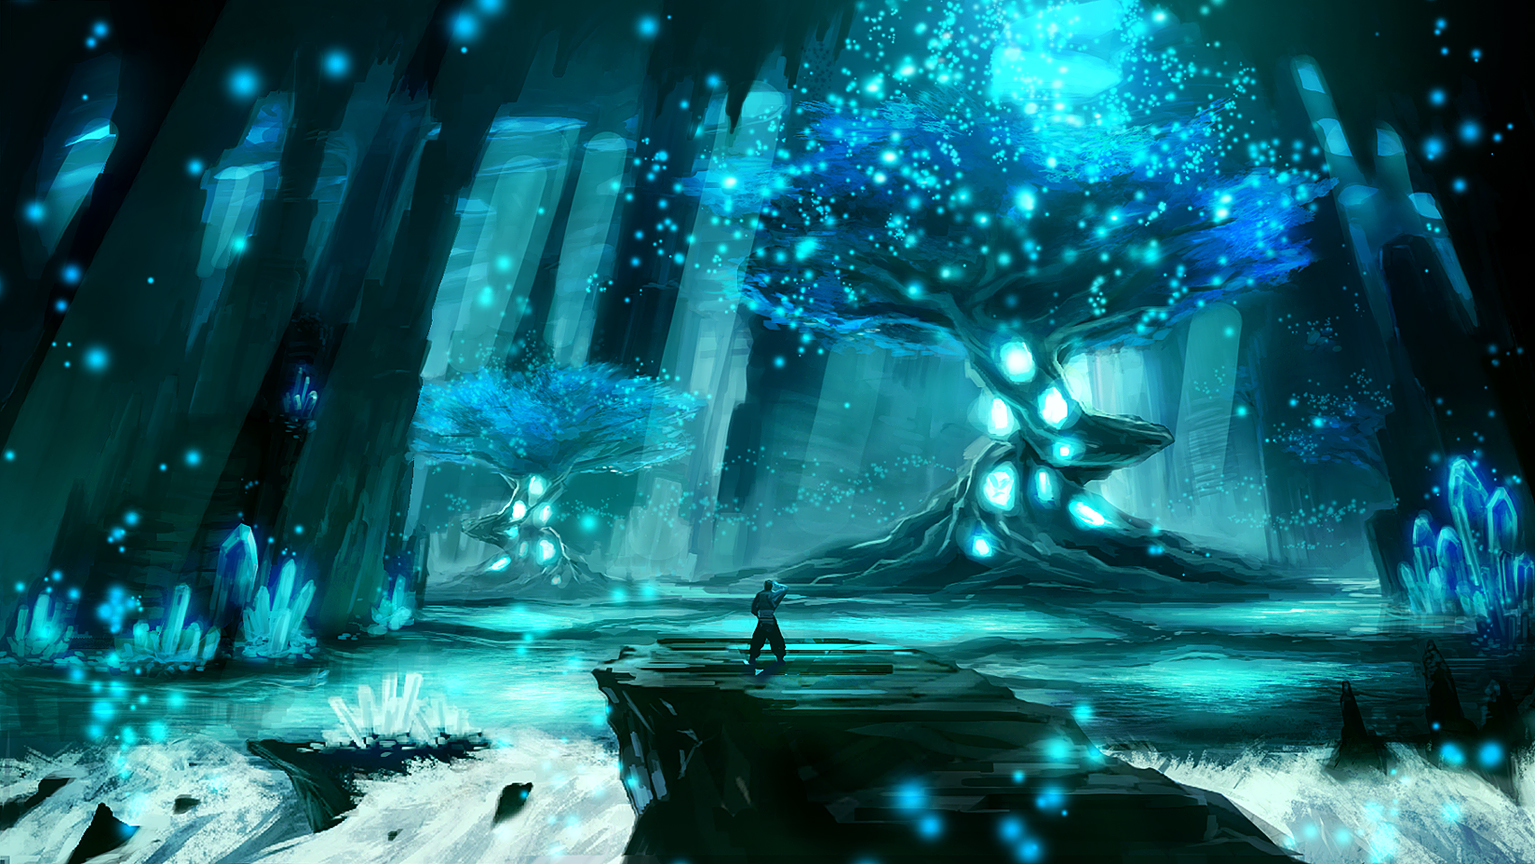
The entirety of the Tenth floor is taken up by the Endless Caverns. The expanse of ever-twisting caves and caverns are considered to be impossible to fully explore, in part because of the constant silent assault on the will and psyche of any who dare travel here. Every nook and cranny reveals a new path, twisting and turning in three dimensions to confuse and confound. Terrain within the Endless Caverns is diverse, ranging from razor-sharp layers of shelf-like rock to slick fungal jungles, to mineral-encrusted, glistening pools of black, brackish water. As one ventures out farther from Yomi, the ambient levels of light gradually fade while monsters and other denizens grow more nightmarish. The closer players get to the Labyrinth, or the Void, the more their very perceptions of reality seem to become twisted in malevolent shadow.
◉ « Tartarus »
Spoiler
A massive prison-like fortress, long abandoned by the inhabitants of the floor. The area is swamped with hostile enemies and mired in roiling miasma that slows passage and impairs sight. Should players make their way into the fortress, they will find themselves in conflict with the shadows of the long-departed guards, relentlessly hunting escaping prisoners. The keep’s interior walls are lined with iron-barred cells, some still containing spirits driven mad by the horrors they endured in their final days, or suffer still at the hands of their jailors. Wails can be heard echoing through the stone walls from the Banshee that supposedly haunts the grounds.
◉ « The Void »
Spoiler
At the farthest northern reaches of the floor, in the deepest depths and blackest darkness, there is a pit which has no bottom and leads nowhere. Forty feet wide, its edge is marked by the decayed remains of an ancient serpent, perfectly arrayed around this strange wound in the world that some call an ouroboros. Like the symbols of old, the serpent’s body circles back upon itself, devouring its own tail. A feeling of eternal dread emanates from its center.
Glowing icy-blue flowers surround this portal, randomly dotting the area. Dubbed "Echo Flowers" by the players who discovered them, they are said to endlessly repeat the last sound to touch their petals. Whether it be the sound of fighting, speaking, or screaming; each flower continuously sings its last acquired sound, but always in a garbled, distorted manner that conveys a haunting quality the any living creature will inherently feel as ‘wrong’. Most of the time, they merely scream, but wary travelers are sometimes treated to long lost bits of conversation from travelers exploring the area. On the rarest of occasions, in a perfect whisper a flower will ask, "Don't we all come from Darkness? Is that why we're so fond of seeing into it?"
The closer the player gets to the edge of the void, the colder they feel, until the very blood in their veins and jelly in their eyes threatens to freeze and their breath falls like heavy fog from every hard fought exhalation. Should a player actually venture into the void until they are engulfed by it, their heads will become filled with a cacophony of voices that overwhelm their senses. Sometime later, they will awaken on a bed, back in Yomi with a dozen spirits gathered around them and gazinge at them frightfully with their soulless eyes. Many players speculate that some quest or item is out there that will reveal the way into the void. For now, it remains a mystery to all.
◉ « Stygian River »
Spoiler
The largest river in the entirety of the floor, its waters are brackish and highly acidic. Skeletal monster are occasionally drawn to it and completely dissolve mere moments after making contact with its putrid foulness. Players that simply touch the river will find themselves taking blight damage as their avatar begins to disintegrate. Despite the palpable hazards the Stygian River remains popular for its fabled ability to reveal one's innermost desires by gazing into its waters. Some claim that the constant miasmic haze that hovers over it can materialize those desires, but that any attempt to make contact with it will cause it to dissolve.
Transportation
There is no Transportation on the Tenth Floor. Roads and paths emerging from Yomi taper off and are subsumed by the wilderness mere yards from the gates.
Common Mobs of Floor Ten
Spoiler-
Skeletal Monsters - The Skeletal remains of various monsters and animals. Most are aggressive or quickly become so at the slightest provocation. Often brittle with age, they typically break easily, especially in the face of crushing weapons and attacks.
- Locations: <<Endless Caverns>> <<Tartarus>> <<Labyrinth>>
-
Shadow Monsters - A lightless, spectral entity capable of combat and highly effective in low-lit areas. In darkness, they are often much bigger and their forms can be changed to be almost anything they desire, including a dragon, human, or even a monstrous beast. The amount of light is vital to their fighting prowess, and they often cower away from anyone wielding a Holy weapon. A few are non-aggressive though those are typically weaker and take on the forms of animals.
- Locations: <<Endless Caverns>> <<Tartarus>> <<Labyrinth>>
-
Shadow Knights - Ancient guards and sentinels that patrol Tartarus. Now, with their spirits sundered, they are little more than shades encased in metal armor. They seem to carry special hatred for the living, and especially those who are naïve or innocent.
- Locations: <<Tartarus>>
-
Drakes - These large, wingless lizards are among the rare and few living organisms left on the floor, these beasts have adapted to drink the floor’s toxic and acidic waters. A general lack of food ensures they are very aggressive towards anything even remotely edible, especially players.
- Locations: <<Endless Caverns>>
Field Boss of Floor Ten
Spoiler
<<Banshee>>
For centuries, the <<Banshee>> cried only to warn of impending death. Then, a distraught widow cursed the creature. Now she screams eternally within the walls of the prison Tartarus, a sound that can be heard all over Floor Ten.
HP: 650/650 | MIT: 30 | DMG: 100 | ACC: 1 | EVA: 2
Abilities:
- Undead | <<Banshee>> can be targeted by healing skills, which will deal twice the heal they’d inflict as damage. [Example: First-Aid will deal 8% of max HP per Rank.]
- Ghostly Form | All damage taken, unless dealt through healing, will be halved.
- Ear Piercing Screech | On a CD of 9+, the Banshee will screech at the party instead of attacking, paralyzing everyone for one turn. This attack cannot occur twice in a row.
- Tier Lock | For the duration of the fight, all of the participants’ stats that scale with Tier are calculated as though they’re Tier 2. [DMG/MIT/BLEED enhancements etc.] This skill only locks downward. Those at Tier 1 will still have T1 stats.
Drop:
“Bottled Banshee Scream" (T2/Consumable - Instant/Single Use); Free Action consumable that will stun all enemies for one turn without fail, but be destroyed in the process. This effect does not circumvent the standard stun cooldown.
« Floor Ten Labyrinth »
The Floor Ten Labyrinth is rather difficult to locate and access. Instead of just finding an area, players must instead find a peculiar black floating crystal that spawns rarely and only at the end of one of the floors deepest and most dangerous caverns. Making contact with this crystal in any way will cause the world to seem to melt around them, forcing them to enter a parallel world. Everything here is monochromatic, shifting between shades of black-and white. The very reality of the world is distorted into a living nightmare. Walls here are constantly shifting. Whispers of dark desires fill the players’ minds, tempting them to give in to slumber. The player must travel through this Shadow World until they find the next black crystal and use it to return to the mortal plane of existence. Their forms will, again, melt through the ground until the players find themselves back in their physical bodies, able to continue on with the Labyrinth.
SpoilerLabyrinth Rules
-
To complete the labyrinth, players must successfully travel at least three times through the shadow plane, and ultimately return to ‘reality’ where they will find themselves before the boss room door. Any players may regress in the labyrinth by spending a post action to backtrack the way they came. After backtracking all of the way out, the player is officially out of the labyrinth and able to end the roleplay. A roleplay may not end inside the labyrinth.
- To advance through ‘real’ sides of the labyrinth, players must roleplay traveling through the stone maze and defeating two loot-minimum strength (for highest level player) skeletal monsters per player in the party before finding and activating the next Shadow Crystal.
- To advance through the ‘shadow’ side of the labyrinth, players must roleplay traveling through the black and white world with its shifting walls constantly changing the world around them. During this time, the players do not have a physical form, and their appearance shifts and distorts like a shadow. No items can be used, access to inventories is blocked, and items cannot be swapped in any way while in this plane of existence. Returning to ‘reality’ requires each party to roll a collective LD of 45 times the number of players present in that party. Within the Shadow side, all forms of health regeneration are negated and each player suffers 3*Tier Blight damage every turn. Anytime a player rolls the LD to search for the next crystal, the CD is also rolled. Any CD roll result of 2 or lower spawns one shadow monster per player in that party. These creatures must meet loot minimums for the highest level character in the party. The shadow monsters attack immediately on the same player’s turn.
Quests:
<<SOTW: Leeching Nightmare>>
<<DHA: The Dragon Age Crusade>> -
Skeletal Monsters - The Skeletal remains of various monsters and animals. Most are aggressive or quickly become so at the slightest provocation. Often brittle with age, they typically break easily, especially in the face of crushing weapons and attacks.
-
<<Floor 09>>
The 9th Floor of Aincrad is a craggy, lava-filled hellscape, covered in ash from the constant flow of lava and thick, low-hanging doomlike clouds that hover overhead like thick, angry blankets trying to smother everything below. The peaks of the local shattered tors spew great pillars of grey into the red-black sky and feeding it also with oppressive, magma-fed heat. The heat at Mount Kazan, the highest peak of the floor, is said to be overwhelming. Tales tell that it is one of the hottest locations in all of Aincrad, reaching levels far beyond what a human being is able to withstand. The same stories claim that it is impossible to return from this place without scars, and that those who do are still so close to death that they are bedridden for days. There is no greenery here. What flora one might have existed has long-since been burned away or otherwise been starved of sunlight and precious water needed for its survival.
NPC inhabitants of this floor are mostly charred and soot-covered humans and dwarves, all dark or copper-skinned from years of living in this area. They have adapted to the heat and wear only basic protective fabrics and leathers, covering as little as necessary in order to keep the searing heat at bay. Water is more precious here than gold, and even those sources that exist are so tainted as to be toxic. Hostile creatures here will not hesitate to gut you and drink your blood for its juices. Bandits roam the wilderness in the guise of guides while prospectors turn to raiding their neighbors when desperation grows deep enough. Rare resources abound, but so do those who will take any action to claim them. Strangers are typically viewed with suspicion, or else considered marks ripe for plunder.
Legends speak of a multi-headed creature that was once the primary source of the constant magma that permeates every corner of this floor. Some believe that the creature emerged from its hidden lair randomly to raze the landscape and forge it anew with footsteps of molten lava. Players came to know this vast creature as <<Grivas the Hydra>>, a many-headed drake that spewed fire as hot as the molten liquid the legends depicted. They slew it, at great cost, and caused Mount Kazan’s great peak to be covered in a caul of cooled magma that remains there still. Daring NPCs travelled to the top of the mountain and discovered that the volcano had become dormant. The once-lethal site could now be visited with minimal threat. Many have taken this as an opportunity to expand their exploits to the far reaches of the floor. Small, new outposts and holds can now be found nestled across the floor. Since Mount Kazan's artificially imposed slumber, the overall heat of the floor has gradually moderated from that of a blazing inferno to simply hellish. Golems and other rock-based creatures have risen in prominence, while their fiery kin have retreated to other, lesser bastions of heat and flame.
Main Settlement:
<<Yōgan Village>>
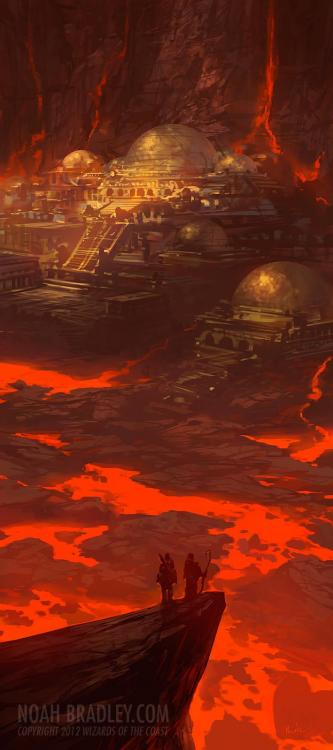
Yōgan Village can be found at the base of Mount Kazan and is one of few, relatively safe locations on the 9th Floor. It was originally established as a mining settlement and remains an active trading hub for those who seek ores, smelted metals and the like. The Mining Guild hires thugs and mercenaries to keep out the worst of the rabble, but life here is harsh. Everyone here is said to be looking for something, whether it's the prospect of fortune or the glory of hunting some great elemental beast, or just to fade into anonymity. No one settles here to raise their family, at least not by choice.
A barrier of cooled magma and rock surrounded the village in the aftermath of the floor boss’ death, sheltering it from the nearest and most dangerous flows. it also serves as natural protection against the floor's many roving monsters. Buildings here are made of vast, hollowed out chunks of obsidian, a deep, black volcanic glass also harvested in the nearby grounds and used to create tools and weapons. Despite endless smoothing and polishing from wear, the obsidian remains sharp and causes frequent injury to locals and visitors aside. Yōgan refuses to shed its edge. It is considered a local rite of passage to have cut yourself on its dwellings and bled upon the shard-strewn streets at least once. It might also explain the odd preponderance of cobblers in such a small settlement.
The only teleporter on the entire floor is located on a white marble slab in the center of the settlement, upon which no soot or ash can seem to fall or be placed. The stone is not native to this floor, and none of the NPCs are aware of its origins.
Sub-Settlements:
◉ « Knorilt Village »
Spoiler
Knorilt Village is a smaller village located south of Yōgan, atop the inactive volcano Mount Hellion. Knorilt is home to a race of dwarves that harvest obsidian, and have build their homes out of lava rock and b yre-using the slag from their massive smelters. The village is notorious for reeking of sulfur, which seeps out of the ground and rocks. Knorilt lacks anything that isn't related to taverns, inns, gems and metalwork. Most of those living here are employed by the Mining Guild and tensions often run high between the various competitive factions, each seeking to claim the next big find, or vying for promising territory for their next dig. There is ample work to be found for those with strong backs, and even more so for those unencumbered by the trappings of morality.
Other Locations
◉ « Volcanic Flatlands »
Spoiler
Great expanses of basalt and other ash-covered igneous rock comprise most of the ninth floor. Due to the nature of the constantly moving and cooling lava flows, the terrain itself is always changing. A built up mound of cooled volcanic rock may prove to have been but a blister and have popped to become a small pool of magma overnight. Monsters such as the rock golems and lava elementals can be found roaming across the flatlands, yet vast stretches of the floor can also feel eerily silent and empty. There is a primordial quality to the place, that also seems to resent intrusion. No sooner will a group of savvy adventurers set up camp only to discover that they've done so over a nest of magma vipers, or wake after restless slumber to find their position spontaneously surrounded by a raging flow of liquid fire.
◉ « Mount Stylahm »
Spoiler
Mount Stylahm is the tallest volcano on the 9th Floor, towering over all of those below it. It is also aggressively active, regularly spewing lava from its peak that cools long before it reaches the base. The volcano is home to a vast network of caves that run throughout its interior like a maze, leading all the way from its base and nearly reaching the apex. Some of the caverns are flooded with molten lava, and spontaneously shifting floods of the stuff are not uncommon. There are countless entrances into the cave network, but they change too frequently to be reliably mapped. Adventurers favour the site because mobs and material spawn points seem to refresh much more frequently than normal.
◉ « The Profaned Peak »
Spoiler
The Profaned Peak is a flat-topped mountain, whose peak is covered in a lake of lava. Sitting in the middle of the lake is a large stone platform, along with a massive throne said to have been carved from an ancient meteor. A lone, long, stone walkway connects the platform to the northern edge of the mountain peak, allowing players to traverse the vast span. A massive jeweled crown made from gold and silver sits atop the seat, its edged burnt black and reeking of unholy blight. There are no records as to their origins, but the local NPCs believe it to have been the final resting place of an ancient race's king, one whose entire population was wiped out by some user of vile, infernal flames.
◉ « Wrought-Iron Ruins »
Spoiler
To the west of Mount Kazan are a series of ruins notably composed of charred black iron, warped and pitted by the harshness of the environment. This cursed area appears to be some sort of graveyard for restless, iron-clad soldiers whose armor has been seared to their undead flesh. They can be seen wandering about the string of ruins, which look like fragments of some ancient wall or battlements. Some claim that the site is an ancient battlefield. The path to these ruins is challenging to follow and seems to defy conventional mapping. Even experienced guides seem to get lost trying to seek them out, and yet those travelling the floor come across them with disturbing regularity even when seeking to avoid them.
Transportation
While traversing the lava-filled floor in itself can be treacherous, one main trait is that the cooled lava flows have resulted in fairly level terrain, making it fairly easy to travel on foot. However, there are no real established forms of transportation for players on this floor. NPCs do have carts, but they are always in use for transporting various goods and resources.
Common Mobs of Floor Nine
Spoiler-
Rock Golems - Bulky, durable constructs formed from the massive abundance of raw magma and stone across the floor. Their bodies look like the encrusted surface of a simmering volcano, with a cooled, rock shell barely containing a molten interior. They fight by swinging their massive arms in large sweeping patterns, but occasionally also rip off their own limbs and toss them at people.
- Locations: <<Volcanic Flatlands>>, <<Mount Stylahm>>
-
Lava Elementals - Spirits of unbridled anger or passion invested into pure magma from the peak of Mount Kazan and other large volcanos of the floor. Swift and slick in their movements, their main sources of damage comes from bubbling gouts of fire spewed from their bodies, latching onto opponents or just searing them by their touch. They rarely wander far from the pools that spawn them, lest they start to cool and grow sluggish.
- Locations: <<Volcanic Flatlands>>, <<Profaned Peak>>
-
Pyre Vultures - Elemental avians with feathers like oversized flakes of ash and wrapped around a roiling inner core of pure fire. They ride the violently unpredictable thermal current throughout the floor, concealing themselves in the thick smoky clouds. Somehow able to sense their prey through the thick haze, they will swoop down in groups, scratching and scorching their targets with talons that are coated with volcanic glass.
- Locations: Mountainous Regions
-
Iron Knights - The still moving sets of armor from battles long past. The armor of these creatures has been badly beaten and worn, but has not rusted over time due to the lack of moisture where they are found. The flesh of their last occupant sometime remains, seared to the interior surface. No longer retaining any form of intelligence, they will attack any living creature on sight, swinging wildly with their weapons.
- Locations: <<Wrought-Iron Ruins>>
Field Boss of Floor Nine
Spoiler
<<Phoenix>>
Born from the volcanoes that dot the floor, <<Phoenix>> soars over the criss-crossing rivers of lava. It is difficult to catch, and even more difficult to kill, due to its <<Ashborn>> skill. Anyone who kills the creature, however, will be handsomely rewarded.
HP: 975/975 | MIT: 50 | DMG: 90 | ACC: 2 | EVA: 2
Abilities:
- Ashborn | Upon dropping to 0 HP, the Phoenix’ health will go back to 225, and its DMG will be boosted to 110. This can only happen once per battle.
- Inferno| On an MD 9-10, the Phoenix will rain fire onto its opponents, hitting the Player with the highest hate for 150 mitigatable DMG and applying T2 Burn to the entire party.
- Tier Lock | For the duration of the fight, all of the participants’ stats that scale with Tier are calculated as though they’re Tier 2. [DMG/MIT/BLEED enhancements etc.] This skill only locks downward. Those at Tier 1 will still have T1 stats.
Drop:
“Hellstorm" (T2/Consumable/Single Use); Apply an additional (20*Player's Tier) unmitigated damage to every attack for a single thread.
« Floor Nine Labyrinth »
The Floor Nine Labyrinth is found at the top of Mount Kazan, a perilous area that remains so even in the absence of the floor boss. <<Grivas the Hydra>> once dwelled here, travelling through solid rock to create the ever-shifting tunnels that still litter the mountain. Its lair was inside a secondary stone structure at the peak, housing another network of tunnels formed by the confluence of several volcanic rivers. Those rivers have mostly cooled and clogged up the network since Mount Kazan went dormant following Grivas' death, but some of the tunnels remain passable.
The boss chamber remains open and empty, and most of the clogged tunnels are filled with ash that can be cleared with effort. Breathing is difficult, as every step and motion seems to churn the powdered rock back into the air. Players without the <<Survival>> skill or Fireproof enhancement take 10 unmitigatable damage for every post spent within the labyrinth and the tunnels leading up to the labyrinth boss room. The labyrinth boss room itself is large enough to offer a brief reprieve of breathable air, serving as a break point for those what wished to recover before turning back. Those wishing to travel further would have to pass through the even more dense volcanic fog. Players without the <<Survival>> skill or Fireproof enhancement take 20 unmitigatable damage every post spent within the deeper tunnels. Those with one or the other take only 10 damage per post, whereas any well-prepared soul who has both would suffer no negative effects.
For the early tunnel network, players must make at least 2 out-of-combat posts (total, whether solo or in a group) and fight two monsters before they are able to reach the labyrinth boss room. Should they venture into the deeper network, they must make another 3 out-of-combat posts (total, whether solo or in a group) and fight three monsters before they are able to reach the floor boss room. All monsters must meet loot minimum requirements for the highest level character present. If they choose to venture in, they find a large platform made of volcanic rock, surrounded by a wide, deep bowl that once held a circular lake of magma, with various openings in the dome-like wall to let lava flow into the lake. An immortal object lies in the center of the room, a massive plate-like basalt structure, with a series of long, wispy clusters of volcanic glass all around it. Inspecting the top of the structure reveals what appears to be the hide of the boss, somehow since fused into the surface of the stone.
Quests:
<<Guardian Of Fire>>
<<Gatekeeper Of Fire>>
<<The Iron Guardian>>
<<Bandit Camp>>
<<DHA: Cavity Of Ruin>>
Boss Fight: Paving The Way To 10 -
Rock Golems - Bulky, durable constructs formed from the massive abundance of raw magma and stone across the floor. Their bodies look like the encrusted surface of a simmering volcano, with a cooled, rock shell barely containing a molten interior. They fight by swinging their massive arms in large sweeping patterns, but occasionally also rip off their own limbs and toss them at people.
-
Floor 8
<<Elvish Rivalries>>
Party Limit: 4 | 20+ Posts
Repeatable for standard thread rewards
Quest Rewards:
- 700 Experience Points
- 250 col
-
Each player receives:
-
Elven Fire
- A red stone granted by the queen of the elves. It contains the fire magic and is able to be applied to a weapon.
- (Consumable) Applies a T1 Burn Effect to a weapon for a single thread. This item has 3 charges and is destroyed on the third use.
-
Elven Fire
- Unlocks <<Elvish Treaties>> Quest
Requirements:
- Roleplay being summoned to meet Haela, the Queen of the Elves.
- Roleplay speaking with Queen Haela and Commander Arun.
- Defeat the Treant without letting the Gate take more than 500 DMG.
- Return to speak to Haela and roleplay the epilogue.
- Thread summary must clearly indicate whether the Treant was spared.
Summary:
While passing through the city of Ellesmera, the players encounter an elven page in full formal dress and royal livery. He bows, curtly, then reports that the Queen Haela herself has requested an audience with them. A prompt suddenly appears before them, asking whether they wish to accept the quest, though no real details have yet been provided.
Upon acceptance, the page escorts the players directly to The Great Tree in the center of the town. Around it is wrapped a grand residence, too humble to be called a palace, yet also too finely crafted to be dubbed a simple home. It is a perfect, reflective blend of elven craftsmanship and architecture, exuding warmth and comfort while is awes all who set eyes upon it. The page provides the players with admittance to the throne room, but refuses to enter himself, explaining that it only for those above his station. The room's interior is fantastically appointed with polished mahogany floors, intricately carved furniture pieces that each look like they were made from a single piece of wood. Elegant filigree adorns most surface, giving the appearance of living song dancing across every surface in the space.
The hall appears suited to multiple purposes with the Queen's throne sitting at the far end and a long planning table occupying the center of the room. Sprawled across the table is a map of the entire floor, including all known settlements and unique locations. As the players approach the Queen, who is sitting upon her throne bearing an air of consternation, they notice an armored elf carrying a spear standing at her side adorned in high-quality armor. The Queen herself appears to be rather young, despite being the oldest elf in Ellesmera. After a moment, she addresses the players in a soothing voice.
"Apologies for disturbing such a beautiful day. I would never have planned to ask for assistance from a human, but we are short on capable fighters. Too many of my soldiers have fallen or been gravely injured. This centuries-old war has taken its own toll on the elves of Ellesmera." She stands and gestures to the armored elf beside her. "Scouts report a pending attack from the treants, with a main force at least twenty strong. Commander Arun plans to take the rest of our forces to face them before they reach the city as to not bring harm to any of its citizens, but doing so would leave our walls and gates unprotected from attack." She turns to Commander Arun, who steps forward.
"We request that you temporarily take on the watch duty for our gate. My intent is to ensure that none of our enemies reach it, but we require capable backup as a precaution. Decide quickly, our enemies shall soon be upon us. Of course, you shall be compensated for work even if you do just stand at the gate."
After the players accept, Commander Arun shall take them to the gate and set off with a force fifty strong into the forest.
The players shall stand in front of the gate for several minutes before they feel the ground begin to tremble. Emerging from the tree line, a large angry treant comes to face the players. It is their duty to protect the gate and defeat the enemy that lies before them.
Outline:
To successfully complete the quest, the players must defeat the Treant before it defeats them or destroys the gate. The destruction of the gate results in immediate failure. The gate itself has 500 HP and is treated as a target in this instance. Should the Player a player fail to protect the gate, immediately begin roleplaying the Failed Epilogue.
NPCs:

<<Haela, Queen of the Elves>>
A millennia old elf that has served as Queen since the fall of her mother fifty years ago. Despite her age, she appears to be a young woman. She intends to be the ruler that ends the war, desiring peace as her legacy and for the duration of her reign.
![✅[55+] Male elf - Android, iPhone, Desktop HD Backgrounds / Wallpapers (1080p, 4k) (1920x1200) (2020)](https://www.99images.com/photos/wallpapers/others/sm/male-elfandroid-iphone-desktop-hd-backgrounds-wallpapers-1080p-4k-tr0wu.jpg?v=1584014763)
<<Arun, Elf Commander>>
Pronounced Erin, this young commander is revered for his strength and tactical brilliance. He is known for his use of the Holy Spear of Flame, Gungnir which makes him unmatched in combat against the Treants.
Enemies:

Treant
An eight meter tall giant of wood with a strength unmatched by any human. Its battle style focuses on using raw strength to slam into its opponents. It focuses not on hitting opponents directly as its punches cast powerful shockwaves that damage everything in the vicinity.
HP: 450/450 | MIT: 175 | DMG: (See Shockwave Punch)Abilities:
- Shockwave Punch | Every turn, the Treant shall use this attack spreading its damage between every single target in the vicinity. Deals 300 mitigatable damage spread between all players and the gate. This attack will not miss. For example: If there are two players taking this quest then both players and the gate shall take 100 damage per turn.
- Burning Timber | Should the Treant be affected with a Burn ailment, its Mitigation shall become 0, its damage output will double, all Burn damage to it shall be doubled and the Mercy effect will no longer be an option.
- Wooden Body | Treant is not affected by any DoT effects other than Burn and Blight. Treant is also immune to Stun attacks.
-
Mercy | Upon reaching 50 or less HP, the Treant will surrender and no longer attack unless the player attacks them again. If this option is chosen, begin the Mercy Ending.
Epilogue:
SpoilerMercy Ending
As the player mercifully allows the Treant to live, it rumbles with gratitude."You... are... most... kind... human.... I... am... in... your... debt...." The treant stands from its fallen position before slowly moving back into the forest whence it came. Not a moment later, Commander Arun retursn with less than half of the force that rode out at his side. There is a sadness to his eyes but he greets the player anyway.
"I am glad to see that you and the gate are still standing. I must say that it was one hell of a fight we had today, I wasn't sure you'd be able to hold the gate on your own. Come, we must report to the queen."
After returning to the Queen, Commander Arun shall bow and begin his report. "We lost thirty-three men in the battle that just took place. The sheer number of Treants that were put against us was unimaginable. This attack was far too aggressive to be normal." The queen nods and looks away.
"We can't go on like this anymore. We must end this conflict, peacefully. Unless we plan on conscripting every elf in the city, we can't continue this fight. We must swiftly bring about an end to this war. Too many have already lost their lives." She turns to the players. "I see that you have managed to protect the city gates. We are in your debt, please accept this as recompense. Usually, this item is only be able to be used by the elite elf warriors." She hands the players a red stone that is warm to the touch. "I do have one more thing to ask of you. The treants won't trust any elf. You're not involved, and don't have the right ear span. They might talk to you. I wish for you to travel to the Treant Grove at Baobab, as our ambassador, and forge a treaty by any means necessary."
Commander Arun approaches you and says a few words in an unfamiliar language. After he finishes, a small red orb begins to follow the player around. "This is a fire spirit going by the name of Aga. She isn't as powerful as the magic of my spear, but can help you out if the treants need convincing. She can ignite causing fire, something that terrifies even their king." The quest reaches its conclusion with a display of rewards and the panel to accept the next quest.
Killer Ending
The Treants lifepoints reach zero, however its body remain on the ground after death instead of pixelating. It no longer speaks, nor moves. Commander Arun returns with less than half of his original force. There is a sadness in his eyes as they reach the treant at the players' feet."Ah. My apologies, I didn't realize that one got through. However, it is not quite dead yet. Treants are not like you and me. They are a piece of the forest itself. To kill one, you must use one of two methods: set it alight with fire or break apart its core. When weakened like this their bodies become easy enough to break. If you were to just leave this treant it would regenerate over time." He lifts up his spear, the weapon beginning to blaze with flame. He drives the spear into the Treant, catching it on fire. He walks away. "Come, we must report to the queen."
Returning to the Haela's side, Commander Arun bows and begin his report. "We lost thirty-three men in the battle. The sheer number of treants that were put against us was unimaginable. This attack was far too aggressive to be normal." The queen shall nod and look away.
"We can't go on like this anymore. We must end this conflict, peacefully. Unless we plan on conscripting every elf in the city, we can't continue this fight. We must swiftly bring about an end to this war. Too many have already lost their lives." She turns to the players. "I see that you have managed to protect the city gates. We are in your debt, please accept this as recompense. Usually, this item is only be able to be used by the elite elf warriors." She hands the players a red stone that is warm to the touch. "I do have one more thing to ask of you. The treants won't trust any elf. You're not involved, and don't have the right ear span. They might talk to you. I wish for you to travel to the Treant Grove at Baobab, as our ambassador, and forge a treaty by any means necessary."
Commander Arun approaches you and says a few words in an unfamiliar language. After he finishes, a small red orb begins to follow the player around. "This is a fire spirit going by the name of Aga. She isn't as powerful as the magic of my spear, but can help you out if the treants need convincing. She can ignite causing fire, something that terrifies even their king." The quest reaches its conclusion with a display of rewards and the panel to accept the next quest.
-
Floor 22
<<What We Fight For>>
Party Limit: 2 | 20+ Posts
Repeatable for standard thread rewards.

Quest Rewards:
- 500 Experience Points
-
Each player receives:
-
Glimpse of Before (Unique Vanity Item)
- A small picture frame that houses a mirror. As the player gazes into it while focusing on a memory of the real world, the Cardinal system will interpret the data and present it visually in the mirror.
-
Glimpse of Before (Unique Vanity Item)
Requirements:
- Roleplay entering the Forest of Memories.
- Find the Memory Chamber entrance.
- Outwit your Reflection by overcoming you character's main flaws.
- Roleplay entering the Memory Chamber, where they can reflect on their favorite memories and most glaring mistakes.
- The Players must have learned a lesson about themselves and their weaknesses by the quest's conclusion, which will be listed in the thread summary.
Summary:
Within the Forest of Memories, hazy anomalies have propagated which fill their viewers with a sense of familiarity and nostalgia. When the players travel deeper into the forest, they will discover a set of stairs that lead down into the ground. The stairs eventually level out into a dimly lit hallway with a mirror blocking their passage to whatever might lay beyond. Though seemingly impossible to maneuver past, those who manage it will reveal a simple stone chamber where the light from a solitary ball of flame in the center refracts from countless mirrors to illuminate its volume. Peering into the main mirror, they will catch glimpses of their past: things and people they love most, treasured memories, and agonizing mistakes and shortcomings. If the players have strong enough resolve to study these snippets from their past and use them to become better, they will be awarded with an item that harnesses the essence of the Memory Chamber in a more portable and mobile fashion.
Outline:
The players must roleplaying entering the Forest of Memories, though it it up to them whether they do so to deliberately search for the Memory Chamber, or if they simply happen upon by accident. This requires a LD roll as post actions (modifiers apply). An LD result of 17+ is required to find the Memory Chamber.
Once faced with the mirror blocking the corridor, they will see a reflection of themselves as they were in the real world. Their <<Reflection>> will mirror their every move, applying equal pressure against the mirrors surface from the opposite direction to prevent entry. By exploiting one's own weaknesses as described by the flaws listed in their journal, they can outwit the <<Reflection>> and pass through the mirror barrier as though it were made of a reflective liquid as opposed to brittle glass. This is strictly a roleplaying exercise meant to help your character discover something about who they have become in SAO, compared to the person they were before.
Once inside the Memory Chamber, players may roleplay viewing any memory from the real world, be it good or bad. By the time they have left, they must have learned something. Refusing to reflect on their own shortcomings and vow to overcome them will mean that no picture frame will be awarded.
NPCs:

<<Reflection>>
This silent NPC will bar the player entry to the Memory Chamber by mimicking their actions, applying equal pressure against the mirror's membrane from the other side to prevent passage through brute force. Only by outsmarting it can the player find solace in what lay beyond.
Epilogue:
SpoilerRegardless of whether a player is capable of earning the treasure the Memory Chamber guards, their time there is limited. The solitary fiery light will gradually fade until darkness swallows the chamber whole, and no attempts to illuminate it with items with provide the light necessary to continue viewing their memories. As such, there will be nothing left to do other than leave. No other sources of light will function here, and the Night Vision mod does not function.
Once outside, if the player looks back, they will find that the entrance has vanished. If they ever wish to return, they will need to start the search over from the beginning.
Those who were successful within the Memory Chamber will leave with a special item that cannot be recreated through any other means in the game, allowing them to relive their memories from the real world much like they did within the room that housed such a prize. -
Floor 1
<<The Third Lesson>>
Party Limit: 4 | 20+ Posts
Prerequisite: Must have completed <The Second Lesson>>
Repeatable only if escorting someone who has never run the quest.
Escorts are exempt of the quest's requirements, may not offer any aid, and only earn standard thread rewards.Quest Rewards:
- 500 Experience Points
- 500 Col
- Loot results for <<Big Bertha>>
-
Each player receives:
-
Big Bertha Braciole
- Unique Consumable (Meal) | A fishy entree that restores +2 additional EN each turn in combat for one thread.
-
Big Bertha Braciole
Requirements:
- Must roleplay meeting <<Pete Larkin>>.
- Consume one consumable (possibly including one acquired in the previous two Lessons quests.)
- Defeat and loot <<Big Bertha>>
- Roleplay returning to <<Dorian>> in downtown Tolbana.
Summary:
You find the rugged old fisherman on the end of the dock. Like the two men before him, Pete sports a long white beard. You can't help but think it likely that they must be related somehow? When you explain why you're there, Pete looses a deep, hearty belly-laugh. "Yer tellin' me Mayor Dorian's taken to sending players to do his dirty work? Seems wrong that he-"
Pete stops mid-sentence, distracted by a sudden shimmering just below the surface. "There she is!" he explodes, thrusting his fishing pole into your arms. "You take that, 'n' I'll grab my harpoon. I can't believe Big Bertha's finally reared her beautiful head! You got any of those potion things? We'll need all the help we can get to bring Bertha down."
Outline:
After meeting up with <<Pete Larkin>>, each player (except for the escorts) must use at least one consumable prior to attempting to catch <<Big Bertha>>.
Attempting to catch <<Big Bertha>> requires a post action to make the attempt. On a CD roll of 6+, <<Big Bertha>> surfaces. Combat begins on the next post. Escorts cannot participate in this combat or expend any post actions to catch <<Big Bertha>>.
The player that defeats <Big Bertha>> must roll and include the results of their loot roll for <<Big Bertha>> in the same post. All players must agree on how the loot will be distributed.
NPCs:

<<Pete Larkin>>
An old fisherman with years of experience, the aspiration of the biggest catch keeps him going.
<<Dorian White>>
The mayor of Tolbana. A pleasant enough man, though he seems a bit absent-minded, and he's always in a hurry.
Enemies:

<<Big Bertha>>
Big Bertha uses loot minimum for HP and DMG for the highest level player who is not an escort.Abilities:
-
En Garde! | Gains +2 Accuracy against a target that hit it within the same rotation. <<Big Bertha>> is the sporting catch and always attacks last in the rotation.
Epilogue:
SpoilerWith a grin so bright it rivals the sun, Pete bestows upon you a long, white hunk of bone. "Big Bertha's bill," he announces proudly. "It's gotta be worth some col, and should repay my debt." With a wink, he explains, "T'was me who borrowed the good mayor's money. It let me buy this fishing pole, actually! Always intended to pay it back. Now I can!"
When you give the swordfish's jawbone to Mayor Dorian, he eyes it dubiously. "Well, yes," he stammers, "I suppose that's a fair trade. Truth be told, I don't quite remember how much we loaned him, anyway." Delicately, with two fingers, Dorian accepts the unusual item. "Uh, alright, that's all, then. Thank you for your help. If you ever need anything in this town, do not hesitate to drop my name. I'm sure that's far more valuable than any monetary reward I could offer you, anyway."
-
Floor 1
<<The Second Lesson>>
Party Limit: 4 | 20+ Posts
Prerequisite: Must have completed <The First Lesson>>
Repeatable only if escorting someone who has never run the quest.
Escorts may not offer any aid, and only earn standard thread rewards.Quest Rewards:
- 475 Experience Points
- 500 Col
-
POTENTIAL REWARD | Based on their roleplaying choice, each player receives one of the following rewards:
-
Boarlet's Blood
- Received if you pocketed the glass vial
- Rare Potion | DMG II
-
Boar Jerky
- Received if you examined the glass vial and defeated <<Mama Boar>>
- T1 Perfect Consumable | DMG II | MIT I
-
Boarlet's Blood
-
Each player may choose on of either:
-
Tealeaf Blade
- T1 Uncommon Weapon of Choice | DMG I
-
Tealeaf Armor
- T1 Uncommon Armor of Choice | MIT I
-
Tealeaf Blade
- Unlock <<The Third Lesson>> Quest.
Requirements:
- Must roleplay interacting with Lyle.
-
Defeat (3) boarlets*.
- Boarlets' stats found below.
- Boarlets can be spawned individually or as groups.
- (Option) Defeat <<Mama Boar>>*.
- Return the boar tusks to Lyle**.
*Note: If more than one player is taking the quest for the first time, multiply the required number of boarlets and mama boars by the number of first-time quest-takers.
**Note: The tusks mentioned in the summary have a 100% drop rate, and therefore do not require a roll to obtain.Summary:
The steady clang of metal on metal greets you as you enter the dimly lit shop. A man stands behind the anvil, rhythmically striking a heavy hammer against his newest project. Like Zackariah, the man sports a long white beard, and is pushing seventy years old. Unlike Zackariah, there is no warmth or gentleness in the NPC's eyes. Instead, Lyle regards you with annoyance, bordering on disgust. "I'm busy," he states tersely.
As you attempt to explain the situation or introduce yourself, he will cut you off with a wave of his leathery hand. "I don't do anything without payment. Go kill a couple of those pesky boarlets for me, and bring back their tusks. They're pretty weak, so even you shouldn't have any trouble. Do that, then I'll hear you out."
Outline:
Go into the wilds surrounding Tolbana and kill 3 Boarlets per player (excluding escorts).
After Killing Boarlets:
You deal the final blow against the third boarlet, and as the pixels rain down around you, you notice an unusual item nestled in the grass. The sun gleams off the edge of a tiny glass vial. Do you inspect the item, or simply pocket it and head back to Lyle's shop?Pocket It:
SpoilerYou've acquired <<Boarlet's Blood>> This rare potion consumable that grants you +2 DMG per thread.
Examine It:
SpoilerWhile you're studying the vibrantly colored liquid, you don't notice the enormous boar approaching you from behind. By the time you turn around, it's nearly too late! Plus, while you're fighting the newest threat, the original vial disappears. However, should you successfully defeat the enraged mother boar, you'll receive <<Boar Jerky>>, a tough hunk of dried meat. A perfect meal consumable, the jerky offers +2 DMG, +5*tier MIT.
NPCs:

<<Lyle Tealeaf>>
An old blacksmith. He's set in his ways, with a bit of a temper, and a tough exterior.
Enemies:
<<Boarlet>>
They've killed more players than all of the floor bosses combined. Don't let the cuteness deceive you.
HP: 5/5 | DMG: 3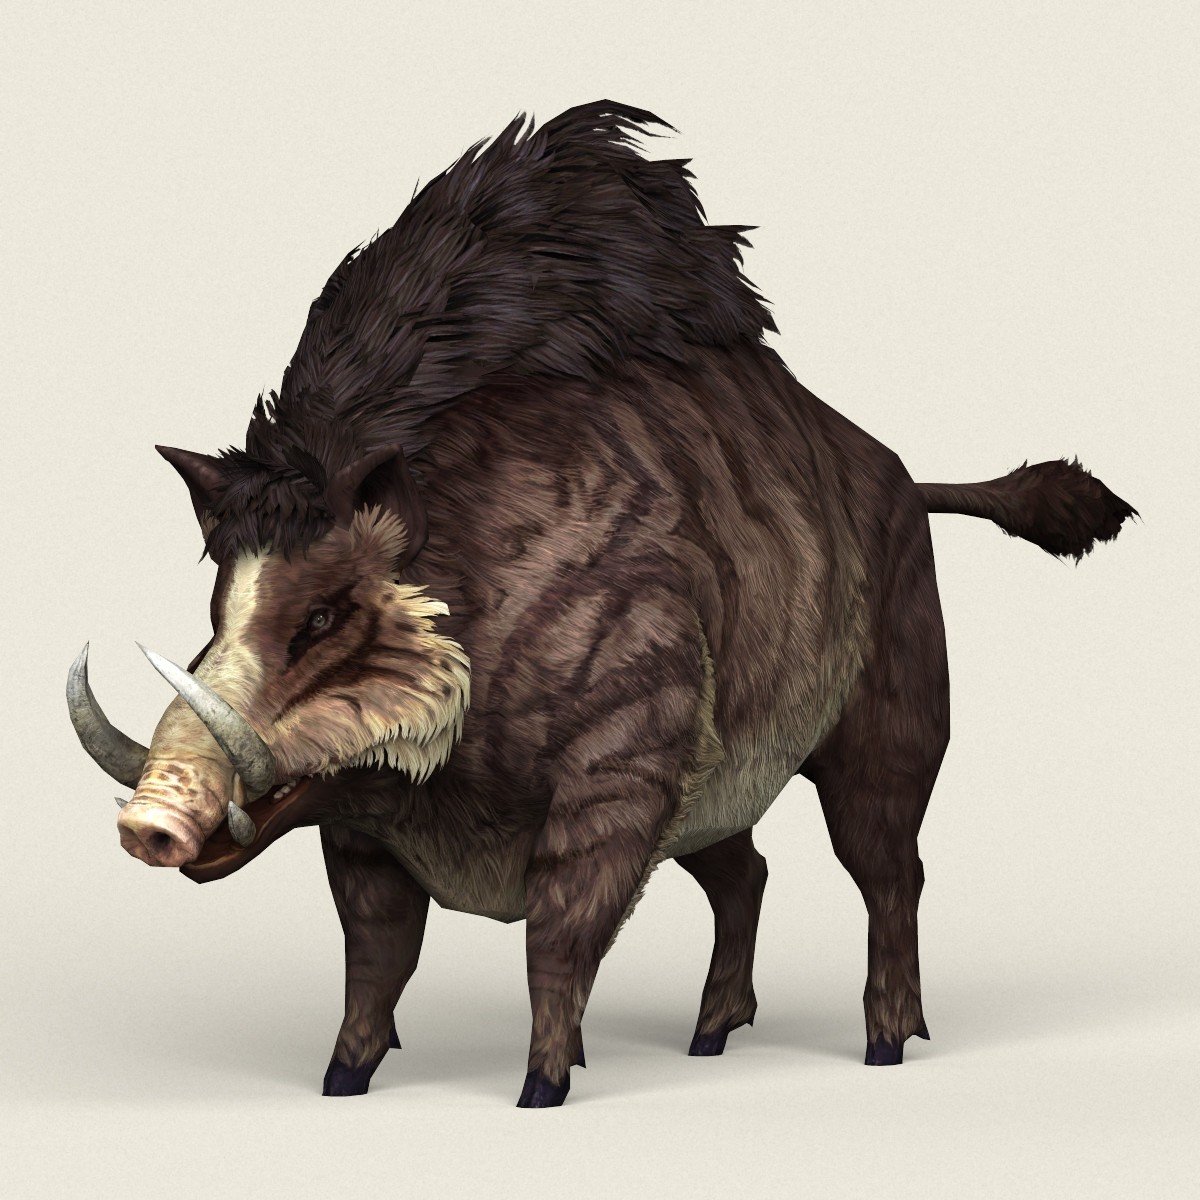
<<Mama Boar>>
Hell hath no fury like a mama boar scorned.
HP: 60/60 | DMG: 15 | MIT: 5 | EVA: -1
Epilogue:
SpoilerWhen you return with the required tusks, Lyle gives a curt nod of approval. "I use these on hilts," he explains simply, before setting the items aside. "Now, I'll have you know that I don't take loans from anyone, especially men the likes of Dorian White. You might try old Pete Larkin. He spends all his time fishing for river monsters or some such nonsense." With a scoff, he adds, "Without a real job, the man could probably use the charity." Lyle turns back to his work, but gestures with his head toward a nearby table. "Grab yourself a weapon and armor from those bins on your way out. They're about worthless, but consider it payment for the tusks."
-
Floor 1
<<The First Lesson>>
Party Limit: 4 | 20+ Posts
Repeatable only if escorting someone who has never run the quest.
Escorts may not offer any aid, and only earn standard thread rewards.Quest Rewards:
Remember: these rewards are given to all participants completing the quest for the first time. They are in addition to the standard thread rewards. Be sure to track your potions somewhere (a spreadsheet, your journal, etc.).- 450 Experience Points
- 500 Col
- 5 materials
-
An Assortment of Potions:
- (5) T1 Uncommon Health Potions: Heals 5% of Maximum HP.
- (1) T1 Uncommon Damage Potion: +1 DMG for an entire thread.
- (1) T1 Uncommon Overhealth Potion: Adds 5% of Maximum HP to users Maximum HP for a thread.
- (1) T1 Health Potion, quality is based on Crafting Results.
- Unlock <<The Second Lesson>> Quest
Requirements:
- Must roleplay speaking to Dorian to receive the quest.
- Must roleplay interacting with Zackariah.
- Gather 5 materials
- Return to Zackariah with the materials.
- Craft a Healing Potion of Uncommon or greater quality.
Summary:
"You there! Stop, please!" A man approaches you with long, purposeful strides. "Pardon me, but I am in need of some assistance, and you appear quite capable." Giving the NPC your attention, he heaves a quick sigh, adjusting the monocle over his right eye. "My name is Dorian, and I am the mayor of this town. As part of those mayoral duties, I issued a small loan to a member of the community a few months ago. Well, the time to collect had come around and I-" Flustered, Dorian systematically runs his fingers over his perfect mustache. "You see, I've forgotten who it was I loaned the money to. Terribly embarrassing, I know, but I am a very busy man, and I cannot keep track of everything that happens. I'm sure you understand." With a wave of his hand, Dorian continues, "Should you be willing to track down the loan recipient for me, and collect the col, I would be eternally grateful. Just, maybe don't let anyone else know I forgot who the loan went to?"
Upon acceptance of the quest, Dorian nods. "Excellent, I knew I could count on you! You might start with Zackariah, the alchemist. He's often doing projects for the town, so it may have been him that borrowed the money."
As you enter Zackariah’s shop, you are met with shelves and shelves of colorful potions in various vials and jars. “Oh, hello," comes the distracted greeting from behind the counter. A man with a long, snow-white beard glances up from a bubbling cup of sweet-smelling purple liquid. "Are you here to order something? I’m sorry, but I am currently swamped with orders, and I’m running out of supplies.” Light comes into the man's dark eyes, a lightbulb going off to signify a brilliant idea. “Would you gather a few materials for me? Flowers, herbs, rare woods, whatever you can find outside the city walls. I promise I’ll help you fill your order as soon as you return. In fact, I would be willing to show you how to do it yourself.”
Outline:
After receiving your instructions from Dorian and Zackariah, head out into the wilds of Floor One and roleplay gathering the necessary components.
Gather (5) materials by making LD rolls. Each rolls requires a post and succeeds on an LD of 11+.
*Note: The LD: 11+ is for this quest only. Normally, gathering materials requires an LD of 15+.
Once you have collected the required materials, return to Zackariah's shop and make crafting rolls. Zackariah will give the player as many materials as necessary until the player crafts a Healing Potion of Uncommon or higher quality. The player will no longer be able to craft after succeeding in crafting a potion. Also, players will not retain leftover materials gathered in the first part of the quest. You will receive 5 materials as part of the quest rewards as recompense. Zackariah is patient and will not berate players for failing. A player can make as many attempts in one post as is necessary to successfully craft the potion using the following:
-
Craft (1) Healing Potion of Uncommon or greater quality.
- CD: 1-3 = Fail, try again | 4-6 = Uncommon Quality (Success) | 7-9 = Rare Quality (Success) | 10-12 = Perfect Quality (Success)
Note: If more than one player is taking the quest for the first time, each is responsible for collecting their own materials, and crafting their own potion.
NPCs:
<<Dorian White>>
A mayor of Tolbana. A pleasant enough man, though he seems a bit absent-minded, and he's always in a hurry.
<<Zackariah Stroll>>
An older gentleman, and expert alchemist. He is kind, intelligent, and speaks softly.
Epilogue:
SpoilerAfter successfully crafting the potions, Zackariah holds them up, examining your work. "You did a fantastic job," he finally declares, offering you the items. "Now, was there anything else?" Once you explain your real reason for visiting, Zackariah chuckles and shakes his head. "Leave it to Dorian to forget something so important. No, I'm afraid it wasn't me that borrowed the col. You might try Lyle, the blacksmith. I've seen him talking with the mayor frequently the past month or so, and he's just up the road. I wish you luck!"
-
Floor 1
<<The First Few Lessons>>
Party Limit: 4 | 20+ Posts

Welcome to the First Few Lessons quest line! If you're here, it's likely because you're a newcomer to the floating castle. If you have any questions at all, please do not hesitate to ask (post in the Discord, or create a support ticket). Please be sure to remember this important information:
- These quests can only be completed for quest rewards once. However, you may run them again if you're escorting someone who has never taken them before. You will only receive standard thread rewards for completing the quest after the first time.
- While these quests are structured in a way that introduces new players to the system, any player at any level may take them for quest rewards.
- The requirements for these quests are per person. Each person must meet the demands themselves. For example, if four people take the first quest together, the group must collect twenty materials - five from each person. While you may roleplay helping your companions, you may not mechanically offer any aid to reach those requirements.
-
Floor 8
<<Treant Treaties>>
Party Limit: 4 | 20+ Posts
Prerequisite: Must have completed <<Treant Rivalries>>
Repeatable for standard thread rewards.Quest Rewards:
- 1,000 Experience Points
- 450 col
Requirements:
Mercy Route (Only available to those spared the Commander Arun)
Spoiler- Roleplay speaking to Haela and convince her to enter a treaty favoring both the treants and the elves.
- Earn the trust of Haela by rescuing her husband, Lumen, from the Treant prison.
- Roleplay returning to Baobab to speak to Ned to find the location of the prison, and receive the key to the prison.
- Use a post action to use the key to open the prison.
- Earn a collective LD of 50 calming down Lumen as he attacks the party members, or kill him.
-
Those who calmed Lumen
- Accompany Lumen to defeat <<Surtas, the Great Flame>> in No Man's Land. Lumen cannot die or else the Killed Lumen Route shall begin.
- Return to Haela and deliver Lumen to her.
- Return to Baobab and Roleplay the ending.
-
Those who killed Lumen
- Return to Haela and inform her that Lumen had already fallen.
- Return to Baobab and Roleplay the ending.
Killer Route
Spoiler- Roleplay speaking to Haela
- Defeat Haela, Queen of the Elves
- Speak with Haela and Needlethorn
- Return to Baobab and roleplay the ending.
Summary:Mercy Route
Haela stands before the player(s), having earned her respect in sparing Arun after besting him in combat. "You show that you yourself care about the elven people by sparing one of our own lives; however, I am not sure if the Treants hold the same respect. They care about the forest, and the forest alone. They do not care for the elves even though we are inhabitants of the forest and aid its growth with our magic." Haela takes a step back, looking away as she ponders something for a moment. "If the Treants wish to gain my trust... they can start by returning my husband to me. They have him locked away for several hundred years in a prison unknown to me. If Ned is willing to return him to me, I understand that he is willing to end the war. The reason should be made clear to you soon enough." With that said, the new objective for the quest is to return to Baobab and speak to Ned.
As the player returns to Baobab and voices the Queen's demands, Ned shall remain silent for a moment. "I should have known this moment would come. It has been so long that I had almost forgotten. Lumen, the King of the Elves, and the strongest of them to ever live. While he isn't the one to rule the elves, his strength is only to be matched by my own when I was younger. I have sensed his power become dull while he has been locked away in his impenetrable prison; however, I am sure he has just entered a sleep state to conserve power. You would probably refer to it almost like hibernation," A branch from Ned lowers down, offering up a strange looking dagger. This dagger's hilt is made from wood and the blade itself doesn't appear to be made of metal. "I have fashioned the key to be easily wieldable by own of your stature. Just South of this location you will find yourself in front of a wall of trees so thick that they can't be walked through. It serves as the gate to the prison. Strike the wall with this weapon and a small enough opening should be created for you to step inside."
Once the player finds the prison of trees, they will find them to be not the average tree, but covered with a bark as hard as steel. No matter what attempt to break, burn, or destroy the trees shall have no effect. However, upon the key being slashed into one of the trees, it shall make way, allowing enough room for a human to walk in between them. They will find the prison to be shrouded in complete darkness, the sun blocked out by the thick overhanging trees that prevent upward escape. As they step forward through the darkness, they will find a sudden light as small yellow orbs lift into the air like fireflies and bring a warm yellow light to the room. The prison is rather large, appearing to be several hundred meters in each direction. Large gashes can be found in a few of the trees, but nothing else major to note. In the very center of the room, floating just a foot above the ground stands a white-haired elf, a white sword resting in his right hand. His hair floats around him and the yellow orbs almost seem attracted to his very being, floating curiously around him. As players approach, the elf's eyes will open slightly and there will be little time for them to react before a sweep of light slashes the area where they stand. From here, players must attempt to speak some sense into the half-asleep elf or kill him.
>> Those that calmed Lumen
Lumen hesitantly halts his attacks, taking a look at his opponents for the first time. "I... apologize. I am still... very tired. The last I remember... hunting Surtas and being ambushed by the king of Treants, Nedshanta Cor'Quessir, who thought I was preparing to cross No Man's Land into his territory." His half-closed eyes search the perimeter for a moment. "How... have you come here? Even at full strength I was unable to break through." As the player mentions the situation of how they came to rescue himn, Lumen will shake his head. His voice seems to be more of a mumble instead of words. "It won't matter... if Surtas isn't dead. It causes much of the death in No Man's Land. With all this time... I am sure it grew even stronger. I knew it would eventually become a threat when I seen a firefox with three tails. I... can't return home until I have completed my mission."
Players shall follow Lumel to No Man's Land, finding that Lumel's name and health bar has joined the party. Upon arriving at No Man's Land, Lumel will once again draw his blade before closing his eyes. "It comes." Is all he says before the party is rushed by a six-foot tall firefox, with nine tails sprouting from its behind. "It cannot die until all of its tails have been taken out."
As Surtas falls, Lumel will smile. "Good. No longer do I have to worry about the Forest becoming engulfed in flame. We may now return to my homeland. I hope it is just as I left it." The party returns to Ellesmera, to find the gate to the city in ruins, the large force of Treants waiting just outside. Many of them seem charred or are missing limbs. Inside of the gates lay many elven warriors who have healers tending to their wounds. A ceasefire seemed to have occurred and the fighting momentarily stopped. As the party approaches and the NPC's notice Lumel, many treants seem uncomfortable while many elves gasp with joy. Of course, the biggest reaction comes from Haela who had been tending to the wounded warriors. Tears streaming down her face, she rushes forward, clinging to the elf. "Lumel... I was worried I would never get to see you again! What they've done to you... it doesn't matter you are safe now." After a hug that lasts over a minute, Haela pulls back from Lumel to look at him. Lumel has a smile on his face, but it appears to be dazed. "It seems you kept yourself alive after all of this time by putting yourself to sleep." Haela lifts her hand to Lumel's face, touching his forehead. A faint green glow is seen before Lumel's eyes open the rest of the way. "It will take some time but you will be back to normal in no time my love." Haela finally turns her attention towards the party and says, "You have done me a service I can never repay. I will try to pay in some small amount to that debt by allowing treaties to begin taking place between myself and the Treants. I would be willing to allow them to live within Ellesmera."
>> Those that killed Lumen
Lumen sinks to his knees, his weapon clattering to the ground. Defeated, he pixelates, becoming blue shards that float away with the wind. The prison becomes silent as the party's next objective is to return to Ellesmera.
Upon return, the players find the gate to the city destroyed, the Treants sitting just outside. Just through the gates lay several wounded elves, being tended to by those wielding healing magic. As the party steps forward, they will notice Haela staring at them from across the way witha confused expression. As she approaches, she asks but one question. "Where is Lumen? Was the Treant King not willing to give him up? If not, I am going to continue this war." As the party explains that he is dead, she will become taken aback for a moment. "Impossible... there is no way he can be dead! There has to be a mistake! Without him..." She never finishes her thoughts.
"Leave here. Tell the Treant King he and his people can return to living here. I suppose the Elf tribe will be run into ruin in a thousand years. With my husband dead, none shall replace me on the throne. Our customs prevent me from marrying any other man, and there is no other way to decide the next ruler without bloodshed."
Killer Route
"You will shortly regret what you have done here." She raises her shield hand where a light begins to emit. "I won't be going down easy. Not only do I wield spirit magic, within me is the strength of every queen before me. Our Royal power is passed down and can be drawn on by our descendants!" Haela waves her hand, and a deep fog begins to sweep the area. Within seconds the area is flooded with a thick fog, concealing the location of Haela. All that allows the player to know that she is still around is the fact that they are randomly bombarded with a spear of light energy and she hurls a magic attack at opponents.
As Haela's health bar would drop to 0, it stops at 1. From there, it rises again back up to full and the fog in the area completely fades. "You can't defeat me as long as I've got my mind set on defeating you! Now, feel the power of the Queens of the past!" She raises her shield hand once more, another light beginning to emit. However, this time light rains down on the area and four aethereal figures appear before the party, armed to the teeth. The party will have to destroy these figures before being able to attack the queen again.
For a second time, Haela's health bar stops at 1 HP remaining before rising back up til full. "I don't understand. You've... defeated my own power and the power of the Queens before me." Tears of anger begin to stream down Haela's face. "WHY ARE YOU DOING THIS?" She wipes the tears from her eyes before steeling herself once more. "I guess... the only way to defeat a monster is to become one..." Haela thrusts her spear into the ground and closes her eyes. Raising both hands, a green aura begins to surround her. A wind begins to spew forward and the green aura slowly darkens until it is black. This happens to Haela's hair as well. Her eyes snap open and one of them has gone dark as well. "I will do everything in my power to defeat you. I've even converted my own energy into dark power to defeat you. Such is taboo for our people as the change is permanent, but I will do anything to protect my people." With that, Haela begins to attack again, fighting stronger than she had previously.
As Haela stands defeated, her health will stop at 1 but will not rise again. "I don't get it. I used everything I had and still lost. I couldn't protect my people." As she falls to her knees, the wall to the building will be broken as Needlethorn makes his way through. "It would seem I have missed much. The queen has already been defeated. This brings the elves into Checkmate and we have won the war." The treant prince seems rather amused. "You were a formidable opponent, Haela. However, if you do not surrender now, our forces will no hesitate to wipe the rest of the elves in this city. We have spared most Elves by only injuring them. Surrender the city and leave peacefully and no more blood shall be shed. You may make home somewhere else, but wherever it is you are forbidden from using magic or weapons and any elves found using them shall be executed. Do you understand and accept these terms?" Haela begins to shudder for a moment before nodding her head. "Excellent. Human, return to my father and let him know of our victory. Of course, as the king he must set everything into motion. You have done well and impressed me."
Outline:
Mercy RouteSpoilerAllies:
<<Lumen>>
Husband to Haela and widely known as the strongest elf to ever exist. Wielding countless Light Spirits, he is able to fight extremely well. His power over spirits grant him extra speed, strength, the ability to levitate and more. However, his power is severely lowered due to a self-induced hibernation hundreds of years ago after he was captured by the Treants.HP: 700/700 | DMG: 150 | MIT: 100 | ACC: 3 | EVA: 2 | Battle Healing 30
Abilities:
- Flash Strike | At untraceable speeds Lumen moves behind his opponent and swipes his sword, sending a slash of light at his opponent. Deals 75 minimum DMG and increases his EVA by 1 until Lumen's next turn. Used on the first turn, and then whenever available afterward. 2 turn cooldown.
- Judgement of Light | Lumen ensnares his opponent between several swords of light created by magic. These swords then rush forward and strike them from all sides. Deals 50 extra damage and ignores half of the target's mitigation. Activates on a critical hit, takes priority over <<Flash Strike>>
-
Blessing of Light:
- While fighting Lumen: Permanently increases the damage of all Lumen's attacks by 25.
-
When Allied with Lumen: Increases the party's base DMG by 4 for their next critical attack and permanently increases Lumen's attack by 10. Activates on a CD 10-12 and still makes an attack afterward.
NPCs:
<<Haela, Queen of the Elves>>
A millennia old Elf that has served as Queen since the fall of her mother fifty years prior. Despite her age, she appears to be a young woman. She intends to be the ruler that ends the war before passing it on to her eventual offspring.
Enemies:

<<Surtas>>
A firefox that was able, with some strange mutation, to be able to gain stronger overtime. It has grown to the point that it has nine tails and has become a large threat to the entire forest. To be defeat, each of its tails bust be cut off.
Surtas' Tail #1 - HP: 50/50
Surtas' Tail #2 - HP: 50/50
Surtas' Tail #3 - HP: 50/50
Surtas' Tail #4 - HP: 50/50
Surtas' Tail #5 - HP: 50/50
Surtas' Tail #6 - HP: 50/50
Surtas' Tail #7 - HP: 50/50
Surtas' Tail #8 - HP: 50/50
Surtas' Tail #9 - HP: 50/50
DMG: 175 | MIT: 100 | ACC: 2Abilities:
- Counter of Fire | Deals 50 unmitigatable damage to any entity that destroyed a tail since its last action as a free action.
- Illusion of Fire | Only 1 Tail may be targeted at a time, meaning no AoE attacks.
Killer Route
SpoilerPhase 1
<<Haela, Queen of the Elves>>
Haela covers the area in a thick fog, making visibility for players next to nothing. Unseen, Haela will begin barraging the player with her holy spear by thrusting it forward and sending a projection of the weapon into the player. Inside of this fog, Haela can see everything, making stealthed players instantly found. Players only hope is to find her within this fog and bring her health down.
HP: 500/500 | DMG: 125 | MIT: 125 | ACC: 4 | Battle Healing 30Abilities:
- Mystical Fog | [Field Effect] Stealth doesn't work in this phase as well as any auto-hit abilities. Evasion and Accuracy of all Players is set to a maximum of 1. Players must roll an LD of 6+ in addition to standard BD requirements in order to hit.
Phase 2

<<Haela, Queen of the Elves>>
As she rises again from the brink of death, she will use her ability to summon the spirits of the queens of the past to her side to protect her. A glittering light will shine down from above, encasing Haela in a golden light. Four light blue spirits cast themselves down onto the ground. While features can't be made out, it is obvious that Haela's words are true that she summoned her ancestor's help.
HP: 500/500 | DMG: 100 | MIT: 150 | ACC: 4 | EVA: 1 | Battle Healing 30Abilities:
- Spirit Protection | Cannot be targeted until all four <<Royal Spirits>> have been defeated.
- Spirit Arsenal | Haela's spirit weapons ignore 25% of the target's mitigation.

<<Royal Spirit>>
Spirits of the Queens of old, serving their tribe even in the afterlife. They understand that if their spirit is defeated that they will never exist again; however, they are willing to put everything on the line in the defense of the queen and continuing their bloodline.
HP: 125/125Abilities:
- Ancestral Armaments | While <<Royal Spirits>> cannot act independently, they strengthen and protect the elven monarch. When Haela makes an attack, these spirits become spectral weapons that enhance her own attacks, adding 25 DMG per active spirit.
Phase 3
.thumb.jpg.ecb3b831d83c75ab495bab9266c89140.jpg)
<<Haela, Queen of the Elves>>
Stricken by her inability to defeat her attackers, Haela decides to throw away everything in the hope to defeat them. Corrupting her own spirit magic and turning it into raw power, she once more faces the players at full health. This time however, she's attacking without holding back, prepared to destroy anything and everything in her path.HP: 700/700 | DMG: 150 | MIT: 150 | ACC: 4 | EVA: 1
Abilities:
- Dark Pulse | On a natural MD 6-8, Haela sends a vibration into the target's body that drops them to the ground. Deals normal damage and stuns the opponent
- Corruption | On a natural MD 9-10, Haela strikes an opponent directly with her weapon, afflicting them with a myriad of status effects. Deals normal damage and gives target a T1 Bleed, Burn, Blight, and Envenom effect each lasting 2 turns.
- Destroy (Passive) | Reduces Player's MAX HP by 10% of the damage dealt from physical damage (not from status effects). This effect shall last until the battle is over.
Epilogue:
Good Ending
SpoilerUpon returning, the player(s) can find Ned standing near where they left him, his gaze drawn to the sky. As the party approaches, he will speak before giving them the chance. "After all of this time, it has finally all come to an end. It seems my patience has been rewarded. My family and I may return to where we truly belong, and with the Elves assistance the Cypher Rune can be retrieved. I suppose Lumen would be up to such a task, if you managed to wake him up from his slumber." Ned brings his gaze down to the players below him. A deep rumble is head as a sigh of relief escapes from him. "You truly have done great work. Managing to end a 500 year old war, appeasing both sides. Truly resourceful. Your name shall be honored by our people for centuries to come."
Ned looks away once more, taking a step forward. A hum emitted deep from his throat. As his humming continues, the players will find that the wind is slowly picking up. Leaves swirl around the player before the wind lifts the player off their feet and gently raises them towards the sky. Above the trees, until the player is easily 100 meters in the air. A voice speaks from a distance, but they can hear quickly. "This is the land that you have saved. Everything that resides within the forest you have saved. The death and destruction shall finally come to an end."
The player will slowly fall to the ground, gently placed there as the leaves and the wind stop flowing. "If there is anything that myself or my people can do for you, all you must do is ask. As for now, I have an idea for a reward befitting of you." He presents the player with the reward and quest ends.
Treant Victory Ending
SpoilerUpon returning, the player(s) can find Ned standing gazing at them with as much of a concerned expression as a tree could make. "You return." Is all he has to say for a moment. "You needn't tell me what has transpired, as I already am aware. Mother has already sent out her cry of pain, as her children fell from more bloodshed. I can't say that I am happy, but I understand that my brethren seek to live in their homeland. Things I am sure, will only become harder from here on out as the hatred between us and the Elves grow deeper."
Ned stretches towards the sun as he continues. "However, I am sure you have done the best you could do. The war itself shall cease and blood shall not be shed for quite some time. My time in this world runs short, I am glad to have seen the end before I go. Now, I can rest next to my mother and not have to mourn my own death." Ned shall then look to the player(s) and present the rewards.
-
Floor 8
<<Treant Rivalries>>
Party Limit: 4 | 20+ Posts
Repeatable for standard thread rewards.

Quest Rewards:
- 700 Experience Points
- 250 col
-
Each player receives:
-
Blessing of Barkskin
- A small piece of wood engraved with the blessing of the forest. Upon use makes the wearer's skin appear to be more like bark.
- Increases Mitigation by 25 for 1 thread. This item has 3 charges and is destroyed on the third use.
-
Blessing of Barkskin
- Unlock the <<Treant Treatise>> Quest
Requirements:
- Roleplay being summoned to meet the Treant King, who, due to a name that is too difficult to pronounce, goes by <<Ned>>.
- Roleplay speaking with the Treant King, Ned, and the Prince Needlethorn.
-
Sneak past or defeat the three Elven Guards who protect the entrance.
- Player must successfully pass a stealth check from all guards who have a passive search rating of 13.
- Confront and defeat Arun, Commander of the Elves.
Summary:
While traveling in the Sacred Grove of Baobab, one of you hears the deep rumbling voice of the Treant King who resides in the center of the clearing. Looking up, the players find him peering back down at them, taking a moment to examine them before continuing.
"Within you... I feel great resolve. I have lived in The Great Forest for quite a long time. Since then, I have been pushed from my proper place at my mother's side, and have since spent years watching my kin fall to the fiery magics wielded by the elves. This is a malfeasance I can tolerate no longer. They threaten the continuance of my people and the Forest. I can no longer sit idle." Ned looks upwards at a large group of treants that were gathering at the edge of the grove.
"Soon, we shall launch our assault upon the elven city in an attempt to bring down the gate and lay bare the heart of their settlement. However, part of me fears that we shall not succeed. Their strength remains greater than ours, as their numbers always have been. I doubt if we can even push to the gate. However... I believe it may be possible to distract their main force and leave their capital relatively unguarded. Perhaps you could slip in and force the queen into submission while her guard is away. I don't typically like resorting to such tactics, but we have few options remaining. If you get the chance I would like you to at least attempt to smooth things over peacefully." The ground shakes as another treant comes forward, his body covered in thick thorns.
"We are prepared to move in, father. With a force this strong, we should be able to sweep aside anything that stands in our way." The seems pensive and hesitant before replying.
"Needlethorn, my son. Do not become overconfident and forget the threat that the elves pose. I fear you underestimate them. Move with caution. If they are willing, these humans shall assist you for this battle. They shall sneak in while you draw the elven defenders away. I hope you are able to push through and meet up with them." Prince Needlethorn gives the party a skeptical glance.
"You think mere humans can be of some worth? At least I don't have to worry about them being in the way." Needlethorn grunts dismissively before stepping away back to rejoin the main force of treants, giving the King a chance to speak his final instructions in peace.
"Forgive him. He is young and allows his power to go to his head. I suppose it is my fault for allowing these outbursts, but I am old and lack the zeal for further conflict. Five hundred years ago, I was able to best even the current Queen of the Elves' husband. Best of wishes to you, friend. May the forest guide you down the right path." The players head out with the force a short time later.
About halfway through, Needlethorn shall show them down a path which will bring the player around to the other side of Ellesmera where they can begin their infiltration.
The players should be able to just walk into the city without any trouble. The elves do not recognize them as a threat, unless any in their number bears an orange icon. It doesn't take much to notice that the city is sparsely populated and under-defended. Only three guards remain standing by the front entrance to the palace, curled around the massive trunk of The Great Tree.
As a group, the players must decide whether to slip past the guards or defeat them. Should any player confront the guards they will enter a battle stance and demand that they leave the palace and city alike. If they do not oblige, the guards will attack. Whichever approach is taken, as the players enter the building, a bright flash of light will shoot into the sky,, like some sort of red flare. It immediately flushes any hidden player out of hiding and prevent them from re-initiating the skill for the next several minutes. If a player snuck in, they can close and lock the door behind them, preventing the three guards from attacking them.
The players have little choice but to press on, into the palace. A beautiful set of hand-carved wooden stairs leads up to the throne room. Seated upon it is the Elven monarch; the queen herself. She gazes over at the players before scolding them.
"It was foolish for you to come here. You have broken several laws of our city and now stand before me, the queen, armed and with hostile intent. I don't believe that you act on your own, but to think that the King of Treants is resorting to sending assassins? It is beneath him. Don't think even for a moment that I will be defeated so easily." As if on cue, a burst of light emanates from the roof of the palace and an elf falls through to the ground. As he lands, a wave of flame spreads thinly across the floor. Brandishing his spear, Gungnir, the elven commander glares at you before charging.
Outline:
NPCs:
<<Ned, King of the Treants>>
A being said to have existed for over 10,000 years and presiding as the ruler of the Treants for the last few thousand. Standing at fifty feet tall, none are larger save for the Great Tree itself. His voice carries a deep wisdom and care for the forest as well as rumbling the ground with every word.
<<Needlethorn, Prince of the Treants>>
Prince of the Treants and son to <<Ned>>, he is quite strong for his age. Only a bit over five-hundred years, his prickly personality has caused for his body to become covered in pointy thorns capable of skewering those who come too close to him.
Enemies:
<<Elven Guard>>
<<Elven Guards>> typically are found roaming Ellesmera. They are quite agile and trained in the sword and low-leveled magic. They fight in the service of the queen and will lay down their life for her.
HP: 150/150 | DMG: 50 | MIT: 50 | ACC: 2 | EVA: 2Abilities:
- Restoration | When below 75 HP, the Elven Guard will use their post action to heal themselves for 50 HP. This ability has a 2 turn cooldown.
<<Arun, Commander of the Elves>>
One of the strongest Elves to roam the Great Forest and currently commander of the Elven army. He wields the magic spear, Gungnir, a weapon infused with the power of fire. In the eyes of the Treants, he is the most threatening figure in the army of the Elves.
HP: 450/450 | DMG: 125 | MIT: 100 | ACC: 2 | EVA: 3 | Burn 14 (2 turns on 9-10) | Battle Healing 30Abilities:
- Firestorm | On a CD 10-12, Arun will leap up and throw his weapon into the center of the room instead of attacking normally, washing over all of his opponents with a flame attack that ignores mitigation and evasion. This attack hits all party members automatically.
- Greater Restoration | When below 150 HP, Arun will use his post action to heal himself for 150 HP. This ability has a 2 turn cooldown.
-
Mercy | The first time he is knocked below 50 HP his health bar will go no lower. Arun will attempt to surrender and no longer attack, though the players may then press their attack to kill him. If this option is chosen, begin the Mercy Ending.
Epilogue:
Mercy Ending
SpoilerAs Arun kneels on the ground, his spear clatters to the floor beside him. He breathes heavily, severe damage apparent on his body even though it is slowly healing.
"You have bested me... human. I was... no match for you. However... I can't allow you to attack the queen. She can handle herself... but she is important to the people of our city. I beg of you to have-" A sharp, female voice from the throne cuts him off.
"That is enough! I can handle myself, thank you very much. Your mercy is appreciated, strangers. It shows me that you are moral creatures, and that you don't truly mean ill towards me or my people, but instead care deeply scars that more murderous actions would leave upon your souls. If you speak for the Treants, I am inclined to listen to you. However... that doesn't mean I am willing to accept any terms. I will only settle for an end to the war if it suits my people. I am not going to just surrender and move from our ancestral home." Haela shall step forward, and cast a healing spell that will completely heal Arun. Arun nods gratefully to his liege, then step to the side of the room where he will continue watching.
A screen appears before the player displaying their rewards and show that a new quest has begun.
Murder Ending
SpoilerAs Arun falls, he dissipates into blue pixelated shards that will fill the room and smothers it in silence. It is broken, moments later, by the sound of footsteps as Haela approaches. A fierce look burns in her eyes as she advances, stopping only just beyond arm's reach of the party.
"You have proven your mettle by taking down our strongest warrior. And, by the absence of Arun at the main battle, I am sure it won't be long before the Treants break into our city. Many of my people shall die and the Treants will win the war. The King of Treants gambled to take the king piece off the board, and it worked. Before long, we shall be in checkmate." Haela looks to the side as she mentions. "I have failed in my position as queen. However, as long as I stand, you will not leave here alive." Haela brandishes her polearm and shield.
A screen appears before the player with their rewards and show that a new quest has begun.
-
Floor 6
<<Calming the Soul>>
Solo Party | 20+ Posts
Repeatable for standard thread rewards
Quest Rewards:
- 2,000 Experience Points
- Unlock <<Meditation>> Extra Skill
Requirements:
- Meditate beneath the Waterfall of the Sage.
- Conquer all of your Inner Demons.
- Equipment and Battle-Ready Inventory are set upon declaration, and cannot be changed throughout the thread. No access to your broader inventory is permitted.
Summary:
Nestled deep within the jungles of the sixth floor awaits a most sacred place. A former holy ground, abandoned by religious practitioners of ages past; the Waterfall of the Sage. It attracts nearby players like moths to a flame, filling those who arrive with an unbridled sense of serenity and relaxation. Even to the casual visitor, importance seems to precipitate upon the area, its pressure as unrelenting as it is palpable. People from even the furthest reaches of the floating castle Aincrad will campaign to the scene to sit atop the mossy stone settled before the waterfall, concentrating on its ebb and flow in the hopes of uncovering its secrets.
Rumors tell tales of tourists who have opened their eyes to a separate plane of existence. To some, it may appear to be a sprawling, endless white space devoid of matter. To others, an obsidian void that devours every last trace of light. Players have reported everything between, from fields of flowers to a literal rendition of Hell itself, depending upon the proclivities of the individual experiencing it. Despite the discrepancies in venues between players, there do seem to be consistent aspects that all of the experiences have shared.
Invasive whispers permeate the space, echoing the subject’s deepest and most secretive thoughts. A shadow - a featureless silhouette of a human being occupies the space, its shape and size mirroring the individual who finds themselves there. It will introduce the player to a series of doors as a disturbingly large, unsettlingly white smile stretches across what one could only assume to be its face. The doors will present themselves in a manner that holds significance to the player, their designs depicting colors, shapes, symbols, textures, or even smells that are designed to elicit an emotional response in accordance with their deepest held fears and anxieties.
The shadow will motion with its hand, a signal for the player to enter the doors at their own pace. Upon selecting a door, the player is faced with one of their Inner Demons, who must be vanquished before proceeding. Behind each door awaits increasingly powerful foes, the dread attached to each more substantial than the last. Each door features its own location, layout decided by the Inner Demon being fought. Those who found themselves unable to proceed suffered a jarring unraveling of the mind, their fears casting them out of the trance and back into reality, causing the quest to fail.
The players who failed lost not only the rewards, but a piece of themselves. The players who succeeded left with something more; insight, courage, and the techniques to steady their fears and calm the turbulent tides of their minds.
Outline:
No additional instructions.
NPCs
<<The Entity>>
A shadow figure that acts as the guide within the space of the quest. It will always adopt the shape of the subject, and always sport the unsettling smile once it has appeared. It is neither hostile, nor particularly helpful; more a silent observer than an active participant in the quest.
Enemies:
<<First Inner Demon>>
The first Inner Demon in a series against one’s greatest fears and anxieties. Its shape, form, and name will manifest in accordance with the trepidations of the viewer.HP: ¼ of Player’s maximum HP
DMG: ¼ of Player’s Maximum Damage (Base Damage * Highest available Sword Art, including buffs/enhancements)
MIT: ¼ of Player’s Base Damage<<Second Inner Demon>>
The second Inner Demon in a series against one’s greatest fears and anxieties. Its shape, form, and name will manifest in accordance with the trepidations of the viewer.
HP: ⅓ of Player’s maximum HP
DMG: ⅓ of Player’s Maximum Damage (Base Damage * Highest available Sword Art, including buffs/enhancements)
MIT: ⅓ of Player’s Base Damage<<Third Inner Demon>>
The third Inner Demon in a series against one’s greatest fears and anxieties. Its shape, form, and name will manifest in accordance with the trepidations of the viewer.
HP: ½ of Player’s maximum HP
DMG: ½ of Player’s Maximum Damage (Base Damage * Highest available Sword Art, including buffs/enhancements)
MIT: ½ of Player’s Base Damage<<Fourth Inner Demon>>
The fourth and final Inner Demon in a series against one’s greatest fears and anxieties. Its shape, form, and name will manifest in accordance with the trepidations of the viewer.
HP: ¾ of Player’s maximum HP
DMG: ¾ of Player’s Maximum Damage (Base Damage * Highest available Sword Art, including buffs/enhancements)
MIT: ¾ of Player’s Base Damage
Epilogue:
SpoilerUpon slaying the final Inner Demon, the Player will find themselves awash in a white light. The light will consume them in entirety before fading to reveal the Waterfall of the Sage. Any amount of time may have passed while in the trance, depending upon the individual experience. A panel will populate before the Player heralding the quest’s completion, along with an alert that indicates the <<Meditation>> skill has been unlocked in their skill tree.
-
Floor 13
<<Cleansing the Corruption>>
Party Limit: 4 | 20+ Posts
Repeatable for standard thread rewards, quest col rewards and Horsemen drops.

Quest Rewards:
- 3,000 Experience Points
- 10,000 Col
-
Each player receives:
-
Rune of Cain
- A smooth stone rune inscribed with the Mark of Cain. Must be T2+ to use.
- Deals 50 Thorns DMG to anything that deals a critical hit against the user. Lasts for one thread. Ignores passive abilities that would otherwise negate this effect.
-
Rune of Cain
-
POTENTIAL REWARD | Player that defeats War receives
-
Bloodcrystal of War
- T2 Crystal: +4 DMG, -20*Player's Tier Mitigation
-
Bloodcrystal of War
-
POTENTIAL REWARD | Player that defeats Pestilence receives
-
Essence of Corruption
- Adds a Blight effect to one weapon for one thread. (36 DMG for 2 turn on a BD:9-10)
-
Essence of Corruption
-
POTENTIAL REWARD | Player that defeats Famine receives
-
Song of Famine
- T2 Debuff Song: Decreases a single targets ACC and EVA by 2 for four turns.
-
Song of Famine
-
POTENTIAL REWARD | Player that defeats Death receives
-
Death's Song
- T2 Debuff Song: Target is unable to heal for the next two turns. Includes, Battle Healing. Can be removed by Purify. Doesn't affect Floor/Event Bosses.
-
Death's Song
Requirements:
- Quest must be undertaken with a party of four players.
- Roleplay accepting the quest from Miraak.
- Roleplay entering Demon's End
- Players must defeat the Four Horsemen of the Apocalypse, each player starting by facing off against their own foe
- Fights are undertaken concurrently, with each player facing one of the Horsemen. If a player defeats their Horseman early, they may assist another player until all Horsemen are defeated.
- Roleplay taming a Horseman’s mount.
- Roleplay riding their mount to the Heart of Corruption.
- Defeat ten Blightbound Monstrosities
- Roleplay Armageddon and the defeat of The Blight.
Summary:
Once a well known and beloved priest, the NPC, Miraak, found himself swayed by a fallen angel named Artamiel. Artamiel inspired Miraak with talk of a "perfect world," and persuaded the man to turn on all he had once known and believed. Using dark, forbidden magic, Miraak unleashed a corruption that consumed the entire floor. Though the players were able to draw Miraak back from the brink of insanity, and free him from Artamiel's influence, the corruption remains.
Now, players can find Miraak standing beside an inaccessible church in Angel's Point. When approached, he explains that the corruption is far too formidable for mere humans to vanquish. Rather, the Four Horsemen of the Apocalypse are the only beings with enough power to challenge The Blight itself. He encourages the players to enter <<Demon's End>>, and track down the four legendary riders. "I do not know what comes next," he confesses, "but only a combined effort by all four Horsemen can cleanse these lands, and finally bring an end to this nightmare."
Outline:
After roleplaying meeting and accepting the quest from Miraak, the players must enter Demon's End, where they must challenge and defeat the Four Horsemen of the Apocalypse. All four are fought at the same time, using the following special rules:
- Each player use a post action to declare which horseman they are challenging
- Normal hate rules are suspended. Each horseman only attacks their challenger.
- Players can attack other horsemen after the one they challenged has been defeated.
When all four horsemen have been defeated, each player gains the following buffs, that last until removed, or the end of the thread, whichever occurs first:
- Apocalyptic (Player Passive) | As the new Four Horsemen of the Apocalypse, Players stats are adjusted to the following: HP 1500, DMG 30, ACC 4, EVA 4, MIT 175. Any consumables will not provide benefit past these points.
-
Each player receives the additional buffs specific to the Horseman they challenged, losing any benefits from their own consumables while these buffs are in effect:
-
War:
- Wrath | The Player that defeats War earns the right to mount Wrath, The Red Horse. Wrath’s Rider gains the War and Devil’s Smite abilities.
-
Pestilence:
- Conquest | The Player that defeats Pestilence will earn the right to mount Conquest, the Black Horse. Conquest’s Rider gains the Pestilence and Call of Corruption abilities.
-
Famine:
- Drought | The Player that defeats Famine earns the right to mount Drought, the White Horse. Drought’s Rider will gain the Devil’s Pierce and Hell Blast abilities.
-
Death:
- Doom | The Player that defeats Death earns the right to mount Doom, the Pale Horse. Doom’s rider gains the Death and Devil’s Sweep abilities.
-
War:
Each player must spend a post action assuming their Horseman's role by claiming their mount. Their revised stats, including the new quest buffs, must be included in this post.
As newly-minted Horsemen of the Apocalypse, the players must then enter the Heart of Corruption and defeat ten Blightbound Monstrosities.
Once the tenth Blightbound Monstrosity has been defeated, each player must spend one post action to trigger Armageddon, and roleplay The Blight's defeat.
NPCs:
<<Miraak>>
A priest led astray by a fallen angel. Now, he works to right his wrongs by ridding the floor of the corruption.
Enemies:


<<War>> <<Pestilence>> <<Famine>> <<Death>> One of the Four Horsemen of Apocalypse. It is the living carnation of war and bloodshed. Its only purpose is to spread its violence on humanity. Its violent tendencies sometimes allow it to make multiple actions. It fights players with a Two-Handed sword as cold as night.
Receives its own roll.
One of the Four Horsemen of Apocalypse. It is the living carnation of plague. Its only purpose is to spread disease and the corruption. It constantly lands status effects to all. It fights players with diseased arrows that it repeatedly uses to sprout arrows into its opponents chest.
Receives its own roll.
One of the Four Horsemen of Apocalypse. It is the living incarnation of starvation and scarcity. Its only purpose is to spread famine and starve out humanity. Its very aura seems to drain players of all additional help. It fights players with a spear as dark as night.
Receives its own roll.
One of the Four Horsemen of Apocalypse. It is the living carnation of Death. Its only purpose is wipe out humanity. Its very presence prevents the creation of life and healing. It fights players with a scythe as eerie as a crow.
Receives its own roll.
HP: 1350
MIT: 75
DMG: 125
ACC: 3
EVA: 1HP: 1500
MIT: 50
DMG: 150
ACC: 1
EVA: 3HP: 900
MIT: 50
DMG: 150
ACC: 2
EVA: 2HP: 700
MIT: 25
DMG: 125 Unmitigatable DMG
ACC: 3
EVA: 2War (Passive): On a CD 10-12, Receives another Attack. Can only activate once per turn. This CD is determined on his first attack's roll.
Corruption (Passive): Will always deal at least 100 DMG after MIT.
Bloodlust(Passive): Gains an additional 20 DMG for ever 100 HP missing.
Devils Smite - Will deal an extra 100 DMG on MD 9-10.
Wrath: The Player that defeats War earns the right to mount Wrath, The Red Horse. Wrath’s Rider gains the War and Devil’s Smite abilities.
Pestilence (Passive): On any landed hit, add a Blight effect dealing 24 DMG for the next three turns. These effects don't refresh but stack up to 3 effects in total. After reaching 3, it will refresh the oldest effect.
Corruption (Passive): Will always deal at least 50 DMG after MIT.
Plague (Passive): Enemy player suffers 36 DMG every turn.
Call of Corruption: On CD 11-12, will detonate any Blight effects on the player, dealing their full damage in a single turn.
Disease: On MD 9-10, Deal 100 Extra DMG, and apply two Blight effects instead of one.
Conquest: The Player that defeats Pestilence will earn the right to mount Conquest, the Black Horse. Conquest’s Rider gains the Pestilence and Call of Corruption abilities.
Famine (Passive): Buffs are made Ineffective for this battle. Debuffs still work.
Corruption (Passive): Will always deal at least 100 DMG after MIT.
Devil's Pierce: On a MD 9-10, deals double damage.
Hell Blast: On a CD 10-12, Blasts a black wave of energy, hitting the enemy player for 200 Unmitigatable DMG.
Drought: The Player that defeats Famine earns the right to mount Drought, the White Horse. Drought’s Rider will gain the Devil’s Pierce and Hell Blast abilities.Death (Passive): After hitting an opponent, the opponents current HP becomes its Temporary Max HP until the battle is over.
Battle Killing (Passive): Players don't receive Battle Healing and take half of their Battle healing as DMG every turn. Emergency Recovery is ineffective.
Devil's Sweep: On a MD 9-10, Death trips players, stunning them for 1 turn.
Doom: The Player that defeats Death earns the right to mount Doom, the Pale Horse. Doom’s rider gains the Death and Devi’s Sweep abilities.Last Hit Reward:
"Bloodcrystal of War" T2 Crystal: +4 DMG, -20* Player's Tier MitigationLast Hit Reward:
Essence of Corruption: Adds a Blight effect to a weapon for one thread. (36 DMG for 2 turn on a BD:9-10)Last Hit Reward:
"Song of Famine" T2 Debuff Song: Decreases a single targets ACC and EVA by 2 for Four turns.Last Hit Reward:
"Death's Song" T2 Debuff Song: Target is unable to heal for the next two turns. Includes, Battle Healing. Can be removed by Purify. Doesn't affect Floor/Event Bosses.
<<Blightbound Monstrosity>>
HP: 2000/2000 | DMG: 500 | ACC: 3 | EVA: 1Abilities:
- Corruption (Passive) | Deals 25% of a Player’s Maximum Health every turn as damage unless they possess the <<Apocalyptic>> Buff.
- Consume | On a CD10+, attempt to consume the mount of the last player that dealt damage. That mount’s rider can still attack, but suffers a -1 ACC penalty. The Blightbound Monstrosity must suffer 500 DMG in a single turn or else the player’s Mount is consumed and they lose their <<Apocalyptic>> Buff.
-
One Mind, One Body | As fragments of The Blight, damaging enough Blightbound Monstrosities will have an adverse effect on the whole. Defeating 10 of these creatures will weaken The Blight sufficiently enough that players may purge the taint.
- Armageddon | After defeating 10 Blightbound Monstrosities, The Blight’s protection wanes. All Players must spend a post action to activate Armageddon. The Wrath of Heaven will rain down and smite The Blight, ending the quest (see Epilogue).

<<The Blight>>
An entity that exists only to consume and corrupt. A black, oozing mass of filth that spreads throughout the floor. If left unchecked, it will consume everything - even Castle Aincrad itself.<<Immortal Object>>
Epilogue:
SpoilerA beam of brilliant white light pierces the dark clouds, then drives directly into the center of the black mass. The pungent smell of sulfur stains the air as the goo begins to bubble. An animal-like screech erupts as the holy light purifies the corruption, wiping it away. While Maarak congratulates the players on a job well done upon their return to <<Angel's Point>>, microscopic bits of jet-black sludge slink together just outside the city.
-
<<Floor 08>>
The eighth floor of Aincrad is covered with a vast forest sprouting from one side of the land to the other with very few areas not covered with trees. The landscape is primarily flat with some large hills that are similarly covered in forest. It is also home to countless rivers and streams. Wandering the woods feels like you are surrounded by a vast hall of wide wooden columns reaching high above your head to a nearly constant canopy of green. Most of the trees are larger than Redwoods and stretch between 60 and 80 feet above the forest floor before the dense canopy prevents further view. Nearly all are deciduous, though conifers are more common near the floor’s outer edges. The forest floor varies from bare patches or rich brown soil to carpets of ferns and moss, with rare smaller groves of trees where the canopy is thinner. The entire floor seems to exist in a perpetual state of late spring or early summer. Light filters through the sky of leaves, but never in overwhelming brightness. Rain, strangely, only seems to fall at night, giving the feeling of an endlessly leaky roof dripping down in a thousand thousand places, rather than in its more familiar wind-driven form. Glades, where the canopy opens to reveal a brilliant azure sky above, are exceedingly rare, and treated as sacred spaces by all of the floor’s residents.
Two major factions of NPCs dominate this floor: the Elves and Treants. The two neighboring tribes occupy areas at opposite ends of the Floor with years of bloodshed further separating the two. The Elves are more numerous, faster, and benefit from great affinity for magic. Their seat of power is at the base of the Great Tree in the city of Ellesmera. The Treants are much larger in stature, each easily standing up to 30 feet tall and renown for their strength and resilience. Their home is focused around the sacred glade of Baobab. Both factions have been at odds for centuries, though their conflict has grown worse in the years since the defeat of the floor boss and now threatens the peace and serenity of the entire forest.
The Elves have a saying: where there is creation, destruction shall surely follow. On the 8th Floor, it had a name and was known as an enemy to the forest and its inhabitants, a plague that threatened their woods. Feared by both the Elves and the Treants, <<Kro the Ruined>> was a malevolent creature. Standing over ten foot tall, this monster of wood and fire, this vile pestilence consumed everything it touched, ravaging it, or worse. Victims of its touch were set alight by its accursed flames and driven to madness, then loosed upon the very woods they once treasured and protected. The Treants blame the Elves’ use of fire magics for spawning the demon, whereas the Elves blame the Treants for the same by their constant draw on the magic that sustains the forest. The floor boss was killed when players reached the floor in their quest to Aincrad’s pinnacle, but the feud between both factions continues to fester.
Main Settlement:
<<Ellesmera>>

Ellesmera is the main settlement of the floor, and also the seat of the elven court. The city stands in the midst of the forest overlooking a magnificent waterfall and the broad valley that opens below. Its architecture is awe-inspiring, filled with splendid structures that are so sculptural that they appear to have been grown rather than built. Each is unique and graceful with swooping curves that mimic the lines of the landscape and foliage where they are nestled. Everything here is built to gather water and reflect sunlight whether it be day or night. It is said to be one of the greatest sights in Aincrad.
Hundreds of elves live in Ellesmera. Each is as elegant and graceful, with a sense of ageless beauty that seems to defy the whims of time. Most of the NPC residents claim to be over 200 years old. There is also a notable absence of children in the city, especially compared to human settlements elsewhere in the game. Elven children are a rare and treasured blessing, which is why their society seems to take the loss of each and every life so seriously. Their war against the Treants has cost them much. Only a small handful of children live in Ellesmera, and they are closely guarded. The city is also protected by a tall palisade wall and watch towers made of parallel trees knitted together by the elves’ magic into an impressive barrier.
The city itself rests under the watchful eye of its queen, Haela, who is said to be nearing her millennium. Her dwelling, a palatial residence by any standard, sits opposite The Great Tree in Ellesmera’s central square. The Great Tree is regarded by all of the 8th Floor NPCs as the most important part of the forest, and is said to feed and sustain all of the floor’s woodlands and creatures with its life. It is also the subject of the ongoing strife between the Elves and Treants.
Sub-Settlements:
◉ «Baobab»
SpoilerBaobab can more accurately be described as a holy site than a settlement. It is an accessible safe zone for all players located near the eastern edge of the floor. Several dozen treants are present here at any given time, including their great king. Most of them are disinterested in conversation, but a rare few might still be cajoled into speaking with a compelling player. They have grown weary of war and the speed at which players seem to trounce through their lands. There are no inns, shops or taverns in Baobab, though the soft mosses covering the ground throughout the glade is said to make a fine substitute for formal bedding with a blanket of warmth from the sun, and a quiet, peaceful atmosphere. It is one of the better places in Aincrad for those that just wish to bask in nature. The largest of the treants, their King, stands near the center of the clearing, watching over everything and waiting for the time that he may return to the mother tree, if he can ever wrest The Great Tree back from the elves.
◉ «Florenthia»
Spoiler
Florenthia is a place of refuge to those who wish to escape the forest’s war. While not nearly as elegant or refined as Ellesmera, the village is functional enough for its residents and considered a cosy stop-over for travellers. Elves and treants alike live here in harmony working together to make their own way without the worries of their kins’ ancient feud. They have given up the pursuit of the Great Tree in exchange for peace and a lack of bloodshed. Most are pariahs or exiles for making this choice, and have been shunned by their respective races as disgraces. They have peace and comfort, though, and remain positive while they wait out the conflict on the sidelines. Florenthia’s greatest worry is flooding, which plagues their low-lying settlement after every major rainfall. Visitors here often remark that the buildings always seem to look brand new, likely because their predecessors recently floated away.
Other Locations
◉ « Forest of the Great Tree »
Spoiler
All of the woodlands on the 8th Floor are said to have once been seeded and spread from a single sprout, which over time became the immense thing that now overshadows Ellesmera and is known as The Great Tree. The entire forest is connected to it, and as it thrives or suffers, so does the fate of the woods. Its reach extends to every corner of the floor, and somehow created a wide variety of flora that now thrive within its bounds. Most of the forest consists of deciduous trees, though a few conifers can be found along the outer edges of the floor. There is an abundance of wildlife in the woods, and elven hunters take care to garner only what they need for their survival and minimal trade. Many monsters and field bosses are few, but the standard animals have been imbued with the forest’s strength. They are far stronger than their typical kin on other floors and perfectly capable of taking on threats that would come to harm them.
◉ « No Man's Land »
Spoiler
There is a wide swath of forest, roughly halfway between Ellesmera and Baobab, that has been utterly devastated by the conflict between the two factions. Each side blames the other, but here the raw destructive powers at their disposals are laid bare. Nearly three hundred feet long, and a hundred feet wide, the area remains charred and void of life. Nothing has grown back since the battle that occurred here just before the floor boss fell. Firefoxes are said to scamper through the debris, still searching for snacks, but nothing else living willingly enters this smoky clearing, where flames never seem to die.
◉ « Graveyard of the Willowed »
Spoiler
North of Ellesmera sits a sepulcher where ashes are spread in memory of fallen elven warriors. It is an odd custom that emerged due to the absence of bodies left to bury, and stand more as a field full of monuments than a proper graveyard. Tall willow trees block out the sun and dozens of gravestones made out of various stained hardwoods have been etched with various elven glyphs and names. A rare species of flower sprouts in the area and is said to hold the spirits of the fallen who are honored here. On the rarest of occasions, one will find a lone treant here looking onto the graves mournfully. These remorseful soldiers spill forth their regrets in song for the actions that caused avoidable deaths.
Transportation
The elves are excellent and light-footed runners, and the treants too large and heavy to ride upon beasts or machines. Neither would desecrate the forest floor by cladding it in stone to build a road. Where necessary, goods are sometimes strapped to elk bound by magic to temporary service, but this is considered an imposition on the forest.
Common Mobs of Floor Eight
Spoiler-
Great Tailed Deer - A proud creature typically living in groups of three or four. Unless provoked, they will typically not attack players, but will not run away like the real world typical deer would. Their antlers are quite large and curve around their head making it easy to slash attackers. Despite their power, speed, they are known for their tails which are actually surprisingly long, soft, and fluffy. These beasts provide most of the meat that the elves eat and their tail's fur makes a lot of carpet and clothing.
- Locations: <<Forest of the Great Tree>>
-
Great Bear - A large beast that usually lives in solitude, its will attack anything deemed strong enough to be a threat. Its razor-sharp claws slice through armor and rip unwary players to tatters. The roars of a Great Bear are deafening and typically delivered while they stand 8-feet high on their hind legs. Many try to escape them by running away or climbing trees, though few realize how quick they are for their size or how adept they are at following you up the trunk.
- Locations: <<Forest of the Great Tree>>
-
Firefox: The spirit of a fox with the breath of fire magic infused in it. These creatures were created by the elves and released near the city of Baobab to attack the treants and set them alight. They are rare, but attack and burn down anything in sight making them deadly to treants. Their only weakness is their fragility, as they rely on speed and guile over resilience.
- Locations: <<Forest of the Great Tree>>
-
Blazing Treant: Setting a treant alight causes it to lose all reason and attack anything that could even resemble an elf. Many fell to this fate while <<Kro the Ruined>> ravaged the woods, and they still respawn as such after his death. Blazing treants are vicious and relentless, driven by blinding and self-destructive rage. Their damage output far exceeds that of normal treants, as all receive the Burn enhancement. Their weakness is the loss of durability they suffer as a result of their condition.
- Locations: <<Forest of the Great Tree>>, <<Labyrinth>>
-
Rogue Elf - Some of the elves don't believe that players are on their side of the war. The more extreme among them believe that they are an even greater threat to The Great Tree than the treants themselves. These radicals and renegades lash out against players in whatever ways they can, often operating individually, or in small cells, and nearly always out of the sight of their fellow Elves.
- Locations: <<Forest of the Great Tree>>
Field Boss of Floor Eight
Spoiler
<<The Ashen One>>Centuries ago, when people first began to settle in the woodlands, they met an ancient creature. This creature was intelligent, and possessed many powers over the life of the forest. After negotiation, it was this humble deity that created the firm foundation for Baobab, in return for humans remaining peaceful with the wood. After a human from Florenthia caused an accidental forest fire, <<The Ashen One>> became extremely volatile. While it leaves the villages themselves alone, it is extremely aggressive to Players wandering around in the forest.
HP: 900/900 | MIT: 45 | DMG: 85 | ACC: 2 | EVA: 1
Abilities:
- Smokescreen | Upon being hit by a crit, <<The Ashen One>> will release a cloud of ashes to blind the Players, giving them -1 ACC. Any party member can expend a Post Action to get rid of the cloud. If <<The Ashen One>> lands an MD 9-10 while the Smokescreen is up, all party members will take 110 mitigatable DMG and then the Smokescreen will fade.
- Weakness | If afflicted with TOXIC VENOM, the firefox’ DMG will drop to 55, ACC to 1 and EVA to 0 for the duration of the status affliction.
- Tier Lock | For the duration of the fight, all of the participants’ stats that scale with Tier are calculated as though they’re Tier 2. [DMG/MIT/BLEED enhancements etc.] This skill only locks downward. Those at Tier 1 will still have T1 stats.
Drop:
“Firefox Tail" (T2/Consumable - Instant/Single Use); As a Free Action, the user lowers up to 4 enemies’ ACC by 1, as well as their MIT by 5*Player's Tier. Does not stack with Lullaby debuffs.
« Floor Eight Labyrinth »
The labyrinth on Floor eight is similar in looks to the area of <<No Man's Land>>. The ground and trees have been scorched, leaving hardly anything living. Players who enter are forced to travel through a land of smoke and ruin in search of the boss room. Scarce paths are forged out in the midst of still-burning trees. Getting through this labyrinth is all about speed, as those who aren't cautious can succumb to the thick poisonous smoke that blankets the area. Other than the poisonous smoke, there is one other key difference between No Man's Land and the labyrinth. The monsters. This area is filled to the brim with Great Bears, Great Tailed Deer, and Blazing Treants. However, these aren't the normal version of the monsters. The monsters here remain afflicted by the dead floor boss’ curse. All of these creatures burn constantly with a black flame and have been driven to madness. They attack everything not wreathed in the same black flame as their soulless eyes serve as glassy mirrors that reflect only fire. These crazed beasts are not to be taken lightly, as they each have increased damage, speed, and all have intent to kill on sight.
Sunlight in this area is almost completely obscured by thick, hazy smoke, however the light of the flames make it quite easy to see in the area. Every post players make in the labyrinth take 20 unmitigatable damage (or 10 if they have the Survival skill).
Quests:
<<Monkey King>>
<<Elvish Conflict>>
<<Treant Conflict>>
<<SOTW: Ferocious Foe>>
<<DHA: The Keeper Of Life & Death>>Boss Fight: Paving the Way to 9
-
Great Tailed Deer - A proud creature typically living in groups of three or four. Unless provoked, they will typically not attack players, but will not run away like the real world typical deer would. Their antlers are quite large and curve around their head making it easy to slash attackers. Despite their power, speed, they are known for their tails which are actually surprisingly long, soft, and fluffy. These beasts provide most of the meat that the elves eat and their tail's fur makes a lot of carpet and clothing.
-
<<Floor 07>>
The seventh floor of Aincrad consists of a vast swaths of rocky and mountainous terrain, including several high peaks. Large portions of the floor are covered in coarse and hardy long grasses growing in thin patches of soil with rocky outcropping littering the landscape. The topography is dynamic. Slopes raise to almost sheer angles to create the massive cliffs. The higher mountain peaks are frequently covered in snow. Small, gravel-strewn paths direct players from one location to the other, but large settlements are rare. Smaller settlements like hamlets and villages dot the lower slopes, but seldom offer the players anything more than a monster-free environment. The 7th Floor is notoriously exhausting to traverse because of the rough landscape, but it is also incredibly picturesque. Bandits and monsters also lurk about in great numbers. The mountains are home to several different species of wildlife such as elk, moose, mule deer, and mountain goat. Predators such as wolves, bears, and bobcat find their hunting grounds around their bases and lower slopes. The true threat on the floor comes from the aggressive elementally-aspected lizardmen tribes that lurk around every corner, ambushing players and NPCs alike. Their origins remain a mystery, but they seek to actively drive players and NPCs away from all of the peaks on the floor, keeping them to the valleys.
The NPCs that reside on this floor are all hard-working humans with rugged features and strong work ethics. Each and every one of them can always be found busy, working to improve their own lives and those of the community where they reside. Life here is hard. Each NPC also follows a specific trade, whether it be mining precious ore, working the livestock, crafting tools, or being a shop keep. None of them live in poverty and most seem content, but are also eminently practical people. From a young age, children's talents are assessed and then honed into which profession would be most suitable for them. Some find themselves to be the crafty merchant, a hunter, or even a guard to defend the settlements from monsters.
It has always been held, among locals, that Nimbus' mountain was carved out by a great beast that sought to protect the humans. This gigantic creature created a home large enough for hundreds before moving away and entering a restful slumber, waiting until it would be needed once more. It came as a great surprise, a few years ago, when a series of sudden, massive earthquakes began to randomly shake the entire floor. They caused large rocks to fall on buildings within Nimbus' sanctuary cavern. Many residents were convinced that they had somehow angered the Great Beast and began worshipping profusely. Several players found themselves in the midst of this crisis and chose to take action. Thanks to their efforts, the threat was swiftly ended. The Great Beast, more commonly known among players as Antharas the Unearthed, had begun to awaken from its slumber and was stirring the world in the process. The players hunted and killed the beast before it destroyed the settlement, as it became clear that the monster cared nothing for those who had taken shelter there and would wreak havoc upon its full awakening. Despite understanding that the Great Beast would have killed them, several local NPC's still give up offerings to it as thanks for creating their safe haven.
Main Settlement:
<<Nimbus>>
Floor Seven's main settlement is known as "Nimbus." It is a massive stone fortress built inside a crudely hallowed out mountain. The heavily guarded stone city is home to most of the floor's NPCs. Those gathered here are live contented lives surrounded by a canopy of rock that cradles them protectively. All of the structures are constructed entirely of stone, either carved from the walls or built out from them. Fresh water springs provide a steady and reliable source of water which is gathered in several ornate fountains throughout the town - a symbol to their importance. A heavy security presence also keeps crime to a minimum. Should they feel like it, players can occupy themselves by mining for ore, apprenticing under an NPC blacksmith, or even training with the local militia. Green crystals provide the most common source of illumination, and can be found inside most local homes, shops and lining the streets and tunnels. These green crystals, called Lumen, are harvested from the depths of nearby mines and are essential to Nimbus' survival. Their light is feared by the seemingly endless hordes of lizardmen that infest most of Floor Seven. Most guards, travelers, and merchants keep a few on hand to ward the monsters off, and they are endemic to every aspect of local art and culture. Every NPC invariably wears a charm or jewelry of some sort that somehow features the crystals.
Sub-Settlements:
◉ «Deepedge»
Spoiler
Deepedge is the largest of the floor's settlements, outside of Nimbus. It is a village build on the steep incline of a mountainside, constructed from a mixture of stones of varying size, stained pine wood, and wattle and daub. The entire town seems precariously perched on the edge of a deep gorge, ready to teeter of the edge without warning. A pair of streams run along either side of the village, leading into a larger river that helps sustain the village's human inhabitants, supplemented by nearby pastures and hunting the abundant mountain goats that are common in the area. Their skins are common protection against the cold and chilling winds. Lizardmen are the main and ever-present danger in the region.
Other Locations
◉ « Rocky Plains »
Spoiler
Most of the floor's few valleys and lowlands are filled with grassland littered by loose stones and rock outcroppings. The terrain is scenic, though the constant, rolling hills can be wearying for some. The weather trends between two extremes. The sun is either shining in the most beautiful way, or a torrential storm is constantly buffeting players with rain and casting lightning down on the ground. These storms appear suddenly. Any NPCs in the area immediately take shelter the moment they appear, for they conceal another peril. Great swarms of Storm Lizardmen often use these gales as cover and rain down from the sky to attack, then vanish just as quickly in their aftermath. Several different forms of wildlife can be found here such as antelope, coyotes, owls, and bison.
◉ « Mountain Ranges »
Spoiler
The entire floor is mountainous, but several large peaks dominate the terrain, towering over the rest of the landscape. They are littered with caves, dungeons, and monsters and are often traveled by players seeking adventure. Little wildlife travels here, save the ever-present and innumerable mountain goats that are the lifeblood of survival for local inhabitants. The cold climate in the upper reaches of each peak also makes them a perfect home for frost-lizardmen. They have small lairs scattered throughout the area, and frequently wait in hiding behind rocks and in the snow for a foolish player or NPC to wander by.
◉ «The Eye»
Spoiler
The Eye is the highest point of the floor, located atop the tallest mountain. Players located the landmark while searching for potential Easter eggs, and were mildly disappointed by its absence. It was later discovered that, at noon, a mighty griffin appears, challenging any players from the sky to fight and if the players manage to defeat it before the allotted time runs out, they will receive an egg. It is rumored that if a player collects the right eggs, they can access a secret quest on the seventh floor that is rich with rewards.
◉ «The Temple of Three»
Spoiler
The Temple of Three is located on a path that leads up to one of the lesser peaks near the east end of the floor. Its architecture is reminiscent of Japanese temples, demonstrated by its use of shōji and tatami mats. Three stone statues are present in the main room of the temple, with inscriptions under each that read "Chansi", "Dharma", and "Vinaya" respectively. The third statue, Vinaya, has been destroyed, leaving only the pedestal remaining. The Keeper of the Temple is an elderly deaf man that never speaks. Supposedly there is a side-quest for those who manage to find and return the missing pieces of the statue that will reward them with a unique "cutscene".
Transportation
There is no formal transportation system on the Seventh Floor, save minor trails and footpaths most commonly found in the lower hills and grasslands. Rarer mountain paths lead up some of the mountain slopes, but they are rarely safe to travel. A few daring players have attempted to domesticate wild mountain goats to use as mounts, but with mixed results.
Common Mobs of Floor Seven
Spoiler-
Rock-Lizardmen - Grey-scaled humanoid reptiles the live in the mid-slopes of most of the floor's peaks and favor using hammers and clubs as weapons. They are often found hiding in tall grasses, or in stony rubble, waiting for an unsuspecting player to walk by before leaping out to attack. Like most of the mobs on the floor, they are said to fear and recoil from the light of the Lumen crystals. Rock-lizardmen always have MIT equal to at least half the damage that they deal.
- Locations: <<Rocky Plains>>, <<Labyrinth>>
-
Frost-Lizardmen - White-scaled humanoid reptiles that dwell at the tops of the highest peaks throughout floor seven. They blend in easily with the snow, hiding there and waiting for prey to walk by before making their attack. They can be held back with the use of a Lumen Crystal. Frost-lizardmen always have the Freeze and/or Frostbite, and are immune to the effects of both. Their weakness is that they take double damage from the Burn effect.
- Locations: <<Mountain Ranges>>, <<Labyrinth>>
-
Fire-Lizardmen - Crimson-scaled humanoid reptiles that are most common in the warmest areas of the Rocky Plains, often found sunning themselves on rocky outcroppings. Unlike their kin, they have no natural camouflage ability but make up for it in fighting prowess. They can be held back with the use of a Lumen Crystal. Their attacks always carry the Burn enhancement, and they all benefit from having the Fireproof enhancement. Damage dealt by Freeze and Frostbite enhancements against them is doubled.
- Locations: <<Rocky Plains>>, <<Labyrinth>>
-
Storm-Lizardmen - Winged, humanoid reptiles with light blue coloring. These creatures only show when the weather is at its worst and hunt down every player or NPC in sight. They favour spears and javelins, occasionally also using whips. These monsters are also known to combat using their sharp talons and attack from the air. These monsters always gain the benefit of the paralytic immunity enhancement, have a minimum of EVA 1. Like the rest of their kin, they can be held at bay by the light of the Lumen crystals.
- Locations: Anywhere where the weather is storming
-
Golemite - Hiding amongst the rocks, these slow but durable monsters are comprised of nothing but rock making them indiscernible from the rest of the rocks on the ground. They have high damage and mitigation, but can't manage to dodge any attack giving their opponents perfect accuracy. Their bodies make most weapons useless. Increase MIT by 50 against attacks made against these creatures, except by hammers, warhammers and martial arts (not claws).
- Locations: Anywhere on this floor
Field Boss of Floor Seven
Spoiler
<<Avian Avenger>>Atop the peak of the highest mountain of the seventh floor, rumor tells of a large, predatory bird. It can only be found when the sun is highest in the sky. Most believe that something is meant to happen during this time, as the <<Avian Avenger>> attacks anyone who approaches the mountain. If Players manage to get close enough to the mountain's base, they will find an indestructible golden egg. The egg disappears once the Field Boss has been slain, but appears to do nothing else.
HP: 780/780 | MIT: 45 | DMG: 80 | ACC: 2 | EVA: 1
Abilities:
- Twister | On an MD 9-10, the beast’s wings will stretch out and create a small tornado, targeting the player with the lowest MIT and stunning them for one turn, as well as dealing 100 mitigatable DMG instead.
- King of the Sky | Due to the Avenger’s agility, players with two handed weapons will have -1 ACC when trying to hit him.
- Tier Lock | For the duration of the fight, all of the participants’ stats that scale with Tier are calculated as though they’re Tier 2. [DMG/MIT/BLEED enhancements etc.] This skill only locks downward. Those at Tier 1 will still have T1 stats.
Drop:
“Gryphon’s Treasure" (T2/Consumable - Instant/Single Use); Using this item as a Free Action will cause winds to emerge from the pearl, pushing all nearby enemies away and resetting the user’s hate back to 0.
« Floor Seven Labyrinth »
The Floor Seven Labyrinth is found inside one of the peaks at the southern edge of the floor, where Antharas the Unearthed used to slumber. The mountain somehow remains intact. No one knows exactly how the Boss managed to enter and leave its own burrow. Players may enter the labyrinth from the top of the mountain, where they will find a large flat area with stone pillars scattered around. It was here that the labyrinth guardian sat and protected the entrance. Progress was made by travelling downward, deeper into the mountain. The interior of the mountain is a death trap, split into three different areas.
The western area is alarmingly cold and slippery, decreasing players' EVA and ACC by 2, unless they have the Survival skill. Any player that fails to roll a Natural LD of 3+ when posting will be frozen. Players who use any item with a freeze enhancement have to roll a LD of 6+. This area is also littered with Frost-Lizardmen.
The center of the mountain is littered with electrically charged crystals that fill the air with a powerful static. This static will paralyze any player that fails to roll a Natural LD of 3+ any time they are spending time in this area. Players using Heavy Armor have to Roll a LD of 6+. Storm-Lizardmen are known to hangout here, especially near the crystals.
The east side is horrendously hot and filled with areas with magma sitting in pools waiting for players to step into. Players in this area who lack the <<Survival>> skill have their base damage reduced by 2 and mitigation reduced by 18. Also, any players failing to roll a Natural LD of 3+ to avoid being burned suffer 10 DMG for the duration of 3 Posts. Players using the Burn enhancement have to roll a LD of 6+. Fire-Lizardmen enjoy soaking the warm magma while they wait for players to wander by.
Players must make at least 3 out-of-combat posts in each area as they make their way through the mountain and fight four monsters from each area. No matter which path they chose, they will come to the same ending at the base of the mountain outside of the boss room. Should they venture into the boss room, they will find a large spacious empty room with cracks covering the sides of it as if something strained the mountain itself. An immortal object rests in the center of the room: an immense skeleton resembling that of a Tyrannosaurus Rex.
Quests:
<<Case Of Wurms>>
<<AN: Unfinished Business>>
<<DHA: The King & The Conquerer>>
Boss Fight: Paving the way to 8 -
Rock-Lizardmen - Grey-scaled humanoid reptiles the live in the mid-slopes of most of the floor's peaks and favor using hammers and clubs as weapons. They are often found hiding in tall grasses, or in stony rubble, waiting for an unsuspecting player to walk by before leaping out to attack. Like most of the mobs on the floor, they are said to fear and recoil from the light of the Lumen crystals. Rock-lizardmen always have MIT equal to at least half the damage that they deal.
-

<<Floor 06>>
The sixth floor of the Aincradian castle embodies a large jungle with massive trees and vegetation. Most unsettled parts of the floor are absolutely covered in foliage with breaks for passage being extremely rare. The landscape is exhausting to traverse. Hills and mountains dominate the landscape, clad in thousands of cacophonous waterfalls cascading ever downward into deep gorges below. The trees of the floor are notoriously and impossibly large, dwarfing even the greatest redwoods. Massive roots and branches create a labyrinth of nature, along with countless kudzu-covered ruins concealed around the floor. The vegetation is a perfect thriving habitat for many different species of animals and a perfect hunting ground for predators and plant-based monsters alike.
The NPC inhabitants of the six floor are all human. These people call themselves Amazonians, and have learned to cope with life in the treacherous jungle. Each and every one of them is trained to be a skilled hunter and knows their hunting grounds intimately. Cultural taboos keep the genders separate in their society. The women live in the village of "Krycim", located on the western side of the floor, whereas the men live within the village of "Senimoh" in the far east. Every year, on the first day of spring, twenty young men are sent from Senimoh to Krycim with nothing but a hunting knife. If they survive the journey, they may complete the "Ritual of Procreation". Afterwards, they return to their homeland with the boys born from the ritual's last cycle.
A terrible blight once dwelled on this floor and swept through it regularly spreading misery and devastation. This foliage-based monstrosity spread its disease transforming plants such that they would cause a terrible disease the mind if consumed. Many animals became rabid after is passing, and spread the taint if they were consumed themselves. Tales are still told of humans succumbing to madness from the affliction. Their deeds became a plague of nightmares upon their kin. <<Oro the Blight>>, was eventually destroyed, at great costs, but many plants infected by his toxins still linger in the jungle to the spread his disease. Players seem to be immune to the worst of its effects, but can still succumb to sickness and extreme nausea for periods lasting hours, or even days.
Main Settlement:
<<Krycim>>
Krycim is a village of about a hundred women located on the western side of the floor. Situated next to a large waterfall, it is well-supplied by several sources of fresh water, including springs and streams. The local architecture consists of delicately handcrafted reed-like structures supported on bamboo frames.and well created. It blends perfects with the surrounding areas, some items being carved within trees themselves. The housing and buildings are made of hard stone, however some of it has eroded and does not hold its former glory. The amazons here are normally kind even though they are not outspoken. However, middle-aged to older amazons are not very pleasant with male players as they believe them being there is against tradition unless its time for the Ritual of Procreation.
Sub-Settlements:
◉ « Senimoh »
Spoiler
<<Senimoh>> does not share the same beauty as Krycim as the eastern side of the floor does not hold the same beauty as the western. Senimoh is built right next to a swamp due to the fact that they use the swamp to catch larger food, even alligators. Due to this, many of the male Amazons wear crocodile skin as clothing for protection. Their houses are made of wood instead of stone, making them more insulated during winter times but lacking the same durability. The males eat far more meat than the women and much less plants. They normally hunt with spears crafted from wood and sharpened rocks.
Other Locations:
◉ « Jungle Expanse»
Spoiler
A area of rich green foliage with trees winding through in very thick patterns. Within its mass, much wildlife will find its home. Birds and insects are found in great numbers. Snakes, Primates, and even predators such as tigers live within. To the East, one will find far more diseased Foliage type monsters and to the West more animals that have migrated to escape the disease. Caution should be exercised in any area of the jungle and nothing should be eaten in case the player end up diseased.
◉ « Ruins of Tsjericanth »
Spoiler
The Ruins of Tsjericanth are a massive expanse of ruins, whose decayed buildings were made from a mixture of stone and clay that has mostly eroded from the constant rainfall. These ruins are filled with stone columns that are similar to the ones in Krycim, although they tell the story from the large snake beast's perspective and appear to have been constructed more recently than the ruins themselves. The detailed inscriptions claim that the Amazonian warriors attacked them unjustly and laid their sacred home to ruin. Nature has long since reclaimed the ruins, although there are still some ways inside the labyrinth-like ruined city.
◉ « The Waterfall of the Sage »
Spoiler
A great Waterfall flowing in the Easternmost area of the Floor. The water is smooth-flowing and calming to even look at. In front of the Waterfall are several large smooth stones that players can sit on and look into the water. Despite the time of day, the Waterfall glows, giving off a warm light. No monsters spawn around it, and the water itself cleanses the diseased plants around it. While gazing into the Waterfall, players can enter the physical world of their mind as they search to quell the darkness within them. Any players who are currently mediating become immortal objects and do not perceive anything around them. If anyone were to try to touch someone while in the mediating state, they would pass through them. However, legend has that if a married player wearing their wedding ring were to try to touch their meditating partner, then they too could be taken to that place.
Transportation
There is no transportation on the Sixth Floor. The foliage is too dense and topography too steep for any consistent roads, paths or pack animals.
Common Mobs of Floor Six
Spoiler-
Man-Eating Plants - Extremely Large plants that take the appearance of a Venus Fly Trap. They are known for capturing their opponent within their mouth and then slowly digesting them by dealing damage over time and keeping them immobile.
- Locations: <<Jungle Expanse>>
-
Killer Vine - Giant plants that have large flower and use long vines as whips to attack or strangle its victims. While immobile, they normally are in large groups, making them difficult to fight with piercing weapons such as spears.
- Locations: <<Jungle Expanse>>
-
Predators - Tiger's and Leopards have been known to attack the stray player or NPC, as normally humans are not diseased. Nornally they hunt alone, but it wouldn't be strange to find two mates hunting together. Those that have been diseased are far more aggressive than those who are not as they have no care for their own life. Alligators and carnivorous fish are found int he waters and swamps found on the floor
- Locations: <<Jungle Expanse>>
-
Diseased Hunters - Normally those from Krycim that have eaten the diseased plants bearing fruits or nuts. It is a slow and painful descent into madness, they never make it back to Krycim and now they are fighting anything in sight, tooth and nail. While they still retain the ability to use weapons such as knives, they no longer require them.
- Locations: <<Jungle Expanse>>
-
Spirits of Tsjericanth - The fallen inhabitants of the ruin still roam the area, seeking revenge on the humans that had brought death to them and their city. While the spirits may be felled in battle, they will only be gone for a short time before their ethereal matter condenses once more.
- Locations: <<Ruins of Tsjericanth>>
-
Shadows of the Once - Those who fall to madness from their demons within the Waterfall become shadows of their formal selves, the human in them dying and becoming a physical manifestation of their Demons. While the player might be long dead, their body will travel around in the floor, attacking any players as their darkness and inner hate drives them forward. These Demons can't be reasoned with and their hosts are gone forever. These are very powerful beings, although finding them is extremely hard.
- Locations: <<Jungle Expanse>>
Field Boss of Floor Six
Spoiler
<<Byakko>><<Byakko>> is a tiger of flame and smoke that prowls the sixth floor. It is considered the source of most wildfires in the area, and some claim that it draws its power from the infernos. It is best to deal with the creature quickly, before the blaze burns too hot, and <<Byakko>> can no longer be stopped.
HP: 690/690 | MIT: 45 | DMG: 75 | BURN: 1 slot of T2 | ACC: 1 | EVA: 1
Abilities:
- Extinguish | Hitting Byakko with a Frostbite or Freeze effect will cause it to lose its BURN and ACC effects for the rest of the battle, tiring it out.
- Frantic | On a CD of 9+, Byakko will attack a second time. This can only happen once per rotation.
- Wildfire | Every third attack, Byakko will spend its turn trying to start a wildfire. Players must stun the monster to prevent it from doing so, or else on its next turn, everybody will receive 50 unmitigatable DMG and T2 BURN.
- Tier Lock | For the duration of the fight, all of the participants’ stats that scale with Tier are calculated as though they’re Tier 2. [DMG/MIT/BLEED enhancements etc.] This skill only locks downward. Those at Tier 1 will still have T1 stats.
Drop:
“Tiger Rage" (T2/Consumable/Single Use); Sends the user’s senses into a frenzy, causing them to lose 10 MIT, but apply T2 BURN to any enemy they land a critical hit on for two turns. Lasts for one thread.
« Floor Six Labyrinth »
At the southern end of the Floor, players will find the labyrinth waiting for them. Almost all plants and creatures are here infected by Oro's lingering blight. Anyone approaching the labyrinth will first notice a large area blanketed with trees intertwined together to make a massive, and seemingly impenetrable wall. With effort, a passage can be found, often in the form of a difficult-to-reach gap. Beyond the tree-palisade, players have effectively entered the labyrinth. Upon entry, vines appear and snatch players by their legs then drag them to a random area somewhere in the labyrinth, making it difficult to map its layout. A grove of dead trees can be found in the centre of the maze. The doors to the Boss chamber can be found within.
Monsters inside the labyrinth are invariably stronger than those in the other areas of the floor, feeding upon the rich soil and abundant sunlight that seems to reach every corner. There are no animals inside. Only the plant-based monsters exist here. Killer vines sprawl everywhere, covered with sharp thorns that render them dangerous on attack and defense. Man-eating plants are now equipped with serrated blade-like teeth, hungry to bleed the juices from their victims. The greenery is also constantly grasping and constricting at anything that wanders near, seeking to restrain it while other predatory plants come to devour the catch.
Quests:
<<The Gemini>>
<<Calming The Soul>>
<<DHA: Plagues & Decay>>
Boss Fight: The Path To Floor Seven (Cleared) -
Man-Eating Plants - Extremely Large plants that take the appearance of a Venus Fly Trap. They are known for capturing their opponent within their mouth and then slowly digesting them by dealing damage over time and keeping them immobile.
-
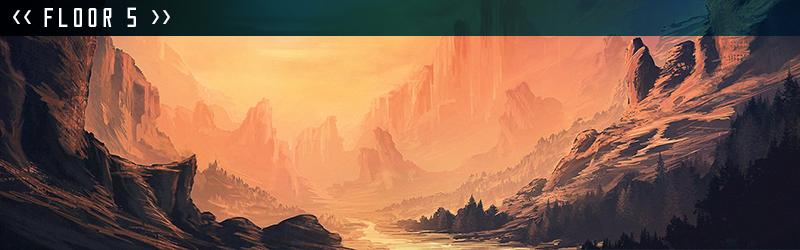
<<Floor 05>>
The fifth floor consists almost entirely of deserts and barren, sandy wastelands with sparse signs of settlement scattered here and there. What civilization does exist here always congregates near or around a source of water. Spiked and broken rock formation and rubble stone litter the landscape. Plant life is limited to scrub brush and cactuses due to the extreme heat. Sandstorms frequently rage across the sands, affecting those who venture out unprepared. In this harsh wilderness, there are very few places to seek shelter from the suns blazing heat. A few caves can be found scattered about in gorges and canyons, but they are often small and shall, providing protection for only a few at a time. They are also popular spawning and shelter sites for local wildlife and to be approached with caution.
NPCs throughout the floor are human. Resources here are very limited and most live their life in abject poverty. There are few legitimate merchants to be found, many having become crooks and con artists in order to survive. Banditry and theft are the closest thing available to common employment, and their spoils often pass as a source of supply for local merchants' stalls. The rest is bartered or spent at the towns' pubs, drinking away gripes and tales of misfortune. Despite the dour lot of most on this floor, one group remains driven and determined towards their goal. Acting under the guise of "The True People", a group that moves in secret to worship their god, Chardark. In their pursuits, The True People have mastered their arts of deceit, thievery and swordplay, offering everything they obtain to appease their Scorpion King. Blending in perfectly with other NPCs, their only distinguishing feature is a small scorpion tattoo branded on their left wrist though it is normally kept covered.
<<Chardark the Scorpion King>> was once the floor boss here. Hidden beneath the sands of the desert, he thrived in pure darkness and intense heat. Chardark, with his almost impenetrable armor and pincers that could snap steel right in half, terrorized the floor in its ancient years, and re-awoke just as the game began. Luring victims into his lair with treasures and bounties given to it by its followers, Chardark was a vile and malevolent entity that fed on greed and avarice. The True People still exist, but have been lost and without purpose since their god's demise.
Main Settlement:
<<Fortaleza>>
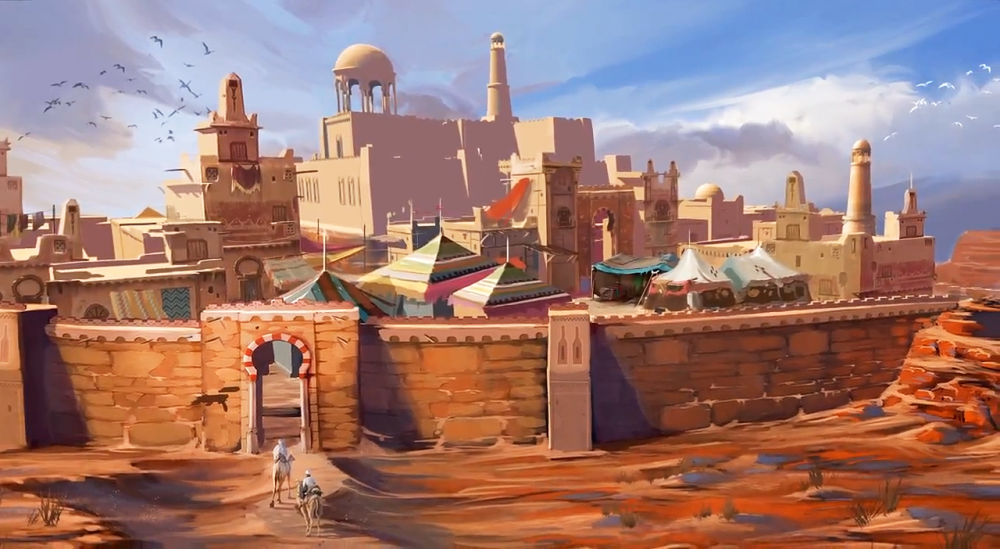
One of the only settlements on the 5th floor, Fortaleza is surrounded by a sandstone brick wall meant to buffer against sandstorms and keep the wind and scouring dust from overwhelming the streets. Two gates limit access, and guards patrol the top of the wall to prevent illicit entry. Bribes are commonplace here, and serve to convince people to overlook or subvert the few existing rules.
Most of the town's structures are temporary, made up of little more than cloth and tapestries strewn between wooden poles, or just erected as awnings. A few larger buildings are constructed out of polished sandstone and mud bricks, mortared together to withstand the harsh winds. Roofs are often flat and framed in wood, with a clay tile or baked mud surface. The town itself is little more than a market and bazar, full of shops, kiosks and the occasional tavern, but few residences. There are only two inns, and patronage at one is said to guarantee forceful expulsion from any attempt to enter the other.
Sub-Settlements:
◉ «Saharda»
Spoiler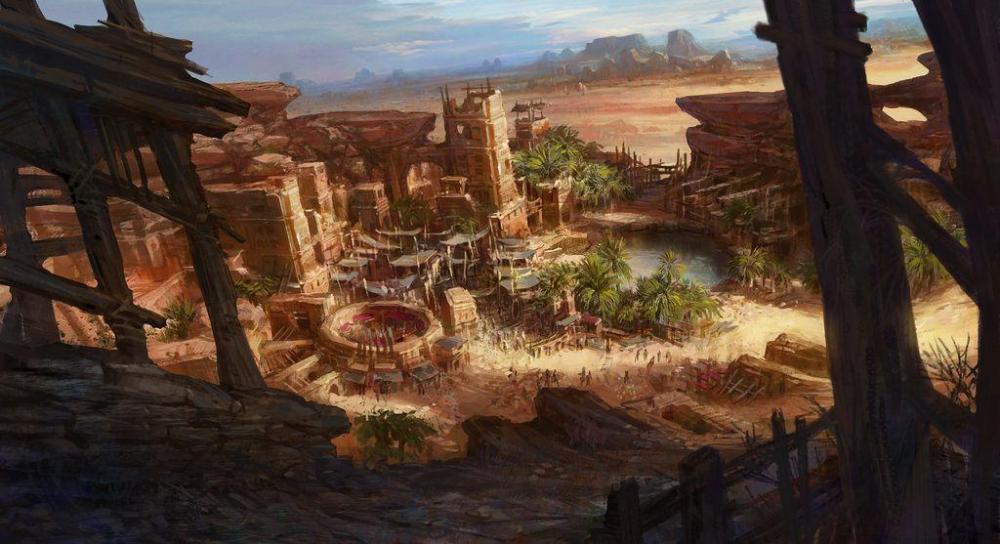
Built around a rare oasis, the town of Saharda is a hotspot for traders and merchants alike. Unlike the other towns and forts located on floor five, Saharda has no natural or man-made defense system, and simply just relies on the good will of people to keep it safe. This is rarely enough. Bandits and raiders often swoop down in numbers from the surrounding hills, hoping for some easy plunder. More daring and solitary souls merely cling to the shadows and pilfer whatever they happen to be able to fit in their pockets.
◉ «Clycama»
Spoiler
The town of Clycama, located at the northernmost part of the floor, is the most remote outpost on the floor. It sits on the very edge of Aincrad, looking out at the vast and endless skies beyond. Located at the end of a deep sandstone canyon, the town was constructed where rare water flows collect and trickle over the edge of the world. Intrepid NPCs constructed a dam here, long ago and at great cost, and created a small lake that provides enough sustenance for the town to survive. Those glory days are long since past, however, and Clycama now barely stands in light of its crumbling state of disrepair.
Other Locations:
◉ «The Firefly Oasis»
Spoiler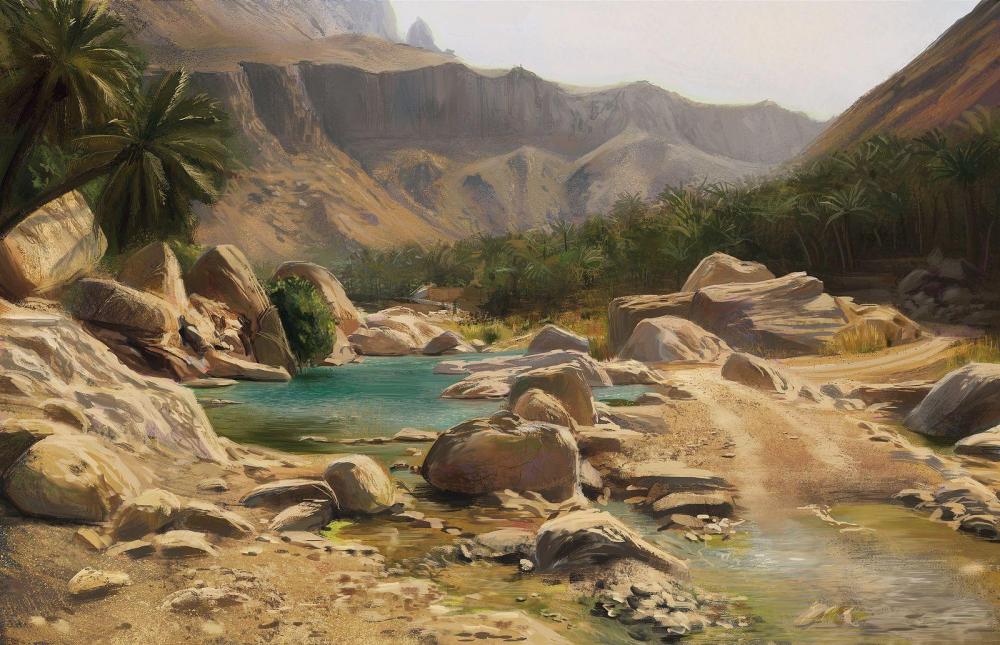
Just west of Fortaleza lies the Firefly Oasis. Though much smaller than Saharda’s oasis, the Firefly Oasis is still a hotspot for travelers to visit. Common, relatively harmless desert wildlife can often be seen prowling around the area, such as foxes, meerkats, and armadillo. In the late evening, fireflies gather in great swarms over the pool's crystal clear water. Their lights bestow a most magnificent orange-yellow glow about the place that is said to be among the floor's few, rare romantic gems.
◉ «The Calmest Badlands»
Spoiler
Located just a kilometer or two away from Forteleza are the Calmest Badlands. Consisting of a slightly depressed series of flatlands separated by mysterious crystalline formations that create boundary-like fences between the different patches. Viewed from afar and above, these patches are said to form some sort of strange pattern like some sort of grand game board played at by titans who abandoned their pastime long ago. Desiccated winds blow through these lands, draining life-giving moisture away from any living creature foolish enough to wander here. If there is anything worth finding in these desolate lands, no one has ever returned to tell of it.
◉ « El Paso del Diablo »
Spoiler
A long, narrow, and winding canyon path that links a series of campsites, rest points and outposts leading from Fortaleza to Saharda. it passes around the mountains, clinging to valley floors. Sandstorms and ever-shifting sands have a tendency to obscure or even swallow whole sections of the trail and travelers tell of perils worse than just the heat, sand and occasional rockslides along its entire course. Monsters prey on those who wander through the pass, which is rife with blind turns, choke points and other perfect ambush sites. Local NPCs consider it a rite of passage to have run and survived this gauntlet at least once, and many boast about the number of times they have made the trek.
◉ « El Perdido »
Spoiler
El Perdido is a long and loosely defined section of floor five which occupies most of the wasteland areas to the west of Fortaleza. Many foul creatures are said to live under the sands of this terrible and desolate terrain. Scorching sun and heat bleach the seemingly endless sands of this all-consuming desert, separating the rest of the floor from its labyrinth. Terrors still stalk the desert here, preying upon any foolish enough to enter, or to be preyed upon by those with wit and heart enough to dare.
Transportation
Stone markers identify loosely defined trails throughout the floor, the most notable of which is El Paso del Diablo. Camels, horses and donkeys can be obtained from various sources around the floor, but struggle in areas of shifting sand and deep canyons. Other than caravans setting themselves upon well-set routes, most people prefer to travel on foot.
Common Mobs of Floor Five
Spoiler-
Saltworms - Large and long sand-colored worms encrusted in blinding white salt crystals that they pick up while digging through and under the flats. They have no sense of vision but make for it with their rows of dagger-like teeth.
- Locations: <<The Calmest Badlands>>
-
Violent Armadillos - Larger than average armadillos that have developed a taste for blood. Their plates of armor make them hard to attack efficiently.
- Locations: <<El Paso del Diablo>>
-
Sand Hyenas - Travelling in packs around even the harshest of places are the Sand Hyenas. Matching the size of a medium-sized dog, these hyenas have fur that camouflages with the sand and sandstorms of floor four.
- Location: <<El Paso del Diablo>>, <<The Calmest Badlands>>
-
Giant Rattlesnakes - Abnormally large rattlesnakes that can stretch to fifteen feet long.
- Location: <<El Paso del Diablo>>, <<El Perdido>>
-
Rock Golems - A being made up of multiple rocks. Often hide in the sand or among other rocks to fool travelers and merchants.
- Locations: <<El Paso del Diablo>>, <<The Calmest Badlands>>, <<Labyrinth>>
-
Giant Scorpions - Scorpions the size of a full-grown adult that range from colors like yellow to brown. They like to hide and bury themselves beneath the sand and surprise unsuspecting travelers with their abnormally large stingers.
- Locations: <<The Calmest Badlands>>, <<El Perdido>>, <<Labyrinth>>
Field Boss of Floor Five
Spoiler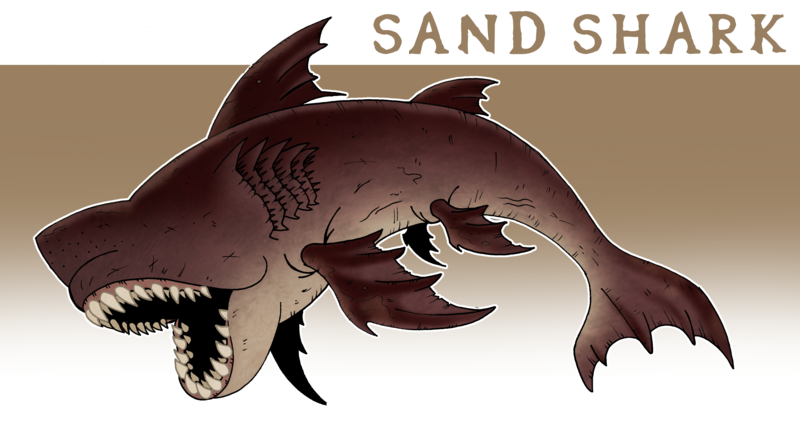
<<Sand Shark>>Without sight, the <<Sand Shark>> used perfected hearing and smell to stalk its prey. It is believed to be an ancient species of shark that somehow came back to the living. Without water, it adapted to swimming within the sand, and lost sight due to not needing it. It is able to hear any footsteps or movement atop of the sand, and smell anything a mile away. If encountered, its advised to remain as still as possible.
HP: 555/555 | MIT: 35 | DMG: 50 | BLEED: 1 slot of T1 | ACC: 1 | EVA: 2
Abilities:
- Bad Footing | Missing an attack against the Sand Shark causes the Player to get bogged down by the sandy environment, making the next attack against them deal 15 DMG more.
- Sharp Jaws | On an MD 9-10, the Shark will reduce the MIT of its target by 10 for <<Sand Shark’s>> next attack, which will automatically target the same Player regardless of Hate values.
- Weapon Lock | Only Sword Arts of Rank 4 or lower may be used against this boss.
- Tier Lock | For the duration of the fight, all of the participants’ stats that scale with Tier are calculated as though they’re Tier 1. [DMG/MIT/BLEED enhancements etc.]
Drop:
“Sand Armor Potion" (T1/Consumable - Instant/Single Use); Functions like a Parry for the first attack the user sustains after consumption. Can stack with Parry to reduce incoming damage up to 75%.
<< Floor Five Labyrinth >>
The fifth floor labyrinth lies beneath the blistering sands, its many entrances concealed and difficult to find. The floors and walls are made of hard sand stone. Most of the rooms are bare, save and except for monsters that dwell therein. Advancement leads downward, deeper and deeper beneath the desert. The air is stale, and heat oppressive despite being hidden away from the sun. Each level of the labyrinth becomes consistently harder to pass with more false leads and dead ends present. The entire place is also unlit, making it that much harder to explore. Traps are sparse, save the mob-filled pit rooms.
Downward passage is limited to sand pits where players must voluntarily allow themselves to be swallowed down into the depths. Choosing the wrong pit leads to nests of nasty angry mobs in overwhelming numbers followed by marching back up concealed stairs leading back to the previous level. Four levels must be passed before reaching the guardians room on the fifth and final level. It stands empty now, save for an elevating platform that will return visitors back to the start of the labyrinth.
SpoilerBuffers to those without <<Night Vision>>
-1 ACC
-2 LDBuffers to those without <<Survival>>
Lose 5 points of HP for every turn spent within the Labyrinth
Labyrinth Mechanics
Players may not advance in the labyrinth if a monster remains in the room and they must use the quicksand pits to move deeper within the labyrinth. Using the Loot Dice, they will find out if they managed to make it deeper in or ended up choosing the wrong path. All skills and consumables improve the loot dice as normal, helping to choose the right path.Note: After a player has found the correct path, they no longer need to roll for that floor again as they should know the correct way. Meaning, if a player made it to Floor Three before choosing the wrong path, they do no need to roll to pass through Floors One and Two, instead they just have to make a post passing through the floor. Every time you fail on a floor, the next time you search again, receive +2 LD to the roll.
-
Floor One
- One option, requiring a LD of 1-20 to proceed downward.
-
Floor Two
- Two Options, requiring a LD of 11-20 to proceed downward.
-
Floor Three
- Four Options, requiring a LD of 16-20 to proceed downward.
-
Floor Four
- Five Options, requiring a LD of 19-20 to proceed downward.
Should a player fail to fail to choose the right path, they must fight Floor Leveled monsters equivalent to the failed floor level * amount of players.
Example: If a Players A and B were on Floor Three trying to make it to Floor Four but failed to choose the wrong path, they would fight 6 (3*2) monsters in total.
Quests:
<<Arabian Nights: The First Of Many>>
<<Butcher In The Sands>>
<<Bloodstained Land>>
<<The Traveler>>
<<DHA: Of Greed And Avarice>>
Boss Fight: Azure Flames Ascending to F6 -
Saltworms - Large and long sand-colored worms encrusted in blinding white salt crystals that they pick up while digging through and under the flats. They have no sense of vision but make for it with their rows of dagger-like teeth.
-
Floor 17
<<Challenge of Olympus: Cook>>Quest Rewards:
- 500 Experience Points
- Hestia’s Cauldron | Crafting Tool | Meticulous: +1 CD when crafting in one’s workshop.
Requirements:
- Player must be at least a Rank 2 Cook.
-
Roleplay the following:
- Receiving an invitation to visit Olympus, on Floor 17.
- Meeting a satyr guard, often acting as an escort for the player.
- Speaking with Hestia, god of hearth and home
- Initiating a challenge set out by Hestia.
- Overcoming said challenge.
- Players are given reign to craft the challenge on their own accord. They are also welcome to alter Hestia's demeanor and appearance to better fit the story they want to tell.
- Players are encouraged to set a difficult challenge for their characters to overcome, be it through wit, strength or sheer willpower.
- Gods in these quests are NPCs solely for RP flavour. They are unable to engage in combat nor affect the setting of Aincrad in any way.
Summary:
Most players receive a message in their system mail at the ding of their profession reaching Rank 2. Sent on behalf of his pantheon by ‘Zeus’, players around Aincrad are invited to visit Olympus on Floor 17 to test their skills against the gods of their respective crafts themselves. Succeed and receive a limited edition trophy that’s guaranteed to boost your skills even further. Fail, and…
Well, Zeus was occasionally known to waste one’s time, now wasn’t he?
The road to Olympus is guaranteed to be safe when undertaking this quest. A ‘Blessing of Olympus’ buff seems to repel most monsters away from the player, should they stick to the main road leading to the mountain. And as though that wasn’t enough, the gods have sent a satyr to lead them to their abode, ‘just in case’ the player got lost. Anyone even remotely versed in Greek mythology might be able to tell that it is Hera’s handiwork that lends them safe passage. Zeus isn’t the kind of entity to have taken precautions.
Each god’s challenge differs from player to player, so it is unlikely that any advance preparation would prove helpful in the upcoming trial. Hestia has a soft and caring disposition, speaking expressively with the player like an old friend or kind mother would. She is likely to initiate physical contact with the player -- platonic, of course, but will respect one’s boundaries should they request it. Her aim is always to make all who step through her temple doors welcome.
Her tests are about the player coming up with a recipe that might embody their spirit, balancing a delicacy’s flavors or making a feast to serve and please another being found on Olympus. Rarely would she request a player to create a dish technically challenging, though it has happened before. Hestia is unlikely to give away many hints with regards to quantities or ingredients -- however, her suggestions for such almost always lead the player on the right track. Players who successfully satisfy her wishes will receive one of her signature cauldrons, and the goddess’ pride besides.
Outline:
This quest is strictly a roleplaying exercise. There are no mandatory mechanics, save the general rules of the game.
NPCs:
<<Hestia>>
Soothing, gentle and tender are all words to describe the goddess of the hearth and home. Her appreciation lies in caring for the other -- an indifference or a turn of one’s nose at social connections would cause Hestia to turn distant and cold towards them.
Epilogue:
SpoilerNot many players get to experience being one of the gods’ favored, and here another one of their number stands strong. The goddess of the hearth is awash with satisfaction and showers the player with congratulatory praises, alongside offering an invitation to them to join the gods at their evening banquet. Before the player is able to provide their answer, however, Hestia is more likely to carry away their freshly made feast to some of the other denizens of Olympus -- only returning to her champion when the platers are empty, with gracious apologies in tow.
Despite her eagerness to diverge from the topic at hand to share the fruits of the player’s labor with others, she remains focused on escorting the player around to better acquaint them with Olympus and their formalities until the time of celebration. In the great feast hall, at sundown, a circle of gods await the pair alongside mythical beings and other successful challengers crowned that day as masters of their own crafts. A toast to their victories afterwards, the champion are offered to partake in the feast of the divine, as is customary.
-
Floor 17
<<Challenge of Olympus: Fisher>>Quest Rewards:
- 500 Experience Points
- Amphitrite’s Net | Crafting Tool | Conscientious: +1 CD when fishing.
Requirements:
- Player must be at least a Rank 2 Fisher.
-
Roleplay the following:
- Receiving an invitation to visit Olympus, on Floor 17.
- Meeting a nymph who will typically act as an escort for the player.
- Speaking with Amphitrite, goddess of the sea and safe voyages.
- Initiating a challenge set out by Amphitrite.
- Overcoming said challenge.
- Players are given reign to craft the challenge on their own accord. They are also welcome to alter Amphitrite's demeanor and appearance to better fit the story they want to tell.
- Players are encouraged to set a difficult challenge for their characters to overcome, be it through wit, strength or sheer willpower.
- Gods in these quests are NPCs solely for RP flavour. They are unable to engage in combat nor affect the setting of Aincrad in any way.
Summary:
Players who have been keen on their gathering profession will have received a message from one familiar name of the Greek pantheon. Unlike the demeanor of his older brother, Poseidon extends a lengthy, formal offer inviting recipients to visit a private property under his name. ‘It is a domain kept pristine of our own accord’, the god writes, and he expects it to be treated with the same respect he offers in his letter. The cause of the players’ visit is to partake in the Challenge of Olympus.
Upon reaching Floor Seventeen, challengers are anointed with a ‘Blessing of Olympus’ buff and assigned a nymph escort that will whisk them away from the mountain leading to the sea gods’ main base of operations. To the coast they guide the player, and onto a rowboat. The nymphs will ferry them personally out to sea -- and no matter what happens, the player will always be ensured safe passage across the waves when embarking on this quest. A clustering of clouds later, they arrive at a hidden isle; the Land of Hesperides, a bountiful and serene outpost filled with flora, fish and mythical attendants.
Their guide will lead them to one of two divinities, one being the author of their letter whom they could expect to rule over their skills in judgement. However, it is his better half who appears before them instead. Amphitrite, a regal and benevolent goddess has been said to better suit leading a new generation of fishers into respecting the fish and the sea. With patience and compassion, she is there every step of the way to watch over her challenger’s actions, and correct them when she believes there might be something they could do better.
Her task is likely to be games of catch and release. Sometimes, she wishes to see some of her favorite subjects once more, and turns her challenges into a trial of finding and seeking them out. Once she believes that the player is ready to learn more about different fishing methods, she proceeds to educate them on the subject. For their perseverance and warmth shown to aquatic life, she will impart onto the player a net made out of rubber, deemed unlikely to harm their future catches.
Outline:
This quest is strictly a roleplaying exercise. There are no mandatory mechanics, save the general rules of the game.
NPCs:
<<Amphitrite>>
An amiable and gracious spirit, Amphitrite is keen on seeking better treatment for her subjects of fish and innocent water creatures alike. There is nothing she despises more than lack of compassion for others, and players may experience her ire should they hold such an attitude.
Epilogue:
SpoilerAmphitrite’s excitement is short on nothing -- it is with the warmest of gestures that she invites the player to one of the rare get-togethers on the isle, this in honor and commemoration of the player’s besting their trial. Should the player be interested in joining, the goddess will arrange accommodations for the evening, leaving an attendant nymph to guide them around the isle or the seas at the player’s behest. Only at sundown does she seek out the player personally and in earnest, guiding them to a long wooden table where many a creature of the Land of Hesperides have gathered for the momentous occasion.
It is Poseidon who happens to preside over this table, flanked by Amphitrite on his left and Demeter to his right. He initiates a toast to the jewel who has found success in their endeavors this day, before commencing the feast proper. A chorus of cheers erupts from all attendees who are present. The player is welcome to enjoy the fruits of the day’s labors; perhaps while being subjected to the sea god’s loose scrutiny. He might even impart a few of his own tips, if the mood catches him.
-
Floor 17
<<Challenge of Olympus: Forager>>Quest Rewards:
- 500 Experience Points
- Demeter’s Cornucopia | Crafting Tool | Bountiful: +1 CD when using Foraging skill.
Requirements:
- Player must be at least a Rank 2 Forager.
-
Roleplay the following:
- Receiving an invitation to visit Olympus, on Floor 17.
- Meeting a nymph, who acts as an escort for the player.
- Speaking with Demeter, goddess of harvest and agriculture.
- Initiating a challenge set out by Demeter.
- Overcoming said challenge.
- Players are given reign to craft the challenge on their own accord. They are also welcome to alter Demeter's demeanor and appearance to better fit the story they want to tell.
- Players are encouraged to set a difficult challenge for their characters to overcome, be it through wit, strength or sheer willpower.
- Gods in these quests are NPCs solely for RP flavour. They are unable to engage in combat nor affect the setting of Aincrad in any way.
Summary:
Players who have been keen on their Foraging profession will receive a message from a familiar name of the Greek pantheon. Unlike the demeanor of his older brother, Poseidon extends a lengthy, formal offer inviting recipients to visit a private property under his name. ‘It is a domain kept pristine of our own accord’, the god writes, and he expects it to be treated with the same respect he offers in his letter. The cause of the players’ visit is to partake in the Challenge of Olympus.
Upon reaching Floor Seventeen, challengers are anointed with a ‘Blessing of Olympus’ buff and assigned a nymph escort that will whisk them away from the mountain leading to the sea god's main base of operations. To the coast they guide the player, and onto a rowboat. The nymphs will ferry them personally out to sea -- and no matter what happens, the player will always be ensured safe passage across the waves when embarking on this quest. A clustering of clouds later, they arrive at a hidden isle; the Land of Hesperides, a bountiful and serene outpost filled with flora, fish and mythical attendants.
Their guide will lead them to Demeter, who greets them at a grove. The woman is somewhat stern, her focus set on the player’s would-be task. Her goal is to educate the player on not altering the environment around them as they go about their material search. Sometimes, they are tasked to gather for a divine ally or the creatures of the wild. Other times, the trial will test the player’s perception and efficiency, or Demeter will enroll the player to tend to the emerald isle.
Her strictness fades only after the day’s work is complete. Then, and only then, will she reveal the slightest hint of care towards the player, ensuring they are not too worn out by the obstacles she set before them. When all is said and done, should the player’s results please her, Demeter will bestow upon them a cornucopia of her personal fashion, one capable of storing multiple materials at once without overflowing.
Outline:
This quest is strictly a roleplaying exercise. There are no mandatory mechanics, save the general rules of the game.
NPCs:
<<Demeter>>
Demeter is the exemplar for the words ‘distinguished’ and ‘dignified’. Only around her most trusted inner circle will her guard drop and her concern for nature and crops show -- until then, she lets no signs of weakness slip through her façade.
Epilogue:
SpoilerHer invitation comes discreetly to the player -- they don’t often have many challengers showing up at the isle, after all. The feast they prepare for champions of her trial is equally rare. Thus the player is offered the rare chance to attend, partaking in the crops and meals that the nymphs and the goddess make out of their isle’s bounty. Should they accept, Demeter will leave the player to wander the premises alongside an attendant, and only when the banquet is ready will she call for them.
At a long wooden table, Poseidon presides over the harmony of creatures present, before initiating a toast to the champion who has brought success and glory to themselves. When the feast begins, the player is encouraged to enjoy the fruits of the day’s labor; perhaps while being subjected to the sea god’s loose scrutiny, they might also have a chance to pick up some new gathering tricks from those with whom they dine.
-
Floor 17
<<Challenge of Olympus: Appraiser>>Quest Rewards:
- 500 Experience Points
- Hermes’ Scale | Crafting Tool | Methodical: +1 CD when identifying items in one’s shop.
Requirements:
- Player must be at least a Rank 2 Appraiser.
-
Roleplay the following:
- Receiving an invitation to visit Olympus, on Floor 17.
- Meeting Hermes, messenger of the gods.
- Initiating a challenge set out by Hermes.
- Overcoming said challenge.
- Players are given reign to craft the challenge on their own accord. They are also welcome to alter Hermes's demeanor and appearance to better fit the story they want to tell.
- Players are encouraged to set a difficult challenge for their characters to overcome, be it through wit, strength or sheer willpower.
- Gods in these quests are NPCs solely for RP flavor. They are unable to engage in combat nor affect the setting of Aincrad in any way.
Summary:
Most players receive a message in their system mail at the ding of their profession reaching Rank 2. Sent on behalf of his pantheon by ‘Zeus’, players around Aincrad are invited to visit Olympus on Floor 17 to test their skills against the gods of their respective crafts themselves. Succeed and receive a limited edition trophy that’s guaranteed to boost your skills even further. Fail, and…
Well, Zeus was occasionally known to waste one’s time, now wasn’t he?
The road to Olympus is guaranteed to be safe when undertaking this quest. A ‘Blessing of Olympus’ buff seems to repel most monsters away from the player, should they stick to the main road leading to the mountain. And as though that wasn’t enough, the gods have sent a satyr to lead them to their abode, ‘just in case’ the player got lost. Anyone even remotely versed in Greek mythology might be able to tell that it is Hera’s handiwork that lends them safe passage. Zeus isn’t the kind of entity to have taken precautions.
Most gods stay in their temples while awaiting their challengers, but Hermes is one not to rely on his satyr servants. He relates much with players in regards to his own endless duties, and has taken a bit of time off to tend to a subsection of mortals and impart his own knowledge and gifts; if they deserve, of course.
Audacious and ambitious, Hermes will often meet and escort players to Olympus himself, where he imposes his trials upon them with little warning. No amount of preparation is likely to aid the player against his divine whims, but the herald welcomes them to try.
Sometimes he splits his daily tasks with his subject. Other times he’ll focus on business and start a some convoluted scheme to bamboozle the denizens of Olympus. His offers are nothing short of trickery -- but of course, the player is on his side now. They carry immunity from Zeus’ judgements in executing Hermes' pranks. As part of his façade of prestige, he throws in a few genuine tests of guile and economic wherewithal, or some random test of one’s insights into an item’s value in the game. In whatever way the player manages to overcome his challenges, or if the god grows tired and bored of his own charade, he’ll award them a miniature version of his scales for display.
As a merchant, the player owns a shop, don’t they? Every shop should have a set of scales.
Outline:
This quest is strictly a roleplaying exercise. There are no mandatory mechanics, save the general rules of the game.
NPCs:
<<Hermes>>
A high-strung entity. He speaks just as fast as his winged boots race. His bounds and leaps in thinking and trickery are sure to lead the player in circles, though the herald is often seen frustrated when his ideas don’t get through to others.
Epilogue:
SpoilerNot many players get to experience being one of the gods’ favored, and here another one of their number stands strong. The trick with Hermes is that he often pretends that his actions are all part of the whims and premeditations of fate. Somehow, he fishes out a dozen personally scribed invitations, all addressed to the player, and inviting them to join the gods at their nightly banquet for overcoming Olympus’ challenge. One can only wonder where he obtained all these hand-written notes and who he scammed in order to put his associates' name all over them.
Leading the player into the great feast hall, they join a circle of gods, mythical beings and other successful challengers, now touted as the masters of their own crafts. As is customary, the champion will be offered to partake in the feast of the divine. Just don’t stuff your inventories full of breadsticks, okay?
-
Floor 17
<<Challenge of Olympus: Performer>>Quest Rewards:
- 500 Experience Points
- Apollo’s Metronome | Crafting Tool | Meticulous: +1 CD when crafting in one’s workshop.
Requirements:
- Quest undertaker must be at least a Rank 2 Performer.
-
Roleplay the following:
- Receiving an invitation to visit Olympus, on Floor 17.
- Meeting a satyr guard, often acting as an escort for the player.
- Speaking with Apollo, god of music and medicine.
- Initiating a challenge set out by Apollo.
- Overcoming said challenge.
- Players are given reign to craft the challenge on their own accord. They are also welcome to alter Apollo's demeanor and appearance to better fit the story they want to tell.
- Players are encouraged to set a difficult challenge for their characters to overcome, be it through wit, strength or sheer willpower.
- Gods in these quests are NPCs solely for RP flavour. They are unable to engage in combat nor affect the setting of Aincrad in any way.
Summary:
Most players receive a message in their system mail at the ding of their profession reaching Rank 2. Sent on behalf of his pantheon by ‘Zeus’, players around Aincrad are invited to visit Olympus on Floor 17 to test their skills against the gods of their respective crafts themselves. Succeed and receive a limited edition trophy that’s guaranteed to boost your skills even further. Fail, and…
Well, Zeus was occasionally known to waste one’s time, now wasn’t he?
The road to Olympus is guaranteed to be safe when undertaking this quest. A ‘Blessing of Olympus’ buff seems to repel most monsters away from the player, should they stick to the main road leading to the mountain. And as though that wasn’t enough, the gods have sent a satyr to lead them to their abode, ‘just in case’ the player got lost. Anyone even remotely versed in Greek mythology might be able to tell that it is Hera’s handiwork that lends them safe passage. Zeus isn’t the kind of entity to have taken precautions.
Strangely, Apollo’s challenges are often intricately refined affairs. The god is classy and sophisticated, so any attempts to sharpen one’s image and performances before they meet him is duly appreciated. However, a perfect recital will not always guarantee one’s success in his evaluations. The key elements he seeks in an artist often go unsaid. Apollo is unlikely to reveal his secrets or direct expectations to the player.
His tests are often ritualistic and bizarre, laced with layers of arcane intricacies. Apollo assumes the role of the strict music teacher, meticulously monitoring the player's method and execution while left to decipher whatever paradoxical madness he has cast upon them. Some have reported the god asking the performer to simply interpret a genre of music. Others claim that he speaks like a raving lunatic, asking the artist to generate confounding noise or to manipulate their efforts with the excessive abuse and multi-layering of recording crystals. The lucky few to have discovered the method behind his madness reported receiving a golden metronome from the god himself, alongside his praise and respect at having endured a long and soul-shattering ordeal.
Outline:
This quest is strictly a roleplaying exercise. There are no mandatory mechanics, save the general rules of the game.
NPCs:
<<Apollo>>
Stern, strict and closed off, this man seems nothing like the radiant sun of one’s day. He rarely speaks on his emotions and points of his satisfaction -- speak of love and love lost, however, and his demeanor might slip through. Just a little.
Epilogue:
SpoilerNot many players get to experience being one of the gods’ favored, and here another one of their number stands strong. Apollo’s light is blissful when one finally basks in the moment where he loosens his strict and convoluted persona. His favored get to peek behind the false facades that he only puts on to separate the wheat from the chaff. He still maintains his air of superiority, however, as he issues his champion an invitation for their attendance: one night at the gods' banquet for a celebration of a new prized performer in the making.
He makes sure the player is well dressed for the party, should they choose to attend, and personally escorts them to the great feast hall. A circle of gods await them alongside other mythical beings and successful challengers of the day, now touted as the masters of their own crafts. A toast acts as their cheer of celebration, and as customary, the champion will be offered to partake in the feast of the divines.
-
Floor 17
<<Challenge of Olympus: Alchemist>>Quest Rewards:
- 500 Experience Points
- Dionysus’ Decanter | Crafting Tool | Meticulous: +1 CD when crafting in one’s workshop.
Requirements:
- Player must be at least a Rank 2 Alchemist.
-
Roleplay the following:
- Receiving an invitation to visit Olympus, on Floor 17.
- Meeting a satyr guard, often acting as an escort for the player.
- Speaking with Dionysus, god of revelry and wine.
- Initiating a challenge set out by Dionysus.
- Overcoming said challenge.
- Players are given reign to craft the challenge on their own accord. They are also welcome to alter Dionysus's demeanor and appearance to better fit the story they want to tell.
- Players are encouraged to set a difficult challenge for their characters to overcome, be it through wit, strength or sheer willpower.
- Gods in these quests are NPCs solely for RP flavor. They are unable to engage in combat nor affect the setting of Aincrad in any way.
Summary:
Most players receive a message in their system mail at the ding of their profession reaching Rank 2. Sent on behalf of his pantheon by ‘Zeus’, players around Aincrad are invited to visit Olympus on Floor 17 to test their skills against the gods of their respective crafts themselves. Succeed and receive a limited edition trophy that’s guaranteed to boost your skills even further. Fail, and…
Well, Zeus was occasionally known to waste one’s time, now wasn’t he?
The road to Olympus is guaranteed to be safe when undertaking this quest. A ‘Blessing of Olympus’ buff seems to repel most monsters away from the player, should they stick to the main road leading to the mountain. And as though that wasn’t enough, the gods have sent a satyr to lead them to their abode, ‘just in case’ the player got lost. Anyone even remotely versed in Greek mythology might be able to tell that it is Hera’s handiwork that lends them safe passage. Zeus isn’t the kind of entity to have taken precautions.
Each god’s challenge differs from player to player, so rarely would one’s preparation lend them aid in the upcoming trial. Anyone who steps into Dionysus’ chambers as a guest is almost always offered a goblet filled with sweet-smelling something -- the closest hint one could get to tasting ambrosia, though the drinks will never intoxicate the player. The god is friendly and welcoming, most certainly a smooth talker with a luxurious voice, and the only time this behavior observes an exception might be when he’s suffering a hangover from a party the night before. At worst, he may be afflicted with a short temper, fatigue and mild irritation, and he will have to be aided by one of the many attendants Olympus during the trial.
Dionysus’ tests have a fascination for grand crafts that perform the unimaginable, or otherwise a creation that answers a known alluring riddle. A potent restorative for resolving his headaches would also be one to surprise him, the god knowing full well he grows immune to a variety of hangover cures too quickly. Any magical miracle mixed in a bottle or over a burner and laced with potential is the performance he seeks. You must impress him.
He wastes no time gassing up the player with his quips and snark, if he has the patience to hold banter. It’s almost always in good faith. The man never takes himself or much of anything seriously. Best his interest, and you would receive one of his prized decanters, either for display or for storing liquid solutions.
Outline:
This quest is strictly a roleplaying exercise. There are no mandatory mechanics, save the general rules of the game.
NPCs:
<<Dionysus>>
This god is joyful, proud and boisterously confident. He has a vested interest in serving others, ensuring they enjoy life, especially around his company. All work and no play makes Dionysus a bitter man.
Epilogue:
SpoilerNot many players get to experience being one of the gods’ favored, and here another of their numbers stands strong. Dionysus acts completely carefree about the player’s success, not bothering to conceal his sense of extreme pride. His excitement often has him cracking open another bottle of liquor for the moment, while ushering his attendants to store his newfound treasure in the museum where he hoards his solutions. He’s likely to casually drop an invitation to the gods' banquet, giving away few details about the event unless they're about his own presence at the feast.
Come the late afternoon, Dionysus can be found in high spirits, and will gladly guide the player lazily towards the city’s communal feast hall. One might expect attention to be drawn to the drunken, giggling figure and their new chosen alchemist, however none of the gods seem to bat an eye at his behavior. A toast to the player’s victory afterwards and the champion will be offered to partake in the feast of the divines, as is customary. for beating the Challenge of Olympus.
-
Floor 17
<<Challenge of Olympus: Artisan>>Quest Rewards:
- 500 Experience Points
- Aphrodite’s Magnifier | Crafting Tool | Meticulous: +1 CD when crafting in one’s workshop.
Requirements:
- Player must be at least a Rank 2 Artisan.
-
Roleplay the following:
- Receiving an invitation to visit Olympus, on Floor 17.
- Meeting a satyr guard, often acting as an escort for the player.
- Speaking with Aphrodite, goddess of love and beauty.
- Initiating a challenge set out by Aphrodite.
- Overcoming said challenge.
- Players are given reign to craft the challenge on their own accord. They are also welcome to alter Aphrodite's demeanor and appearance to better fit the story they want to tell.
- Players are encouraged to set a difficult challenge for their characters to overcome, be it through wit, strength or sheer willpower.
- Gods in these quests are NPCs solely for RP flavour. They are unable to engage in combat nor affect the setting of Aincrad in any way.
Summary:
Most players receive a message in their system mail at the ding of their profession reaching Rank 2. Sent on behalf of his pantheon by ‘Zeus’, players around Aincrad are invited to visit Olympus on Floor 17 to test their skills against the gods of their respective crafts themselves. Succeed and receive a limited edition trophy that’s guaranteed to boost your skills even further. Fail, and…
Well, Zeus was occasionally known to waste one’s time, now wasn’t he?
The road to Olympus is guaranteed to be safe when undertaking this quest. A ‘Blessing of Olympus’ buff seems to repel most monsters away from the player, should they stick to the main road leading to the mountain. And as though that wasn’t enough, the gods have sent a satyr to lead them to their abode, ‘just in case’ the player got lost. Anyone even remotely versed in Greek mythology might be able to tell that it is Hera’s handiwork that lends them safe passage. Zeus isn’t the kind of entity to have taken precautions.
Out of all the gods of the primary pantheon, Aphrodite is the most likely to seek the player once they arrive at Olympus. Call it her overzealousness or an attempt to better her first impressions to the challenger; the goddess always greets the player with a warm and cheery smile. Some have described her as being too air-headed and bubbly. Others find solace in her heartfelt conversation and eagerness to welcome strangers to her own abode.
Each god’s challenge differs from player to player, so rarely would one’s preparation lend them aid in the upcoming trial. For Aphrodite, her challenges are almost always half-hearted and unrefined with regards to their rules and regulations. Most of the time, her tasks are centered on the goddess’ or the player’s personal aesthetics; rarely would she test her challengers of how their craft might benefit their users. With the judge not appearing to take the trial too seriously, then, what players offer the goddess might come across as a formality. However, Aphrodite is just as likely to turn her nose up at the offering should it not fall within her personal qualifications of ‘fashion’.
Should any win her approval, they are awarded a golden magnifier, alongside the goddess’ own blessing and favor.
Outline:
This quest is strictly a roleplaying exercise. There are no mandatory mechanics, save the general rules of the game.
NPCs:
<<Aphrodite>>
An excitable and curious entity, Aphrodite is talkative, and just as graceful with words as she is with her poise. She revels in the discourse of personal and intimate affairs, emotions and assorted fancies of mortals, and the expressions of such are the means of her challenges. The more original the medium, the more likely she is to be impressed, for the span of Aphrodite's attention is known to be fleeting.
Epilogue:
SpoilerNot many players get to experience being one of the gods’ favored, and here another one of their numbers stand strong. Of course, crowning her new champion isn’t a lasting priority of the ever-distracted goddess of love -- she most likely spends her time examining the piece newly introduced to her and fits it into an assortment of different aesthetic themes, inviting the player to toss in their opinions on her suggested layouts. Only after she’s had her fun will Aphrodite set the piece aside for one of the satyrs to stash away, finally extending the player an offer to be her 'plus one' at a pending dinner banquet.
What fun, being Aphrodite’s personal escort to an event. She dolls and dresses up the player and fusses over their attire, if only for her personal amusement. When it is time to gather, she walks with the player to Olympus’ feast hall, where the full pantheon of gods is present, ready to celebrate their newfound prized crafters and end the day’s activities on a joyous note. Of course, the player is most certainly welcome to partake in the prepared feast. They are the guest of honor, after all!
-
Floor 24
<<Incognito Assassination>>
Party Limit: 1 | 20+ Posts
Prerequisite: Must have completed <<Incognito Analysis>>
Repeatable for standard thread rewards.
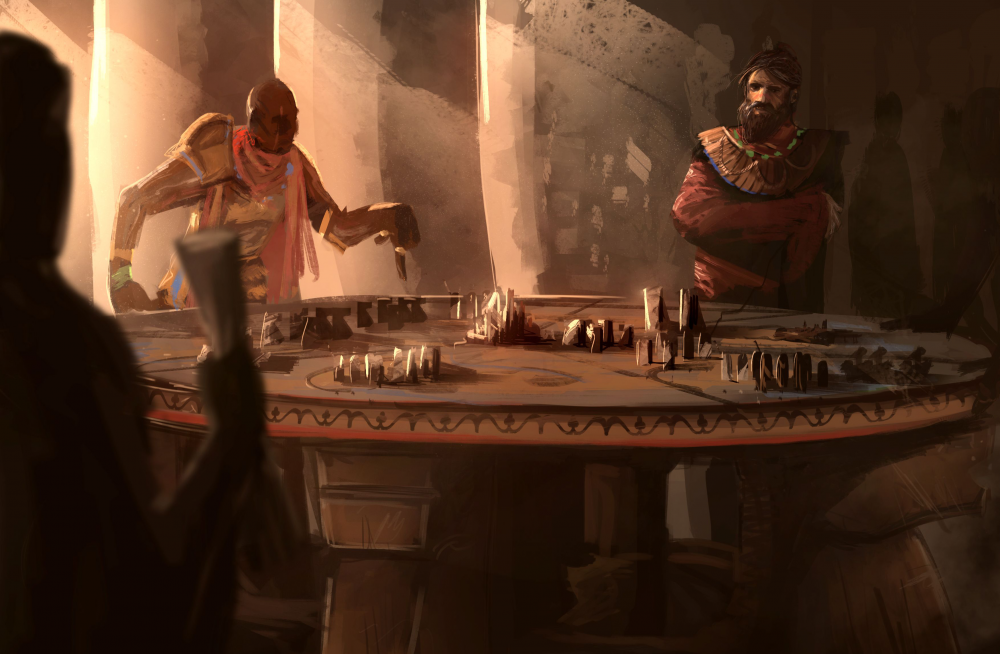
Quest Rewards:
- 4,000 Experience Points
- 10,000 col
-
The player receives:
-
Blade of the Warrior
- [T3 - Perfect Weapon of Choice]: Absolute ACC | ACC 2
-
Blade of the Warrior
Requirements:
- Defeat Uso-Tsuki and his bodyguards.
- Return to the Chief and receive your rewards.
Summary:
You've gathered enough information to know the route that Uso-Tsuki is taking to kill the Chief of Marsonia, and it's up to you to stop him. Find a way to take him out before he can reach his target. Uso-Tsuki has hired two of his strongest guards to help protect them, so you will need to take them out before you can take out Uso-Tsuki.
Outline:
Players may choose whether to start the thread going over the plan with the <<The Chief>>. Once at the site, the Player will fight both bodyguards at the same time, but Uso-Tsuki will flee the moment combat begins. This gives the Player a chance to rest in between fights. Intercept the group on their route to assassinate the Chief and initiate combat. Once the bodyguards have been felled, the Player may pursue Uso-Tsuki and put an end to the assassination attempt once and for all.
NPCs:

<<The Chief>>
The Chief of Marsonia is a straightforward man who is widely considered equally wise and cunning. Every move is calculated, and he leaves little to chance. Having earned his position through enduring several gauntlets of war and strife, he is hardened to the consequences of trust and betrayal. He will express to the player that he once saw Uso-Tsuki as a son, but now realizes his pseudo-nepotism was a vehicle that now risks his untimely demise. Though not the sort to plead, he requests the player's aid in thwarting Uso-Tsuki's attempt on his life.
Enemies:
 <<Difendā>>
Out of <<Uso-Tsuki's>> pair of bodyguards, <<Difendā>> specializes in defense. He will absorb attacks for his allies without a second thought, even though he understands it means he will be the first to die as a result. He relies on <<Purotekutā's>> blade to enforce his iron will.
HP: 500/500 | DMG: 75 | MIT: 150 | ACC: 2 | EVA: -1
This boss uses its own BD roll when attacking.Abilities:
- Defender | <<Difendā>> fulfills the role that his name implies. He will defend <<Uso-Tsuki>> and <<Purotekutā>> by taking damage for any attacks issued against them while he is still alive.
- Wild Charge | Starting with his first turn, <<Difendā>> will wildly charge the Player, reducing his BD by -1 for the attack while gaining 25 DMG and stunning the opponent upon hitting. This ability has a 3 turn cooldown, and <<Difendā>> will always use it again as soon as it is available.
 <<Purotekutā>>
Out of <<Uso-Tsuki's>> pair of bodyguards, <<Purotekutā>> specializes in offense. He will unleash the fury of his katana to smite the enemies of his allies. He relies on <<Difendā's>> armor to protect him, but will return the favor with retribution served by his blade.
HP: 1000/1000 | DMG: 150 | ACC: 1 | EVA: 2
This boss uses its own BD roll when attacking.Abilities:
- Eagle Eye | <<Purotekutā>> is fully expecting an attack from an enemy. He will always instantly identify a stealthed player, breaking their stealth and negating any auto-hit bonuses.
- Disciplined | Starting after his first turn, <<Purotekutā>> will go into the way of an oncoming successful attack, blocking half of the final damage and delivering half of the blocked damage back to the Player. This damage is mitigatable. <<Purotekutā>> will not reflect any status conditions that may incur during this attack. This ability overrides <<Difendā's>> <<Defender>> ability. This ability has a 4 turn cooldown, and <<Purotekutā>> will always use it again as soon as it is available, though it will only activate against successful attacks.

<<Uso-Tsuki>>
<<Uso-Tsuki>> is the mastermind of the assassination attempt against <<The Chief>>. Once a loyal member of the black ops corps, <<Uso-Tsuki>> is now seen as a danger and imminent threat. He aims to take <<The Chief>> down and fill the power vacuum it creates, assuming it to be his rightful position.
HP: 1400/1400 | DMG: 150 | MIT: 75 | ACC: 3 | EVA: 1
This boss uses its own BD roll when attacking.Abilities:
- Master's Eye | <<Uso-Tsuki>> knows that you are coming, and is already prepared. His precognitive vision allows him to predict your motions and negate ACC and auto-hit bonuses.
- Fleet Feet | On his first roll, if <<Uso-Tsuki>> misses, he will attack a second time in the same turn.
- Ultimate Assassin | Starting on his second turn, Uso-Tsuki will gain a DMG boost of 75 for that attack only. This ability has a 3 turn cooldown, and <<Uso-Tsuki>> will always use it again as soon as it is available.
Epilogue:
Upon reporting <<Uso-Tsuki's>> defeat to <<The Chief>>:
SpoilerUpon informing <<The Chief>> of <<Uso-Tsuki's>> defeat, he will become visibly upset and explains to the Player that, while he knew it needed to be done, he still viewed <<Uso-Tsuki>> as a son. Nonetheless, he will still thank the player for saving his life, and present him with a powerful weapon forged by his people. A panel appear, informing the player of the quest’s completion, listing the quest rewards and experience gained.
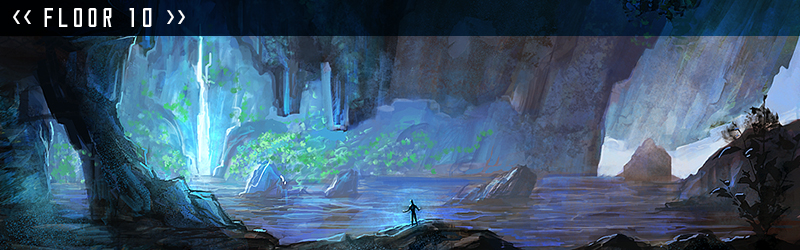
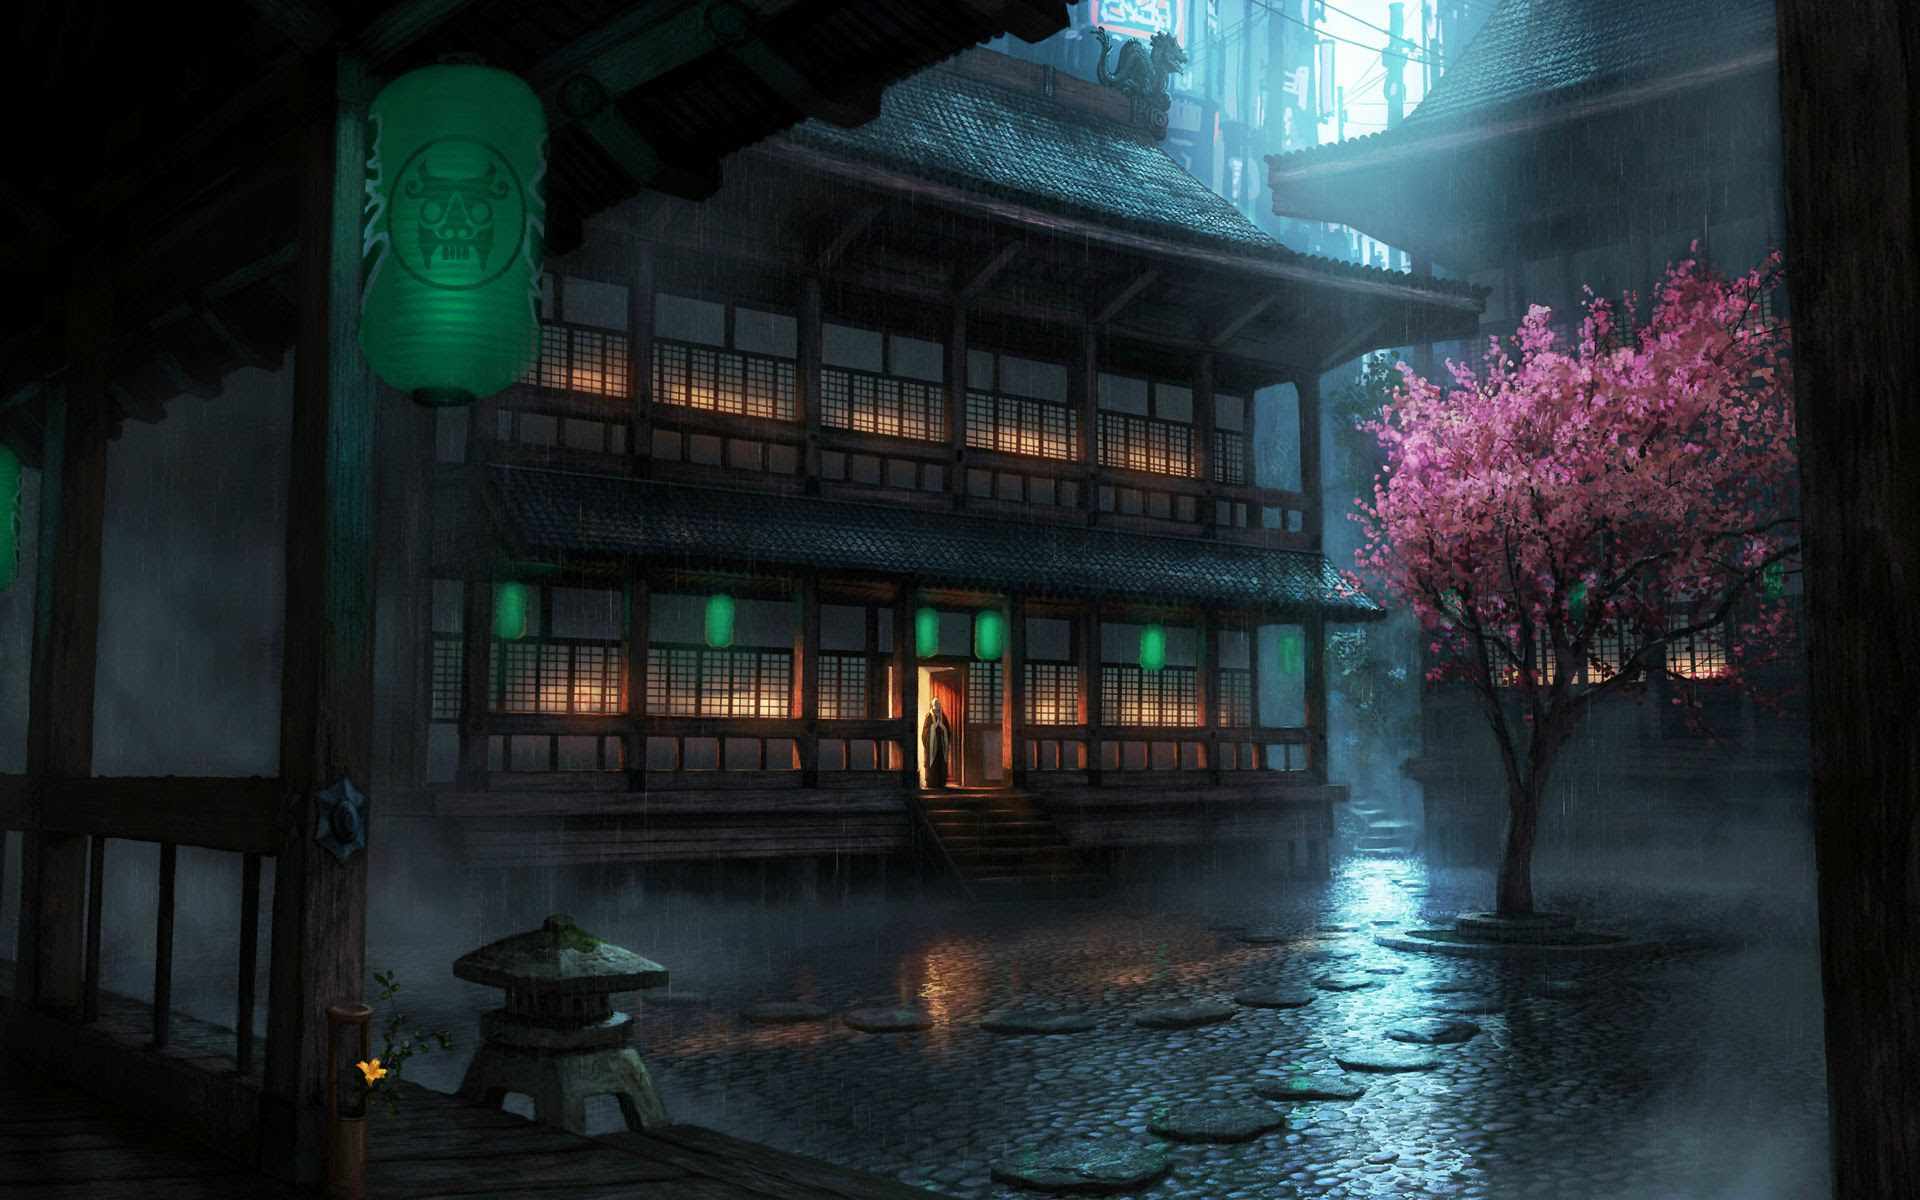


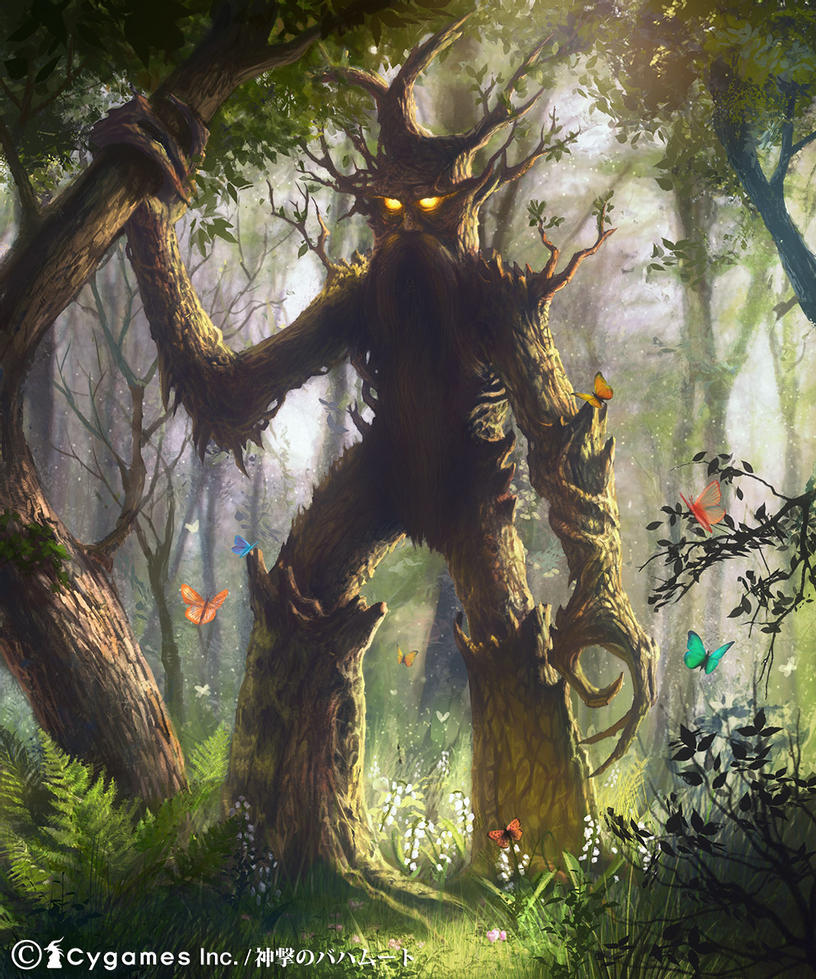


.jpg.006e7b7c8491260f89b1b6ec1a22de46.jpg)

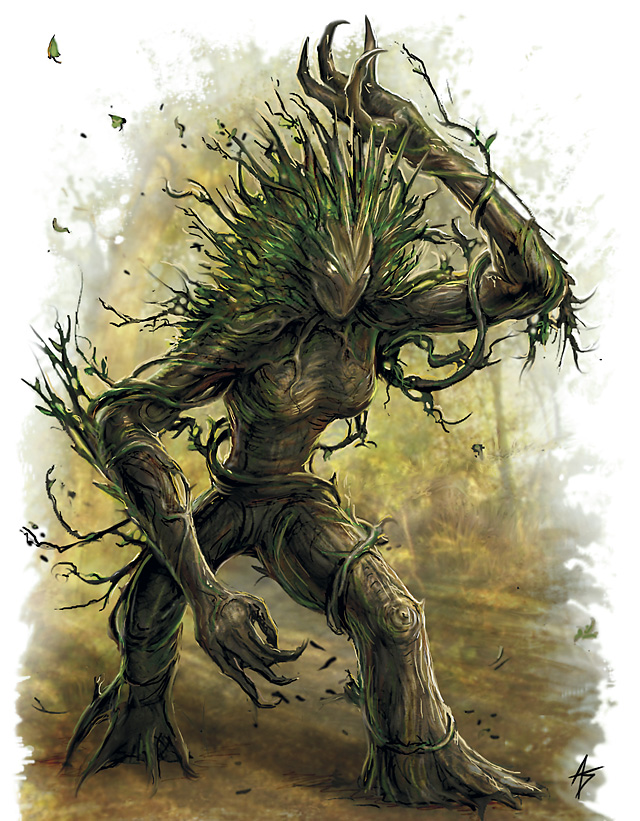
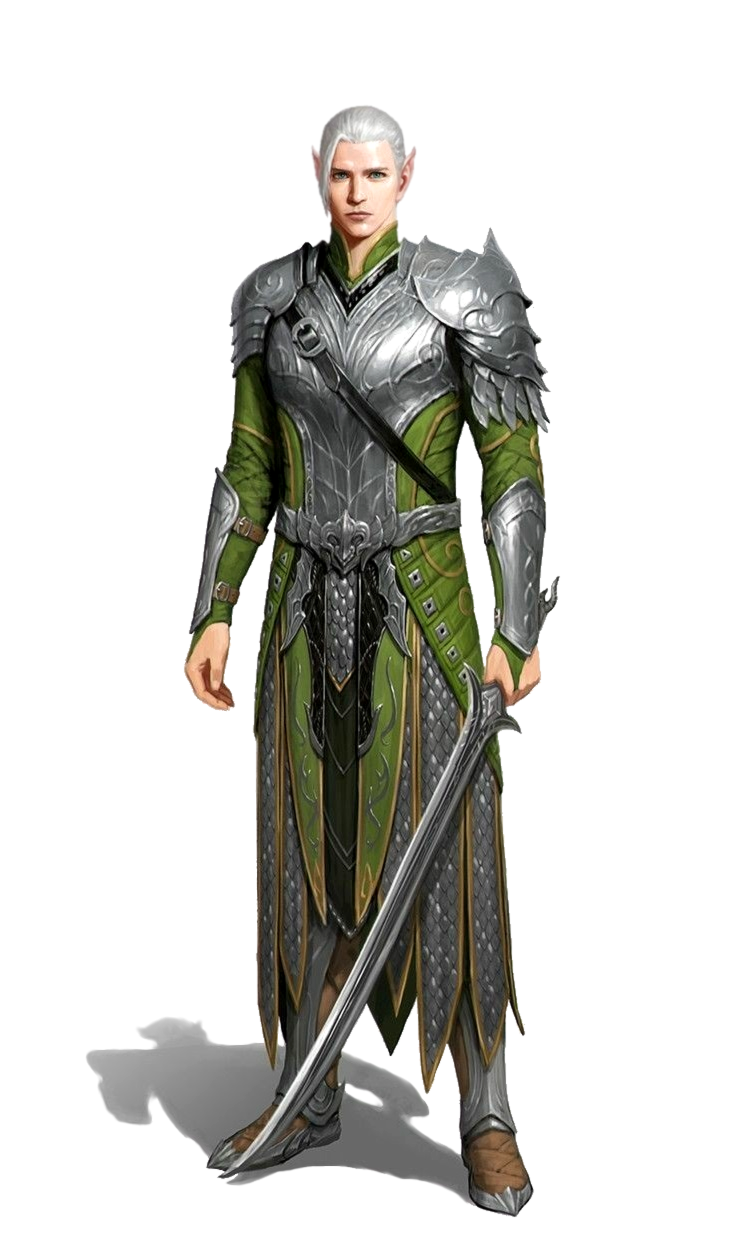
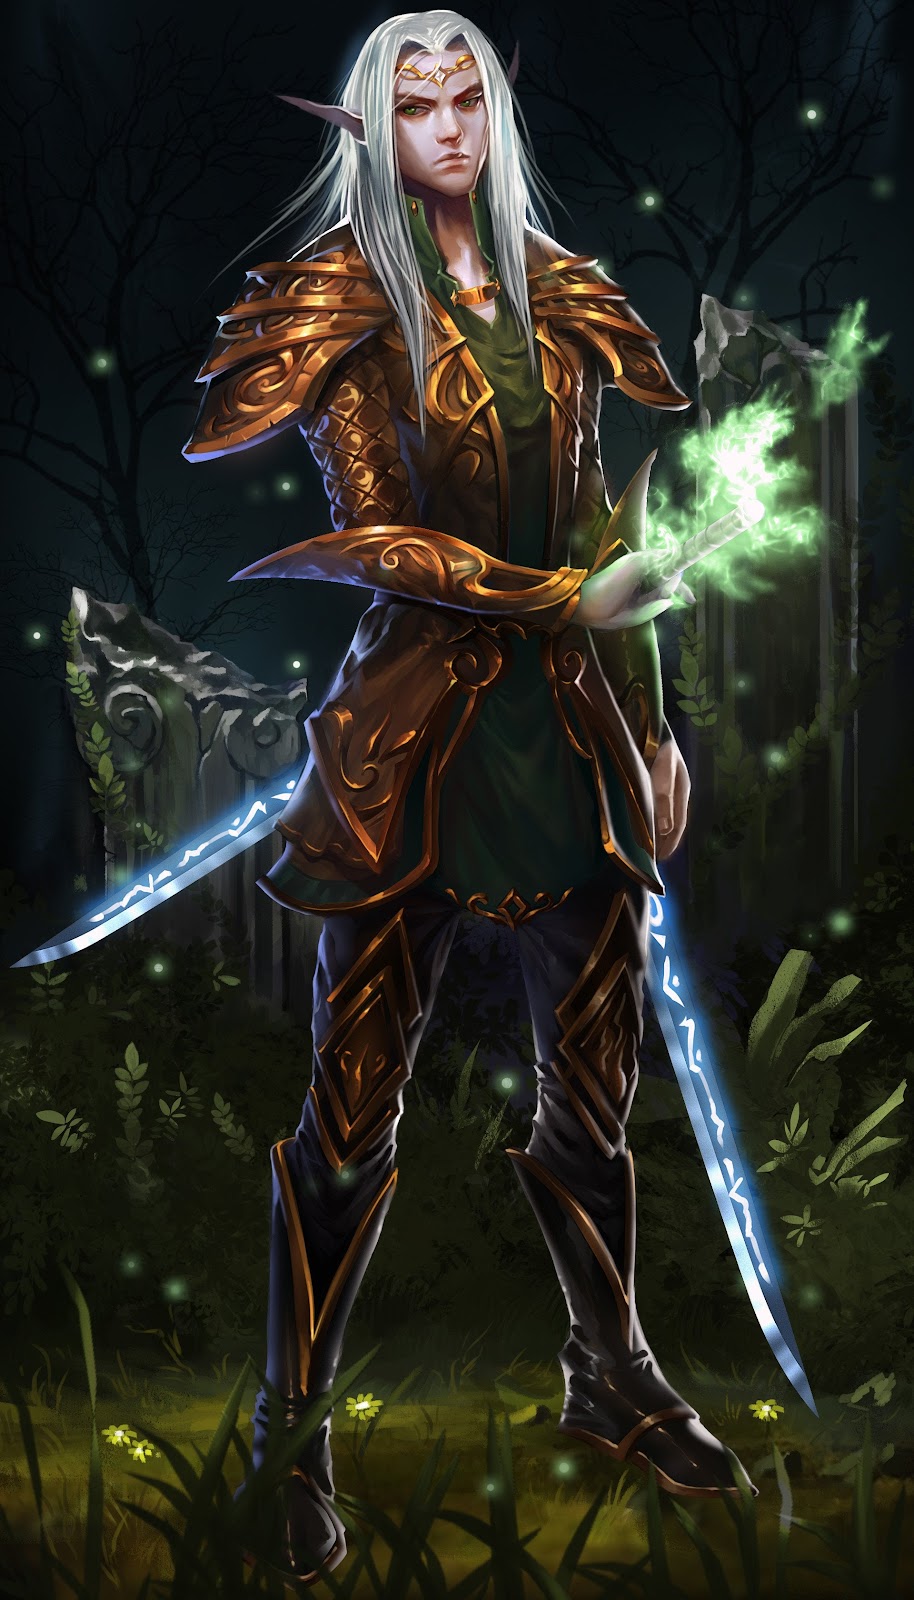


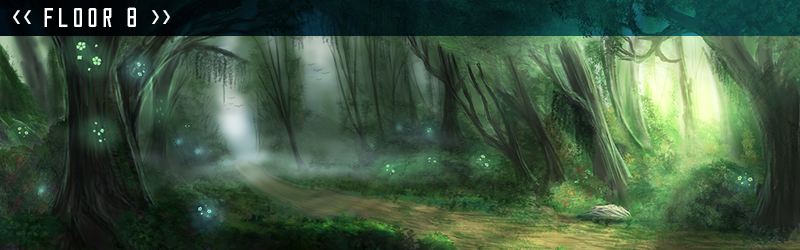


Aincrad Floor Index (11→28)
in Intermediate Floors
Posted
«Teleport Gate»
Note: ◉ & ◉ signify whether or not mobs spawn in a location, and if a player can be killed there.
Orange Players are only hindered by the guards in established cities. They may still enter these "safe zones."