Cardinal
-
Content Count
96 -
Joined
-
Last visited
Content Type
Profiles
Forums
Calendar
Blogs
Posts posted by Cardinal
-
-
-
<<Champion's Hall>>

After a long, arduous journey to become stronger, players will receive a message informing them that the 'Champion's Hall' has now been made available to them. Speaking its name instead of a Town on top of every floor's teleporter will lead to a gilded hallway. The walls are lined with altars displaying both new and old items players may be familiar with. Suits of armor and weapons on statues flank each alter. Trying to save this location to a teleport crystal will not work, and any players that haven't been messaged by the system regarding this place will be unable to travel there, even if they try.
Upon trying to pick one of the items up off its altar, all of the statues will raise their weapons as though guarding them, and prevent players from getting any closer. From there on out, the only option is to leave the hall, as no more than one player may be present in it at a time. Which floor or where this hall is remains a mystery, but perhaps it'll be uncovered, sooner or later.
Rules:
- Players may post in the Champion’s Hall once per month (30 days since the last post) in order to obtain a copy of an expired or seasonal consumable.
- Players may not interact with one another in their posts. This is a consequence of the one post per month rule the thread follows.
Champion's Choice
Spoiler-
Duality (1)
Choose one of the following effects: +30 MIT, -3 DMG or +3 DMG, -30 MIT. These effects stack with other buffs.
-
Love's Respite (1)
Using this item will reset one's crafting attempts. This item can be used in conjunction with Crafter's Respite in the same day.
-
Memory of Battle (1)
Doubles the bonus from Scents of the Wild totems for a single thread.
-
Memory of the Blood Crystal (1)
Replace an enhancement slot on a weapon with the Vampiric (Offensive) enhancement for a single thread.
-
Galaxial Water Snake (1)
Provides +1 CD when rolling to train familiars in <<Taming your Friend>>. Can also be used to change a familiar's appearance to a starry sky’s form of itself. Single-use item. CD buff lasts for one thread.
-
Ghost Treat (1)
Allows its user to skip the searching portion of the <<Feeding your Enemy>> quest. If the player fails to tame the creature, they will have to find it again by the searching rules in the quest. Can also be used to change a familiar’s appearance to a ghostly form of itself.
-
Horn of Battle (1)
Sounding this horn will grant oneself and their party +2 increased energy regen for a single thread.
-
Respec Ticket (1)
Allows a single enhancement slot on a single piece of gear to be replaced with an enhancement of the player's choosing at a crafter who specializes in the gear's item type. Players may only select enhancements from the crafter's standard enhancement table, and enhancements must continue to obey their slot caps.
-
Burning Determination (1)
Applies BURN I to one's weapon for a single thread. This application exceeds equipment caps as a separate source, but two instances of the effect from this item will not apply.
-
Cold Shoulder (1)
Applies FREEZE I to one's weapon for a single thread. This application exceeds equipment caps as a separate source, but two instances of the effect from this item will not apply.
-
Die For Me! (1)
Applies BLEED I to one's weapon for a single thread. This application exceeds equipment caps as a separate source, but two instances of the effect from this item will not apply.
-
Bring the Thunder (1)
Applies PARALYZE I to one's weapon for a single thread. This application exceeds equipment caps as a separate source, but two instances of the effect from this item will not apply.
-
Extinguished (1)
Applies FIREPROOF to the user for a single thread.
-
No Chill (1)
Applies ANTIFREEZE to the user for a single thread.
-
Iron Will (1)
Applies BLOODCLOT to the user for a single thread.
-
Weather the Storm (1)
Applies PARALYTIC IMMUNITY to the user for a single thread.
-
Ring of Platinum Keys (5)
Each Platinum Key is a single-use item that grants +3 LD when opening a Treasure Chest. Only one Platinum Key made be used per thread.
-
Blessed Bandages (3)
A package of linen bandages inscribed with blessed and holy runes. Each bandage removes one debuff on a target party member of the player's choice. Requires a post action to apply.
-
Floor 26
<<Slime Conundrum>>
Party Limit: 6 | 20+ Posts
Repeatable for standard page rewards, col, and items.Quest Rewards:
- 6,000 EXP
- 22,500 Col
- King’s Core (T4/Unique/Consumable): The user gains +20% Overhealth and +80 MIT at the cost of -10 DMG. This item does not stack with Overhealth consumables
Requirements:
- Roleplay entering the sewers
- Make your way through the hordes of slimes in the dungeon
- Defeat the Slime King
- Collect the treasure in the Slime King’s chest
Summary:
With the Shadow’s fall, the 26th floor was unlocked, revealing a sprawling city. There are very few areas one could call dangerous, but the sewers are certainly among them. They are filled those in hiding, be it due to a wanted status, or a simple desire to disappear. Regardless of their reasons, these inhabitants all have one thing in common - the struggle to survive in such a godless place. This necessity has led to the rise of numerous information brokers, all of whom have explored the sewers.
It was these info brokers who first spoke of a special dungeon hidden, albeit poorly, in the sewers. With multiple entrances throughout, it’s easy to access, but the simplicity ends there. The dungeon itself is packed with very strong gelatinous, foes. They are agile and deadly to those who do not properly prepare themselves. These monsters are tenacious, and determined to protect whatever lies at the deepest point of the dungeon. The brokers suspect it is a mother slime, or even a king. Human or monster? Only one way to find out.
Outline:
The players must first roleplay entering the sewers, and locating one of the multiple entrances to the dungeon. Next, they’re met with waves of combat that they must clear in order to reach the dungeon’s boss.
Once they’ve entered the dungeon, they’re faced with the first party of enemies. It consists of x3 Slime Worms, x1 Slime Polyp and x1 Slime Abomination.
Upon defeating them, they may delve further in to find the second party of enemies. This wave is made up of x1 Slime Worm, x3 Slime Polyps and x2 Slime Abominations.
With room to rest before their next encounter, each party member may choose to spend a post action to recover their health and energy back to full. Next, they must find the dungeon’s final corridor. There, they will be faced with a single <<Slime King>>. However, not all is as it appears. Once he is felled, he will be regenerated, although slightly weaker than the time prior. He will come back twice in total. Defeating all three of his forms will lead to a congratulatory message, showing the party their way out of the dungeon, and providing them with ample amounts of col and EXP.
Enemies:
<<Slime Polyp>>
A tower that appears to be static, but can stretch any direction it wants to dodge or extend the reach of its attacks. Weapons, bones and trash can be seen floating inside it, as though they’re caged up.HP: 800
DMG: 80
MIT: 60
ACC: 3
EVA: 2Toxic: On an MD 9-10, the monster’s attacks will inflict T4 Blight for two turns on their targets.
Acid Spit: In the case of a CD 6+ and MD 9-10, the attack will become an AoE and target the four players with the highest hate.
Unison: If another Slime monster falls, <<Slime Polyp>> will gain +10 DMG for the rest of the battle.<<Slime Worm>>
Although its body is a lot more dense than the rest, it’s still fairly agile. It isn’t capable of taking hits in stride, as evidenced by the various cuts across its form, but it can just as easily dish them out itself.
<<Slime Worm gets its own separate roll to attack.>>HP: 1200
DMG: 120
ACC: 3
EVA: 1Predator: On an MD 10, <<Slime Worm>> will attack again. This effect cannot occur twice in a row.
Toxic Touch: If an attack roll against a <<Slime Worm>> results in an CD 10+, the player will lose 3 base DMG for the next two turns. This effect does not stack.<<Slime Abomination>>
An assortment of bones, all covered in a thick, bouncy slime. At the end of each of its appendages lies another head, but they appear non-functional. Its core swims at the very center of what would be its torso, open wide and exposed.HP: 900
DMG: 100
MIT: 40
ACC: 4
EVA: 2Back and Forth: If a <<Slime Abomination>> takes 500 DMG before its next turn, it will attack twice during the following turn.
Strength in Numbers: If any other Slime monsters are alive, every second attack, the <<Slime Abomination>> will instead heal every Slime for its DMG.
Unison: If another Slime monster falls, <<Slime Abomination>> will gain +10 DMG for the rest of the battle.<<Slime King>>
A wretched being that has taken over this part of the sewer. It appears to spawn slimes out of its own body, blending them with whatever trashed objects he can find to preserve as much of his own existence as possible.
<<Slime King gets its own separate roll to attack.>>HP: 5000/2500/1250
DMG: 220
MIT: 50
ACC: 4
EVA: 4King’s Aura: The <<Slime King>> is unaffected by Paralyze, Freeze and the Familiar’s Grappling skill.
Almighty: The boss cannot be afflicted with both Lullaby and Hypnosis.
Pure Structure: Any DoT effects on the boss will last half their original duration, except for Burn. Afflicting the boss with Burn will also deal double damage to it.
Self Sustaining: On a CD 9+, <<Slime King>> will heal 100 HP at the end of his turn.
Royal Gel: On an MD 9-10, the <<Slime King>> will launch an AoE attack at the four players with the highest hate, dealing 160 DMG and afflicting them with T4 Blight for two turns. This skill cannot occur once <<Gelatinous Form>> has activated.
Quick Split: On a CD 9+ and LD 10+, the <<Slime King>> will not attack and instead, summon a <<Slime Abomination>> to his aid. A <<Slime Abomination>> can only be summoned once per turn. This skill is deactivated once <<Gelatinous Form>> has activated twice.
Gelatinous Form: Every time the boss’ health reaches 0, two more Kings will spawn, using the next lowest HP available. If a Slime King with the lowest amount of max HP possible dies, he will not spawn any more.
Epilogue:
SpoilerAs the final blow is dealt, the <<Slime King>> explodes, sending pixels and bits of green goo in all directions. This time, he actually stays dead. Yet even as Players celebrate, and follow the quest's prompts out of the dungeon, tiny bits of slime creep closer to each other across the dirty, trash-littered floor.
-
Floor 25
<<Trouble Brewing>>
Party Limit: 6 | 20+ Posts
Repeatable for standard page rewards, col, and items.Quest Rewards:
- 5,000 EXP
- 20,000 Col
- Dragon’s Jewel (T4/Unique/Consumable): Provides the user with DMG +5, at the cost of all non-action inhibiting, negative status effects lasting twice their original duration against the user. This effect does not stack with other Damage (Potion/Crystal) Consumables.
Requirements:
- Roleplay entering the maze
- Locate a Foreboding Tower (LD 18+)
- Defeat the Shadow Dragon Matriarch in its lair
Summary:
Rumblings of another powerful enemy are causing mass confusion and wide-spread fear across the 25th floor. NPCs worry that the floor they call home may be destroyed, while Players wonder what the appearance of this powerful enemy might mean for the game. Not only is the dragon fearsome, it's arrival has been accompanied by a frightening boom in the Shadow Dragon population.
Now, exploring the maze's many twisting corridors is even more risky than usual; Players are bombarded with hellfire as soon as they dare turn a corner. This menace in question is said to live atop one of the ten Foreboding Towers that line the maze. To find the dragon is an arduous task, as the towers rotate daily. To make matters worse, it often flies from one tower to the other, setting up camp for a few days before nesting on the next one. Whatever it’s doing to keep the Shadow Dragon population up, be it feeding them or giving birth to more, it needs to be stopped before the maze becomes impassable.
Outline:
The players must first roleplay entering the maze, and then begin rolling their LD as a post action to locate one of the Foreboding Towers. They must roll an LD 18+, including modifiers to locate a tower. Once they do, they may roleplay their ascent up the tower, or gloss over it as they see fit, before they’re met with the Shadow Dragon Matriarch. Once they defeat her, they may expend a post action on rolling nat LD to see which tower they ended up on, which will cause the loot to vary.
In the case they roll an LD of 1-6, the players will find a stash of T4 Unidentified Demonic Weapons equal to their party amount.
In the case they roll an LD of 7-12, they will find a stash of T4 Unidentified Demonic Armors equal to their party amount.
In the case they roll an LD of 13-18, they will find a stash of T4 Unidentified Demonic Trinkets equal to their party amount.
If they roll an LD 19-20, the players will instead be rewarded with 1 Demonic Shard and 2 Gleaming Scales each.
Enemies:
<<Shadow Dragon Matriarch>>
A fearsome and large Shadow Dragon. Unlike the rest of them, it’s slower but its scales can deflect attacks with ease, and its strength is overwhelming. Its black fire breath appears deadly enough to make most want to steer clear of the beast.
<<Shadow Dragon Matriarch>> gets its own separate roll to attack.HP: 4500
DMG: 250
MIT: 150
ACC: 3
EVA: 1
Dragon’s Scales: The Matriarch’s scales protect it, not allowing its MIT to drop below 110.
Pureblood: The boss is immune to Hypnosis, Lullaby, Misperception, Paralysis, Freeze as well as the Familiar’s Grappling Skill.
Tail Swipe: When rolling MD 9-10, the Matriarch will use its tail as a whip to attack all of the party, dealing 120 unmitigatable damage and lower everyone’s energy by 10.
Piercing Gaze: On a CD 10+, the boss will paralyze the player with the lowest hate for a turn before attacking normally. This skill cannot activate alongside <<Tail Swipe>> or <<Hellfire>>.
Vicious Stomp: In the case of a CD 6-9 and LD 10+, the Matriarch will stomp the ground, lowering the entire party’s EVA by 1 for two turns. This effect does not stacked and any further activations will refresh its duration.
Preparation: Every four turns, the boss will attack the player with the highest hate for 100 DMG before flying up in the air, preparing to bombard the players with fire on its next turn.
Hellfire: After staying in <<Preparation>> for a turn uninterrupted, the boss will breathe out fire on the players, dealing 300 unmitigatable DMG and applying 24 Burn DMG for the next two turns.
Bring Down The House: If the Matriarch is still in <<Preparation>>, players can deal 750 DMG to it to knock it out of the sky. Doing so will prevent it from using <<Hellfire>> and deal an additional 250 unmitigatable DMG to it.
Epilogue:
SpoilerAt long last, the Matriarch has been defeated. The population of the Shadow Dragons will steadily dwindle, and the maze will become a less perilous trek once more. At least, until another Shadow Dragon takes up the mantle, and continues where the previous Matriarch left off. But the Players should have enough time to recover before that happens.
-
Floor 24
<<In Too Deep>>
Party Limit: 6 | 20+ Posts
Repeatable for standard page rewards, col, and items.Quest Rewards:
- 5,000 EXP
- 15,000 Col
- Shore’s Treasure (T4/Unique/Consumable): Doubles a user’s Prosperity buffs for a single thread.
Requirements:
- Roleplay the group making their way to the Paradise Islands
- Defeat the Sand’s Claw
- Check around the shore for extra loot by rolling nat LD 15+
Summary:
Rumors have begun to spread across the more recently unlocked floors. There is talk of strong monsters making their territory well known, and aggressively trying to protect it, warding off NPCs and players alike. Some block off useful resources, while others only make travelling about the area a nuisance at worst. If the stories are to be believed, the creatures are incredibly strong. Whoever can bring an end to them will surely receive an abundance of col and rare items.
On the Paradise Islands of the tropical 24th Floor, a huge rock can be seen shifting about the sands from time to time. Occasionally, it even stretches a massive claw out to snap at whatever tries getting close. Little else is known about the creature, and as such, it’s only natural that the island’s citizens warn players to never go near it. Upon getting too close to the beach where the <<Sand’s Claw>> is said to lay, a quest prompt will emerge for players to accept or decline. Regardless of their choice, it’s advised that Players prepare themselves, should they decide to keep forging ahead.
Outline:
The players will need to roleplay their trip to the Paradise Islands in however many posts they please before facing the <<Sand’s Claw>>. Upon defeating it, they’re free to spend their post actions on searching the beach up to six times total.
Rolling the LD, players must get a natural LD 15 or higher in order to discover a group of <<Sand Dollars>> equal to their party size. Taking out these weak enemies will result in extra treasures for those lucky enough.
Enemies:
<<Sand’s Claw>>
A massive crab with a boulder on its back. Despite the looks though, it’s too slow to pose a threat against a well coordinated group. So long as one stays out of its grip, they’ll be just fine.
<<Sand’s Claw>> gets its own separate roll to attack.
HP: 4000
DMG: 220
MIT: 125
ACC: 3
EVA: -1Tough Shell: This monster’s MIT and ACC cannot be reduced, and it remains unaffected by Incarcerate, Paralysis and Freeze effects.
Too Large: Familiars’ Grappling Skill cannot be used to stun the boss. Only normal stuns will work on it as a result of SAs or skills being used, and they will have a 4 turn cooldown.
Pincer Attack: Sand’s Claw will attack two times during its turn, targeting the player with the highest hate, and then the player with the second highest hate. Perform one attack roll for each attack.
Sand Cloud: Upon rolling CD 9+ and LD 10+ during one of its attacks, the boss will instead raise a cloud of sand from the beach, lowering each player’s ACC by -1 for their next two turns. This effect does not stack and any further activations will refresh its duration.
King’s Grip: On an MD 10, Sand’s Claw will lower the target’s MIT by 15 for the next two turns. This effect stacks up to two times, and any further activations will refresh its duration.
Bubble Spray: On an MD 10 and CD 6+, Sand’s Claw will instead hit the entire party for 125 unmitigatable DMG, lowering every player’s EVA by 1 for two turns. This effect does not stacked and any further activations will refresh its duration.
Gobble Up: If the boss’ health reaches 2000, on its next turn it will skip its attack and start eating rocks. It must be hit with 3 or more Delay SAs until its next turn, otherwise it will expend it on healing 1000 HP. This can only occur once per battle.
Soft Skin: Once afflicted with Bleed, the effect will not wear off for the remainder of the battle.
Unguarded Sides: Area of Effect attacks consume twice the base energy, but deal 50% (rounded up) more damage.<<Sand Dollar>>
HP: 25
DMG: 10
MIT: 5Stacked: Defeating a Sand Dollar will result in the Players getting +200 EXP each, as well as +2,000 Col to split however they please at the end of the thread.
Heavy Pockets: Once a group of Sand Dollars is defeated, one of the players may roll CD. On a CD 10, Unidentified Demonic T4 Trinkets are found. On a CD 11, Unidentified Demonic T4 Weapons are found. On a CD 12, Unidentified Demonic T4 Armors are found. These rolls are not affected by buffs, and the amount of equipment found is equal to the players present in the party.
Few Stragglers: No more than two groups of Sand Dollars can be found in a single thread.
Epilogue:
SpoilerHaving defeated the monstrous crustacean, the Players are now free to leave the 24th Floor... The villagers appear to be more at ease with the departure of the adventurers, but also unsure of how to return the favor for the time being. Should the Players again feel up to the task when another <<Sand's Claw>> emerges, the villagers will certainly be willing to pay handsomely for its removal.
-
Floor 1
<<Black Iron Dungeon>>
Party Limit: 4 | 20+ Posts
Repeatable
Quest Rewards:
-
Any materials and loot that you find/gather.
Requirements:
- None.
Summary:
Beneath the Black Iron Palace in the Town of Beginnings lay a hidden dungeon that wasn’t discovered until recently. The revelation of its existence came as a shock to the Players of Aincrad, who had tirelessly scoured the first floor since the game’s debut. Had they simply overlooked it during their investigations? Or had it sat in waiting for the opportune moment to present itself?
Once it was discovered, a scout team was sent in to investigate. The first few levels were fairly easy, but the difficulty ramped up rapidly. After encountering a trap room that locked them inside and disabled Teleport Crystals, two members of the party were killed, and the survivors were consequently forced to turn back. Ever since, it has been seen as taboo for all but the most powerful of warriors to venture into its depths. Even then, it is stressed that survival is not guaranteed.
Outline:
The Black Iron Dungeon is an atypical dungeon that hosts powerful mobs, dangerous traps, and untold treasures. The Black Iron Dungeon holds multiple levels, descending downwards.
Loot earned within the dungeon will be tiered to the Black Iron Dungeon's Level number (Level B1 = Tier 1 loot, Level B2 = Tier 2 loot, etc). Standard loot tables apply when looting mobs/bosses/treasure chests.
Maps looted from monsters in the Black Iron Dungeon will open on any floor currently available and the dungeon's tier will scale to that floor.
New levels will be unlocked at each new tier in Sword Art Online. See the following for specific details of each level.
Spoiler[LEVEL B1]
Unlocked instantly.Standard Mobs present here will have varying stats that adhere to the following parameters:
- HP: 20 ~ 200
- DMG: 6 ~ 60
B1 Trap: The player steps on a panel. As the panel sinks into the floor, arrows will rain upon the party from above, dealing 50 unmitigatable damage. Players with three slots of EVA in their armor will be nimble enough to avoid damage, while Players with three slots of MIT will witness the arrows harmlessly bounce off of them.
B1 Boss Monster will adhere to the following parameters:
- HP: 1000
- DMG: 120
- EVA: 1
- ACC: 1
[LEVEL B2]
Unlocked at Tier 2.Standard Mobs present here will have varying stats that adhere to the following parameters:
- HP: 220 ~ 400
- DMG: 66 ~ 120
B2 Trap: The floor beneath the Players shifts, creating a downward slope where the path was once level. Only once the floor has pitched will the Players realize it is slicked with some sort of mysterious oil. They’ll slide helplessly down the ramp and into a shallow pool of viscous ooze, which covers their bodies and reduces their mobility. EVA and ACC are reduced by 2 for the next combat encounter, and Sword Arts will cost an additional 2 EN each until the fight has concluded.
B2 Boss Monster will adhere to the following parameters:
- HP: 1500
- DMG: 180
- MIT: 50
- EVA: 1
- ACC: 1
[LEVEL B3]
Unlocked at Tier 3.Standard Mobs present here will have varying stats that adhere to the following parameters:
- HP: 420 ~ 600
- DMG: 126 ~ 180
B3 Trap: The corridor suddenly becomes pitch black, filled with a darkness so palpable the Players can practically feel it. As though pulled along like a puppet by invisible strings, a Boss Monster will lumber into view, shambling toward the Players like a predator with prey in its sights. Seemingly immobilized by the sudden onset of the darkness, the Players won’t regain mobility until the Boss Monster has reached them, forcing them to fight.
B3 Boss Monster will adhere to the following parameters:
- HP: 2000
- DMG: 240
- MIT: 75
- EVA: 1
- ACC: 2
[LEVEL B4]
Unlocked at Tier 4.Standard Mobs present here will have varying stats that adhere to the following parameters:
- HP: 620 ~ 800
- DMG: 186 ~ 240
B4 Trap: Shackles erupt from the floor and walls of the corridor and bind the Player that tripped the trap. A surge of electricity runs along the length of the chains and into the Player, instantly reducing their HP to red (25%). The energy will arc to all surrounding Players, inflicting 50% of the damage dealt to the target Player as unmitigatable damage. The ruckus will attract five nearby loot minimum mobs, who will attack the Players on the following post.
B4 Boss Monster will adhere to the following parameters:
- HP: 2500
- DMG: 300
- MIT: 100
- EVA: 1
- ACC: 2
- Immune to Debuffs.
Exploration
Every fifth post (post #5, post #10, post #15, etc.) within this dungeon requires a roll for LD, even when in the middle of combat against standard mobs. This LD can only be influenced with the Searching Skill and/or Scouting Familiar and/or Nimble Cloth Armor Mod. This roll does not require a Post Action, but must be performed separately and after all other rolls within the post. In the event that the Player(s) are already engaged with a Boss Monster, Chest Room, or Trap, they are exempted from this roll.
LD Result Outcome [1] Boss Monster encounter. [2] Trap encounter. [3 - 18] Nothing happens. [19+] Chest Room encounter. Chest Room
When opening a Chest in a Chest Room within the Black Iron Dungeon, roll for natural CD and LD. LD may only be modified by the Lock Picking Skill and/or a Scouting Familiar.
If your CD is 7 or lower, the chest will be empty. The room will lock and trap the Player(s) inside, disabling Flee mechanics as well as Teleport Crystals. When the room locks, the walls will open to reveal 10 mobs with stats relative to the maximum the Dungeon Level you are on permits.
In the event that your CD is 8 or higher, the chest will produce loot as normal in accordance with the natural LD. All party members will receive a copy of the loot produced by the chest.
LD Result Rewards [1 - 4] (Dungeon Level * 1000) col, (Dungeon Level * 3) Materials. [5 - 8] (Dungeon Level * 2000) col, (Dungeon Level * 5) Materials. [9 - 12] Unidentified Perfect Weapon (1)
Unidentified Perfect Armor/Shield (1)
Unidentified Perfect Trinket (1)[13 - 16] Unidentified Perfect Weapon (2)
Unidentified Perfect Armor/Shield (2)
Unidentified Perfect Trinket (2)[17 - 18] Unidentified Perfect Weapon (3)
Unidentified Perfect Armor/Shield (3)
Unidentified Perfect Trinket (3)[19+] Gleaming Scale (1) or Demonic Shard (1) Bonus EXP
Players can potentially receive bonus EXP for each page completed or Boss Monster killed within the Black Iron Dungeon, provided they are interacting with the floor corresponding with their own Tier. This bonus EXP is progressively unlocked as the Player completes Sword Art Online’s quest content, with the exception of these quests:
- Making Vows
- Saying Vows
- Breaking Vows
- Nature's Treasure
- Redemption
- Black Iron Dungeon
The Bonus EXP breakdown is as follows:
-
50 quests completed:
- Boss Monster = Current Highest Floor * 100 EXP
- Page Completion = Player Tier * 75 EXP (in addition to standard page rewards)
-
75 quests completed:
- Boss Monster = Current Highest Floor * 200 EXP
- Page Completion = Player Tier * 125 EXP (in addition to standard page rewards)
-
100% of quests completed:
- Boss Monster = Current Highest Floor * 300 EXP
- Page Completion = Player Tier * 175 EXP (in addition to standard page rewards)
Epilogue:
Spoiler—Are you still in one piece?
Yeah?
Cardinal will try again another time.
-
-
Below are a list of words defined to be related to SAO-RPG's systems and setting. Search for 'define: [term]' on this page to look up the term's definition. Players are invited to add words and their definition by submitting them to the #suggestions channel on Discord.
GENERAL define: SAO
Short for Sword Art Online, the name of the franchise that this roleplay is based off of, and the name of the game that players in this roleplay are trapped in.define: VRMMORPG
Short for Virtual Reality Massively Multiplayer Online Roleplaying Game, a new type of video game genre that takes advantage of virtual reality technology to create a realm that supports a large number of players.define: FullDive
FullDive defines a type of VR simulation where the player's consciousness is fully transported into a simulated reality.define: NerveGear
NerveGears are the periphery with which Sword Art Online uses to connect its users to the game. It takes advantage of FullDive technology.define: Cardinal
The name of the system that runs Sword Art Online. It is capable of monitoring player behavior and states as well as control enemies and generate new content for players in the game.define: Aincrad
The world and setting of Sword Art Online. Aincrad is described as a giant iron castle in the sky, consistent of 100 floors. The game will end once the boss of the 100th floor has been defeated.define: Floor
A vertically-separated layer within the castle of Aincrad. Each floor differs from one another in terms of environment, enemies and atmosphere.define: Settlement
Cities of a floor. The main hub of a floor is often referred to as the main settlement.define: Teleporter
The main method of transportation between the different floors and realms of Aincrad. There is a teleporter in every main settlement of a floor.SAO-RPG define: SP
Short for Skill Points. Alternatively, if used in a thread title, short for Solo Party.
Further Reading: [Skills & Mods] | [Thread Anatomy]define: PP
Short for Private Party. Commonly found in thread titles.
Further Reading: [Thread Anatomy]define: OP
Short for Open Party. Commonly found in thread titles. Alternatively, if used in a chat context, slang for overpowered.
Further Reading: [Thread Anatomy]define: 1HAS, OHAS, 2HAS, THAS
Short for One-Handed Assault Spear or Two-Handed Assault Spear respectively. Both are weapon types and weapon skills players may obtain in SAO-RPG.define: 1HSS, OHSS, 2HSS, THSS
Short for One-Handed Straight Sword or Two-Handed Straight Sword respectively. Both are weapon types and weapon skills players may obtain in SAO-RPG.define: 1HBA, OHBA, 2HBA, THBA
Short for One-Handed Battle Axe or Two-Handed Battle Axe respectively. Both are weapon types and weapon skills players may obtain in SAO-RPG.define: MA
Short for Martial Arts. It is a weapon type and weapon skill that players may obtain in SAO-RPG.define: SA
Short for Sword Art. They define combat movements used by players and guided by Cardinal.
Further Reading: [Sword Arts]define: Tier
Indicates the required level of a player to equip or consume an item. New tiers are unlocked at specific floor intervals.
Further Reading: [Tiers]COMBAT define: HP
Short for Health Points. When this reaches 0, a character is forfeit.
Further Reading: [Stats] | [Combat Stats]define: EN
Short for Energy. In combat, this resource limits how many sword arts and/or skills players can use in succession.
Further Reading: [Stats] | [Combat Stats]define: DMG
Short for Damage. Defines the amount of damage a player is able to deal to a given enemy in combat. All players have at minimum a DMG of 1.
Further Reading: [Stats] | [Combat Stats]define: MIT
Short for Mitigation. Defines the amount of damage a player is able to negate from enemies in combat.
Further Reading: [Stats] | [Combat Stats]define: ACC
Short for Accuracy. Defines how well a player is able to land strikes on their target in combat.
Further Reading: [Stats] | [Combat Stats]define: EVA
Short for Evasion. Defines how well a player is able to avoid strikes from enemies targeting them in combat.
Further Reading: [Stats] | [Combat Stats]define: Post Action
An action that requires a player to make a post to execute.
Further Reading: [Post Action]define: Free Action
An action that does not require a player to make a post to execute. Often, players may only execute one free action per post.
Further Reading: [Free Actions]define: Base DMG
Also known as Base Damage. A player's DMG stat taken at the moment of damage calculation. May be modified during combat by critical hits or skills.
Further Reading: [Calculating Damage Values in Combat]define: Final DMG
A player's damage dealt to an enemy after calculations are complete (sword art multipliers, enemy's MIT deduction, etc).
Further Reading: [Calculating Damage Values in Combat]define: Phase
An action's attribute that directly deducts from mitigation before Final DMG is calculated. Differs from the 'Phase' Unique weapon enhancement. The percentage indicated in front of Phase (eg. 50% Phase) indicates the amount of mitigation deducted or ignored.
Further Reading: [TBD]define: CHARACTER GROWTH define: Skills
Skills often describe specializations that a character has decided to invest in. Skills may be bought using a character's SP.
Further Reading: [Skills]define: Extra Skills
Separate from Skills, Extra Skills allow players to perform different actions in Combat. These Extra Skills may be obtained from quests or through the expenditure of SP.
Further Reading: [Extra Skills]define: Combat Mastery
A special type of skill that greatly boosts the capabilities of a character starting from Tier 2. Only one Combat Mastery may be obtained per character at any time.
Further Reading: [Resources List]define: Familiar Mastery
A special type of skill that requires the aid of a Familiar to utilize. Only one Familiar Mastery may be obtained per character at any time.
Further Reading: [Resources List]define: define: Table of Contents | [top]
Spoiler- Introduction
- Table of Contents
- Starting the Game
-
Character Creation
> Navigating the Site
> Stats, Items & Tiers
> Skills & Mods
-
Roleplay Rules
> Thread Anatomy
> Using the Dice Roller
> Using the Economy Dashboard
-
Gameplay
> Thread Mechanics
>> Post Actions
>> Gathering
>> Treasure Chests
>> Dungeons
>> Combat
>> Looting
>> Stealth
>> Field Bosses
-
> Character Growth
>> Quests
>> Evaluations
>> Familiars
>> Shops >> Professions
>> Guilds
>> Housing
>> Cursor Colours
>> Paragon Levels
>> Custom Skills
>> Custom Sword Arts
-
> End Game
>> PvP, Player Killing
>> Labyrinths
>> Floor Boss Raids
>> Death & Rebirth
- Glossary
-
After scaling to new heights, one may be able to see the light on the horizon. Yes; with their newfound power, special events are available to players to participate in, one where they risk their characters life on the line in an effort to test their characters' strength. The End Game section covers topics such as pitching players against each other, scouring the floors for the Labyrinth, taking on the Floor Boss for progression's sake and even death should their characters meet their untimely demise during this arduous process.
Player vs. Player (PvP) combat is almost identical to normal combat. The hate system is ignored, as players may choose their target regardless of who or what has already attacked them. There are two kinds of PvP combat: Duels and Unauthorized Combat.
Duels
Duels are consensual battles in which one player challenges another. Duels may be initiated at any time and place outside of other combat, including in safe zones/settlements.
When accepting a duel, the challenged party specifies the type of duel. The opposing party must accept the invitation for the following fight to be considered a duel. There are three different types of duels:
- [First Strike]: Whoever lands the first strike wins.
- [Half Loss]: Whoever drops their opponent to 50% or below of their total health wins.
- [Total Loss]: Whoever drops their opponent to 0 HP wins.
After accepting, players are allowed one round (1 post each) to prepare. During the preparation round, each player rolls for initiative on their post (LD) to determine who goes first. A double-post is permitted in an instance where the last person to prepare wins the initiative roll.
Duels have a time limit of 15 rounds/30 posts from when it begins. If the victory condition for the duel is not met within the time limit, the victor is chosen based on who has the highest percentage of their total HP remaining. In the event of a tie, the duel is considered a Draw.
When a duel ends, a large notification will appear between the two players declaring the victor. If the two players are far apart at the end of the duel, they will each receive a notification separately.
If a player is killed in a duel, the victor receives the losing player's col and equipped items.
Unauthorized Combat
Unauthorized Combat is simply the term for combat between players that takes place outside of a duel. Unauthorized combat cannot be initiated in a safe zone.
If a player with a green cursor damages another player with a green cursor in this way, the attacker's cursor will change to orange. We highly encourage players to communicate with others when there is conflict between characters. Whenever one player engages in unauthorized combat with another, it should make sense for them to do so. Using a character to attack or harass another player for OOC reasons will not be tolerated.
Flavoured Combat (no dice rolls) is also encouraged as long as the players involved are communicative and there is no abuse or god-modding taking place.
Player Killing
No player can kill another player without OOC permission. Exploitation of this rule is also disallowed. For example, provoking others to the point where the insulted player would be driven to attack the aggressor may result in the attacker being allowed to PK regardless of receiving OOC permission.
If players are interested in playing a PKer or 'villain'-type character, there is also the alternative of killing flavoured players/NPC player characters. Some quests also provide a route in which players slay NPC characters, which changes their cursor to an orange colour without the need for killing player characters. For more information on cursor colours, read up about the topic [here].
SAO-RPG staff reserves the right to validate, void, or otherwise make rulings on certain actions that involve Unauthorized Combat and Player Killing. Please be communicative with fellow players and staff to ensure everyone can have an enjoyable roleplay experience!
Labyrinths
Labyrinths are tower-like structures with many levels that connect each floor of Aincrad to the one above and below. Their entrances are protected by a guardian, which must be defeated before players can enter the Labyrinth and challenge the Floor Boss, unlocking the next floor up. Labyrinths are initially hidden on every new floor. During their search, players are encouraged to roleplay exploring the new floor: finding settlements, points of interest, or fighting monsters, etc.
Labyrinth Scouting Rules:
- Threads that intend to search for a Labyrinth on a new floor should include the word "Scouting" in the title.
- Scouting parties are limited to a maximum of 4 players.
- The scouting thread's first post must declare the party's participating players.
- All participating players must be of the highest available tier, with respect to level caps (eg. Tier 4 for Floor 27).
- All players in a scouting party must have at least one post of roleplay before any Labyrinth searches can be made.
- The party's participating players must be assigned a bracket in a table with CD values of even distribution.
As scouting for labyrinths is considered a group effort in a tense and hostile environment, post rotation order must be followed as if in combat. No member of the party may post again until every other member has posted at least once after their post. If a Player is eligible to make a search roll, they must do so unless prevented due to a lingering effect of a previous roll. Players are encouraged to come prepared for the relentless, harrowing pace.
Players may begin to roll to find the Labyrinth entrance after 10 posts (i.e. on the 11th post). Labyrinth search rolls take up a post action. At that point, players can make searching rolls (LD) once every character's 4 posts (2 if they have the Reveal mod). As an example, Players A and B can search once after each other, and then must make 3 more posts each before they can roll to search again. The party also needs to keep a running total of everyone's individual roll totals, alongside a party total.
In addition, when rolling to search, each player must consult the table below to determine any other conditions or effects that occur as a result of their search roll.
LD Result Outcome [1-8] The party discovers a puzzle or environmental obstacle. This obstacle may be defined by the party. Each player in the group must each post once, describing their contributions in resolving this obstacle before they are able to resume their search. Players may use this opportunity for rest, but searching cannot resume until this obstacle has been overcome. [9-15] The party is ambushed by a large group of 8 loot-minimum enemies with respect to the highest levelled player present. On a CD4+, enemies will go first in turn order, and will attack the party at random. Determine the party members attacked by CD.
Searching cannot resume until all enemies have been defeated.[16-20] The party encounters a pair of elite enemies with the following stats:
HP: (Tier * 300) | DMG: (Tier * 70) | MIT: (Tier * 30) | ACC: 2 | EVA: 1 | Phase.
On an LD15+, a Sentinel ignores hate and attacks a random party member. Determine this party member by CD.
Searching cannot resume until all enemies have been defeated.[21-25] The party encounters a threat or obstacle which requires stealth to overcome. Each player must make a post to roll for Stealth against a Stealth Detection of 11+. Players that fail lose 25% of their maximum hit points (rounded down).
Searching cannot resume until all players have made their Stealth checks.[26-30] The party finds a treasure chest that has to be opened. A separate post action is required to open it.
On a CD6+, roll for its result as per standard Treasure Chest proceedures. Otherwise, the chest is actually a mimic with the following stats:
HP: (Tier * 500) | DMG: (Tier * 90) | MIT: (Tier * 40) | ACC: 3 | EVA: 3
It immediately attacks the player who attempted to open it before the party can react.
If a mimic is spawned, searching cannot resume until it has been defeated.[31+] Nothing happens. On three consecutive searching results of 31+, the entire party regains all hit points and energy. When the party LD tally meets or exceeds the total LD required, as listed in the Floor Description, they have found the entrance Labyrinth and discovered the guardian that defends it. Send a message to the Floor Developer GM once the total is met for information on the Labyrinth Guardian.
Come thread closing, the player who contributed the most to the LD pool receives 10% bonus EXP. The second-highest contributor receives 5% bonus EXP.
Labyrinth Guardian
While multiple players and parties can go looking for the Labyrinth at the same time, the Labyrinth Guardian can only be fought and defeated once. However, up to 8 players may be involved in the fight against the Labyrinth Guardian. The first party to find it will be given a brief description of it in a separate thread created by staff. This thread will then be used to facilitate the fight.
- If a different party meets the requirements to find the Labyrinth Guardian, the first party will be given a time limit to initiate the fight (if they have not started the fight already).
- Parties that discover the location of the Labyrinth Guardian while the fight is already in progress may be permitted to join the ongoing battle after 1 full rotation. This requires the agreement of all players already in the active thread; players that join cannot exceed the 8 player cap.
Players who successfully defeat the Labyrinth Guardian will be issued various rewards, including information about the Floor Boss’ room. This generally includes a brief description of the room and any noticeable features - things a character would see from taking a peek inside of the room.
Raid Meeting Threads
After the Labyrinth Guardian has been defeated, a Raid Meeting thread may be created. The Raid Meeting Thread can be organised by anyone, but only the players who defeated the Guardian have any knowledge about the Floor Boss room. This part of the process is completely optional, but crucial for players who might be interested in sharing details about the boss room or devising a plan of attack when facing the Floor Boss. The location and the meeting time is usually discussed in the Raid Meeting, and it is also up to the players involved to disclose that information.
Defeating the guardian and/or hosting the raid prep meeting will no longer convey any systems-based bonuses during the raid.
Floor Bosses are considered one of the most difficult challenges in SAO-RPG. Defeating a floor's boss unlocks the next level of Aincrad, allowing the next floor to be opened for all players.
Assuming a Raid Meeting thread was created, when it has ended, the Boss Raid thread will be created. There must be a minimum 12 total players (3 groups of 4 players) in order to attempt a Boss Raid. Do note that the maximum size of a party in a Boss Raid is 6 instead of 4; no [Blank Dungeon Maps] are necessary for this increase in limitation.
BR threads have a 72-hour "sign-up" period, where players must make at least one initial post that includes their full stats. Players should take this time to prepare themselves for the fight; this includes trading, using consumables, and determining group formations.
- A player in the raid may only benefit from up to five crafted consumables buffs at any given time. Only the strongest quality of enhancements will come into effect when using a consumable.
- An enemy in the raid may only suffer from up to two crafted consumable debuffs at any given time. Only the strongest quality of debuffing enhancements will come into effect when using a consumable.
During the sign-up period, the BR thread is considered to be an OP thread. Despite being an Open Party, Boss raids are typically private events. While technically anyone is permitted to post and join the fight, it should make sense for characters to do so. Having a character act on information that should not be available to them is considered metagaming, and is not allowed.
At the end of the sign-up period, players must declare their respective party members. Should parties not be decided by players, staff will sort players into their own groups. Participating players’ stats are locked in for the fight and may not be edited. Floor Bosses are controlled and facilitated by staff. Players are only responsible for their own actions in combat.
The battle then begins! A single boss post will be made at the start of the fight to introduce it; after which, all players must take their turn within the given time limit. Boss Raid rotations will have a timer of approximately 72 hours, and players do not have a set turn order for posting. Players that do not post within the allotted time frame will have their turn skipped and generally receive a penalty.
Party rules still apply for certain actions, and the boss will (typically) take action against each party during its turn.
Keep in mind that all Floor Bosses are uniquely designed. Some Floor Boss abilities may override normal game mechanics or have special rules.
Floor Boss Raid Victory
Special rewards are issued to participating players upon the defeat of a Floor Boss. Congratulations on the shining victory! The road to the next floor is open to these players alongside their win, allowing them a 48-hour head start to explore it to their heart’s content.
After 48 hours have passed since the Floor Boss’ defeat, anyone may create a thread that takes place on the new floor.
Event Boss Fights
Event Boss fights generally follow the same principles as a Floor Boss Raid; they too have a sign-up period where players will be required to post their stats and be allowed to prepare for the fight as they deem necessary with follow-up posts. The main differences between the two are the following:
- Difficulty: Floor Boss Raids are usually considered more difficult than Event Boss Fights.
- Party Management: Floor Boss Raids have a restriction of six (6) on their party sizes, whereas Event Boss Fights usually consider all players in a respective tier as a party.
- Accessibility: Whilst Floor Boss Raids are considered to be rather private events, Event Boss Fights are often made out to be public information in-universe.
As long as an Event Boss fight is not in progress, players are welcome to sign up for the battle and test their mettle in a unique, time-limited experience!
Death in Sword Art Online is permanent. Should one’s character reach zero hit points, the NerveGear which they had on in the real world emits high-powered microwaves to destroy their brain and kill them. This mechanically translates to the permanent loss of that character, and there are some rules around what happens when a character dies:
- If the character was still in any unfinished/unlocked topics, players may choose to close them up. The character is, however, unable to join or start any new topics from thereon.
- If the character had a home, it is destroyed upon death, unless they were married.
- If the character had a familiar, it is destroyed upon death.
- If the character had a shop, the shop thread is locked and cannot be posted to after the time of the character's death.
-
If the character was a Guild Leader, guild ownership is immediately transferred to the Co-Leader.
- If no Co-Leader was established, the guild may appoint a new Guild Leader within one week. If no new Guild Leader is appointed within the time limit, the guild will be disbanded.
-
All items and col a character has are lost upon death.
- If the character was married, only their equipped items and Battle Ready Inventory is lost.
- If the character was killed in a duel, the winner of the duel receives the character's equipped items.
Rebirth System
When a character dies, that player may create a new character under the Rebirth System. A Rebirth character begins with a portion of the EXP of the deceased character, as a way of compensating the player for their hard work and time invested into a character and the site itself. A Rebirth character's starting EXP is equal to 50% of the total EXP of the deceased character. For example, a deceased character that had a final total of 50,000 EXP would allow a Rebirth character to start with 25,000 EXP.
A Rebirth Character's application would follow these steps:
- Create a new journal for the Rebirth character. Include a tag ("Rebirth") in the new character's journal during the review process.
- Message a PST member either on [Discord] or [on-site] with two links: the deceased character’s journal and the rebirth character’s journal.
- Staff will review the new journal, verify account ownership and check transferable starting SP. During this process, players must be able to verify the e-mail addresses of both the deceased and Rebirth character accounts, or otherwise provide evidence that they own both characters.
- Once the review has been complete and the journal has been approved by a staff member, a Rebirth character can begin roleplaying as normal.
Submitting a character for Rebirth rewards has strict requirements that must be followed, or else the Rebirth request will not be approved. The requirements are as follows:
- The new character must be submitted from a new account with a new journal. Characters whose journals have already been approved are ineligible.
- The deceased character's journal must have all completed threads that awarded EXP linked in order to verify EXP totals. Incomplete or unlinked threads that cannot be verified will not count toward the Rebirth character's starting EXP.
- Players may not transfer accounts or characters that have benefited or will benefit from the Rebirth system.
- Players who have previously received strikes against their account may only use the Rebirth system at the discretion of staff.
Rebirth Character Bundles
Rebirthed characters may choose one of four bundles to start out with that contain equipment, col, materials, and/or items to get them started. Specify which bundle has been chosen in the Inventory section of their journal when submitting it for approval.
QuoteSet A | Basic Package:
- Rare Weapon of choice
- Rare Armor of choice
- (5 * Tier) Starter Healing Potions (Heals 50 * Tier HP)
- (2,500 * Tier) Col and (10) materials
Set B | DPS Package:
- Perfect Weapon of choice
- Rare Armor of choice
- (5 * Tier) Starter Healing Potions (Heals 50 * Tier HP)
- (2,000 * Tier) Col and (5) materials
Set C | Tank Package:
- Rare Weapon of choice
- Perfect Weapon of choice
- (5 * Tier) Starter Healing Potions (Heals 50 * Tier HP)
- (2,000 * Tier) Col and (5) materials
Set D | Support Package:
- Rare Weapon of choice
- Rare Armor of choice
- (5 * Tier) Starter Healing Potions (Heals 50 * Tier HP)
- (3 * Tier) Standard Healing Crystals (Heals 50 * Tier HP)
- (2,500 * Tier) Col and (10) materials
-
Characters that want to change and grow over time during their journey throughout Aincrad have several options made available to them to kit out their story, whether it be through levels and stats, seeking out new horizons to frontier or by finding solace from the bustle of everyday adventuring in the iron castle. Elements covered under this topic often provide one’s characters with permanent bonuses until they are opted to be altered or removed by their player.
Quests are additional challenges and narratives created by Cardinal; they often provide bonus rewards upon their completion. The [Quest sub-section] contains a list of all available quests, detailing specific objectives, enemies and rewards.
When taking on a quest, the name of the quest must be included in the title of the thread. All quest objectives must also be completed come thread closing; it can be helpful to link the undertaken quest in the first post for all players present to refer their journey against. In the thread summary, players are also responsible for listing and distributing any quest rewards.
Most quests have certain rules and limitations:
- Party Limit: States up to how many players can partake in the quest at any given time. Solo (1) is always an option unless explicitly stated otherwise.
- Level Limit: Only players with a level below this indicator can start the quest.
- Non/Repeatable: Indicates whether or not the quest can be completed more than once. Repeated completions typically award a portion of the quest's original rewards.
- Post Count: Some quests require more than a single page of role play to be considered complete.
In certain scenarios, some players might choose to aid another in a non-repeatable quest. Players are free to do so as long as the following rules are abided:
- The player who starts the quest thread has not completed the quest.
- The player who is aiding their companion does not receive quest rewards.
Regarding quest rewards, all players who are partaking in the quest will receive its rewards — assuming it is the player's first time completing it — unless stated otherwise (eg. col divided by group, item that goes to the party leader, etc). Upon quest repetition, only rewards marked with a [Repeatable] tag will be issued to participating players on top of standard thread rewards. All players within a thread must participate and be a part of completing quest requirements to receive the quest completion rewards. This includes being part of the combat party when killing quest targets.
Extra Skills
Most Character Growth can be achieved through quests. As an example, Extra Skills are part of a load out feature in SAO-RPG that fuel most Free Action skill usages, as well as provide some passive bonuses or other Post Actions for players to use in battle.
Most Extra Skills may be unlocked through the completion of quests. The number of Extra Skills a player may equip in a thread is equal to a player's Tier. Players may pick and choose a variety of Extra Skills to equip in a thread as long as they have completed the corresponding Extra Skills quest. Players may swap Extra Skills in a thread at any time, so long as they are out of combat.
To view a list of Extra Skills available, see the Resources List [here].
Evaluations
| tags: #evals, #eval template, #evals templateSome items or actions performed by players must be run through staff to ensure that they abide by the rules of the game as well as stick to the setting of SAO-RPG. Examples can include the following:
- Describing a familiar
- Modifying a familiar (its skill or appearance via the use of an item)
- Describing a crafted item
- Appraising an unidentified item
- Fusing two existing items together via Item Fusion
- Declaring the use of a unique item to modify the properties of an existing item
- Redeeming a newly generated item from a completed thread
- Submitting a proposal for a Custom Skill/Sword Art
Each player is allotted one thread under the [Evaluations sub-section] that they will use during their time on-site. After an item has been submitted for evaluation, it must be approved by staff -- seek out a PST member either from [Discord] or from the [Staff List] to notify them that an evaluation is ready for approval.
Players are advised to be as meticulous as possible with their evaluations; items that are obtained from quest and events must have their obtainment posts linked, and items that are crafted must have their evaluation approval linked as well as item ID listed. Any items that might affect die roller rolls in the submitted evaluation process must also be listed either in the evaluation request itself or in a linked post related to the evaluation request.
Other types of Evaluations, such as skill refunds or housing approvals have their own specific threads in which evaluations are posted to.
Evaluation Templates:
SpoilerDo note that evaluations submitted to PST can be in any format so long as the following general guidelines have been followed and the post has been formatted in a readable manner. For other evaluation types that don't have a template provided, please provide as much information as possible so that PSTs are able to handle the unique evaluation request.
Making sure evaluation submissions are neat and tidy allows PSTs to evaluate submissions more quickly and handle requests in a streamlined manner. Thank you very much for your co-operation.
PROFESSIONS TEMPLATE
SpoilerSUBMITTING A NEW CRAFTED/IDENTIFIED ITEM FOR APPROVAL
- Shop Post: [please provide a link where this request's craft/appraisal ids have been rolled upon. this should be a post in one's shop thread.]
- Transaction Date: [should any materials/col be transacted to the banker, please note down the transaction date here for easier referencing.]
- Cost of Transaction: [state the amount of materials/col that have been sent to banker.]
- Crafter's Profession:
- Crafter's Rank:
- Item Name:
- Item Tier:
- Item Type:
- Item Rarity:
- Item Enhancements:
- Craft/Appraisal/Obtainment IDs & Rolls:
- Item Description:
SUBMITTING AN ITEM FUSION
- Shop Post: [please provide a link where this request's craft/appraisal ids have been rolled upon. this should be a post in one's shop thread.]
- Transaction Date: [should any materials be transacted to the banker, please note down the transaction date here for easier referencing.]
- Cost of Transaction: [state the amount of materials that have been sent to banker.]
- Crafter's Profession:
- Item Fusion Materials: [optional, if any.]
- Item Component #1 Details: [this item will act as the primary item to be fused upon.]
- Item Component #2 Details: [this item will be consumed upon fusion.]
- Roll ID: [please register this fusion with the die roller. be as specific as possible in the roll purpose.]
- New Item Details: [please ensure that all details match item component #1 save for the enhancements transferred over during the fusion process.]
SUBMITTING ITEM REROLLS
- Shop Post: [please provide a link where this request's craft/appraisal ids have been rolled upon. this should be a post in one's shop thread.]
- Transaction Date: [should any col be transacted to the banker, please note down the transaction date here for easier referencing.]
- Cost of Transaction: [state the amount of col that have been sent to banker.]
- Appraiser's Rank:
- Item Details: [please provide information about the item to be re-rolled upon here in full.]
- Selected Enhancements to Re-Roll:
- Appraisal IDs & Rolls:
- New Item Details: [please ensure that all details match the original item details save for the enhancements rolled upon during the re-roll process.]
ITEM MODIFICATION TEMPLATES
SpoilerSUBMITTING AN ITEM TO BE MODIFIED
- Modification Item's Post: [please provide a link where the modification item has been obtained from.]
- Target Item Details: [please provide information about the item to be modified here in full.]
- Modifications Made: [state any changes to be made via the modification item's details.]
FAMILIAR TEMPLATES
SpoilerAPPLYING FOR NEW FAMILIAR
- Familiar Obtainment Thread: [please provide a link as to where this familiar has been obtained from. please ensure that the thread has been closed first before submitting the familiar for approval.]
- Familiar Name:
- Familiar Description:
- Familiar Image: [optional.]
APPLYING FOR NEW FAMILIAR MASTERY
- Familiar Approval Post: [please provide a link as to where this familiar has been approved.]
- Familiar Mastery Thread: [please provide a link as to where this familiar has learned familiar mastery from. please ensure that the thread has been closed first before submitting the familiar for approval.]
- Chosen Familiar Mastery:
CUSTOM SKILL/SWORD ART TEMPLATE
SpoilerCREATING A CUSTOM SKILL
- Paragon Level Log: [please provide a link to where you've been tracking your paragon levels.]
- Skill Name:
- Skill Effect:
- Skill Description:
CREATING A CUSTOM SWORD ART
- Paragon Level Log: [please provide a link to where you've been tracking your paragon levels.]
- Sword Art Name:
- Damage Multiplier & Modifiers:
- Weapon Type Limitation: [state one of the following: one-handed weapons, two-handed weapons, a specific weapon type.]
- Sword Art Description:
For more information about crafting, see Professions [here].
For more information about appraising items, see Appraisers on the Resources List [here].
For more information about Item Fusion, see Item Fusion [here].
For more information about Familiars, see [here].
For more information about skill refunds, see Skills [here].
For more information about Housing, see [here].
For more information about Custom Skills, see [here]. For more information about Custom Sword Arts, see [here].
Players can obtain a small non-humanoid companion to act as their familiar -- one can imagine this as a pet if they so choose. To unlock this feature, players must have completed the quest [Feeding your Enemy]. The familiar may then be submitted for evaluation; its template can be found under the Evaluations topic [here].
Players may choose to release, or kill off their familiars if they wish to obtain a new familiar. Players will be required to repeat the quest [Feeding your Enemy] in order to obtain the new familiar.
The following guidelines apply to what a familiar may be:
- Players may only have one familiar at a time.
- The familiar must be smaller than 3 ft. in any dimension (3 ft. is a bit larger than the size of a Great Dane)
- No humanoid monsters allowed
- May not be capable of direct communication with the player
If players so choose, they may then proceed to teach their familiar tricks that their character may benefit from via the [Training your Friend] quest. This will unlock [Familiar Mastery].
- Only one [Familiar Mastery] skill may be unlocked at a time.
- [Familiar Mastery] does not take up a skill slot.
- [Familiar Mastery] must have SP invested into it before its respective action may be used (see Resources List [here] for more information). When using [Familiar Mastery] actions, the player must make note of their familiar's presence or interact with their familiar.
- [Familiar Mastery] may be altered after SP invested into it has been refunded; simply take on the quest again and submit it in a new evaluation post when the quest is completed.
Staff may deny any familiar should they believe it to not be within reason of these guidelines. If players are uncertain about their familiar ideas breaching SAO-RPG’s setting, they are encouraged to contact PST members to verify their concepts’ validity before approval.
Familiar names and descriptions should not change when training or retraining a familiar, although one may add on explanations into how the familiar fights. The familiar’s name and description must still be included in a training re-evaluation for staff’s records. If a training evaluation has been denied, please contact staff for more information.
Shops
Each player is allotted their own thread under the [Merchants and Shops sub-section] to set up their own store. There, they can trade with players (usually in an attempt to make a profit). If the shopkeeper also has a Crafting Profession, their thread made in this section is also delegated to their crafting attempts and logs. Players are allowed to list items they have obtained, found or crafted up for sale in these threads. They can attach a stated price to their items or ask other players to barter for them.
Posts made under this sub-section do not adhere to the site's word minimum of 150.
Players are also welcome to communicate with others to collaborate sharing a store/crafting space. Feel free to be creative, but please message a staff member to go over the details of any out-of-the-ordinary shop set-ups.
For more information about Crafting Professions, see [here].
Interacting with Shops
Most shops will feature at least one of two types of transactions when trading for goods:
-
Stock
Some shops will often have items in stock. These shops feature items that have already been crafted/identified.
To make a purchase, create a post tagging the store's owner about the sale of the item and send the required funds for the item(s) over to that player. The item will immediately belong to the player who had made the purchase. Players do not need to wait for a confirmation from the store's owner for this transaction to occur.
-
Order
Other shops may feature a transaction by Order. These shops will require players to make a post having filled out an order form in the store owner's thread before the item can be made. Details like the item's enhancements and rarity types are left up to the client's wishes. Players should then submit the order's payment to the store owner. Payments vary between different shops, though most fees should be listed in a store's front page. These posts should also tag the store's owner to notify them of a request for items to be made.
The customer will then need to wait for the store owner to evaluate these items. Once the order has been fulfilled, the store owner will notify their client of the availability of the item with a separate post in their thread, often alongside a tag to the item(s)' recipient. Players will need to make one last post stating that they have received their ordered items in the store owner's thread. This concludes the end of an Order transaction.
There are two types of professions a player can take up; Crafting and Gathering.
- Crafting Professions are able to create equipment and consumables that have enhancements attached to them for player use, through expending materials.
- Gathering Professions are able to collect col and/or equipment alongside treasures, in addition to materials obtained through standard Gathering.
Players are capable of learning one profession under each category. Do note that Professions have unique buffs that apply to themselves. As such, regular CD & LD bonuses do not apply unless explicitly stated otherwise.
Examples of eligible CD & LD buffs for application to Professions include:
- CD Tools from the [Challenge of Olympus] quests,
- For Gathering Professions, Housing Buffs from the Fishing Pond, Greenhouse rooms and their upgraded counterparts,
- For Crafting Professions, [Trading Hall] as the Mercantile Guild buff.
Crafting Professions
Players may take up a Crafting Profession via the completion of the [Earning a Living] quest in order to craft items with enhancements. Each profession has their own field that they excel in; look to the following table for details.
Profession Item Type Specialization Blacksmith EquipmentHeavy Armor, Light Armor, Shields, Weapons Tailor Light Armor, Cloth Armor, Clothing, Plushies, Weapons (Handwraps) Artisan Trinkets, Jewelry, Sculptures Alchemist ConsumablesPotions, Crystals, Salves Cook Snacks, Meals, Desserts, Feasts Performer Support Songs, Debuff Songs Appraisers N/A Item Appraisals, Item Rerolls, Junk-sales After each day’s worth of crafting, players must submit any spent materials (or col for appraisers) to the @Banker via the economy system. Any items crafted that players wish to use must be evaluated in their own evaluation threads using an item template, found under the Evaluations topic [here].
Crafting for professions may only take place in shop threads. Every day, players are given a certain amount of attempts to craft items with; players should link their rolls back to their crafting post and keep track of their profession’s experience alongside their use of materials. These attempts can also be refreshed once a day with the use of a consumable with the [Crafter's Respite] enhancement.
Daily crafting attempts will reset at 12:00 AM for each player at their respective local times.
For more information on the economy system, see Using the Economy Dashboard [here].
More details about each crafting profession may be found on the Resources List [here].Examples:
SpoilerA shop's crafting post may look something like the following:
DATE: [30/10/20]
RANK 7 BLACKSMITH | [EXP: 686/1240] | Daily Crafting Attempts: 8 +1CRAFTING BUFFS:
Hephestus' Hammer | Obtained from Challenge of Olympus | [link] | +1 CD when crafting
Artisan's Pliers | Custom Ambition Tool bought from Argo | [link] | +1 EXP per craft
Extended Workshop | Housing Buff | [link] | +2 EXP per craft, +1 daily crafting attemptCrafting Tier 3 [One-Handed Straight Sword]s:
ID: 176150 | CD: 4 | LD: 20 | Salvage (Success)
ID: 176149 | CD: 11 | Success! (Rare)
ID: 176148 | CD: 9 | Success! (Rare)
ID: 176147 | CD: 11 | Success! (Rare)
ID: 176146 | CD: 4 | LD: 1 | Salvage (Fail)
ID: 176145 | CD: 12 | Success! (Perfect)
ID: 176144 | CD: 1 | Fail
ID: 176143 | CD: 3 | LD: 15 | Salvage (Success)
ID: 176142 | CD: 1 | FailRESULT: +74XP (34, +10+10+20) | [EXP: 760/1240]
-8 Materials | Sent to Banker.NEW ITEMS:
Uncommon [One-Handed Straight Sword] (1)
Rare [One-Handed Straight Sword] (3)
Perfect [One-Handed Straight Sword] (1)Crafting Professions require materials before players are able to forge any items. One can better their chances of gathering materials through the passive benefits of Gathering Professions. Players can pick up a Gathering Profession via the completion of the appropriate [Earning a Living] quest.
Profession Die Type Specialization Treasure Foraging LD Has a chance of obtaining col and materials while Foraging. Demonic Shard Fishing CD Has a chance of obtaining equipment and materials while Fishing. Gleaming Scale Treasures
Gathering with a profession will allow players to obtain Treasures under the right conditions, known as Demonic Shards and Gleaming Scales.- Demonic Shards can be used to upgrade an item from Perfect rarity to Demonic. It is also necessary to preserve an item's Demonic status when fusing it with another piece of equipment. To upgrade a Perfect rarity weapon to Demonic, one (1) Demonic Shard must be used. The last enhancement slot may either be rolled upon following standard Appraiser identification rules or chosen from one of the standard enhancements available to its item type. Players may also choose to use three (3) Demonic Shards when upgrading a Perfect rarity weapon to Demonic, in order to roll their last enhancement slot following only the unique Appraiser identification table.
- Gleaming Scales can be used to preserve an item's unique enhancement when fusing it with another piece of equipment. To reroll an enhancement slot on an equipment solely from the unique enhancement table, three (3) Gleaming Scales must be used.
These Treasures are highly valued for their abilities in altering an item to better fit their users' needs. They may be utilized on their own or be paired together with two other items in a process known as Item Fusion. Read on to learn more about Item Fusion.
More details about each gathering profession may be found on the Resources List [here].
Players are want to upgrade their equipment as they progress through the game. To do so, a system called Item Fusion has been introduced in 3.0 to facilitate this process. To do so, the following requirements must first be met:
- Players must have two items of the same item type and rarity to fuse together.*
- Players must take these items to a player with the appropriate Crafting Profession that manages these item types (eg. Blacksmith for Weapons/Shields/Light Armor/Heavy Armor, Tailor for Cloth/Light Armor, Cooks for Food, etc).
- Players must obtain permission from their respective assisting crafter to fuse the items together.
- OPTIONAL: For players looking to fuse items with Unique Enhancements, they must sacrifice a Gleaming Scale in the process.
- OPTIONAL: For players looking to fuse items into a Demonic Rarity, they must sacrifice a Demonic Shard in the process.
* Note that there are exceptions to this rule. For further details, please look to the fusion recipes listed in any of the crafting professions listed in the Resource List [here].
Any treasures used during this process must be submitted to the Banker. Additionally, either the client or the crafter must submit an evaluation form in their own thread requesting for such an item fusion to be approved. The process is complete once this evaluation has been approved.
By utilizing this system, players are able to develop weapons they have grown attached to into something of more power and value.
For further details on item fusion, look to any one of the crafting professions listed in the Resource List [here].
Whether this be to help new players on their way, to amass and horde Col, or to make the ultimate sacrifice and head to the front lines, guilds act as the premiere way of organizing fellow players together to shepherd them towards a shared goal. A guild can provide their members a plethora of benefits, through passive buffs from their Guild’s Rank, purchasing one-time buffs with earned Guild Tokens from the Guild Shop, or gaining access to Guild Quests and Buildings. Players also have the freedom to run their guilds however they like, installing a member ranking system, holding promotional or guild events, etc.
Players may check the list of current existing guilds via the [Guilds Page]. If a guild is public, players are welcome to join it. Otherwise, contacting a guild member would be the best way to investigate their application process. Do note that players are only allowed to be part of only one Guild at any given time.
Guild Requirements
Prospective Guild starters must abide by the following requirements:
- Minimum four character members (including the Guild Leader).
- These members must not be part of any other existing guilds.
- One of these members must be appointed the Guild’s Treasurer upon the Guild's creation.
- The Guild Leader must be at least Level 5.
The Guild Leader must create a Guild via the [Guilds Page]. Once approved by a staff member, the Guild will be listed in the Guild Directory. There may only be one Leader and any number of Officers in a guild.
- The Leader is responsible for overseeing the guild thread and activity.
- Officers are the only players able to claim the guild if the Leader becomes inactive.
Step-by-Step Guide to Guild Creation & Page Management
SpoilerStep 1: From the main page, under the "Browse" tab and next to "Forums" is an option that says "Guilds."

Mobile users will be able to find it under the side navigation menu.

Step 2: This is the Guild Directory, where current existing Guilds are listed. To create a new guild, use the green button on the right that says “Start a Guild”.

Step 3: This is the Guild creation page.

- State the name of the new Guild.
-
Declare the guild's accessibility setting:
- Public: All players can join this guild. They are also capable of reading and replying to this guild's topics and discussions.
- Open: All players can join this guild. They are also capable of reading to this guild's topics and discussions, however only its members can post and reply to them.
- Closed: Players may request to join the guild. All players may view the Guild's front page and its list of members. Only its members can read and reply to the guild's topics and discussions.
- Private: Only the Guild's members may view the Guild's information, alongside reading and replying to its topics. Players may only join this guild via the leader(s)' invitations.
- [OPTIONAL] Give the Guild a description. This could be anything from a welcome message to the Guild's motive operandi. Make sure its details abide by forum rules and role-play etiquette. Players will read this when viewing your Guild's information.
- [OPTIONAL] Give the Guild a logo by uploading an image.
- Declare the leader of the new Guild.
- Declare the type of Guild it will be. Select between Front-lines, Leveling, Mercantile and PvP; this will also determine the types of buffs the Guild will be able to provide its members.
- Declare the founding members (4 minimum, please include the leader's name).
Step 4: The guild has been created!
There are plenty of features available for use.
- A miniature forum is available for guild members to use and discuss activities with (topics, threads).
- Guild members also have access to a Calendar and a Blog for hosting Guild events or making Guild announcements.
All of these are accessible via the Manage Guild function on the top left; members can visit these features via the tabs at the top of the Guild information once they have been set up.
More features are available under the Members tab; one can view the list of Guild members, Co-Leaders, Moderators and Leaders there. By clicking on the gear/settings icon beside a member's card, options to alter their role will appear; only the Guild Owner can edit a guild's settings.
- Leaders can moderate content and promote others to Co-Leaders and Moderators.
- Co-Leaders can moderate content and manage members.
- Moderators can moderate content but cannot manage members.
Guild invitation notifications will appear as such (see below). Following the notification will take the user to view the guild's page. If the guild is Private or Closed, one can accept the invitation by selecting the "Join Guild".
Guild Activity
With regards to guild activity, if a Guild Leader does not make an in-character post for 45 days, Officers may choose to take over as Guild Leader. The position of Leader may be passed on to another member by the current Leader at any time, in which case they would no longer be in control of the guild.
A guild leader is the only one who may Disband a guild. If a guild's leader would like to disband a guild, they must edit the description to include a disbandment tag ("DISBANDED") within the guild description and message an Admin on [Discord] or [on-site] with the name of the guild asking for them to remove it.
Guild Tokens
All Guild members have the ability to earn Guild Tokens. As a currency, Guild Tokens act as symbols of Guild unity and activity.
When Guild members accumulate Guild Tokens, the Tokens they earn are tied directly to their currently affiliated Guild at the time of its award. Guild Tokens are not transferable between Players of different Guilds. However, Guild Tokens are tradable between Players of the same Guild. Note that trading Guild Tokens may only occur during a thread’s summary, due to the trading restrictions on Guild Tokens as a currency.
When leaving a Guild, Players must submit all Guild Tokens to a Guild official or Treasurer. Failing to do so will invite Staff Action against the individual.
Guild Tokens may be earned when participating in a thread with other members of the same Guild. When at least two members of the same Guild are participating in the same thread, each Guild member can claim one (1) Guild Token on thread closure. Additional tokens are awarded to the Guild’s Treasurer if three or more members of the same Guild are present in the same thread. See the table below for Token distribution.
Guild Member CountTokens to each
Guild MemberTokens to Guild Treasurer 1 0 2 10 3 1 4 2 5 3 6+ 4 Guild Tokens may be exchanged at the Guild Token Merchant to apply one-time buffs to a member of the same Guild per thread. Each buff from the Guild Token Merchant may only apply once per thread, unless stated otherwise. Alternatively, Guild Tokens may be purchased at a high col cost. See [Guild Token Merchant] for more details.
Guild Ranks
All Guild have a Rank. A Guild’s Rank represents its notoriety in-universe as a result of their members’ actions, and will require upkeep from its members to be maintained.
Upon its creation, a Guild will start out at Rank 0, and can max out at 5. All Guilds past Rank 0 will benefit from Guild Rank buffs, and will have their Rank re-evaluated every 3 months, with each Guild’s evaluation occurring within the same window. If not maintained, a Guild’s Rank will deteriorate.
Maintaining Rank
A Guild can either advance or maintain its Rank by meeting a threshold of Guild Tokens by the end of the evaluation window. Guild Tokens should be accumulated by the members of a Guild, after which, an officer must submit these Tokens to the Banker and declare if the Guild is to maintain or advance its Rank in a corresponding evaluation thread. A Guild’s Rank will deteriorate by one (1) otherwise.
Within each evaluation window, Guilds may only rank up once, with the exception of a Guild raising its Rank from 0 to 1. Additionally, only Guilds past Rank 1 will be eligible for a Rank demotion — Guilds at Rank 1 or lower will not be affected by demotions.
Consult the table below for both the advancement and maintenance fees. When considering decimals, round up.
Guild Rank Guild Buffs Advancement Cost 0 — (Member Count) x 1 Tokens 1 Free Guild Hall `+(1 * Rank)% EXP,
+(1 * Rank)% bonus col on thread closures(Member Count) x 1.2 Tokens 2 (Member Count) x 1.4 Tokens 3 Free Permanent Upgrade: Guild Hall II (Member Count) x 1.6 Tokens 4 (Member Count) x 1.8 Tokens 5 Free Permanent Upgrade: Guild Hall III — * Note that the advancement fee is exclusive of a Guild’s maintenance fee, and both must be paid in order to advance the Guild’s Rank at the end of the evaluation window.
** Note that a Guild need only pay for its current Rank’s maintenance fee during an evaluation window when attempting to advance their Rank, and not the maintenance fee of the Rank they are attempting to advance towards.Guild Territory
Upon advancing to Rank 1, a Guild will be bestowed Territory in one of the floors of Aincrad. This Territory will be situated outside of safe zones on the Floor, but will allow Guilds to construct their own Buildings.
Guilds may select which floor they want to own Territory from. In addition, multiple Guilds may own different Territory on the same Floor.
Buildings
Guild Buildings will provide buffs that differ from the ones obtainable through Guild Tokens via the Guild Shop. Buffs from Buildings will have a limited number of uses, which will require Guild Tokens to replenish once these charges have been depleted.
At its base cost, Buildings will be established within a Guild’s Territory upon purchase. However, Guilds have the option to construct Buildings outside of their territory. An additional tax of 1 Token applies for each of the following conditions met:
- The Building is to be constructed on a different floor than the Guild’s Territory.
- The Building is to be constructed in a Safe Zone.
Some Buildings may also be upgraded at an additional cost. See [Resource List] for details.
Guild Quests
Guilds that possess a Guild Hall gain the ability to create Guild Quests. Only Guild officers are allowed to create these quests. Guild Quests allow a Guild’s members to follow a structure, achieve objectives or carry out rituals that build upon the identity of a Guild, while also providing additional Guild-related rewards from the quest’s completion.
For members running Guild Quests, the following rules apply:
- Players will only be eligible to earn EXP once from each separate Rank of any Guild Quests.
- Players can earn other standard Guild Quest rewards once every evaluation window.
Creating A Guild Quest
When creating a Guild Quest, Guild officers are to submit a quest outline and general summary for their members, similar to how site quests are currently constructed. These quests are meant to elaborate on the Guild’s identity, and can be tied to the grounds it was founded upon or the floor it exists upon. While each Guild Quest has no official requirements, creators are allowed to impose restrictions required for the quest as necessary.
Each Guild Quest will provide a standard set of Guild Quest rewards to participants, alongside standard thread rewards. While officers may elect to provide additional quest rewards for the Guild Quest’s completion, do note that doing so is optional, and the Guild itself will have to provide these rewards to its members. For further detail on standard Guild Quest rewards, see the evaluation template [here].
Note the following guidelines on creating a Guild Quest:
- Quest outlines must consider the participation of two or more Guild members, up to a maximum of six.
- Quest outlines should have combat or dice-roll elements made optional.
- Quest submissions may only be altered once every evaluation window.
Housing
| tags: #player housing, #estates, #apartmentsPlayers may purchase an abode to retire to at the end of a long day of adventuring. Player houses provide multiple benefits depending on the types of rooms installed; they may be purchased by a single player or be signed under two players (provided they are married). Players may also obtain a home as a [Donation Reward].
Home Purchasing Rules:
- Player homes cannot be purchased on Floors 1-10 (restrictions vary with donation rewards).
- Player applying to purchase a home must be at least level 10 (these restrictions do not apply to donation rewards).
- Each Player may only own one home at a time. To purchase another, they must either liquidate their previous home for col or use it as equity to fund the new property.
Plots & Rooms
Player housing must be built on plots; different sized plots cost more as they get bigger. The larger the plot’s size, the larger the size of the house built upon it can be, hence more rooms can fit into the player’s home.
- Standard plots are considered to be inside a Safe Zone; within a settlement or city. These plots are unable to be bought by Orange Players (PKers).
- PK-accessible plots cost more and must be located outside of a Safe Zone.
Housing have three different limit values that describe their buildings:
- Room Slots indicate how many indoor rooms a home can have.
- Yard Slots indicate how many outdoor rooms a home can have.
- Stories Limit dictates how tall (or deep) a home’s floors can go. They are necessary should one plan to have an attic or basement.
Each room in a house has a Player Limit. When a room is purchased, a player must be assigned to that room to indicate their benefiting from the room’s buff. A player can be assigned to multiple rooms, but a room can’t have more people assigned to it than its Player Limit. A home’s owner can reassign each room’s beneficiaries once every 30 days.
To apply for/purchase a home, fill out the form located in the [Housing Evaluation thread]. Once the evaluation has been approved by staff, any room bonuses can be used freely. Housing details should be added and kept up to date in its homeowner(s)’ Journal. Additional rooms may be added after a house's initial application.
The Housing Reference in the Resources list goes into details about the costs of homes, rooms and their individual limit values. Check it out [here] for more information.
Read on for more information about Orange Players.
Cursor Colours
| tags: #pkers, #pk-ers, #player killers, #player killing, #pk, #killing another playerA player's cursor can be one of two colors: green or orange. The most common type of cursors for players is green. An on-site cursor color will remain green until a player has met the conditions of an indefinite or permanent orange cursor.
An orange cursor indicates that the player has committed some type of crime, and the duration of the orange cursor depends on the nature of the crime and how many infractions the player has had in the past.
List of infraction examples:
- Attacking a green player outside of an authorized combat (with or without the use of dice rolls)
- Stealing
- Physically harassing another player
- Killing another player (by flavour or by PvP)
Players with an orange cursor have a more difficult time getting around in Aincrad. Not only are orange players widely regarded as criminals, but most safe zones will have NPC guards that will act hostile towards them. Players with orange cursors are encouraged to keep this in mind when RPing in or around settlements, or populated locations. Orange Players are also at a higher risk of being attacked; there are no penalties against a green player attacking an orange player.
- For the first three infractions, a cursor changes colors until the end of the thread in which the crime was committed. Afterwards, a player's cursor will turn back to green. These temporary cursor changes should simply be roleplayed.
- On the fourth infraction, a player's cursor turns orange indefinitely. The only way to revert to a green cursor at this point is to complete the [Redemption] quest located [here].
- On the fifth infraction, or after the first instance of killing a green player outside of a duel, a cursor will become permanently orange. Nothing may revert a permanent orange cursor back to green. If a player’s cursor would turn indefinitely or permanently orange, please notify a PST member via [Discord] or [on-site messages] to have their cursor color changed.
Cursor color changes must be noted in the summary once a thread is completed. This includes temporary changes and the number of infractions to date. Players may choose to track when and how many times their cursor color changes in their journal.
For more information about killing another player, see PvP [here].
Paragon Levels
| tags: #paragon, #level cap, #how do i break level capIn SAO-RPG, level caps match closely to the current floor that has been unlocked. However, once level cap has been reached, players are still able to accumulate EXP and levels. These levels past the level cap are considered Paragon Levels, and for every 5 Paragon Levels a player achieves, they gain +20 HP, +2 EN, and +5 SP.
There are also certain benchmark rewards of Paragon Levels that are only attainable once per character. Note that rewards obtained via Paragon Levels are bound to their individual character; the marriage system does not bypass these restrictions.
Paragon Levels are calculated as such:
Total Level based off EXP – Level Cap = Paragon Level
Paragon Levels are fluid. Once the level cap is increased, Paragon Levels are converted to standard levels to match the new level cap.
Paragon Level Benchmark Rewards 5 At the end of every thread, this player will gain an amount of col equivalent to 15% of the EXP earned in that thread. 10 Gleaming Scale (1)
Can be used to preserve an item's unique enhancement when fusing it with another piece of equipment. To reroll an enhancement slot on an equipment solely from the unique enhancement table, three (3) Gleaming Scales must be used.
Demonic Shards (1)
Can be used to upgrade an item from Perfect rarity to Demonic. It is also necessary to preserve an item's Demonic status when fusing it with another piece of equipment. To upgrade a Perfect rarity weapon to Demonic, one (1) Demonic Shard must be used. The last enhancement slot may either be rolled upon following standard Appraiser identification rules or chosen from one of the standard enhancements available to its item type. Players may also choose to use three (3) Demonic Shards when upgrading a Perfect rarity weapon to Demonic, in order to roll their last enhancement slot following only the unique Appraiser identification table.
+1 LD to Search attempts, Lockpicking and opening Treasure Chests.25 Gleaming Scale (1)
Demonic Shards (1)
Free SP Reset (1)50 Gleaming Scale (1)
Demonic Shards (1)
Paragon Tier Up Tickets (3)
Increases an equipment's tier by one (1). Cannot be used on an equipment that has had its tier raised before.75 Gleaming Scale (1)
Demonic Shards (1)
Custom Sword Art
Allows the player in question to use an unconventional Sword Art created based on certain conditions according to the player's combat Shift.100 Gleaming Scale (2)
Demonic Shards (2)
Access to the Champion's Hall
A large ceremonial hall once used by ancient heroes of the realm. Only the most powerful of warriors in Aincrad may find access to this place. Players may choose one consumable from a list in this hall to store in their inventory once a month.To view the full level chart, look to the Resources List [here].
Custom Skills
| tags: #custom skills, #how do i break the gameCustom Skills (CS) are a collection of specialized mechanics submitted by the SAO-RPG community that have been approved by staff for use. They pose a chance for players to round out their build or create special niches for their characters to be adapted to how players would see them in an ideal light.
Upon reaching Paragon 50, players can submit a Custom Skill for approval in their personal Evaluation thread. If staff does not believe that the submitted Custom Skill can be approved as-is, feedback and suggestions will be given and the player will be allowed to make modifications to their design before submitting it for approval once again.
- Each character may only create one Custom Skill. In addition, they may only possess one Custom Skill at a time.
- Custom Skills will cost 10 SP for the character to learn it after the skill has been evaluated by staff.
- Custom Skills made by one character may be taught to other characters. Note that this requires the original Custom Skill owner's permission for another to acquire it.
- Players who wish to teach others of the Custom Skill they have created must submit a Player Permission list in their evaluation thread. Players may also revoke their permissions to learn or use the Custom Skill through the same method.
- Characters who have been granted this permission will be allowed to learn this Custom Skill for as long as the Custom Skill's owner has this permission invoked.
- Given that only one Custom Skill may be possessed by a character at any given time, if a character already has another Custom Skill active, they must refund the Custom Skill they had in order to learn another one.
Understand that Staff reserves the right to change rules and mechanics surrounding Custom Skills and Sword Arts at any time. Should a combination of Extra Skills, Custom Skills and/or Sword Arts come about that is particularly game-breaking, staff will attempt to take steps to mitigate its abuse, and hence may impose limitations that might prevent or forbid combinations or use of these Custom Skills/Sword Arts outright. This will affect all players who have permission to learn or use the Custom Skill/Custom Sword Art, including the player who made it.
Creating Custom Skills
Custom Skills will be evaluated on a case-by-case basis as there is no firm rubric for how they should be constructed. Although no parameter maximums have been decided, please stay reasonable when adding stats or effects to your skills. The objective behind the creation of a Custom Skill, while to provide a mechanical bonus to one's character, is to allow a horizontal progression to differentiate a character's identity, rather than to promote vertical progression for stat competition.
Examples:
Spoiler► All of Me
Cost: 10 SP
Active
Requirement: ----
Effect: The user may choose to activate this skill as a free action once every three turns. Upon activation, at the cost of 10% of their max HP, they can add +2 DMG to their next attack. This skill cannot be used if the HP needed to activate it exceeds the user's current.
Description: After mustering the willpower to, the user puts more energy than necessary into their attacks, feeling power surge through them with every single strike. Needless to say, they must pay a hefty price too, damaging themselves in the process through their recklessness.► Devil's Luck
Cost: 10 SP
Passive
Requirement: ----
Effect: Once per thread, the user may reroll their own attack roll once and choose which of the two results they want to keep for the turn.
Description: When things begin to get pushy, the player will carefully consider their choices and try to go for the best attack possible, using their utmost focus to land their attack even if they'd initially given the impression that wasn't possible.► Hardhitter
Cost: 10 SP
Passive
Requirement: ----
Effect: Every 3rd turn, the SA used will deal 20% more damage. This effect will not activate if during the two turns prior, the user hadn't attacked, or missed their targets.
Description: Hit by hit, the user's momentum picks up with their attacks until they manage to land a much more devastating blow on their opponent.► Healer's Grace
Cost: 10 SP
Passive
Requirement: ----
Effect: All healing skills will heal an additional 5% of the target's max HP at the cost of +4 EN.
Description: Hours and hours of training have managed to make the user's healing abilities stronger, however at a cost. With better focus, come better results. Even if that ends up more tiresome, it's the healing that matters.► Hoarder
Cost: 10 SP
Passive
Requirement: ----
Effect: Looting a monster heals the player for 40 HP. This effect cannot activate during combat.
Description: A refreshing breeze rejuvenates the player as they obtain well-earned spoils.► Indomitable
Cost: 10 SP
Passive
Requirement: Must have any Armor Skill at Rank 5.
Effect: While under 50% HP, critical hits made against you will deal half the damage (rounded up). This effect can only occur once every three turns.
Description: Just when the tides have started to turn and they're being pushed to a wall, the user finds a way to stand their ground and refuses to back down out of sheer willpower.► Loner
Cost: 10 SP
Passive
Requirement: ----
Effect: When in a Solo Party, the user gains +3 DMG and +20 MIT.
Description: For some, there is no better way to focus than to be alone. Nobody can get in the way of your efforts, and you need but to rely on yourself and yourself alone.► Lucky Streak
Cost: 10 SP
Passive
Requirement: ----
Effect: Consecutive critical hits will multiply the critical damage modifier.
Description: Some people never get lucky, others do, and even fewer hit the jackpot. With every critical hit lining up almost effortlessly, the user's attacks begin to ramp up in damage, decimating any foes that dare challenge them during their lucky day.► Seeing Red
Cost: 10 SP
Passive
Requirement: ----
Effect: After missing an attack with a BD 1, the player deals 25% increased final DMG on their next turn if their attack is successful.
Description: Just when you run out of luck, anger is the only thing you need to keep you going. More enraged than ever before, you feel the strength to take your fate into your own two hands and just throw everything opposing you to the side like they never even stood a chance.► Tenacious
Cost: 10 SP
Passive
Requirement: ----
Effect: If the user takes more than 30% of their max HP as damage from a single attack, they gain 5% of their max HP as MIT for the next two turns. This can only occur once per battle.
Description: Upon getting hit with a powerful blow, the user will get serious and stay on their feet, bolstering their own defenses to protect themselves and the rest of their party from harm's way.For more information on the Custom Skills currently available, refer to the Custom Skills List [here].
Custom Sword Arts
| tags: #how do i break the gameCustom Sword Arts (CSA) are a collection of specialized sword arts built off a template and created by the SAO-RPG community that have been approved by staff for use. They pose a chance for players perform additional or unique feats in the heat of battle, whether to inflict status effects by convenience or to enable them to take advantage of a weakness to deal more damage.
Upon reaching Paragon Level 75, players can submit a Custom Sword Art for approval in their personal Evaluation thread.
- All characters may only have one Custom Sword Art.
- There is no investment cost a character has to pay to acquire a Custom Sword Art.
- Custom Sword Arts will require players to have achieved Rank 5 in their weapon's mastery before being able to learn them.
- Additionally, players are required to have picked up a Combat Shift, available at Rank 5 of any weapon's mastery, which enables them to be proficient at certain types of sword arts.
- Players who wish to teach others of the Custom Sword Art they have created must submit a Player Permission list in their evaluation thread. Players may also revoke their permissions to learn or use the Custom Sword Art through the same method.
Understand that Staff reserves the right to change rules and mechanics surrounding Custom Skills and Sword Arts at any time. Should a combination of Extra Skills, Custom Skills and/or Sword Arts come about that is particularly game-breaking, staff will attempt to take steps to mitigate its abuse, and hence may impose limitations that might prevent or forbid combinations or use of these Custom Skills/Sword Arts outright. This will affect all players who have permission to learn or use the Custom Skill/Custom Sword Art, including the player who made it.
Creating Custom Sword Arts
The following list of values set the base multiplier a Custom Sword Art with regards to a player's Shift.*
Shift Base CSA Multiplier EN Cost ST x21 (Value of Final Multiplier) AoE x20 (Value of Final Multiplier + 1 + 2 per target hit) Tech x18 (Value of Final Multiplier + 1) Afterwards, one's Custom Sword Art Multiplier may be altered depending on the conditions a player grants to it.**
Availability Condition Multiplier Alteration DEFAULT: May be used any time. – x4 May only be used if the player did not get hit the previous turn. – x2 May only be used after ST-B had successfully landed the previous turn.
This CSA may not be used to activate ST-B.+ x3 May only be used after a TECH sword art had successfully landed the previous turn. + x2 May only be used after AoE-II had successfully landed the previous turn. + x3 May only be used after missing a sword art the previous turn. + x4 May only be used after successfully stunning an enemy the previous turn. + x5 May only be used after a natural MD9-10 had successfully landed against you the previous turn. + x5 Additional effects may also be granted to the Custom Sword Art afterwards, altering its multiplier even further.
Shift Effect Name Effect Detail Multiplier Alteration ST Pierce Ignores 50% of target's mitigation. Stacks with Phase. – x3 ST Absolute This sword art will not miss on a natural BD1. – x3 AoE Zap Deals (4 * Player Tier) unmitigated damage to all enemies for each target struck by the player that turn. – x4 AoE Break Lowers the enemies' MIT by 15 for 2 turns. Stacks with Shatter. This effect cannot stack upon itself, but may be refreshed. – x5 TECH Counter If the player has the [Parry] skill equipped and it is off cooldown, it is activated automatically with a successful connection of this sword art. – x3 TECH Cripple Inflicts (10 * Player Tier) unmitigated damage and -1 ACC to the target for 2 turns. This DoT cannot stack upon itself, but can be refreshed. – x4 Once the details above have been established for the Custom Sword Art, players may then fill out the evaluation form and submit it to PST for approval.
* These Custom Sword Arts need not consider Shift Bonuses into account as they have already been included with regards to the above calculations.
** Custom Sword Art effects and/or conditions may be requested from the staff team, however Staff reserves the right to reject them or tweak them for balancing reasons.Examples:
Spoiler[ST CSAs]:
- [x26] CSA-ST (26 EN) | May only be used after successfully stunning an enemy the previous turn.
- [x22] CSA-ST (22 EN) | PIERCE | May only be used after missing a sword art the previous turn. Ignores 50% of target's mitigation. Stacks with Phase.
- [x14] CSA-ST (14 EN) | ABSOLUTE | May be used any time. This sword art will not miss on a natural BD1.
[AoE CSAs]:
- [x23] CSA-AoE (24 + 2 * targets EN) | May only be used after AoE-II had successfully landed the previous turn.
- [x21] CSA-AoE (22 + 2 * targets EN) | ZAP | May only be used after a natural MD9-10 had successfully landed against you the previous turn. Deals (4 * Player Tier) unmitigated damage to all enemies for each target struck by the player that turn.
- [x13] CSA-AoE (13 + 2 * targets EN) | BREAK | May only be used if the player did not get hit the previous turn. Lowers the enemies' MIT by 15 for 2 turns. Stacks with Shatter. This effect cannot stack upon itself, but may be refreshed.
[TECH CSAs]:
- [x20] CSA-TECH (21 EN) | Can only be used if a TECH SA successfully landed the previous turn.
- [x18] CSA-TECH (18 EN) | COUNTER | May only be used after AoE-II had successfully landed the previous turn. If the player has the [Parry] skill equipped and it is off cooldown, it is activated automatically with a successful connection of this sword art.
For more information on the Custom Sword Arts currently available, refer to the Custom Sword Arts List [here].
The Storyteller System allows individuals to guide a thread for other players, providing them with the capability of posting in a manner of storyteller, rather than player character. Taking on a third person [Storyteller] role, the individual controls all aspects of the thread outside of each attending player character, including but not limited to the monster spawns, weather, environment, NPC's conversations and various other minutiae.
In order to create a Storyteller Thread, the following requirements must be included in the thread's creation:
- The individual handling the [Storyteller] role must create and label the title of the thread with either [ST] or [Storyteller] tags.
- The first post within the thread must contain a notation in a form of <<Storyteller System in effect, Acting as Storyteller>> in order to verify for staff that the system is in place and being operated by the posting individual.
- Include your [True Level] and your [True Tier], but you do not need to include your stat lock as a result.
In addition to the above three criteria, the following requirements must also be in place during the use of the [Storyteller] system:
- The Storyteller must start the thread, even if they are not the party leader. This is for the sake of clarity and so the Storyteller can set the scene.
- Only one (1) active [Storyteller] may be involved in a thread at any given time, as determined by the original posting account.
- This system cannot be used to write for yourself, as a manner to gain additional experience for any alternate characters. Any threads found to be abusing this system will be subject to regular pentalies and/or warnings upon review.
- The [Storyteller]'s character cannot be present in the thread itself, and as such cannot hold a conversation, or participate in the story in any manner. This extends to the [Storyteller] account not being considered as part of the player count maximum for determining quest restrictions.
- While the [Storyteller] is not required to include a character statblock within their original post, their [True Level] and [True Tier] must be included for the purposes of determining final rewards on thread closure.
- Individuals holding the [Storyteller] role within a thread are not eligible to obtain any quest completion rewards, rewards and/or drops from Field Bosses, loot drops from hostile mobs, or any col from thread closures. Individuals holding the [Storyteller] role within a thread are eligible to experience based upon the word count of the thread.
- This system is eligible to be used with Solo Quests such as Gemini, Challenge of Olympus and others, in order to provide a more diverse narrative and more engaging option for players.
- The [Storyteller] controls NPC, hostile mobs, quest targets, story environment(s), and/or the general flow of the thread within reason and agreement of all attending players. This includes the inclusion of material spawns, chest spawns, dungeon spawns, locale information, time of day and/or other aspects of the story. All spawns handled by the [Storyteller] must adhere to regular mechanics and rulings as required.
- Spawned Mobs, general story flow aspects, as well as any other possible conflicting issues must be agreed upon between [Storyteller] and party members. Any disagreements held between the [Storyteller] and party members should be brought forth to staff for review if a resolution cannot be found within the group itself.
- Abuse of the [Storyteller System] as reviewed and determined by staff will remove the offending party's accessibility to use the [Storyteller] role and system in it's entirety, until such time as an appeal is made and accepted. If a character is lost in a way that is determined by staff to be predatory and/or malicious in intent, a revoking of events and revival of the aforementioned character may be placed into effect.
The Assist System provides player characters the opportunity to reduce their level in order to match that of a lower leveled player, provided a difference of five (5) levels of more exists between each player. Those involved in the Assist System mechanic obtain a benefit of additional experience obtained at the completion of the thread, with the intent of providing players the opportunity to engage together on more equal footing wihtout feeling a difference in power balancing within a thread.
Individuals engaged within the Assist System are provided with one of two tags:
- [Assisted]: The lowest level player within the thread that is being level/tier/paragon matched.
- [Assisting]: A player who is choosing to match their own level/tier/paragon to the [Assisted] individual.
The Assist System incorporates the following rules and requirements for it's use:
- The [Assisting] player(s) are considered "Tier Locked" to the [Assisted] player's tier and their level reduced to the [Assisted] player's level.
- All participants in the system obtain a +5% experience reward bonus for each [Assisting] player during the thread completion calculation.
- When this system is activated in a thread, any additional player(s) must accept the [Assisting] player tag, and associated adjustments, in order to continue within the thread. Individuals who fail to do so may be revoked from receiving rewards at the threads completion, as determined by staff review.
Examples:
SpoilerKirito | Level 33, Paragon 58, Tier 4, True Tier 10
Lisbeth | Level 7, Paragon 0, Tier 1, True Tier 1
Asuna | Level 33, Paragon 42, Tier 4, True Tier 8Kirito chooses to use the Assist System, becoming the [Assisting] player and designating Lisbeth as the [Assisted]. The new stat blocks look like this.
Kirito | Level 7, Paragon 0, Tier 4, True Tier 10 [Assisting]
Lisbeth | Level 7, Paragon 0, Tier 1, True Tier 1 [Assisted]
Asuna | Level 33, Paragon 42, Tier 4, True Tier 8
Experience Bonus: +5%Asuna must join in given that the system has been activated as an [Assisting], matching her stats to Lisbeth as well. This adds an additional +5% experience gain bonus (for each [Assisting] player). So finalizing it looks like this:
Kirito | Level 7, Paragon 0, Tier 4, True Tier 10 [Assisting]
Lisbeth | Level 7, Paragon 0, Tier 1, True Tier 1 [Assisted]
Asuna | Level 7, Paragon 0, Tier 4, True Tier 8 [Assisting]
Experience Bonus: +10% -
Looting
| tags: #loot drop table, #item drop table, #loot table, #mob loot, #monster loot, #rolling for lootMost monsters are capable of dropping loot. However, only under certain conditions would players be capable of looting them. In order for players to loot a fallen monster, the monster they slay must abide by loot-minimum parameters for all players who participated in the combat. Monsters must also abide by floor-standard parameters first and foremost before being considered viable for loot.
Loot Minimum Parameters:
- HP = (Player Level * 12)
- Damage = (Player Level * 4)
Player Level considered by Loot Minimum exclude Paragon Level considerations. Quest enemies and bosses that fall within loot minimum parameters may also be looted unless otherwise stated.
Enemies designed by players via custom combat must ensure their enemies' ACC and EVA stats are only above or equal to 0. For example, an enemy with 3 ACC and/or 0 EVA may be eligible for looting. An enemy with 2 ACC and -2 EVA is not.
When facing multiple enemies, each target must receive a separate LD roll. In the same post that a monster is slain, that player rolls another die with the Roll Purpose "Looting: <target>", "Loot from <target>", etc.
Looted monsters will net players (HP * 3) col when killed. Players will also benefit from natural CD and LD bonuses:
- CD or LD even = (HP * 2) additional bonus col
- CD or LD odd = (2) bonus materials
Furthermore, looted monsters get a roll at the Loot Table below, after modifiers apply.
All items obtained from looted monsters match the tier of the highest player of the party; if the player that killed it was of Tier 4, the items that may drop from it would be scaled to Tier 4.
Items obtained this way will be unidentified. These unidentified items would have to be examined by a player with the Appraiser profession in order to be utilized. Maps obtained from monsters match their current floor unless the current floor is below 5; in this scenario, they automatically default to Floor 5.
LD CD Loot Obtained [1-5] [1-12] - - - [6-10][1-4] Uncommon Consumable (1) [5-12] Rare Trinket (1)
Additional Col (HP)[11-15][1-4] Rare Trinket (1) [5-8] Rare Weapon (1)
Uncommon Consumable (1)[9-12] Rare Armor/Shield (1)
Additional Col (HP * 2)[16-18][1-4] Rare Consumable (1)
Rare Weapon (1)[5-8] Rare Consumable (1)
Rare Armor/Shield (1)[9-12] Rare Trinket (1)
Additional Col (HP * 3)[19-20][1-4] Perfect Consumable (1)
Rare Trinket (1)[5-8] Perfect Armor/Shield (1)
Perfect Trinket (1)[9-12] Perfect Weapon (1)
Additional Col (HP * 4)[21-22][1-4] Perfect Armor/Shield (1)
Perfect Weapon (1)[5-8] Perfect Armor/Shield (1)
Perfect Consumables (2)[9-12] Perfect Trinket (1)
Additional Col (HP * 5)[23-24][1-4] Perfect Trinket (1)
Perfect Weapon (1)[5-8] Perfect Armor/Shield (1)
Perfect Weapon (2)[9-12] Perfect Consumable (1)
Additional Col (HP * 6)[25+][1-4] Perfect Consumables (2)
Perfect Armor/Shield (2)[5-8] Perfect Weapons (3)
Additional Bonus Col (HP * 7)[9-12] Gleaming Scale (1) or Demonic Shard (1)
Random Dungeon MapExamples:
SpoilerKirito | Lv. 6 | HP: 15/120 | EN: 4/30 | DMG: 7 | ACC: 3 | EVA: 3 | LD: 3 | PROSP: 3
Hell Hound #1 | HP: 0/120 | DMG: 36
Hell Hound #2 | HP: 0/120 | DMG: 36
Hell Hound #3 | HP: 0/120 | DMG: 36
Hell Hound #4 | HP: 0/120 | DMG: 36After decimating these Hell Hounds through the power of plot armor, he decides to loot them.
ID: 176151 | LD: 19 + 3 = 22 | CD: 12 | Looting Hell Hound #1
| [BASE COL]: 120 * 3 = 360col
| [CD BONUS]: 120 * 2 = 240col
| [LD BONUS]: 2 materials
| [PROSPERITY]: 120 * 3 = 360col
| [LOOT TABLE]: Perfect Unidentified Trinket (1), 120 * 5 = 600col
Total Loot: 1,560col, 2 materials, Perfect Tier 1 Unidentified Trinket (1)ID: 176152 | LD: 7 + 3 = 10 | CD: 3 | Looting Hell Hound #2
| [BASE COL]: 120 * 3 = 360col
| [CD BONUS]: 2 materials
| [LD BONUS]: 2 materials
| [PROSPERITY]: 120 * 3 = 360col
| [LOOT TABLE]: Uncommon Unidentified Consumable (1)
Total Loot: 720col, 4 materials, Uncommon Tier 1 Unidentified Consumable (1)ID: 176153 | LD: 5 + 3 = 8 | CD: 1 | Looting Hell Hound #3
| [BASE COL]: 120 * 3 = 360col
| [CD BONUS]: 2 materials
| [LD BONUS]: 2 materials
| [PROSPERITY]: 120 * 3 = 360col
| [LOOT TABLE]: Uncommon Unidentified Consumable (1)
Total Loot: 720col, 4 materials, Uncommon Tier 1 Unidentified Consumable (1)ID: 176154 | LD: 5 + 3 = 8 | CD: 2 | Looting Hell Hound #4
| [BASE COL]: 120 * 3 = 360col
| [CD BONUS]: 120 * 2 = 240col
| [LD BONUS]: 2 materials
| [PROSPERITY]: 120 * 3 = 360col
| [LOOT TABLE]: Uncommon Unidentified Consumable (1)
Total Loot: 960col, 2 materials, Uncommon Tier 1 Unidentified Consumable (1)
Loot Summary:
+ 3,960col
+ 10 materials
+ Perfect Tier 1 Unidentified Trinket (1)
+ Uncommon Tier 1 Unidentified Consumables (3)
Sometimes it’s good to keep a low profile on the fields of Aincrad. Stealth allows players to stay hidden from anyone or anything that isn’t present in their party. It relies on multiple post actions and their LD die rolls; one post is required to enter the Stealthed state.
There are two bonuses that apply to actions regarding Stealth: Stealth itself (often obtained from the Stealth skill and enhanced by low-light environmental effects), and Stealth Detection (often obtained from the Searching skill).
-
It takes a post action and a die roll (LD) for one to enter stealth. This rating must exceed their seeker(s)' passive Stealth Detection rating. Stealth bonuses apply.
- When hiding from NPCs and monsters, this passive Stealth Detection rating is a 9 (unless stated otherwise).
- When hiding from a player, this passive Stealth Detection rating is a 10 + any Stealth Detection bonuses the seeking player might have. When hiding from multiple players at once, roll against the highest passive Stealth Detection rating from the seeking party.
- When discovered, players fall out of their Stealthed state. Another entry post and roll will be necessary if they wish to return to their Stealthed state.
- A tie in stealth and detection ratings result in the stealthed entity being discovered.
- Players in Stealth may choose to leave their Stealthed state out of their own volition.
- Players and entities may choose to seek out players in stealth; this takes a post action and a die roll. On a search, players must roll (LD) to beat their target’s last Stealth roll. Stealth Detection bonuses apply.
It is possible to attack from stealth. Players will need to be in Stealth before the attack. Depending on the skills taken by a player, bonuses may apply when attacking from stealth. The stealthed combatant will fall out of stealth after their attack. Should a combatant miss an attack while in stealth, they will also fall out of hiding and lose all bonuses they might’ve gained from a surprise attack.
It is also worth emphasizing that stealth can only be entered out-of-combat unless one has the Vanish mod after unlocking it through the Stealth skill.
While in stealth, players may also suffer from damage. Stealthed players are not immune to Environmental effects. Mobs performing AoE attacks will also automatically target players in stealth. Suffering damage will not end a player's stealth. On the other hand, players performing AoE attacks may not target entities in stealth.
Examples:
SpoilerArgo | Lv. 10 | HP: 200/200 | EN: 38/38 | DMG: 1 | EVA: 3 | LD: 5 | Stealth Rating: 3 | Stealth Detection: 2
Kirito | Lv. 6 | HP: 120/120 | EN: 30/30 | DMG: 7 | ACC: 2 | EVA: 2 | LD: 2Argo and Kirito are playing a game of hide and seek. Let's watch how events unfold.
Argo's passive stealth detection is 10 + 2 = 12.
ID: 176169 | LD: 20 | Kirito enters stealth.
ID: 176170 | LD: 4 +2 = 6 | 6 <= 20 | Argo can't seem to find Kirito...
ID: 176172 | LD: 18 | Kirito remains in stealth.
ID: 176173 | LD: 7 +2 = 9 | 9 <= 18 | Argo can't seem to find Kirito...
ID: 176174 | LD: 18 | Kirito remains in stealth.
ID: 176175 | LD: 3 +2 = 5 | 5 <= 18 | Argo can't seem to find Kirito...
ID: 176176 | LD: 13 | Kirito remains in stealth.
ID: 176177 | LD: 15 +2 = 17 | 17 >= 13 | Argo spots Kirito!
Kirito is knocked out of stealth!
Field Bosses are a new type of enemy that have appeared with the introduction of 3.0. These mobs are unique in that they may be spawned into any player-made thread, so long as all participants agree. They may even be brought into quest threads, so long as all other quest requirements are met beforehand (excluding post requirements). This allows players spawn a Field Boss to fill the remaining space.
Field Bosses differ between floors. To view a list of Field Bosses, look to the [Beginner Floor Guide] and/or the [Intermediate Floor Index].
Players may first spawn a field boss without consequence in a given thread. After which, a fifteen post cooldown begins before any subsequent field bosses can be spawned. This allows players to slay field bosses multiple times in a single thread. The cooldown begins on the first post after a field boss has been killed, but it may be reduced with the use of certain items and mods, such as [Spyglass] or [Tracking] respectively, if the Player with the mod has slain the mob before. (Tip: Spyglasses can be bought from the NPC Merchant at a relatively low cost.)
Field Bosses have a few caveats to them.
- When challenging Field Bosses, players will have their stats scaled down to match to the Field Boss' tier (eg. Player fighting Field Boss on Floor 17 will have their gear, consumable and skills' stats adjusted to Tier 2). This system is described further below, in the Tier Lock System section of the Site Guide & Rules.
- Upon defeat, Field Bosses drop special items that cannot be found elsewhere in Aincrad. All players will earn a copy of the item.
- Field Bosses may also be looted through standard looting processes if its meets all present players' loot parameters.
-
Field Bosses will award its combat participants with EXP based on whichever is lower: the Player's Tier or the Field Boss' Tier. Players must participate in the full duration of combat in order to be eligible for these EXP Rewards. Consult the following table for the Field Boss EXP Rewards:
Tier EXP 1 100 2 240 3 420 4 640 5 900 6 1200 7 1540 8 1920 9 2340 10 2800
Tier Lock System
In some instances, players may either have their Tier lowered due to the effects of a Field Boss, a group choice, and/or an alternative system such as the Assist System. Tier locking is applicable for the entirety of a thread, and follows the below outlined requirements.
- A Tier Lock must be declared at the beginning of a thread where it is being used, including the [Tier Lock] tag within the participant's first post. Once this has been declared, it cannot be reversed for the duration of the thread.
- When engaging with the Assist System and/or a thread containing a Field Boss all participants must use the [Tier Lock] system, and adjust their statblocks accordingly as required. Individuals may choose to engage the [Tier Lock] system in regular threads on a per participant basis, should the Assist System and/or a Field Boss not be engaged in the thread.
- A [Tier Lock] used during a Field Boss thread must be reduced to the lowest intended Field Boss tier, and cannot be adjusted at later times within the same thread.
- A Tier Lock can now be used to reduce your Current Level in addition to your Tier, reducing your loot minimums to match as well as changing the items dropped by creatures to the proper tier of the newly Tier Locked Tier/Level.
- An individual who engages the [Tier Lock] system has their Skills, Addons and Enhancements scale with tier according to your newly defined tier within the system. While the individual's available Skill Points (SP) are not affected, the effects of each Skill, Add-on and/or Enhancement may be reduced and/or adjusted in accordance to the lowered Tier. Note: Skills obtained through reaching specific Tiers (i.e. Combat Mastery) are not lost due to Tier Locking, but do have their effects lowered to the appropriately locked Tier status.
Example:
SpoilerArgo | Lv. 32 | HP: 640/640 | EN: 82/82 | DMG: 20
Argo has gained a damage increase from their Damage Combat Mastery, however they have chosen to face a Tier 2 Field Boss.
Argo's adjusted statblock would require a reduction of all skills, add-ons and enhancements in correlation with the [Tier Lock] system, causing their damage to be reduced.
Argo | Lv. 32 | HP: 640/640 | EN: 82/82 | DMG: 14
-
Combat is the main heart of SAO-RPG. Because this topic is so crucial and in-depth to SAO-RPG, before combat discussions can begin, players are firmly advised to have read the following topics in order to gain context for some of the things discussed in this chapter:
Combat in SAO-RPG takes place over multiple posts in succession. In each combat, there are usually two opposing parties; Players and Monsters. Participants on each side get a turn to perform a series of actions; when all participants have utilized their turn, a new round of turns can begin. In the event of combat starting within a thread, all characters present enter combat together. This makes all participants within the thread applicable targets for any effect that occurs (AoE, Field Boss Tier Lock, Environmental Effects, etc.)
Turn order is initiated on the side of the Players unless otherwise noted. When all players have made their turn, one player in the party (usually the last person in the turn order) rolls for the attacks made by the Monsters party. When all monsters have been rolled for, players get to take their turns once again.
Preview:
SpoilerStart of Combat
[0, 0, 0] Sachi | Lv. 5 | HP: 100/100 | EN: 28/28 | DMG: 7 | ACC: 2 | MIT: 15 | TAUNT
| Sachi is a Rank 2 [TWO-HANDED SPEAR] user.
[0, 0, 0] Klein | Lv. 5 | HP: 100/100 | EN: 28/28 | DMG: 7 | ACC: 2 | EVA: 2 | MIT: 10
| Klein is a Rank 2 [CURVED SWORD] user.
[0, 0, 0] Agil | Lv. 5 | HP: 100/100 | EN: 28/28 | DMG: 7 | ACC: 3 | MIT: 15
| Agil is a Rank 2 [TWO-HANDED WAR AXE] user.
[0, 0, 0] Koharu | Lv. 5 | HP: 100/100 | EN: 28/28 | DMG: 8 | ACC: 3 | EVA: 3
| Koharu is a Rank 3 [DAGGER] user.Kagachi | HP: 350/350 | DMG: 80 | EVA: -1 | MIT: 15
Kagachi's Minion #1 | HP: 100/100 | DMG: 20 | EVA: -1
Kagachi's Minion #2 | HP: 100/100 | DMG: 20 | EVA: -1
Round #1
-
KOHARU | ID: 197676 | BD: 3 + 3 + 1 = 7 | <<ST-I>> vs Kagachi.
-
| The strike lands! (-8 EN)
| 8 * 8 = 64 DMG | 64 - 15 = 49 DMG
-
| The strike lands! (-8 EN)
-
KLEIN |
ID: 197677 | BD: 1 + 2 + 1 = 4 | <<AoE-I>> vs Kagachi.
| ID: 197678 | BD: 10 + 2 + 1 = 10 | <<AoE-I>> vs Kagachi's Minion #1.
| ID: 197679 | BD: 2 + 2 + 1 = 5 | <<AoE-I>> vs Kagachi's Minion #2.-
| The strike lands! There's a major critical! (-7 EN)
| 7 + 2 = 9 DMG | 9 * 5 = 45 DMG
-
| The strike lands! There's a major critical! (-7 EN)
-
AGIL | ID: 197680 | BD: 9 + 3 + 1 = 13 | <<AoE-I>> vs Kagachi.
| ID: 197681 | BD: 1 + 3 + 1 = 5 | <<AoE-I>> vs Kagachi's Minion #1.
| ID: 197682 | BD: 4 + 3 + 1 = 8 | <<AoE-I>> vs Kagachi's Minion #2.-
| The strike lands! There's a minor critical! (-9 EN)
| 7 + 1 = 8 DMG | 8 * 5 = 40 DMG | 40 - 15 = 25 DMG
| 7 * 5 = 35 DMG
-
| The strike lands! There's a minor critical! (-9 EN)
-
SACHI | ID: 197683 | BD: 4 + 2 + 1 = 7 | <<TECH-A>> vs Kagachi's Minion #1.
-
| The strike lands! (-6 EN)
| 7 * 6 = 42 DMG
-
| The strike lands! (-6 EN)
- - - - -
-
KAGACHI | ID: 197684 | MD: 6 | Attacking Agil!
- 80 - 15 = 65 DMG
- KAGACHI'S MINION #1 | Stunned!
-
KAGACHI'S MINION #2 | ID: 197685 | MD: 2 - 2 = 0 | Attacking Klein!
- Kagachi's Minion #2 missed!
[0, 2, 0] Sachi | Lv. 5 | HP: 100/100 | EN: 22/28 | DMG: 7 | ACC: 2 | MIT: 15 | TAUNT
[0, 2, 0] Klein | Lv. 5 | HP: 100/100 | EN: 21/28 | DMG: 7 | ACC: 2 | EVA: 2 | MIT: 10
[2, 0, 1] Agil | Lv. 5 | HP: 35/100 | EN: 19/28 | DMG: 7 | ACC: 3 | MIT: 15
[1, 0, 0] Koharu | Lv. 5 | HP: 100/100 | EN: 20/28 | DMG: 8 | ACC: 3 | EVA: 3Kagachi | HP: 276/350 | DMG: 80 | EVA: -1 | MIT: 15
Kagachi's Minion #1 | HP: 13/100 | DMG: 20 | EVA: -1 |[STUNNED]
Kagachi's Minion #2 | HP: 65/100 | DMG: 20 | EVA: -1
Round #2
-
KOHARU | ID: 197686 | BD: 5 + 3 + 1 = 9 | <<ST-II>> vs Kagachi.
-
| The strike lands! (-11 EN)
| 8 * 11 = 88 DMG | 88 - 15 = 73 DMG
-
| The strike lands! (-11 EN)
-
KLEIN | ID: 197687 | BD: 4 + 2 + 1 = 7 | <<AoE-I>> vs Kagachi.
| ID: 197688 | BD: 8 + 2 + 1 = 11 | <<AoE-I>> vs Kagachi's Minion #2.-
| The strike lands! (-9 EN)
| 7 * 5 = 35 DMG | 35 - 15 = 20 DMG
-
| The strike lands! (-9 EN)
-
AGIL | ID: 197689 | BD: 9 + 3 + 1 = 13 | <<AoE-I>> vs Kagachi's Minion #1.
| ID: 197690 | BD: 5 + 3 + 1 = 9 | <<AoE-I>> vs Kagachi's Minion #2.-
| The strike lands! There's a minor critical! (-9 EN)
| 7 + 1 = 8 DMG | 8 * 5 = 40 DMG
| 7 * 5 = 35 DMG
-
| The strike lands! There's a minor critical! (-9 EN)
-
SACHI | ID: 197691 | BD: 7 + 2 + 1 = 10 | <<TECH-A>> vs Kagachi.
-
| The strike lands! (-6 EN)
| 7 * 6 = 42 DMG | 42 - 15 = 27 DMG
-
| The strike lands! (-6 EN)
- - - - -
- KAGACHI | Stunned!
Kagachi | HP: 156/350 | DMG: 80 | EVA: -1 | MIT: 15 |
[STUNNED]
Kagachi's Minion #1 | HP: -27/100 | DMG: 20 | EVA: -1
Kagachi's Minion #2 | HP: -15/100 | DMG: 20 | EVA: -1[2, 2, 0] Sachi | Lv. 5 | HP: 100/100 | EN: 17/28 | DMG: 7 | ACC: 2 | MIT: 15 | TAUNT
[1, 2, 1] Klein | Lv. 5 | HP: 100/100 | EN: 13/28 | DMG: 7 | ACC: 2 | EVA: 2 | MIT: 10
[2, 2, 2] Agil | Lv. 5 | HP: 35/100 | EN: 11/28 | DMG: 7 | ACC: 3 | MIT: 15
[2, 0, 0] Koharu | Lv. 5 | HP: 100/100 | EN: 10/28 | DMG: 8 | ACC: 3 | EVA: 3
Round #3
-
KOHARU |
ID: 197692| BD: 1 + 3 + 1 = 5 | <<ST-I>> vs Kagachi.- | Koharu missed! (-2 EN)
-
KLEIN | ID: 197693 | BD: 9 + 2 + 1 = 12 | <<ST-I>> vs Kagachi.
-
| The strike lands! There's a minor critical! (-6 EN)
| 7 + 1 = 8 DMG | 8 * 6 = 48 DMG | 48 - 15 = 33 DMG
-
| The strike lands! There's a minor critical! (-6 EN)
- AGIL | No action taken.
-
SACHI | ID: 197694 | BD: 9 + 2 + 1 = 12 | <<ST-I>> vs Kagachi.
-
| The strike lands! There's a minor critical! (-6 EN)
| 7 + 1 = 8 DMG | 8 * 6 = 48 DMG | 48 - 15 = 33 DMG
-
| The strike lands! There's a minor critical! (-6 EN)
- - - - -
-
KAGACHI | ID: 197695 | MD: 3 - 3 = 0 | Attacking Sachi!
- Kagachi missed!
Kagachi | HP: 90/350 | DMG: 80 | EVA: -1 | MIT: 15
[4, 2, 0] Sachi | Lv. 5 | HP: 100/100 | EN: 12/28 | DMG: 7 | ACC: 2 | MIT: 15 | TAUNT
[3, 2, 1] Klein | Lv. 5 | HP: 100/100 | EN: 8/28 | DMG: 7 | ACC: 2 | EVA: 2 | MIT: 10
[2, 2, 2] Agil | Lv. 5 | HP: 35/100 | EN: 12/28 | DMG: 7 | ACC: 3 | MIT: 15
[2, 0, 0] Koharu | Lv. 5 | HP: 100/100 | EN: 9/28 | DMG: 8 | ACC: 3 | EVA: 3
Round #4
-
KOHARU | ID: 197696 | BD: 7 + 3 + 1 = 11 | <<ST-I>> vs Kagachi.
-
| The strike lands! (-8 EN)
| 8 * 8 = 64 DMG | 64 - 15 = 49 DMG
-
| The strike lands! (-8 EN)
-
KLEIN | ID: 197697 | BD: 5 + 2 + 1 = 8 | <<ST-I>> vs Kagachi.
-
| The strike lands! (-6 EN)
| 7 * 6 = 42 DMG | 42 - 15 = 27 DMG
-
| The strike lands! (-6 EN)
-
AGIL | ID: 197698 | BD: 8 + 3 + 1 = 12 | <<ST-I>> vs Kagachi.
-
| The strike lands! (-6 EN)
| 7 * 6 = 42 DMG | 42 - 15 = 27 DMG
-
| The strike lands! (-6 EN)
Kagachi | HP: -13/350 | DMG: 80 | EVA: -1 | MIT: 15[4, 2, 0] Sachi | Lv. 5 | HP: 100/100 | EN: 12/28 | DMG: 7 | ACC: 2 | MIT: 15 | TAUNT
[4, 2, 1] Klein | Lv. 5 | HP: 100/100 | EN: 3/28 | DMG: 7 | ACC: 2 | EVA: 2 | MIT: 10
[3, 2, 2] Agil | Lv. 5 | HP: 35/100 | EN: 7/28 | DMG: 7 | ACC: 3 | MIT: 15
[3, 0, 0] Koharu | Lv. 5 | HP: 100/100 | EN: 2/28 | DMG: 8 | ACC: 3 | EVA: 3Let’s revisit the most commonly encountered stats to explain them in further detail using the knowledge we now have of the Dice Roller.
- HP: Hit Points - The amount of health a character has. If this value reaches 0, the character will be forfeit.
- EN: Energy - The amount of energy points a character has. If this value reaches 0, the character will no longer be able to use sword arts.
- DMG: Damage - The base damage a character deals. This value will always minimally be at 1, and will be amplified by one's sword art’s multiplier during combat.
- MIT: Mitigation - Reduces damage done to a character after being hit.
- ACC: Accuracy - Increases one's chances to land an attack. Affects a character’s die value when they roll to attack enemies in combat.
- EVA: Evasion - Decreases one's chances of being hit by an attack. Affects the enemy’s die value when they roll to attack players in combat.
- LD: Loot Die - Increases one's character’s overall luck. Affects a character’s die value when they roll to loot fallen enemies.
We will begin explaining Sword Arts first. This section will primarily address EN and DMG values.
For more information about Die Modifiers in Combat (ACC, EVA, LD), jump to Calculating Die Values in Combat [here].
For more information about Damage Modifiers in Combat (HP, DMG, MIT), jump to Calculating Damage Values in Combat [here].
For more information about regenerating lost values in and out of combat, jump to Energy and Health Regeneration [here].Combat in SAO is largely aided by the use of sword arts, a term used for combat movements assisted by the game’s greater Cardinal system. One can think of them as combat abilities in the context of SAO-RPG; characters can use them in battle to enhance their damage by a powerful multiplier. The use of sword arts is regulated by a character’s Energy (EN), and one can gain access to more powerful sword arts by increasing their weapon’s skill level.
Each sword art has a multiplier and an EN cost. Some sword arts may cost more than others due to an additional effect the sword art possesses. Sword arts are split into four different categories:
- ST: Stands for [Single Target]; this Sword Art may only affect one target at a time.
- AoE: Stands for [Area of Effect]; this Sword Art may affect multiple targets at once, up to a cap of 4.
- TECH: Stands for [Technical]. Sword Arts in this category would induce certain effects to the user or its target(s).
- RAW: Sword Arts in this category are few, but built for specific purposes.
Some sword arts may also have an attribute attached to them, which may change the way one strategizes for combat. These attributes are dependent on a player's weapon type. Refer to the list of attributes below:
- [AoE]: This sword art can be used to strike multiple targets at a time. Each target attacked requires its own roll on the die roller. The EN cost for this sword art increases by 2 per each target struck.
- [Stun]: This sword art can stun a target, forcing them to lose their post action on their next turn. Note that a target can only be stunned once every 3 turns.
- [Delay]: This sword art reduces the target's ACC by 1 for their next turn.
Other sword arts in SAO-RPG also have a pre-requisite condition that must be met before it is capable of being utilized. Some may require a certain natural die value to be met, others may require a specific sword art to be executed on the user's previous turn.
Players must declare which sword art they are using in their Dice Roll’s Purpose when they choose to attack with a sword art. If the attack roll is successful, use the art's multiplier alongside the character’s total base damage to get the character’s total raw damage for the attack.
To view all available sword arts across all weapon types, see the Resources List [here].
To learn more about status effects, see [here].Attacking in Combat
| tags: #how to attackAttacking in SAO-RPG requires a player to roll for a BD value on the Dice Roller and compare it to this chart before modifiers are added.
Natural BD Value Outcome 1 Critical Miss! 2 - 5 Miss. 6 - 8 Hit! 9 Minor Critical Hit! (+1 DMG) 10 Major Critical Hit! (+2 DMG) There are three unique die values on this chart: 1 (Critical Miss), 9 (Minor Critical +1) and 10 (Major Critical +2). Critical is a key term that signifies a predetermined outcome; such values are unable to be modified by common stat values unless a unique enhancement or effect is in play.
- On a Critical Miss, this means that players will always miss.
- On a Major or Minor Critical Hit, this means that players will always land their hits.
Players gain bonus DMG upon rolling a Major or Minor Critical. This bonus DMG value is added to the player’s base DMG for that strike alone before sword art multipliers come into calculation.
Players should roll once for every attack made each turn. If players are performing an AoE attack, they should roll once per target they are attempting to hit. The same applies for enemies; players can choose to utilize a single roll's BD and MD values for a player's strike against the enemy and the enemy's strike against them respectively (unless stated otherwise, eg. in certain Quests).
Calculating Die Values in Combat
| tags: #how to attackLet’s take a look again at a few of the common stats found on SAO-RPG.
- ACC: Accuracy - Increases one's chances to land an attack. Affects the character’s die value when they roll to attack enemies in combat.
- EVA: Evasion - Decreases one's chances of being hit by an attack. Affects the enemy’s die value when they roll to attack players in combat.
- LD: Loot Die - Increases a character’s overall luck. Affects a character’s die value when they roll to loot fallen enemies.
These stats directly affect the die value obtained from the Dice Roller. As such, they are valuable stats to focus on when considering one’s build.
When rolling for a character’s attack, aside from criticals, any modified BD die value of 6 or higher will be considered a hit. A character’s ACC can boost this value; likewise, an enemy’s EVA can lower it. The same goes for an enemy rolling against a character as well, hence explains a worthwhile investment for players to build their EVA stat.
Examples:
SpoilerHere are Kirito’s stats:
Kirito | Lv. 6 | HP: 120/120 | EN: 30/30 | DMG: 7 | ACC: 2 | EVA: 2 | LD: 2Kirito is training against various types of dummy targets. Let’s see his rolls and determine the outcome.
-
ID: 74604 | BD: 8 | Attacking Training Dummy #1 | ACC: 0 | EVA: 3
8 + 2 ACC - 3 EVA = 7
Kirito lands the hit!
-
ID: 74558 | BD: 6 | Attacking Training Dummy #2 | ACC: 0 | EVA: 4
6 + 2 ACC - 4 EVA = 4
Kirito misses!
-
ID: 74555 | MD: 3 | Moving Target #1 attacks Kirito! | ACC: 3 | EVA: 3
3 + 3 ACC - 2 EVA = 4
Moving Target #1 misses!
-
ID: 74556 | MD: 9 | Moving Target #2 attacks Kirito! | ACC: 1 | EVA: 1
9 is a Minor Critical!
Moving Target #2 lands the hit!
-
ID: 74557 | BD: 8 | MD: 7 | Sparring with Combat Trainee | ACC: 3 | EVA: 3
Kirito’s Attack: 8 + 2 ACC - 3 EVA = 7
Kirito lands the hit!
Combat Trainee’s Attack: 7 + 3 ACC - 2 EVA = 8
Combat Trainee lands the hit!
Similarly, a character’s LD will affect their LD value when they are looting monsters in combat. Looting is covered in its own separate topic [here].
Calculating Damage Values in Combat
| tags: #how to calculate damage, dmg calculationLet’s take a look again at a few of the common stats found on SAO-RPG.
- HP: Hit Points - The amount of health a character has. If this value reaches 0, the character will be forfeit.
- DMG: Damage - The base damage a character deals. This value will be amplified by a sword art’s multiplier during combat.
- MIT: Mitigation - Reduces damage done to a character after being hit.
When attacking an enemy in combat, players must state if they are using a basic attack or a sword art on the Dice Roller’s roll purpose.
- Basic attacks deal the base amount of DMG a player has.
- Sword arts apply multipliers to the player’s base DMG to increase the amount of damage dealt with one attack.
When calculating damage on a successful hit, add up all sources of base DMG (eg. Critical attacks will net bonus points of DMG). Then, if a Sword Art has also been used, apply the multiplier to get one's total raw damage. If the opponent has any mitigation, it should be subtracted from the character's raw damage. This results in the final damage dealt. The calculation would look like this:
(Total Base DMG) x (Sword Art Multiplier) = (Raw DMG) - (Enemy MIT) = (Total DMG)
Note that on a successful hit, the lowest damage that can be dealt is 1, even if the target's MIT is higher than the raw damage being dealt against it.
Examples:
SpoilerHere are Kirito's and Klein's stats:
Kirito | Lv. 6 | HP: 120/120 | EN: 30/30 | DMG: 7 | MIT: 12
Klein | Lv. 6 | HP: 120/120 | EN: 30/30 | DMG: 8 | ACC: 4Kirito recently picked up a new set of Light Armor. Let’s help him test his newfound defense.
For the sake of this test, Klein has used an Uncommon Damage Potion (+1 DMG) and an Uncommon Accuracy Snack. Klein is also in possession of the [CURVED SWORD] weapon skill at Rank 2.-
Klein attacks Kirito with [ST-I] of (x6) multiplier. It costs 6 EN.
The strike lands!
8 * 6 = 48 DMG | 48 DMG - 12 MIT = 36 DMG
Let’s get comfortable with tracking Kirito’s HP and Klein’s EN.
Kirito | Lv. 6 | HP: 84/120 (-36) | EN: 30/30 | DMG: 7 | MIT: 12
Klein | Lv. 6 | HP: 120/120 | EN: 24/30 (-6) | DMG: 8 | ACC: 4
-
Klein attacks Kirito with [AOE-I] of (x5) multiplier. It costs 5 EN and carries the [AoE] attribute.
The strike is a Major Critical (+2 DMG); it lands!
With one target struck, the sword art costs 5 + (2 * 1) = 7 EN.
8 + 2 = 10 DMG | 10 * 5 = 50 DMG | 50 - 12 MIT = 38 DMG
Kirito | Lv. 6 | HP: 46/120 (-38) | EN: 30/30 | DMG: 7 | MIT: 12
Klein | Lv. 6 | HP: 120/120 | EN: 17/30 (-7) | DMG: 8 | ACC: 4
- Klein attacks Kirito with a basic attack. It costs 1 EN.
-
The strike lands!
8 DMG - 12 MIT = -4 DMG <= 1 DMG
Kirito | Lv. 6 | HP: 45/120 (-1) | EN: 30/30 | DMG: 7 | MIT: 12
Klein | Lv. 6 | HP: 120/120 | EN: 18/30 (-1) | DMG: 8 | ACC: 4Managing one’s EN is crucial; without energy, there's not much one could do in combat. Note the following:
- At the beginning of each player's turn, they recover (1 * Tier) energy. Starting at full energy, one might expend their energy in one post and then regenerate one energy at the beginning of their next turn before taking action again.
- Successful basic attacks consume 1 energy.
- Successful sword art attacks consume the amount of energy listed on the individual art used.
- Failed attacks consume 2 energy.
- Players cannot go below 0 energy.
If something has an energy cost, it would be listed with the sword art/skill information. There are also enhancements and skills that improve one's total energy and regeneration.
Out of Combat Regeneration
- Energy is restored one point per post out of combat, and has a benchmark of being fully restored on the third post out of combat.
- Health regenerates (Tier * 10) HP each post while out of combat.
Regeneration and recovery rates are based off each player's posts. In a party, each player would need to make three posts each to fully restore their energy.
Examples:
SpoilerHere are Kirito's and Klein's stats:
Kirito | Lv. 6 | HP: 120/120 | EN: 30/30 | DMG: 7 | ACC: 3
Klein | Lv. 6 | HP: 120/120 | EN: 30/30 | DMG: 7 | ACC: 3Kirito and Klein are sparring, both with their weapon skills at Rank 2. Let's see their rolls and determine their outcomes.
-
ID: 176103 | BD: 7 + 3 = 10 | <<ST-I>> vs Klein.
The strike lands! (-6 EN)
7 * 6 = 42 DMG
-
ID: 176104 | BD: 7 + 3 = 10 | <<AoE-I>> vs Kirito.
The strike lands! (-7 EN)
7 * 5 = 35 DMG
Let’s get comfortable with tracking Kirito’s and Klein’s HP and EN.
Kirito | Lv. 6 | HP: 85/120 (-35) | EN: 24/30 (-6) | DMG: 7 | ACC: 3
Klein | Lv. 6 | HP: 78/120 (-42) | EN: 23/30 (-7) | DMG: 7 | ACC: 3
Since this is the start of a new round of combat, Kirito and Klein regenerate one (1) EN.
-
ID: 176106 | BD: 3 + 3 = 6 | <<ST-I>> vs Klein.
The strike lands! (-6 EN)
7 * 6 = 42 DMG
-
ID: 176107 | BD: 10 + 3 = 13 | <<ST-I>> vs Kirito.
The strike lands! It's a major critical! (-6 EN)
7 + 2 = 9 DMG | 9 * 6 = 54 DMG
Kirito | Lv. 6 | HP: 31/120 (-54) | EN: 19/30 (+1, -6) | DMG: 7 | ACC: 3
Klein | Lv. 6 | HP: 36/120 (-42) | EN: 18/30 (+1, -6) | DMG: 7 | ACC: 3
Whoops! Looks like they both struck each other with a little too much force. The two players decide to take a few moments of short rest before getting back into training.
Post #1
Kirito | Lv. 6 | HP: 41/120 (+10) | EN: 20/30 (+1) | DMG: 7 | ACC: 3
Post #2
Klein | Lv. 6 | HP: 46/120 (+10) | EN: 19/30 (+1) | DMG: 7 | ACC: 3Post #3
Kirito | Lv. 6 | HP: 51/120 (+10) | EN: 21/30 (+1) | DMG: 7 | ACC: 3Post #4
Klein | Lv. 6 | HP: 56/120 (+10) | EN: 20/30 (+1) | DMG: 7 | ACC: 3Post #5 | Since this is the third post that Kirito has been out of combat, his EN has been restored to full.
Kirito also decides to chug a few HP Recovery Potions to restore his health to full.
Kirito | Lv. 6 | HP: 120/120 (+10+18+18+18+5) | EN: 30/30 (+9) | DMG: 7 | ACC: 3Post #6 | Since this is the third post that Klein has been out of combat, his EN has been restored to full.
Klein follows Kirito's example to restore his health to full.
Klein | Lv. 6 | HP: 120/120 (+10+18+18+18) | EN: 30/30 (+10) | DMG: 7 | ACC: 3Now that their reserves have been replenished, Kirito and Klein are ready to spar once again.
There are two types of actions a player can take in combat: Post Actions and Free Actions.
Each post a player makes in combat is often tied to its own post action. Players are only able to make one post action per turn.
In-Combat Post Actions:
- Using a Basic Attack
- Using a Sword Art
- Using Active Skills
- Entering Stealth (Roll LD + Stealth Rating)
- Detecting Stealth (Roll LD + Stealth Detection)
- Using Consumables (except alchemy crystals)
- Equipping items
- Unequipping Items
- Trading multiple items to a single player
- Retreating from Combat
On the topic of Active Skills: These are several actions one can take in battle that are not attacks nor sword arts. These actions are often learned through skills that one can pick up, and they can affect their party members’ stats, hate values and cooldowns amongst other things. For more information about these abilities, see the Resources List [here].
Free Actions can be utilized alongside Post Actions during combat. There are several caveats to using Free Actions:
-
Free Actions are split up into three distinct categories: Item Usage, Skill Usage, and System Mechanic.
- Item Usage refers to the use of consumable items.
- Skill Usage refers to the use of a skill, such as [Concentration], [Disguise], [Vanish] and [Quick Change]. All free action skill usages must be declared on the roll purpose of the corresponding post's action.
- System Mechanic covers all actions that fall outside the realm of the first three categories.
- Only one of each category of free action may be activated in a post.
QuoteFor example, let’s take an Alchemist’s Crystal. It has an enhancement called Mass HP Recovery, which allows players to restore health to the entire party as a free action.
With this item:
- Players can only use one (1) Mass HP Recovery Crystal per turn. [Item Usage]
- Players can pair this Crystal use up with another Free Action (eg. trading away another Mass HP Recovery Crystal to another player, which would be categorized under [System Mechanic]).
- Players can also choose to swap out their equipment on the same turn using a skill called [Quick Change]. [Skill Usage]
Look to the following for a brief list of possible Free Actions:
Free Actions
-
Item Usage
- Using an Alchemist’s Crystal
- Using a Performer’s Song (Masterpiece, type Instant)
-
Skill Usage
- Swapping Equipment with [Quick Change]
- Gaining stat bonuses through the use of [Concentration] or [Disguise]
- Entering stealth through [Vanish], if its activation conditions are met.
-
System Mechanics
- Trading one (1) item to one (1) player
- Executing a [Switch]
For more information about Switching, see [here].
Attacks that characters make will draw aggression from their enemies. This mechanic is referred to as hate. Enemies will always attack targets with the highest hate value unless stated otherwise.
- If a player misses, they draw no (0) hate.
- If a player lands their attack, they draw one (1) hate.
- If a player lands a critical attack, they draw two (2) hate.
- Players have the option of choosing who an enemy attacks if it has zero hate from all sources against it.
- If players are tied on hate on a target, the target’s attack will be deferred to the last player who struck that target.
Players will usually indicate an enemy's hate value beside their names or beside the enemy's names.
Examples:
SpoilerHere are Kirito's and Asuna's stats:
[0] Kirito | Lv. 6 | HP: 120/120 | EN: 30/30 | DMG: 7 | ACC: 3 | EVA: 3
[0] Asuna | Lv. 7 | HP: 140/140 | EN: 32/32 | DMG: 6 | ACC: 3 | MIT: 12Kirito and Asuna are fighting a wild hog.
Wild Hog | HP: 70/70 | DMG: 40-
Kirito attacks the Wild Hog with [ST-I] of (x6) multiplier.
Kirito misses! (-2 EN)
-
Asuna attacks the Wild Hog with [ST-I] of (x6) multiplier.
The strike lands! (-6 EN)
6 * 6 = 36 DMG
Let's get comfortable with tracking everyone's stats.
[0] Kirito | Lv. 6 | HP: 120/120 | EN: 28/30 (-2) | DMG: 7 | ACC: 3 | EVA: 3
[1] Asuna | Lv. 7 | HP: 140/140 | EN: 26/32 (-6) | DMG: 6 | ACC: 3 | MIT: 12Wild Hog | HP: 84/120 (-36) | DMG: 40
-
Asuna currently has highest hate on the Wild Hog. The Wild Hog attacks Asuna!
The strike lands!
40 - 12 = 28 DMG
[0] Kirito | Lv. 6 | HP: 120/120 | EN: 28/30 | DMG: 7 | ACC: 3 | EVA: 3
[1] Asuna | Lv. 7 | HP: 112/140 (-28) | EN: 26/32 | DMG: 6 | ACC: 3 | MIT: 12Wild Hog | HP: 84/120 | DMG: 40
A new round of combat begins. Kirito and Asuna regenerate one (1) EN.
-
Kirito attacks the Wild Hog with [ST-I] of (x6) multiplier.
The strike lands! It's a major critical! (-6 EN)
7 + 2 = 9 DMG | 9 * 6 = 54 DMG
-
Asuna attacks the Wild Hog with [ST-I] of (x6) multiplier.
Asuna misses! (-2 EN)
[2] Kirito | Lv. 6 | HP: 120/120 | EN: 23/30 (+1, -6) | DMG: 7 | ACC: 3 | EVA: 3
[1] Asuna | Lv. 7 | HP: 112/140 | EN: 25/32 (+1, -2) | DMG: 6 | ACC: 3 | MIT: 12Wild Hog | HP: 30/120 (-54) | DMG: 40
-
Because of his critical attack, Kirito currently has highest hate on the Wild Hog. The Wild Hog attacks Kirito!
The strike misses!
A new round of combat begins. Kirito and Asuna regenerate one (1) EN.
-
Kirito attacks the Wild Hog with [ST-I] of (x6) multiplier.
The strike lands! (-6 EN)
7 * 6 = 36 DMG
[3] Kirito | Lv. 6 | HP: 120/120 | EN: 18/30 (+1, -6) | DMG: 7 | ACC: 3 | EVA: 3
[1] Asuna | Lv. 7 | HP: 112/140 | EN: 26/32 (+1) | DMG: 6 | ACC: 3 | MIT: 12Wild Hog | HP: -6/120 (-28) | DMG: 40The Wild Hog has been defeated!
On the subject of fighting with Multiple Parties: the enemy will always target the player with the highest hate in the last active party. Even if another player in party #1 had more hate than anyone in party #2, if party #2 was the last active party, the enemy would still only target players in party #2 on its second turn.
For more information on fighting in multiple parties, see [here].
Skill Cooldowns
| tags: #cooldowns in combat, #cdSome skills may grant players the ability to perform special actions in combat. When doing so, they induce a cooldown that acts as a timer, limiting how often the player may use such an action in the fight. The number indicated by the cooldown signifies the number of turns its user must have ended before the action is available for use again.
Example:
SpoilerHere are Yuuki's stats:
[0] Yuuki | Lv. 11 | HP: 220/220 | EN: 40/40 | DMG: 14 | ACC: 3 | EVA: 3Yuuki is testing out a skill called [Concentration]. [Concentration] allows a player to raise their ACC by 1 for a turn and afford them a chance to strike the enemy despite a natural BD1. It has a 5 turn cooldown before it may be used again.
Round #1
- Yuuki uses [Concentration].
[0] Yuuki | Lv. 11 | HP: 220/220 | EN: 40/40 | DMG: 14 | ACC: 3+1 | EVA: 3 || [CONCENTRATION: 0/5]
Her turn ends, and so Concentration's timer goes up by 1.
[0] Yuuki | Lv. 11 | HP: 220/220 | EN: 40/40 | DMG: 14 | ACC: 3 | EVA: 3 || [CONCENTRATION: 1/5]
Round #2
-
Yuuki does nothing this turn.
Her turn ends, and so Concentration's timer goes up by 1.
[0] Yuuki | Lv. 11 | HP: 220/220 | EN: 40/40 | DMG: 14 | ACC: 3 | EVA: 3 || [CONCENTRATION: 2/5]
Round #3
-
Yuuki does nothing this turn.
Her turn ends, and so Concentration's timer goes up by 1.
[0] Yuuki | Lv. 11 | HP: 220/220 | EN: 40/40 | DMG: 14 | ACC: 3 | EVA: 3 || [CONCENTRATION: 3/5]
Round #4
-
Yuuki does nothing this turn.
Her turn ends, and so Concentration's timer goes up by 1.
[0] Yuuki | Lv. 11 | HP: 220/220 | EN: 40/40 | DMG: 14 | ACC: 3 | EVA: 3 || [CONCENTRATION: 4/5]
Round #5
-
Yuuki does nothing this turn.
Her turn ends, and so Concentration's timer goes up by 1.
[0] Yuuki | Lv. 11 | HP: 220/220 | EN: 40/40 | DMG: 14 | ACC: 3 | EVA: 3 || [CONCENTRATION: 5/5]
Round #6
- Yuuki is able to use [Concentration] again at the start of her turn.
[0] Yuuki | Lv. 11 | HP: 220/220 | EN: 40/40 | DMG: 14 | ACC: 3 | EVA: 3
To view all available skills (that may have cooldowns in play), see the Resources List [here].
Switching is a type of Free Action that allows two players in the same party to swap hate values on an opponent. Switching may only occur on a single opponent at any given time.
- To initiate a Switch, a player must first land a successful attack. In the same post they must verbally call out to another player for a Switch.
- To take over the Switch, the player called out to must agree and make a successful follow-up attack to complete the Switch. When this has occurred, the two players will swap hate values.
The player who had switched in must wait one round before initiating another switch.
Retreating
| tags: #running away, #run away from combat, #runaway, #withdrawing from combat, #withdraw from combat, #escaping combatDire situations call for dire solutions; call it a tactical withdrawal or an escape from combat, as long as one manages to live another day, they can return to the site of the fight for a rematch. Dead players tell no tales.
A retreat attempt takes up a post action in combat. Roll a die (LD) to determine the outcome; standard bonuses do not apply.
LD Outcome [1-7] Failed attempt. The enemies are hot on the player’s trail. Roll for the enemies’ attacks on their turn. Combat resumes thereafter. [8-14] Partial success. The enemy is still on the pursuit, but the player manages to evade their attacks. Combat resumes. [15+] Success. The player has lost the interest of the enemy. Exit combat. Circumstances in the escape attempt will affect the LD roll for a positive bonus.
-
If the opponents’ total health is below 50%, improve the escapee’s result by +1.
- For a single enemy, the calculation is as simple as comparing their current HP to their max HP. For groups of enemies, ensure the group’s total health is below 50% of their total max HP before adding this bonus to the result. Enemies that have died in that pack of monsters are factored into this calculation.
- If the escaping player does not have the highest hate against their opponent, improve their result by +2.
- If this is a repeated escape attempt, improve the escapee’s roll’s result by the number of past withdrawal attempts in their current fight.
While running away, any monsters that happen to die will not drop loot. Players are also not allowed to re-engage these monsters in the same thread, even if other party members happen to remain in the heat of battle.
Examples:
SpoilerArgo | Lv. 10 | HP: 200/200 | EN: 38/38 | DMG: 1 | EVA: 3 | LD: 5
Wild Wolf #1 | HP: 80/80 | DMG: 30
Wild Wolf #2 | HP: 80/80 | DMG: 30Argo has just been ambushed by two Wild Wolves! She's not built for combat. The best she can do is try and run away!
Round #1
ID: 176159 | LD: 1 | Retreating from combat.
Failure!ID: 176160 | MD: 3 - 3 = 0 | Wild Wolf #1 missed!
ID: 176161 | MD: 9 - 3 = 6 | Wild Wolf #2 attacks!
The strike lands! It's a minor critical! (-31 HP)Argo | Lv. 10 | HP: 169/200 | EN: 38/38 | DMG: 1 | EVA: 3 | LD: 5
Round #2
ID: 176163 | LD: 5 +1 = 6 | Retreating from combat. Escape Attempt #2.
Failure!ID: 176164 | MD: 1 - 3 = -2 | Wild Wolf #1 missed!
ID: 176165 | MD: 6 - 3 = 3 | Wild Wolf #2 missed!
Round #3
ID: 176166 | LD: 6 +2 = 8 | Retreating from combat. Escape Attempt #3.
Partial Success!Wild Wolves #1 and #2 automatically miss!
Round #4
ID: 176167 | LD: 19 +3 = 22 | Retreating from combat. Escape Attempt #4.
Success! Argo has escaped combat!It is worth noting that one's inventory is specifically limited during times of combat. Players are give five (5) slots with which they can fill with items, be it equipment to swap to or consumables for use. Each consumable, should they have the same name and properties, can stack up to a quantity of five (5) per slot. During combat, they may only use items from this prepared load out.
Players must declare what items they have in their Battle-Ready Inventory as part of their Character Stats at the start of the thread. Players are allowed to organize and swap items between their main inventory and their battle-ready inventory in a post action when they are not in combat.
An example has already been provided [here], regarding Player Stats under Thread Anatomy.
Some skills increase this limit. For more information, see the Resources List [here].
For more information about swapping items, see Post Actions [here].
For more information about having stats in a player's first post, see [here].Status Effects
| tags: #status conditionsSpecial equipment and sword arts will be able to apply status effects. Status effects come in a few distinct flavours:
- Buffs and Debuffs positively and negatively impact their targets' stats respectively. Debuffs in particular may also create vulnerabilities for the target that may be exploited in future turns.
- Ailments debilitate their targets in various other manners (losing a turn, suffering damage over time).
- Conditions are unique effects that can't be categorized under the above labels. They also encompass effects that protect their targets from ailments and/or debuffs.
Examples of Status Effects:
-
Buffs
-
Thread Buffs; from Consumables, Skills, Housing
eg. Damage, Mitigation, Accuracy, Evasion, Antibiotics, Filling -
Turn Buffs; from Skills
eg. Concentration, Disguise, Charge, Rampart -
Support Buffs; from Skills
eg. Sharpness, Barrier -
Housing Buffs; from Housing
eg. Rested, Clean, Relaxed, Col Stash, Skylight
-
Thread Buffs; from Consumables, Skills, Housing
-
Debuffs
-
Temporary Debuffs; from Consumables
eg. Hypnosis, Lullaby, Misperception -
Vulnerabilities; from Consumables
eg. Incarcerate, Perpetuate -
Exploitations; from Sword Arts
eg. Delay, Shatter
-
Temporary Debuffs; from Consumables
-
Ailments
-
Damage over Time (DoTs); from Consumables, Equipment, Sword Arts
eg. Burn, Blight, Bleed, Envenom, Toxic Venom -
Disables; from Consumables, Equipment, Sword Arts
eg. Stun, Paralysis, Freeze
-
Damage over Time (DoTs); from Consumables, Equipment, Sword Arts
-
Conditions:
-
Immunities; from Consumables, Equipment
eg. Paralytic Immunity, Bloodclot, Antifreeze, Fireproof
-
Immunities; from Consumables, Equipment
Note that enhancements that modify the damage of outgoing attacks, such as Heavy Momentum, Fallen, Holy, or Phase do not qualify as status effects.
Special Clauses:
- Damage over Time: Damage done by DoTs are not affected by mitigation.
-
Debuffs:
- Shatter: Shatter's MIT deduction against a target is also calculated on the attack it is applied upon.
-
Disables: All disables remove evasion properties from their targets for as long as they remain disabled.
- Stun vs Paralysis vs Freeze: Stuns have a 3 turn cooldown that must wear off before the target can be stunned again. Paralysis and Freeze does not have this cooldown. In the scenario that all three disables are inflicted against an enemy on the same turn, Freeze would take priority over Paralysis and Stun. Between Paralysis and Stun in the same scenario, Paralysis would take priority over Stun.
- Freeze: If a player has activated Freeze in a solo-combat scenario, Freeze will remove the enemy's turn action. If another player is present to strike a frozen monster before it takes its turn, it will also inflict additional damage.
- Vulnerabilities: Incarcerate and Perpetuate do not stack.
For more information about the various kinds of status effects, look to the Resources List [here].
For more information about Housing Buffs, look to the Resources List [here].Though the methods of altering one's critical thresholds are few, with game elements such as [Focus] sword arts and the [Duelist] Unique Skill, this section will explain how critical thresholds work.
When expanding a player's critical threshold, all expansions will be considered minor criticals. The die value the bottom of a player's critical threshold will always provide a +1 base DMG increase. This base DMG then increases should the player roll higher into the critical threshold. Critical thresholds will always end at the highest value of the die being rolled (in the case of combat, this value is 10).
Examples:
- In most scenarios, players will work with a base critical threshold of natural BD9/10, which hence relates to a (+1/2) DMG increase.
- An example of a modified critical threshold may be seen when using a [Focus] sword art, which expands the player's threshold and bonus DMG values to natural BD8/9/10 and (+1/2/3) DMG respectively.
- Players with the [Duelist] Unique Skill using a [Focus] sword art will have a modified critical threshold of BD7/8/9/10, netting them (+1/2/3/4) DMG respectively.
It is worth noting that a natural BD10 is the only method of achieving a major critical. For the [Duelist] Unique Skill holder, with their BD+1 adjustment allowing for modified criticals, a natural BD9 will achieve them a major critical.
During combat, the number of conditionals can grow out of hand should players utilize them to their fullest extent. The following standards have been provided to aid players in running through when their applied effects may come into play:
- Recovery effects (Health regeneration, EN regeneration)
- Detrimental effects (Bleed, Burn, Blight, Rend, etc.)
- Free Actions (Using Crystal, Quick Change, Readying for a Switch, etc.)
- Post Action
- Reactive Free Actions (Vanishing after slaying an enemy, etc.)
- Recovery from Detrimental effects (Ailments wearing off; Paralyze, Bleed, etc.)
- End Turn.
Examples:
SpoilerSerpentine Soldier | HP: 86/240 | DMG: 32 | BD9+: BLEED [12], PARALYZE
-
Serpentine Solider attacks Kirito!
The strike lands! It's a major critical!
32 + 2 = 34 DMG
[3] Kirito | Lv. 6 | HP: 58/120 (-34) | EN: 12/30 | DMG: 7 | ACC: 3 | REGEN: 4 | BLEEDING: 12 (0/2) | PARALYZED
[2] Asuna | Lv. 7 | HP: 86/140 | EN: 25/32 | DMG: 6 | ACC: 3 | MIT: 12
A new round of combat begins. Kirito and Asuna regenerate one (1) EN.
Kirito has just been badly hurt! Thankfully, Asuna is there to cover for him while he wrestles with his debilitations. Let's look at the order of operations as he attempts to recover.
-
Kirito recovers health via Regen! (+4 HP)
Kirito is bleeding! (-12 HP)
Kirito is paralyzed; he is unable to move!
-
Asuna hands Kirito a Perfect HP Recovery Potion as a free action.
Asuna attacks the Serpentine Soldier with [ST-I] of (x6) multiplier.
The strike lands! (-6 EN)
6 * 6 = 36 DMG
[3] Kirito | Lv. 6 | HP: 50/120 (+4-12) | EN: 13/30 (+1) | DMG: 7 | ACC: 3 | REGEN: 4 | BLEEDING: 12 (1/2) |
PARALYZED| REGENERATING: 4 (1/3)
[3] Asuna | Lv. 7 | HP: 86/140 | EN: 20/32 (+1, -6) | DMG: 6 | ACC: 3 | MIT: 12Serpentine Soldier | HP: 50/240 (-36) | DMG: 32 | BD9+: BLEED [12], PARALYZE
-
With matching hate values, Asuna is the last player to have attacked the Serpentine Soldier. The Serpentine Solider attacks Asuna!
The strike lands!
32 - 12 = 20 DMG
[3] Kirito | Lv. 6 | HP: 50/120 | EN: 13/30 | DMG: 7 | ACC: 3 | REGEN: 4 | BLEEDING: 12 (1/2) |
PARALYZED| REGENERATING: 4 (1/3)
[3] Asuna | Lv. 7 | HP: 66/140 (-20) | EN: 20/32 | DMG: 6 | ACC: 3 | MIT: 12Serpentine Soldier | HP: 50/240 | DMG: 32 | BD9+: BLEED [12], PARALYZE
A new round of combat begins. Kirito and Asuna regenerate one (1) EN.
-
Kirito recovers health via Regen! (+4 HP)
Kirito is bleeding! (-12 HP)
Kirito has recovered from Paralysis! Kirito used an Perfect HP Recovery Potion! (+18 HP)
-
Asuna attacks the Serpentine Soldier with [TECH-A] of (x6) multiplier.
The strike lands! (-7 EN)
6 * 6 = 36 DMG
[3] Kirito | Lv. 6 | HP: 60/120 (+4-12+18) | EN: 14/30 (+1) | DMG: 7 | ACC: 3 | REGEN: 4 |
BLEEDING: 12 (2/2)| REGENERATING: 4 (2/3)
[3] Asuna | Lv. 7 | HP: 66/140 | EN: 14/32 (+1, -7) | DMG: 6 | ACC: 3 | MIT: 12Serpentine Soldier | HP: 14/240 (-36) | DMG: 32 | BD9+: BLEED [12], PARALYZE | [STUNNED: 0/1]
- Serpentine Solider is stunned! It can't move!
Serpentine Soldier | HP: 14/240 | DMG: 32 | BD9+: BLEED [12], PARALYZE |
[STUNNED: 1/1]
A new round of combat begins. Kirito and Asuna regenerate one (1) EN.
-
Kirito recovers health via Regen! (+4 HP)
Kirito has recovered from Bleed!
Kirito attacks the Serpentine Soldier with [ST-I] of (x6) multiplier.
The strike lands! (-6 EN)
7 * 6 = 42 DMG
[4] Kirito | Lv. 6 | HP: 64/120 (+4) | EN: 9/30 (+1, -6) | DMG: 7 | ACC: 3 | REGEN: 4 |
REGENERATING: 4 (3/3)
[3] Asuna | Lv. 7 | HP: 66/140 | EN: 15/32 (+1) | DMG: 6 | ACC: 3 | MIT: 12Serpentine Soldier | HP: -28/240 | DMG: 32 | BD9+: BLEED [12], PARALYZESerpentine Soldier has been defeated!
The following terminology will be used to define batches of combat:
- Every entity (player, monster, NPC) that attacks or takes a Post Action will normally take a turn.
- After each participant in combat has taken their turn, a new round will begin starting from the first initiator of the fight.
- Given multiple parties in combat, once every party has completed a round of combat with their enemy, a new rotation will begin starting with the first party in the fight.
If more than four players are involved in combat, multiple parties should be formed. Parties can be split up in any way as long as a single party does not exceed four members (i.e. two groups of three / one group of four and one group of two). During combat involving multiple parties, the enemy must have a turn in between each group. A round of combat with six players could look like this:
-
Party #1
- [Player 1]
- [Player 2]
- [Player 3]
- [Enemies' Turn]
-
Party #2
- [Player 4]
- [Player 5]
- [Player 6]
- [Enemies' Turn]
The group of players that are currently attacking is known as the 'active party'. The last player in the active party should make additional rolls to control the enemies' movements. In the example above, Player #3 has the responsibility of wrapping up their party and the enemies’ turn, while Player #6 has the responsibility of concluding the entire round of combat by rolling once more for their opponents.
Players can choose to start combat with enemies of their own design. Only four enemies can be spawned in and fought at any given time. All custom enemies must respect the following guidelines for monsters found on Aincrad’s floors:
Floor Standard Parameters:
-
Minimum:
- HP = (Floor * 10)
- Damage = (Floor * 3)
Multiple enemies designed in the same fashion should be labelled with numbers behind their names (eg. Boar #1, Boar #2, Boar #3). Players are also allowed to empower or debilitate their enemies with different stats and effects as they see fit.
Custom enemies, should they meet loot-minimum parameters, are subject to looting once killed.
Examples:
SpoilerHere are a list of monsters Kirito has spotted on his journey throughout Aincrad.
[ Floor 7 ]
- Ibex Goat | HP: 70/70 | DMG: 21
- Tiny Rock Golem | HP: 150/150 | DMG: 45 | MIT: 30
-
The Greatest Avian | HP: 350/350 | DMG: 105 | EVA: 3 | FLIGHT | STUNNING PECK
> FLIGHT: If the opponent rolls a CD9+ on their attack, The Greatest Avian dodges it even if it is a critical strike.
> STUNNING PECK: On an MD9+, The Greatest Avian's attack stuns the opponent for one turn.
[ Floor 9 ]
- Imp | HP: 90/90 | DMG: 27
- Scorched Fiend | HP: 130/130 | DMG: 52
-
Firestarter | HP: 300/300 | DMG: 90 | BURN II
> BURN II: On an MD8+, Firestarter inflicts [BURN: 12 DMG] for two turns against its enemy. -
Lava Drake | HP: 408/408 | DMG: 135 | FIRE BREATH
> FIRE BREATH: On an MD9+, Lava Drake deals 50 more damage to its opponent and inflicts [BURN: 12 DMG] for two turns against its enemy. -
Blazing Warrior | HP: 213/213 | DMG: 99 | MIT: 35 | ACC: 2 | EVA: 2 | BURN II | BRUTE STRENGTH
> BURN II: On an MD8+, Blazing Warrior inflicts [BURN: 12 DMG] for two turns against its enemy.
> BRUTE STRENGTH: On an MD6-8, Blazing Warrior deals 25 more damage.
For more information about Looting, see [here].
Some floors and quests have specific rules regarding environmental effects. Environmental effects cannot be negated until one moves out of their circumstances (eg. leaving a floor, ending a quest). Environmental effects do not affect monsters within their vicinity unless stated otherwise.
- Visibility: Low-light or Darkness conditions are capable of lowering one's ACC and Searching.
- Hazardous Terrain: Takes on various forms, capable of lowering various stats or apply ailments to passing players.
Be sure to check the floor descriptions or quest summaries for these details.
'Grinding' Threads
When calculating math for threads that do not include Quests, Field Bosses, Dungeons, Events, Labyrinth Scouting and Boss Fights, Raids, players may choose to forego critical hits and enhancement procs against mobs to simplify the math. Full calculations and rolls are still required, in all other respects. Increased hate generated from critical hits still apply, even where the player chooses to ignore the other benefits, unless the target is killed or hate is otherwise irrelevant.
Putting it all Together
| tags: #combat summary, #combat tldr, #tldr combat, #how to fight, #combat how toCombat is understandably complex and text heavy. While there are many rules to the subject, most of the time players will not be adhering to too many of its various rules and applications, especially when they first start the game. The list of actions below can apply to all combat scenarios as a streamlined, condensed process. Once this sequence is mastered, players are fully welcome to experiment as with combat as they see fit.
-
Start a character's turn. Apply regeneratives (health and/or energy), resolve ailments and progress cooldown counters here. Players should always be capable of delivering a basic attack (single target sword art, costing 1 EN and dealing player’s DMG).
- Any Free Actions? Should players wish to utilize Free Actions, they must do so here before they take their post action. Depending on the type of Free Action, its use may also be required to be stated on the Die Roller.
-
Take a Post Action. Most of the time, this would be a sword art. In the event that one is not attacking, declare the action taken as clearly as possible (consuming an item, doing nothing for that turn).
- If a character is attacking, roll for their attack. On the [Die Roller], roll for a BD/MD’s results. State the attack’s name on the roll purpose (sword art or otherwise) and state the target that it’s being inflicted on. The numbers gained directly from the dice roller are referred to as natural rolls.
- Modify that die. Apply ACC/EVA bonuses to the BD/MD accordingly. The attacking party’s ACC would improve the natural roll’s result, while the defending party’s EVA would reduce it. The numbers after these applications are referred to as modified rolls.
-
Did it hit? If the modified results are above 6, it’s a hit. Natural rolls of 1 will always miss. Natural rolls of 9/10 will always land, and the attack gains a +1/+2 DMG boost respectively. These ranges are referred to as critical hits or misses.
-
If yes, Damage Calculation. Attacks are calculated as such:
[Player DMG] x [Sword Art Multiplier] = [Raw Damage]
If an enemy has mitigation, then here’s how the calculation would continue:
[Raw Damage] - [Enemy MIT] = [Final Damage]
Remember that if the enemy’s MIT is higher than the delivered raw damage, they still take one (1) point of damage from that attack. - If yes, Hate Calculation. Each successful strike will yield the attacking player 1 hate from the targeted enemy. Critical attacks yield 2 hate. Hate is used to determine which player enemies will attack on their next turn; the higher the hate, the more likely an enemy will strike a player. On a tie of hate, the enemy will attack the last player who had attacked it. If an attack has not been made against a monster, the players get to decide who amongst them is targeted.
-
If yes, Damage Calculation. Attacks are calculated as such:
- Energy Calculation. For players, failed attacks consume 2 energy (EN). Successful attacks consume the sword art/skill’s stated EN cost.
- Ending One's Turn: Turn order will always operate in batches. Commonly, all players will take a turn each where they declare and roll for their post actions before the enemies take their turn. This is referred to as a round of combat. The last player posting for each round of combat usually rolls for the enemies’ attacks.
Players can opt to use the roll made for their attack for their enemy as well, or roll separately for their opponent, unless stated otherwise (eg. Quests will sometimes have this requirement). The same goes for enhancements with thresholds for activation (eg. Recovery, Vampiric (Defense)). In either cases, keep all combatants’ rolling styles consistent.
Full Combat Examples:
Spoiler1v1 | Kirito vs. Frenzy Boar
SpoilerStart of Combat
[0] Kirito | Lv. 8 | HP: 160/160 | EN: 34/34 | DMG: 7 | ACC: 3 | EVA: 3
| Kirito is now a Rank 3 [ONE-HANDED STRAIGHT SWORD] user.Frenzy Boar | HP: 250/250 | DMG: 36
Round #1
ID: 197700 | BD: 10 + 3 = 11 | MD: 10 - 3 = 7 | <<ST-I>> vs Frenzy Boar.
-
The strike lands! It's a major critical! (-8 EN)
| 7 + 2 = 9 DMG | 9 * 8 = 72 DMG -
Frenzy Boar attacks Kirito! It's a major critical!
| 36 + 2 = 38 DMG
Frenzy Boar | HP: 178/250 (-72) | DMG: 36
[1] Kirito | Lv. 8 | HP: 122/160 (-38) | EN: 26/34 (-8) | DMG: 7 | ACC: 3 | EVA: 3
Round #2
ID: 197701 | BD: 5 + 3 = 8 | MD: 2 - 3 = -1 | <<ST-II>> vs Frenzy Boar.
-
The strike lands! (-11 EN)
| 7 * 11 = 77 DMG - Frenzy Boar missed!
Frenzy Boar | HP: 101/250 (-77) | DMG: 36
[1] Kirito | Lv. 8 | HP: 122/160 | EN: 16/30 (+1, -11) | DMG: 7 | ACC: 3 | EVA: 3
Round #3
ID: 197702 | BD: 10 + 3 = 10 | MD: 3 - 3 = 0 | <<TECH-A>> vs Frenzy Boar.
-
The strike lands! (-9 EN)
| 7 * 8 = 56 DMG
| Frenzy Boar is stunned!
Frenzy Boar | HP: 45/250 (-56) | DMG: 36 |
[STUNNED][2] Kirito | Lv. 8 | HP: 122/160 | EN: 8/30 (+1, -9) | DMG: 7 | ACC: 3 | EVA: 3
Round #4
ID: 197703 | BD: 5 + 3 = 8 | <<ST-I>> vs Frenzy Boar.
-
The strike lands! (-8 EN)
| 7 * 8 = 56 DMG
| Frenzy Boar has been defeated!
Frenzy Boar | HP: -11/250 (-35) | DMG: 36[3] Kirito | Lv. 8 | HP: 122/160 | EN: 1/30 (+1, -8) | DMG: 7 | ACC: 3 | EVA: 3
1v1 | Kirito vs Skeleton
SpoilerStart of Combat
[0] Kirito | Lv. 8 | HP: 160/160 | EN: 34/34 | DMG: 9 | ACC: 3 | EVA: 3
| Kirito is now a Rank 3 [ONE-HANDED STRAIGHT SWORD] user.Skeleton | HP: 300/300 | DMG: 60
Round #1
ID: 197704 | BD: 4 + 3 = 7 | <<TECH-A>> vs Skeleton.
-
The strike lands! (-9 EN)
| 9 * 8 = 72 DMG
| Skeleton is stunned!
Skeleton | HP: 228/300 (-72) | DMG: 60 |
STUNNED[1] Kirito | Lv. 8 | HP: 160/160 | EN: 25/34 (-15) | DMG: 9 | ACC: 3 | EVA: 3
Round #2
ID: 197705 | BD: 3 + 3 = 6 | MD: 10 - 3 = 7 | <<ST-I>> vs Skeleton.
-
The strike lands! (-8 EN)
| 9 * 8 = 72 DMG -
Skeleton attacks Kirito! It's a major critical!
| 60 + 2 = 62 DMG
Skeleton | HP: 156/300 (-72) | DMG: 60 || [STUN IMMUNITY: 0/4]
[2] Kirito | Lv. 8 | HP: 98/160 (-62) | EN: 18/34 (+1, -8) | DMG: 9 | ACC: 3 | EVA: 3
Round #3
ID: 197706 | BD: 3 + 3 = 6 | MD: 6 - 3 = 3 | <<ST-II>> vs Skeleton.
-
The strike lands! (-11 EN)
| 9 * 11 = 99 DMG - Skeleton missed!
Skeleton | HP: 57/300 (-99) | DMG: 60 || [STUN IMMUNITY: 1/4]
[3] Kirito | Lv. 8 | HP: 98/160 | EN: 8/34 (+1, -11) | DMG: 9 | ACC: 3 | EVA: 3
Round #4
ID: 197707 | BD: 9 + 3 = 12 | <<TECH-A>> vs Skeleton.
-
The strike lands! It's a minor critical! (-9 EN)
| 9 + 1 = 10 DMG | 10 * 8 = 80 DMG
| Skeleton is immune to stun.
| Skeleton has been defeated!
Skeleton | HP: -23/300 (-80) | DMG: 60 || [STUN IMMUNITY: 2/4][5] Kirito | Lv. 8 | HP: 98/160 | EN: 0/34 (+1, -9) | DMG: 9 | ACC: 3 | EVA: 3
1v4 | Agil vs Dire Wolves
SpoilerStart of Combat
[0, 0, 0, 0] Agil | Lv. 17 | HP: 340/340 | EN: 52/52 | DMG: 16 | ACC: 2 | EVA: 1 | MIT: 71
| Agil is a Rank 5 [TWO-HANDED WAR AXE] user.Dire Wolf #1 | HP: 280/280 | DMG: 84
Dire Wolf #2 | HP: 280/280 | DMG: 84
Dire Wolf #3 | HP: 280/280 | DMG: 84
Dire Wolf #4 | HP: 280/280 | DMG: 84
Round #1
ID: 197708 | BD: 6 + 2 = 8 | MD: 7 - 1 = 6 | <<AOE-I>> vs Dire Wolf #1.
ID: 197709 | BD: 9 + 2 = 11 | MD: 1 - 1 = 0 | <<AOE-I>> vs Dire Wolf #2.
ID: 197710 | BD: 4 + 2 = 6 | MD: 10 - 1 = 9 | <<AOE-I>> vs Dire Wolf #3.
ID: 197711 | BD: 7 + 2 = 9 | MD: 2 - 1 = 1 | <<AOE-I>> vs Dire Wolf #4.-
Agil lands 4 hits! (-19 EN)
| 16 * 11 = 176 DMG
| 16 + 1 = 17 DMG | 17 * 11 = 187 DMG -
Dire Wolf #1, #3 attack Agil!
| 84 - 71 = 13 DMG
| 84 + 2 = 86 DMG | 86 - 71 = 15 DMG
Dire Wolf #1 | HP: 104/280 (-176) | DMG: 84
Dire Wolf #2 | HP: 93/280 (-187) | DMG: 84
Dire Wolf #3 | HP: 104/280 (-176) | DMG: 84
Dire Wolf #4 | HP: 104/280 (-176) | DMG: 84[1, 2, 1, 1] Agil | Lv. 17 | HP: 312/340 (-13-15) | EN: 33/52 (-19) | DMG: 14 | ACC: 2 | EVA: 1 | MIT: 71
Round #2
ID: 197712 | BD: 6 + 2 = 8 | <<AOE-II>> vs Dire Wolf #1.
ID: 197713 | BD: 3 + 2 = 5 | MD: 6 - 1 = 5 | <<AOE-II>> vs Dire Wolf #2.
ID: 197714 | BD: 7 + 2 = 9 | <<AOE-II>> vs Dire Wolf #3.
ID: 197715 | BD: 6 + 2 = 8 | <<AOE-II>> vs Dire Wolf #4.-
Agil lands 3 hits! (-20 EN)
| 16 * 14 = 224 DMG
| Dire Wolf #1, #3, #4 have been defeated! - Dire Wolf #2 missed!
Dire Wolf #1 | HP: -120/280 (-224) | DMG: 84
Dire Wolf #2 | HP: 93/280 | DMG: 84
Dire Wolf #3 | HP: -120/280 (-224) | DMG: 84
Dire Wolf #4 | HP: -120/280 (-224) | DMG: 84[1, 3, 2, 2] Agil | Lv. 17 | HP: 312/340 | EN: 14/52 (+1, -20) | DMG: 14 | ACC: 2 | EVA: 1 | MIT: 71
Round #3
ID: 197718 | BD: 9 + 2 = 11 | <<ST-I>> vs Dire Wolf #2.
-
The strike lands! It's a minor critical! (-12 EN)
| 16 + 1 = 17 | 17 * 12 = 204 DMG
| Dire Wolf #1 has been defeated!
Dire Wolf #1 | HP: -111/280 (-204) | DMG: 84[2] Agil | Lv. 17 | HP: 312/340 | EN: 3/52 (+1, -12) | DMG: 14 | ACC: 2 | EVA: 1 | MIT: 71
2v1 | Kirito & Asuna vs Minotaur
SpoilerStart of Combat
[0] Kirito | Lv. 15 | HP: 300/300 | EN: 48/48 | DMG: 15 | ACC: 3 | EVA: 3 | MIT: 12
| Kirito is a Rank 5 [ONE-HANDED STRAIGHT SWORD] user.
[0] Asuna | Lv. 15 | HP: 300/300 | EN: 48/48 | DMG: 14 | ACC: 2 | EVA: 2 | MIT: 27
| Asuna is a Rank 5 [RAPIER] user.Minotaur | HP: 1000/1000 | DMG: 150 | EVA: -1 | MIT: 25
Round #1
-
KIRITO | ID: 197719 | BD: 1 + 3 + 1 = 5 | <<TECH-A>> vs Minotaur.
- | Critical miss! (-2 EN)
-
ASUNA | ID: 197720 | BD: 6 + 2 + 1 = 9 | CD: 6 | <<TECH-A>> vs Minotaur.
-
| The strike lands! (-13 EN)
| 14 * 12 = 168 DMG | 168 - 25 = 143 DMG - | Minotaur is stunned!
-
| The strike lands! (-13 EN)
Minotaur | HP: 920/1000 (-80) | DMG: 150 | EVA: -1 | MIT: 25 ||
[STUNNED]| [STUN IMMUNITY: 1/4][0] Kirito | Lv. 15 | HP: 300/300 | EN: 46/48 (-2) | DMG: 15 | ACC: 3 | EVA: 3 | MIT: 12
[1] Asuna | Lv. 15 | HP: 300/300 | EN: 35/48 (-13) | DMG: 14 | ACC: 2 | EVA: 2 | MIT: 27
Round #2
-
KIRITO | ID: 197721 | BD: 7 + 3 + 1 = 11 | CD: 4 | <<ST-I>> vs Minotaur.
-
| The strike lands! (-12 EN)
| 15 * 12 = 180 DMG | 180 - 25 = 155 DMG
-
| The strike lands! (-12 EN)
-
ASUNA | ID: 197722 | BD: 8 + 2 + 1 = 11 | CD: 9 | MD: 10 - 2 = 8 | <<ST-I>> vs Minotaur.
-
| The strike lands! (-12 EN)
| 14 * 12 = 168 DMG | 168 - 25 = 143 DMG
| Asuna gains [ST-B READY]! -
| Minotaur attacks Asuna!
| 150 + 2 = 152 DMG | 152 - 24 = 128 DMG
-
| The strike lands! (-12 EN)
Minotaur | HP: 622/1000 (-155-143) | DMG: 150 | EVA: -1 | MIT: 25 || [STUN IMMUNITY: 2/4]
[1] Kirito | Lv. 15 | HP: 300/300 | EN: 35/36 (+1, -12) | DMG: 15 | ACC: 3 | EVA: 3 | MIT: 12
[2] Asuna | Lv. 15 | HP: 172/300 (-128) | EN: 24/36 (+1, -12) | DMG: 14 | ACC: 2 | EVA: 2 | MIT: 24 || [ST-B READY]
Round #3
-
KIRITO | ID: 197723 | BD: 9 + 3 + 1 = 13 | CD: 9 | <<ST-II>> vs Minotaur.
-
| The strike lands! It's a minor critical! (-15 EN)
| 15 + 1 = 16 DMG | 16 * 15 = 240 DMG | 240 - 25 = 215 DMG
| Kirito gains [ST-B READY]!
-
| The strike lands! It's a minor critical! (-15 EN)
-
ASUNA | ID: 197724 | BD: 3 + 2 + 1 = 6 | MD: 8 - 2 = 6 | <<ST-B>> vs Minotaur.
-
| The strike lands! (-20 EN)
| 14 * 20 = 280 DMG | 280 - 25 = 255 DMG -
| Minotaur attacks Asuna!
| 150 - 24 = 126 DMG
-
| The strike lands! (-20 EN)
Minotaur | HP: 152/1000 (-215-255) | DMG: 150 | EVA: -1 | MIT: 25 || [STUN IMMUNITY: 3/4]
[3] Kirito | Lv. 15 | HP: 300/300 | EN: 20/36 (+1, -15) | DMG: 15 | ACC: 3 | EVA: 3 | MIT: 12 || [ST-B READY]
[3] Asuna | Lv. 15 | HP: 46/300 (-126) | EN: 5/36 (+1, -20) | DMG: 14 | ACC: 2 | EVA: 2 | MIT: 24 ||[ST-B READY]
Round #4
-
KIRITO | ID: 197725 | BD: 3 + 3 + 1 = 7 | <<ST-B>> vs Minotaur.
-
| The strike lands! (-20 EN)
| 15 * 20 = 300 DMG | 300 - 25 = 275 DMG
| Minotaur is defeated!
-
| The strike lands! (-20 EN)
Minotaur | HP: -123/1000 (-275) | DMG: 150 | EVA: -1 | MIT: 25 || [STUN IMMUNITY: 3/4][4] Kirito | Lv. 15 | HP: 300/300 | EN: 1/36 (+1, -12) | DMG: 15 | ACC: 3 | EVA: 3 | MIT: 12 ||
[ST-B READY]
[3] Asuna | Lv. 15 | HP: 46/300 | EN: 6/36 (+1) | DMG: 14 | ACC: 2 | EVA: 2 | MIT: 24 -
KOHARU | ID: 197676 | BD: 3 + 3 + 1 = 7 | <<ST-I>> vs Kagachi.
-
The bulk of this guide will outline the various elements and actions of SAO-RPG that a player can take. It is split up into three main sections: Thread Mechanics, Character Growth and End Game.
-
[Thread Mechanics] will cover what actions are possible for players to take with regards to SAO-RPG’s systems and stats. We highly recommend giving most of these topics a glance over at least once, as these topics are frequently visited by most players during their time on SAO-RPG.
Most necessary topic(s): [Thread Mechanics], [Post⠀Actions], [Combat]
-
[Character Growth] will cover elements of the game that players can look into should they want to build either statistical and/or flavour elements of their character. We recommend reading these topics based on one's interest in these elements. Keen on a familiar? Look into that.
Most necessary topic(s): [Quests], [Evaluations], [Paragon Levels]
-
[End Game] will cover the mechanics necessary with regards to beating the game. We recommend reading these topics on a need-to-know basis, since these mechanics don’t come into play as often as topics under Thread Mechanics, for example.
Most necessary topic(s): [PvP]
Click on the names of the various topics or sections in the list to jump to them.
Most of the time, players will be off on their own adventures with a couple other characters in a thread of their own. In these scenarios, players will often take turns with each other writing posts, detailing their characters’ actions with regards to the other player(s) characters. Players will often create their posts in a set rotation: for example, if there are three players in a given thread, Player A gets to go first, Player B second and Player C third, before the cycle resets and Player A gets to reply again.
[OP]s are the exception to this rotational rule; any player is allowed to post at their own rate as long as they respect the no-double-posting rule. Ideally, this would also respect the rate of which other players involved in the [OP] can post, so player discretion is advised.
Players may pass their own turns to post to reorganize the post order. Communication with fellow party members and writers is crucial! In the scenario that a player is unable to post for an extended period of time, they should inform their teammates of an absence; the other players can then decide as a group on the best course of action from there onwards. In the event that a thread has been defunct long enough to warrant cause for concern (eg. lack of response from other players, outdated thread), please forward the thread to a PST member so that they may offer advice on what could be done.
Adventures like these are often fraught with uncertainties, whether it be an outing on a quest or a simple herb gathering stroll. As such, many thread mechanics rely on the use of the Dice Roller. Be sure to get acquainted with the topic first (found [here]) before continuing to read on.
Almost all mechanics in threads are considered Post Actions. Players may only use one post action per roleplay post. Certain mechanics, like Combat and searching for Treasure Chests, may take up multiple post actions to resolve and hence will require multiple posts from players involved.
Out of Combat Post Actions:
- Material Gathering
- Looking for Treasure Chests
- Opening a Treasure Chest
- Searching for Dungeons
- Searching for Labyrinths
- Using Stealth (Roll LD + Stealth Rating)
- Detecting Stealth (Roll LD + Stealth Detection)
- Using Consumables
- Switching Equipment
- Accessing and Organizing Inventories
- Trading items between players.
Some of these Post Actions have their own caveats.
- Characters may consume multiple items in one Out of Combat Post Action. This usually occurs for most players at the start of a thread.
- Characters may access their general inventory during a thread to switch items between their Battle-Ready Inventory and Equipment. This is considered a single Out of Combat Post Action.
- Characters may trade multiple items in one Out of Combat Post Action.
Details related to the other Post Actions can be found in their individual topics (eg. [Gathering], [Treasure Chests], [Dungeons], [Labyrinths], [Stealth]).
Some actions may be considered as a post action out of combat, but not in combat. Post Actions related to Combat will be covered [here]. Make sure to consult the guide and their specific topics or ask a PST member if any questions happen to arise with regards to how Post Actions work.
Players can attempt to gather materials without fighting monsters. The following guidelines apply to gathering:
- Players must be out of combat. Posts where monsters are spawned or killed cannot be used for gathering.
- The fiction must allow for searching, foraging, or otherwise gathering of items. Players may not search for materials in safe zones/settlements, player shops, guild halls, etc.
- Players may not attempt to search for materials without their character taking action to do so in their post.
When rolling the dice to search for materials, refer to the LD result. Players need to roll a 15 or higher to find materials. On a successful gathering attempt, gain one (1) material.
A more efficient way of collecting materials and various unique items is the Forager profession. For more information on gathering professions, see [here].
After 20 posts in a thread (i.e. on post 21+), players are able to search for a treasure chest. Searching for a chest must follow certain guidelines:
- The fiction must allow for a treasure chest to be found. For example, one would not be able to search for a treasure chest while they are in a settlement, player shop, house, etc.
- Players may not search for a treasure chest while in combat.
- Players may not search for a treasure chest and a sub-dungeon within 10 posts of each other. For example, if one searches for a sub-dungeon on post 21, the earliest they can search for a treasure chest is on post 32.
To search for a treasure chest, roll the dice and use the LD result. Players need to roll a 15 or higher to find a treasure chest. Modifiers such as the Search skill, +LD equipment and consumables affect this roll.
After finding the chest, another post action must be used to open it. Make another roll on a new post and use the LD result. While opening chests, only the Picking skill, Dismantling mod, and keys sold by the General Merchant can affect the roll.
Look to the following chart to determine the items obtained from the treasure chest. Keep in mind that items obtained through treasure chests are always <<Unidentified>>, and players will need to look for someone with the Appraiser profession to identify these items. The contents of a treasure chest match the tier of the player who opens the chest.
LD Result Col Materials Items [1] A [Mimic] monster spawns at loot-minimum parameters. It immediately attacks the player that opened the chest, and it takes its turn before players’. This monster is eligible to drop loot once it is killed. [2-4] [Floor] * 50 2 Uncommon Consumables (2) [5-7] [Floor] * 75 3 Rare Consumables (2) [8-10] [Floor] * 100 5 Rare Weapon (1),
Rare Consumables (2)[11-13] [Floor] * 150 8 Perfect Armor/Shield (1),
Rare Consumables (2)[14-16] [Floor] * 200 10 Perfect Weapon (2),
Perfect Consumable (1)[17-19] [Floor] * 250 12 Perfect Weapon (1),
Perfect Armor/Shield (1),
Perfect Consumables (2)[20+] [Floor] * 300 15 Gleaming Scale (1) or Demonic Shard (1) For more information about Appraisers and Identifications, please look to the Resources List [here].Players can choose who amongst their party gets to open the treasure chest. Should players go a whole post rotation without opening the treasure chest, it will disappear.
Deep within the bowels of the floating castle of Aincrad, hidden behind false walls and hordes of monsters, there exists a surplus of secret dungeons untouched by the general masses. Their importance to the overall clearing of the game is negligible, but they aren't without their own challenges and rewards. These dungeons require a good deal of persistence, a keen eye, and a bit of luck to be uncovered.
- Only one Dungeon can be found per thread.
- Dungeons can only be found on Floor 5 or higher.
- Players may search for a Dungeon after 15 posts (i.e. on post 16+), or after 15 posts since the last attempt.
- Players may not search for a Dungeon while in combat.
-
Players may not search for a Dungeon and a treasure chest within 10 posts of each other.
(eg. If one searches for a treasure chest on post 20, the earliest they can search for a sub-dungeon is on post 31.) - Players may not spawn other enemies other than the Dungeon preset when in a Dungeon.
To search for a dungeon, roll the dice and use the LD result. Players need to roll a 15 or higher to find a dungeon. Modifiers such as the Search skill, +LD equipment and consumables affect this roll.
When found, the Tier of the dungeon will be scaled to the highest capped Tier (ie. highest Tier excluding Paragon Levels) in the party. The general layout and theme of the dungeon is up to the discretion of the players. Monsters found in a dungeon may be looted should they meet the party's loot minimum.
A dungeon must be entered in the same thread it has been found in unless it is stored in a Blank Dungeon Map.
Using Blank Dungeon Maps
Blank Dungeon Maps can be purchased from the General Merchant. They can be used to save the information of a discovered dungeon for later use. Dungeons that have been saved to a Map can be traded or sold, and can be used to initiate the dungeon in a different thread from the one it was discovered in.
Blank Dungeon Maps must match the Tier of the player who had discovered the dungeon. For example, if a dungeon was discovered by a Level 15 player, the party would need to cache it in a map with a <<[T2] Blank Dungeon Map>>.
When using a Blank Dungeon Map, assign the Tier Difficulty and roll's ID# to the map. For example, a <<[T1] Blank Dungeon Map>> would become a <<[T1] Dungeon Map #12345>>. This map may then be used across any floor to open a dungeon of the Tier Difficulty indicated on the map.
Using Random Dungeon Maps
Random Dungeon Maps differ from standard Dungeon Maps as they allow players to select the floor at which the dungeon is revealed upon.
Random Dungeon Maps may be obtained from various sources, such as opening a Treasure Chest when fishing. Similar to searching for a Dungeon, when used by a player, they will open up a Dungeon matching the Tier of the player who had the Random Dungeon Map.
Challenging a Dungeon
All enemies within the Dungeon must follow the following order of opponents with the following minimum stats (Tier here references the highest capped Tier among the players in the party):
-
Wave #1 | (4) Standard Monsters:
- HP: (Tier * 100) | DMG: (Tier * 45) | MIT: (Tier * 15) | ACC: 1 | EVA: 1
-
Wave #2 | (2) Elite Monsters:
- HP: (Tier * 175) | DMG: (Tier * 70) | MIT: (Tier * 30) | ACC: 2 | EVA: 1
-
Wave #3 | (1) Boss Monster:
- HP: (Tier * 500) | DMG: (Tier * 90) | MIT: (Tier * 40) | ACC: 3 | EVA: 3
- Critical (MD 9): Deals (Tier * 100) DMG to the target with the highest hate. Also deals (Tier * 60) DMG to every other player.
- Critical (MD 10): Deals (Tier * 110) DMG to the target with the highest hate. Also deals (Tier * 85) DMG to every other player.
Rewards are issued to the party based off how far it has progressed through the dungeon.
- Wave #1 | (Floor * 2) Materials (ea.)
- Wave #2 | (Elite Monsters' totalled HP * 20) col (ea.)
- Wave #3 | (Boss' HP * 50) col (split.), [LD Drop] (party.)
EXP Rewards are also issued to each party member based on their uncapped Tier (ie. Tier including Paragon Levels) upon completion of the dungeon. EXP gained this way will only be issued to characters upon the closure of the thread. Players must have participated in all waves of combat in order to be considered eligible for these EXP Rewards. Consult the table below for EXP rates:
Player Tier EXP Player Tier EXP 1 150 11 4950 2 360 12 5760 3 630 13 6630 4 960 14 7560 5 1350 15 8550 6 1800 16 9600 7 2310 17 10710 8 2880 18 11880 9 3510 19 13110 10 4200 20 14400 For beating the boss/Wave #3 of a dungeon, the player who found or opened the dungeon may roll upon the following table using natural LD to obtain an [LD Drop]. All players present will receive a copy of the rolled reward each. All items found are scaled to the tier of the dungeon they were found in.
LD Reward CD [1 - 6] Additional (Boss' HP * 50) col, (Floor * 2) materials [7 - 11] Unidentified Perfect Weapons (2),
Unidentified Perfect Armors (2).[12 - 14] Unidentified Perfect Armor/Shield with one guaranteed Unique Enhancement. [15 - 17] Unidentified Perfect Weapon with one guaranteed Unique Enhancement. [16 - 18] Unidentified Perfect Trinket with one guaranteed Unique Enhancement. [19 - 20]Unidentified Demonic Equipment of the dungeon's Tier.[1 - 4] Trinket [5 - 8] Armor/Shield [9 - 12] Weapon -
[Thread Mechanics] will cover what actions are possible for players to take with regards to SAO-RPG’s systems and stats. We highly recommend giving most of these topics a glance over at least once, as these topics are frequently visited by most players during their time on SAO-RPG.
-
Characters with their journals approved by staff are now free to roleplay at their leisure. While veterans of the site would have already become familiar with these rules, for new players to the site, this section covers roleplay etiquette with regards to SAO-RPG's systems. Explained here are the following:
- [Thread Anatomy] covers the necessary components required from players when they create a roleplay thread.
- [Using the Dice Roller] is a how-to guide on using the site's die roller; this is necessary when performing a wide variety of actions.
- [Using the Economy Dashboard] explains where players can access their currencies, as well as provide information on how to send it off to other players.
It is highly recommended that new players use/rely on this section as an aide to their time here in SAO-RPG.
Furthermore, it bears repeating that players keep general roleplay etiquette in mind when playing with others. The following rules also have to be respected in all roleplay threads:
-
All roleplay posts must have a minimum of 150 words of in character text.
- Battle stats and OOC notes or comments do not count toward this minimum.
- Text bounced off from someone else’s post does not count towards this minimum.
- Posting twice or more in a row (double posting) is generally disallowed, unless a player is in a Solo Party (SP) thread or has gotten permission from their roleplay partners in a Private Party (PP) thread.
- Details of the Sword Art Online setting must be respected; for more information on the game's generally accepted principles, see [here].
Every roleplay thread must consist of the following items:
- Thread Title: A thread tag is required. Quest names may also be visible here.
- Player Stats: Must be declared on the first post of every player's entrance to that thread.
- Post Actions, Dice Rolls: will fill the remaining posts from there on, alongside character interaction between roleplayers (or a written narrative for solo-party threads).
- Thread Summary: Declares the rewards obtained from the thread's completion.
Read on further for more information about each topic.
Dice Rolls will be covered in [Using the Dice Roller], whilst Post Actions are covered in their own topic [here].
Thread Titles
All threads must be tagged with their corresponding thread type in the thread title. Thread tags are made up of the following components:
-
Floor: Indicates the floor the thread is taking place on. Players can travel between floors in a thread, but only one floor tag needs to be stated. This can be the starting floor, or the most prevalent floor the thread will take place on.
Party Types: - [SP]: Solo Party. Only the thread creator may post in an SP. This type of thread is the only exception to the “no double posting” rule. If your thread was created as an SP, but you wish to convert it to a PP at some point, you may do so as long as it is reasonably plausible within the context of the thread at that point.
- [PP]: Private Party. A select number of players may participate in a PP. The creator will typically invite and decide on the players taking part before the thread is created, however participants are free to invite other players afterwards. A PP thread will be converted to an SP thread if a Player double-posts. It can still be converted back to a PP later on, so long as it is reasonably plausible within the context of the thread at that point.
-
[OP]: Open Party. Anyone can join and participate in the adventure. This type of thread is recommended for players looking to meet several other players in the game with little to no planning ahead. OPs are also a good way to host an event or throw a party. Don’t be afraid to get creative with an open party thread.
Situational: - [EB]: Event Boss. Special occasions where players can fight one-of-a-kind bosses. Boss threads are considered to be [OP] during a “sign up & preparation” period, and change to [PP] when the battle has begun. Players are encouraged to investigate these threads should they spark interest; please abide by the fight's registration period and time limit for posting when doing so.
- [BR]: Boss Raid. These are the Floor Boss battles. Check out Floor Bosses section [here] for more details.
If the thread creator wishes to undergo a quest in a thread, the quest name must be stated in the title of the thread.
Examples:
Spoiler- [F01-PP] Start of Something New | <<The First Few Lessons are Free>>
- [F05-SP] Wild Cats | <<Feeding your Enemy>>
- [F01-PP] Bully in the Alley
- [F22-OP] A Moment’s Respite
- [F10-EV] New Year Celebrations
- [F50-BR] Half-Time
For more information about quests, read up on them [here].
Player Stats
| tags: #stats on first post, #declaring stats, #stats first postIn every thread, all participating players are required to declare their stats, equipment, skills and active mods in their first post. Any consumables one might want to use may also be declared alongside their post as a post action. This helps players to be consistent with their stats during the duration of the adventure.
Example:
SpoilerKirito | Lv. 6 | HP: 120/120 | EN: 30/30 | DMG: 7 | ACC: 2 | EVA: 2 | LD: 2
Equipped Items:
- Standard Straight Sword | Tier 1 Perfect One-Handed Straight Sword | DAMAGE III
- Standard Leather Armor | Tier 1 Rare Light Armor | EVASION II
- Gold Ring | Tier 1 Rare Jewelry | ACCURACY II
Battle-Ready Inventory:
- Teleport Crystal (3) | Tierless Crystal | TELEPORT
- Healing Potion (5) | Tier 1 Perfect Potion | HP RECOVERY III [+60 HP]
Consumed Items:
- Bread with Custard | Tierless Rare Dessert | LOOT DIE II
Skills:
-
One-Handed Straight Sword | RANK 3/5
- Mod: Stamina
Misc. Buffs:
- Well Rested | -1 EN for the first three expenditures of each combat.
For more information about the Battle-Ready Inventory and Combat, see Combat mechanics [here].
For more information about Post Actions, see [here].
For more information about additional buffs for player characters, read up about Character Growth [here].Thread Closure Requirements
A thread can be marked as 'Complete' and closed for rewards whenever quest requirements have been fulfilled and does not have unresolved combat. All players in the thread must have at least three 150 word posts per page to obtain the standard thread rewards as normal. The following quests require a player to make an entire page (20 posts = 1 page) to fulfill the requirements to complete the quest:
- Earning a Living (All variants)
- Challenge of Olympus (All variants)
- What We Fight For
- To Shine a Light
- The Traveler
- On the House
- The Gemini
To complete quest requirements in an easily to follow and evaluate fashion, players are required to include some sort of label or tag to relay which requirement is being performed unless otherwise obvious. If a quest requires you to travel up a mountain, it is advised to use some version of:
Post Action | Traveling up the mountain
Thread Summary
| tags: #thread summary, #thread rewards, #thread closing, #closing thread, #closing a thread, #thread complete, #completing a threadAt the end of each thread, one player will be required to write up a summary of the thread’s issued rewards. This would usually be on either the end of the last roleplay post or in a post of its own. The thread summary usually includes quest rewards, dungeon rewards, loot obtained from slain monsters and/or materials gathered during the journey.
When writing a thread summary, player should also take care to award themselves of the following:
Thread Progression:
- Each closed thread will reward participants with col and EXP.
- 400col will be issued per page. Col rewards are issued to the party as a whole. It is left up to the thread participants to decide how it should be split up. An even split is usually the default, unless parties agree otherwise.
- EXP will be issued based off all participants' word counts, a character's individual tier, alongside the number of players in a thread, following the formula below:
(Word Count / 5) * (Player's Tier)
- Word count calculations will be based off [wordcounter.net].
- A Player's Tier to be considered for awarded EXP is based off the player's overall level, Paragon included. For example, a player whose levels total anywhere from 51-60 would receive awards as though they're Tier 6, and a player with a total of 71-80 as if they're Tier 8, etc.
- Full EXP rewards will also only be given to each participant on a three (3) posts to one (1) page total requirement. Players who do not meet the 3-post requirement across the entire thread will not receive any rewards.
- As an example, a player who has only made 5 posts in a thread that was completed with 64 posts/3 pages will only be eligible for 1/3 of all EXP rewards. Other players in that same thread that have made 6 posts will receive 2/3 of the full EXP reward. Only players who have made 9 posts are eligible for the full EXP reward.
Other Reward Sources:
- Completing a quest or clearing a dungeon in a thread will usually award bonus EXP, col, and other items. Any bonus EXP should be added onto EXP calculations derived from page counts.
Once the thread summary has been written, contact a PST via Discord or on-site DMs to submit the thread for review. Once players have been reached for an approval of their thread, they may add the obtained thread rewards into their character’s journal.
Example:
SpoilerThread Summary
Kirito:
+ 700 EXP [Total] | 500 EXP [Quest] + 200 [Thread Progression]
+ 600col [Total] | 500col [Quest] + 100col [Thread Progression]
+ Anneal Blade | Tier 1 Rare Weapon | DAMAGE IIAsuna:
+ 700 EXP [Total] | 500 EXP [Quest] + 200 [Thread Progression]
+ 600col [Total] | 500 [Quest] + 100 [Thread Progression]
+ Sylvant Rapier | Tier 1 Rare Weapon | DAMAGE IIKlein:
Ineligible for Quest Rewards
+ 200 EXP [Thread Progression]
+ 100col [Thread Progression]Agil:
Ineligible for Quest Rewards
+ 200 EXP [Thread Progression]
+ 100col [Thread Progression]For more information about looting monsters, see Looting mechanics [here].
For more information about quests, see Quest mechanics [here].
For more information about gathering, see Gathering mechanics [here].
For more information about sub-dungeons, see Dungeon mechanics [here].
SAO-RPG uses a random roll system, similar to many tabletop roleplaying games. Hence, various mechanics on SAO-RPG incorporate a dice roller to determine the outcome of actions. Players may find the dice roller [here], or by clicking this button that is located below a new post’s text box.
The dice roller requires three fields to be filled in before submission:
- Character Name, to log which player is rolling on the dice roller.
- Post Link, to locate where the roll is being used at.
- Roll Purpose, to indicate what the roll is to be used for.
The following mechanics utilize the dice roller:
To learn more about these mechanics, click on them to jump to their explanations.
Post Links
Players will need to create a placeholder post before they are able to fetch the post’s link.
Players may fetch post links via the three dots on the top-right corner of every post in a thread, or by right-clicking on the post ID number (‘#20’ in this example) and selecting ‘copy link’.


Roll Purpose
Players must use the roll purpose field to indicate clearly what the roll is being used for. It is encouraged to be as specific as possible with regards to their roll purposes. If a character is attacking a monster with a sword art, the names of the sword art and the target must be indicated. If a character is crafting an item, the item’s tier and type must be indicated.
Examples:
SpoilerPost Action Roll Purposes
- Material Search
- Looking for Treasure Chest
- Entering Stealth
Combat Roll Purposes
- Basic attack vs Boar Pup #1
- <<Blast>> vs Skeleton Warrior #2
- Minotaur #3 attacks Kirito!
Crafting Roll Purposes
- Crafting Tier 1 Salve
- Crafting Tier 1 Light Armor
- Identifying [#000001] | Tier 1 Rare Katana | Slot 1
Quest Objective Purposes
- Fishing for Moretsuna
- Searching for Fonsa
When using the dice roller, be sure that the character name, post link, and roll purpose are correct. Rolls with incomplete or incorrect information will be voided. Using exploits such as rolling multiple times is strictly prohibited.
Reading and Calculating Dice Values
For every roll made on the dice roller, four random numbers are generated.
Die Name Acronym Range Battle Die BD 1 - 10 Craft Die CD 1 - 12 Loot Die LD 1 - 20 Mob Die MD 1 - 10 - The Battle Die (BD) is primarily used for determining the outcome of a player’s attack during combat. It also sees secondary observations in Crafting; namely, an appraiser’s identification rolls.
- The Craft Die (CD) is primarily used for determining the outcome of a crafter’s success at creating an item. It also sees secondary observations in combat, where it is used to determine the chance of certain conditions activating for either the player or the enemy, or utilized in looting where it determines what kind of loot the player will pick up.
- The Loot Die (LD) is primarily used for determining the outcome of a player’s searching or gathering attempt, or the type of loot obtained from a fallen monster in combat. It also sees secondary observations in combat, where it is used to determine the chance of certain conditions activating for either the player or the enemy, or utilized in crafting where it determines the value or number of items its crafter is creating.
- The Mob Die (MD) is primarily used for determining the outcome of an enemy’s attack during combat.
Almost all mechanics that utilize the Dice Roller follow these three simple steps:
- Rolling the die: Obtain the base die value by rolling the die. This base die value is often referred to as a natural roll.
- Adding modifiers: Depending on the mechanic the player is rolling the die for, certain modifiers may apply. These modifiers are derived from a player’s stats; for example, Accuracy may affect the Battle Die, Evasion may affect the Mob Die, Loot Die enhancements may affect the Loot Die, etc. A modified die value is often referred to as a modified roll.
- Comparing the total: Once all modifiers have been applied, the final number can be compared against a target number or a chart to finalize the result of the dice roll.
Some mechanics may require players to look at multiple dice values on a single roll to determine the action’s outcome.
Examples:
SpoilerPost Actions
- ID: 126908 | LD: 4 | Materials Search. Nothing found...
- ID: 126912 | LD: 20 | Materials Search. Material found (1).
- ID: 157635 | LD: 28 (18, +10) | CD: 9 | Materials Search. Material found (1). [Gatherer] activated, extra materials found (2).
- ID: 158828 | LD: 23 (12, +11) | Searching for Treasure Chest. Treasure Chest located!
- ID: 167285 | LD: 16 (11, +5) | Maintaining Stealth.
Combat Rolls
- ID: 157035 | BD: 6 (2, +4+1) | <<Galaxy Destroyer>> vs Nemean Lion. Attack hits!
- ID: 143395 | BD: 4 (4, +4-4) | <<Eternal Cyclone>> vs Terra Firma. Attack misses!
- ID: 138638 | MD: 10 (6, +3+1) | Attack vs Hestia. Attack lands.
- ID: 151978 | CD: 11 | MD: 4 (1, +3) | Attack vs Alec. Attack misses. [Call to Hunt] activated.
Crafting Rolls
- ID: 160934 | CD: 9 (8, +1) | LD: 12 | Crafting Tier 1 Snack. Rare Snack (2) created.
- ID: 167291 | BD: 10 | CD: 10 (9, +1) | LD: 10 | Identifying [#161658] | Tier 3 Demonic Weapon | Slot: 3/4 | Outcome: Burn/Freeze
Quest Objectives
- ID: 164534 | CD: 11 | Fishing for Moretsuna: Outcome Successful.
- ID: 145291 | LD: 12 (7, +5) | CD: 5 | Searching for Fonsa... Fonsa found, barely alive.
All roll values, their calculations and their outcomes must be indicated on the post that was rolled on.
Example Post:

For more information about rolling for different mechanics and their applicable modifiers, look to the Thread Mechanics section below.
When receiving rewards from quests or trading currency between different players, SAO-RPG takes advantage of the forum’s Economy Dashboard. One can find it by clicking on their profile options, located at top-right of the forum’s interface.
 On mobile, one can scroll to the bottom of the site’s homepage to find it.
One can find two accounts listed on the left.
- The Spending Account is where most of one’s currency on hand can be located. Rewards obtained from quests can be found here once a PST member closes one's threads.
- The Central Bank of Aincrad is for a player’s personal use; they can move their currencies over to this account and utilize it as a savings account.
Players may perform various actions with their currencies by the icon on the right of their currency amounts.
Players can send their currencies over to another member by the Send to Member option; they’ll usually be required to do so for SP refunds and item crafts by forwarding their col and materials to the @Banker. Players should also do so to directly pay other players for goods and services from the Merchants & Shops section. Meanwhile, the Transfer option is for shifting currencies between the Spending account and Central Bank of Aincrad.
When sending money to other accounts, players should try to be specific with the message/note field to log their transactions accurately. For example, if a transaction is attached to a post, one should deposit the post's link into the roll purpose, along with a short description of its purpose. Players do not need to write posts to transfer currencies across different players and accounts. However, it is encouraged that all players log as much of their transactions between each other for accuracy's sake.
!!! Be sure not to mix the Central Bank of Aincrad (savings account) and the @Banker user account (transaction logger) up!
-
What is SAO?
Sword Art Online, abbreviated as SAO, is the first ever virtual reality massively multiplayer online (VRMMORPG). Run on the NerveGear, its release saw 10,000 players logged onto its servers on the first day of its release. These players were then subsequently trapped within the game later in the day, when they discovered that they were all unable to log out. Victims of this incident were invited by SAO's creator to reclaim their freedom by ascending the iron castle of Aincrad to clear the game. In doing so, these amateur adventurers would pitch themselves against the dangers of the world they now lived in with an incredible caveat:
If they died in-game, they died in real-life.
Your character is one such individual.
The World and Setting
It has been a few years since the start of the game, and no signs of its clearance is in sight. While many players have gone out to seek their fortune, venturing out of the Town of Beginnings to serve the frontlines, just as many have set foot out of the city only to meet their fate at the hands of Cardinal, the game's operating system. What has your character been doing all this time? Where have they gone, and who have they met?
Intrigue lies within the untold story, for better or worse, and Aincrad always looks forward to folding new aspiring individuals into its landscape.
For more clarity on the details of SAO's setting, refer to this FAQ [here].
Before one can participate in any roleplaying threads, every player must fill out a Journal to create and manage their character. Imagine it to be like a character sheet. It should contain everything from their appearance, to their skills and stats, to their backstory and personality. A basic template has been provided, however players may edit the style to their liking. Just be sure to include all required information when crafting a journal.
Journal Rules & Restrictions
- Players cannot be beta testers for Sword Art Online. This will be every character’s first time playing SAO before becoming trapped in the game.
- Players cannot be or have any relation to canon SAO characters (Kirito, Asuna, etc). SAO-RPG is its own universe, the only canon character that currently exists being Heathcliff. He does not have any previously-established relation to any players in or outside of SAO.
- Players cannot be “hackers” in a way that allows them to tamper with SAO or the Cardinal system.
- Certain disabilities/mental illnesses are not permitted.
- Non-human characters are not permitted. Players, however, may still equip appearance altering vanity items to create the illusion of a non-human persona.
- Players must keep a log of all threads, SP gains/expenditures, and items in their journal. These logs may be kept together or be split up into separate sections. The logs must include a link to the thread/post along with the SP, items, etc., earned. SP totals and items any character has obtained must be able to be verified through these logs.
Anatomy of a Journal
- Appearance: A picture of the character is preferred, but a written description is also acceptable as long as it is highly detailed. If an image is included, please use an anime-styled image to stay consistent with the site and setting.
- Profile: Basic information about the character (eg. Username, Real Name, Age, Height, Weight, Country of Origin, etc.)
- Background: Include a descriptive background for the character that is at least 2 paragraphs (5 sentences each). Since this is what brings the character to life, please add as much detail as possible!
- Virtues/Flaws: Include a minimum of three virtues and three flaws for the character. Each virtue/flaw must be described with a minimum of three full sentences.
- Skills, Inventory: This section will hold the abilities one's character has picked up as well as the items they have collected during their journey. It will be updated frequently as the character progresses through the game.
- Roleplay Log: Keep a log of completed roleplay threads--simply link to the thread. Feel free to also enter the tracking of SP, items, and col in this section as well.
- Friends List, Relationships, Story So Far: These sections are optional and can be removed should players imagine themselves not utilizing them. Players can keep track of other players they have met in these sections, alongside a summary of major events that have happened to them over the course of their stay in Aincrad.
Journal Template
Spoiler[character image]
Profile:
Username:
Real name:
Age:
Gender:
Height:
Background:[Insert character backstory here. 2 paragraphs/5 sentences each minimum.]
Virtues
- [Insert Virtue here. 3 sentence minimum.]
- [Insert Virtue here. 3 sentence minimum.]
- [Insert Virtue here. 3 sentence minimum.]
Flaws
- [Insert Virtue here. 3 sentence minimum.]
- [Insert Virtue here. 3 sentence minimum.]
- [Insert Virtue here. 3 sentence minimum.]
Skills:
- [Insert Skills here.]
Inventory:
New Character Bundle: [State your New Character Bundle choice here.]
Equipment- [Insert Equipment here.]
Consumables
- [Insert Consumables here.]
Roleplay Log:
- [TAG] Thread Name | <<Quest Title>> | STATUS
- [TAG] Thread Name | <<Quest Title>> | STATUS
- [TAG] Thread Name | <<Quest Title>> | STATUS
New Character Bundles
New characters may choose one of four bundles to start out with that contain equipment, materials, col (the game's currency) and/or items to help them started. Specify which bundle has been chosen in the Inventory section of the journal when submitting it for approval.
QuoteSet A | Basic Package:
- Uncommon Weapon of choice
- Uncommon Armor of choice
- (5) Starter Healing Potions (Heals 50 HP)
- 2,500 Col and (10) Materials
Set B | DPS Package:
- Rare Weapon of choice
- (3) Starter Healing Potions (Heals 50 HP)
- 2,500 Col and (10) Materials
Set C | Tank Package:
- Rare Armor of choice
- (3) Starter Healing Potions (Heals 50 HP)
- 2,500 Col and (10) Materials
Set D | Support Package:
- (3) Starter Healing Potions (Heals 50 HP)
- 2,000 Col and (25) Materials
Set E | Scout Package:
- Rare Trinket of choice
- (3) Starter Healing Potions (Heals 50 HP)
- 2,000 Col and (10) Materials
Equipment rarity dictates how many enhancement slot the item possesses; equipment of Uncommon or Rare quality can hold up to one (1) or two (2) enhancements respectively. Declare these enhancements chosen on equipment when stating which package a character is picking up. Similar enhancements can take up multiple slots to further improve their effect. To learn more about enhancements, see [here].
In addition, all players are allotted 5 skill points (SP). These skill points can be invested into a variety of skills found [here]. Players may choose to invest these skill points now or hold them for later. Any skill that requires five (5) ranks to master will have an entry investment of exactly 4 SP (eg. weapon skills).
New players are especially recommended to invest their points into the first rank of a weapon skill. Since weapon skills determine one's access to sword arts, one may also turn to the Sword Art list located [here] for more information regarding their preferred weapon skill.
Tips for Creating a Character
-
Background: Who were they before entering Sword Art Online? How did they grow up? Did they have any major events in their life worth noting? How did this character secure their place as one of the 10,000 players to enter SAO? How have they passed their time since becoming trapped in the game?
As they adventure, consider revisiting their journal and updating their background. Including synopses of important arcs a character has experienced or relationships they have established is a great way to develop one's story!
- Virtues/Flaws: One should take a look at their character's personality, habits, and traits to determine what about them could be considered a “virtue” or a “flaw”. Keep in mind that what some might see as a virtue could also be seen as a flaw. are allowed to have an identical virtue/flaw, but write them out separately and describe how this trait benefits them as a virtue, and also how it hinders them as a flaw.
Veteran’s Recommendation
- Grab the Support Package. Players start out with an abundance of currency (col, materials) despite having little gear. This currency can be used to barter with existing players with professions in the Merchants and Shops section of the forum to gain better gear (of Perfect rarity, for example).
-
Be careful when picking which weapon you would like to invest SP in. Some have specific restrictions that others don't.
- Players looking to invest into Martial Arts are advised to hold their SP for now. They will need to unlock the Martial Arts skill from completing the quest Breaking the Unbreakable. See [here] for further detail.
- Players looking to invest into Katana are required to invest their SP into One-Handed Curved Sword and perform a single-page thread in which they obtain a katana to obtain the Katana skill. Players will then require an extra 4SP to invest into the newly obtained Katana skill.
Getting A Journal Approved
Once a character has been created, their sheet should be submitted into the [Journals sub-forum] in a new thread. Staff on the Player Support Team (PST) will have to review the submission prior to approving these journals; please inform them of the journal’s completion when it is ready for approval. The quickest way to get into contact with them is via the roleplay’s [Discord server], however they may also be contactable via site DM’s on the forum. Refer to a list of staff [here].
Post Character Creation
Most players begin on the tutorial quest chain called The First Few Lessons, located [here]. The site's [Discord server] is also a good place to start looking for other players to roleplay with. Alternatively, one can make a post on the [Player Request Board] to announce their search for a roleplay partner.
There are many different sub-forums to be found on SAO-RPG. Make sure that topics are posted in the appropriate sub-section. For any mistakes made with regards to threads and sub-sections, please message a staff member for help.
Starting the Game
- Tutorials: The complete rules, resources, and guide for all different aspects of the game. You're already here!
- Journal: All new journals must be submitted here. Other existing journals can also be found here should one find interest in reading up on other players in Aincrad.
- Evaluations: Crafted items and unique item uses must be submitted for evaluation before they can take effect. Check out the Evaluation section of the guide [here] for more detail.
Roleplay Sections:
- Beginner Floors: Roleplay threads that take place on Floors 1 through 10. Most newly created characters start their journey here.
- Intermediate Floors: Roleplay threads that take place on Floors 11+. The difference in floors signify danger, as well as discern the role-playing hub for most veteran players from players just starting out.
- Player Vs. Player: Challenge another player to a friendly duel. Check out PvP [here] for rules on combat with another player.
- The Frontlines: Where floor boss raids take place. Check out Floor Bosses [here] for more info.
Progression-related Boards:
- Quests: A list of quests that can be completed for additional rewards. Check out the Quest section [here] for more information.
- Merchants and Shops: Player-run shops allow for customers to purchase or place orders for equipment and items. Check out the Crafting & Professions section [here] for more information.
- Player Request Board: If players should need help on a quest, want to recruit guild members, or make a trade, post in the player request board! Threads in this section should still be in character--imagine one's character is posting a request to a bulletin board.
Miscellaneous:
- Unrestricted Chat Filter: This is a mature section for players age 18+. Players and characters with face claims that are underage or can be misconstrued as underage are not allowed to participate in this section. Characters must also have at least 100 posts before being allowed to participate in this section. Threads in this section are not eligible for SP or other rewards. Should one be interested in some more mature writing, contact a staff member for access to this section.
- Sword Art Online (OOC): Out of character discussion about SAO-RPG. Ask others to RP with your character, discuss plot, ask questions, etc.
One may also find other sections such as “Introductions” and “Support Ticket”. Use these sections appropriately when discussing about anything unrelated to SAO-RPG, have a question for staff, and so on. All of these remaining sections are considered to be OOC.
Leveling
Leveling in SAO-RPG is determined by the total amount of EXP a player has accumulated during their time on site. EXP is gained primarily from role playing with others, by starting and closing threads with other players or perhaps by oneself. Players can go on quests and partake in events in these threads to further increase their EXP gain.
A chart can be referred to [here] to see how the EXP values correspond to the different levels, as well as review the stats your character will have at those levels.
We recommend players to read on to gleam more information about the game before officially looking into the different ways a character is able to gain EXP through.
Throughout the following documentation players may notice a pair of terms, [True Level] and [True Tier]. [True Level] is used to describe the combination of Player's Level (up to level cap) with a Player's Paragon Level, in order to provide a singular number. In addition, the terminology of [True Tier] is used to describe a Player's actual tier, by using the formula of [Player's Level / 10], with outcomes rounded upwards.
Stats
Every character will have a few base stats to consider; these are the basic and most common stats that one will encounter:
- HP: Hit Points - The amount of health a character has.
- EN: Energy - The amount of energy points a character has.
- DMG: Damage - The base damage a character deals.
- MIT: Mitigation - Reduces damage done to a character after being hit.
- ACC: Accuracy - Increases one's chance to hit an attack.
- EVA: Evasion - Decreases one's chance of being hit by an attack.
- LD: Loot Die - Increases a character’s luck.
To understand further what effects some of these stats have, consult the chapter on Using the Dice Roller [here].
For easier referencing, stats for a given character are often displayed in a stat bar, often formatted as such:
Kirito | Lv. 6 | HP: 120/120 | EN: 30/30 | DMG: 7 | ACC: 2 | EVA: 2 | LD: 2
Some stats increase passively as one's character levels up, such as HP and Energy. A chart can be referred to [here] to see how one character’s stats may correspond to their levels. Other stats can be increased with skills, equipment, and consumable items. Read on to see how to acquire them.
Items
| tags: #equipment, #consumablesItems exist to lend a character bonus stats and effects. They can be acquired by running through quests or events and receiving them as rewards, crafting them or looting them from monsters. Items often come in two main varieties: Equipment and Consumables.
- Equipment refers to the items a character would wear like armor, weapons, and accessories.
- Consumable items provide temporary bonuses and typically disappear after they are used. Some examples include potions, crystals, and food.
We refer to the bonuses and effects an item provides as enhancements. Each item also has a corresponding quality that limits the number of enhancements it carries.
Quality Enhancement Slots Vanity 0 Uncommon 1 Rare 2 Perfect 3 Demonic 4 - Each enhancement has a cap, or a limit to their effectiveness. When an enhancement cap is met on an item, it cannot be assigned further to the rest of its enhancement slots.
- Enhancements may be built upon multiple equipment to bolster its overall effectiveness, but they may not be used in tandem to exceed this cap on a character.
- A player may only benefit from up to three pieces of equipment at any given time. All players may only equip one weapon, which also counts towards their three equipment limit, but they may mix and match their armors/accessories in as many combinations as they would like.
- A player may only benefit from the strongest enhancement from consumables taken in a thread. Enhancements on multiple consumables cannot be used to bolster its overall effectiveness.
- Enhancements from consumables and equipment stack upon each other, with respect to their item type's enhancement caps.
Items also have a secondary State tag to them that describes its origins:
- Unidentified: The item's stats are unknown. This item is not capable of being equipped and must instead be identified at an appraiser.
- Identified: The item's stats are known. This item may be equipped. In this state, the item may have its individual enhancements rolled upon at an appraiser.
- Quest: The item's stats are known. This item may be equipped. This often indicates that the item has been obtained through a quest. In this state, the item may not have its individual enhancements rolled upon at an appraiser.
- Crafted: The item's stats are known. This item may be equipped. This often indicates that the item has been made by crafting, however, it also may have passed through a crafter who has merged the item with another through Item Fusion or have been altered through the use of a special consumable. In this state, the item may not have its individual enhancements rolled upon at an appraiser.
Examples:
Spoiler-
Player A has the following equipment:
- Perfect Light Armor, with 3 slots of Evasion.
- Rare Trinket, with 2 slots of Evasion.
In this scenario, the total Evasion Player A has adds up to five (5). However, because the enhancement cap on Evasion is three (3), the player will not receive the benefits of two (2) of the Evasion enhancements.
-
Player B consumes the following:
- Rare Potion of Strength, with 2 slots of Damage.
- Uncommon Potion of Strength, with 1 slot of Damage.
In this scenario, the total Damage Player B has accumulated adds up to three (3). However, only the strongest quality of enhancements apply when using consumables. Hence, the Damage from Uncommon Potion of Strength is overwritten by the Damage from Rare Potion of Strength. Player B ultimately has a boosted damage value of two (2), rather than three (3).
-
Player C has the following equipment:
- Perfect One-Handed Straight Sword, with 3 slots of Damage.
Player C then consumes the following:
- Rare Potion of Strength, with 2 slots of Damage.
In this scenario, the total Damage Player C has accumulated adds up to five (5). The temporary enhancements from the consumable stacks with the equipment’s enhancements; until the potion’s effect ends, he maintains his boosted damage total.
-
Player D has the following equipment:
- Perfect Light Armor, with 2 slots of Mitigation, 1 slot of Evasion
- Rare Trinket, with 2 slots of Evasion.
- Uncommon Heavy Armor, with 1 slot of MitigationIn this scenario, the total Mitigation and Evasion Player D has accumulated adds up to three (3) each. Enhancements can be spread across multiple equipment pieces at once to bolster their overall effectiveness. Additionally, whilst Light Armor may have a Mitigation cap of two (2), Heavy Armor has a Mitigation cap of three (3), so Player D is able to maintain his stats until he decides to switch his armor.
For more information on appraisers, see [here].
For more information on Item Fusion, see [here].Vanity Items
| tags: #vanityVanity items are an exception to the aforementioned mechanics. Vanity items do not alter the state of play in the game (due to the lack of enhancements), and with respect to the setting, players may create/obtain these items at any time, how they so choose. Vanity items do not need to be purchased/sold; players may simply state them into existence as they please. The following restrictions apply to Vanity items:
- Within reason, one can don as many pieces of vanity equipment as they’d like. A character can’t wear two helmets, but they could wear a helmet, amulet, cape, chest plate, pants, and boots all at the same time.
- Vanity equipment may be used to activate skills, however when doing so, vanity equipment must abide by the rule of benefitting from three equipment pieces at a single time.
- Vanity items must respect the setting of SAO.
Common examples regarding the use of vanity items would be a character eating a bowl of ramen in their writing flavour, or a standard piece of equipment that came with their beginner package.
Acceptable examples of vanity items include potions that alter a character's hair colour and beachwear outfits.
Items such as potions that cause insanity in players or clothing that would have players' avatars appear naked are examples of items that would not be permitted.Tiers
All items also have tiers. Some enhancements and skills scale based on the tier of the item or player. As a character increases in level, they will be able to use higher-tiered items in order to keep their stats up to par with the monsters they may be fighting. Tiers are unlocked for players according to their individual progress with levels, while similarly being restricted on levelling progress with overall floor completion.
- Tier 1: No minimum level.
- Tier 2: Minimum level of 11 to use.
- Tier 3: Minimum level of 21 to use.
- Tier 4: Minimum level of 31 to use.
- Tier 5: Minimum level of 41 to use.
As of current, Tier 4 is the highest Tier available to players.
Consumable and Equipment items that do not scale with item tier may be considered tierless and can be used by players of all tiers. Note that both items may only be indicated as tierless upon item evaluation, and will be valued as Tier 1 items upon a junksale.
Certain items may have special or unique effects that provides a character with different stats to keep track of in battle. For more information on these enhancements and effects, a full enhancement list is available [here] to learn more about the potential of items.
Combat Mastery is a skill that unlocks for all players once they have reached Tier 2. For more information about this skill, see [here].
Skills
The skills a character has will determine how well they perform different actions. Think of skills being the make up of a character’s core capabilities, while equipment helps to bolster the efficiency of their specializations by way of stats. Players earn skill points (SP) through completing quests, threads, sub-dungeons and events to spend on skills they think would benefit their characters most.
Skill Ranks
Some skills have ranks that increase their effectiveness. As you increase the ranks of those skills, the SP cost increases:
- Rank 1 - Novice = 4 SP
- Rank 2 - Journeyman = 4 SP
- Rank 3 - Expert = 6 SP
- Rank 4 - Master = 8 SP
- Rank 5 - Grandmaster = 8 SP
It takes a total of 30 SP to Grandmaster a skill. Other skills have no ranks. To learn those skills, simply spend the amount of SP noted as its cost.
Spending SP
A character’s journal should be used to keep track of their total SP earned, spent and kept available, alongside noting skills and mods they currently have. Whenever they have enough SP for their next skill, the numbers on their journal may be adjusted to indicate an expenditure of SP.
Refunding SP
Skill refunds allow players to remove unwanted skills from their character at a one-time col cost. In order to refund a skill, players must post in the [Skill Refund Evaluation] topic using the template provided in that topic. When the transaction has been confirmed by a PST member, they will quote and approve the refund. At this point, the skill points refunded will be free to be redistributed or reinvested into other skills at the player's leisure.
Mods
Some skills in SAO-RPG also have modifiers (mods). Mods increase the effectiveness of a learned skill or offer additional abilities. Mods are available to be unlocked once a player has obtained its corresponding skill, sometimes also raising its skill rank to a particular minimum level. For example, to learn the Precision mod, a character must already have 5 ranks invested into their Weapon Skill.
There is no limit as to how many total Mods one can learn. However, players may only have up to 5 active mods in any given thread. For more information about declaring active mods, refer to the [Thread Anatomy] section of this guide.
Addons
Addons are a subset of mods that do not count towards the number of active mods within a given thread. However, they must also be declared similar to the active mods.
-

1. What can my character feel in Sword Art Online?
QuoteThe NerveGear sends fake signals to replicate the five senses. A player's avatar is capable of seeing, hearing, smelling, tasting, and touching in Sword Art Online. Players also feel fatigue and hunger. The Pain Absorber system run by Cardinal prevents the signals of pain being sent to the user's brain--instead, when a player's avatar is injured they may feel a slight tingling sensation.
2. What are we allowed to do as writers? What are the rules around world-building?QuoteAs long as three major points are respected, players have a lot of freedom in building the world of SAO-RPG with their writing:
- Players should not directly contradict any staff-issued information. General floor descriptions, main settlements, quest details, etc., should not be purposefully changed in a player's writing.
- Players should keep in mind the general feel of Aincrad and the SAO universe. You probably wouldn't see a spell-casting cyborg NPC, but a crazed alchemist that believes they are a cyborg isn't as much of a stretch. If you ever feel unsure about a setting or story you would like to write for your character, feel free to contact staff for clarification.
- SAO-RPG is considered an alternate universe from the canon material. Please keep in mind that nearly all canon characters do not exist. The systems, quests, etc., are created with the source material in mind, however, so making direct references to locations or monsters is generally acceptable.
3. Can my character get drunk/possessed/have a psychological disorder?QuoteNo. The effects of alcohol are not replicated to the brain, although alcoholic drinks do exist. Avatars would simply be able to taste the drink, and perhaps they might feel a placebo effect if they believe the liquid is alcoholic, but an avatar is never truly intoxicated. Cardinal will never impose an effect from an item, monster, or any other source that affects a player's psyche. Players cannot become possessed or be forced to do or say anything against their will. Additionally, psychological disorders such as MPD/DID are disallowed.
That is not to say that every player is in a perfect mental state. Becoming trapped in Sword Art Online can be a stressful and traumatic ordeal, and some players may become mentally unstable as a result. Feel free to contact staff for clarification on mental disorders and what is acceptable for the site.
4. Does my avatar need to eat/drink/sleep/bathe?QuoteSince players feel fatigue and hunger, sleeping and eating are a necessity. If a player does not sleep for an extended period of time, they may eventually collapse from exhaustion. This does not cause a character to lose HP, however, meaning an avatar cannot die from starvation. Some everyday actions are simply not done in SAO, such as changing clothes by hand or going to the bathroom. Bathing is possible, but not necessary.
5. What information is available in my character's interface?QuoteA player's own name, level, colored health bar, and (current/maximum) hit points are located in the upper left corner of one's field of vision. If the player is in a party, they can also see the hit points and names of all other party members. In the bottom left corner of the visual field is a clock that displays Aincrad's local time. Without being in a party with another player, the only thing that can be seen in their cursor.
While outside of buildings, a colored cursor is displayed over every NPC, monster, and player. A green cursor is the default for all players, while an orange cursor indicates the player has committed a crime. Yellow cursors indicate inactive (non-aggressive) monsters, certain NPCs, and pets. All active monsters possess a red cursor. If a monster is the objective of an accepted quest, a player will see a narrow yellow border surrounding the cursor.
Monsters also have their name and health bar(s) displayed around them. Regular monsters normally have a single health bar while bosses typically have multiple.
6. When do health bars change color?QuoteA health bar changes from green to yellow at 50%, and yellow to red at 30% of maximum HP.
7. What is Cardinal?QuoteCardinal manages and drives all of Sword Art Online's systems. It is able to make balance changes, generate quests, and locate and fix bugs in the system. System changes and updates in SAO-RPG are posted under the Cardinal account, meaning that patches do not have to be considered ret-cons to previous system information.
8. What are NPCs? NPC Players?
QuoteNPCs, or Non-Player Characters is anyone in the game who is not considered a living player. This can include quest-givers, shopkeepers, and other inhabitants of cities. There are all kinds of them, and unless an NPC has been specifically designed as part of a quest or event, players are welcome to design and write about NPCs as they fit into the story of your thread. 'NPC Players' refers to characters that are meant to be a real person playing Sword Art Online, but does not have an account, journal, or is recognized as a member of the site. They can be created and written about the same as a regular NPC, but these characters typically have more weight to them--they are humans just like anyone else's character, not just programmed NPCs. NPC Players can be used in many ways to advance your character's plot, but it is important to note that both NPCs and NPC Players may not aid in combat or any other mechanic that would give your character an advantage, unless specifically stated in a quest or staff-run event. If you wish to fight against an NPC or NPC Player, you can roleplay combat between them, and even give them stats and roll dice like you would with a monster, if you wish. Keep in mind that attacking anyone that does not already have an orange cursor typically results in a strike against your own cursor. Using NPCs or NPC Players can be a useful tool; don't hesitate to have fun with your writing!
9. How long has it been? What's the current timeline?
QuotePlease note that the following is out of character knowledge.
Time progresses at a different rate in the game than in our characters' real lives. As of November 6, 2017 (OOC real time), characters should have the perception that 2 years have passed since the game's launch. This will continue to roughly mirror the passage of real time until the game's completion. The note that the perception of time is different in-game is to allow the idea that a set amount of time has passed in the real world (likely 2 years) upon the game's completion, regardless of how long it takes for the site to clear all 100 floors.We hope to release more changes soon that will streamline boss fights and floor clearing, as well as help new players establish themselves despite the time gap, but hopefully this timeline serves as a helpful tool for players throughout the rest of our time spent clearing the game.
-

Guild Buildings:
Building Name Buff Effect Build
LimitConstruction Cost Recharge Cost Guild Hall* Allows a Guild the ability to create one Guild Quest. Narratively, it also allows players to teleport back to the Guild Territory when using Teleport Crystals. 1 Unlocked at Guild Rank I — Storage Vault Allows a guild to create a Storage Vault in their Guild Page. Members can use this thread to store and withdraw items. Any items that have trading restrictions cannot be moved to a Storage Vault. 1 1 Token — Trading Hall* Reduce LD needed for Salvage by 5 (10+ for Alchemist crystals, 6+ for everything else). +2 EXP per craft. Rank 9 crafters and Rank 4 merchants/performers receive +1 crafting/identification attempt per day. Rank 10 crafters and Rank 5 merchants/performers receive +2 crafting/identification attempts per day. 1 1 Token — Treasury +5% bonus col from last-hit monster kills and +10% bonus col from treasure chests. 1 1 Token — Training Room When performing a Guild Quest, the lowest-leveled guild member receives +10% bonus EXP at the end of the thread. (Limit one use per Guild Quest per evaluation window. Recharging refreshes the limitation on one Guild Quest for that evaluation window.) 1 1 Token 1 Token Dormitory For all guild members, increases out of combat HP regen by (5 * Tier HP) and decreases full energy regen to 2 Out of Combat Posts. Does not stack with Housing’s ‘Relaxed’ buff. 1 1 Token — Garden* Once per evaluation window, returns 1 x (Guild Rank) materials to the Guild Treasurer. ∞ 1 Token — Estalagem* Once per evaluation window, returns 1% of the construction cost in col to the Guild Treasurer. ∞ 1 Token — Menagerie* Guild members undertaking <<Feeding Your Enemy>> gain +1 LD to familiar searching rolls and +1 to familiar taming rolls. 1 1 Token — Armory* Once per charge, players may submit a Skill Refund evaluation regardless of the 30 day cooldown window. 1 1 Token 1 Token Laboratory Once per charge, when receiving single-use consumables from Quest Rewards, if a Guild Treasurer were to receive additional tokens, one guild member may claim 1 x (Additional Token / 2) copies of the consumable. 1 1 Token 1 Token Hunt Board Once per charge, if two or more Guild members are present when hunting Field Bosses on the floor, the party may choose to bring the cooldown to respawn the Field Boss to 1 post, but forgo receiving that Field Boss’ EXP at the end of the thread. This buff may only apply once per thread. 1 1 Token 1 Token Barracks When constructing this Building, select a floor. Apply additional taxes for constructing this Building on a floor if it is not the same as the Guild’s Territory. Once per charge, if two or more Guild members are present when hunting that floor’s Field Boss, the party may choose to bring down its respawn cooldown by 3 posts, to a minimum of 1 post. This buff may only apply once per thread. 3 * (Current Max Player Tier) 1 Token 1 Token Library Once per charge, if a Storyteller is eligible to claim a Guild Token, their character gains +10% bonus EXP at the end of the thread. This buff may only apply once per thread. 1 1 Token 1 Token Bureau Once per charge, if two or more Guild members are present in a thread, allow two dungeons to be spawned/explored in that thread, regardless of Dungeon-searching cooldowns. This buff may only apply once per thread. 1 1 Token 1 Token Landmark Allows Guild officials to construct a custom location within Guild Territory for narrative purposes. This can be placed on other floors/in settlements after applying additional tax costs. Each landmark location constructed has to be submitted to staff for evaluation. ∞ 1 Token — *These Buildings may also be upgraded at an additional cost.
Upgraded Building Pre-requisite Building Buff Effect Upgrade Cost Guild Hall II Guild Hall Allows a Guild the ability to create two Guild Quests. Unlocked at Guild Rank III Guild Hall III Guild Hall II Allows a Guild the ability to create three Guild Quests. Unlocked at Guild Rank V Trading Hall II Trading Hall In addition to Trading Hall buffs, crafters receive +1 crafting/identification attempt per day. 2 Token Trading Hall III Trading Hall II In addition to Trading Hall buffs, crafters receive +2 crafting/identification attempts per day. Crafters now successfully Salvage their crafting materials on a LD 9 threshold. Appraisers gain an initial additional reroll per identified item at no cost. 3 Token Menagerie II Menagerie In addition to Menagerie buffs, guild members may now narratively tame up to three (3) different familiars each and swap them out between threads. When swapping familiars narratively, players will maintain their owned Familiar Skill. 2 Token Menagerie III Menagerie II In addition to Menagerie II buffs, the maximum number of familiars guild members can tame narratively is five (5). Guild officials may also appoint a familiar mascot, shared between their guild members to accompany them narratively in their threads. 3 Token Armory II Armory In addition to Armory buffs, when submitting a Skill Refund evaluation, guild members have the option to pay an additional Token to refund up to 30 additional SP. 2 Token Bureau II Bureau In addition to Bureau buffs, when two or more Guild members are completing a Rumor thread, each Guild member gains +10% bonus EXP at the end of the thread. Other party members gain +5% bonus EXP at the end of the thread. This buff is not stackable between different Guilds. 2 Token Garden II Garden Once per evaluation window, returns 3 x (Guild Rank) materials to the Guild Treasurer. 2 Token Garden III Garden II Once per evaluation window, returns 5 x (Guild Rank) materials to the Guild Treasurer. 3 Token Estalagem II Estalagem Once per evaluation window, returns 2% of the building’s base construction cost in col to the Guild Treasurer. 2 Token Estalagem III Estalagem II Once per evaluation window, returns 3% of the building’s base construction cost in col to the Guild Treasurer. 3 Token Player Housing:
Plot Sizes & Costs:
Plot Type Standard Cost PK Cost Room Slots Stories Limit Yard Slots Studio 20,000 30,000 2 1 0 Apartment 30,000 45,000 4 1 0 Townhouse 48,000 72,000 5 2 1 Starter Home 58,000 87,000 7 2 1 Two-Story Home 86,000 133,500 10 3 2 Estate 124,000 186,000 15 4 3 All basic rooms cost 10,000 Col to add to the plot. So a Studio Plot with one Workshop would cost a total of 30,000 Col. Rooms come in a variety ranging from Bedrooms to Dining Rooms. Keep in mind that some rooms have restrictions that must be followed. Some rooms also have upgrades from their basic versions, which each cost 15,000 Col.
Example: If you were to buy a Bedroom, and want to upgrade it to a Master Bedroom. It would cost 10,000 Col (for the basic bedroom), then an additional 15,000 Col to upgrade it to a Master Bedroom. Costing you 25,000 Col in total.
Room Name Player Limit Restrictions Buff Name Buff Effect Upgrade Bedroom 1 "Rested" -1 energy cost for the first two expenditures of each combat Master Bedroom Bathroom 1 "Clean" The first time you would suffer DoT damage in a thread, reduce damage taken from DoT each turn by 20% (rounded down) Master Bathroom Basic Workshop 1 Must assign a workshop type "Working" +2 EXP per crafting attempt Extended Workshop Basic Kitchen 1 "Filling" Increase the effectiveness of a single food item consumed in a thread by +1 T1 slot. This can exceed normal Cook enhancement caps. Ex: A perfect T2 MIT food gives 35 MIT instead of 30. Storage Closet 1 "Item Stash" +1 Battle Ready Inventory Slot Dining Room 2 Limit 1 per floor. "Tasty" Turn 2 identical food items (same quality, tier, & enhancements) into a Lesser Feast. A Lesser Feast contains 4 portions of the food items sacrificed. Lesser Feasts created this way cannot be used outside of the thread they are created. Limit 1 item created per thread. Dining Hall Living Room 2 Limit 1 per floor. "Relaxed" Increases out of combatHP regen by (5 * Tier HP) and decreases full energy regen to 2 Out of Combat Posts. Attic (Storage) 1 Cannot have more than 1 Attic. Requires 2 or more stories. "Col Stash" +5% bonus col from monster kills and treasure chests Attic (Bedroom) 1 Cannot have more than 1 Attic. Requires 2 or more stories. Skill may be reassigned once every 30 days. "Skylight (Skill)" +1 Expertise to declared utility skill. Cannot boost a skill without ranks, or increase a skill past its maximum rank. Cannot boost a skill the user has not learned yet. Ranks obtained using this buff will make the mods of that rank available for purchase. Mods obtained this way are unusable if this buff is removed until the skill is returned to the appropriate rank by way of SP purchase. Fishing Pond 1 Uses a Yard slot "Angler" +2 Fishing EXP per fishing attempt Ornate Fishing Pond Herbalist Hut 1 Uses a Yard slot "Forager" +2 Gathering EXP per gathering attempt Greenhouse Slime Farm 1 Uses a Yard slot. Cannot have a Slime Farm and a Mega Slime Farm. Cannot stack with a guild's Training Room. "Basic Training" +5% EXP to a thread. Limit one use per month. Must be used on a player's first post in a thread. Cooldown begins counting down when used in a post. Mega Slime Farm Basement 1 Requires 2 or more stories. "Multipurpose" Gain +1 to LD, Stealth Rating, Stealth Detection, or Prosperity to one post in a thread. Can be applied after a roll Guest Room 1 "Decor: «Name of Amenity»" Players can have one «Amenity» in a «Guest Room» and the «Amenity» cannot be recovered. Players are allowed to change which «Amenity» is in the «Guest Room». Multiple instances of the same «Amenity» do not stack. This buff affects the player and their choice of up to two party members.
Workshop Type Profession Restriction Sewing Room Tailor Atelier Artisan Pharmacy Alchemist Chef's Kitchen Cook Recording Studio Performer Forge Blacksmith Uses a Yard slot Storage Shed Merchant Uses a Yard slot
Upgraded Room Player Limit Restrictions Buff Name Buff Effect Master Bedroom 2 When assigning a second player, they must be married to the first. "Well Rested" -1 energy cost for the first three expenditures of each combat Master Bathroom 2 When assigning a second player, they must be married to the first. "Squeaky Clean" The first time you would suffer DoT damage in a thread, reduce damage taken from DoT each turn by 25% (rounded down) Extended Workshop 1 "Hard Working" +2 Crafting EXP per crafting attempt and +1 crafting attempt per day Ornate Fishing Pond 1 Uses a Yard slot. Cannot have a Fishing Pond and an Ornate Fishing Pond. “Practiced Angler” +2 Fishing EXP per Attempt and additional +1 LD & CD to fishing attempts.
Greenhouse 1 Uses a Yard slot. Cannot have a Herbalist Hut and a Greenhouse. “Green Thumb” +2 Gathering EXP per Attempt and additional +1 LD & CD to gathering attempts. Dining Hall 4 Uses 2 room slots. Limit 1 per floor. "Delicious" Turn 3 identical food items (same quality, tier, & enhancements) into a Feast. A Feast contains 6 portions of the food items sacrificed. Feasts created this way cannot be used outside of the thread they are created. Limit 1 item created per thread. Mega Slime Farm 1 Uses a Yard slot. Cannot have a Slime Farm and a Mega Slime Farm. "Advanced Training" +10% EXP to a thread. Limit one use per month. Must be used on a player's first post in a thread. Cooldown begins counting down when used in a post.
Upgrading or Downgrading a Plot of Land:
Simply reference the plot you have on the left-hand side and move across to the plot you would like along the top to determine the amount of col needed/owed back for your desired transition. Ensure that you don't have too many rooms for a downgrade.Standard Plot of Land:
Houses None Studio Apartment Town House Starter House Two Story House Estate Studio -5,000 0 35,000 62,000 77,000 119,000 176,000 Apartment -7,500 -2,500 0 57,000 72,000 114,000 171,000 Town House -12,000 -7,500 -4,500 0 63,000 105,000 162,000 Starter Home -14,500 -9,500 -7,000 -2,500 0 103,000 160,000 Two Story home -21,500 -16,500 -14,000 -9,500 -7,000 0 146,000 Estate -31,000 -26,000 -23,500 -19,000 -16,500 -9,500 0 PK Accessible Plot of Land:
Houses None Studio Apartment Town House Starter House Two Story House Estate Studio -7,000 0 55,000 93,000 115,000 180,750 264,000 Apartment -12,000 -3,750 0 85,500 108,000 177,750 256,500 Town House -18,000 -10,500 -6,750 0 106,000 164,250 243,000 Starter Home -22,000 -14,250 -10,500 -3,750 0 160,500 235,500 Two Story home -33,000 -25,875 -22,125 -15,375 -11,625 0 227,000 Estate -46,000 -39,000 -35,250 -28,500 -24,750 -13,125 0 Selling a house:
When selling housing plots, all rooms must be sold alongside it. Look to the chart above for how much col will be refunded to the player upon its sale.
When selling individual room(s), 75% of the room(s)' cost will be refunded back to the player. Add this to the refund cost when selling housing plots.
Regarding Housing via Donor perks:
Housing plots and rooms granted by Donor perks will not refund col into your wallet. Instead, the amount that is "refunded" will count as equity toward future housing purchases. Their value will still be refunded at a 75% rate upon a sale, but will act as credit toward future housing purchases.
-

Players that pick up the «Foraging» profession will be able to forage for materials and col while out of combat. They also have a chance of finding Demonic Shards, materials that can be used in the combination of items to create one of Demonic Quality. The chance of successful foraging attempts depends on the player's «Foraging» rank.
- [0-49 EXP] Rank 1 - Novice Forager: Successfully forage for materials on a LD 14+.
- [50-149 EXP] Rank 2 - Journeyman Forager: Successfully forage for materials on a LD 13+.
- [150-299 EXP] Rank 3 - Adept Forager: Successfully forage for materials on a LD 12+.
- [300-499 EXP] Rank 4 - Master Forager: Successfully forage for materials on a LD 11+.
- [500+ EXP] Rank 5 - Grand Master Forager: Successfully forage for materials on a LD 10+. Gain ability to find a Demonic Shard on a LD 17+ and CD 12+.
Levelling Up:
Gaining EXP will increase your Foraging Rank, allowing you to have better chances to forage for materials, col and Demonic Shards.
- Foraging attempts: +3 EXP
- Successful forage: +8 EXP
- Critical forage (additional materials/Demonic Shards): +16 EXP
Critical Foraging Chart:
Foragers have the ability to forage for additional materials, col and Demonic Shards on critical forages. As one's Foraging rank increases, the conditions for critical foraging changes, making it more likely for one to find additional rewards on a foraging attempt. The player must meet both the LD requirement to obtain materials and the CD requirement stated below; after which, they may gain additional rewards based on the CD of their foraging roll.
Do note that Professions have unique buffs that apply to themselves. As such, regular CD & LD bonuses do not apply unless explicitly stated otherwise.
SpoilerRank 1
CD:
[1-6] = No additonal materials.
[7+] = 1 additional material.Rank 2
CD:
[1-5] = No additonal materials.
[6+] = 1 additional material.Rank 3
CD:
[1-4] = No additonal materials.
[5-8] = 1 additional material.
[9+] = 2 additional materials & 1,500col.Rank 4
CD:
[1-4] = No additonal materials.
[5-7] = 1 additional material.
[8+] = 2 additional materials & 1,500col.Rank 5
CD:
[1-4] = No additonal materials.
[5-6] = 1 additional material & 1,000col.
[7-9] = 2 additional materials & 2,500col.
[10+] = 3 additional materials & 3,000col.Foraging/Using a Demonic Shard:
Starting at Rank 5, foragers have a chance to find a Demonic Shard on a foraging roll of LD 17+ and CD 12+. This will come in addition to other rewards obtained (eg. materials from initial foraging attempt, additional materials and col from critical forages).
Demonic Shards are valuable treasures used in the process of upgrading items. For more information, see the Site Guide & Rules [here].
-

Players that pick up the «Fishing» profession will be able to fish for materials and equipment while out of combat. They also have a chance of finding Gleaming Scales, materials that can guarantee unique enhancements on equipment. The chance of successful fishing attempts depends on the player's «Fishing» rank.
- [0-49 EXP] Rank 1 - Novice Angler: Successfully fish up a material on a CD 8+. Critical catch a treasure chest on a LD 12+.
- [50-149 EXP] Rank 2 - Journeyman Angler: Successfully fish up a material on a CD 7+. Critical catch a treasure chest on a LD 11+.
- [150-299 EXP] Rank 3 - Adept Angler: Successfully fish up a material on a CD 6+. Critical catch a treasure chest on a LD 10+.
- [300-499 EXP] Rank 4 - Master Angler: Successfully fish up a material on a CD 5+. Critical catch a treasure chest on a LD 9+.
- [500+ EXP] Rank 5 - Grand Master Angler: Successfully fish up a material on a CD 4+. Critical catch a treasure chest on a LD 8+. Gain ability to critical catch a Gleaming Scale on a CD 12+ and LD 17+.
Levelling Up:
Gaining EXP will increase your Fishing Rank, allowing you to have better chances when fishing up materials, treasure chests, and Gleaming Scales. Additionally, increases your chances at better loot while opening up treasure chests obtained by the Fishing skill.
- Fishing attempts: +3 EXP
- Successful catches: +8 EXP
- Critical catches (treasure chests/Gleaming Scales): +16 EXP
Critical Catches:
Anglers have the ability to fish up treasure chests and Gleaming Scales on critical catches. As one's Fishing rank increases, the conditions for critical catches changes, making it more likely for one to find additional rewards on a fishing attempt.
Do note that Professions have unique buffs that apply to themselves. As such, regular CD & LD bonuses do not apply unless explicitly stated otherwise.
For a critical catch, after meeting the CD and LD requirements of one's Fishing rank as stated above, an additional roll must be made on the fishing attempt's post to open up the treasure chest. Anglers may then gain additional rewards based on the LD of their additional roll. Note that a treasure chest fished up in this manner does not require a post action to open. Only Profession LD modifiers, alongside the LD bonuses provided by one's Fishing rank, apply to treasure chest rewards.
Spoiler► Rank 1 - No bonus
► Rank 2 - +1 LD while opening up treasure chests obtained by the Fishing skill
► Rank 3 - +2 LD while opening up treasure chests obtained by the Fishing skill
► Rank 4 - +3 LD while opening up treasure chests obtained by the Fishing skill
► Rank 5 - +5 LD while opening up treasure chests obtained by the Fishing skillTreasure Chest Loot Table (LD):
[1-4] = Unidentified Rare Armor/Shield (2), Unidentified Rare Trinket (1)
[5-9] = Unidentified Rare Weapons (2), Unidentified Rare Consumables (2)
[10-14] = Unidentified Perfect Armor/Shield (1), Unidentified Rare Armor/Shield (1)
[15-19] = Unidentified Perfect Weapons (2), Unidentified Rare Weapon (1)
[20-24] = Unidentified Perfect Weapons (2), Unidentified Perfect Armor/Shield (2), Random Dungeon Map
[25] = Unidentified Perfect Weapons (3), Unidentified Perfect Armor/Shield (3), Gleaming ScaleCatching/Using a Gleaming Scale:
Starting at Rank 5, anglers have a chance to find a Gleaming Scale on a fishing roll of CD 12+ and LD 17+. This will come in addition to other rewards obtained (eg. materials from initial fishing attempt, additional loot from treasure chests).
Gleaming Scales are valuable treasures used in the process of upgrading items. For more information, see the Site Guide & Rules [here].
-

Appraisers are players that can junk sell items, reroll their enhancements or identify ones dropped from monsters. The amount of identifications and rerolls they can perform depends on their rank, as do the amount of times they can reroll enhancements on a single item:
- [0-100 EXP] Rank 1 - Beginner Appraiser: Total 5 identifications per day. Enhancements can be rerolled on the same item up to 2 times.
- [101-250 EXP] Rank 2 - Experienced Appraiser: Total 6 identifications per day. Enhancements can be rerolled on the same item up to 3 times.
- [251-500 EXP] Rank 3 - Professional Appraiser: Total 7 identifications per day. Enhancements can be rerolled on the same item up to 4 times.
- [501-1000 EXP] Rank 4 - Master Appraiser: Total 8 identifications per day. Enhancements can be rerolled on the same item up to 5 times.
- [1001-1500 EXP] Rank 5 - Grand Master Appraiser: Total 10 identifications per day. Enhancements can be rerolled on the same item up to 6 or more times.
Levelling Up:
Gaining EXP will increase your Appraiser Rank, allowing you to identify/reroll more times a day and increase the number of rerolls you can perform on a single item.
- Identifications: +3 EXP per slot
- Rerolls: +5 EXP
- Unique Enhancement Identification: +5 EXP (on top of base EXP gains)
Junk Sale:
Appraisers can sell off Uncommon or higher quality items for Col. Any item sold this way will be destroyed. The Col listed below is the amount received for each item sale. Appraisers will pass the Col received to the player that offered them the items sold and usually keep an agreed amount of the sale profits as their own.
SpoilerEquipment:
TierEquipment Uncommon Rare Perfect Demonic 1 100 200 400 700 2 300 500 750 1200 3 600 900 1250 1850 4 1000 1400 1900 2650 5 1500 2000 2700 3600 6 2100 2700 3650 4700 7 2800 3500 4750 5950 8 3600 4400 6000 7350 9 4500 5400 7400 8900 10 5500 6500 8950 10450 Consumables:
TierConsumables Uncommon Rare Perfect Demonic 1 50 100 200 350 2 150 250 375 600 3 300 450 625 925 4 500 700 950 1325 5 750 1000 1350 1800 6 1050 1350 1825 2350 7 1400 1750 2375 2975 8 1800 2200 3000 3675 9 2250 2700 3700 4450 10 2750 3250 4475 5225 Identifying Items:
Appraisers can identify items dropped from monsters or found in treasure chests. Identifying an item will determine what enhancements it possesses. In order to identify it, Appraisers spend a set amount of Col depending on the item's tier and quality. Any Col used for identification is destroyed, like items when junk selling them. After the cost is paid, Appraisers will roll for every unidentified slot on the item, one at a time.
Identification Costs:
SpoilerEquipment:
- [T1] Rare (320 Col)
- [T1] Perfect (640 Col)
- [T1] Demonic (960 Col)
- [T2] Rare (800 Col)
- [T2] Perfect (1,200 Col)
- [T2] Demonic (2,000 Col)
- [T3] Rare (1,440 Col)
- [T3] Perfect (2,000 Col)
- [T3] Demonic (3,120 Col)
- [T4] Rare (2,080 Col)
- [T4] Perfect (3,040 Col)
- [T4] Demonic (4,320 Col)
Consumables:
- [T1] Uncommon (80 Col)
- [T1] Rare (160 Col)
- [T1] Perfect (320 Col)
- [T2] Uncommon (240 Col)
- [T2] Rare (400 Col)
- [T2] Perfect (600 Col)
- [T3] Uncommon (480 Col)
- [T3] Rare (720 Col)
- [T3] Perfect (800 Col)
- [T4] Uncommon (800 Col)
- [T4] Rare (1,120 Col)
- [T4] Perfect (1,440 Col)
The quality of the item determines the maximum amount of enhancements that can be identified, just as regular item quality functions:
- Uncommon: 1 slot
- Rare: 2 slots
- Perfect: 3 slots
- Demonic: 4 slots
If an item's identified enhancement would result in an illegal item (following the standard enhancement rules), the Appraiser must re-roll the LD (Loot Die) and make note of all rolls made when submitting the item for evaluation.
Regular Enhancement Loot Die Chart:
Spoiler-
Weapons
- [1-6] = Taunt or Keen
- [7-13] = Bleed or Paralyze
- [14-20] = Damage or Accuracy
-
Cloth Armor
- [1-5] = Evasion or Mitigation
- [6-10] = Risky or Light Momentum
- [11-15] = Regen or Recovery
- [16-20] = Loot Die
-
Light Armor
- [1-6] = Regen or Recovery
- [7-13] = Mitigation or Evasion
- [14-20] = Light Momentum
-
Heavy Armor
- [1-6] = Regen or Recovery
- [7-13] = Thorns or Heavy Momentum
- [14-20] = Mitigation or Taunt
-
Shields
- [1-6] = Regen or Recovery
- [7-13] = Taunt or Paralyze
- [14-20] = Mitigation or Thorns
-
Trinkets
- [1-5] = Loot Die or Quality
- [6-10] = Taunt or Recovery
- [11-14] = Keen or Prosperity
- [15-20] = Accuracy or Evasion
-
Consumables*
- [1-3] = Antidote or Probiotics
- [4-6] = Loot Die or Prosperity
- [7-10] = Damage or Accuracy
- [11-14] = Mitigation or Evasion
- [15-17] = HP Recovery or Vitality
- [18-20] = Over-Health or Protein
* When identifying consumables, roll once and apply the enhancement up to the enhancement's cap (refer to the Enhancement List). If the consumable identified is a higher quality than the enhancement cap, it stops at the cap and the item's quality is adjusted (ex. a Perfect Consumable identified to have 2 ACC becomes a Rare Consumable).
Identifying Unique Enhancements:
Depending on your Appraiser rank, you have a chance to discover unique enhancements when identifying equipment (CD [Craft Die] bonuses do affect the chance for discovering unique enhancements):Spoiler►Rank 1 - BD: 10 | CD: 12
►Rank 2 - BD: 10 | CD: 11+
►Rank 3 - BD: 10 | CD: 10+
►Rank 4 - BD: 10 | CD: 9+
►Rank 5 - BD: 10 | CD: 8+If you identify a unique enhancement or use 3 Gleaming Scales to reroll a slot, refer to the chart below to determine which one was found:
Unique Enhancement Loot Die Result Chart:
Spoiler-
Weapons
- [1-3] = Paralytic Venom (Offensive) or Blight
- [4-6] = Fallen Damage or Holy Damage
- [7-10] = Freeze or Burn
- [11-14] = Vampiric (Offensive) or Envenom (Offensive)
- [15-17] = Absolute Accuracy or Phase
- [18-20] = Frostbite or Static
-
Cloth Armor
- [1-5] = Antifreeze or Fireproof
- [6-10] = Bloodclot or Paralytic Immunity
- [11-15] = Vampiric (Defensive) or Envenom (Defensive)
- [16-20] = Holy Blessing or Life Mending
-
Light Armor
- [1-5] = Antifreeze or Fireproof
- [6-10] = Bloodclot or Paralytic Immunity
- [11-15] = Vampiric (Defensive) or Envenom (Defensive)
- [16-20] = Holy Blessing or Life Mending
-
Heavy Armor
- [1-3] = Antifreeze or Fireproof
- [4-6] = Bloodclot or Paralytic Immunity
- [7-10] = Vampiric (Defensive) or Envenom (Defensive)
- [11-14] = Holy Blessing or Life Mending
- [15-17] = Flame Thorns or Frost Thorns
- [18-20] = Flame Aura or Frost Aura
-
Shields
- [1-4] = Antifreeze or Fireproof
- [5-8] = Bloodclot or Paralytic Immunity
- [9-12] = Flame Thorns or Frost Thorns
- [13-16] = Flame Aura or Frost Aura
- [17-20] = Holy Blessing
-
Trinkets
- [1-6] = Antifreeze or Fireproof
- [7-13] = Bloodclot or Paralytic Immunity
- [14-20] = Holy Blessing or Life Mending
- Consumables*
* When identifying a consumable and a Unique Identification combination is rolled, still refer to the Regular Enhancement LD Result Chart. In addition, the Appraiser may declare the item as a Crystal, or Feast:
- Crystal: Does not take a post action to use. Follows normal Crystal-use rules.
- Feast: Can be used to feed a party of up to 6 players. Follows normal Feast-use rules.
Rerolls:
Rerolls allow for players to re-identify a pre-existing enhancement on a piece of equipment in hopes of obtaining a different or unique enhancement. This does not take up a crafting attempt. Each time an item goes through the reroll process, its name will be updated to "[Item Name]+1".
Item rerolls abide by the following rules:
-
An item can be rolled a maximum times of (Item Tier + 1).
- As an example, a Tier 3 item can be rolled max 4 times, and a Tier 4 item can be rolled up to 5 times
- Via Floor Progression, Aincrad is currently on Tier 4. Hence, there is no current gear that can be rolled 6 or more times. The list will be updated however as more Tiers come into play.
-
If an enhancement is rolled that matches a pre-existing enhancement on the equipment piece at capacity, the player is allowed an additional reroll attempt.
- For example, if a player rolls [TAUNT/KEEN] on a perfect sword that has [KEEN II/???], the player may choose either [TAUNT] on their roll or opt for the reroll attempt.
Reroll Pricing Chart:
Depending on how many times an item has been rerolled already, the price for the next reroll will be increased. You can see the prices on the chart below.
Spoiler1st Reroll - 1,000 Col
2nd Reroll - 2,000 Col
3rd Reroll - 4,000 Col
4th Reroll - 8,000 Col
5th Reroll - 16,000 Col
6th Reroll - 32,000 Col
7th Reroll - 64,000 Col
8th Reroll - 128,000 Col
9th Reroll - 256,000 Col
10th Reroll - 512,000 Col
11th Reroll - 1,024,000 ColItem Fusion:
Appraisers can combine unidentified items to create higher quality items. This does not take up a daily crafting attempt. During the combination process, the components (i.e. items combined together) and the combined item (i.e. the item created as a result of combining the components), must adhere to the following rules:
- Items must be of the same item type and tier to be considered eligible as components for the combination process.
- Items must not have been identified nor evaluated to be fused in this manner.
- If a Demonic item is used as a component, the resulting item will be a Perfect item unless a Demonic Shard is used.
- Item combinations must have the following exchange rate:
Spoiler- 2 Uncommon items = 1 Rare item
- 2 Rare items = 1 Perfect item
- 2 Perfect/Demonic Items = 1 Perfect item
- 2 Perfect/Demonic item + 1 Demonic Shard = 1 Demonic item
Mystic Essences:
To streamline the process of achieving an ideal weapon with specific Unique enhancements, appraisers can sacrifice items with Unique enhancements and break them down into Mystic Essences. This process does not use up any of the Appraiser’s daily identification attempts, but the sacrificed item will be lost in the process.
For each Unique enhancement on the item to be sacrificed, 1 Mystic Essence will be obtained. For 3 Mystic Essences, Appraisers can expend them to select a Unique enhancement on an unidentified slot of an unidentified item. This may only ever occur once per unidentified item.
Mystic Essences abide by the following rules:
- Only items with Unique Enhancements that were identified by an Appraiser will be eligible to be sacrificed for Mystic Essences.
- All Mystic Essences must be attached to an ID and be evaluated with the following format: "12345" (original), "12345-1" (first copy), "12345-2" (second copy).
- All Mystic Essences must be logged within the Appraiser's shop as untradeable resources.
- Mystic Essences may be applied to any item type, of any item tier and quality.
-

Performers are players that dance, play instruments, and sing for others' entertainment and often times even give buffs. Songs can be created and recorded to increase or decrease stats. The tier level, types of items, and number of daily crafts they can make vary depending on their rank:
- [0-39 EXP] Rank 1 - Musico Primo: Able to craft Tier 1 equipment. 2 crafts per day.
- [40-159 EXP] Rank 2 - Secondo Artistica: Able to craft Tier 2 equipment. 4 crafts per day.
- [160-639 EXP] Rank 3 - El Tercio Tocador: Able to craft Tier 3 equipment. 6 crafts per day.
- [640-2559 EXP] Rank 4 - El Quarto Instructor: Able to craft Tier 4 equipment. 8 crafts per day.
- [2560+ EXP] Rank 5 - La Quinta Orchestra: Able to craft Tier 5 equipment. 10 crafts per day.
Performers can make the following types of items:
- Support Songs (Available at Rank 1): Utility songs to increase luck, and healing songs to recover HP, both are useful buffs to have for a party.
- Debuff Songs (Available at Rank 2): Songs used to weaken your enemies, these are the Performer's niche.
Making/Using Performer Crafts:
Songs made by Performers are stored on recording crystals. Despite the name, these crystals are different from those made by Alchemists as they just need one material to craft and typically require a post action to use.Crafting Soundtracks:
A performer may take ten identical debuff songs + 1 demonic shard in order to turn them into a Soundtrack. This does not take up a daily crafting attempt. The Performer must use the Dice Roller and include the IDs of the ten items that are being used for the Soundtrack (e.g. "Crafting Soundtrack from 1234, 1235"). The Dice Result does not matter as there is no chance of failure when crafting a Soundtrack, so this is simply used for identification purposes. Since they are used to create a Soundtrack, the ten debuff songs cannot be used again elsewhere. Note: 'Identical' debuff songs must share the same quality, tier, and enhancement. In the event of a masterpiece effect, all debuff songs must have the same masterpiece effect.Using Soundtracks:
Soundtracks are a reusable consumable item that can be used in a thread to apply the effects of a debuff song. These items function identically to the debuff songs they are crafted out of, but can be used without being consumed once per combat. These items have a stack limit of 1, which means each one takes a slot of your battle ready inventory.Leveling Up:
Gaining EXP and increasing your Performer Rank increases the Tier level and number of items you can craft each day.- Critical Fail and Fail crafts: +1 EXP
- Salvage crafts, regardless of success: +2 EXP
- Uncommon crafts: +3 EXP
- Rare crafts: +5 EXP
- Perfect crafts: +8 EXP
Item Fusion:
Performers can combine items types that they are able to craft (i.e. Support Songs, Debuff Songs) to create higher quality items. This does not take up a daily crafting attempt. During the combination process, the components (i.e. items combined together) and the combined item (i.e. the item created as a result of combining the components), must adhere to the following rules:- Items must be of the same item type and tier to be considered eligible as components for the combination process.
- Items do not have to be evaluated to be fused in this manner, however unevaluated items cannot fuse with evaluated items.
- If a Demonic item is used as a component, the resulting item will be a Perfect item unless a Demonic Shard is used.
- Masterpieces may be fused with each other to create a Masterpiece of a higher rarity following Standard Fusion.
-
Item combinations must have the following exchange rate:
Quote
Standard Fusion
Fused items used in these recipes will drop their Masterpiece status if both items do not hold Masterpiece status.- 2 Uncommon items = 1 Rare item
- 2 Rare items = 1 Perfect item
- 2 Perfect/Demonic Items = 1 Perfect item
- 2 Perfect/Demonic item + 1 Demonic Shard = 1 Demonic item
Upgrading Standard items to Masterpieces
Item components used in these recipes do not have Masterpiece status.- 3 Uncommon items = 1 Rare item (Masterpiece)
- 3 Rare items = 1 Perfect item (Masterpiece)
- 3 Perfect items = 1 Perfect item (Masterpiece)
- 2 Demonic items = 1 Demonic item (Masterpiece)
Crafting Die Result Chart:
As your Performer rank increases, the crafting die result chart changes, making it less likely for you to fail and more likely to succeed on higher-quality crafts. Do note that Professions have unique buffs that apply to themselves. As such, regular CD & LD bonuses do not apply unless explicitly stated otherwise.Performers have a chance on successful crafts to produce a Masterpiece song. When submitting a Masterpiece for evaluation, specify one of the following effects to apply to the song:
- "Mass": The song effects the maximum number of targets possible. (4/6 players in a regular/boss party, or up to 4 enemies)
- "Instant": The song does not require a post action to use.
Spoiler-
Rank 1
CD:
[1] = Critical Fail (Lose materials)
[2-5] = Fail (Lose materials)
[6-9] = Salvage (Keep materials on LD 11+)
[10] = Uncommon item (1 slot)
[11] = Rare item (2 slots)
[12] = Perfect item (3 slots)
LD:
[1-17] = No additional items.
[18-20] = Masterpiece crafted. -
Rank 2
CD:
[1] = Critical Fail (Lose materials)
[2-4] = Fail (Lose materials)
[5-7] = Salvage (Keep materials on LD 11+)
[8-10] = Uncommon item (1 slot)
[11] = Rare item (2 slots)
[12] = Perfect item (3 slots)
LD:
[1-16] = No additional items.
[17-20] = Masterpiece crafted. -
Rank 3
CD:
[1] = Critical Fail (Lose materials)
[2] = Fail (Lose materials)
[3-6] = Salvage (Keep materials on LD 11+)
[7-9] = Uncommon item (1 slot)
[10-11] = Rare item (2 slots)
[12] = Perfect item (3 slots)
LD:
[1-15] = No additional items.
[16-20] = Masterpiece crafted. -
Rank 4
CD:
[1] = Critical Fail (Lose materials)
[2] = Fail (Lose materials)
[3-5] = Salvage (Keep materials on LD 11+)
[6-8] = Uncommon item (1 slot)
[9-11] = Rare item (2 slots)
[12] = Perfect item (3 slots)
LD:
[1-13] = No additional items.
[14-20] = Masterpiece crafted. -
Rank 5
CD:
[1] = Critical Fail (Lose materials)
[2-3] = Salvage (Keep materials on LD 11+)
[4-6] = Uncommon item (1 slot)
[7-10] = Rare item (2 slots)
[11-12] = Perfect item (3 slots)
LD:
[1-11] = No additional items.
[12-20] = Masterpiece crafted.
-

Cooks create delicious items with similar buffs to an alchemical potion or crystal. They can be eaten and used in a single thread, or used during a feast.
- [0-19 EXP] Rank 1 - Beginner Cook: Able to craft Tier 1 food. 2 crafts per day.
- [20-39 EXP] Rank 2 - Apprentice Cook: Able to craft Tier 2 food. 3 crafts per day.
- [40-79 EXP] Rank 3 - Professional Cook: Able to craft Tier 3 food. 4 crafts per day.
- [80-159 EXP] Rank 4 - Experienced Cook: Able to craft Tier 4 food. 5 crafts per day.
- [160-319 EXP] Rank 5 - Assistant Cook: Able to craft Tier 5 food. 6 crafts per day.
- [320-639 EXP] Rank 6 - Mentor Cook: Able to craft Tier 6 food. 7 crafts per day.
- [640-1279 EXP] Rank 7 - High Mentor Cook: Able to craft Tier 7 food. 8 crafts per day.
- [1280-2559 EXP] Rank 8 - Provisional Master Cook: Able to craft Tier 8 food. 9 crafts per day.
- [2560-5119 EXP] Rank 9 - Master Cook: Able to craft Tier 9 food. 10 crafts per day.
- [5120+ EXP] Rank 10 - Grand Master Cook: Able to craft Tier 10 food. 11 crafts per day.
Cooks can make the following types of items:
- Snacks (Available at Rank 1): Cheese and crackers, stuffed apples, garlic bread, etc. Snacks are used for temporary buffs.
- Desserts (Available at Rank 2): Chocolate mousse, strawberry shortcake, cookies, etc. Desserts are used for temporary buffs.
- Meals (Available at Rank 3): Roast boar, stuffed pigeon, grilled cheese, etc. Meals are used for temporary buffs.
- Feasts (Available at Rank 5): Thanksgiving feast, wedding feast, birthday feast, etc. Feasts are items that can feed/buff multiple players, making them very useful in parties and raids.
Crafting Feasts:
A cook may take two identical food items in order to turn them into a Feast. This does not take up a daily crafting attempt. The Cook must use the Dice Roller and include the IDs of the two items that are being used for the Feast (e.g. "Crafting Feast from 1234, 1235"). The Dice Result does not matter as there is no chance of failure when crafting a Feast, so this is simply used for identification purposes. Since they are used to create a Feast, the two food items cannot be used again elsewhere. Note: 'Identical' food items must share the same quality, tier, and enhancement.Using Feasts:
Feasts are a consumable item that can be used in a thread to feed and buff a full raid party of 6 players. "Using", or activating a Feast in order for other players to use it does not require a post action, but cannot be done during combat. The player who uses a Feast can take a portion for themselves--as well as use other consumable items--in the same post. Once it has been used, portions of a Feast cannot be recovered or returned to a player's inventory, and a Feast will disappear when all 6 portions have been taken.Leveling Up:
Gaining EXP and increasing your Cook Rank increases the Tier level and number of items you can craft each day.- Critical Fail and Fail crafts: +1 EXP
- Salvage crafts, regardless of success: +2 EXP
- Uncommon crafts: +3 EXP
- Rare crafts: +5 EXP
- Perfect crafts: +8 EXP
Item Fusion:
Cooks can combine items types that they are able to craft (i.e. Snacks, Meals, Desserts) to create higher quality items. This does not take up a daily crafting attempt. During the combination process, the components (i.e. items combined together) and the combined item (i.e. the item created as a result of combining the components), must adhere to the following rules:- Items must be of the same item type and tier to be considered eligible as components for the combination process.
- Items do not have to be evaluated to be fused in this manner, however unevaluated items cannot fuse with evaluated items.
- If a Demonic item is used as a component, the resulting item will be a Perfect item unless a Demonic Shard is used.
-
Item combinations must have the following exchange rate:
Quote
- 2 Uncommon items = 1 Rare item
- 2 Rare items = 1 Perfect item
- 2 Perfect/Demonic Items = 1 Perfect item
- 2 Perfect/Demonic item + 1 Demonic Shard = 1 Demonic item
Crafting Die Result Chart:
As your Cook rank increases, the crafting die result chart changes, making it less likely for you to fail and more likely to succeed on higher-quality crafts. Do note that Professions have unique buffs that apply to themselves. As such, regular CD & LD bonuses do not apply unless explicitly stated otherwise.Cooks have a chance on successful crafts to produce more than one copy of an item. When submitting an item for evaluation, any copies must have the same quality, tier, and enhancements as the successful craft. The ID for copies should be listed in the evaluation should be: "12345" (original), "12345-1" (first copy), "12345-2" (second copy).
Spoiler-
Rank 1
CD:
[1] = Critical Fail (Lose materials)
[2-5] = Fail (Lose materials)
[6-9] = Salvage (Keep materials on LD 11+)
[10] = Uncommon item (1 slot)
[11] = Rare item (2 slots)
[12] = Perfect item (3 slots)
LD:
[1-17] = No additional items.
[18-20] = Yields 1 additional item. -
Rank 2
CD:
[1] = Critical Fail (Lose materials)
[2-4] = Fail (Lose materials)
[5-8] = Salvage (Keep materials on LD 11+)
[9-10] = Uncommon item (1 slot)
[11] = Rare item (2 slots)
[12] = Perfect item (3 slots)
LD:
[1-17] = No additional items.
[18-20] = Yields 1 additional item. -
Rank 3
CD:
[1] = Critical Fail (Lose materials)
[2-4] = Fail (Lose materials)
[5-7] = Salvage (Keep materials on LD 11+)
[8-10] = Uncommon item (1 slot)
[11] = Rare item (2 slots)
[12] = Perfect item (3 slots)
LD:
[1-15] = No additional items.
[16-20] = Yields 1 additional item. -
Rank 4
CD:
[1] = Critical Fail (Lose materials)
[2-3] = Fail (Lose materials)
[4-6] = Salvage (Keep materials on LD 11+)
[7-9] = Uncommon item (1 slot)
[10-11] = Rare item (2 slots)
[12] = Perfect item (3 slots)
LD:
[1-15] = No additional items.
[16-20] = Yields 1 additional item. -
Rank 5
CD:
[1] = Critical Fail (Lose materials)
[2] = Fail (Lose materials)
[3-6] = Salvage (Keep materials on LD 11+)
[7-9] = Uncommon item (1 slot)
[10-11] = Rare item (2 slots)
[12] = Perfect item (3 slots)
LD:
[1-15] = No additional items.
[16-18] = Yields 1 additional item.
[19-20] = Yields 2 additional items. -
Rank 6
CD:
[1] = Critical Fail (Lose materials)
[2] = Fail (Lose materials)
[3-5] = Salvage (Keep materials on LD 11+)
[6-9] = Uncommon item (1 slot)
[10-11] = Rare item (2 slots)
[12] = Perfect item (3 slots)
LD:
[1-12] = No additional items.
[13-17] = Yields 1 additional item.
[18-20] = Yields 2 additional items. -
Rank 7
CD:
[1] = Critical Fail (Lose materials)
[2] = Fail (Lose materials)
[3-5] = Salvage (Keep materials on LD 11+)
[6-8] = Uncommon item (1 slot)
[9-11] = Rare item (2 slots)
[12] = Perfect item (3 slots)
LD:
[1-12] = No additional items.
[13-17] = Yields 1 additional item.
[18-20] = Yields 2 additional items. -
Rank 8
CD:
[1] = Critical Fail (Lose materials)
[2-4] = Salvage (Keep materials on LD 11+)
[5-8] = Uncommon item (1 slot)
[9-11] = Rare item (2 slots)
[12] = Perfect item (3 slots)
LD:
[1-11] = No additional items.
[12-15] = Yields 1 additional item.
[16-20] = Yields 2 additional items. -
Rank 9
CD:
[1] = Critical Fail (Lose materials)
[2-4] = Salvage (Keep materials on LD 11+)
[5-7] = Uncommon item (1 slot)
[8-10] = Rare item (2 slots)
[11-12] = Perfect item (3 slots)
LD:
[1-9] = No additional items.
[10-15] = Yields 1 additional item.
[16-20] = Yields 2 additional items. -
Rank 10
CD:
[1] = Critical Fail (Lose materials)
[2-3] = Salvage (Keep materials on LD 11+)
[4-6] = Uncommon item (1 slot)
[7-10] = Rare item (2 slots)
[11-12] = Perfect item (3 slots)
LD:
[1-9] = No additional items.
[10-15] = Yields 1 additional item.
[16-18] = Yields 2 additional items.
[19-20] = Yields 3 additional items.
-

Alchemists create enhanced potions and crystals to allow players to heal and buff their status both in and out of battle. Some of these items take a turn in battle to use, so plan your usage wisely. The tier level, types of items, and number of daily crafts they can make vary depending on their rank:
- [0-19 EXP] Rank 1 - Beginner Alchemist: Able to craft Tier 1 equipment. 2 crafts per day.
- [20-39 EXP] Rank 2 - Apprentice Alchemist: Able to craft Tier 2 equipment. 3 crafts per day.
- [40-79 EXP] Rank 3 - Professional Alchemist: Able to craft Tier 3 equipment. 4 crafts per day.
- [80-159 EXP] Rank 4 - Experienced Alchemist: Able to craft Tier 4 equipment. 5 crafts per day.
- [160-319 EXP] Rank 5 - Assistant Alchemist: Able to craft Tier 5 equipment. 6 crafts per day.
- [320-639 EXP] Rank 6 - Mentor Alchemist: Able to craft Tier 6 equipment. 7 crafts per day.
- [640-1279 EXP] Rank 7 - High Mentor Alchemist: Able to craft Tier 7 equipment. 8 crafts per day.
- [1280-2559 EXP] Rank 8 - Provisional Master Alchemist: Able to craft Tier 8 equipment. 9 crafts per day.
- [2560-5119 EXP] Rank 9 - Master Alchemist: Able to craft Tier 9 equipment. 10 crafts per day.
- [5120+ EXP] Rank 10 - Grand Master Alchemist: Able to craft Tier 10 equipment. 11 crafts per day.
Alchemists can make the following types of items:
- Salves (Available at Rank 1): An item with a paste-like consistency, similar to an ointment. Salves are applied to the surface of a player's skin or a weapon to take effect.
- Potions (Available at Rank 3): Liquids that are typically stored in a glass or crystal vial. They have a variety of uses for both combat and when crafting.
- Crystals (Available at Rank 5): Powerful items that can be used in an instant. Along with teleportation, they provide many useful combat buffs.
Crafting Crystals:
Crystals are made just the same as other items and use a single crafting attempt, but they require 2 materials to make. Rolling a Salvage result when crafting a crystal saves 1 material by default, but if the LD result of that roll is 15 or higher, both materials are salvaged. Using a crystal does not take a post action, although only one crystal can be used per post while in combat.Leveling Up:
Gaining EXP and increasing your Alchemist Rank increases the Tier level and number of items you can craft each day.- Critical Fail and Fail crafts: +1 EXP
- Salvage crafts, regardless of success: +2 EXP
- Uncommon crafts: +3 EXP
- Rare crafts: +5 EXP
- Perfect crafts: +8 EXP
Item Fusion:
Alchemists can combine items types that they are able to craft (i.e. Salves, Potions, Crystals) to create higher quality items. This does not take up a daily crafting attempt. During the combination process, the components (i.e. items combined together) and the combined item (i.e. the item created as a result of combining the components), must adhere to the following rules:- Items must be of the same item type and tier to be considered eligible as components for the combination process.
- Items do not have to be evaluated to be fused in this manner, however unevaluated items cannot fuse with evaluated items.
- If a Demonic item is used as a component, the resulting item will be a Perfect item unless a Demonic Shard is used.
- If an item with a Unique enhancement is used as a component, the combined item will not be able to possess that Unique Enhancement unless a Gleaming Scale is provided.
-
Item combinations must have the following exchange rate:
Quote
- 2 Uncommon items = 1 Rare item
- 2 Rare items = 1 Perfect item
- 2 Perfect/Demonic Items = 1 Perfect item
- 2 Perfect/Demonic item + 1 Demonic Shard = 1 Demonic item
Crafting Die Result Chart:
As your Alchemist rank increases, the crafting die result chart changes, making it less likely for you to fail and more likely to succeed on higher-quality crafts. Do note that Professions have unique buffs that apply to themselves. As such, regular CD & LD bonuses do not apply unless explicitly stated otherwise.Alchemists have a chance on successful crafts to produce more than one copy of an item. When submitting an item for evaluation, any copies must have the same quality, tier, and enhancements as the successful craft. The ID for copies should be listed in the evaluation should be: "12345" (original), "12345-1" (first copy), "12345-2" (second copy).
Spoiler-
Rank 1
CD:
[1] = Critical Fail (Lose materials)
[2-5] = Fail (Lose materials)
[6-9] = Salvage (Keep materials on LD 11+)
[10] = Uncommon item (1 slot)
[11] = Rare item (2 slots)
[12] = Perfect item (3 slots)
LD:
[1-17] = No additional items.
[18-20] = Yields 1 additional item. -
Rank 2
CD:
[1] = Critical Fail (Lose materials)
[2-4] = Fail (Lose materials)
[5-8] = Salvage (Keep materials on LD 11+)
[9-10] = Uncommon item (1 slot)
[11] = Rare item (2 slots)
[12] = Perfect item (3 slots)
LD:
[1-17] = No additional items.
[18-20] = Yields 1 additional item. -
Rank 3
CD:
[1] = Critical Fail (Lose materials)
[2-4] = Fail (Lose materials)
[5-7] = Salvage (Keep materials on LD 11+)
[8-10] = Uncommon item (1 slot)
[11] = Rare item (2 slots)
[12] = Perfect item (3 slots)
LD:
[1-15] = No additional items.
[16-20] = Yields 1 additional item. -
Rank 4
CD:
[1] = Critical Fail (Lose materials)
[2-3] = Fail (Lose materials)
[4-6] = Salvage (Keep materials on LD 11+)
[7-9] = Uncommon item (1 slot)
[10-11] = Rare item (2 slots)
[12] = Perfect item (3 slots)
LD:
[1-15] = No additional items.
[16-20] = Yields 1 additional item. -
Rank 5
CD:
[1] = Critical Fail (Lose materials)
[2] = Fail (Lose materials)
[3-6] = Salvage (Keep materials on LD 11+)
[7-9] = Uncommon item (1 slot)
[10-11] = Rare item (2 slots)
[12] = Perfect item (3 slots)
LD:
[1-15] = No additional items.
[16-18] = Yields 1 additional item.
[19-20] = Yields 2 additional items. -
Rank 6
CD:
[1] = Critical Fail (Lose materials)
[2] = Fail (Lose materials)
[3-5] = Salvage (Keep materials on LD 11+)
[6-9] = Uncommon item (1 slot)
[10-11] = Rare item (2 slots)
[12] = Perfect item (3 slots)
LD:
[1-12] = No additional items.
[13-17] = Yields 1 additional item.
[18-20] = Yields 2 additional items. -
Rank 7
CD:
[1] = Critical Fail (Lose materials)
[2] = Fail (Lose materials)
[3-5] = Salvage (Keep materials on LD 11+)
[6-8] = Uncommon item (1 slot)
[9-11] = Rare item (2 slots)
[12] = Perfect item (3 slots)
LD:
[1-12] = No additional items.
[13-17] = Yields 1 additional item.
[18-20] = Yields 2 additional items. -
Rank 8
CD:
[1] = Critical Fail (Lose materials)
[2-4] = Salvage (Keep materials on LD 11+)
[5-8] = Uncommon item (1 slot)
[9-11] = Rare item (2 slots)
[12] = Perfect item (3 slots)
LD:
[1-11] = No additional items.
[12-15] = Yields 1 additional item.
[16-20] = Yields 2 additional items. -
Rank 9
CD:
[1] = Critical Fail (Lose materials)
[2-4] = Salvage (Keep materials on LD 11+)
[5-7] = Uncommon item (1 slot)
[8-10] = Rare item (2 slots)
[11-12] = Perfect item (3 slots)
LD:
[1-9] = No additional items.
[10-15] = Yields 1 additional item.
[16-20] = Yields 2 additional items. -
Rank 10
CD:
[1] = Critical Fail (Lose materials)
[2-3] = Salvage (Keep materials on LD 11+)
[4-6] = Uncommon item (1 slot)
[7-10] = Rare item (2 slots)
[11-12] = Perfect item (3 slots)
LD:
[1-9] = No additional items.
[10-15] = Yields 1 additional item.
[16-18] = Yields 2 additional items.
[19-20] = Yields 3 additional items.
-

Artisans create charms, gems, trinkets, and other intricate works of art. Their accessories provide a wide variety of buffs from utility, to combat, to crafting. The tier level, types of items, and number of daily crafts they can make vary depending on their rank:
- [0-19 EXP] Rank 1 - Beginner Artisan: Able to craft Tier 1 equipment. 2 crafts per day.
- [20-39 EXP] Rank 2 - Apprentice Artisan: Able to craft Tier 2 equipment. 3 crafts per day.
- [40-79 EXP] Rank 3 - Professional Artisan: Able to craft Tier 3 equipment. 4 crafts per day.
- [80-159 EXP] Rank 4 - Experienced Artisan: Able to craft Tier 4 equipment. 5 crafts per day.
- [160-319 EXP] Rank 5 - Assistant Artisan: Able to craft Tier 5 equipment. 6 crafts per day.
- [320-639 EXP] Rank 6 - Mentor Artisan: Able to craft Tier 6 equipment. 7 crafts per day.
- [640-1279 EXP] Rank 7 - High Mentor Artisan: Able to craft Tier 7 equipment. 8 crafts per day.
- [1280-2559 EXP] Rank 8 - Provisional Master Artisan: Able to craft Tier 8 equipment. 9 crafts per day.
- [2560-5119 EXP] Rank 9 - Master Artisan: Able to craft Tier 9 equipment. 10 crafts per day.
- [5120+ EXP] Rank 10 - Grand Master Artisan: Able to craft Tier 10 equipment. 11 crafts per day.
Artisans can make the following types of items:
- Trinkets (Available at Rank 1): Pocket watches, charms, etc. Mainly utility and looting buffs.
- Jewelry (Available at Rank 3): Necklaces, circlets, earrings, etc. Primarily provides buffs that are useful in combat.
- Sculptures (Available at Rank 5): Clay, ice, stone, etc. Sculptures can come in many different shapes and sizes and provide crafting bonuses.
Leveling Up:
Gaining EXP and increasing your Artisan Rank increases the Tier level and number of items you can craft each day.- Critical Fail and Fail crafts: +1 EXP
- Salvage crafts, regardless of success: +2 EXP
- Uncommon crafts: +3 EXP
- Rare crafts: +5 EXP
- Perfect crafts: +8 EXP
Item Fusion:
Artisans can combine items types that they are able to craft (i.e. Trinkets, Jewelry, Sculptures) to create higher quality items. This does not take up a daily crafting attempt. During the combination process, the components (i.e. items combined together) and the combined item (i.e. the item created as a result of combining the components), must adhere to the following rules:- Items must be of the same item type and tier to be considered eligible as components for the combination process.
- Items do not have to be evaluated to be fused in this manner, however unevaluated items cannot fuse with evaluated items.
- If a Demonic item is used as a component, the resulting item will be a Perfect item unless a Demonic Shard is used.
- If an item with a Unique enhancement is used as a component, the combined item will not be able to possess that Unique Enhancement unless a Gleaming Scale is provided.
-
Item combinations must have the following exchange rate:
Quote
- 2 Uncommon items = 1 Rare item
- 2 Rare items = 1 Perfect item
- 2 Perfect/Demonic Items = 1 Perfect item
- 2 Perfect/Demonic item + 1 Demonic Shard = 1 Demonic item
Crafting Die Result Chart:
As your Artisan rank increases, the crafting die result chart changes, making it less likely for you to fail and more likely to succeed on higher-quality crafts. Do note that Professions have unique buffs that apply to themselves. As such, regular CD & LD bonuses do not apply unless explicitly stated otherwise.Spoiler-
Rank 1
[1] = Critical Fail (Lose materials)
[2-5] = Fail (Lose materials)
[6-9] = Salvage (Keep materials on LD 11+)
[10] = Uncommon item (1 slot)
[11] = Rare item (2 slots)
[12] = Perfect item (3 slots) -
Rank 2
[1] = Critical failure (Lose materials)
[2-4] = Fail (Lose materials)
[5-8] = Salvage (Keep materials on LD 11+)
[9-10] = Uncommon item (1 slot)
[11] = Rare item (2 slots)
[12] = Perfect item (3 slots) -
Rank 3
[1] = Critical failure (Lose materials)
[2-4] = Fail (Lose materials)
[5-7] = Salvage (Keep materials on LD 11+)
[8-10] = Uncommon item (1 slot)
[11] = Rare item (2 slots)
[12] = Perfect item (3 slots) -
Rank 4
[1] = Critical failure (Lose materials)
[2-3] = Fail (Lose materials)
[4-6] = Salvage (Keep materials on LD 11+)
[7-9] = Uncommon item (1 slot)
[10-11] = Rare item (2 slots)
[12] = Perfect item (3 slots) -
Rank 5
[1] = Critical failure (Lose materials)
[2] = Fail (Lose materials)
[3-6] = Salvage (Keep materials on LD 11+)
[7-9] = Uncommon item (1 slot)
[10-11] = Rare item (2 slots)
[12] = Perfect item (3 slots) -
Rank 6
[1] = Critical failure (Lose materials)
[2] = Fail (Lose materials)
[3-5] = Salvage (Keep materials on LD 11+)
[6-9] = Uncommon item (1 slot)
[10-11] = Rare item (2 slots)
[12] = Perfect item (3 slots) -
Rank 7
[1] = Critical failure (Lose materials)
[2] = Fail (Lose materials)
[3-5] = Salvage (Keep materials on LD 11+)
[6-8] = Uncommon item (1 slot)
[9-11] = Rare item (2 slots)
[12] = Perfect item (3 slots) -
Rank 8
[1] = Critical failure (Lose materials)
[2-4] = Salvage (Keep materials on LD 11+)
[5-8] = Uncommon item (1 slot)
[9-11] = Rare item (2 slots)
[12] = Perfect item (3 slots) -
Rank 9
[1] = Critical failure (Lose materials)
[2-4] = Salvage (Keep materials on LD 11+)
[5-7] = Uncommon item (1 slot)
[8-10] = Rare item (2 slots)
[11-12] = Perfect item (3 slots) -
Rank 10
[1] = Critical failure (Lose materials)
[2-3] = Salvage (Keep materials on LD 11+)
[4-6] = Uncommon item (1 slot)
[7-10] = Rare item (2 slots)
[11-12] = Perfect item (3 slots)
-

Tailors can create various items such as light armor and plushies. Their armor is mostly used by damage-focused characters, and they can also provide useful Loot Die bonuses. The tier level, types of items, and number of daily crafts they can make vary depending on their rank:
- [0-19 EXP] Rank 1 - Beginner Tailor: Able to craft Tier 1 equipment. 2 crafts per day.
- [20-39 EXP] Rank 2 - Apprentice Tailor: Able to craft Tier 2 equipment. 3 crafts per day.
- [40-79 EXP] Rank 3 - Professional Tailor: Able to craft Tier 3 equipment. 4 crafts per day.
- [80-159 EXP] Rank 4 - Experienced Tailor: Able to craft Tier 4 equipment. 5 crafts per day.
- [160-319 EXP] Rank 5 - Assistant Tailor: Able to craft Tier 5 equipment. 6 crafts per day.
- [320-639 EXP] Rank 6 - Mentor Tailor: Able to craft Tier 6 equipment. 7 crafts per day.
- [640-1279 EXP] Rank 7 - High Mentor Tailor: Able to craft Tier 7 equipment. 8 crafts per day.
- [1280-2559 EXP] Rank 8 - Provisional Master Tailor: Able to craft Tier 8 equipment. 9 crafts per day.
- [2560-5119 EXP] Rank 9 - Master Tailor: Able to craft Tier 9 equipment. 10 crafts per day.
- [5120+ EXP] Rank 10 - Grand Master Tailor: Able to craft Tier 10 equipment. 11 crafts per day.
Tailors can make the following types of items:
- Weapons/Clothing (Available at Rank 1): Dresses, shirts, hand wraps (martial arts weapons), etc. Weapons typically provide damage or other on-hit attack bonuses, whereas clothing is normally used for vanity or loot bonuses.
- Cloth Armor (Available at Rank 2): Robes, silks, common clothing, etc. Cloth armor prioritizes freedom of movement for the user over its more structured counterparts.
- Light Armor (Available at Rank 3): Leather, Hide, etc. Light armor provides defensive bonuses but less than Heavy Armor.
- Plushies (Available at Rank 5): Stuffed animals, pillows, dolls, etc. Plushies provide Loot Die and Crafting bonuses.
Leveling Up:
Gaining EXP and increasing your Tailor Rank increases the Tier level and number of items you can craft each day.- Critical Fail and Fail crafts: +1 EXP
- Salvage crafts, regardless of success: +2 EXP
- Uncommon crafts: +3 EXP
- Rare crafts: +5 EXP
- Perfect crafts: +8 EXP
Item Fusion:
Tailor can combine items types that they are able to craft (i.e. Weapons/Clothing, Cloth Armor, Light Armor, Plushies) to create higher quality items. This does not take up a daily crafting attempt. During the combination process, the components (i.e. items combined together) and the combined item (i.e. the item created as a result of combining the components), must adhere to the following rules:- Items must be of the same item type and tier to be considered eligible as components for the combination process.
- Items do not have to be evaluated to be fused in this manner, however unevaluated items cannot fuse with evaluated items.
- If a Demonic item is used as a component, the resulting item will be a Perfect item unless a Demonic Shard is used.
- If an item with a Unique enhancement is used as a component, the combined item will not be able to possess that Unique Enhancement unless a Gleaming Scale is provided.
-
Item combinations must have the following exchange rate:
Quote
- 2 Uncommon items = 1 Rare item
- 2 Rare items = 1 Perfect item
- 2 Perfect/Demonic Items = 1 Perfect item
- 2 Perfect/Demonic item + 1 Demonic Shard = 1 Demonic item
Crafting Die Result Chart:
As your Tailor rank increases, the crafting die result chart changes, making it less likely for you to fail and more likely to succeed on higher-quality crafts. Do note that Professions have unique buffs that apply to themselves. As such, regular CD & LD bonuses do not apply unless explicitly stated otherwise.Spoiler-
Rank 1
[1] = Critical Fail (Lose materials)
[2-5] = Fail (Lose materials)
[6-9] = Salvage (Keep materials on LD 11+)
[10] = Uncommon item (1 slot)
[11] = Rare item (2 slots)
[12] = Perfect item (3 slots) -
Rank 2
[1] = Critical failure (Lose materials)
[2-4] = Fail (Lose materials)
[5-8] = Salvage (Keep materials on LD 11+)
[9-10] = Uncommon item (1 slot)
[11] = Rare item (2 slots)
[12] = Perfect item (3 slots) -
Rank 3
[1] = Critical failure (Lose materials)
[2-4] = Fail (Lose materials)
[5-7] = Salvage (Keep materials on LD 11+)
[8-10] = Uncommon item (1 slot)
[11] = Rare item (2 slots)
[12] = Perfect item (3 slots) -
Rank 4
[1] = Critical failure (Lose materials)
[2-3] = Fail (Lose materials)
[4-6] = Salvage (Keep materials on LD 11+)
[7-9] = Uncommon item (1 slot)
[10-11] = Rare item (2 slots)
[12] = Perfect item (3 slots) -
Rank 5
[1] = Critical failure (Lose materials)
[2] = Fail (Lose materials)
[3-6] = Salvage (Keep materials on LD 11+)
[7-9] = Uncommon item (1 slot)
[10-11] = Rare item (2 slots)
[12] = Perfect item (3 slots) -
Rank 6
[1] = Critical failure (Lose materials)
[2] = Fail (Lose materials)
[3-5] = Salvage (Keep materials on LD 11+)
[6-9] = Uncommon item (1 slot)
[10-11] = Rare item (2 slots)
[12] = Perfect item (3 slots) -
Rank 7
[1] = Critical failure (Lose materials)
[2] = Fail (Lose materials)
[3-5] = Salvage (Keep materials on LD 11+)
[6-8] = Uncommon item (1 slot)
[9-11] = Rare item (2 slots)
[12] = Perfect item (3 slots) -
Rank 8
[1] = Critical failure (Lose materials)
[2-4] = Salvage (Keep materials on LD 11+)
[5-8] = Uncommon item (1 slot)
[9-11] = Rare item (2 slots)
[12] = Perfect item (3 slots) -
Rank 9
[1] = Critical failure (Lose materials)
[2-4] = Salvage (Keep materials on LD 11+)
[5-7] = Uncommon item (1 slot)
[8-10] = Rare item (2 slots)
[11-12] = Perfect item (3 slots) -
Rank 10
[1] = Critical failure (Lose materials)
[2-3] = Salvage (Keep materials on LD 11+)
[4-6] = Uncommon item (1 slot)
[7-10] = Rare item (2 slots)
[11-12] = Perfect item (3 slots)
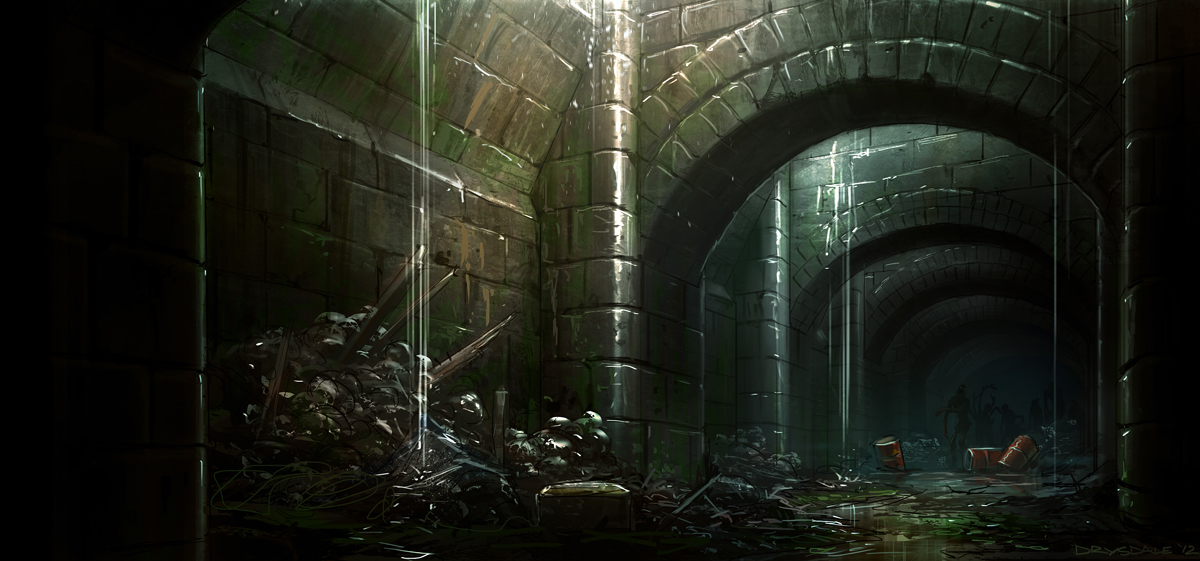
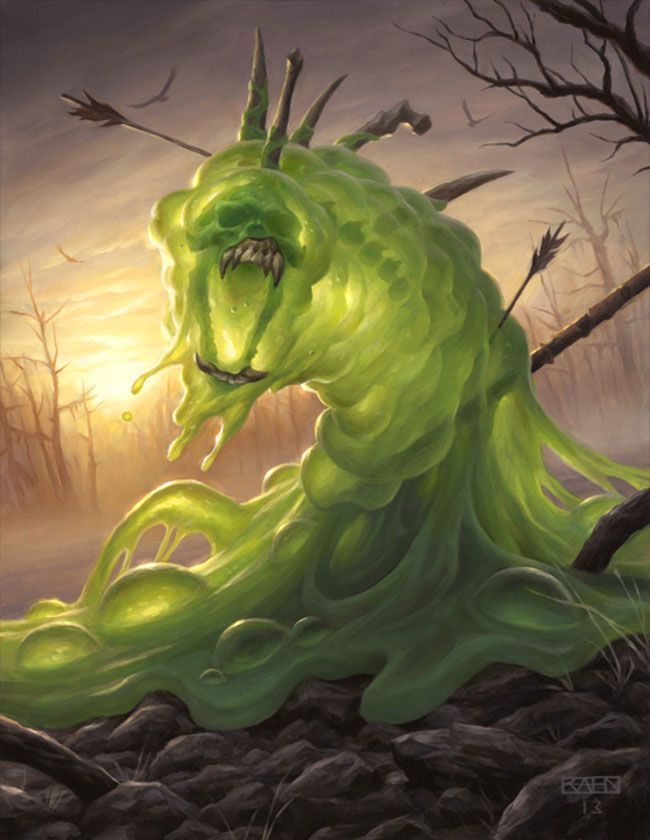


3.1 | Custom Sword Arts & Skills List
in Tutorials
Posted
A-G
► Aerial Ace
Cost: 10 SP
Active: Free Action
Effect: Stacks with Combat Skill [Charge]. As a free action, change the player's stance from [Standard] to [Aerial]. While in [Aerial] stance, on a [Sword Art]'s execution, the following changes are applied until the start of the next turn:
Description:
With experience comes tinkering, and with tinkering comes innovation. Through rigorous training, Macradon had found a way for him to enhance his sword arts by adding momentum to his attacks by executing them mid-air. Aerial strikes hinders his basic defensive dexterity while airbound, but provides more than enough power in return. The Aerial Ace style always has the sword in one hand when initiating a Sword Art to aide the user in nimbleness to jump into the air, while in the air the user presumes the sword art stance and activates their Sword Art.
Created by: @Macradon
Usable by: ---
Creation Details: [here]
► Bloody Slaughter
Cost: 10 SP
Passive
Effect: The user gains a stack of Bloody Slaughter for every 4 loot-minimum mobs killed. The user must land the killing blow against these mobs to be considered towards gaining Bloody Slaughter stacks.
Description:
Crozeph's weird appetite took a dark turn as he tried to pursue an improvement for his kendo skills. Instead of finding something or someone to give him an idea ( or simply training with Baldur or Ariel), he instead realized that he is what he eats. As he kills enemies, the corpses never shatters into fragments and instead consumed by Crozeph and as the buffs stack, the sclera in his left eye darkens.
Clarifications:
Created by: @Crozeph
Usable by: ---
Creation Details: [here]
H-P
► Ill Omen in Red
Cost: 10 SP
Passive
Restriction: Parry must be owned and equipped, usable only if the player is wearing only cloth armor
Effect: Players with this skill ignore imposed mitigation enhancement caps on armor skills, the armor still must follow normal mitigation enhancement slot caps (I.E. Cloth Armor cannot have more then one on a single piece). All missed attacks against the player are now flavored as a "Parry" given you choose to stand your ground and make the opponent miss.
Description:
A good swordsman knows that a sword can be as effective at protecting yourself as any shield can be, blocking and redirecting blows as an active form of defense. True guard, light of step and movement are the foundations of all swordplay. Where the best offense is not giving your opponent the opportunity to make a rebuttal, leave no opening and strike when the moment arises. Through difficulty only a select few can muster the strength to wield such a defensive measure, as its tax on the frame is almost unmatched. Simply only those with the most intense will can handle the burden.
Created by: @Raidou
Usable by: ---
Creation details: [here] Ticket #0035
► Kaiso no Waza: Meikyo Shisui
Cost: 10 SP
Passive
Requirements: Katana Rank 5, Concentration
Effect:
- The effects of « Concentration » [Extra Skill] are now a passive but must still be equipped (this still consumes an available extra skill slot as normal)
- While wielding a katana, the user can choose to store the usage of ST-B when a natural CD9+ has been rolled (removing the restriction of the roll having to be made the previous attack).
- This stored ST-B can be used when an attack would be made, as if the natural CD was 9+ on the previous attack.
- The original restriction of 'the sword art used the previous turn is not ST-B' remains unchanged.
Description:
Through constant training and steeling of the mind the wielder has attained martial prowess that finds expression in Kaiso no Waza: Meikyo Shisui. A refined battle experience into a custom skill that allows a creative and more fluid use of the most powerful abilities in ones arsenal. The ebb and flow of battle becomes a finely honed edge and way of life.
Created by: @Ariel - The Crowned Lion
Usable by: ---
Creation Details: [here] Ticket #0033
► Lady Midnight
Cost: 10 SP
Passive
Requirements: Rank 5 [Hiding], [Vanish] Mod
Effect: The user may use [Vanish] as a free action.
Description:
Legend has said there are three that preside over the shadows. The Master of Shadows, The Lord of Darkness, and Lady Midnight. Lady Midnight directly ties the user to the shadows, and allows for the user to gather and manipulate shadows at will, however; this more affects the ethereal realm than that of the physical.
Created by: @Hidden
Usable by: ---
Creation Details: [here]
► Like Water
Cost: 10 SP
Passive
Requirements: Rank 5 [Martial Arts], Equipped [Hand Wraps]
Effect: The user can target additional enemies with any sword art, but each additional enemy past the sword art's normal number of targets will have its normal expected damage divided equally against all targets. (I.E if the attack is an ST-B that deals 500 damage, targeting two will deal 250 [50%] to each which is subject to mitigation separately. Or in another case using AOE-II that does 300 damage to 4 targets, will deal 200 damage to 6 [300 * 4 = 1200 / 6 = 200) In addition, combat encounters you participate in have no size limit for enemies, but only if the content allows it.
Description: A whirlwind of destruction, like a tsunami it surrounds and overwhelms in spades. Those that cannot brace against the coming tide will find itself washed away in its unforgiving embrace.
Created by: @Kasumi
Usable by: ---
Creation Details: [here] Ticket #0053
Q-Z
► Shades of the Gemini
Cost: 10 SP
Passive [Addon]
Requirements: Disguise [Extra] Skill (must be active/equipped)
Limitation: User cannot benefit from, or inflict, any returned damage enhancements or item effects based on an attackers dice roll [Thorns, Immolation, Aura]. This restriction does not affect the Parry skill or its mods/addons.
Effect: Disguise effects become a constant, passive, critical hits made against you only occur on a BD: 10, or BD:9-10 if the attacker has focus. Additional narrative effects as noted below.
Description:
Gleaned from extensive study of the Gemini, the Player learns to modify his own appearance and grant limited autonomy to their shadow, imbuing it with instruction and enabling it to appear as a duplicate that can act independently. This shade can also divide itself into multiple further copies. While not able to attack in any way, these duplicitous shadows serve as ongoing distractions during combat and carry potential for a broad variety of clandestine purposes. Narratively, the player can change his or her appearance at will: including voice, gender, gear worn and held, height and build. In addition, this can conceal the users cursor from view.
Created by: @Freyd
Usable by: Wulfrin
Creation Details: [here] Ticket #0029
► Shokko-do (The Candlelight Way)
Cost: 10 SP
Passive
Effect: BRN inflicted/refreshed by the user also will apply partial phase (-25% Mitigation) for the same duration. Partial phase stacks with other phase effects up to the maximum of -100%
Description:
After completing Calming The Soul, Koga returned to the practice of his arts. Kendo, Iaido, and Aikido all served as part of the basis of what would become Koga's Shokko-Do. Born from the countless days and nights spent honing his skills, examining both himself and his place in a world that had entrapped him, Shokko-Do embodied and empowered both Koga's greatest weaknesses, and his desires for himself and those around him.
The soul of the user appears to manifest itself, appearing as mystical fire at their feet, and in their eyes. Moving faster than human perception, the user strikes precisely, soulflame left in their wake, and burrowing into the flesh of their enemies. At the end of battle, only two flames are left to linger.
Created by: @Koga
Usable by: ---
Creation Details: [here] Ticket #0043
► Starcross
Cost: 10 SP
Active: Free Action (Skill)
EN Cost: 5 EN
Cooldown: Special
Requirements: Concentration (Obtained), Meditation (Obtained)
Effect:
Description:
The user has allied themselves with a pawn of Cardinal. Wherever they go, it follows, and provides a rudimentary service to supplement as their aid. What utility it provides in its absence is imparted upon its user until its return.
* in lamented hauntings and shards of a mirror long broken, there comes an illusion of hope, of light everlasting. listen to the echoes. in dies est duplicitas; where the sun goes to die. if you will [her], in return, [she] will bid you [her] strength.
Created by: @NIGHT
Usable by: ---
Creation Details: [here] | Ticket #0040
► Supernatural Fury
Cost: 10 SP
Howl Addon (Passive)
Restriction: Usable only if the player is wearing an item with Fireproof
Effect: Whenever the user of this skill uses a skill to generate hatred on a target, all Burn Damage Effects present on the user (I.E. Burn, Flame Aura [Non-Critical], Flame Thorns [Critical Effect], Immolation Potion, Hellstorm), Apply to those target/targets as if a successful attack (inbound/outbound) has been made in activation range to trigger the effects. All Damage dealt in this way acts in the way it normally would, as well as the ailments applied. However they bypass any Fire Immunity/Antidote/probiotic effects present on applicable targets.
Description:
The heat that comes off of a phoenix burns hot enough to set the wind ablaze, those that are foolish enough to draw a beat of its wings will be seen to ash. This Custom Skill allows the user to harness the grace of a phoenix to which all will burn within its embrace.
Created by: @Eruda
Usable by: ---
Creation Details: [here] Ticket #0037
► Veteran
Cost: 10 SP
Passive
Requirements: Any Rank 5 Weapon Skill, Quick Change Skill
Effect: Choose two Weapon types. Declare one as Primary and one as Secondary. The Secondary Weapon now shares all Weapon Skill Ranks, Mods, and Shifts as the Primary Weapon. If Quick Change is used to switch between the two weapons types, Quick Change's effective Cooldown is reduced by one turn.
Description:
Adaptability is a crucial skill in combat. Those experienced in battle understand that sometimes, a single weapon doesn't cut it.
Created by: @Oscar
Usable by: ---
Creation Details: [here] Ticket #0026