Cardinal
-
Content Count
96 -
Joined
-
Last visited
Content Type
Profiles
Forums
Calendar
Blogs
Posts posted by Cardinal
-
-

Weapon Skill Sword Arts:
Note: Shift Specialties and their effects can be found under weapon skills, above.
SpoilerRank 1
- [x4] ST-I (4 EN) | A single-target sword art.
- [x3] AOE-I (1 + [2 * targets] EN) | AOE | A sword art that strikes multiple targets at once.
- [x4] TECH-A (5 EN) | STUN | A single-target sword art that stuns an enemy.
Rank 2
- [x6] ST-I (6 EN) | A single-target sword art.
- [x5] AOE-I (5 + [2 * targets] EN) | AOE | A sword art that strikes multiple targets at once.
- [x6] TECH-A (7 EN) | STUN | A single-target sword art that stuns an enemy.
Rank 3
- [x8] ST-I (8 EN) | A single-target sword art.
- [x11] ST-II (11 EN) | A powerful single-target sword art. Only available for use when ST-I was used and successfully struck an enemy the previous turn or if ST-II had been used and had missed the previous turn.
- [x7] AOE-I (7 + [2 * targets] EN) | AOE | A sword art that strikes multiple targets at once.
- [x8] TECH-A (9 EN) | STUN | A single-target sword art that stuns an enemy.
Rank 4
- [x10] ST-I (10 EN) | A single-target sword art.
- [x13] ST-II (13 EN) | A powerful single-target sword art. Only available for use when ST-I was used and successfully struck an enemy the previous turn or if ST-II had been used and had missed the previous turn.
- [x17] ST-B (17 EN) | A devastating single-target sword art. Can only be used if the sword art used the previous turn is not ST-B and had rolled a natural CD9+. When performing an AoE attack, this CD check applies to only the first roll.
- [x9] AOE-I (9 + [2 * targets] EN) | AOE | A sword art that strikes multiple targets at once.
- [x12] AOE-II (12 + [2 * targets] EN) | AOE | A powerful sword art that strikes multiple targets at once. Only available for use when AOE-I was used and successfully struck an enemy the previous turn or if AOE-II had been used and had missed all intended targets the previous turn.
- [x10] TECH-A (11 EN) | STUN | A single-target sword art that stuns an enemy.
Rank 5
- [x12] ST-I (12 EN) | A single-target sword art.
- [x15] ST-II (15 EN) | A powerful single-target sword art. Only available for use when ST-I was used and successfully struck an enemy the previous turn or if ST-II had been used and had missed the previous turn.
- [x20] ST-B (20 EN) | A devastating single-target sword art. Can only be used if the sword art used the previous turn is not ST-B and had rolled a natural CD9+. When performing an AoE attack, use only the first roll.
- [x11] AOE-I (11 + [2 * targets] EN) | AOE | A sword art that strikes multiple targets at once.
- [x14] AOE-II (14 + [2 * targets] EN) | AOE | A powerful sword art that strikes multiple targets at once. Only available for use when AOE-I was used and successfully struck an enemy the previous turn or if AOE-II had been used and had missed all intended targets the previous turn.
- [x12] TECH-A (13 EN) | STUN | A single-target sword art that stuns an enemy.
- [x12] TECH-B (12 EN) | DELAY | A single-target sword art that, on a successful strike, applies [Delay] on the enemy. [Delay] is a debuff that reduces the enemy’s ACC by 1 for one turn.
Collected Sword Arts:
Spoiler-
[x12] TECH-C (12 EN) | COUNTER | A single-target sword art that, on a successful strike, places [Counter] around the player. [Counter] is a buff that reduces the final damage taken by its user by 25% (rounded down) for one turn.
-
Unlock Condition: Have the skill [Parry]
-
Unlock Condition: Have the skill [Parry]
-
[x12] TECH-D (12 EN) | SHATTER | A single-target sword art that applies a stack of [Shatter] to an enemy for 3 turns. [Shatter] is a debuff that can stack up to a cap of 3, taking immediate effect on the attack it was applied on. Each stack of [Shatter] removes -20 MIT from an enemy, down to 0, if it has MIT. Refreshes duration upon application.
-
Unlock Condition: Complete <<The Monkey King>> and meet any additional quest requirement(s).
-
Unlock Condition: Complete <<The Monkey King>> and meet any additional quest requirement(s).
-
[x12] TECH-E (14 EN) | RESTORATIVE STRIKE | A single-target sword art that restores HP to its user (10% of its final damage dealt as HP).
-
Unlock Condition: Complete <<Cull of the Dead>> and meet any additional quest requirement(s).
-
Unlock Condition: Complete <<Cull of the Dead>> and meet any additional quest requirement(s).
-
[x8] TECH-F (8 + 2 * targets EN) | AOE STUN | A sword art that strikes multiple targets at once. All struck targets are stunned for one turn.
-
Unlock Condition: Complete <<To Take the Title>> or affiliated repeat quests and meet any additional quest requirement(s).
-
Unlock Condition: Complete <<To Take the Title>> or affiliated repeat quests and meet any additional quest requirement(s).
-
[x12] TECH-G (12 EN) | BURN | A single-target sword art that, on a successful strike, applies [Burn] on the enemy. [Burn] is a DoT ailment that deals [14 * Player Tier] unmitigated Burn damage for 2 turns.
-
Unlock Condition: Complete <<Gatekeeper of Fire>> and meet any additional quest requirement(s).
-
Unlock Condition: Complete <<Gatekeeper of Fire>> and meet any additional quest requirement(s).
-
[x2] RAW-A (10 EN) | THORNS | A single-target sword art that utilizes the [Thorns] of the individual against the enemy. Other types of enhancements that apply damage upon contact with the individual are also considered in improving the damage of this sword art (eg. Immolation Potion, Flame/Frost Aura, etc). Outgoing damage is considered mitigatable. Must have a weapon equipped to activate this sword art.
- Unlock Condition: Have the skill [Heavy Armor].
-

 Spoiler
► Antidote
Cost: 1 Slot
Cap: 3 Slots
Effect: When applied, prevents any status effect from being applied to you. Each slot is a charge. When a status effect is blocked, a charge of Antidote wears off. Effect lasts for one thread.
Applicable to: Salves► HP Recovery
Cost: 1 Slot
Cap: 3 Slots
Effect: Heals the user for (5% per slot) HP.
Applicable to: Salves, Potions► Toxic Venom
Cost: 3 Slots
Cap: 1 Slot
Effect: Natural critical attack rolls of 9-10 deal (8 * Tier) unmitigatable poison damage on each enemy turn for 3 turns. Effect lasts for one thread. Poison damage does not stack, but can be refreshed.
Applicable to: Salves► Pheromones
Cost: 3 Slots
Cap: 1 Slot
Effect: When used during the «Feeding your Enemy» quest, gain +1 CD when attempting to tame a familiar. Effect lasts for one thread.
Applicable to: Salves, Potions► Crafter’s Respite
Cost: 3 Slots
Cap: 1 Slot
Effect: Resets your daily crafting/identification attempts. Cannot use more than one Crafter’s Respite within one calendar day.
Applicable to: Potions► Damage
Cost: 1 Slot
Cap: 3 Slots
Effect: Gain +1 base damage per slot. Effect lasts for one thread.
Applicable to: Potions, Crystals► Mitigation
Cost: 1 Slot
Cap: 3 Slots
Effect: Prevent (5 per slot * Tier) damage from successful attacks against you. Effect lasts for one thread.
Applicable to: Potions, Crystals► Over-Health
Cost: 1 Slot
Cap: 3 Slots
Effect: Adds +5% per slot to your maximum HP. Effects last for 1 thread.
Applicable to: Potions, Crystals► Mass HP Recovery
Cost: 3 Slots
Cap: 1 Slots
Effect: Heals you and each member of your party for (10%) HP.
Applicable to: Crystals► Teleport
Cost: 3 Slots
Cap: 1 Slots
Effect: Use a post action to activate a teleport crystal. Teleports the player to the town or designated teleportation area they specify.
Applicable to: Crystals Spoiler
► Taunt
Cost: 1 Slot
Cap: 1 Slots
Effect: +1 Hate generated from Howl, Focused Howl, and successful attacks.
Applicable to: Trinkets► Accuracy
Cost: 1 Slot
Cap: 3 Slots
Effect: Gain +(1 per slot) to the BD when attacking. Cannot be used to cause a critical hit.
Applicable to: Trinkets, Jewelry► Evasion
Cost: 1 Slot
Cap: 3 Slots
Effect: Reduces the die value by (1 per slot) on an enemy’s attack against you. Cannot be used to avoid a critical hit.
Applicable to: Trinkets, Jewelry► Keen
Cost: 1 Slot
Cap: 2 Slots
Effect: After a successful attack, gain +(1 per slot) BD. Keen expires once you exit combat. Cannot be used to cause a critical hit.
Applicable to: Trinkets, Jewelry► Recovery
Cost: 1 Slot
Cap: 2 Slots
Effect: Before your post action, make a separate CD roll. On a natural CD7+, regain (1 per slot * Tier) additional energy. This CD roll may also apply to activating the effects of Vamp-Def.
Applicable to: Trinkets, Jewelry► Quality
Cost: 1 slot
Cap: 2 slots
Effect: You receive +1 CD * slot when looting mobs.
Applicable to: Trinkets, Jewelry.► Prosperity
Cost: 1 Slot
Cap: 3 Slot
Effect: Gain +(1 per slot) to the base multiplier when receiving col from killing an enemy.
Applicable to: Trinkets, Jewelry► Sneaky
Cost: 1 Slot
Cap: 3 Slot
Effect: Gain +(1 per slot) Stealth Rating
Applicable to: Trinkets, Jewelry► Insightful
Cost: 1 Slot
Cap: 3 Slot
Effect: Gain +(1 per slot) Stealth Detection
Applicable to: Trinkets, Jewelry► Loot Die
Cost: 1 Slot
Cap: 3 Slots
Effect: Gain +(1 per slot) to the LD.
Applicable to: Trinkets, Jewelry, Sculptures► Ambition
Cost: 3 Slots
Cap: 1 Slot
Effect: Gain +1 bonus crafting EXP for each crafting attempt per day or gathering attempt per thread.
Applicable to: Trinkets, Sculptures Spoiler
► Damage
Cost: 1
Cap: 3
Effect: +(1 * Tier) base damage per slot.
Applicable to: Weapons► Accuracy
Cost: 1 Slot
Cap: 3 Slots
Effect: Gain +(1 per slot) to the BD when attacking. Cannot be used to cause a critical hit.
Applicable to: Weapons► Bleed
Cost: 1 Slot
Cap: 2 Slots
Effect: Natural critical attack rolls of 9-10 (1 slot) or natural successful attack rolls of 8-10 (2 slots) deal (12 * Tier) unmitigated bleed damage each enemy turn for 2 turns. Bleed damage does not stack, but can be refreshed. The highest tier of Bleed damage overrides lower tier versions; cannot be overridden by lower-tier versions.
Applicable to: Weapons► Keen
Cost: 1 Slot
Cap: 2 Slots
Effect: After a successful attack, gain +(1 per slot) BD. Keen expires once you exit combat. Cannot be used to cause a critical hit.
Applicable to: Weapons► Paralyze
Cost: 1 Slot
Cap: 2 Slots
Effect: Successful attack rolls you make with this item of a natural 9-10 (1 slot) or 8-10 (2 slot) will apply Paralysis on the target, removing their action on their next turn. Paralyzed targets lose any evasion properties until this status wears off. [If present on the weapon or shield this applies on successful sword arts/shield bash. This effect does not trigger when the user is struck.]
Applicable to: Weapons, Shields► Mitigation
Cost: 1
Cap: 3
Effect: Prevent (6 per slot * Tier) damage from successful attacks against you.
Applicable to: Light Armor, Heavy Armor, Shields► Regen
Cost: 1 Slot
Cap: 2 Slots
Effect: After taking damage, gain Regen at the beginning of your next turn. Heal (2% per slot of your total health) every turn for three rounds. Damage over time effects (Bleed, Poison) will not trigger Regen. Does not stack with Battle Healing. Taking damage while Regen is active will refresh it to its full duration.
Applicable to: Light Armor, Heavy Armor, Shields► Recovery
Cost: 1 Slot
Cap: 2 Slots
Effect: Before your post action, make a separate CD roll. On a natural CD7+, regain (1 per slot * Tier) additional energy. This CD roll may also apply to activating the effects of Vamp-Def.
Applicable to: Light Armor, Heavy Armor, Shields► Taunt
Cost: 1 Slot
Cap: 1 Slots
Effect: +1 Hate generated from Howl, Focused Howl, and successful attacks.
Applicable to: Heavy Armor, Weapons, Shields► Heavy Momentum
Cost: 1 Slot
Cap: 2 Slots
Effect: After an unsuccessful attack, gain +(1 per slot * Tier) base damage until your next successful attack, at which point this bonus is removed. Another unsuccessful attack will reactivate this enhancement. Must be using the Heavy Armor Skill for this enhancement to take effect. [For Area of Effect attacks: This effect only activates if you miss all enemies targeted by the attack.]
Applicable to: Heavy Armor► Thorns
Cost: 1 Slot
Cap: 2 Slots
Effect: Successful non-critical attacks against you deal (9 per slot * Tier) unmitigated damage to the attacking enemy. Only activates on damage dealing, melee attacks.
Applicable to: Heavy Armor, Shields Spoiler
► Vitality
Cost: 1 Slot
Cap: 2 Slots
Effect: Restore (2 per slot * Tier) energy
Applicable to: Snacks, Desserts► Loot Die
Cost: 1 Slot
Cap: 3 Slots
Effect: Gain +(1 per slot) to the LD. Effect lasts for one thread.
Applicable to: Snacks, Desserts► Prosperity
Cost: 1 Slot
Cap: 3 Slot
Effect: Gain +(1 per slot) to the base multiplier when receiving col from killing an enemy. Effect lasts for one thread.
Applicable to: Snacks, Desserts► Ambition
Cost: 3 Slots
Cap: 1 Slot
Effect: Gain +1 bonus crafting EXP for each crafting attempt per day or gathering attempt per thread.
Applicable to: Desserts, Meals► Protein
Cost: 1 Slot
Cap: 2 Slots
Effect: Gain +(1 per slot) base damage and -(5 per slot * Player’s Current Tier) mitigation. Effect lasts for one thread.
Applicable to: Meals► Accuracy
Cost: 1 Slot
Cap: 2 Slots
Effect: Gain +(1 per slot) to the BD when attacking. Cannot be used to cause a critical hit. Effect lasts for one thread.
Applicable to: Snacks, Desserts, Meals, Feasts► Evasion
Cost: 1 Slot
Cap: 2 Slots
Effect: Reduces the die value by (1 per slot) on an enemy’s attack against you. Cannot be used to avoid a critical hit. Effect lasts for one thread.
Applicable to: Snacks, Desserts, Meals, Feasts► Mitigation
Cost: 1 Slot
Cap: 3 Slots
Effect: Prevent (5 per slot * Tier) damage from successful attacks against you. Effect lasts for one thread.
Applicable to: Desserts, Meals, Feasts► Over-Health
Cost: 1 Slot
Cap: 3 Slots
Effect: Adds +5% per slot to your maximum HP. Effects last for 1 thread.
Applicable to: Meals, Feasts► Probiotics
Cost: 1 Slot
Cap: 3 Slots
Effect: When applied, prevents (3 per slot * Tier) damage from damage over time effects inflicted on you once per turn. Effect lasts for one thread.
Applicable to: Snacks, Feasts Spoiler
► Damage
Cost: 1 slot
Cap: 3 slots
Effect: +(1 * Tier) base damage per slot.
Applicable to: Weapons► Accuracy
Cost: 1 Slot
Cap: 3 Slots
Effect: Gain +(1 per slot) to the BD when attacking. Cannot be used to cause a critical hit.
Applicable to: Weapons► Paralyze
Cost: 1 Slot
Cap: 2 Slots
Effect: Successful attack rolls you make with this item of a natural 9-10 (1 slot) or 8-10 (2 slot) will apply Paralysis on the target, removing their action on their next turn. Paralyzed targets lose any evasion properties until this status wears off. [If present on the weapon or shield this applies on successful sword arts/shield bash. This effect does not trigger when the user is struck.]
Applicable to: Weapons► Bleed
Cost: 1 Slot
Cap: 2 Slots
Effect: Natural critical attack rolls of 9-10 (1 slot) or natural successful attack rolls of 8-10 (2 slots) deal (12 * Tier) unmitigated bleed damage each enemy turn for 2 turns. Bleed damage does not stack, but can be refreshed. The highest tier of Bleed damage overrides lower tier versions; cannot be overridden by lower-tier versions. [Must hit to activate the status condition.]
Applicable to: Weapons► Keen
Cost: 1 Slot
Cap: 3 Slots
Effect: After a successful attack, gain +(1 per slot) BD. Keen expires once you exit combat. Cannot be used to cause a critical hit.
Applicable to: Weapons► Taunt
Cost: 1 Slot
Cap: 1 Slots
Effect: +1 Hate generated from Howl, Focused Howl, and successful attacks.
Applicable to: Weapons► Loot Die
Cost: 1 Slot
Cap: 3 Slots
Effect: Gain +(1 per slot) to the LD.
Applicable to: Clothing, Cloth Armor, Plushies► Risky
Cost: 1 Slot
Cap: 2 Slots
Effect: When you take damage, gain +(1 per slot * Tier) base damage until your next successful attack, at which point this bonus is removed. Taking damage again will refresh this enhancement. Must be using the Cloth Armor Skill for this enhancement to take effect.
Applicable to: Cloth Armor► Evasion
Cost: 1 Slot
Cap: 3 Slots
Effect: Reduces the die value by (1 per slot) on an enemy’s attack against you. Cannot be used to avoid a critical hit.
Applicable to: Cloth Armor, Light Armor► Mitigation
Cost: 1 Slot
Cap: 2 Slots
Effect: Prevent (6 per slot * Tier) damage from successful attacks against you.
Applicable to: Cloth Armor, Light Armor► Recovery
Cost: 1 Slot
Cap: 2 Slots
Effect: Before your post action, make a separate CD roll. On a natural CD7+, regain (1 per slot * Tier) additional energy. This CD roll may also apply to activating the effects of Vamp-Def.
Applicable to: Cloth Armor, Light Armor► Regen
Cost: 1 Slot
Cap: 2 Slots
Effect: After taking damage, gain Regen at the beginning of your next turn. Heal (2% per slot of your total health) every turn for three rounds. Damage over time effects (Bleed, Poison) will not trigger Regen. Does not stack with Battle Healing. Taking damage while Regen is active will refresh it to its full duration.
Applicable to: Cloth Armor, Light Armor► Light Momentum
Cost: 1 Slot
Cap: 2 Slots
Effect: After an unsuccessful attack, gain +(1 per slot) to the BD until your next successful attack, at which point this bonus is removed. Another unsuccessful attack will reactivate this enhancement. Cannot be used to cause a critical hit. [For Area of Effect attacks: This effect only activates if you miss all enemies targeted by the attack.]
Applicable to: Cloth Armor, Light Armor Spoiler
► HP Recovery
Cost: 1 Slot
Cap: 3 Slots
Effect: Heals the user for (5% per slot) HP.
Applicable to: Support Song► Monsters' Fortune
Cost: 1 Slot
Cap: 3 Slots
Effect: When played, gain +1 LD per slot when rolling for loot on the next monster killed.
Applicable to: Support Song► Monsters' Favor
Cost: 1 Slot
Cap: 3 Slots
Effect: When played, gain +1 CD per slot when rolling for loot on the next monster killed.
Applicable to: Support Song► Familiar Sight
Cost: 3 Slots
Cap: 1 Slot
Effect: When played during the <<Feeding your Enemy>> quest, gain +2 LD when attempting to find a familiar. Effect lasts for one thread.
Applicable to: Support Song► Incarceration
Cost: 3 Slots
Cap: 1 Slot
Effect: When played, all active DoTs on a single enemy gain an Incarcerate effect at the end of the user's turn. Incarcerated DoTs deal double damage for their duration. DoT effects applied afterwards do not gain this effect, but this effect will persist when the DoT is refreshed.
Applicable to: Debuff Song► Perpetuate
Cost: 3 Slots
Cap: 1 Slot
Effect: When played, the user can select and refresh any number of active status effects (Including DoT or Ailments) on a single enemy.
Applicable to: Debuff Song► Catalyst
Cost: 3 Slots
Cap: 1 Slot
Effect: Can only be played when a DoT would be refreshed. Any DoT that would be refreshed deals all of its remaining damage, before it is refreshed.
Applicable to: Debuff Song (Masterpiece/Instant)► Hypnosis
Cost: 1 Slot
Cap: 2 Slots
Effect: When played, reduces a single enemy’s Accuracy by 1 per slot. Effect lasts for two turns.
Applicable to: Debuff Song► Lullaby
Cost: 1 Slot
Cap: 2 Slots
Effect: When played, reduces a single enemy’s Evasion by 1 per slot. Effect lasts for two turns.
Applicable to: Debuff Song► Misperception
Cost: 3 Slots
Cap: 1 Slot
Effect: When played, reduces the final damage (after mitigation) of a single enemy by 10% (rounded down). Effect lasts for two turns.
Applicable to: Debuff Song Spoiler
► Absolute Accuracy
Cost: 1 Slot
Cap: 1 Slot
Effect: Attack rolls of 1 no longer automatically miss. Gain +1 to the BD when attacking. Cannot be used to trigger a critical hit.
Applicable to: Weapons► Holy Damage
Cost: 1 Slot
Cap: 2 Slots
Effect: Critical attack rolls of 9-10 gain (2 per slot * Tier) Holy damage to your total base damage.
Applicable to: Weapons► Fallen Damage
Cost: 1 Slot
Cap: 2 Slots
Effect: Successful attack rolls of 6-8 (before modifiers) gain (2 per slot * Tier) Fallen damage to your total base damage.
Applicable to: Weapons► Phase
Cost: 1 Slot
Cap: 1 Slot
Effect: Critical attack rolls of 9-10 ignore half of the target’s mitigation (rounded down).
Applicable to: Weapons► Vampiric (Offensive)
Cost: 1 Slot
Cap: 2 Slots
Effect: On a nat. 9-10 BD heals X% of player's Max HP (10% for 1 slot, 15% for 2 slots). In the case of AoE attacks, this applies to the first attack.
Applicable to: Weapons► Paralytic Venom
Cost: 1 Slot
Cap: 2 Slots
Effect: Natural successful attack rolls of 8-10 (1 slot) or 7-10 (2 slots) remove the enemy’s action on their next turn. Paralyzed opponents lose any evasion properties. [Must hit to activate the status condition.]
Applicable to: Weapons► Freeze
Cost: 1 Slot
Cap: 2 Slots
Effect: Natural critical attack rolls of 9-10 (1 slot) or natural successful attack rolls of 8-10 (2 slots) remove the enemy’s action on their next turn as a Frost effect. Frozen opponents have their Evasion set to -1. Striking a frozen enemy before the effect ends deal an extra (16 * Tier) unmitigatable damage. [Must hit to activate the status condition.]
Applicable to: Weapons► Envenom (Offensive)
Cost: 1 Slot
Cap: 2 Slots
Effect: Natural critical attack rolls of 9-10 (1 slot) or natural successful attack rolls of 8-10 (2 slots), deal (8 * Tier) unmitigatable Poison damage each enemy turn for 4 turns. [Must hit to activate the status condition.]
Applicable to: Weapons► Burn
Cost: 1 Slot
Cap: 2 Slots
Effect: Natural critical attack rolls of 9-10 (1 slot) or natural successful attack rolls of 8-10 (2 slots) deal (14 * Tier) unmitigated Burn damage each enemy turn for 2 turns. Burn damage does not stack, but can be refreshed. The highest tier of Burn damage overrides lower tier versions; cannot be overridden by lower-tier versions. [Must hit to activate the status condition.]
Applicable to: Weapons► Frostbite
Cost: 1 Slot
Cap: 2 Slots
Effect: Natural critical attack rolls of 9-10 (1 slot) or natural successful attack rolls of 8-10 (2 slots) deal (10 * Tier) unmitigated Frost damage each enemy turn for 2 turns. In addition, anyone with Frostbite receives a -1 Accuracy debuff until the effect wears off. Frostbite damage does not stack, but can be refreshed. The highest tier of Frost damage overrides lower tier versions; cannot be overridden by lower-tier versions. [Must hit to activate the status condition.]
Applicable to: Weapons► Blight
Cost: 1 Slot
Cap: 2 Slots
Effect: Natural critical attack rolls of 9-10 (one slot) or Natural successful attack rolls of 8-10 deal (8 * Tier) unmitigated Blight damage each enemy turn for 2 turns. In addition, anyone with Blight loses 5*Tier Mitigation for 2 turns. Blight damage does not stack, but can be refreshed. The highest tier of Blight damage overrides lower tier versions; cannot be overridden by lower-tier versions. [Must hit to activate the status condition.]
Applicable to: Weapons► Static
Cost: 1 Slot
Cap: 2 Slots
Effect: Natural critical attack rolls of 9-10 (1 slot) or natural successful attack rolls of 8-10 (2 slots) deal (10 * Tier) unmitigated Static damage each enemy turn for 2 turns. In addition, when the prior effect is applied, you can choose up to 4 targets that are not the source of this trigger to receive (6 * Tier) unmitigated static damage. Static damage does not stack, but can be refreshed. The highest tier of Static damage overrides lower-tier versions; cannot be overridden by lower-tier versions. [Must hit to activate the status condition.]
Applicable to: Weapons► Holy Blessing
Cost: 1 Slot
Cap: 2 Slots
Effect: After taking damage, heal (2% per slot) HP at the beginning of your next turn. Damage over time effects (Bleed, Poison) will not trigger Holy Blessing. Can only trigger once per round. Stacks with Battle Healing.
Applicable to: Cloth Armor, Light Armor, Heavy Armor, Shields, Trinkets► Vampiric (Defensive)
Cost: 1 Slot
Cap: 2 Slots
Effect: Before your post action, make a separate CD roll. On a natural CD9+, regain (5 * slot)% of your max HP. This CD roll may also apply to activating the effects of Recovery.
Applicable to: Cloth Armor, Light Armor, Heavy Armor► Life Mending
Cost: 1 Slot
Cap: 2 Slots
Effect: Increases the user’s healing done to other targets through skills and use of consumable items by 10% of the initial heal (rounded down) per slot.
Applicable to: Cloth Armor, Light Armor, Heavy Armor, Trinkets► Envenom (Defensive)
Cost: 1 Slot
Cap: 2 Slots
Effect: When hit by natural monster attack rolls of 9-10 (1 slot) or 8-10 (2 slots), deals (8 * Tier) unmitigated Poison damage each enemy turn for 4 turns. [Must hit to activate the status condition.]
Applicable to: Cloth Armor, Light Armor, Heavy Armor► Flame Thorns
Cost: 1 Slot
Cap: 2 Slots
Effect: Successful attacks against you deal (2 per slot * Tier) unmitigated Burn damage to the attacking enemy. Successful critical attacks against you deal an additional (4 per slot * Tier) unmitigated burn damage each enemy turn for 2 turns.
Applicable to: Heavy Armor, Shields► Flame Aura
Cost: 1 Slot
Cap: 2 Slots
Effect: Prevent (4 per slot * Tier) damage per slot from successful attacks against you. Successful non-critical attacks against you deal (2 per slot * Tier) unmitigated Burn damage to the attacking enemy.
Applicable to: Heavy Armor, Shields► Frost Thorns
Cost: 1 slot
Cap: 2 slots
Effect: Successful attacks against you deal (2 per slot * Tier) unmitigated damage to the attacking enemy. Successful critical attacks against you deal an additional (4 per slot * Tier) unmitigated Frost damage each enemy turn for 2 turns.
Applicable to: Heavy Armor, Shields► Frost Aura
Cost: 1 Slot
Cap: 2 Slot
Effect: Prevent (4 per slot * Tier) damage per slot from successful attacks against you. Successful non-critical attacks against you deal (2 per slot * Tier) unmitigated Frost damage to the attacking enemy.
Applicable to: Heavy Armor, Shields► Paralytic Immunity
Cost: 1 Slot
Cap: 1 Slot
Effect: Grants immunity to all Paralysis effects.
Applicable to: Cloth Armor, Light Armor, Heavy Armor, Shields, Trinkets► Bloodclot
Cost: 1 Slot
Cap: 1 Slot
Effect: Grants immunity to all Bleed effects.
Applicable to: Cloth Armor, Light Armor, Heavy Armor, Shields, Trinkets► Antifreeze
Cost: 1 Slot
Cap: 1 Slot
Effect: Grants immunity to Frost effects.
Applicable to: Cloth Armor, Light Armor, Heavy Armor, Shields, Trinkets► Fireproof
Cost: 1 Slot
Cap: 1 Slot
Effect: Grants immunity to Burn effects.
Applicable to: Cloth Armor, Light Armor, Heavy Armor, Shields, Trinkets► Cursed
Cost: 1 Slot
Cap: 1 Slot
Effect: This item cannot be traded to another player, and this item cannot leave the player's inventory. If two players are married with a Cursed item in their shared inventory, either player may access the item. This item automatically adjusts its Tier to the player it's equipped to.
Applicable to: Weapons, Cloth Armor, Light Armor, Heavy Armor, Shields, Trinkets -

Skill Point Costs:
Spoiler- Rank 1 - Novice = 4 SP
- Rank 2 - Journeyman = 4 SP
- Rank 3 - Expert = 6 SP
- Rank 4 - Master = 8 SP
- Rank 5 - Grandmaster = 8 SP
It takes a total of 30 SP to Grandmaster a skill. Other skills have no ranks. To learn those skills, simply spend the amount of SP noted as its cost.
Utility Skills:
Spoiler► Quick Change
Cost: 8 SP
Active: Free Action
Cooldown: 3 Turns
Effect: Allows the user to instantly equip, unequip, or swap any equipment in their battle-ready inventory. All active and temporary buffs and conditions granted to the player by the unequipped item are immediately lost, unless the new item carries the same enhancement (e.g. Keen, Heavy Momentum, Risky, etc.)
Description: You’ve become acquainted with your equipment and have learned to navigate through your battle-ready inventory with great ease.► Extended Mod Limit
Cost: 10 SP
Passive
Effect: Increase the number of active mods available by 2.
Description: Your focused interest on modifying your skills has granted you access to further customization.► Extended Weight Limit
Cost: 10 SP
Passive
Effect: +2 additional Battle-Ready inventory slots.
Description: Increases the limit on how many different items you can hold in your inventory during battle.-
[Extended Weight Limit Mod] Large Pockets
- Cost: 12 SP
- Passive
- Effect: Increases the number of identical items you can carry in one Battle Ready inventory slot to 15.
- Description: After many hours of stuffing items into your pockets, you found a way to compact them to fit easier.
► Lock Picking
3 Ranks
Cost: 5 SP per Rank
Passive
Effect: +1 LD per rank when picking the locks on chests.
Description: Your sleight of hand improves your chances of successfully unlocking a treasure chest.-
[Rank 3 Lockpicking Add-on] Dismantling
- Cost: 5 SP
- Passive
- Effect: +2 LD when opening a treasure chest.
- Description: You’ve become more adept at picking locks, and your increased luck allows a chance for better loot to be found in chests.
► Searching
5 Ranks
Passive
Effect: +1 LD per rank. +1 to Stealth Detection per rank.
Description: Increases your perception, making it easier to find treasure, detect hidden creatures, and increases your chance of obtaining better loot from monsters.-
[Rank 2 Searching Mod] Night Vision
- Cost: 3 SP
- Passive
- Effect: Ignores any penalties from low light or darkness. Negates the bonus Stealth Rating from low light or darkness.
- Description: Allows the user to see normally in dim or dark areas.
-
[Rank 3 Searching Mod] Detect
- Cost: 4 SP
- Passive
- Effect: Grants +2 Stealth Detection. Grants +1 LD when searching for dungeons and labyrinths.
- Description: Your perception is increased further, allowing you to find dungeons and hidden creatures more easily.
-
[Rank 4 Searching Mod] Tracking
- Cost: 4 SP
- Active: Post Action
- Effect: Allows the user to track a monster, NPC, or other player that they have encountered or know the name of. Cannot be used in combat. Once a monster or NPC is encountered, this allows a player to bypass searching checks to find them outside of combat; for field bosses, this reduces the cooldown for their spawn by 5 posts. When a target is tracked, all bonuses to their Stealth Rating are negated. When entering combat with a tracked target, the tracker's first attack against them cannot miss.
- Description: You have become a master hunter, and now can track any creatures that you have encountered before.
-
[Rank 5 Searching Addon] Reveal
- Cost: 6 SP
- Passive
- Effect: +2 LD when searching for dungeons and labyrinths. You may also search for a dungeon once every 10 posts (instead of 15). Reduces the personal post cool down when searching for a labyrinth to 3 posts (instead of 5).
- Description: Allows you to see through doors, walls and some objects, as well as increasing the chance to find dungeons and other hidden entrances.
Combat Skills:
Spoiler► Battle Healing
5 Ranks
Passive
Effect: While in combat, recover 1% per rank of your maximum HP (rounded down) at the beginning of your turn.
Description: Passively recover health in battle.-
[Rank 5 Battle Healing Mod] Emergency Recovery
- Cost: 6 SP
- Passive
- Energy cost: 10
- Effect: When non-fatal damage would leave you with 25% or less of your maximum HP, recover 10% of your maximum HP after the attack resolves. Effect cannot occur more than once per thread. When activated if the player has lower than 10 energy remaining, simply reduce the player's energy to 0.
- Description: When you survive an attack that drops your health into the red, you gain a second wind to recover a portion of your total HP.
► Charge
Cost: 10 SP
Active: Post Action
Energy cost: 2*Tier
Cooldown: 3 turns
Effect: Perform a single attack/Sword Art with +3 base damage. Charge attacks have a -1 Accuracy debuff and cannot be affected by any auto-hit effects.
Description: Charge towards an opponent to inflict extra damage.-
[Charge Mod] Bull Rush
- Cost: 10 SP
- Active: Free Action
- Energy cost: 2*Tier
- Cooldown: 3 turns
- Effect: Modifies Charge to forego the bonus damage and stun all targets hit. Charge attacks have a -1 Accuracy debuff and cannot be affected by any auto-hit effects.
- Description: Your Charge becomes more reckless, inflicting a stun against your opponent.
► Energist
Cost: 8 SP
Passive
Effect: Increase base Energy by 5*Tier.
Description: You are more skilled with using energy, increasing your total energy available.► Fighting Spirit
Cost: 10 SP
Passive
Effect: Attacking and using Howl or Focused Howl generates +1 additional Hate. (Ex. Generate 1/2/3 Hate on a Miss/Hit/Critical attack. Generate 5 Hate when using Focused Howl.)
Description: You become more intimidating when attacking enemies, making them even more likely to attack you.► Howl
Cost: 10 SP
Active: Post Action
Energy cost: 2 EN
Cooldown: 2 turns
Effect: Adds +2 Hate each against up to 4 targets.
Description: Taunt nearby enemies to attack you, increasing your Hate against multiple creatures at once.-
[Howl Addon] Focused Howl
- Cost: 5 SP
- Active: Post Action
- Energy Cost: 4 EN
- Cooldown: 4 Turns
- Effect: Adds +4 Hate against a single target.
- Description: Focus the enemy’s attention on you to gain a larger amount of hate by taunting a single creature.
Weapon Skills:
Spoiler►<<Weapon Type>> Skill
5 Ranks
Passive
Effect: At Rank 1, gain +3 DMG. At Ranks 2-5, +1 per rank (max of +7 DMG for R5 Weapon Skill). At Rank 5, unlock the ability to specialize in a Combat Shift.Weapon Types (non-exhaustive list of example weaponry in parethenses):
- Daggers (i.e. knives, tantos, karambits)
- Rapiers (i.e. Spada da lato, Estoc, Swept Hilt, Pappenheimer)
- Straight Swords (i.e. Shortswords, Longswords, Bastard Swords, Great Swords)
- Curved Swords (i.e. Scimitars, Falchions, Messers, Cavalry Sabres)
- Polearms (i.e. Spears, Scythes, Glaives, Halberds)
- Hammers (i.e. Morningstars, Flails, Maces, Frying Pans)
- Axes (i.e. Handaxes, Battle Axes, Military Picks, Lochaber Axes)
- Whips (i.e. Leather Whips, Chains, Whip Swords, Kusarigamas)
- Claws (i.e. Brass Knucles, Punch Knives, Cestus, Fascia)
- Thrown Weaponry (i.e. Throwing Axes, Kunai, Chakrams)
- Projectile Weaponry*** (i.e. Slingshots, Shortbows, Crossbows)
- Katanas* (i.e. Odachi, Nodachi, Chokuto, Tachi)
- Martial Arts** (i.e. Handwraps, Boxing Gloves, Quarterstaffs, Tonfas)
*Unlocked after completing a Katana acquisition thread.
**Unlocked after completing the <<Breaking the Unbreakable>> quest.
***Guns are not allowable projectile weaponry.►Addons for All Weapon Skills
-
[Rank 5 Weapon Addon] Stamina
- Cost: 4 SP
- Passive
- Effect: Reduces EN of all attacks by 2.
- Description: After having used your weapon for many battles, it no longer causes strain on your body.
-
[Rank 5 Weapon Addon] Precision
- Cost: 2 SP
- Passive
- Effect: Gain +1 ACC.
- Description: After many fights, your vision is honed, allowing you to be more precise.
-
[Rank 5 Weapon Addon] <<Weapon Type>> Ferocity
- Cost: 4 SP
- Passive
- Effect: +2 DMG when using the weapon of your choice. Players cannot use Focus and Ferocity at the same time for the same Weapon Type.
- Description: Become more vicious and ferocious with your weapon of choice.
-
[Rank 5 Weapon Addon] <<Weapon Type>> Focus
- Cost: 4 SP
- Passive
- Effect: Decreases minor critical threshold by 1. Also reduces DoT thresholds by 1. Players cannot use Focus and Ferocity at the same time for the same Weapon Type.
- Description: You're more experienced with landing critical strikes. Some weapon effects are easier to activate than others.
►Combat Shifts per Player
Combat Shifts apply only to its specific Weapon Type. Should a Player invest into different Weapon Types, they will not share Shifts across Weapon Skills.-
[Rank 5 Shift] ST Specialist
- Cost: 10 SP
- Passive
- Effect: For the following Sword Arts, +3 to multipliers and +2 to EN cost; ST-I, ST-II, ST-B. No other Shifts for the same Weapon Type may be possessed.
-
[Rank 5 Shift] AOE Specialist
- Cost: 10 SP
- Passive
- Effect: For the following Sword Arts, +4 to multipliers and +2 to EN cost; AoE-I, AoE-II. No other Shifts for the same Weapon Type may be possessed.
-
[Rank 5 Shift] TECH Specialist
- Cost: 10 SP
- Passive
- Effect: For TECH Sword Arts, +4 to multipliers, +3 to EN cost. No other Shifts may be taken.
Armor Skills:
Spoiler► Unhindered
Cost: 15 SP
Passive
Restriction: Cannot benefit from Armor Skills, Mods, Addons. Must be wearing at least a single accessory (Trinket or Jewelry).
Effect: +1 Accuracy, +1 Loot Dice, +1 Evasion, +5*Tier HP. Your mitigation is capped at 0 equipment slots.
Description: You have adapted to a less is more approach and have optimized the use of accessories to fill the gap, allowing to invest your experience elsewhere. These items are just a little more effective when used by you.► Cloth Armor
5 Ranks
Passive
Effect: Gain Mitigation based on your rank in Cloth armor. You can only benefit from one armor skill at a time (the respective armor type must be equipped). Your mitigation is capped at 1 equipment slots.- Rank 1: 4 MIT
- Rank 2: 8 MIT
- Rank 3: 12 MIT
- Rank 4: 16 MIT
- Rank 5: 20 MIT
Description: You have become proficient in cloth armor, which protects you a little but grants you agility and mobility.
-
[Rank 3 Cloth Armor Mod] Athletics
- Cost: 4 SP
- Effect: Gain +1 base Damage.
- Description: You have become adept at lightweight weapons, able to move quickly with them and make more deadly blows.
-
[Rank 5 Cloth Armor Addon] Nimble
- Cost: 6 SP
- Effect: Gain +1 Evasion while wearing Cloth Armor. Player also gains +1 LD.
- Description: You are more quick and nimble, with a sharper eye. Able to evade detection and hits easier, find items and people quicker.
► Light Armor
5 Ranks
Passive
Effect: Gain Mitigation based on your rank in Light Armor. You can only benefit from one armor skill at a time (the respective armor type must be equipped). Your mitigation is capped at 2 enhancement slots and Your Evasion is capped at 2 enhancement slots.- Rank 1: 6 MIT
- Rank 2: 12 MIT (-1 to Stealth Rating)
- Rank 3: 18 MIT
- Rank 4: 24 MIT (-1 to Stealth Rating for -2 total)
- Rank 5: 30 MIT
Description: You have become proficient in Light Armor with leather or scale armor and few metal plates, allowing you protection as well as some maneuverability.
-
[Rank 3 Light Armor Mod] Meticulous
- Cost: 4 SP
- Effect: Gain +1 base Damage.
- Description: You have learned to focus on your opponents more carefully, able to spot openings more often than not and allowing more chances of a successful hit.
-
[Rank 5 Light Armor Addon] Resolve
- Cost: 6 SP
- Effect: Gain +1 Accuracy and +10 * Tier HP.
- Description: You have trained hard and can endure more hits as well as land stronger strikes.
► Heavy Armor
5 Ranks
Passive
Effect: Gain Mitigation based on your rank in Heavy armor. You can only benefit from one armor skill at a time (the respective armor type must be equipped). Your evasion is capped at 1 enhancement slot and you take -1 to Stealth Rating per rank.- Rank 1: 8 MIT
- Rank 2: 16 MIT
- Rank 3: 24 MIT
- Rank 4: 32 MIT
- Rank 5: 40 MIT
Description: You have become proficient in plated armor of metal and chain, acting as a wearable shield.
-
[Rank 3 Heavy Armor Mod] Impetus
- Cost: 4 SP
- Effect: Gain +1 base Damage.
- Description: You have learned to use the weight of your armor to add more power and force to your attacks when using heavy weapons.
-
[Rank 5 Heavy Armor Addon] Iron Skin
- Cost: 6 SP
- Effect: Gain +15 Mitigation and +15 * Tier HP
- Description: Your body becomes as strong as your armor, as if it were made of iron as well, allowing you to endure and block more.
Combat Masteries:
Spoiler► Combat Mastery: Damage
3 Ranks
Cost:- [Unskilled] -> Rank 1 - Novice = Tier 2
- [Novice] -> Rank 2 - Expert = 5 SP
- [Expert] -> Rank 3 - Grandmaster = 8 SP
Passive
Effect: Gain +1 * Tier additional Base Damage per rank. Ranks of this Skill obey Damage enhancement caps.
Description: You’ve chosen to specialize in the art of combat, bolstering your strength beyond its usual parameters.► Combat Mastery: Accuracy
3 Ranks
Cost:- [Unskilled] -> Rank 1 - Novice = Tier 2
- [Novice] -> Rank 2 - Expert = 5 SP
- [Expert] -> Rank 3 - Grandmaster = 8 SP
Passive
Effect: Gain +1 to BD per rank. Ranks of this Skill obey Accuracy enhancement caps.
Description: You’ve chosen to specialize in the art of accuracy, ensuring your shot is true in even the most dire of circumstances.► Combat Mastery: Evasion
3 Ranks
Cost:- [Unskilled] -> Rank 1 - Novice = Tier 2
- [Novice] -> Rank 2 - Expert = 5 SP
- [Expert] -> Rank 3 - Grandmaster = 8 SP
Passive
Effect: Gain +1 EVA per rank. Ranks of this Skill obey Evasion enhancement caps.
Description: You’ve chosen to specialize in the art of evasion, your nimble feet allowing you to navigate through danger unscathed.► Combat Mastery: Mitigation
3 Ranks
Cost:- [Unskilled] -> Rank 1 - Novice = Tier 2
- [Novice] -> Rank 2 - Expert = 5 SP
- [Expert] -> Rank 3 - Grandmaster = 8 SP
Passive
Effect: Gain +6*tier Mitigation per rank. Ranks of this Skill obey Mitigation enhancement caps.
Description: You’ve chosen to specialize in the art of mitigation, your stalwart defenses allowing you to brave even the fiercest of storms.Familiar Skills:
Spoiler► Grappling Familiar
Cost: 10 SP
Active: Free action
Cooldown: 5 Turns
Effect: On your next successful attack, your familiar rushes to a target, stunning it for one turn. Grappling Familiars are subject to their own stun cooldown (i.e. players and grappling familiars have different stun cooldowns).
Description: Your familiar will come to your aid by your command, holding an opponent in place to ensure you can hit your mark.► Hunting Familiar
Cost: 10 SP
Active: Free Action
Cooldown: 5 Turns
Effect: Your familiar has a nose for treasure. Roll LD/CD (without bonuses) as if you had slain a loot-minimum mob.
Description: Where did all of this stuff come from? Some mysteries are best left unsolved.► Healing Familiar
Cost: 10 SP
Active: Free Action
Cooldown: 3 Posts
Effect: Upon use of a healing skill, your familiar provides a 10*tier HP bonus to your heal.
Description: Your familiar has a healing touch, supplementing your own medical prowess.► Protector Familiar
Cost: 10 SP
Active: Free Action
Cooldown: 3 Posts
Effect: The next time you would take damage, your familiar rushes to your aid, reducing the final damage by 10%.
Description: Sometimes your pet will take hits for you. Good boy.► Rending Familiar
Cost: 10 SP
Active: Free Action
Cooldown: 5 Posts
Effect: Your familiar attacks with you in tandem, applying Rend [7*tier unmitigatable damage] to a target that lasts for two turns. Rend damage does not stack, but can be refreshed. The highest tier of Rend damage overrides lower tier versions; cannot be overridden by lower-tier versions.
Description: Your familiar’s nasty bite rends the opponent, causing them to take damage over time.► Scouting Familiar
Cost: 10 SP
Passive
Effect: +2 LD to searches for dungeons or Labyrinths, and when opening treasure chests.
Description: Your familiar is an expert tracker, aiding in your efforts to search.► Profession Familiar
Cost: 10 SP
Passive
Effect: Your familiar is adept in the ways of your profession, and supports you. +2 crafting/gathering EXP per attempt, and one additional crafting attempt per day (two additional crafting attempts per day if you’re at max crafting rank).
Description: Your familiar is adept at fetching tools and assisting your crafting attempts.Extra Skills:
Spoiler► Concentration
Cost: Complete <<The Gemini>> with Unlock Conditions
Action: Free Action
Cooldown: 5 Turns
Effect: As a free action, gain Absolute Accuracy on your next attack. In the case Absolute Accuracy is already present, increase your Accuracy by 1 instead. Effect lasts until the start of next turn.
Description: You’ve learned to temporarily boost your focus, making your blade sharp and your aim true.► Disguise
Cost: Complete <<The Gemini>> with Unlock Conditions
Action: Free Action
Cooldown: 5 Turns
Effect: As a free action, increase Evasion by 1 and lesser criticals [BD8 w/ focus/BD9] are not autohits. Effect lasts until the start of next turn.
Description: You’ve become fleet of foot, capable of unleashing bursts of speed when the need arises.► Survival
Cost: Complete <<The Traveler>> with Unlock Conditions
Action: Passive
Effect: Increases Healing effects received from all sources by 10%. Grants immunity to all damage dealing environmental attacks/effects.
Description: Your skin has grown hard and weathered, allowing you to brave even the harshest of storms with relative ease.► Meditation
Cost: Complete <<Calming the Soul>> with Unlock Conditions
Action: Post Action
Cooldown: 3 Turns
Effect: Recover an additional (4 * Tier) energy.
Description: Revitalize yourself by stilling your mind.► Forgotten King’s Authority
Cost: Complete <<Betrayal of the King>> with Unlock Conditions
Action: Free Action
Energy Cost: 5 EN
Cooldown: 7 Turns
Effect: Dispel any disabling effects on yourself. This can be done while disabled.
Description: Through sheer force of will you can exhibit extraordinary command over your body.► Dragon’s Ascent
Cost: Complete <<The Dragon Age Crusade>> with Unlock Conditions
Action: Free Action
Energy Cost: 5 EN
Cooldown: 7 Turns
Effect: As a free action, Increase Base Damage by 1*tier and increase passive health regeneration by 5*tier until the start of your next post. Cannot be used in conjunction with any other damage-increasing abilities.
Description: You’ve learned the way of the dragon, boosting both your strength and survivability.► Lady Luck
Cost: Complete <<The Swashbuckling Buccaneer>> with Unlock Conditions
Action: Free Action
Energy Cost: 5 EN
Cooldown: 5 Turns
Effect: Replace a single enhancement slot on your weapon with a random enhancement using the Appraiser’s Identification roll until the start of your next turn.
Description: Roll the dice on your fate, perhaps Lady Luck will favor you.► Photosynthesize
Cost: Complete <<Keep Calm and Ki’Raion>> with Unlock Conditions
Action: Free Action
Energy Cost: 5 EN
Cooldown: 5 Turns
Effect: As a free action, improve the effects of any healing (not including passive HP regeneration) you do until the start of the next turn by 20%.
Description: Through the study of botany, you have unlocked the secrets of improved healing.► Brawler
Cost: Complete <<Bandit Camp>> with Unlock Conditions
Action: Free Action
Energy Cost: 5 EN
Cooldown: 5 Turns
Effect: Increase mitigation by 10*tier until the start of your next turn.
Description: You might not float like a butterfly but your face breaks fists.► Assault Mode
Cost: Complete <<Bloodstained Land>> with Unlock Conditions
Action: Free Action
Energy Cost: 5 EN
Cooldown: 4 Turns
Effect: As a free action, switch your accuracy and evasion values until the start of your next turn.
Description: Mastery of multiple forms of combat has allowed you to freely switch between styles.► Frozen Hide
Cost: Complete <<Absolute Zero>> with Unlock Conditions
Action: Free Action
Energy Cost: 5 EN
Cooldown: 4 Turns
Effect: As a free action, apply one slot of Frost Aura and one slot of Frost Thorns equal to your tier to yourself until the start of your next turn.
Description: You’ve spent time in the tundra, learning the secrets of the frost.► Parry
Cost: 10 SP
Active: Post action
Energy cost: 9 EN
Cooldown: 3 Turns
Effect: Apply the energy cost upon proc, not activation. Reduces the final damage of the next successful attack against you by 50% (rounded down) and negates stun/paralysis effects of that attack. If hit by multiple attacks, only apply parry to the first attack against you. Parry lasts for three turns. Cooldown starts when the player activates the Skill. If the player is hit when using Parry, the cooldown is reset to 3 turns.
Description: Prepare yourself against your opponent’s next attack.-
[Parry Mod] Justified Riposte
- Cost: 5 SP
- Passive
- Cooldown: 4 Turns
- Effect: A successful Parry also stuns the target for 1 turn.
-
Description: Your parry catches your opponent off guard, leaving them temporarily stunned.
-
[Parry Mod] Vengeful Riposte
- Cost: 6 SP
- Passive
- Cooldown: 4 Turns
- Effect: A successful Parry also returns 50% (rounded down) of the raw damage that would be dealt to you back to your opponent. The reflected damage can be mitigated by the opponent.
- Description: Your parry reflects a portion of your opponent’s damage back to them.
► Hiding
5 Ranks
Passive
Effect: +1 Stealth Rating per rank.
Description: Blend into your surroundings, making it harder for monsters and other players to sense your presence and detect you.-
[Rank 2 Hiding Mod] Untraceable
- Cost: 4 SP
- Passive
- Effect: Gain +1 Stealth Rating. Negates the effect of the Tracking skill against the user.
-
Description: You learn how to move perfectly, and can move without leaving so much as a trace.
-
[Rank 4 Hiding Mod] Vanish
- Cost: 6 SP
- Active: Free Action
- Energy Cost: 5 EN
- Cooldown: 3 Turns
- Effect: Allows the user to make an attempt to enter stealth as a free action instead of a post action. if successful, the user is now concealed.
-
Description: After having used stealth skills for some time, you have become silent, and now can move so silently that enemies can lose perception of you.
-
[Rank 5 Hiding Mod] Surprise Attack (Assassin)
- Cost: 6 SP
- Passive
- Energy Cost: 8 EN
- Effect: Attacks made from stealth cannot miss. Attacking from stealth grants +1 * player’s tier DMG. Stuns and other status effects (Bleed, Paralysis, Burn, etc) cannot trigger. Cannot possess both Surprise Attack (Assassin) and Surprise Attack (Trickster).
-
Description: You have mastered hiding, and now can move so silently that the target has no time to react, guaranteeing a hit. You focus on hitting critical zones and exploiting your target's weak points, allowing for bonus damage.
-
[Rank 5 Hiding Mod] Surprise Attack (Trickster)
- Cost: 6 SP
- Passive
- Energy Cost: 8 EN
- Effect: Attacks made from stealth cannot miss. Attacking from stealth reduces final damage by 50% and automatically applies all status effects (Bleed, Paralysis, Burn, etc) the player possesses on active equipment/consumables. Cannot possess both Surprise Attack (Trickster) and Surprise Attack (Assassin).
- Description: You have mastered hiding, and now can move so silently that the target has no time to react, guaranteeing a hit. You focus on slipping past the enemy's defenses and sacrifice strength in order to apply as many status effects as possible.
► First Aid [Requires two Extra Skill slots]
5 Ranks
Active: Post Action
Energy cost: (3 * Rank in skill) EN
Effect: Heal 4% per rank of a target party member’s maximum HP (rounded down). Cannot target the user.
Description: The user’s hands and target player glow a soft white, healing the target for a percentage of their maximum HP.-
[Rank 2 First Aid Mod] Purify
- Cost: 4 SP
- Active: Post Action
- Energy cost: 3 EN
- Cooldown: 1 Turn
- Effect: Remove all status conditions on one target party member. Can target the user.
-
Description: The user’s hands and target player glow an eerie bright white, removing one status condition from the target.
-
[Rank 3 First Aid Mod] Energize
- Cost: 5 SP
- Active: Post Action
- Energy Cost: 10 Energy
- Effect: Restore 8 Energy to target party member. Cannot target the user.
-
Description: The user’s hands and target player glow an eerie light green, transferring a portion of the user’s energy to the target.
-
[Energize Mod Add-On] Hyperactive
- Cost: 5 SP
- Active: Post Action
- Energy Cost: 5 Energy
- Cooldown: 3 Turns
- Effect: Increase the passive energy regen of the target party member by 3 for three turns. Can target the user. [A player cannot be affected by Hyperactive more than once at a time.]
-
Description: The user’s hands and target player glow an eerie bright yellow, increasing the amount of energy the target regenerates for a short time.
-
[Rank 4 First Aid Mod] Barrier
- Cost: 6 SP
- Active: Post Action
- Energy Cost: 15 EN
- Cooldown: 2 turns
- Effect: All party members gain a barrier effect that lasts until the beginning of the user's next turn. The barrier reduces final damage from all sources done to the party by 15 % for one turn.
-
Description: The user’s hands and target player glow a dark blue, providing a strong, temporary defense.
-
[Rank 5 First Aid Addon] Field Medic
- Cost: 6 SP
- Active: Post Action
- Energy Cost: 15 EN
- Cooldown: 3 Turns
- Effect: Heal your entire party (including yourself) for 25% of each party member’s maximum HP (rounded down).
- Description: The user and each of the user’s party members simultaneously glow a soft white. Drains the user’s energy to restore health to the entire party.
► Block
5 Ranks
Passive
Effect: Requires an equipped shield. User’s evasion cannot be greater than 0 (can still be negative). Grants additional mitigation:- Rank 1: 5 MIT
- Rank 2: 8 MIT
- Rank 3: 12 MIT
- Rank 4: 18 MIT
- Rank 5: 25 MIT
Description: Defend with your shield, deflecting damage from your opponent’s attacks.
-
[Rank 3 Block Mod] Shield Bash
- Cost: 4 SP
- Active: Post Action
- Cooldown: 2 Turns
- Energy cost: 6 EN
- Effect: Make an attack with an equipped shield. On a hit, deals (Base * 10) damage, stuns the enemy for one turn, and automatically applies enhancement effects present on the shield. Note: When calculating Base Damage for Shield Bash, Base Damage Increases from Weapon Skills do not apply. This attack can trigger enhancements on the weapon based on the natural BD roll like a successful normal attack would.
-
Description: Smash your shield into target, dealing damage and stunning them.
-
[Rank 5 Block Addon] Rampart
- Cost: 6 SP
- Active: Free Action
- Cooldown: 5 Turns
- Energy cost: 10 EN
- Effect: Reduce final damage that would be dealt to you by 25% (rounded down). Effect lasts until the beginning of your next turn.
- Description: Spend a turn to prepare yourself against the next attacks that would be dealt to you, allowing you to block additional damage.
► Leadership [Requires two Extra Skill slots]
5 Ranks
Passive
Cost:- [Unskilled] -> Rank 1 - Novice = 5 SP
- [Novice] -> Rank 2 - Journeyman = 8 SP
- [Journeyman] -> Rank 3 - Expert = 10 SP
- [Expert] -> Rank 4 - Master = 12 SP
- [Master] -> Rank 5 - Grandmaster = 15 SP
- For a total of 50 SP.
Effect: Gain access to Leadership Arts every rank. In order to use a Leadership Art, it must take up a mod slot. Each Leadership Art takes up a different mod slot. Leadership Arts from different sources do not stack.
Description: The user raises their weapon/fist into the air, with each player in the party glowing a soft iridescent glow for a few seconds.-
[Rank 1 Leadership Art] Elusive
- Active: Post Action
- Energy cost: 4 EN
- Cooldown: 2 Turns.
- Effect: Increase the Evasion of all players in your party by 1 for a single turn.
-
Description: The user raises their weapon/fist into the air, with each player in the party glowing a soft blue glow for a few seconds.
-
[Rank 2 Leadership Art] Rally
- Active: Post Action
- Energy cost: 6 EN
- Cooldown: 2 Turns
- Effect: Increase the Accuracy of all players in your party by 1 for a single turn.
-
Description: The user raises their weapon/fist into the air, with each player in the party glowing a soft violet glow for a few seconds.
-
[Rank 3 Leadership Art] Steadfast
- Active: Post Action
- Energy cost: 8 EN
- Cooldown: 3 Turns
- Effect: Status Effects that would be applied to the party for the next two turns would instead be applied to the user instead (normal rules for how status effects refresh instead of stacking apply).
-
Description: The user raises their weapon/fist into the air, with each player in the party glowing a soft silver glow for a few seconds.
-
[Rank 4 Leadership Art] Inspiring Speech
- Active: Post Action
- Energy cost: 8 EN
- Cooldown: 3 Turns
- Effect: Decreases all currently active cooldowns of all other party members by one.
-
Description: The user raises their weapon/fist into the air, with each player in the party glowing a soft red glow for a few seconds.
-
[Rank 5 Leadership Art] Press the Attack
- Active: Post Action
- Energy cost: 10 EN
- Cooldown: 3 Turns
- Effect: Increase the Damage of all other party members by +(Target's Tier) base damage for a single turn.
- Description: The user raises their weapon/fist into the air, with each player in the party glowing a soft iridescent glow for a few seconds.
-
INFORMATION REGARDING ADDITIONAL SP BEYOND 2.6 LEVEL CAP
SpoilerPlayers with additional SP past 529 (Lv. 88 in v2.6) are offered the following options to spend their SP. Please indicate your choice in your application under Notes where applicable. Players may choose to spend Platinum they may receive from this conversion or hold onto it for future purposes.
OPTION 1: SP TO LEVELS
-- Level 89: 20 SP (549 SP total)
-- Level 90: 25 SP (574 SP total)
-- Level 91: 30 SP (604 SP total)
-- Level 92: 35 SP (639 SP total)
-- Level 93: 40 SP (679 SP total)
-- Level 94: 45 SP (724 SP total)
-- Level 95: 50 SP (774 SP total)
-- Level 96: 55 SP (829 SP total)
-- Level 97: 60 SP (889 SP total)
-- Level 98: 65 SP (954 SP total)
-- Level 99: 70 SP (1024 SP total)
-- Level 100: 75 SP (1099 SP total)OPTION 2: SP TO PLATINUM
5:1 = SP:PlatinumGleaming Scales = 4 Platinum
Demonic Shards = 4 Platinum
Enhancement Reroll Ticket (normal) = 2 Platinum
Demonic Consumable of Choice (must follow standard enhancement caps) = 3 PlatinumFAQ
Spoilernone, for now. this space will be updated when questions about the conversion process are forwarded to staff.
-
<<3.0 Conversion>>
Welcome to the 3.0 Conversion thread. All characters existing in the 2.6 system are expected to be transferred over to the new system through this procedure.
This thread will be focusing on Character Conversions and Item Upgrades only. Through this process, a character's SP will be converted EXP with their levels adjusted accordingly, whilst players may select important items for their characters to be upgraded to better suit their play style in the new 3.0 system. Players are advised to post in their own evaluation threads regarding other (optional) types of conversions and re-evaluations.
Conversion Procedure
- Players will need to post in this thread once using the character they intend to convert with.
-
Players must fill up the template (found below) in their post.
-
Players are allowed three (3) items to be upgraded during the 3.0 conversion process.
- In doing so, the items will scale to the player's new tier.
-
Players can opt to swap their item types with the following considerations:
- Armors may swap to a different armor type.
- Weapons may swap to a different weapon type.
- Accessories may swap between Trinkets, Jewelry and Sculptures.
- Shields remain as they are.
- Should their equipment enhancements fail to fit their new item type, players may suggest enhancements (within reason) that will replace their item's illegal enhancements. Normal enhancements may be swapped for another normal enhancement, unique enhancements may be swapped for another unique enhancement.
- Equipment not upgraded through this process will not be liable to the same alteration processes.
-
Players are allowed three (3) items to be upgraded during the 3.0 conversion process.
-
Players will then wait for a staff member to approve of their post.
- Staff members will need to verify the player's items and SP. This verification procedure may take some time. We kindly request for your patience.
- As the initial player conversions of 3.0 have been completed, please leave your approval post link in one of the PST members' Private Messages or the #approvals channel on Discord.
- In the scenario that there is a problem with a player's conversion application, staff will contact them either through Private Messages or Discord.
-
In a staff's approval message, the following information should be disseminated to the player regarding their character:
- Total EXP
- Total SP
- Current Level
- Paragon Level
- Unlocked Paragon Rewards (where applicable)
-
Once approved, the conversion process would have concluded for that character. Players encouraged to use this thread as their character/items' baseline of reference should records be necessary in the new 3.0 system.
- Note that players are not expected to inform staff of their SP allocation once their application has been submitted and approved. Players are free to track their SP allocation as per usual in their own journals. SP allocation should reflect their new total SP as stated in the approval post of their application.
Rules of 3.0 Conversion
- Until otherwise notified, all players/writers are allowed up to 2 characters per week to be converted from 2.6 to 3.0 using this process.
- Players/writers are not allowed under any circumstances to transfer equipment before converting their character for the sake of upgrading their equipment via the conversion process. Any player/writer found doing so will forfeit their rights to convert equipment via the conversion process completely.
- Characters that do not have a transfer request approved before role playing with the 3.0 system will have forfeited their rights to upgrade their items with the given transfer.
- Floor 25 boss drops are not up for conversion.
Guidelines
- Players should ensure that their applications are tidy.
- Players should ensure that links in their application to where their characters' SP is being tracked are working.
- Players should verify on their end that their SP tracking is as accurate as possible and that all participated threads, alongside their links, have been accounted for.
- Please check the list of known items that are required to be converted below. Players who own these items should submit these items and their conversions under the notes section of their conversion application.
Should players be in need of further assistance, please do not hesitate to look for staff members via private messages on the site or through #ask-a-staff on Discord.
TEMPLATE
SpoilerCurrent Level:
Current SP:
Link to SP Tracking: [link]
Item Upgrades:2.6 | PRE-CONVERSION 3.0 | UPGRADED ITEM #1
Item Name:
Item ID:
Item Tier:
Item Type:
Item Rarity:
Item Enhancements:
Description:Item Name:
Item Tier:
Item Type:
Item Enhancements:
Description:ITEM #2
Item Name:
Item ID:
Item Tier:
Item Type:
Item Rarity:
Item Enhancements:
Description:Item Name:
Item Tier:
Item Type:
Item Enhancements:
Description:ITEM #3
Item Name:
Item ID:
Item Tier:
Item Type:
Item Rarity:
Item Enhancements:
Description:Item Name:
Item Tier:
Item Type:
Item Enhancements:
Description:Notes:
[any other items that are required to be converted would go here. players may also leave additional clarifications for staff to refer to regarding their application here. note that converted items do not benefit from the same upgrades provided in the field above.]KNOWN ITEMS TO BE SUBMITTED FOR CONVERSION
Spoiler-
EQUIPMENT
- [Flowing Illusion] via Rovian Wars
- [PumpKing's Crown] via Halloween 2015
- [Rings of Matrimony] via Valentines 2017
- [Scarecrow's Fear] via Halloween 2017
- [Mask of the Lovers] via Valentines 2018
- [Scarecrow's Armor] via Halloween 2019
- [Muramasa] via Battoujutsu, v2.6.
-
CONSUMABLES
- [Hershey's Kiss], [New Life Carol], [New Life Song], [Peppermint Lollipop] via Christmas 2019
-
WARES
Spoiler
ADVENTURING NECESSITIES
-
Teleport Crystal | [800col]
Use a post action to activate a teleport crystal. Teleports the player to the town or designated teleportation area they specify.
-
Glow Stone | [200col]
While holding a Glow Stone, the area around you is illuminated. You and players near you do not suffer any penalties for darkness or low-light conditions. Cannot wield a weapon while holding a Glow Stone, but it can be swapped out and and back in to continue its effect. Effect lasts for one thread.
-
Dimensional Backpack | [5,000col]
Adds +1 to Battle Ready inventory. This item does not take up a Battle Ready inventory slot. A player may only have one Dimensional Backpack at any time.
CONSUMABLES
-
Blank Dungeon Map
Assign a successful sub-dungeon search roll to a blank map in order to explore the dungeon in another thread. When used, apply the dungeon difficulty and roll ID (Ex. Intermediate Dungeon Map #12345). Can only hold the location of one sub-dungeon that matches the Tier of the map.- Tier 1 | [100col]
- Tier 2 | [200col]
- Tier 3 | [300col]
-
Tier 4 | [400col]
-
Field Rations | [1,000col]
Grants +12% to max HP. Cannot be used in combat. Effect lasts for one thread. A player cannot benefit from more than one Field Rations at a time. This effect cannot stack with Over-Health consumables. Filling may be used on this item, increasing its buff from 12% to 16% max HP.
-
Immolation Potion
When used, successful non-critical attacks against you deal (10 * Tier) unmitigated damage to the attacking enemy. Must be of the appropriate tier to use. Effect lasts for one thread.- Tier 1 | [300col]
- Tier 2 | [600col]
- Tier 3 | [900col]
-
Tier 4 | [1200col]
-
Keys
A single-use item that grants an LD bonus when opening a Treasure Chest.- LD Bonus: +1 | Silver Key | [500col]
-
LD Bonus: +2 | Golden Key | [1,000col]
-
Tents
Use a post action to activate this item's effects. Grants -1 energy cost for the first two expenditures of each combat. Effect lasts for one thread.- Single | [400col]
-
Double | [600col]
Up to two players may take advantage of this tent in a thread.
-
Spyglass (x3) | [800col]
-
Use to reduce the number of posts required to search for a dungeon, familiar or field bosses by 5 posts. Effect lasts for one thread.
-
Use to reduce the number of posts required to search for a dungeon, familiar or field bosses by 5 posts. Effect lasts for one thread.
-
Water Canister (x3) | [400col]
Grants +(5 *Tier) health regeneration while out of combat. Effect lasts for one thread.
-
Nametag | [2500col]
Allows its user to change the name and description of an equipment piece.
-
Tank Beginner Booster | [50col]
[Can only be purchased by players that had taken the Tank Starter Package upon Character Creation]
For the duration of a thread, gain your ranks of any Armor or Block Skill as ranks in an available Weapon skill of your choosing. This can only be used below True Tier 5.
-
Support Beginner Booster | [50col]
[Can only be purchased by players that had taken the Support Starter Package upon Character Creation]
For the duration of a thread, gain your ranks of the First Aid or Leadership Skill as ranks in an available Weapon skill of your choosing. This can only be used below True Tier 5.
-
Scout Beginner Booster | [50col]
[Can only be purchased by players that had taken the Scout Starter Package upon Character Creation]
For the duration of a thread, gain your ranks of the Searching Skill as ranks in an available Weapon skill of your choosing. This can only be used below True Tier 5.
CRAFTING & PROFESSIONS
-
Custom Ambition Tool | [800col]
Gain +1 bonus crafting EXP for each crafting attempt.
-
Crafting Material | [700col]
Basic materials used across all crafting professions.
-
Teleport Crystal | [800col]
-
<<General Merchant>>
All Merchant NPCs will carry a base selection of goods. Players are allowed to purchase from them at any time. Make a post here to buy items from these NPCs.
Purchasing Guide
- Players should post their shopping list and price breakdowns in this thread.
- Once a post has been made, send the appropriate col value to the @Banker.
-
All purchases are automatic. Players do not need to wait for an approval to receive the items purchased.
- This exception is made for materials, with which needs to be delivered to the player from the Banker.
- For accidental purchases and refunds, please contact a member of staff through site messages or on Discord.
- Please ensure that your receipts are kept tidy.
Example Purchase
SpoilerBuying the following items:
- Teleport Crystals x5
- Glow Stone x1
- Dimensional Backpack x1
Total: (800 * 5) + (200 * 1) + (5000 * 1) = 9,200col
Should players be in need of further assistance, please do not hesitate to look for staff members via private messages on the site or through #ask-a-staff on Discord.
-
<<Member Directory>>
All players are obligated to make a post here indicating other characters they own and write. Players are advised to keep their post in this thread updated whenever they create a new character. Having a post here is also necessary should players be interested in obtaining a Unique Skill in the future. A gentle reminder that players will face dire consequences should they be found manipulating systems regarding Unique Skills.
Post Guidelines
- Players may make a post here on any character they write as.
- In their post, they should state all characters they write on alongside links to their respective characters' journals.
- Each character's journals should have a field that links viewers back to the player's post in this thread.
- Should a player's post in this thread belong to a character who has recently died, players should contact staff for assistance in transferring their post's details over to another/a newer character the player will be writing on.
Should players be in need of further assistance, please do not hesitate to look for staff members via private messages on the site or through #ask-a-staff on Discord.
BASE TEMPLATE
Spoiler- Character Name:
- Character Description:
- Character Journal: [link]
-
Floor 9
<<Gatekeeper of Fire>>
Party Limit: 4 | 20+ Posts
Prerequisite: Must have completed <<Guardian of Fire>>
Repeatable for standard thread rewards, and <<Cerberus Etching>>Quest Rewards:
- 3500 Experience Points
- 7500 col
-
Each player receives:
-
Cerberus Etching (Unique Material)
- Removes one enhancement on a weapon and replaces it with Burn. (This effect cannot override the Burn enhancement cap. Consumed on use.)
-
Cerberus Etching (Unique Material)
-
POTENTIAL REWARD | If Cerberus, Inferno's Rage, used Blazing Bite at least once during the quest
- Unlock <<TECH-G>> collected sword art.
Requirements:
- Defeat 3 <<Infernal Hell Hounds>>
- Defeat <<Cerberus, Inferno’s Rage>>
Summary:
With the count of years behind the players stacking up higher and higher, so too are they encountering mutated versions of the more typical respawning bosses. First it was the Wasp Queen, then it was Avalanche, then Sand Shark. Now, it appears that even Cerberus has gotten one of Cardinal’s premium facelifts, reborn as <<Cerberus, Inferno’s Rage>>. While the previous iteration of this boss was aggressive, it is said that the new and improved version is on an unprecedented level of danger. Facing it is not an endeavor for the faint of heart.
That being said, the rewards for defeating this new and improved Cerberus are considered well worth the risks involved. It is said that overcoming Cerberus will grant one the means to make their weaponry truly extraordinary. What’s more, rumors have begun circulating that those who know how to properly manipulate the boss’ AI will walk away with an exclusive skill that can bolster their offensive power beyond typically thought possible.
Will you accept the challenge, and face off against Cerberus one more time?
Outline:
Volcano's Effect: Due to the extreme heat, each player will suffer 30 unmitigatable damage on their posts while in combat during this thread. This effect can be ignored if the player has the <<Survival>> extra skill active, or the Fireproof or Flame Aura enhancements on worn equipment.
Enemies:
<<Infernal Hell Hound>>
These mobs will always travel in packs, working in teams to protect one another and their alpha. Though they won’t typically pick fights with those stronger than themselves (without good reason), they’ll descend upon those weaker with a tenacity and coordination unrivaled by other predators of the floor.
HP: 450/450 | DMG: 125 | MIT: 50 | ACC: 2 | EVA: 2Abilities:
- Burning Bite | On successful attacks, the player is afflicted with T4 Burn. (56 unmitigatable damage per turn for 2 turns.)
- Boiling Hide | On successful attacks against an Infernal Hell Hound, the player receives 25 thorns damage. Successful critical attacks against Infernal Hell Hounds increases damage received by the player to 40. This damage is negatable by Fireproof.
- Infernal Soul |Deals additional damage. (+25 minor crit | +50 major crit)
<<Cerberus, Inferno’s Rage>>
Alpha to its brethren, this boss commands a small army of less powerful hounds that will work to defend it until its last breath. Sporting three heads, adventurers have found this boss to be particularly difficult to kill. Not only are its stats high, but it will enthusiastically fight with all three heads at once, making it difficult to find safe openings with which to strike.
Cerberus, Inferno's Rage (Head #1) HP: 650/650 | DMG: 175 | MIT: 75 | ACC: 3 | EVA: 2
Cerberus, Inferno's Rage (Head #2) HP: 650/650 | DMG: 175 | MIT: 75 | ACC: 3 | EVA: 2
Cerberus, Inferno's Rage (Head #3) HP: 650/650 | DMG: 175 | MIT: 75 | ACC: 3 | EVA: 2Abilities:
- Bloodless | This boss is immune to all status ailments.
- Bringing Hell | This boss can attack once per turn for each head active.
- Limited Availability | Players can only target one head at a time. This also extends to AoE attacks.
- Burning Bite | On Cerberus' successful attacks, the player is afflicted with T4 Burn. (56 unmitigatable damage per turn for 2 turns.) This ailment is negatable by Fireproof.
- Boiling Hide | On successful attacks against Cerberus, the player receives 30 thorns damage. Successful critical attacks against Cerberus increases damage received by the player to 50. This damage is negatable by Fireproof.
- Infernal Punishment | On a critical attack, heads of Cerberus that have not yet attacked for that turn will gain additional damage and 50% Phase for their attack that turn. (+25 on minor crit | +75 on major crit)
-
Blazing Bite | If all three heads are reduced to 150 HP or less without any having been destroyed, <<Cerberus, Inferno’s Rage>> will howl with all three heads, summoning 3 <<Infernal Hell Hounds>> to come to its aid as a Free Action. They attack immediately, as part of the same post. Damage from new applications of Burning Bite is now doubled. (112 unmitigatable damage per turn for 2 turns.)
Epilogue:
If <<Cerberus, Inferno’s Rage>> did not use <<Blazing Bite>>:SpoilerWith the boss defeated, the volcanic activity in the area appears to simmer down, and the players are no longer harmed by its debilitating effects. A panel appears, informing the players of the quest’s completion, listing the quest rewards and experience gained.
If <<Cerberus, Inferno’s Rage>> used <<Blazing Bite>>:
SpoilerOnce the boss and its ilk are destroyed, the debilitating effects of the volcano will subside, and the roiling air will no longer harm the players. A panel appears, informing the players of the quest’s completion, along with an alert beneath the quest rewards that indicates the <<Blazing Bite>> skill has been unlocked in their skill tree.
-
Floor 21
<<The Hidden Village>>
Party Limit: 4 | 20+ Posts
Repeatable for standard thread rewards.
Rewards:
- 2,000 Experience Points
- 5,000 Col
-
POTENTIAL REWARD | Bonus Experience Points
-
Granted upon the defeat of (2 * Party Members) Dragon Knights. This reward may only be obtained once per character.
500 Experience Points
-
Granted upon the defeat of (2 * Party Members) Dragon Knights. This reward may only be obtained once per character.
-
POTENTIAL REWARD | Bonus Materials
-
Granted to players who successfully complete the EXTRA objective: Plant Mushrooms. This reward may only be obtained once per character.
2 x Mushrooms Planted Materials (All players in quest receive combined amount)- If a player has the Gathering Profession, they are able to plant twice as many mushrooms. They will receive double the granted material reward upon completion of quest and close of thread. (Double materials only for those with Gathering)
-
Granted to players who successfully complete the EXTRA objective: Plant Mushrooms. This reward may only be obtained once per character.
Requirements:
-
Complete the following objectives:
- Fulfill these task requirements: [Whiff out torches], [Topple cairns], [Plant rusted equipment], [Plant Fool’s Gold], [Go into hiding].
- Travel back to town in three posts or Slaying all Dragon Knights.
-
Must roleplay the following:
- Talking to Ureka in Charko.
- Performing tasks in the tunnel towards Charko.
- Stealthing from the Dragon Knights.
- Walking back to Charko or Engaging in combat with the Dragon Knights.
Summary:
Charko is a village that doesn’t open up much to anyone. It’s recluse; the people keep to themselves, in fear of drawing attention from adventurers and passersby. So it is strange when one of the villagers has a quest marker above their heads -- stranger still when it is a council member of the city. She introduces herself as Ureka, responsible for maintaining community well-being and relations, and recently one of her members have reported growing concerns of dragon knights near the borders of town.The sleepy citadel isn’t much for combat; weapons and military defenses would set most of the citizens at an unease. But, between the help of adventurers and herself, perhaps there’s a better way to reroute these wandering patrollers.
Outline:
PART I | THE REROUTING EFFORT
Note that LD modifiers do not apply to this section of the quest.
The dragon knights will be advancing closer to the village at the end of every post rotation once the quest is initiated. After 5 turns, the dragon knights will have reached the village and the quest will have failed. Players will need to restart the quest to try again.
Each turn, players will also roll for LD as a free action. Players will need to have their total LD beat a certain threshold per rotation in order to stay ahead of the dragon knights. If their LD total falls below this threshold at any point during this phase, the quest will have failed. Players will need to restart the quest to try again.
For their post action, players may perform tasks based on their individual LD roll. Players may complete as much progress in their task in a single post action, however they may only perform one type of task in a post action. As an example, players may whiff out two torches if their individual LD is 4, but they may not also topple a cairn in the same post action.
Note that if the quest is taken solo, Ureka will join as a participating character. The solo player will then be capable of taking two free and post actions to perform quest mechanics per turn.
LD Threshold
Rotation # Total LD Threshold 1 4 2 8 3 16 4 32 5 64 Tasks
- Whiff out torches: Players must whiff out 4 torches. They may do so once their individual LD rolls have reached 2, 4, 6 or 8.
- Topple cairns: Players must topple marking cairns. They may do so once their individual LD rolls have reached 3, 6, 9 or 12.
- Plant rusted equipment: Players must plant borrowed rusted equipment in select areas. They may do so once their individual LD rolls have reached 4, 8, 12 or 16.
- Plant Fool’s Gold: Players must plant Fool’s Gold once only after the above three tasks have been accomplished. This may be done at any individual LD roll.
- [EXTRA] Plant mushrooms: When the above four tasks have been completed, players may choose to plant mushrooms to not only further the route’s disguise, but to help bolster the village’s food supply. Additional rewards will be granted based on the amount of times these mushrooms have been planted.
- Go into hiding: Players may end this phase of the quest early by rolling for stealth and beating a standard passive detection roll of 9 on the LD. Players who have gone into hiding may still roll to add to the total LD threshold, but may not take any additional actions to complete tasks.
All players must end the quest phase by going into hiding. This starts the next phase of the quest.
If all players have not successfully gone into hiding by rotation #5, the quest will have failed. Players will need to restart the quest to try again.
Should players be waiting for their party members to successfully go into hiding, they need not roll to maintain stealth, however must narratively remain as such.
- - - - -
PART II | THE AFTERMATH
Now that the dragon knights have successfully been directed elsewhere, the party will be asked to head back into town. On the other hand, the dragon knights do have monster cursors above their heads…
The party is offered two options. The party as a whole must pick one:
RETURN TO CHARKO
SpoilerPlayers may observe the dragon knights be distracted by the false treasures should they wish to. This section of the quest will require the party to write three posts. After which, the quest would be completed.
SLAY THE DRAGON KNIGHTS
SpoilerWell, with some of their numbers culled, less patrols would then happen, right? Inevitably, it would be for the better of Charko and the entire floor combined.
The party must fight (2 * Party Size) Dragon Knights before the quest may be completed.
NPC's:
<<Ureka>>
A demure and courteous young woman, who is slightly more formal and peppy than she first lets on. Playing the role of intelligence on the council seat, it is little wonder how she’s capable of orchestrating a suitable plan in somewhat dire times (with only minimal losses).
Enemies:
<<Dragon Knight>>
If it’s shiny at first glance, they want it, and they’ll only scowl in the face of false tribute before moving on. Loyal to Tessleth, they continue to search the floor and extort its citizens of any valuables they have by brute force and intimidation. Prideful folk, they fight in pairs at minimum, with a strange strategy: only one of them will attack, whilst the rest of their party defends.HP: 650/650 | DMG: 125 | MIT: 50 | ACC: 2 | EVA: -1
Abilities:
- Formation | Dragon Knights oft work in teams, and must be spawned in groups of two or more. Their party will consist of every member being a Shielder save for one of them, who will assume the role of Lancer.
-
Lancer | All Dragon Knights seen on patrol are lance users by nature of training. Only one Dragon Knight in battle will assume a lance weapon, gaining a 50 DMG buff and attacking on its turn. If a Lancer falls in battle with other Dragon Knights in its party, the healthiest Dragon Knight will assume the new role of Lancer.
- Critical Eye | A roll of 8 on their designated monster die will be considered a critical attack.
- Long Reach | The length of their weapons alongside the broad and swift movements of a trained warrior results in some of their attacks capable of cleaving through several players at once. On a critical attack against the primary threat target, roll for attacks against every other member in the player’s party.
-
Shielder | If there are multiple Dragon Knights in combat, every other Dragon Knight except for one designated Lancer will carry a tower shield instead, incapable of attacking. Their MIT will increase by 75 whilst they are defending; they lose this bonus when they swap to a Lancer.
- Pawn | On any attack against the Lancer, the player must make a separate roll to determine Pawn’s activation. Should that roll’s CD be 6+, the damage taken by the Lancer would instead be taken by the healthiest Dragon Knight in the enemy party.
Epilogue:
If the Dragon Knights were not slain
SpoilerAll in a day’s work. With the guard now on their merry way elsewhere, the village is safe for yet another period of time. Perhaps, with a bit of luck and well-wishing on the villagers’ part, forever. Ureka promises to regale her community with tales of the party’s hardship and her wit upon the mission’s planning.
With a bow, she thanks the players for their help and returns to her daily schedule without complaint. The window for quest rewards is then presented to the party.
If the Dragon Knights were slain
SpoilerUreka is only a slight bit unnerved at the players’ readiness for a fight, but she breathes easy once they return from their hunt unscathed. She ponders, only for a moment, at the possibility of their village being found due to their disappearance, but with any traces of struggle being away from their city entrance, it is likely that the scouts looking for their companions would too be misled in their search for their missing numbers. At least the skirmish wouldn’t have caught the attention of any additional patrols that might’ve been around since the start of the players’ mission.
With a bow, Ureka thanks the players for their help. The window for quest rewards is then presented to the party. With that, the NPC returns to her daily schedule without complaint.
If Mushrooms were planted
SpoilerSomething about the earth closer to Charko is causing the mushrooms to grow at a faster rate. Ureka realizes that with proper care and preparation, these mushrooms could be a nutritious and tasty food source for the entire city. As an extra thank you, she gives you multiple pieces of ore from the nearby quarry. Surely it should be enough to pay for the planting they had done.
Image Credit:
Ureka from [Monster Hunter Rise].
Dragon Knights by [chearin from artstation]. -
Floor 10
<<The Dragon Age Crusade>>
Party Limit: 3 | 20+ Posts
Must have completed <<DHA 9: Cavity of Ruin>>
Repeatable for standard thread rewards.
Rewards:
- 5,000 EXP
- 10000 Col
- 10 Materials
- 1 Chest (Shared. The player writing the final post rolls to open the chest and adds it to loot distribution as agreed upon by the group.)
Requirements:
- Roleplay reaching the ancient doorway
- Roleplay discovering journal entries & opening the door
- Traverse through the dungeon & slay 4 * party normal monsters & 2 * party elite monsters
- Defeat miniboss
- Defeat boss
Summary:
The players must roleplay their journey through the tenth floor searching for the doors. Once discovered they will find a single slot for one key. The keys will then glow and players can fuse them into one larger key which can be used to unlock the massive doors. In front of the doors is a journal entry which the players can pick up and read (in spoiler below). As the doors begin to creak open, the players can hear the dark words of Zymirth laughing as he flies overhead towards the open doors.
"Fools! You have only sealed your doom! My master awakens at last! And I his faithful servant shall lead his armies to desolate these lands! Ahahahahaha!"
Inside the doors is a massive dungeon with huge curved tunnels and oversized rooms for various uses. Many carvings and stories are etched into the walls as well.
Journal Entry: Warning! If you wish to avoid spoilers do not read this until your character picks it up and reads it
SpoilerWhoever finds this journal. Whoever reads this. Please understand. If you take this task I leave for you, you face unimaginable danger. I ask you to fight to redeem the dragons. Free them of their guilt. End the lineage of all the evil dragons, and help to protect and free the others. If you make it to the end of the line, you won't be alone. Even if there are no good dragons left out there in the world, I will be there to help you. Zeonig must fall.
Outline:
Past the doors is a dungeon which the players must traverse through is a labyrinth of corridors and massive rooms, both bearing plenty of room for massive creatures to maneuver through. These corridors are twenty four feet tall and are lit by glowstones hanging on the walls and in the water on either side. Runes and symbols line and decorate the columns, and the walls have art and depictions of different scenes from ancient times. Throughout the many corridors are drawings and carvings, runes and writings depicting what appears to be an ancient war against some dark entity which ruled over the dragons. It is impossible to translate any of them, despite the entire structure being perfectly preserved.
Upon defeating enough undead hunters and undead abominations, the players will find a large gate room. Inside this gate room are trees, brush, grass, and even magically generated sunlight. At the gate itself Zymirth can be found desperately trying to open up the gate. However upon finding the players he will viciously attack them for the sole purpose of protecting his master.
Enemies:

<<Undead Dragon Hunter>>
Having been dead, unburied and abandoned for countless ages, these ancient hunters no longer care what they do, who they serve, or why they fight. They resort only to instinct or to direct commands from Zymirth, and never feel or think anything of their own. Despite this their fighting nature, style, skill and expertise remain, resulting in an opponent who will never be fazed or fearful, show no hesitation or emotion, and fight with deadly skill and precision.
HP: 400
Base DMG (see Masters of the Art): 8
MIT: 50
ACC: 3
EVA: 1True Undead: Undead dragon hunters are completely immune to debuffs, paralysis and stun, and all DoTs save for fire based enhancements. Attacks from weapons with the fallen enhancement deal 10% less damage against them and Holy deals 50% more (rounded down). They are unaffected by any skill used to generate additional hate.
Masters of the Art: Every turn, the dragon hunters attack by using one of the following sword arts from the One Handed Straight Sword and Curved Sword sword art lists based on their CD roll:- CD 1 - 3: Shadow Explosion (One Handed Straight Sword)
- CD 4 - 6: Nova Ascension (One Handed Straight Sword)
- CD 7 - 9: Legion Destroyer (Curved Sword)
- CD 10 - 12: Butterfly Illusion (Curved Sword)
Master over Slave: During the fight with Zymirth, the dragon will command the Undead Dragon Hunters to intercept any succesful attacks against Zymirth. While intercepting attacks against Zymirth, the Undead Dragon Hunters have their mitigation halved (50 ➜ 25) and receive double the final damage. They can do this once every three rounds, and can deal their attacks while protecting Zymirth.

<<Undead Abomination>>
This creature is a fusion of countless bones from both humanoids and dragons left scattered across the ground, as well as random souls forced into it to give it life. These abominations act with ruthless brutality, having minimal to no thoughts of their own as they are nothing more than a mass of souls and bodies forced into one. While this prevents the creature from thinking logically in any way sense or form, it gives the monster unimaginable willpower and rage. This creature attacks with reckless abandon, making wide heavy strikes, charges and rushes, with no hesitation or fear of it's own life.
HP: 600
DMG: 150
MIT: 50
ACC: 3
EVA: -1True Undead: Undead Abominations are completely immune to debuffs, paralysis and stun, and all DoTs save for fire based enhancements. Attacks from weapons with the fallen enhancement deal 10% less damage against them and Holy deals 100% more (rounded down). All hate generating skills and enhancements are doubly effective.
Wild Rage: Every three rounds, or anytime a player gains more than 4 hate in a single round, the undead abomination swings it's arms, legs, tail(s) and arms at everything around it dealing an additional 125 damage to each player in the party with the most hate.
<<Zymirth the Wretched>>
As before Zymirth will act primarily as backup and support for his minions, letting them attack the players directly for the most part. However he will also be more aggressive, choosing to attack the players from the skies whenever he has no need to ressurrect his undead warriors or abominations, or use his roar or breath attack. When he attacks it is vicious and filled with malice, but is also driven by fear should the players defeat him and somehow get past the gate itself. His arrogant personality remains, but he is more desperate, more vile, and more aggressive in his actions and words now.When he begins channeling dark magic through his being, his body begins to decay even further. Now acting on pure desperation he strikes like a berserker, seeking to obliterate every player within it's gaze.
HP: 2700
DMG: 300
MIT: 25
ACC: 1
EVA: 4
Necrotic Body: While Zymirth's scales are all but rotten away, resulting in a pitiful amount of mitigation, his magic infused body makes up for it with the increased agility, but also powerful regeneration powers. Each passing turn he regenerates 50 points of damage, and heals himself for 25 points per hit he makes on the players. However he mostly lets his minions fight in his stead, only making an attack every other turn. Zymirth is immune to paralysis, stun, bleed, and poison enhancements. He receives double damage from fire based damage.
Dragon of Old: Unlike any of the previous dragons fought, Zymirth is not a descendant of the ancient dragons, but is one of the ancient dragons. As a result, he possesses a voice of authority unlike any other, allowing him to create an almighty roar. This roar paralyzes the players for one turn, as well as reduces their accuracy and evasion by 1 point for the two turns following stun recovery. Finally it reduces final damage of the players by 10% (after mitigation, rounded down) for the two turns following stun recovery. This ability has a 4 turn cooldown (based on combat rounds, not the number of attacks Zymirth makes), and Zymirth will use it on his third turn in combat.
Undead Summoning: Zymirth can and will conjure, summon and raise undead dragon hunters and abominations from dungeon around them. While this ability has no cooldown, Zymirth can only have four dragon hunters and two abominations on the battlefield at a time, and furthermore it takes one full round for the undead to make it's way into the chamber from the corridors outside. In order to ressurrect the dead he requires a post action, meaning he cannot attack, use his breath attack or roar, and has no evasion bonus. He will not ressurrect his undead forces again unless half or more have been slain and can ressurrect more than one at a time.
Breath Attack: Zymirth's breath attack is a very powerful and deadly acid spray that can hit the entire party, Potag included. Should his breath attack hit, the victim will not suffer any immediate direct damage, but will receive 100 points of unmitigatable acid damage for 2 turns. Before Necrotic Surge, he can only use this ability once. After Necrotic Surge, this ability gains a cooldown of 2 turns.
Necrotic Surge: As a final attempt to defeat the players, if his health reaches 15% or below, he will cancel the spell keeping the undead minions alive and will instead empower himself with dark magic. The result will restore his health to 25% and increase his stats as such: +2 additional accuracy, +30 damage, and makes Breath Attack an ability that has a cooldown of 2 turns. This only activates once and lasts the entire fight.
Epilogue:
SpoilerAs Zymirth takes his final breath, he pleads his master for forgiveness. He then collapses onto the ground and his body begins to turn to dust. A secret compartment in the dungeon opens up, revealing a large chest and the rewards for clearing the dungeon and the quest. The great door, however, remains closed. Whatever mysteries, secrets, and monsters lie beyond it's doors, appears to be sealed forevermore.
-
<<Floor 26>>
Floor 26 is encompassed entirely by the sprawling capital city of the Empire of Ladonia. Draped over a series of low, gently sloping hills and valleys, its urban landscape extends to the very edge of the floor, where the walls that supposedly protect it also serve to mark the outer edges of the floating castle. Standing upon their battlements, players see golden, wheat-laden fields stretching to distant forests and unreachable mountains beyond. It is an illusion, projected at the city limits to maintain the fiction of imperial scale and might. NPCs are perfectly capable of traveling beyond the walls, but any player attempting to cross the threshold instantly reappears at the floor’s teleportation portal.
Ladonia is the city’s name, as much as the nation that it purports to rule. Grand in scale and opulence, its wealthiest quarters are unmatched by anything that players have seen anywhere in Aincrad. White marble and limestone buildings make up most of Ladonia’s architecture, much of it a mismatch of different styles and influences copied from fringe borderlands and other realms conquered to fuel its ever-expanding glory. Galtea was the latest such rival to fall, and many of its most skilled craftsmen and scholars have been dragged to the outskirts, bound by oaths of indentured servitude in exchange for paltry recompense and the pleasure of serving their conquerors. Those less fortunate were brought here in chains. It is a miserable existence, mocking what little remains of their fallen pride and culture. Nothing remains of Galtea itself, as a nation, since Ladonia unleashed the might of its skybound armada and their divinely granted and devastating weapons upon them.
Unlike other floors, where variations in geography and the sprinkle of smaller settlements often determine prominent areas and zones, Ladonia’s neighborhoods and major districts form the equivalent. Seemingly endless layers of ancient catacombs lay concealed below the artisanal glitz and pomp that govern the upper avenues, and here the truth of Ladonia is revealed. Its vast wealth and power were built upon the backs of people, many of them used, consumed, then discarded or ground down to the bone. They end up in the sprawling lower levels without status of privilege, or access to the grandeur they produced for others. Here, they seethe, and the powder-keg waits for its match.
At the center of the city is the seat of the Empire. From the Imperial Palace, Grand Imperator Razwell III governs his infinite domains with the assistance of his three oldest sons, the princes Rasler, Vex, and Lamont. Aging and faltering, the Emperor is beset by threats on all sides, some within his own, extensive family. The native population of Ladonia is mostly human, but nearly any imaginable manner of humanoid can be found walking its streets, or more likely below them if considered beneath notice to those who reign. Nobles, courtesans and merchants walk richly appointed streets and broad avenues, many carried upon palanquins and other assorted modes of travels. The dilettantes attempt to out-do each other in splendor, while the masses watch. The common folk stick to the outskirts and imperial guard roam everywhere, half of the latter considered to be as corrupt as those they are sworn to protect. Ladonia simultaneously prospers and teeters precariously under the weight of its own successes.
Ladonia boasts that its recent defeat of the rival Kingdom of Galtea was made possible by a great gift, granted to them by the Empire’s divine patrons: the Lords of Fate. Though few actually know what it was, as the battle took place far from the capital, it wiped out Galtea with a single use. Galtean refugees speak of a bright flash of light before an intense heat washed over the kingdom and destroyed three-quarters of their fair city in an instant. Despite having lost their homeland, some survivors are said to have banded together and infiltrated Ladonia itself, bearing plans to exact vengeance. Wars are brewing in alleys and parlours of the empire, with opportunities aplenty for devoted champions and the more notorious sort. Many Galteans still follow the lead of their King, whom they claim escaped their realm’s fall and plots against those who wronged them. He’s become a martyr and folk hero to many, receiving credit for every slight or mockery to imperial authority. Wanted posters litter the lower levels, to no avail. Suspects are rounded up and merciless interrogated, fanning growing flames of rebellion. Even the Lords of Fate are said to have gone silent with concern.
Main Settlement:
<<Ladonia: The Imperial Quarter>>
Imperial Ladonia is known for its grand scale and military might. Nowhere is this more blatantly on display than the regimented rows of austere-looking barracks, training grounds, administrative structures and assorted panoplies of power on display around the imperial palace. The central structure is immense, dwarfing everything else in the city, with multiple pavilion-filled gardens, lavish fountains, awe-inspiring fields of sculptures and other amenities beyond imagination, each of them dialed up to eleven on the quality scale. It is impossible not to be moved by the treasures and history gathered in its endless colonnades and halls.
Intended as a monument, as much as the Imperial residence, the palace likewise functions as an impenetrable, multi-layered fortress. Clerks, priests, warriors and courtesans mingle in accordance with an intricate dance throughout the grounds. Outsiders stand out starkly, being unfamiliar with the cloaked dance of local politics, etiquette and prestige. They quickly become pawns in the Machiavellian games and power plays of the many factions struggling for control.
Not actually a safe zone, the many guards on patrol eye all players warily, regardless of their status. Anyone foolish enough to cause a scene will be dealt with swiftly and harshly. Still, agents and assassins remain commonplace here, wielded as weapons in deadly contests and vendetta, often hiding in plain sight.
The royal family rarely leaves the central tower residence, which literally and figuratively overshadows all other structures with its magnificent craftsmanship. Finely detailed sculptural relief covers every inch of the tower’s entire surface, recounting the history of Ladonia’s rise. The uppermost reaches are said to shroud a shrine and chapel to the Lords of Fate and are said to contain a prophecy that will doom the Empire. Players may only enter the parlors and vestibules of the lowest floor. All upper levels remain barred to them by the system itself.
Other Locations:
◉ « Nobles District »
SpoilerRenowned for housing the palaces and estates of the wealthiest and most celebrated noble families in the Empire, this district is second only to the Imperial Quarter in its opulence and security, though the latter is more often provided by the men at arms of each house. The Imperial Guard maintain a modest, watchful presence, mindful of their status as active reminders of Imperial authority. Forces from various factions have been known to clash openly, but the embarrassment of censure for such brazen violence is considered uncouth and often stains the reputations of both houses. The true dangers here are rarely plainly seen.
Should players not carry themselves with confidence through this area, arrogant nobles will eat them alive by insulting them in any way possible. Wealth, influence and prestige are the only true marks of merit here, and those who might voice their disagreement with the status quo will promptly be reminded of their place, and any related slights avenged from the shadows.
◉ « Aquilainean Bazaar »
Spoiler
Unlike most market districts scattered throughout Aincrad’s other floors, the Aquilainean Bazaar purports to provide only the highest quality luxury goods, made available at extravagantly inflated prices. Much of it is dross dressed up with flashy baubles and exotic bits of colour and scents. Only the discerning consumer can spot the true treasures among the trash, or so say the absurdly rich patrons who often make sport of declaring, then parading their ridiculous expenditures.
The Imperial Guard maintain a heavy presence throughout the marketplace, but half of them are only there to collect graft and do little to keep the peace. The large number of travelers and mercenaries who frequent the various shops only complicates the efforts of those with more honest intentions. Meanwhile, the entire place is teeming with thieves, many operating under the auspices of the Brazen Guile - a shadowy syndicate of misanthropes with fingers in every pie across all of Ladonia.
The only safe zone on the entire floor is located around the Concordance Commons, near the eastern outskirts of the city, and the caravan gates. It is also where the floor’s teleportation can be found. Shops, taverns and inns surround the space, offering a spectacular spectrum of wares, services and lodgings to travelers from the Empire’s many provinces and stranger lands beyond.
◉ « Ladonian Skyport »
Spoiler
Located on the edge of the Aquilainean Markets, the spire of Ladonia’s impressive skyport is second only to the imperial palace in height and magnificence, standing as a symbolic reminder of who actually keeps the col flowing. Massive spars, dotted with berths for private, commercial and military airships span outward from the central tower, which uses a series of variant teleporters to move goods and people about, though only in the skyport itself.
Security is especially tight throughout the facility, and access to its uppermost reaches is wholly restricted to Ladonian military officers. Players cannot travel more than ten levels up the tower, though it visibly rises dozens of storeys beyond that point. Deadly battleships can be seen hovering at the topmost levels, like an omnipresent threat and reminder of the Emperor’s true instruments to power.
Smaller aerial taxies are readily available for use throughout the lower spars, shuttling people to fixed travel points all over the city. Fares vary by the size and level of luxury of the ferry. Private carriage can also be arranged, and features prominently as a tourist attraction and feature in romantic escapades.
Skyrat pirates are rumored to have agents in place throughout the skyport’s infrastructure, smuggling all manner of goods about the city under the guise of legitimate business. Their ships occasionally make daring raids on isolated docks and wayward transports that wander too far from the patrol lanes and picket ships that litter Ladonia’s skyline.
◉ « Galtean Refugee Zone »
Spoiler
The designated zone at the edge of the city where survivors of the destroyed Kingdom of Galtea are permitted to squat. It is technically outside the walls, and the only part of the floor accessible to players beyond that boundary. Part slum, part improvised prison camp, it is relatively easy to enter and much harder to leave. A small palisade rings its outer reaches, with weapons pointed inward, making it quite clear where Ladonia considers the threat to be.
Found in a rocky area near the perimeter of Ladonia, the surviving Galteans find themselves relegated here in the absence of any possibility that they could afford to live anywhere else. Numerous guards patrol the area and remain on high alert, watching over the locals and treating them as one might expect of a conquering power towards the conquered. Ladonia isn’t know for its beneficence.
The Galteans are considered to be the lowest end of the social spectrum in Ladonia, often forced to wear a yellow armband or other marks in order to be granted limited access to the city proper, and only at the invite of some other party. While anybody is allowed access into the area, those who visit will be treated suspiciously by the guards, inviting the trouble that usually follows. The Galteans have access to water and limited supplies of food as provided by the Empire, but only if they earn their keep by providing either some specialized service that brought them here in the first place, or as indentured labour working in nearby mines or performing other backbreaking tasks - all for the benefit of the Empire.
Any Galtean who steps or speaks out of line is typically beaten, sometimes to the point of death. Few Galtean Refugees willingly engage in discourse with strangers, especially native Ladonians. They mention little to nothing of their homeland or how it came to its end, though the symbol of the grey raven appears with unusual frequency throughout the camp, drawing much ire from the guards. It was once the mark of Galtea’s missing king.
◉ « Low-Ladonia »
Spoiler
The slums of Ladonia are located in extensive catacombs and sewers directly beneath the city, extending into exposed, poorer residential quarters along the outer edges of the floor. Those that dwell here remain at the bottom of the food chain, sleeping in tents or derelict buildings abandoned as their former occupants moved on to better things.
While treading through Low-Ladonia, one can easily find that their belongings have been pickpocketed by NPC's. There isn't much currency flowing through the slums, but there remain a few vendors selling various essentials such as food. Of course, it is low-quality but sold at dirt cheap prices to match the economy. No guards patrol the area, allowing just about anything to happen. Fights often break out and most NPC's wouldn't bat an eye at finding a corpse face down in the middle of the open street. A few Galteans have also managed to escape the Refugee zone and have made their way down here, shedding or concealing whatever marked their heritage to conceal their identities.
Located underground, or in the shadows of the walls and upper districts, Low-Ladonia is cold and damp, having little access to direct sunlight. There is a lingering odor in the air, mostly from connections to the old sewers, some of which remain active. The ancient sewer system remains accessible through a series of rusted gates and tunnels. Few people in the city proper even remember that these places exist.
The Sewers are not without dangers as a wide variety of monsters can be found within. True peril comes in the form of Blighter covers, Brazen Guile spy rings and splinter cells, and the occasional Galtean rebels. Strangely, having an orange icon over your head tends to earn you a better reception with most of the mobs and NPCs in these areas, to the extent that some will actively parley with players who would be actively assaulted were there crystals shining green.
Transportation
Ladonia’s infrastructure is unmatched, offering practically every form of travel convenience imaginable. Mounts of every shape and size can be purchased or rented here, though they cannot leave the bounds of the floor. Carriages, carts and palanquins fill the streets, just as airships of every shape and size litter the skies. Travel in Ladonia is more constrained by whether you should be someplace, rather than how you’re going to get there.
Common Mobs of Floor Twenty-Six
Spoiler-
Corrupt Guard - Indistinguishable from the multitude of decent and just guardsmen and soldiers who patrol the streets across Ladonia, a notable number are known to be little more than glorified bullied and petty tyrants carving out their own little fiefdoms in the sidestreets and alleyways of the capital. Protection rackets, graft and other scams run rampant. Typically heavily armed, well-trained and travelling in numbers, a group of soured guardsmen can prove to be a serious threat to a cornered, mouthy player.
- Location: Anywhere except the catacombs of Low-Ladonia
-
Brazen Guile Assassin - Said to operate with impunity throughout the capital, the Brazen Guile is a criminal syndicate that dominates the Ladonian underworld. Their assassins are popular tools of the nobles, retained to remove obstacles to their ambitions or avenge perceived slights, real or otherwise. Practiced at blending in, any mob on the street might turn out to be one of their notorious agents. They tend to favor small, discreet weapons that can be easily concealed, unless posing as sell-swords, adventurers, or even guards.
- Location: Anywhere
-
Skyrat Pirate - Daring swashbucklers who frequently raid ships the drift too far from the sky port, they have also been known to run various rackets on its docks, pilfering supplies and even stealing entire ships. Lightly armored, they rely on mobility and agility that mirror the needs of their sailing skills.
- Location: Ladonian Skyport, Low-Ladonia
-
Belligerent Mercenary - Since the end of the Galtean War, thousands of flush and bored warriors have flooded the city's markets, inns and taverns, telling grand tales of their exploits and smashing each other's faces in out of boredom, grief, or some other equally unworthy reason. Mercenaries come in all shapes and sizes, and wield any imaginable form of armor and weaponry. They also often belong to companies that will likely come looking if some of their members have been roughed up or killed.
- Location: Nobles District, Aquilainean Bazaar, Low-Ladonia
-
Urchin Pickpocket - Small. Dirty. Often mischievously adorable and prone to speaking with British accents for no apparent reason. They excel at fetching turkeys, sneaking through undersized openings, as well as pilfering unattended belonging. Never turn your back. Plus, small hands.
- Location: Aquilainean Bazaar, Low-Ladonia, Galtean Refugee Zone
-
Galtean Rebel - Survivors of the decimation of their Kingdom, their numbers are growing in the slums and catacombs, organizing into cells and actively striking against Ladonia at the very heart of its power. Most are fanatics, driven by grief, desperation or just plain rage at the loss of their homeland and loved ones. They bear no obvious identifying markings, unless earned as part of their arrival as refugees. Their weapons and armor are often scavenged and of poorer quality.
- Location: Low-Ladonia, Galtean Refugee Zone
-
Arrogant Fop - It's a common joke among the citizenry that they are more self-obsessed dilettantes in the streets than there are people for them to step on. Were is not for the hefty escorts that surround them, more than a few would find themselves pelted with vegetable matter for their intolerable attitudes. But, sword carry weight, and the worst nobles seem to be constantly surrounded by the most protective assortment. Though arrogant and often cruel, it would be unwise to assume that they are also helpless cowards. Nobles do not survive to adulthood in this city without knowing how to defend themselves, especially those with a penchant for cutting wit.
- Location: Imperial Quarter, Nobles District, Aquilainean Bazaar
Field Boss of Floor Twenty-Six
Spoiler
<<Inanos, The Aether Wurm>>
Location: Low-Ladonia Catacombs, in a maze of multicolored fog.
A creature that is manifested of a thick, rainbow colored fog. Each step a thunderous boom, and being within its proximity seems to destroy your vitality. This beast is a gargantuan one, where only the strongest of players stand a chance.
HP: 3650/3650 | MIT: 200 | DMG: 200 | ACC: 6 | EVA: -2
Abilities:
- Hunger | Inanos gains [Focus] on all attacks made against targets with any missing hitpoints.
- Toxic Film | Each turn in combat applies a single stack of T4 Envenom to a player, whenever a player takes a post action.
- Putrid Hide | Successful attacks against Inanos will apply a stack of T4 Envenom to the attacker.
- Decaying Bite | On a BD 10, Inanos will apply a stack of T4 Envenom. In addition to its normal attack, all stacks of Envenom on the target will deal all their remaining damage and then be removed from the target.
- Tier Lock | For the duration of the fight, all of the participants’ stats that scale with Tier are calculated as though they’re Tier 4. [DMG/MIT/BLEED enhancements etc.] This skill only locks downward. Those at Tier 1, Tier 2, or Tier 3 will still have T1, T2, or T3 stats, respectively.
Drop:
Iridescent Tooth (T4/Reusable/Consumable) | Usable as free action once per combat after you apply a stack of Envenom. This item consumes all of your stacks of Envenom on the target dealing unmitigated damage equal to the damage those stacks would have dealt over their entire remaining durations.« Floor Twenty-Six Labyrinth »
No details are currently known about the location or nature of the labyrinth on Floor 26.
To locate it, a scouting group must roll a combined LD of 150. Refer to the Tutorial for more information on scouting protocol.
Quests:
Labyrinth: Six Feet Under [Labyrinth Boss]
Boss: Paving the Way to Floor 27 [Gabrandr-The Broken King] -
Corrupt Guard - Indistinguishable from the multitude of decent and just guardsmen and soldiers who patrol the streets across Ladonia, a notable number are known to be little more than glorified bullied and petty tyrants carving out their own little fiefdoms in the sidestreets and alleyways of the capital. Protection rackets, graft and other scams run rampant. Typically heavily armed, well-trained and travelling in numbers, a group of soured guardsmen can prove to be a serious threat to a cornered, mouthy player.
-
<<Floor 25>>
Floor 25 is an ominous and foreboding floor, and yet also strangely calm, at least in certain areas. The staircase from floor twenty-four, below, emerges into what appears to be a shrine to some unknown entity. Stepping out of the shrine, visitors find themselves within the floor’s main settlement situated against the great gates of an immense and terrifying labyrinth. Its outer walls stretch higher than anyone could ever hope to reach, and are both flat and seamless. It is impossible to see over the top. The walls also stretch to Aincrad’s outer edge, to be found nearby in both directions, completely cutting off the majority of the floor from access. The only place left to go is the entrance.
What little can be seen outside the labyrinth is nothing but dangerously rough, uneven, even shattered and cracked terrain. Toxic smoke belches out from the ground, poisoning any entity foolish enough to attempt to cross over it. There is no wind, nor breeze, on this floor. The air is stale and cold. A thick blanket of low-hanging sooty-grey clouds hangs low in the skies, breaking only rarely to allow the slightest sliver of light to pass. Such respite is never known within the Labyrinth itself. Rain falls occasionally, and always directly downward and often as a deluge. The place is dour and depressing, at the best of times, weighing on the spirit and the soul of any who travel here.
The NPCs that inhabit the floor are a rugged mix of humans, orcs and minotaurs. Their culture and way of life is based entirely on cooperation and survival. Most if not all of the minotaurs are warriors, hunters, and shamans. Each stands between seven feet and nine feet tall. They also often sport trimmed beards, wearing beaded jewelry if they are shamans, or armor if they are warriors or hunters. The humans are primarily laborers, craftsmen, researchers and alchemists, favouring bright woven clothing, or gambeson armor and dark cloaks when hunting. The orcs are warriors, more often than not, but a select few among them also serve in other capacities. They are short of stature, standing between four and five feet tall, with orange-yellow skin, and often donning animal hides and leathers. Despite their vast differences in culture and history, they work together in surprising harmony for the sake of their common survival.Special Conditions:
Spoiler1. Players can only purchase housing in the main settlement.
2. All threads must begin outside the Labyrinth, and cannot end within the Labyrinth.
3. Players may receive 'starlight chalk' from the inhabitants of Lite'tara. The chalk allows the players to leave behind a line of chalk which they can then follow back to the entrance of the labyrinth. No matter how much the Labyrinth changes, the chalk line will remain unbroken, and always lead them home. If players do not take the chalk, they risk the chance of being lost. Needing to roll a modified LD 17+ to make it back out of the Labyrinth. Any chalk trails and marks a player makes disappears upon completion of their thread.
4. Players cannot escape combat while in the Labyrinth. Those using the hiding skill can use the Vanish mod to escape detection and attacks, but will not escape the monsters themselves. Monsters encountered must always be slain before the player(s) will be permitted to exit the Labyrinth. Players may attempt to reach a safe zone, such as Ogo’mathas, but the mobs will linger outside the walls in wait and combat will resume when they re-enter the Labyrinth. The only foolproof option for escape is to use a teleportation crystal.
5. Players will always incur the darkness penalty in the labyrinth, unless they have suitable means to counter it (i.e. source of light, night vision mod, etc.)
6. In the <<Endless Maze>>, while not actively involved in combat, each player must roll CD on every post. If the CD roll result is 1 or 4, a corresponding number of monsters emerges to attack. The type of monsters is determined by the LD value of the same roll (see the list of Common Monsters for Floor Twenty Five, below). Monsters within the <<Endless Maze>> are much more dangerous than anywhere else on the floor, and must include the variant stats listed in the ‘Common Mobs of Floor Twenty Five’ entries, below.
Legends of an entity known only as "The Shadow" are commonplace among the inhabitants of this floor. Stories of an ancient, non-corporeal being responsible for spawning all of the evil in this land back Aincrad’s prehistory. When the players arrived on this floor, for the first time, local shamans declared that their most important prophecy would soon be fulfilled. When the players returned and declared the Shadow to be dead, the inhabitants of the floor rejoiced and celebrated for many days. They began to venture into the labyrinth more frequently to learn more about their distant ancestors, yet with the same level of precautions as before. For, despite Shadow's legendary threat having been removed, the Labyrinth was no less dangerous than before. It only meant they could delve deeper and further without fear of becoming darklings.
Main Settlement:
<<Lite'tara>>

Lite'tara, meaning 'standing light', is the one and only settlement outside of the Labyrinth, and was once also known as the Settlement of the Iron Fist. It spreads out across the shallow valley that rests between the Labyrinth gate and the edge of the floor itself. The place consists mostly of tattered tents and small buildings such as huts and hovels with a smattering of larger cabins. Workplaces are usually open to the elements. A rare few have tarps overhead to protect their tools and equipment from rainfall. The local populace trudges along, as best they can, managing to scrape by and endure. Despite how grim and deadly this floor is, Lite’tara is relatively lively. Ringing hammers and the wafting scent of fresh cooked bread serve to break up the dreariness of the landscape. Hearty conversations are often accompanied by the prayers and chanting of shamans, and the occasional the boastful laughter of warriors. There is an undercurrent and spirit of life to the place, which offers hope.
A large cluster of tents and structures are set aside for research and alchemy, including a small library where all recorded knowledge is kept. The collective of shamans commune with ancient spirits and entities in their own set of rituals circles on the outskirts, and so forth. Every group has their place, integrated into the whole.
Standing at the gate of the labyrinth is a very old minotaur whose mane has turned gray. He hands out starlight chalk, which leaves magically glowing marks behind that followers can use to find their way back.
Sub-Settlements:
◉ « Ogo'mathas »
Spoiler
Ogo'mathas, meaning "City of Champions" is found deep within the Labyrinth, supposedly in the center of it. To find it players must roll a modified LD of 11+ twice. The entrance is easily spotted above ground, but the settlement itself lies beneath the surface. By observing the surroundings it becomes clear that the place once stood on the surface. It either sank or the Labyrinth was built up and over it. Populated primarily by minotaurs, it also hosts some who've become hopelessly lost in the Labyrinth and have given up any hope of ever escaping it. The stone buildings are ancient and covered with indecipherable text and images. The atmosphere here is grim and serious, with no entertainment to be found. Within the fortified town is a massive castle appointed to hold off the denizens of the Labyrinth and shelter the entire population, if things get really bad. A statue of Orgoth the Minotaur rests at the center of town. The text at the base of the statue reads: "The Greatest of Champions Shall Emerge When the Need is Most Dire."
Other Locations
◉ « The Labyrinth »
Spoiler
Taking up the vast majority of the floor, the Labyrinth is endless. By use of magic, supernatural power or some other force, the Labyrinth exists in a pocket dimension contained within the tower of Aincrad. It’s bigger on the inside, where a pale, dim sun barely managed to cast light enough to reach its outer walls. Nor does this paltry orb ever move, thus the darkness lies thick within the maze. The floor and walls are all completely smoothed and seamless stone. Throughout the Labyrinth are many square towers offering excellent vantage points from which to survey the maze. Most of them are spread great distances apart to make it hard to reach one from the other. Even these offer only a temporary benefit, as the Labyrinth itself changes constantly. Every hour, corridors shift slightly or turn differently, as new doors open while others close. Even the towers will slowly shift from one area to another nearby. A single day’s passage can result in an almost completely different maze design, not that time has any referential meaning here. Even worse, the maze isn't always completely flat, and can curve up and downhill. There are pits, traps, chasms and many other forms of malleable landscape and architecture.
Accidentally encountering another wanderer, whether by themselves or in a group, is practically impossible in the Labyrinth. Navigation is horribly difficult, and danger lurks around every corner. There are no natural sounds within the labyrinth, save those produced by players or the monsters they encounter. Only their own movement and voices will echo through the area. A sense of dread and fear clings to everyone who travels here. Many places in the Labyrinth are also filled with fog and mist, adding further confusion and disorientation. All dungeons on the floor will always be within the Labyrinth, and will always be a maze themselves. There are also several layers to the Labyrinth, being the surface and at least two subfloors of mazes below. Stairs leading between these layers are also scattered throughout, making it that much more difficult to navigate.
◉ « Shrine to Shadows »
Spoiler
Somewhere within the Labyrinth is a very ancient and unusual shrine. To find it, players must roll a modified LD of 20+. Located in a small clearing of soft soil with a spread of dry grass, a chilling breeze blows in a continuous circle around the shrine itself. Many carved stones are placed around the shrine as offerings, each with their own unreadable writing upon it. The shrine itself is a large stone arch with what appears to be an orb in the center. When approached, a pale blue light fills the interior of the orb, shining through its carvings and circular openings in its center. This light follows the players wherever they go, until they leave the shrine. Whenever the light is active, shadows in the clearing seem to gain substance and begin moving independently, as if reaching out to the carving symbols in hopes of communication. Once the players have seen the shrine light up, they will hear faint whispers from the darkness whenever traversing the floor, though they cannot discern what they say.
Any shamans hearing the description of the shrine cannot decide what to make of these omens, whether malevolent or benevolent. Nor can they confirm anything the players may ask or speculate. This is one of the only two locations where monsters will not appear in the Labyrinth.
◉ « Foreboding Towers »
Spoiler
Standing taller than any other structure, and found randomly throughout the Labyrinth, are ten foreboding and ominous towers. In order to find one, a player must roll an LD of 18+. These towers possess their own spiral staircase unlike the far shorter, square-shaped watch towers scattered throughout the Labyrinth. Journeying up the stairs is an exhausting ordeal, usually taking between two to three hours to ascend or descend, depending on the endurance of those making the attempt. At the top of each tower is some sort of arena-like floor, though there is no surrounding seating. Stone pillars stand along the edge of each ring, and lines, runes and texts are carved in as well. These platforms sit above the perpetual cloud cover of the Labyrinth, where the sun and sky shine a pale crimson. Most curiously, the locations of the towers shifts daily, rotating in a predictable, radial pattern with each other. No one has been able to discern why.
◉ « Shrines of Light »
Spoiler
Only found in rare caves that required an LD 16+ to discover, their telltale mark is the cobblestone pathway set into soft soil that draws explorers to them. At the end of the path and back of each cave is a circular stone platform with vibrant grass around it. One large pillar and two smaller ones serve as a shrine. Sunlight shines down from above, without any opening or reveal to indicate its sources. The closer a person gets to a shrine, the more relaxed they become. A warm feeling filling them, and soothing them of stresses and fears gather on their voyages. There are many of these shrines in the Labyrinth. Based on the writing, carvings and symbols found at each of them, they are dedicated to "light itself" or something similar. No one seems to know their origins. The shamans theorize that these shrines are devoted to an entity of light, though no one knows who or what it might be. This is one of the only two locations within the labyrinth where monsters do not appear.
Transportation
None. Walking and climbing are the only options.
Common Mobs of Floor Twenty-Five
Spoiler-
Goblins: LD: 1-3 Hostile humanoids with greenish-gray skin, pointed ears and standing about four feet tall, often with a sever hunch. They usually carry daggers, short swords, slingshots, and other such crude and basic weapons. Gathering in large numbers is what tends to make them most dangerous. Despite their small size, they are cunning and resilient.
- Locations: Entire Floor
- <<Endless Maze>> variant (LD 1-3): each goblin is riding a dire wolf and gains +2 evasion.
-
Lost Ones: After wandering the Labyrinth for too long without finding the way out, even the proudest and most noble souls can be driven to the brink of madness, or over it. Those who share this fate are collectively known as the “Lost Ones.”. Humans, minotaurs, and orcs have all fallen to the Labyrinth’s predations. They retain their combat skills, but have become wild and violent, no longer capable of discerning friend from foe, or even managing any form of rational discussion. They attack anyone on sight and will attempt to take, steal and rob anyone of their food. A few very rare cases are known to include a player who forgot their teleport crystal and lost their way inside. They are among the most deadly predators known to stalk the maze.
- Locations: The Labyrinth, Foreboding Towers
- <<Endless Maze>> variant (LD 4-6): each Lost One has +2 ACC and the Blight enhancement of a tier equal to that of the highest level player in the party.
-
Darklings: Darklings have always lived within the Labyrinth. They come out of hidden tunnels and caves, always lurking in the darkness. Relying on surprise attacks to stun or overwhelm their foes, they are masters of stealth and deception. Darklings are all twisted humans, orcs and minotaurs with greying, shriveled skin. They are incredibly pale and will recoil from light. Curiously they are the only creature in the entire floor that will approach the shrine of shadows, going so far as to offering it worship. They will never attack players at the shrine.
- Locations: The Labyrinth, Foreboding Towers. Shrine of Shadows.
- <<Endless Maze>> variant (LD 7-9): Darklings begin every combat with Hiding active and always acts first in the round. There will always be one Darkling for each player in the group, ensuring that each member is attacked. If the Darkling successfully maintains stealth, its initial attack will automatically hit. Afterwards they attack normally.
-
Umbral Giants: Ranging between nine feet tall to fourteen feet tall, these creatures roam the widest of corridors of the labyrinth. They wear minotaur hide clothing and carry with them long-handled stone clubs and mauls. They are aggressive and will attack anyone in sight. Only one Umbral Giant usually appears at a time, though they can be accompanied by other types of monsters.
- Locations: The Labyrinth.
- <<Endless Maze>> variant (LD 10-11): The attacks of Umbral Giants are AoE effects that can attack up to four players at a time. Final damage against an Umbral Giant is always reduced by 100, to a minimum of 1 damage.
-
Shadow Dragons: Among the rarest of monsters to be seen on this floor, shadow dragons are impressive for their speed and agility, and also small enough to fit through most of the Labyrinth’s corridors. Exceedingly dangerous, a single shadow dragon is considered a match for a party of four players. They are intelligent and capable of strategies, but not communication.
- Locations: Labyrinth, Foreboding Towers.
- <<Endless Maze>> variant (LD 12): Shadow Dragon statistics are equivalent to those of a sub-dungeon boss. Additionally, Dragons can only be affected by 1 debuff. Only one Shadow Dragon will appear when this variant applies.
-
Undead: Ranging from skeletons and zombies, ghouls and ghosts, large groups of undead roam the Labyrinth’s halls. Any NPC or player killed in the Labyrinth has its avatar brought back, by the malignant powers that govern the Labyrinth, as some form of undead monstrosity. The stronger individual, the stronger its undead duplicate.
- Locations: Labyrinth, Foreboding Towers.
- <<Endless Maze>> variant (LD 13-16): Undead are immune to all status effects.
-
Phase Spiders: Treacherous and unpredictable hunters, Phase Spiders hide inside the Labyrinth walls until an enemy comes too close, and then pounces to attack. The spiders have the shape of an immense black widow but it's entire body is silver-grey, giving it a ghost-like appearance.
- Locations: Labyrinth, Foreboding Towers.
- <<Endless Maze>> variant (LD 17-18): Phase Spiders gain +2 ACC, +1 EVA and the Phase enhancement.
-
Void Vipers: These massive serpents use their size to great advantage, blocking access to exits and easily rising to heights that might dissuade smaller opponents. They are incredibly fast attackers, despite their girth, with lightning quick reflexes allow them many openings. Typically solitary, Darklings have been known to ride a single Void Viper into battle while they rely on ranged weapons to attack.
- Locations: Labyrinth, Foreboding Towers.
- <<Endless Maze>> variant (LD 19-20): All attacks made by Void Vipers benefit from Focus, making their natural critical hit rate MD 8-10. They also gain the Envenom (Offensive) (2-slots) enhancement of a tier equal to that of the highest level player in the party.
Field Boss of Floor Twenty-Five
Spoiler
<<Maze Weaver>>
A nearly silent enemy, it is only the skittering of tiny feet that signal the arrival of the <<Maze Weaver>>. Despite towering over Players, this creature is exceptionally speedy, easily leaping from wall to wall. It has made the labyrinth it's own personal web, trapping those who least expect it.
HP: 3150/3150 | MIT: 180 | DMG: 290 | ACC: 4 | EVA: 4
Abilities:
- Eight Legs | Any attack against <<Maze Weaver>> that results in BD 6-8 will deal 75% its final damage (rounded down). Any BD 9-10 however will deal 150% its final damage (rounded down).
- Crushing Blow | On MD 9-10, <<Maze Weaver>> will crush the target’s armor, reducing their MIT by 20 for the remainder of the battle. This effect can stack up to two times.
- Silk Weaver | On CD 10+, instead of attacking, the <<Maze Weaver>> will set up a wall of silk that will absorb up to 300 DMG before breaking. Any attack from a weapon with a BURN enhancement will instantly get rid of it. Upon breaking the wall, this skill can only be activated again after three turns have passed.
- Hardened | Upon reaching 2500 HP, <<Maze Weaver’s>> MIT will be increased by +20, and its EVA reduced by -1 for the rest of the battle.
- Spider's Intuition | In the case of an LD 17+, the <<Maze Weaver>> will attack the Player with the lowest health for 260 mitigatable DMG, paralyzing them from the force of the hit.
- Tier Lock | For the duration of the fight, all of the participants’ stats that scale with Tier are calculated as though they’re Tier 4. [DMG/MIT/BLEED enhancements etc.] This skill only locks downward. Those at Tier 1, Tier 2, or Tier 3 will still have T1, T2, or T3 stats, respectively.
Drop:
“Iron Thread" (T4/Consumable/Re-usable); Applies to the whole party. The first enemy attack to land will deal 25% less damage, and deal the reduced damage to all enemies as an AoE. This buff is removed as soon as anyone gets hit. Reusable, once per thread. [Example: Player A uses buff. Players A, B and C all get buff. Enemy A hits Player A for 100 damage. 25 gets absorbed, and dealt as an AoE to Enemy A, B and C. The buff is removed from Players A, B and C.]
« Floor Twenty-Five Labyrinth »
Twenty four hours after the death of the floor boss and departure of the party, the <<Endless Maze>> at the heart of the Labyrinth turned inward and twisted itself into a confluence of paradoxical passages that is said to include three separate, internal layers. Its tunnels and corridors became more twisted, winding, complex and confusing than even the rest of the Labyrinth. Unlike the rest of the Labyrinth, this place actively changes constantly, as if it is governed by different physical laws that teeter too close to the nature of entropy for sanity to be maintained. No one should linger here long, for fear of losing their minds.
Players must roll LD 20+ to find a stair to the next deeper level, making rolls in accordance with the unique conditions listed above. The Detect and Reveal mods are applicable to these rolls. At the very center of the <<Endless Maze>>, players will find the room where Orgoth the Minotaur was freed from the Shadow’s influence and the players ultimately helped him defeat his villainous darkness. A crown-like ring of magical lights still floats over the room, like a spinning crown, eliminating all darkness from the space. No hostile mobs can enter the boss room, which has since become an unguarded safe zone.
Quests:
<<Essence Of Titanium>>Labyrinth: And a Shadow Attend [Labyrinth Boss]
Boss: Paving the Way to Floor 26 [Shadow, the Malevolent] -
Goblins: LD: 1-3 Hostile humanoids with greenish-gray skin, pointed ears and standing about four feet tall, often with a sever hunch. They usually carry daggers, short swords, slingshots, and other such crude and basic weapons. Gathering in large numbers is what tends to make them most dangerous. Despite their small size, they are cunning and resilient.
-
<Floor 24>>
Floor 24 is primarily an open expanse of water dotted by islands of various sizes that somehow float on or above the crystal clear water’s sparkling surface. A ring of high mountains surrounds the edge of the floor to contain the sea. Untethered to the ocean floor, the archipelago is clustered around a single main land mass, with dozens more hovering around in its orbit. No one seems able to explain how it is that the islands float in the water, or what causes some of them to spring up into the sky on thin spires of rock that resemble the shape of a funnel cloud. Nearly all of the lesser islands at surface level are connected by an intricate web of slender bridges, each no more than ten feet wide. They arch lazily up into the air to allow the passage of smaller vessels below. Some of the walkways are barely the breadth of a single person, which can require some patience or ingenuity when encountering another traveller heading in the opposite direction. Wider platforms sometimes break up the spans, serving as rest points and viewing areas. Water taxis also run often between various locations throughout the floor.
Most of the islands are unnaturally flat, seeming like they might once have belonged to a single expanse of grassland, making them ideal for agriculture and husbandry. Bright, sandy beaches frequently mark the edges of islands flush with the water’s surface. A few even have limited patches of tropical forest that also provides a source of lumber and other more exotic materials. The sea provides almost everything else, and is a vast, largely unexplored area that offers the floor’s primary source of threats.Though its waters are crystal clear, light penetrates barely 50 feet below the surface, beyond which everything is dim to completely dark. Most of the areas along the floor perimeter and in the centre, around the main island, are shallow enough to allow for easy exploration of the extensive coral reefs and all manner of abundant plant and animal life. The areas beyond belong to the depths, where the Sahagin and other dangers dwell.
Floor 24 is blessed with a perpetually warm and pleasant climate, marred only rarely by storms, which are otherwise anchored to specific islands along the outer fringe. There are no seasons here, and the locals are known throughout Aincrad for savouring their endless summers with frequent and excessive feasts of rich food and abundant drink.The inhabitants of the floor are very friendly and accepting of the players, whom they have to see as saviours and valued allies. Dressing mostly in togas, robes and other similarly loose garments, their behavior is noble, gentle and dignified. The people hold a great many festivals to their gods, praising them with great regularity. Legionnaire guards patrol and protect the settlements, maintaining fortified positions in the major settlements, from which they fan out to oversee the less inhabited areas. Legionary ships also patrol the seas. The inhabitants are peaceful, preferring to focus on the development of their arts and culture instead of battle. They do have one intransigent enemy: the water-dwelling Sahagin, with whom they have been at war for many years. Away from actual fields of battle, the only conflict here can be found on the sandy floors of the colosseum, where champions fight till one concedes defeat or dies in their tournaments.
The NPCs of floor 24 worship a pantheon of many gods. The greatest among them are well-known, with shrines and temples devoted to them found at nearly every turn. They are:
- Sol, god of sun, warmth, who is said to keep the sea from submerging the lands, as well as guard and protect the inhabitants.
- Luna, goddess of the moon, tranquility and the sea, who is said to provide peace and calm in the night, and to have set aside her wrath in the storm anchors.
- Ceras, goddess of agriculture and fertility.
- Aporo, god of festivals and music.
- Farna, god of wildlife and marine life.
- Flova, goddess of plant life and spring.
- Jandis, god of fate and choice.
- Jurio, goddess of love and marriage.
- Minharva, goddess of knowledge and wisdom.
- Ponito, god of death and winter.
- Mercora, god of champions and contests.
Aside from their gods, there is only one creature which the local NPCs fear: the demon beast known as Leviathan. Upon hearing the players’ boasts that the great nemesis had been slain, by their hands, there was much skepticism and denial. How could the mighty titan of the depths have been defeated? Yet, rather suddenly, attacks from its Sahagin minions dropped dramatically in frequency and severity. The truth was inescapable. These champions had indeed done the unthinkable. Celebrations erupted all across the archipelagos, and a new festival was dedicated to celebrating and commemorating their triumph. Even now, locals sing the praises of any player they encounter and offer thanks for their deeds, or of those who came before them.
Main Settlement:
<<Scalabis>>
Scalabis spreads across most of the main island which rests at the very center of the floor. It is the only island that has a bedrock foundation connecting it to the ocean bottom. Most of the large island is urbanized, made up of vast and layered architecture with a strong Roman-like style. Marble is everywhere, creating a luxurious and noble atmosphere, as well as a strong, formal sense of presence and identity. The main avenues are wide and well-organized. Navigation across the city is quick and simple. Citizens here smile and stop to help one another, as well as any players they encounter. Even the friendly neighbourhood legionnaires occasionally lend a hand. The city is replete with public facilities like temples, bathhouses, clinics, gardens, market squares, etc. No single building could be considered 'small' save, on its own, though a contest of comparative scales seems to underlay their otherwise functional natures. There are nobles living in the city, but they are often generous, courteous and gracious to both players and NPCs alike, regardless of their status.
Scalabis’ harbour and lighthouse dominate one portion of the shoreline, with a near-constant stream of traffic flowing in and out at all hours. The rest of the coast is open as beaches for anyone to enjoy, spending time amongst the waves, sun and sand as they please. Most of the shipping traffic consists of fishing vessels and biremes. The latter are primarily used for transportation of goods or people, but can also be found being used by legionnaire for their patrols.
Sub-Settlements:
◉ « Palma »
Spoiler
One of the few, hilly islands on the floor, Palma is located at the most eastern edge of the archipelago. It is the site of the main temple to Sol, outside of Scalabis. A grand, marble structure faces the point on the horizon where the sun rises each morning, bringing Sol home from his overnight journey. It is said the sea sparkles like a jewel when viewing it from the temple steps at dawn.
A small and far less impressive camp surrounds the temple, where local merchants and pilgrims gather to pay homage, or just to play tourist. Few permanent structures exist here, save the residences of the priestly orders attending the temple, a few storage buildings, and a small keep with a protective garrison of legionnaires.
◉ « Massa »
SpoilerMassa is Palma’s western counterpart and sacred ground to those who worship Luna. Unlike the pristine white marble of Sol’s temple, Luna’s is deeply striated with veins of indigo, reminiscent of the ocean depths that surround it. Where Palma is the daytime party place, Massa is preferred by visitors for romance and evenings filled with wild revelry. The locals are rarely awake during the day, preferring to keep a nocturnal schedule in deference to their goddess. Local amenities are otherwise nearly identical. Some say that the moon and setting sun's light create a beautiful purple color across the sea and sky if you watch the sunset on their hilltop.
◉ « Marsonia »
Spoiler
Marsonia is south of the Scalabris and concentrated around one medium sized island with several surrounding reefs that form a wide, curved lagoon. Immediately upon arrival, players will notice a large fleet of fishing boats, lured here by the fertile fishing grounds in the surrounding waters. The docks are rife with activity focused on trade and industry, where backroom bargains and handshake deals are standard stock, and even more interesting things happen in the lurking shadows. Players can find nearly any variety of clothing, armor, potions, food, and other goods in Marsonia’s markets. The resale market of player-made items is particularly popular.
Other Locations
◉ « The Colosseum »
Spoiler
The colosseum is, without a doubt, the largest single structure on the floor. Open daily, it features everything from mock-battles, for personal training to fantastic festivals and events, to full-fledged battle royale where combatants duel to the death. Despite their enlightened demeanors, the arena serves as the outlet for floor 24’s NPCs’ darker impulses.
Tournaments and contests of strength and valor draw the biggest crowds. Most of the contestants fight until the other yields, but it is not unheard of for a fight to continue until one or the other dies accidentally or by design. The terrain inside the colosseum can be widely manipulated and modified to suit the needs of the day, ranging from flat earthen land to angular, broken ground with large stones and boulders, or even a pool of water in the center with a wooden platform. This enables every type of warrior, with various skill sets, to test themselves at advantage or disadvantage, depending on their talents. If players choose to have a duel in this arena, the locals will often come to watch should they hear the news, as it is a public place.
◉ « Raitoboru Bay »
Spoiler
This location is famous as a vacation spot for single and courting players and NPCs alike. It is said to be unsurpassed for general relaxation and ambiance. Under sunlight and moonlight, the bay has vastly different colorings and sparkles in the most spectacular manner. Its waves and tides are never violent. The waters even seem to actively avoid knocking over anything constructed of sand on the island’s beaches, and dampen splashes directed against anyone who doesn’t wish to get wet. Swimming in these waters eases tension, bolstered by inexplicable added buoyancy. Even the most adamant, hard-case disciplinarians and edgelords will have their muscles relax, energies recover, and find themselves rejuvenated overall. It is even rumored that, unless the person wishes to remain so, no one leaves the bay with sadness, anger, fear or regret lingering in their heart.
◉ « Paradise Islands »
Spoiler
Located in the northern waters, the Paradise Islands are among the most rugged on the floor. Dotted with cliffs faces, rock spires and partially overgrown by jungle, this area is favoured by those who prefer a vacation filled with athletic activity and challenges.
Each island differs greatly in shape, size, vegetation and wildlife. Great spans of rock, wayward vines, interlaced branches, caves and grottos seem to interconnect the chain. Monsters are actually rare here, which adds to its popularity as a tourist site. Rare and secret ingredients required to make potions of water breathing are said to be hidden among the islands’ thick jungles, though no players have yet to be able to confirm it.
◉ « Storm Anchor Islands »
SpoilerFloor 24’s fantastic climate is unnatural, apparently by design. Raucous rains and thunderstorms are somehow tethered to four specific, rocky and barren islands scattered at far corners of its otherwise calm and open waters. Divers report seeing massive metal chains linking the underside of these largely featureless islands to something in the dark, underwater depths, but none have ever managed to find their ends. Perpetual rains and lightning scour their rocky, broken surfaces, preventing any life from grabbing hold, yet fragments of masonry and hints of old foundations can sometimes be found. No one knows who established the Storm Anchor Islands, how, or even why. If asked about them, the local NPCs just shrug and give thanks to their pantheon for having sequestered the worst and most violent weather away from the rest of their waters.
◉ « Underwater Ruins »
Spoiler
An uncanny abundance of ancient ruined cities and other hints of lost civilizations are scattered throughout the ocean floor, linked by remnants of long-lost roads and pathways that must once have connected them. It is almost as if an entire underwater world, an entire kingdom or empire, sunk into the sea all at once. Most of these ruins are now occupied by Sahagin, who utilize the fractured battlements to house their own fledgling society. Rumours are rife that the Sahagin are actually the twisted descendants of whatever realm was lost to the ocean floor. Each ruin contains everything one would find in ancient cities, towns and settlements, ranging from temples and shrines, castles and colosseums, to farmsteads with pens and pastures for livestock long since vanished. Leviathan once dwelled in a castle that dominated the largest of these ruins, and is strongly suspected of having played a preeminent role in whatever calamity befell its people.
Transportation
The primary mode of foot traffic between the islands of the floor are wooden raft bridges, which consist of two ropes attached to either side of an island. Tied to the ropes are wooden panels that float on the water which the player walks on when crossing them. Some pathways are suspended bridges or even impossibly slender stone spans, giving a clear access for ships to sail under them. A wide variety of water-borne vessels are also utilized, particularly for the shipment of bulk goods or large numbers of people. Water taxis take many forms and frequently ferry people to and fro from popular docks and waypoints scattered throughout the floor. Every island is linked to the rest by some form of physical connection, supplemented as required by naval traffic.
Common Mobs of Floor Twenty-Four
Spoiler-
Sphinxes: Large and highly intelligent beings with the head of a man and the body of a lion, these mythical creatures are normally passive unless provoked, though they are also highly sensitive to slights of courtesy. Their very territorial natures ensure that they are always met as solitary creatures. Those who seek passage through the lands they have claimed as their own will usually be offered a chance at passage in the form of a complex, puzzling or even paradoxical question or riddle. If the right answer is given the player may cross. If not, the sphinx will bar their way, by force if necessary. Attempts to sneak past or otherwise bypass the sphinx’s challenge is considered extremely rude, and considered to be just cause for disembowelment.
- Location: Any island not part of the settlements, Paradise Islands or Raitoboru bay.
-
Sirens: Rare and mysterious beings, they sing a song that pulls at the hearts of NPCs and Players alike, particularly males. When players hear its hypnotic lyrics, they find themselves inexorably drawn to them as if answering a call from their own memories and emotions, making them especially placid, peaceful, and eventually sleepy. One player who encountered a siren stated that if his friend hadn't played a song crystal to counter it, he might have stayed on the water forever listening to it, or even dived in to search for its source. Sirens can appear male or female, and will appear and sound differently to each person. They prefer to lure their prey into the open water, or into isolated caves and bluffs, where they can more easily control and ultimately devour them.
- Locations: Isolated places with no nearby settlements, outposts or homes, etc.
-
Harpies: Strange, bird-like creatures with humanoid heads and torsos, but the feathered arms, legs of an avian, harpy are said to be the personification of storm winds and vengeance. They nest on high cliffs and bluffs, raiding ships and nearby settlements for food and shiny baubles. Not especially intelligent, they are still possessed of a certain stealth and cunning, and can appear in large enough numbers to pose a serious threat. Harpies are capable of flight, preferring to save their energy by gliding, and typically dive upon their victims to catch them by surprise.
- Location: Any island not part of the settlements, Paradise Islands or Raitoboru bay.
-
Sea Serpent: Giant snakes which live in the seas and ocean. They attack anyone that travels too far from the common routes between islands. Nowhere near as large or massive as Leviathan, they are sometimes called "the children of the devil". Even though the inhabitants treat them as children of a demon, they are in fact, nothing more than giant snakes that live in the ocean.
- Location: Ocean
-
Sahagin: Humanoids with exaggerated fish characteristics, such as fins, all-black eyes, webbed feet and hands, gills and tails. They are sluggish on land, but devilishly fast in the water. Capable of wielding all manner of weapons, they often prefer harpoons, tridents and lances - anything capable of easy movement underwater. Since Leviathan's death, their boldness and aggression has lessened considerably, and they have tended to remain in their underwater realm, but some suspect that new leadership could end the current calm with little warning.
-
Location: Ocean
-
Location: Ocean
Field Boss of Floor Twenty-Four
Spoiler
<<Piasuhon>>
On Floor Twenty Four, respect is earned through combat in the Colosseum. People gather from all around to see people compete and fight against creatures big and small. Here, the people like bloodshed and the violence and gore that the Colosseum brings with it. <<Piasuhon>>, or Piercing Horn, is one of the mightiest, and craziest, beasts they have available in the Colosseum. If you win, you earn fame and glory, and a unique reward. But if you lose, the beast will devour you whole, and the people will forget your name as if it was nothing but a spec of dust under their boot. The choice is yours to make.
HP: 3000/3000 | MIT: 170 | DMG: 275 | ACC: 4 | EVA: 3
Abilities:
- By The Horns | Players can choose to attack <<Piasuhon’s Horn>> (HP: 750, MIT: 50, EVA: 3) instead of <<Piasuhon>>. Upon dealing cumulative total of 750 DMG to it, it will break, lowering Piasuhon’s DMG by 50 for the rest of the fight.
- Stampede | On a CD 9+, <<Piasuhon>> will charge right at the Player with the highest hate, dealing +75 additional DMG and stunning them. This can only occur every three turns.
- Body Slam | On an LD 15+, the rhino will use its body to attack the players with the two lowest hate values, dealing -40 DMG less than usual.
- Blinded By Rage | Upon dropping to 1000 HP, <<Piasuhon>> will no longer use <<Body Slam>>. It will gain +50 DMG and +1 ACC, but lose -2 EVA and -20 MIT.
- Seething | While <<Blinded By Rage>> is active, Players may use a Post Action to throw a glowstone to the side, causing <<Piasuhon’s>> next attack to target it instead. This will only work once.
- Tier Lock | For the duration of the fight, all of the participants’ stats that scale with Tier are calculated as though they’re Tier 4. [DMG/MIT/BLEED enhancements etc.] This skill only locks downward. Those at Tier 1, Tier 2, or Tier 3 will still have T1, T2, or T3 stats, respectively.
Drop:
“Rhino’s Horn" (T4/Consumable - Instant (after attack)/Re-usable); Can only be used in combat as a Free Action after the attack roll has happened. The user’s attack will have its base damage increased by 3 [(Base DMG + 3) * SA], but until the end of the battle, their EVA is lowered by -1. Reusable, but can only be used once per battle.
« Floor Twenty-Four Labyrinth »
Floor twenty four’s labyrinth is a series of broad, multi-layered ruins in the darkness of the ocean depths, protected and isolated by a supernaturally strong current that prevent direct descent into its grounds. Forced to approach from the sea bed, those who seek to enter it find themselves amidst a series of ancient ruins left behind by some long-lost civilization whose culture once closely mimicked that which still thrives upon the surface. A cultish faction of Sahagin still dwells here, controlling the various seaborn monstrosities once spawned by Leviathan, their former lord and master. They long for better days, when the surface realm feared them and their power, and would do anything to restore those times and resume their predations upon their ancient foes. In the ruined throne room of a massive castle, at the heart of the labyrinth, players can still find the empty boss room where Leviathan fell, the inky, toxic sludge that was its blood still clinging and coating the stone floors and walls.
Quests:
<<Incognito Antics>>
Labyrinth: 'Sahagin Shenanigans' [Labyrinth Boss]
Boss: Paving the way to Floor 25 (Floor 24 Boss Battle - Leviathan).
-
<<Floor 23>>
Serenity shattered by endless, duplicitous war. This is the tale of Aincrad’s 23rd Floor, where rivalry between the Sun and Night, two tribes of elves, lasted for centuries with no clear winner in sight. The original spark to have lit such a hateful conflict had long since faded from even their impressive memories and drifted into the realms of myth. War had become a habit enshrined in culture and fostered by hatred between kinfolk, until they knew no other way to regard each other. This floor shares two levels. The first is a sylvan paradise once filled with bountiful forests and locked eternally on the cusp between Spring and Summer. Recent events have changed all of that. The latter is a damp and dank Underdark where exiles seek refuge and plot vengeance for grievances; new, old and imagined.
Players eventually breached the floor and found the feuding elves, breaking their deadlock by siding with the Sun against the Night. Some claim that their biases played into the decision, while others argue that they were beguiled by the Eldred King’s wiles. A simmering war that had become a seemingly eternal skirmish suddenly burst into furious and tragic conflict. The balance was broken. Sun started to overcome Night with the aid of the strangers.Queen Lun’Rael, called the Night Lily by her worshipful people, watched from her high tower in the Kriit Woodlands as they were butchered. Slowly, the Night elves began losing ground. Bolstered by the strange powers brought to bear by the newly arrived strangers, the forces of Kith’Sarai, the Eldred King of Ydalin and Lord of the Sun, broke through their enemy’s lines, hunting down and slaughtering their fellow kin wherever they found them. Whole towns were put to the flame in the name of righteous vengeance.
As doom was upon her people, Lun’Rael used the dark magics passed down by generations in her family to perform one final, sacrificial act of defiance to wipe clear the entire battlefield of life at the cost of her own. Most of the Night tribe had fled to the underground to seek shelter in advance of their Queen’s final act. Their ancestral home in the Kriit Woodlands was instantly transformed into a withered, lifeless husk and has since become known as the Vale of Ruin.
The elven tribes that dwell on Floor 23 have both seen their cultures shattered by tragedy. Once-proud traditions have been lost, and former identities replaced by the banal. Forced underground by their defeat, the Night elves were quickly branded as Dark elves, while their Ydalin kin took for themselves the title of Wood elves, befitting their status as masters of the entire, albeit diminished, forests on the surface. But nature itself abhorred both their deeds, and the chaos their actions had wrought. Their rivalry had been stable enough to sustain near-immortal lives, but now, even the seasons no longer know their place.Still reeling from the devastation of Lun’Rael’s curse, Floor 23’s surface climate remains unhinged and now reflects the moods of each player and NPC in their immediate surroundings. The brooding sulk will find themselves under clouds of perpetual and cold autumn rains, whereas a bubbly, cheerful child will bask under the warmth and glow of the summer sun. Those with hope and promise in their hearts foster Spring, whereas anyone with an orange marker is cursed to suffer the chill of an eternal winter.
While the Dark Elves busied themselves with rebuilding their civilization, the Wood Elves have focused on mourning. Their pyrrhic victory devastated their society, leaving unfathomable numbers dead. Every family was affected, most suffering the loss of at least one parent, if not both. These once-proud people have fractured into small family units settling in isolated homesteads and lodges throughout the surface of the floor to reflect and recover. Kith-Sarai’s kingdom is shattered and he still fumes over his stolen victory, plotting to regain the glory denied to him, though much of his power is gone.
The defeat of the Dark Elf Council by the players cleared the way for them to proceed to higher floors, but left a raft of calamity and unresolved consequences in their wake. The spirits of nature on the surface remain unhinged. Power struggles loom among both the Wood and Dark elves, and both sides see the players as partially to blame for their respective downfalls. Even now, a darker and more sinister malignant force seems to be gathering strength in long shadows cast by old conflicts.
Main Settlement:
<<Kalanaes>>

The new capital city of the Dark Elves founded in the Underdark, Kalanaes spontaneously developed its own portal soon after its construction was completed, much to the surprise of players and NPCs alike, and the dismay of the surface elves who found theirs vanished. The city is a bit of a mess with simple buildings composed of clay, stone, and even tents make up homes and merchant stalls. Everything has been quickly cobbled together from limited supplies available in the elves’ new environment. Massive pillars connect the cavern floor and ceiling, with structures nestled around, up and even into them as everyone crammed in for space. Dim lamp-like devices fueled by local phosphorescent mosses provide just enough light for the residents, most of whom have since developed night vision to better cope. The bitter Dark Elves who live in Kalanaes show no kindness to strangers. Players Few even know of their Queen’s death or the details of the tragedy that befell their former home, and the ruling council will go to murderous extents to keep it that way. Through her name, they have assumed control of her people and actively hunt down and suppress anyone who might undermine their legitimacy.
Sub-Settlements:
◉ « Aradennia »
Spoiler
The original point of entry to this floor, Aradennia is the former Sun elf capital, and remains the site of the Eldred King’s court. Much of the settlement is abandoned. Only the inner fortress and keep built into a massive clustered grove of giant oaks are still active, with two-thirds of the surrounding shops and residences now sit vacant. The wood elves have lost faith in their sovereign, whom they blame for having wrought the calamity that befell their people. Only a hundred or so Elven NPCs still dwell here, though the city once housed many more. Most of the outer areas of the settlement are eerily quiet and starting to be overgrown by nature, though the high quality of the original elven craftsmanship will likely keep it from simply being subsumed. Nearly any manner of common and high quality goods or materials can still be obtained here, though supplies are starting to dwindle. The legacy of the Sun elves appears to be fading.
◉ « The Vale of Ruin »
Spoiler
Once the pride of the Night Elves surface dominion in the Kriit Woodlands, it was destroyed and left in shattered ruins when Lun’Rael unleashed her devastating spell. Little remains, save scorches stone, scoured bones, fractured walls and battlements, and the ghosts of the fallen. The Night Lily’s tower still lingers, somehow defying gravity in its precarious, ruined state. Entire sections of it are missing, and the whole of what remains threatens to come crashing down upon the surroundings. This city once rivaled Aradennia in size and grandeur, but it now little more than blighted, unholy ground where tortured and twisted souls still linger. Burnt and broken siegeworks of Kith-Serai’s armies still surround the city, littered with hundreds of blasted suits of bone-filled armor. Nothing lives here. Even the ground is dead. Rains cannot seem to wash the stain of tragedy away and turn into brackish pools within its boundaries.
Other Locations
◉ « The Underdark »
Spoiler
A network of cavernous tunnels deep beneath the surface has become home to the elves cast out from their surface homes. The Underdark spans nearly the entire length of the Floor, without a hint of sunlight able to penetrate the tall cave ceilings. There are no mosses, crystals or other sources of light down here, unless travelers bring them with them. Most of the caverns here are dry and composed of hard granite with sparse springs and meandering water flows providing the barest means for sustenance.
(Note: Players receive a -1 to all BD rolls while in the Underdark due to lack of light, unless <<Night Vision>> is active.)
◉ « Deep Corventhol »
Spoiler
Several ruined settlements predate the migration of the Dark Elves to the Underdark and still linger there, laden with foreign script and other relics left behind by another unknown, ancient race. None know who or what they were or what became of them, and the Dark Elves are too preoccupied with survival to concern themselves with such details. The largest known collection of these ruins has been dubbed Deep Corventhol by Dark Elf explorers who are busy exploring the areas nearest to Kalanaes in order to prepare defenses and plan for future expansion. Their initial surveys were quite circumspect, but rumours abound of an extensive series of catacombs potentially filled with riches and lost knowledge. The quality of stonework in the ruins is impressive, and highly decorative, despite resisting all efforts to decipher it. Everything seems to be made of identically sized blocks stacked in a patterned order, as if suggesting some sort of massive puzzle. Perhaps time will reveal more.
◉ « The Surface »
Spoiler
Once divided between the Ydalin and Kriit Forests, much of the latter was turned into a wasteland during the war that culminated in the creation of the Vale of Ruin. The rest of the floor has mostly recovered from those terrible conflicts, and flourishes as best it can beneath the curse of unbalanced nature. Though life still thrives here, an oppressive undertone of anger and shame suppresses the grandeur of long lost days, when all elven people lived here in harmony. Many of the Wood Elves have returned to wilds and seek to restore that lost communion, though it will likely take many years. They have the patience for it.
◉ « Kriit Wastelands »
Spoiler
Blackened and twisted by destructive magics unleashed during the elven war, the Kriit Forest eventually became better and more accurately known as a wasteland. Few trees still live here, most of them having become burnt out or disease-riddled husks, with the rest petrified by leeched run-off from despoiled springs and streams that no longer flow. This is a place of desiccation and decay, where the dry winds seek to suck the life from the pores of the living and call for retribution for the wrongs done to the natural world.
◉ « Ydalin Forest »
Spoiler
A massive, sprawling forest made up mostly of giant deciduous trees with a lush undergrowth of fronds, ferns and grasslands as ground cover. Ydalin still holds on to shadows of its paradise past, but is troubled by unnatural discontent and the consequences of wild magic gone awry.
Plants and wildlife are abundant throughout the forest, making it an ideal hunting ground for the scattered Wood Elf homesteads and hunting lodges that can still be found. All seem burdened by memories and poor choices, the consequences of which can be plainly seen about them. The seasons intermix here, matching the mood of each player and NPC in their immediate surroundings. Large gathering are avoided as they tend to amplify the effect with potentially catastrophic results. No one knows how to lift the curse, though many are eager to participate in any potential solutions.
Transportation
Most travel across the floor must be done on foot. The forested areas are too dense and covered in large roots to support the construction of roads, which would also contravene the elves’ desire for harmony with nature. The Underdark’s geography is likewise too rugged to support anything more than foot paths and trails.
Common Mobs of Floor Twenty-Three
Spoiler-
Crazed Beastmen - Twisted amalgams of wildlife, these creatures are a byproduct of the raw magics unleashed by the destructive magics unleashed during the elven war. Some are corrupted versions of natural beasts, whereas other have taken on a mixed humanoid-animal form. They are especially common in the ruins of the old Night elf capital.
- Locations: Kriit Wastelands
-
Ydalin Kinslayers - Whereas most of the Wood Elves have forsaken their king’s mad ambitions, some have also grown so hateful that they cannot pull back from the brink. They actively hunt Dark Elves, even going so far as to delve into the Underdark itself on their fanatical crusade. The Kinslayers have no love for players, either, whom they see as agents of their King’s downfall.
- Locations: Kriit Wastelands, Underdark
-
Dark Elf Extremists - Just as the Kinslayers maintain the old grudges of Ydalin, so there are factions within Dark Elf society who continue to pursue treacherous agendas. Some are servants of the reformed Ruling Council of Kalanaes, where others are simply extremists who have given themselves over to some other cause.
- Locations: Underdark
-
Blighted Spirit - Just as magic twisted the living to create the Beastmen, so did it reach beyond the grave and equally warp the dead. Restless spirits of those slain during the seemingly endless conflict still haunt their old battlefields, especially around the old Night Elf capital where so many fell in a single moment.
- Locations: Kriit Wastelands
-
Chittering Husk - Abhorrent creatures of darkness born of some ancient twisted nightmare, these vaguely human creatures are covered with toothy maws, teeth and clawed limbs that clatter, crawl, bite and scratch at anything they encounter. No one knows the origins of these horrors, though they seem to linger in larger numbers near the ancient ruins of the Underdark.
- Locations: Underdark, Deep Corventhol
-
Bleakswords - An order of warriors in the direct service of the Dark Elf Council, the Bleakswords once guarded their lair in the Labyrinth through a combination of stealth and guile. Known for their callous use of poisons and blighted weapons, a few Bleakswords still roam their former halls seeking vengeance on those who stole their purpose.
- Locations: Labyrinth
Field Boss of Floor Twenty-Three
Spoiler

<<Ugzeke>>
A powerful enemy lurks in the shadows of the Underdark, causing the ever so stoic Dark Elves to shiver at the thought of it. Its groans can be heard echoing through the caverns surrounding the town, each step causing the ground to rumble the closer it gets. Despite the Dark Elves not trusting humans such as yourselves, they beckon you to go and find the beast and rid it before it finds a way into their town. At least, if you fail, they won't have to see you around anymore.
HP: 3100/3100 | MIT: 160 | DMG: 300 | ACC: 2 | EVA: -1
Abilities:
- Oblivious | Every turn, unless <<Ugzeke>> rolls CD 5+, he will remain oblivious to the enemy party and refuse to attack. This skill is disabled once <<Ugzeke>> becomes <<In Pain>>.
- In Pain | Once <<Ugzeke’s>> health reaches 1200, he will become enraged as his skin turns red and he notices the party fully. His ACC is reduced to 1, but his EVA is increased to 2.
- Smash | On an MD 9-10, his attack will hit the entire party for 225 DMG, lowering everyone’s ACC by 1 for two turns.
- Hard Hitter | <<Ugzeke’s>> attacks cannot be parried.
-
Tier Lock | For the duration of the fight, all of the participants’ stats that scale with Tier are calculated as though they’re Tier 4. [DMG/MIT/BLEED enhancements etc.]
- This skill only locks downward. Those at Tier 1, Tier 2, or Tier 3 will still have T1, T2, or T3 stats, respectively.
Drop:
“Troll’s Blood" (T4/Consumable/Single Use); The user’s first attack that results in a critical hit each battle for the remainder of the thread will deal twice the raw damage (after proc, crits and SA multipliers, but before MIT deduction), but the user cannot use their post action to attack next turn. Applies to all attacks if AoE.
« Floor Twenty-Three Labyrinth »
Lun’Rael’s sacrifice had already taken place by the time the players discovered the identity and location of the floor bosses, for they were many. <<Isaxi>>, <<Ratar>>, <<Rori>>, <<Evahira>> and <<Durares>> - the Dark Elf Council - and the power behind the throne. These vile champions had been manipulating the war for some time, having even convinced their Queen of the need to sacrifice herself as a means to consolidate their power.
Reaching the boss room, first requires breaching through the concealed behind massive black iron doors, The Bleakswords that once guarded the labyrinth's entrance have largely been dispatched, though some are said to linger still in the catacombs leading up to the tower wherein the Council once conducted its foul business.
Quests:
<<Fonsa's Sacrifice>>
Boss: Paving the Way to Floor 24 (Floor 23 Boss Battle - Dark Elf Council) -
Crazed Beastmen - Twisted amalgams of wildlife, these creatures are a byproduct of the raw magics unleashed by the destructive magics unleashed during the elven war. Some are corrupted versions of natural beasts, whereas other have taken on a mixed humanoid-animal form. They are especially common in the ruins of the old Night elf capital.
-
<<Floor 22>>
Floor 22 is serene, predominantly sunny, and absolutely brimming with the fullest sense of tranquility. A smooth breeze runs through the floor, sending whispers through the trees and soft ripples across the water, bringing with it crisp and cool air from the mountains that surround it. Its forests are divided by the occasional field, or by the much more common creek or river, all of which run into some sort of lake, whether it big or small. These interconnected waterways are usually navigable channels, crossable by some sort of bridge (though the condition of which varies greatly), or, if it comes to it, swimmable. There are no rapids on this floor, no terrifying monsters to run from or dangers to face; everything moves slowly, calmly, and with little other purpose than to linger in its own gentle repose. In the center of the floor is the massive lake that largely serves as the de facto hub of player-based commute.
To the north, the cliffs dominate, and are for the most part inaccessible by normal means. However, recently discovered underground passages lead into a network of tunnels and caves that can, when carefully navigated, bring a player to the top, offering an unparalleled bird's eye view of the terrain below them. The tunnels are strangely roomy and comfortable, and host a myriad of refreshing pools within their depths.
The weather and seasons are normal here. While it rains the most in the spring and snows in the winter, clear days are numbered among the most common and anything otherwise is considered a semi-rare occurrence. In turn, this only further serves to reinforce the serene and peaceful sense that pervades the entire floor; with lazy mobs spoiled by the nature of their environment, Floor 22 serves players as an easy and popular hunting/vacation spot.
NPC Inhabitants of this floor are few and far between, and the most people will see outside of Coral is the odd hunter, fisherman, or lumberjack hard at work or just relaxing in the shade. Solitary figures beware: they're known to kindly invite players who approach to do the same, though they aren't always much for deep and thoughtful conversation. It seems, much like the mobs who inhabit it, this floor's residents seem happily complacent in leading their lives quietly and peacefully. Bialas, Warden of the Storm, was the electrically charged unicorn floor boss of this level, defeated by players after a hard-fought battle. The floor’s sublime and peaceful climate is attributed to its defeat.
Main Settlement:
<<Coral>>

Coral is one of the smallest main settlements in the game, to the point where calling it a city or a town would be putting it generously. Comprised primarily of rustic log cabins built upon foundations of stone, the cozy, rustic charm of the hamlet extends not only to its architecture but to its residents. Most NPCs here exude a certain air of friendliness and hospitality, even extending so far as to only cautiously warn those marked with orange cursors that they shouldn't be within the town's boundaries. This, of course, doesn't apply to those criminals who'd overstay their welcome in the picturesque fields of Coral, nor does it seem to concern the guards of the settlement. Interestingly, the guards of Coral are not uniform in appearance. Each varies is age, race and gender. They all don what appear to be a unique assemblage of slapdash scraps of leather and chainmail. Their only shared feature being the sword on their waist and the simple shield they all carry proudly. With a population just barely numbering into the seventies when including children and the elderly, players seeking weapons or armor will be sorely out of luck, while those searching for general goods or common material will be directed to the family farm and mill down the river.
Sub-Settlements:
◉ « Fulbright Mill »
Spoiler
The go-to place for foodstuffs and simple trinkets, the Fulbright Mill is a family-run farm and general store that exists as the only real mercantile establishment of Floor 22. The NPCs who run and work the surrounding land are simply tagged by Cardinal as "Fulbright". A stern-faced father and anxious looking teenage son work tirelessly in the mill, while the mother and her two excitable youngsters work and help aid hungry travelers in an open-air farmer's market. The shop opens every weekday at the crack of dawn, and closes down at sunset without exception.
◉ « Home of the Weary Smith »
Spoiler
Further out, on the opposite side of the floor when compared to Coral and Fulbright Mill is the Home of the Weary Smith. This outcropping of cabins is home to an old, hearty blacksmith with a long white beard and a well-muscled form. Welcoming adventurers with a complimentary dinner and a place to stay the night, should they need it, this friendly senior spends his retirement tending to his garden with his sons and plump cats. Spoken of with high regard by the residents of Coral, Arthur Blackstone is more than happy to provide a safe haven for those hunters who find themselves in want of company.
Other Locations
◉ « Lake of Reflection »
Spoiler
This aptly named lake stands out as one of the floor's most recognizable locations. Unlike other waters on Floor 22, this place shines unnaturally bright, reflecting twofold whatever light hits it, whether sun or moon or stars. While not uncomfortably blinding by any means, this unique quality makes it nigh impossible to see beneath the surface while the weather is clear. Still, the lake is rich with underwater creatures of varying size and rarity, and here, players find another spot to unwind or fish up the King of Lakes.
◉ « Forest of Memories »
Spoiler
In the Forest of Memories, bittersweet moments long since past reanimate in flickering illusions always just outside of a player's eyesight. A person? A familiar scene? By the time someone turns their head to better identify it, it'll be gone, as though vanished into thin air... or as if it had never been there at all. Regardless of what these mirages are or aren't, the conflicting accounts of brokers and players alike seem to all agree on one thing: there is nothing to be learned here, save for the sleepy ambience of the woods themselves.
◉ « The Reclaimed Sentinel »
Spoiler
Somewhere deep within the Forest of Memories lies a great guardian, crumbling and partially reclaimed by the earth. Made of dilapidated stone, with colorless gems embedded in its core, this giant of a monument lies in a clearing presumably of its own creation, its colossal sword embedded in the dirt and grown over by grass, moss, mushrooms, and other flowering flora. Here is a quiet place, not of eerie warning or gentle tranquility, but of a much deeper respect. Woodland creatures and monsters of all natures gather here to rest on or around the petrified golem without interest or worry in hunting or being hunted. Rumored to have been the missing labyrinth boss of Floor 22, it's said that it grew a love for the nature it roamed and sealed the rampaging Bialas away, ultimately being drained of its energies in the process and only having time enough to find its final resting place. Striking the immortal warrior's corpse will briefly reveal several empty HP bars and the title "Stalwart Sentinel?" before it glitches out of view, causing all mobs in the clearing, passive and monster alike, to become hostile to the aggressor.
◉ « Sapphire Falls »
Spoiler
The Sapphire Falls are most breathtaking when seen at night -- beneath the shade of the surrounding cool grove, a series of miniature waterfalls cascade down cliffs of jagged rock. The vapor emanating from the falls and pools chill the air. Players can feel a noticeable drop in the temperature whenever they come within range of this location. At night, when the moonlight touches the ponds, the waters glow a vibrant blue and dappled sparkles reflect the shine of the stars above. An ocean of blue and purple flowers encompasses these waters seems to sway endlessly in the misty breeze.
◉ « Natalie's Reprieve »
Spoiler
Upon traversing an intricate network of caves and underground passages, players could potentially find themselves on the sunny peak of this floor's tallest mountain, overlooking its many lakes and rivers and forests in its entirety. Inhabitants say that here, where the earth meets the sky in heavenly splendor, even the broken can be made whole again. Against all odds, moss, grass, flowers, and a single oak tree decorate the predominantly rocky mountaintop beautifully in the spring and summer, as yet another sign of nature's gentle caress. A frequent pilgrimage for those unafraid of heights, and even still for those who are, players will always find the remnants of a recent encampment atop its grassy summit but never a sign of NPCs travelling to and from. The place is said to be named for someone's past love.
Transportation
Getting around on the twenty second floor is easy. Well-worn paths of dirt cut the way through most of the forests, bridges often assist in scaling some of the more inclined hills further north of the floor. Should someone feel so inclined to cut their own way through the terrain, they'd find that for the most part, the trees are well spaced apart, and easily give way for even a large travelling party. In Coral, players can rent horses should the fancy strike them, and similarly, boats are an easy and useful find to navigate the waterways. Even where it would seem people would normally not frequently traverse, there can almost always be a bridge found to conveniently assist in crossing a river or canal.
Common Mobs of Floor Twenty-Two
SpoilerFloor 22's mobs are both common and benign. Most creatures are passive until attacked or otherwise antagonized, and include animals such as squirrels, rabbits, deer, boars, and the rare bear. More fantastical beasts include very generic bugs and fish type monsters that roam the forest and live beneath or beside the waters of the rivers and lakes. None of these listed, however, pose much in the way of risk for even the most ill-equipped wanderer.
Field Boss of Floor Twenty-Two
Spoiler
<<Sweetwater Devil>>
One of the Floor Twenty Two's most fearsome creatures, the <<Sweetwater Devil>> threatens the peace the lake normally experiences. It can be spotted leaping out of the water, disrupting the fragile ecosystem, and preying on Players who dare to let their guard down. It spawns in a different body of water every time, but the results are always the same.
HP: 2650/2650 | MIT: 140 | DMG: 250 | ACC: 3 | EVA: 4
Abilities:
- Fearsome Maw | On an MD 9-10, the boss will bite their target with its jaws, causing T4 BLEED for two turns and dealing 300 mitigatable DMG.
- Swift Swimmer | The boss will gain another attack on an attack roll with LD 15+, but will choose the target with the second highest Hate instead.
- Dirty Waters | Every fourth turn, the <<Sweetwater Devil>> will dive underwater, making it much harder to see and therefore unattackable. Unless a Player rolls a natural LD 15+ to spot it in time, its next turn it will attack the player with the lowest hate for 300 DMG with 50% Phase.
- Tail Sweep | On a CD 9+, the <<Sweetwater Devil’s>> attacks will hit the entire party for 225 DMG regardless of MD result, and the player with the highest hate for an additional +25 DMG, applying INCARCERATION to them for the duration of the battle.
- Tier Lock | For the duration of the fight, all of the participants’ stats that scale with Tier are calculated as though they’re Tier 4. [DMG/MIT/BLEED enhancements etc.] This skill only locks downward. Those at Tier 1, Tier 2, or Tier 3 will still have T1, T2, or T3 stats, respectively.
Drop:
“Water’s Finehide" (T4/Consumable/Single Use); The user’s first attack in the thread to be delivered through stealth will ignore Surprise Attack (Assassin & Trickster) downsides. [This means that status effects have the chance to apply for Assassin and Trickster's attack does full damage.]
« Floor Twenty-Two Labyrinth »
See <<Reclaimed Sentinel>>, above.
Quests:
<<King Of Lakes>>
<<Witch Of The West>>
<<What We Fight For>>
<<SOTW: Shocking Stallion>>
Boss: Paving the Way to Floor 23 (Floor 22 Boss Battle - Bialas) -
<<Floor 21>>
The 21st Floor of Aincrad is an intricate network of wide open caverns and twisting tunnels. Its it littered with eerily still and black underground lakes that mirror the void and darkness that hangs around every corner. No sun has ever reached these depths, but phosphorescent moss and fungi can be found in any areas where enough ambient moisture accrues to sustain them. A few isolated caverns are blessed with abundant clean-flowing springs and defensible entrances that enable small settlements to survive.
Unlike some of the more volcanic floors, most of these caverns appear to have been carved by water. The walls are often slick and smooth. Several large, winding rivers carve their way between major areas, sometimes serving as the only means of passage, though it can be a tight squeeze. Surprisingly, most of the water is both drinkable and refreshing, unless tamped with for sinister purposes.
Cavern floors and ceilings are thick with viscous stalactites and stalagmites, the latter often forming from mineral deposits dripping from their twins above. Most of the level's stone surfaces look melted, but are simply caked with the same runoff. Towering mushrooms and other fungi growths are common here, and serve as both a source of food, material and shelter for those who call the floor home. Some have taken things a step further and have literally carved structures into the immense vegetation.
This is a world of vibrant darkness, where light and those who pine for its absence are reviled, and everything from the sublime beauty of stillness to the spine-chilling terror of being hunted as prey exists side by side. Ambush and concealment are a way of life, and people survive by trusting only themselves. Unlike some of the other floors, individual caverns here rise and fall vertically, often by hundreds of feet, rather than stretching across a wide open landscape. Blind corners, treacherous shafts and slides are the norm. Rockslides and raging waterfalls are as much of a threat as the things lurking behind them.
The inhabitants of this floor are dour and heavily burdened workers of the mines, quarries and other resource industries that seek to exploit the floor’s abundant wealth. Everyone works while the elders stay in their homes to tend to children and their chores. Only rarely are any able to enjoy the hot springs, letting their bones relax for a while. NPC Inhabitants of this floor are a diverse lot, with no one group holding dominance over any other. Various humanoid races mine the mineral wealth visible in the walls, floors and ceilings around every turn. Myconid races - or plant-people - can also be found in isolated enclaves. Most denizens of the floor are both superstitious and wary of strangers, associating their arrival with unwanted attention that often leads to greater peril. This is a hard place to live.Tesseleth the Tyrant, defeated floor boss, once lorded over this level and ruled it with and iron-clawed fist. His dragon knights served as agents who scoured the floor and enforced his will and whims. The dragon is gone now, but some of his brood and servitors still skulk the darkness of the labyrinth with dreams of reclaiming what was taken from them. Elsewhere across the floor, the order Tesseleth once imposed has broken down. Floor 21 has become a far more savage place in its wake.
Main Settlement:<<Tomoika>>
Tomoika is by far the largest and best protected settlement on the floor, serving as the main point of supply and shelter for outsiders who seek fortune and glory in its depths. Carved into a series of massive pillars formed by linked stalagmites and stalactites, the rest of the town is comprised of a series of platforms strewn randomly around the between its five central spires. From a distance, the place resembles a majestic cluster of natural stone, infested with a plague of metal and greed. The imagery isn't far off the mark.
Originally established as a trading post by ambitious dwarves of House Thumos, Tomoika has since grown into a center industry. Outbound expeditions and caravans form and obtain supplies here, while craftsmen from across Aincrad seek many of the rare goods and materials unique to floor 21. It is also home to the floor’s only portal plaza, which provides a chokehold on import and export.
Heat belches out of Tomoika’s unique furnaces and foundries, powered by the fury of various fire elementals harnessed for their ability to burn without creating smoke. It is said that this was a penance imposed upon them by their rival water kin in the long distant past. Now they seethe and rage deep underground, impotent to change their fates, while their cores are bled for the benefit of others.
The townsfolk of Tomoika once worshipped Tesseleth the Tyrant, a giant shadow dragon and the floor boss of this level. They used to sacrifice half of their monthly earnings and production just to appease the creature. Since Tesseleth’s demise, other rivalries have rushed to fill the void. Dwarven merchants and others seek to claim House Thumos’ legacy and rule over the city. Others seek to establish monopolies and drive their rivals out. Assassins suddenly find themselves in high demand as merchants and criminal vie for power, staking claims while eliminating those of their rivals, if not the rivals themselves.Sub-Settlements:
◉ «Hotsprings Spa»
Spoiler
The original dwarven settlers of Tomoika soon discovered a series of nearby springs said to have special properties granted to them by the unique crystalline formations growing in the pools. Shaped like large trees, they were dubbed Zesh by the dwarves and are so revered by the locals that the area has since, somehow, become a safe zone. Geothermal vents are believed to be the heat the waters, though this floor isn't known to have any active volcanoes. No one questions it as the miners use these pools to help relax their worn bodies after long days of hard labour. Players are allowed to come and go as they please, as long as they remember to unequip their weapons and armor first. A small contingent of guards from the mining guild keep the riff-raff out, as they've seen substantial improvement in the morale of their workforce since the springs were made available to everyone.
◉ «Charko»
Spoiler
A small village hidden in deep caverns far off the main paths of travel. The people in this village are quiet and keep to themselves, doing their best to avoid interactions with players or other NPCs. They never gave sacrifices to the Floor Boss. Their small settlement became a refuge away from the ruthlessness and chaos that permeated the rest of the floor during Tesseleth's reign, but instilled in them such a strong desire for isolation that it now borders on paranoia. They now seek to preserve it at any cost, especially as most locals fear that Tesseleth's death is but a ruse intended to flush them out.
Other Locations
◉ «Underground Waterfalls»
Spoiler
Nearly all of floor 21’s caverns have water flowing through them in some way, but one location stands out over the rest, where a series of ancient waterfalls formed from years of wear and tear of the running water over the rocks. The walls are covered in glowing crystals which have been kept there by the crevices of the stones, giving an ominous glow behind the waterfall, making it a popular attraction for dates for players and NPC's alike. This area is strangely without any spawning monsters or bosses, so players that need to get away to a safe place are free to come here and relax for as long as they may need.
◉ «Blood Crystal Caverns»
Spoiler
A series of expansive caverns that once served as a major staging area and base for a strange faction of allegedly self-aware mobs calling themselves the Sundered Spire. It was from here, directly below the Lake of Reflections on Floor 22 that Skalaugh and his vanguard broke through the stone separating the floors and attempted to cull as many players as possible in the immediate aftermath of the Tanabata festival. Nothing remains of the Spire, save old debris and detritus, but the blood-red crystals that lined Skalaugh’s hide and powered the faction’s twisted immortality still line every surface. Some say that the shards light was dimmed during the epic clash that occurred here, whereas others claim that it has slowly started to return.
◉ «The Geode Cache»
Spoiler
Discovered accidentally by a dwarven mining expedition, this unusual grotto is actually a series of expansive and interconnected geodes. The crystals vary dramatically in composition and color between the individual areas. All seem to radiate the same, ambient low-level light and are reputed to be of the finest quality for acoustic resonance. Brave and ambitious performers have made special trips to this area in the past, where some claim they have managed to complete their best works. Care must be taken, however, as crystalline life forms have been discovered to inhabit the area and seem to be growing in aggression as more and more visitors tromp through their home.
◉ «The Chittering Halls»
Spoiler
Named after the seemingly endless hordes of spiders that seem to spawn here, the chittering halls are favored by players who seek to grind their way through the system’s deepest and darkest corners in search of treasure and other rewards. It is easy to become lost in these winding passageways, where layer upon layer of webbing seems to change the layout of the space before your eyes. The broken terrain, combined with ubiquitous white strands strewn over every surface can make it hard to find bearings. If it weren't for gravity, some travelers might even struggle to determine which was up, though the spiders descending upon them tends to often serves as a suitable reminder.
◉ «The Grand Necropolis»
Spoiler
Once the seat of an ancient and powerful realm, it sank into the ground over centuries and became lost to history. Herein slumbers an ancient king who betrayed and slaughtered his people, surrounding himself with their remains as twisted trophies to a Pyrrhic victory. In his triumph, he defeated himself, falling into a deep and seemingly endless torpor, until players came to the Floor Twenty One. Something about their presence roused the Time Forgotten King and the legions of ancient dead that still surround him. Undead soldiers have been spotted wandering in nearby caverns, collecting information for their liege as he regains his strength and makes ready to rouse his armies for war, once again.
Common Mobs of Floor Twenty-One
Spoiler-
Cave Spiders - A general term used to cover all of the various forms of giant spiders that dwell in the caverns around the floor. For whatever reason, they seem to concentrate in the Chittering Halls, where they infest every available nook and cranny. Preferring to leap or fall upon their foes, or else to trap them in webs and come suck out their juices at a later time, their large numbers can make them especially dangerous.
- Locations: The Chittering Halls
-
Crazed Prospector - Many have come here seeking riches, whether in mineral or crystalline form, or as a long lost treasure to be reclaimed. Few find what they desire, and lose their minds in the oppressive darkness. They wander the tunnels, still, searching for their prize, and are quick to imagine that anyone they encounter is there to take it from them.
- Locations: Anywhere
-
Cave Trolls - Abundant in the lowest caverns on the floor, they are often too lazy or stupid to hunt down foes and simply wait for everything to flow downhill. It all reaches them eventually. Large in size and possessing massive strength, their regenerative abilities are also legendary.
- Locations: Anywhere
-
Crystalline Monoliths - Self-aware crystal formations that assume various forms when compelled to interact with other creatures, they are mimetic by nature. Anyone who attempts to take, break or otherwise damage any crystals in their presence will immediately be deemed an enemy and attacked.
- Locations: The Geode Cache
-
Rock Golems - Spirits of earth, stone and sludge, they combine their composite elements into bodies suited to their needs. Often found wandering alone in the darkness, set to some unknown purpose, they usually ignore others unless provoked. The more potent spirits are said to be capable of animating multiple host bodies at once, and can bring an entire cavern to life, swarming their foes.
- Locations: Anywhere
-
Red Drakelings - The last kin of Tesseleth, the defeated floor boss, the drakelings still plague many of the caverns surrounding the catacombs around his lair. Highly aggressive, and capable of belching forth fiery breath with disturbing regularity, they should not be taken lightly.
- Locations: Labyrinth
Field Boss of Floor Twenty-One
Spoiler
<<The Watcher>>
One of the oldest creatures to have ever existed, dating back many hundreds of millions of years before man. It was this creature that helped bring life to the animals and insects of the floor. It normally remains at rest, but if a player is found to be disturbing the peace, <<The Watcher>> will appear. It will travel any distance to kill the Players responsible.
HP: 2400/2400 | MIT: 150 | DMG: 230 | ACC: 4 | EVA: 2
Abilities:
- All Seeing | Any attempt of a stealth attack will miss, and result in the attacker taking 50 unmitigatable DMG.
- Sharpened Claws | Every consecutive attack on the same target after the first will deal +30 DMG. This can stack up to 3 times for a total of +90 DMG.
- Penetrating Gaze | On an MD 10, <<The Watcher’s>> eyes will all be pinned on their target, causing them to become paralyzed.
- Massive | At the cost of a Post Action, Players may roll their LD to use the tight space they’re in against the boss. If natural LD 15+, they can throw a pebble at the boulders above The Watcher, causing it to take 300 unmitigated DMG and get stunned, as well as permanently drop its EVA by 1. This can only be done successfully once per battle.
- Tier Lock | For the duration of the fight, all of the participants’ stats that scale with Tier are calculated as though they’re Tier 3. [DMG/MIT/BLEED enhancements etc.] This skill only locks downward. Those at Tier 1 or T2 will still have T1 or T2 stats, respectively.
Drop:
“Watcher’s Extract" (T4/Consumable/Single Use); For the rest of the thread, consecutive attacks against the same target will raise the user’s base DMG by 1. This effect stacks up to three times and resets as soon as targets are switched, or an AoE attack is used.
« Floor Twenty-One Labyrinth »
The labyrinth entrance is located deep in the Chittering Halls, where players must fight through waves of hangry arachnids while searching for it. Concealed behind countless layers of webbing and shifting stones, a grand tunnel leads from the halls to a series of isolated caverns that lead back toward Tomoika. Geothermal vents keep the area extremely warm, making it the perfect incubation chamber for Tesseleth's brood. Countless drakes and drakelings nest in small caves or on high ledges, attacking anything that moves and isn't one of their own. Players intending to reach the boss room must sneak or fight their way through a gauntlet of dragonspawn keen for a fight and always searching for their next meal.
The boss room itself is directly below Tomoika. It is a large cavern filled with stalagmites and stalactites, and featuring the five main support pillars of the city above. Inset between them are the sole set of entry doors, made of highly tempered black steel. All of the other niches are prisons for the primal fire elementals that feed the settlement and its endless hunger for heat and energy to sustain its industries. Littered throughout the room are crystallized warriors who seem to be frozen in place and time. Some of the ones that remain intact inside their crystalline prisons still wear solemn and determined expressions while others show fear and agony as though they had seen pure hell in their final moments. These warriors wear different types armors and weapons, and most of them don long, dark-colored capes marked with the symbol of a great black dragon. Few of them are still left since the final battle claimed their master. The elementals rage at the presence of anyone in the chamber, but only Tesseleth himself knew the key to freeing them. The great beast's obsidian skull still remains as an immortal object hovering in the center of the chamber like some dark obelisk. All efforts to move it have failed.
Quests:
<<The Hidden Village>>
<<Trouble In The Mines>>
<<Betrayal Of The King>>
Boss: Paving the Way to Floor 22 (Floor 21 Boss Battle - Tesseleth the Tyrant) -
Cave Spiders - A general term used to cover all of the various forms of giant spiders that dwell in the caverns around the floor. For whatever reason, they seem to concentrate in the Chittering Halls, where they infest every available nook and cranny. Preferring to leap or fall upon their foes, or else to trap them in webs and come suck out their juices at a later time, their large numbers can make them especially dangerous.
-
<<Floor 20>>
Floor 20 is a dense tropical rainforest laid over jagged, mountainous terrain. Various fractious tribes of human NPCs live here in secluded settlements, competing with each other over resources and vying for dominance over the most plentiful hunting grounds. Travel throughout the forest can be leisurely one minute, then both hazardous and exhausting the next, mitigated only by the staggering beauty of the scenery. Fruit trees and bushes provide an abundant source of food. Cascading waterfalls litter the entire level, fed by pools and springs. Whitewater rapids are common, as are deep grottos buried into cliff faces, where secrets lay buried, waiting to be discovered. This is a floor rife with high adventure, ready for escapades, and perfect for semi-quiet weekend getaways, provided you don’t mind all of the bugs.
Beyond all of its natural beauty, Floor 20 does have one other rather notable feature: an abundance of giant bugs. They are so prevalent that they have become focal points in almost every aspect of local culture. Moths, cicadas and tarantula hawks are especially venerated by local religious practices, but every known form of giant insect can be found somewhere on this level.
Most of the local NPC population is human. Short and stocky in stature and bearing square features, they are a passionate people who can be utterly ferocious when roused. Dark hair is almost ubiquitous, offset by a penchant for vibrant, colorful clothing, and every imaginable form of body art. Artisans of all types are especially prized and celebrated in their culture. They live in distinct tribes that compete with each other in all things: sports, war, life and love. Religion is also front and center, with each tribe espousing the virtue of their particular patron from the pantheon of insect spirits they revere as gods.
Three such creatures have come to special prominence: the great moths, as the spirits of skies and heavens, the great cicadas, as the spirits of earth and fertility, and the great tarantula hawks as the spirits of war and sacrifice. Other insect spirits also have lesser followings.
Since the death of Mortha the Magnificent, floor boss and greatest of the moth spirits, some of the local inhabitants became spiteful, even murderous, towards the Players who had taken the life of their great master. They kept that anger in check, tempered by the fact that the Players allowed Mortha's spawn to survive their assault upon the boss room, and then to hatch and fly free.
It remains a touchy subject. No matter what excuses the Players use they will only fan their anger by bringing up the topic. Players asking the inhabitants how they may correct their mistake is equally a dangerous idea. Secret cults still worship the great moth and would see their master avenged by putting each and every player they encounter to the sword. Many of the shrines, monuments or statues to Mortha outside the safe zones are surrounded by fanatics who will attack Players, without hesitation, for no other reason.
Main Settlement:
<<Xoco>>
Also known as the 'Holy City of the Gods', Xoco is the main settlement of the twentieth floor. It is an impressive city with many intricately carved, sculptural stone buildings interconnected with rope bridges. Ruled by worshippers of the Great Moths, its architecture is clearly designed to highlight the inhabitants’ connection to the sky. Every available surface is incredibly decorated with carvings, much of it painted with vibrant complimenting colors. There are many temples, shrines, altars and statues in Xoco, devoted to each god in the local pantheon. Jungle overgrowth is also carefully trimmed to give off a very beautiful and vibrant feel to the place, letting light penetrate as much as it prevents any obstruction between the sky and its chosen people. There must be something to it, as wide swaths of the city’s tier-like construction entice moths to land frequently to be fed by the priests and their acolytes. Curving staircases pressed against the tall buildings and cliffsides, rope and stone bridges are the primary pathways for travel here, as opposed to open roads or highways. Near the edges of the settlement are makeshift stables housing giant insects which serve as transportation for the inhabitants and Players alike. The largest and most prominent feature of this settlement is the temple of Mortha. Players are rarely if ever allowed to enter the temple grounds without a suitable sacrificial offering.
Sub-Settlements:
◉ « Cigrotha »
Spoiler
A smaller settlement resting within the sunlight forest, this settlement consists mostly of tents, straw shacks, wooden cabins and hovels. Far less impressive and decorated than the other settlements, Cigortha is a farming community surrounded mostly by agricultural lands and few other structures. The sacred temple here is open to the elements, with the river flowing through and beneath it. A large central plaza accommodates bonfires, dances, celebrations, ceremonies and other rituals. Most of the warriors in Cigortha are armed with bows and arrows. Many domesticated giant cicadas, ants and beetles wander this land, used as beasts of burden to plow fields, make irrigation trenches and even to bore tunnels to help insects and mammals live together in harmony.
◉ « Tarakawn »
Spoiler
Also known as the 'Holy City of Champions', Tarakawn consists of two divided by a high cliff. The lower section serves primarily as living quarters and rests at the base of a cliff with walls to protect the city’s inhabitants. A complicated series of trenches, ditches and waterways drains water away from the settlement, serving as both sewers and flood control. This area is populated mostly with houses, marketplaces, workstations, and a small number of guardhouses. Statuary is everywhere and the inhabitants frequently worship and pray to their preferred gods according to their own fashion. Long, steep, winding staircases and elevating platforms connect the lower areas to the upper city atop of the cliff. A large courtyard sits at the cliff’s edge, where warriors marshal for training, battle and war. It also serves as a gathering place and site of refuge if the lower city is ever flooded or invaded. Barracks, armories, smithies and temples surround the main square. The grandest temple, both in size and prominence, is devoted to the grand tarantula hawk, though other deities get their share of devotion. Tarakawn is widely regarded as the most militant and warlike settlement on the floor.
Other Locations
◉ « Sunlight Forest »
Spoiler
A dense and rainforest full of lush foliage, abundant sunlight reaches the forest floor to cover everything in greenery. Even moonlight peers through the thin tree canopy to set alight the forest floor. Every manner of life flourishes here, whether plant or animal in nature. It is a land of plenty, capable of sustaining many creatures. Countless streams and rivulets gather into wide pools of clear water that then flow and join together in beautiful strings of waterfall and rapids that keep everything moist and refreshed. Every imaginable form of giant insect likewise roams the forest, such that nests, hives and burrows are nearly unavoidable. All of them vie for control of territory and resources in an endless cycle of competition emulated by the local NPC tribes.
◉ « Stardust Valley »
Spoiler
A small valley within the Sunlight Forest, it is sparse on trees and underbrush, covered instead by long, tall grasses, bubbling ponds and small creeks. During the day the valley seems largely unremarkable, save for these minor quirks. Everything changes at night, starting with the last light of dusk, as large swarms of lightning bugs gather and sweep across the valley. They normally stay on the tall grasses, occasionally floating above them in search of another spot. They are said to be attracted to intense emotional states, such as moments of love and affection, sorrow and heartbreak, and other such non violent emotions. When affected in this way, they gather together and swirl around the affected person to encourage, comfort, or rejoice in the sensation, sharing in the outpouring of feelings.
◉ « Tajruha - Edge of the World »
Spoiler
Avoided by nearly every inhabitant of the floor, including even the fanatics who hunt Players from the shadows, this place is eerily quiet. The structure and architecture of this temple are completely alien to that of any other found on this floor, with many unrecognizable writings and carvings written that are alien to both NPCs and Players alike. The temple itself resides on a peak near the western edge of the floor, perched precariously at the edge of the mountain's cliffside. Beyond it there is nothing but the sky above and void below. A steep, dangerous pathway just outside of the temple leads to a lower stone platform where the Players can view the rest of the Castle Aincrad above and below. No wind blows here, and the sun’s light feels cooler. The air is light, and a sense of weightlessness pervades the area, as if it somehow sat between the earth's atmosphere and the edges of space. Despite the incredible view, a fear of falling strikes every heart that gazes upon it.
◉ « Shrines of the Gods »
Spoiler
Scattered throughout the floor’s rainforest are many shrines dedicated to different gods. Size seems to suggest their relative importance. Each shrine consists of a single hexagon shaped room with an incredibly deep pit and a large pillar in the center where an altar rests. Statues of the patron god line the corners of the room as well as carvings and writings devoted to its significance, heritage, descendants and legends. The list of shrines of best known shrines include those devoted to: moths, cicadas, tarantula hawks, ants, wasps, bees, flies, dragonflies, fireflies, beetles, rolly polly bugs, and many many more. A series of more gruesome shrines filled with dark worshipers and devoted to vile monstrosities are also rumored to exist.
◉ « The Upper Reaches »
Spoiler
The highest sections of the many mountainous areas of the floor are bare of any vegetation. It is here that the most dangerous forms of giant insect life build their hives, infesting the peaks by tunneling into them. Pock-marked and riddled with openings, only the bravest or most foolhardy would willingly travel here. Guards and sentinels frequently swam on the ground and in the air, challenging anything foolish enough to encroach upon their domains.
Transportation
Transportation on this floor consists mostly of three types:
- Giant domesticated ants, which are the most common and easily trained. Larger drones are often trained and armored for war, serving as mounts for high ranking officials and warriors of the cities. Riding ants will not typically listen to Players’ commands, and will only traverse directly between settlements. Depending on conditions however, such as quests and events, ants may or may not offer Players rides.
- Giant dragonflies are reserved for use by local NPC nobility and rarely made available for use by Players.
- Giant beetles are commonly used as war mounts, given their resilient exoskeletons, and natural strength and weaponry.
Common Mobs of Floor Twenty
SpoilerFloor twenty consists of nearly every form of giant insect imaginable, usually possessing high evasion and accuracy, high mitigation, or high damage based on their natural attributes such as wings, hard exoskeletons, etc. There are however certain mobs that are more deadly, noteworthy, or considered holy by the inhabitants.
-
Giant Fly: Generally found near dung heaps, these insects rarely attack Players unless provoked. When they do attack it is to feed however. They are incredibly fast, granting them a +1 in evasion and only attack with their bite.
- Locations: Anywhere
-
Giant Firefly: Docile creatures, these mobs will never attack a player unless entrapped and given no other option. When attacking, they will do so by creating a bright flash of light that hurts the eyes. Under normal circumstances they will guide good-natured Players out of the area if they become lost.
- Locations: Anywhere
-
Giant Dragonfly: Normally docile unless starving, these giant insects roam the rainforest searching for food. If they attack, it is likely out of desperation to sate their hunger. They do so by ramming Players after a dive attack. Their incredible speed grants them +2 EVA. They are revered as the children of the god of winds and wanderer.
- Locations: Anywhere
-
Giant Ants: These typically come in three variants: carpenter ants, sugar ants, and fire ants. The sugar ants are friendly towards Players and the inhabitants. The carpenter ants are aggressive if hungry or defending their territory. Fire ants are always aggressive and inject a poison on biting their foe. Ants only fight solo when cornered or scouting ahead. Wherever possible, they rely on their numbers for strength, especially near their nests. Ants are revered as the children of the god of conquest, and though killing ant drones is not a taboo, killing the queen or her eggs is a great sin and taboo.
- Locations: Anywhere
-
Giant Bee: Somewhat aggressive at the best of times, and dangerous when riled, they are most often encountered while on their hunt for nectar, but will rarely use their stinger. When near their hive however they will use any means at their disposal and attack relentlessly. All bees inject a poison should they succeed in stinging their target. Bees are revered as the children of the god of fertility.
- Locations: Anywhere
-
Giant Wasps: Incredibly vicious, most wasps will attack Players just for approaching them. They attack repeatedly with their stinger, and will inject a venom should they succeed in their attack. Wasps are revered as the children of the god of bloodlust.
- Locations: Anywhere
-
Giant Mantis: Normally hunting other large insects, the giant mantis will attack Players if disturbed or provoked, swinging their front arm blades to maximum effect. The mantis is one of the few insects that attacks its prey in a surprise attack fashion, and as such it's important to learn and recognize their ambush spots. Mantis are revered as the children of the god of the hunt.
- Locations: Anywhere
-
Giant Beetle: Driven by ravenous hunger these creatures will attack anything. They normally ram into Players, taking advantage of their size, but will occasionally try biting them. Revered as the gods of needs and desires, these creatures may be killed for defense, and for food, but never for sport or to exterminate.
- Locations: Anywhere
-
Giant Centipede: Very aggressive creatures that attack anything smaller than themselves. They bite at foes with their mandibles, as well as simply trying to crush targets under their sheer bulk. Centipedes are seen as a common enemy to all other occupants of the floor.
- Locations: Anywhere
-
Giant Spider: Ranging in variety, giant spiders spin their webs all over the floor, especially in the deepest darkest corners and crevices. Fast, agile, and reproducing in vast numbers, they are among the most dangerous predators on the floor. Spiders are considered the children of the dark god of corruption and evil, and are hated above all else. This may be justified, as they attack just about anything foolish enough to approach them.
- Locations: Anywhere, Edge of the World.
-
Giant Scorpion: Incredibly dangerous due to the combination of their hardened exoskeletons, massive powerful pincers and poisonous stingers, most inhabitants fear these creatures and are grateful that they are rarely encountered. Highly aggressive towards anything not larger than themselves, they will not hesitate to attack and will pursue Players anywhere, even attempting to chase them into safe zones. Scorpions are considered the children of the god of death and ruin. Only the greatest of champions dare face them.
- Locations: Anywhere, Edge of the World.
-
Fanatic: Incredibly devoted followers of the insect gods, especially Mortha, who refuse to forgive or forget the murderous crimes of the Players. They actively hunt and attack every player on the floor, even going so far as to infiltrate and stalk Players within the safe zones. Most fanatics wear masks to conceal their identities, though they can removed them to better blend into the population. Most are considered outcasts, though a small number still hold positions of power within the settlements.
- Locations: Anywhere
-
Dark Worshiper: The only inhabitants who dare stay in the temple at the edge of the world, if only to keep out of reach of the other NPCs. They worship the forbidden gods making sacrifices of other NPCs or Players. Donning the faces of the twisted patrons, they wear skull masks and decorate themselves in grim gruesome war paint.
- Locations: Edge of the World
Other insect gods like Mortha are said to wander the jungles and forests, but never reveal themselves. These creatures are far more massive than the giants, and if any player has ever seen these creatures they never report it.
Field Boss of Floor Twenty
Spoiler
<<The Queen>>
<<The Queen>> is a stronger, deadlier, six-foot version of the original Field Boss. When her hive is bothered, she comes at her enemies with full force and the intention to kill. Within her nest, a rare item called <<Queen's Honey>> is created, and it must be protected at all costs.
HP: 1900/1900 | MIT: 145 | DMG: 260 | ACC: 3 | EVA: 3
Abilities:
- Queen’s Might | Stronger than ever, every attack of <<The Queen>> will gain 50% Phase on CD 6+. To disable this effect for three turns, a Player must expend their Post Action to break her stinger (instead of attack) and force her to grow another one.
- Royal’s Jelly | Every third turn, <<The Queen>> will produce Jelly, permanently boosting her DMG by 30 and MIT by 15.
- Exoskeleton | Upon having her health reduced to 1400, <<The Queen’s>> MIT will drop by 20 and her EVA to 2.
- Flush | On an LD 15+, <<The Queen>> will attack the entire party for 200 mitigatable DMG instead of its usual attack. This attack will hit regardless of MD result.
- Wasp’s Sting | On an MD 9-10, <<The Queen>> will inflict T3 BLEED to anyone hit for two turns. This status affliction will be inflicted upon all Players hit if <<Flush>> occurs simultaneously.
- Tier Lock | For the duration of the fight, all of the participants’ stats that scale with Tier are calculated as though they’re Tier 3. [DMG/MIT/BLEED enhancements etc.] This skill only locks downward. Those at Tier 1 or T2 will still have T1 or T2 stats, respectively.
Drop:
“Queen’s Honey" (T3/Consumable/Single Use); Can be used in a thread with others to provide them with Player Tier*DMG each, at the cost of Player Tier*DMG per person buffed to the user. Stacks with damage buffs. T4 or higher Players cannot be affected by the damage gain of this item. [Example: A Tier 4 user buffs a Tier 1, a Tier 2 and a Tier 3 players. All of them will get 4 DMG, at the cost of 3 * 4 = 12 DMG to the user.]
« Floor Twenty Labyrinth »
The entrance of the labyrinth is in a hollowed out peak in the Upper Reaches. The brightly lit tunnels of this hell hole are filled with cocoons of various victims offered as sacrifices to their defeated overlord. Glow bugs and still roam the tunnels in large numbers, enhancing the light that penetrates the partially translucent stone. Gigantic versions of the otherwise large creatures found elsewhere on the floor dwell in these tunnels, and remain as hungry, vigilant guardians. In the center of the maze is the large canopy area where Mortha was slain. A stone monument has been placed as a sort of grave not by the inhabitants, but by the giant moths.
Quests:
<<SOTW: Pouncing Puma>>Boss: Paving the Way to Floor 21 (Floor 20 Boss Battle - Mothra the Magnificent)
-
<<Floor 19>>
Floor 19 is divided unevenly into two lands known as "Haven" and the "Forbidden Lands". The Forbidden Lands take up the majority of the floor, covering well over 90% of its area. They are a vast expanse of open plains, steep canyons, large deserts, and scattered forest groves desperately clinging to life. Wildlife is also sparse and limited to whatever can survive on scrub grass, along with stunted shrubs and vines.
The remnants of ancient structures dot the ruined landscape, serving as testaments to greater times now long past. The floor's inhabitants refuse to enter the Forbidden Lands altogether. While years of tradition and horror stories play a part, the main reason why the NPCs steer clear is the thundering presence of massive creatures of earth and stone known collectively as the "Forbidden Ones." These enigmatic colossi meander aimlessly throughout Forbidden Lands, each with features mimicking their preferred terrains. The self-imposed isolation of the NPCs in Haven confines them to a tiny, barren portion of the floor that often experiences harsh weather and lacks the beauty or bounty of the distant forests. It is, however, somehow kept safe from the rage of the Forbidden Ones.
The NPC inhabitants of the 19th floor are all human with light-colored and often gray-toned skin. Their hair is invariably black, grey or white, cut short or tightly bound. Face-paints and tattoos in earth tone colors are their only known form of artistic expression. They favor wearing animal hides, including heavy cloaks, to better protect them from the relentless lashing of the elements. All are calloused and hardened from endless physical labor. People here are always stoic and serious. They scorn any action or comment that has to do with entertainment, humor, fun or anything otherwise deemed ‘childish and wasteful’. Even their children are dour. Players are typically addressed as "wanderers", and avoided if they are known to have traveled to the Forbidden Lands. When asked why travel is forbidden, the locals provide a variety of responses:
“The powerful creatures are too dangerous."
"Evil monsters guard the ruins beyond Haven and squash anything that even tries to sneak a peek."
"It is a sacred and holy land, never to be trespassed."
"We dare not risk the wrath of the guardians!”
Watching someone enter the Forbidden Lands is the closest thing you can get to an emotional response from these depressing people. For them, it is like watching someone else throw away their life. Nothing seems to scare them, yet even the hardiest among their number quakes at the mere mention of the creature they call “Tanos.” Even many years on, Tanos remains known as the fearsome demon of incredible power who once commanded all of the Forbidden Ones. Tanos is also said to have single handedly destroyed the lost civilization from which the NPCs of Haven descended. Before the players arrived, he stood stationary on the highest point on the floor, looming like an immovable mountain and surveying their broken dominion. A single inhabitant had somehow angered him, and in a blind fury, he struck down everything that was.
Players eventually succeeded in defeating Tanos, but his minions linger and rampage still, lashing out at all players who drew too close. The inhabitants refuse to believe that Tanos the Unshakeable was slain by such puny strangers, and continue to enforce the taboo that keeps the Forbidden Lands off-limits.
Main Settlement:
<<Home>>

"Home" is a very humble settlement made up mostly of leather tents and huts, with a few wooden shacks here and there. Its name commemorates the fact that its residents have no other safe place to stay. A deadly seriousness usually hangs over the settlement. Despite it being a safe zone, the settlement frequently fends off attacks by packs of wolves that harry the locals for the bounty of their meager flocks and limited crops. Players can attack the wolves, if they wish, but will otherwise be ignored during these raids.
There are a handful of makeshift shops here, where trade can occur, but their stock is limited and the style trends strongly to the rustic and pragmatic. If players look inside the tents they will see minimal possessions and a multitude of mats for sleeping all in one tent. Even the shacks are no better adorned.
Sub-Settlements:
◉ « Mikiakus »
Spoiler
Mikiakus is the name of an ancient ruined city within the Forbidden Lands. The name's meaning remains a mystery, as is much of the city. Devoid of life, this settlement is eerily quiet. The city was built for occupants of two vastly different scales: human and colossal. Its diameter and height are impressive, but the ruins are overgrown with moss, thorny vines and a large assortment of fungi.
Many of the walls and structures are broken and shattered, having apparently endured the ravages of time as well as the passage of angered colossi. Everywhere is littered with cracked and broken stone, bits of fragmented masonry and faded statues worn to the point of becoming featureless. Travel here is difficult, even on foot, often requiring lengthy, perilous climbs and acrobatic shenanigans to reach isolated ledges and other vantage points. Certain areas have ancient texts and relief carving recording the history of those who once lived here, though the language has since been lost.
Other Locations
◉ « The Forbidden Lands»
Spoiler
The Forbidden Lands encompass the entire area of Floor Nineteen on the far side of the Bastion Wall from Home. Desolate, broken and barren are just a few terms that will immediately come to mind as players set their sights upon this vast wasteland of shattered rock strewn with occasional ruins somehow having survived the constant ravages and wanderings of the various colossi that wander aimlessly about the place. It is a treacherous land, with only the barest hints of water and plant life, and living creatures are nearly impossible to find. Tanos' wrath, and the destruction unleashed by his Forbidden Ones, have left an indelible mark upon this landscape.
◉ « The Bastion Wall Shrine »
Spoiler
The Bastion Wall Shrine straddles the large, high promontory that separates the lands of Haven from the rest of the floor. It is the only known point of travel between Haven and the Forbidden Lands. Coming from Haven the players will traverse an incredibly long stone bridge over an impossibly deep chasm. It leads them to a narrow winding stair that clings to the otherwise shear wall face leading them up to the level of the shrine atop the bastion wall. The shrine itself is a single long hall with sixteen stone idol statues, eight on either side. Their features have been lost to time, but their forms are suggestively similar to colossi known to ravage the wastes.
At the far end of the hall is the main chamber of the shrine, where light pours in between the columns onto a single stone altar. It is rumored that there was once an NPC spotted kneeling at the altar, but all of the reports are too old to be confirmed. No hostile creature will ever come anywhere near this shrine, which is a safe zone. Beyond the shrine, players will find another winding staircase descending down onto the plains of the Forbidden Lands.
◉ « Secret Gardens of Yaruun »
Spoiler
Even after its discovery, it remains incredibly difficult to locate them. Rumors abound that the passageway moves from time to time. Others believe that certain quests or achievements must be completed before a player can find the entrance. Whatever the truth may be, those who have managed to find the Secret Garden of Yaruun describe it as 'the most sublime and peaceful garden that there ever was'. Filled with soothing ambience, fresh air, teeming with lush vegetation. Even small animals such as foxes, rabbits, birds, squirrels and the like can be found here. It is rumored that simply resting in the garden recovers health and energy more quickly, and clears the mind allowing them to be more fit for battle when they leave. Though some say it is so alluring that all who enter face the great temptation of never leaving at all.
Transportation
The only way to traverse this floor is by foot. Mounts cannot cross the bastion wall and no suitable creatures can be found in the Forbidden Lands
Common Mobs of Floor Nineteen
Spoiler-
Plains Stalker - A tall four legged creature standing double the height of a man and made of mostly stone with a line of fur stretching from the top of its head, down its spine to its hips. This creature has no feet, standing instead on four jagged stone pikes that start thick and narrow down to a lethal point. A stony cage of ribs protects most of its hide, save the fleshier underbelly. Each creature’s face is slightly different, but bears a bas-relief of an animal resembling marks seen throughout Mikiakus.
- Locations: <<Forbidden Lands: Plains, Canyons>>
-
Stonecrawler - Short, but roughly ten feet long, this lizard-like beast appears to be made mostly of stone scales, slabs and claws. The top half of its body is heavily armored, but articulated to allow it ease of movement. The creature’s whip-like tail attacks are considered to be among its most dangerous, along with goring from the two large horns on its head. Stonecrawlers usually travel alone, and rarer spawns are rumored to be immune to paralysis and stun effects..
- Locations: <<Forbidden Lands: Canyons, Mountains, Cliffs>>
-
Bovine Guardian - Gorgon-like beasts nearly ten feet tall at the shoulders, with thick, basalt-like plates covering most of its hide. Each foot has five razor-sharp claws of obsidian. The beast also has a short hammer-like tail which it can use to slam or crush objects and opponents alike. Bovine Guardians have very high mitigation, are immune to paralysis and stuns, and deal +25/+50 damage on critical hits instead of the usual +1+2.
- Locations: <<Forbidden Lands: Ruins>>
-
Wandering Colossus: Titanic, humanoid creatures standing nearly forty feet tall, their blocky features are often worn with age, but sometimes still feature script and sculptural relief similar to that found in Mikiakus. Devastatingly powerful, there are fortunately solitary, and should never be engaged without the support of a full group (stats as equivalent to a dungeon boss, based on party composition, but providing only standard loot).
- Locations: <<Forbidden Lands: Anywhere>>
-
Pack of Wolves - The only hostile mob in Haven, these animals are cunning and aggressive, attacking anything that comes near them. Their fur is mangy and knotted, they have thin, malnourished bodies, and they often appear to be foaming at the mouth. They always travel in large packs, and harry the local NPCs relentlessly.
- Locations: <<Haven>>
Field Boss of Floor Nineteen
Spoiler
<<The Ancient>>
One of the oldest creatures on the Floor, <<The Ancient>> appears to wander the landscape aimlessly. While it may pause to stare silently at Players, it will not attack unless further provoked. It moves surprisingly well for its age.
HP: 1980/1980 | MIT: 130 | DMG: 225 | ACC: 2 | EVA: 2
Abilities:
- Seal | On an MD 9-10, the boss will stun the Player with the highest hate, hitting them for 50 additional unmitigatable DMG.
- Disruption | Using Purify on <<The Ancient>> will remove any stacks of <<Self Sustained>>.
- Self Sustained | On an LD 15+, <<The Ancient>> will not attack and instead will increase his DMG by 25, as well as heal 200 HP. The DMG buff stacks up to three times.
- The Elder | On a CD 10+, <<The Ancient>> will cleanse all status conditions it’s afflicted with, as well as become immune to all incoming ones for two turns. Once the buff is over, it can only occur again after three turns have passed.
- Tier Lock | For the duration of the fight, all of the participants’ stats that scale with Tier are calculated as though they’re Tier 3. [DMG/MIT/BLEED enhancements etc.] This skill only locks downward. Those at Tier 1 or T2 will still have T1 or T2 stats, respectively.
Drop:
“Crystal of Divine Light" (T3/Consumable - Instant (after attack)/Re-usable); After having rolled for attack, the user may activate the item to deal a slot of Fallen or Holy damage equal to their Tier if their BD allows it. During their next turn however, they will take double damage. Usable only once per thread. This effect does circumvent the standard enhancement cap for Fallen/Holy. [Usable to deal Fallen damage on BD 6-8, Holy damage on BD 9-10.]
« Floor Nineteen Labyrinth »
The labyrinth can be found in a canyon nestled between the two tallest peaks in the Forbidden Lands. While easy to locate, it is far more perilous to traverse as it is also teeming with stonecrawlers and every other form of colossi imaginable. At the very deepest part of the canyon floor, broken into hundreds of scattered fragments, players can still find the lingering, motionless remnants of Tanos' broken body.
Quests:
<<Keep Calm & Ki-Raion>>
<<SOTW: The Colossal Shadow>>
-
Plains Stalker - A tall four legged creature standing double the height of a man and made of mostly stone with a line of fur stretching from the top of its head, down its spine to its hips. This creature has no feet, standing instead on four jagged stone pikes that start thick and narrow down to a lethal point. A stony cage of ribs protects most of its hide, save the fleshier underbelly. Each creature’s face is slightly different, but bears a bas-relief of an animal resembling marks seen throughout Mikiakus.
-
Floor 23
<<Escaping the Underdark>>
Party Limit: 2 | 20+ Posts
Prerequisite: Must have completed <<Search and Rescue>>
Repeatable for standard thread rewards, and <<Fonsa's Song>>.
Quest Rewards:
- 2,000 Experience Points
- 3,000 Col
-
Each player receives:
-
Fonsa's Song (Unique Debuff Song)
- Hypnotic Melody: When played, reduces a single enemy’s accuracy and evasion by 1 each. Can stack with Lullaby and Hypnosis debuffs. Effect lasts for one battle.
-
Fonsa's Song (Unique Debuff Song)
Requirements:
- Roleplay talking with Tythen (and Fonsa, if still alive) at their home.
-
Escape the Underdark to Ydalin Forest.
- Interested in roleplaying the other option? Remember, you may retake <<Search and Rescue>> for a different outcome.
- Roleplay parting ways with your Dark Elf allies.
Summary:
If Fonsa is Alive:
SpoilerAs you join Fonsa and Tythen in their home, you notice evidence of packing: drawers left open, doors ajar, bags filled to bulging. "The military does not look fondly upon desertion," Fonsa explains, "but I cannot, in good faith, return to them." When prompted for further explanation, Fonsa elaborates. "I was sent to retrieve an ancient artifact, believed to harbor enough dark magic to wipe the Wood Elves from existence. Rumor is, Queen Lun’Rael kept notes as to its whereabouts in her tower." She hesitates, then sets her jaw firmly. "I was uneasy when given my assignment, and I reflected on the wrongness of it the entire time I searched. Can we really not live peacefully now, in our two separate worlds? Well, I refuse to be a part of further bloodshed."
"We've heard that there might be a place for us in the Ydalin Forest," Tythen tells you, grabbing a packed canvas bag. "We won't be welcomed by the Wood Elves, but perhaps we can keep our heads down, and make a new life for ourselves. We certainly cannot stay here any longer. Will you help us escape?"
If Fonsa is Dead:
SpoilerAs you join Tythen in his home, you notice evidence of packing: drawers left open, doors ajar, bags filled to bulging. "I think," Tythen begins slowly, "deep down, I knew she was gone. But I couldn't leave until I knew for sure. Now that I do, I need to go. There are too many memories, and without Fonsa, I-" Though he looks as if he might break down, he gathers himself with a long, deep breath. "I want to see the surface. I want to see the trees, feel the sun, and find a place to start over again. Will you help me have that?"
Outline:
If Fonsa is Alive:
SpoilerWith Fonsa hidden beneath the baggage in the back, Tythen carefully maneuvers the wagon through the streets of Kalanaes. Though you receive a few quizzical looks from other Dark Elves, the trip is largely uneventful. At least, until you approach the city's entrance. Another Dark Elf approaches, hailing Tythen with a wave of his hand. Though his expression is originally mild, it darkens when he spots you. "Tythen," he begins coldly, "who is this human? Why are you traveling together?"
-
Describe what happens next. Your character should do whatever necessary to get out of the situation safely. You may bargain, lie, sabotage, resort to violence, or anything else that you can think of. But remember, it is strictly roleplay - there should be no actual combat taking place.
- Optional: Roll the die. A natural LD of 1-9 means your attempt fails, and the Dark Elf goes to alert the guards. A natural LD of 10-20 means you succeeded, and your party is able to exit the city without being further incident. If you're not interested in rolling, you may choose how the confrontation ends, and what the consequences are.
Despite the near-disaster, Tythen's wagon slips into the caverns unscathed. When it finally emerges into the bright sunlight of the Surface, and Fonsa emerges from her hiding spot, you move to sit beside her. "We still have a while before we reach the forest," she tells you. "Talking may make the time pass more quickly? I'd like to know more about the person who saved me."
-
Tell Fonsa about yourself. All players must address all questions. How you answer them, however, is entirely up to you. You may lie, tell half-truths, or spill it all. Just be aware, if you tell Fonsa that she is an NPC and you are trapped in a video game, she will not be able to comprehend the words. She does, however, understand that the world is split into various regions that are now magically linked (her legends refer to it as "the Great Separation"). While the concept of "floors" may be lost on her, she will not be surprised to learn you live somewhere she has never been.
- Who are you?
- Where do you live?
- What made you want to be a "soldier" (her best interpretation of what players are)?
- What do you plan to do next, when you've finished helping them?
If Fonsa is Dead:
SpoilerRiding alongside Tythen on the bench of his wagon, you manage to slip through the city gates without incident. "That went far better than I expected," Tythen admits, once he has brought you deeper into the network of tunnels. "I figured someone would demand to know why I was traveling with a human." Only moments later, a group of three cloaked figures emerge from the shadows. The fabric bears the symbol of the Bleakswords, powerful servants of the corrupt Dark Elf Council who once guarded the Labyrinth's entrance.
"So our intel was correct," the nearest Dark Elf sneers. "You really are attempting to flee the city." He looks at you, disgust plain in his tone and on his face. Still, he continues to address Tythen. "We know you sent the human to find Fonsa, and we know she is dead. Now comes the matter of what she told you before she died."
In response, Tythen's entire being hardens. "My wife respected her work, and would not betray the military's trust. She told me nothing."
With a metallic hiss, the Bleaksword draws his weapon. "There is only one way that we can know for sure."
-
You must battle the three Bleakswords!
Allies:
<<Tythen>>
A Dark Elf with powerful support abilities.When completing the final player roll of the rotation, use the CD to determine Tythen's action.
CD 1-4: Heals all players 5% of their total starting health.
CD 5-8: Provides a +1 damage bonus to all players on their next turn.
CD 9-12: Stuns one enemy for one turn.
Enemies:
<< Bleaksword >>
An elite task force that serves the Dark Knight Council, and once protected the Labyrinth.Each Bleaksword must at least meet the highest level player's loot minimums.
Each Bleaksword receives its own roll.Abilities:
In Sync | The Bleakswords move in perfect unison, but keep enough distance between themselves that they cannot be hit with AoEs. Only one enemy at a time can be targeted by each player (though that enemy can vary between players).
Reinforcements! | If there are two players taking the quest at once, reinforcements will arrive when the third Bleaksword is killed. Three more Bleakswords will arrive, with stats identical to the first group. Combat will continue without a break in between.
The quest ends when the players reach a suitably isolated area in Ydalin Forest, where Fonsa and Tythen will attempt to forge a new life.
Epilogue:
If Fonsa is Alive:
Spoiler"I will never be able to thank you for the help you have given us," Fonsa states. Then she pauses to retrieve something from the pouch on her hip. As she offers the crystal to you, she smiles shyly, the gentle expression softening the war-hardened woman. "While I do not normally share this with others, I find great joy in music. Here is a piece that I sang a few months ago. It's a silly thing, but perhaps you might find some joy in it.
If Fonsa is Dead:
Spoiler"I suppose I'll never know what it was that brought Fonsa to the Surface," Tythen muses aloud, gazing through the trees that surround you both. "Still, there is some peace in knowing it is also where I'll spend the remainder of my days." Slowly, he draws a crystal from his pocket, then offers it to you. "My wife had a beautiful singing voice. She used to record songs for me before going off to fight. Perhaps this one will bring you some comfort, as they have always done for me."
-
<<Floor 18>>
Floor Eighteen is a massive, endless mire. Most of its swampy area is composed of small patches of muddy ground overgrown with reeds and tall barely-rooted grasses, but a few rarer parts are better described as sunken forests. Water levels in the shallower swampland generally comes to the knees, making it possible to traverse by foot. Doing so is a horrendously exhausting experience. Mounted travel is essentially impossible without the use of rare, specialized mounts. Bits of road, fences and decaying stone bridges still poke out of the water here and there, suggesting that the floor’s current condition wasn’t always the case. The sun is rarely seen here, where the skies are perpetually overcast, making it difficult to follow the passage of time.
Most NPC inhabitants of Floor 18 are human, but they are a frail lot, with brittle bones prone to breakage at the slightest impact. Many have had their forms altered and frames bent due to poor nourishment. The living conditions take a serious toll. Most of the villagers keep these ailments to themselves, wearing tattered long clothing that cover most of their bodies. Masks are likewise especially popular as both fashion statements and to cover their worn and drawn out faces. Few wander far from their homes, stagnating in their settlements, just as the rest of the floor does around them.
Tales tell of the Sundrinkers, predecessors to the current inhabitants, who built much of the original infrastructure around the floor, including Eriwald’s Crossing. Most of their great works now sit below water. They are enviously called such because the sun still reached through the haze of clouds in those days. The arrival of some foul beast from beyond brought an end to that golden age, as its very presence poisoned the land and the sky, rendering everything toxic and flooding the floor with its festering waters. Things improved a bit after players arrived and defeated this infectious horror, but the recovery was incomplete. The floor has since settled into this oppressive malaise that has stricken the land as much as its people, leaving both with little hope for a brighter future.
Main Settlements:
<<Eriwald>>
Eriwald is the name of the main settlement of the eighteenth floor, constructed on a precarious network of wooden stilts and piles, forcing residents and visitors alike to navigate the various buildings via raised rope bridges and boardwalks. Despite the unstable appearance of its structures, the settlement overall is surprisingly sound. The locals attribute this to the craftsmanship of Eriwald, an architect from the now defunct Sundrinker generation, who was suspected of constructing the entire settlement in a few nights. Eriwald itself is one of the smallest main settlements discovered in Aincrad to this point, boasting only twenty five buildings. As a result, the number of services available to players is also extremely limited, including a single tavern - affectionately called Mucksucker’s - and a jury-rigged smithy only capable of crafting and repairing the most basic equipment.
Eriwald's Crossing, the only stone bridge to have survived the downfall of the Sundrinkers, connects the settlement to either side of a large, slow-moving river along its eastern edge. Fording the river on foot is treacherous, at best, and generally considered to be a foolhardy task tantamount to basting one’s self for the enjoyment of the local wildlife.
Sub-Settlements:
◉ « Serpent's Pitch »
Spoiler
Where Eriwald is a larger network built on an unsteady foundation, the secondary settlement of Serpent's Pitch is its exact opposite, in a negative light. Built on one of the few dry patches of land in the thickest portion of the flooded forests, the location is closer to a large camp than any form of actual town. Strewn across a trifling area of dry and stable land, the cluster of tents is in fact the only place on the entire floor which grants players the option to rent a place for overnight recuperation. A few dozen tents are available for rent on a first-come, first-serve basis, with a small number of additional lean-tos utilized for simple services. A lone, ring-shaped pavilion stands at the centre of the camp and is used as a mess hall, offering a common central fire and cauldron for long-cooking stews and the like. Merchants occasionally set up a small open-air bazaar nearby, colloquially known as the ‘Flotsam and Dross’, that typically offers a limited assortment of trinkets and Sundrinker artifacts recovered from the mire.
Other Locations:
◉ « The Bog of Lost Sun »
Spoiler
A title given by NPCs to most of the mires that cover the floor, the Bog of Lost Sun, is so named for the fall of the last of the Sundrinker generation. Beneath its waters sit better days, now drowned by decay, dank water, and the detritus of time. While the area itself can seem precarious and dangerous to navigate, most of it is relatively stable. The weather here is unchanging, with a constant humid fog hanging just above the surface of its murky brown waters.
◉ « The Darkwaters »
Spoiler
Flooded forest regions of the eighteenth floor are referred to as Darkwaters by the locals. Here, the constant overcast weather combined with increased water depths leaves little but gloom and a reflective black mirrored surface that reflects the towering petrified tree trunks that loom menacingly overhead. It is highly recommended not to attempt traversing Darkwaters areas by any other route than the rare lonely bridges and plank walkways connecting various dry patches. Dangerous creatures lurk both below and above, awaiting a chance to attack anyone foolish enough to do so.
Transportation
Foot travel is the only real option on the eighteenth floor. The mire is too full of obstacles, and varying in depth, for boats to be used effectively. There are no established roads or pathways outside of the settlements, and the remnants of those around are in a dangerous state of decay.
Common Mobs of Floor Eighteen
Spoiler-
Shallows Prowler - Often encountered by unsuspecting travelers in the shallower areas of the mire, these dark brown alligators normally remain just below the surface, hidden by the murky, muddy water. No matter the size of its chosen target, it will stalk its prey until it determines the ideal time to strike, before biting at whatever part is below or just above the water's surface, aiming to drag it under.
- Locations: Bog of Lost Sun
-
Mudwurm - An oddly passive creature, it can grow to nearly thirty feet long and is often mistakenly considered to be a log or fallen tree and stepped on or over by explorers. They can be quite nasty, when hungry or provoked, striking with an extending toothed proboscis, or else coiling around and burying its victim in the muck.
- Locations: Bog of Lost Sun
-
Gargantu-Gobbler - An unusual large and dangerous monster fish that lurks in the depths of the floor’s waterways. It is particularly sensitive to the vibrations caused by boats, paddles and oars which explains their limited use.
- Locations: Bog of Lost Sun
-
Piranha Swarm - Swarms of deadly mouths and eyes and tiny tails, allegedly connected by tiny bodies. They prefer to travel in schools just below the black, mirrored surface of the Darkwaters, tiny ripples on the surface being the only indication of their presence until it is too late.
- Locations: The Darkwaters
-
Surface Lurker - A strange cousin to the Gargantu-Gobbler, and considered to be some variant of the mob, this creature remains just below the surface of the Darkwater areas. Lurking in the silent waters, it keeps so still it doesn't even cause waves or ripples. One could almost accidentally end up stepping on one of these creatures, but doing so or passing in front of its head will result in this monster lunging forward in an attempt to take a bite out of its target.
- Locations: The Darkwaters
Field Boss of Floor Eighteen
Spoiler
<<The Prowler>>
A fearsome beast prowling the swamped forests, satisfying its hunger with unsuspecting Players. Its body is covered in hard scales, and its jaws are powerful enough to snap through the most powerful defenses. While stealth isn't its strong suit, it provides plenty of fight for any player daring to fight it.HP: 1800/1800 | MIT: 135 | DMG: 215 | ACC: 3 | EVA: 0
Abilities:
- Blinding Flash | In the case of an LD 17+, <<The Prowler's>> esca will shine brightly, paralyzing the entire party for 1 turn, in addition to its standard attack (which follows the paralysis). This can only occur once every three turns.
- Fish Lungs | While <<The Prowler>> is affected by a stun, a Player may choose to spend a Post Action attempting to throw the monster out of the water. A CD roll of 8 or higher will indicate that <<The Prowler>> has been successfully removed from the water. That will cause its MIT to drop to 110, its DMG to 200, its ACC to 1 and its EVA to -1 for the rest of the battle.
- Iron Jaws | In the case of a MD 9-10 and CD 6+, <<The Prowler>> will bite the Player with the highest hate and try to drag them into the waters with it. Doing so will reverse the negative effects of <<Fish Lungs>> if it has occurred. On the Player’s turn, both <<The Prowler>> and the Player will roll LD and if the Player has the highest LD, they’re free to expend their Post Action to return to the surface. For every turn they remain submerged, they’ll take 150 unmitigatable DMG. <<The Prowler>> will also let go if another Player stuns the monster while submerged with a Player.
- Tier Lock | For the duration of the fight, all of the participants’ stats that scale with Tier are calculated as though they’re Tier 3. [DMG/MIT/BLEED enhancements etc.] This skill only locks downward. Those at Tier 1 or T2 will still have T1 or T2 stats, respectively.
Drop:
“Gleaming Fish Scale" (T3/Consumable/Single Use); For the remainder of the thread, after rolling for loot the user may reduce or increase their LD’s value by up to 5. This effect can be used for up to 4 mobs maximum.
« Floor Eighteen Labyrinth »
The Floor Eighteen Labyrinth is found deep within the heart of the largest Darkwater area, at the far south end of the floor and well past any established bridges or trails. Here, a forest of infinitely tall petrified trees with thick, tangled roots, marks its boundary. Those wishing to enter must fight their way through increasingly numerous and exceedingly aggressive versions of wildlife found elsewhere in the mire.
Boat travel is impossible here. Players must navigate the area entirely by climbing and crawling over, under or between the thick network of roots that press together like a thick sort of webbing just above the water’s surface. A few rare patches of dry land can be found along the way, offering brief respite before continuing the slog to the next.To cross between the patch of land, each player must try to swim across the water or navigate the roots without provoking the attention of the nearby enemy mobs. To do so, they must make a roll of the LD towards a threshold indicated below. If they meet or succeed the threshold, they pass to the next piece of land without provoking a battle. Groups combine their rolls and compare the sum to the applicable threshold. If they fail, they must complete the related battle before they can continue. All five thresholds must be passed in order to reach the boss room.
-
Threshold 1 (6 x Player Count):
- Failure results in the following battle: 2*(number of players) loot minimum mobs, each with ACC 1, EVA 1 and MIT 50
-
Threshold 2 (7 x Player Count):
- Failure results in the following battle: 3*(number of players) loot minimum mobs, each with ACC 1, EVA 1 and MIT 60
-
Threshold 3 (8 x Player Count):
- Failure results in the following battle: 4*(number of players) loot minimum mobs, each with ACC 2, EVA 1 and MIT 70
-
Threshold 4 (9 x Player Count):
- Failure results in the following battle: 5*(number of players) loot minimum mobs, each with ACC 2, EVA 2 and MIT 80
-
Threshold 5 (10 x Player Count):
- Failure results in the following battle: 6*(number of players) loot minimum mobs, each with ACC 2, EVA 2 and MIT 100
Players who successfully navigate their way to the center of the Labyrinth will reach a large, moss-covered, spongy patch of land. Pools of acid of varying sizes and shapes litter the area, though any attempt to interact with them fails, registering as a system error. Found at the back of the area is a wall composed most of tightly intertwined trees, making an impassable barrier. At the base of this wall is a monstrously sized bundle of wolf fur, seemingly left by <<Malethis>>, the immense and corrosive dire wolf that was once the floor boss.
Quests:
<<The Poisonous Warg>> -
Shallows Prowler - Often encountered by unsuspecting travelers in the shallower areas of the mire, these dark brown alligators normally remain just below the surface, hidden by the murky, muddy water. No matter the size of its chosen target, it will stalk its prey until it determines the ideal time to strike, before biting at whatever part is below or just above the water's surface, aiming to drag it under.
-

Paragon Levels are indicated by the color blue.
SpoilerTotal EXP Level SP HP EN 0 1 5 20 20 500 2 10 40 22 1000 3 15 60 24 1500 4 20 80 26 2000 5 25 100 28 2500 6 30 120 30 3000 7 35 140 32 3500 8 40 160 34 4000 9 45 180 36 4500 10 50 200 38 5000 11 55 220 40 6200 12 60 240 42 7400 13 65 260 44 8600 14 70 280 46 9800 15 75 300 48 11000 16 80 320 50 12200 17 85 340 52 13400 18 90 360 54 14600 19 95 380 56 15800 20 100 400 58 17000 21 105 420 60 19100 22 110 440 62 21200 23 115 460 64 23300 24 120 480 66 25400 25 125 500 68 27500 26 130 520 70 29600 27 135 540 72 31700 28 140 560 74 33800 29 145 580 76 35900 30 150 600 78 38000 31 155 620 80 41200 32 160 640 82 44400 33 165 660 84 47600 34 170 680 86 50800 35 175 700 88 54000 36 180 720 90 57200 37 185 740 92 60400 38 190 760 94 63600 39 195 780 96 66800 40 200 800 98 70000 41 205 820 100 74500 42 210 840 102 79000 43 215 860 104 83500 44 220 880 106 88000 45 225 900 108 92500 46 230 920 110 97000 47 235 940 112 101500 48 240 960 114 106000 49 245 980 116 110500 50 250 1000 118 115000 51 255 1020 120 121000 52 260 1040 122 127000 53 265 1060 124 133000 54 270 1080 126 139000 55 275 1100 128 145000 56 280 1120 130 151000 57 285 1140 132 157000 58 290 1160 134 163000 59 295 1180 136 169000 60 300 1200 138 175000 61 305 1220 140 182700 62 310 1240 142 190400 63 315 1260 144 198100 64 320 1280 146 205800 65 325 1300 148 213500 66 330 1320 150 221200 67 335 1340 152 228900 68 340 1360 154 236600 69 345 1380 156 244300 70 350 1400 158 252000 71 355 1420 160 261600 72 360 1440 162 271200 73 365 1460 164 280800 74 370 1480 166 290400 75 375 1500 168 300000 76 380 1520 170 309600 77 385 1540 172 319200 78 390 1560 174 328800 79 395 1580 176 338400 80 400 1600 178 348000 81 405 1620 180 359700 82 410 1640 182 371400 83 415 1660 184 383100 84 420 1680 186 394800 85 425 1700 188 406500 86 430 1720 190 418200 87 435 1740 192 429900 88 440 1760 194 441600 89 445 1780 196 453300 90 450 1800 198 465000 91 455 1820 200 479000 92 460 1840 202 493000 93 465 1860 204 507000 94 470 1880 206 521000 95 475 1900 208 535000 96 480 1920 210 549000 97 485 1940 212 563000 98 490 1960 214 577000 99 495 1980 216 591000 100 500 2000 218 605000 101 505 2020 220 621500 102 510 2040 222 638000 103 515 2060 224 654500 104 520 2080 226 671000 105 525 2100 228 687500 106 530 2120 230 704000 107 535 2140 232 720500 108 540 2160 234 737000 109 545 2180 236 753500 110 550 2200 238 770000 111 555 2220 240 789200 112 560 2240 242 808400 113 565 2260 244 827600 114 570 2280 246 846800 115 575 2300 248 866000 116 580 2320 250 885200 117 585 2340 252 904400 118 590 2360 254 923600 119 595 2380 256 942800 120 600 2400 258 962000 121 605 2420 260 984100 122 610 2440 262 1006200 123 615 2460 264 1028300 124 620 2480 266 1050400 125 625 2500 268 1072500 126 630 2520 270 1094600 127 635 2540 272 1116700 128 640 2560 274 1138800 129 645 2580 276 1160900 130 650 2600 278 1183000 131 655 2620 280 1208200 132 660 2640 282 1233400 133 665 2660 284 1258600 134 670 2680 286 1283800 135 675 2700 288 1309000 136 680 2720 290 1334200 137 685 2740 292 1359400 138 690 2760 294 1384600 139 695 2780 296 1409800 140 700 2800 298 1435000 141 705 2820 300 1463500 142 710 2840 302 1492000 143 715 2860 304 1520500 144 720 2880 306 1549000 145 725 2900 308 1577500 146 730 2920 310 1606000 147 735 2940 312 1634500 148 740 2960 314 1663000 149 745 2980 316 1691500 150 750 3000 318 1720000 151 755 3020 320 1752000 152 760 3040 322 1784000 153 765 3060 324 1816000 154 770 3080 326 1848000 155 775 3100 328 1880000 156 780 3120 330 1912000 157 785 3140 332 1944000 158 790 3160 334 1976000 159 795 3180 336 2008000 160 800 3200 338 2040000 161 805 3220 340 2075700 162 810 3240 342 2111400 163 815 3260 344 2147100 164 820 3280 346 2182800 165 825 3300 348 2218500 166 830 3320 350 2254200 167 835 3340 352 2289900 168 840 3360 354 2325600 169 845 3380 356 2361300 170 850 3400 358 2397000 171 855 3420 360 2436600 172 860 3440 362 2476200 173 865 3460 364 2515800 174 870 3480 366 2555400 175 875 3500 368 2595000 176 880 3520 370 2634600 177 885 3540 372 2674200 178 890 3560 374 2713800 179 895 3580 376 2753400 180 900 3600 378 2793000 181 905 3620 380 2836700 182 910 3640 382 2880400 183 915 3660 384 2924100 184 920 3680 386 2967800 185 925 3700 388 3011500 186 930 3720 390 3055200 187 935 3740 392 3098900 188 940 3760 394 3142600 189 945 3780 396 3186300 190 950 3800 398 3230000 191 955 3820 400 3278000 192 960 3840 402 3326000 193 965 3860 404 3374000 194 970 3880 406 3422000 195 975 3900 408 3470000 196 980 3920 410 3518000 197 985 3940 412 3566000 198 990 3960 414 3614000 199 995 3980 416 3662000 200 1000 4000 418 3710000 201 1005 4020 420 TIERS
A player’s Tier denotes certain things relating to their stats - namely, how their Skills and Enhancements interact with their Tier. Each Tier is composed of 10 standard levels, and Paragon Levels do not affect one’s Tier.Tier 1 starts at level 1.
Tier 2 starts at level 11.
Tier 3 starts at level 21.
And so on.PARAGON LEVELS
Once you have reached the level cap, which is determined by the Current Top Floor Cleared + 5 (i.e. Floor 28 + 5 = 33), you are able to continue to accumulate EXP and levels. These levels past the level cap are considered “Paragon Levels”. For every 5 Paragon Levels, you gain +20 HP, +2 EN, and +5 SP. There are also certain benchmark rewards of Paragon Levels that are only attainable once per character.Paragon Level formula: Total EXP level - Level Cap = Paragon Level.
EX: You have 47,600 EXP. This places you at “Level 34.” As the Level cap is set at Level 33, the formula would put you at 34 - 33 = 1 Paragon Level.NOTE: Paragon Levels are fluid. Once the level cap is increased, Paragon Levels are converted to standard levels to match the level cap.
PARAGON LEVEL BENCHMARK REWARDS
[All Bound to Character (marriage system does not bypass character-bound items)]Paragon Level 5 - Laurel Wreath (Earn Col equivalent to 15% of player’s EXP earned in thread)
Paragon Level 10 - (1) Gleaming Scale, (1) Demonic Shard, +1 LD to Looting*
Paragon Level 25 - (1) Gleaming Scale, (1) Demonic Shard, Free Skill Respec
Paragon Level 50 - (1) Gleaming Scale, (1) Demonic Shard, x3 Paragon Tier Up Tickets, Custom Skill**
Paragon Level 75 - (1) Gleaming Scale, (1) Demonic Shard, Custom SA
Paragon Level 100 - (2) Gleaming Scales, (2) Demonic Shards, Access to ‘Champion’s Hall’**** This bonus only applies to looting, searching for and opening chests.
** Limit of one use per equipment.
*** Posting in this thread will allow the player to choose a list of seasonal consumables that’s shown up in past events and take a copy of one. Limited to one post per month per player. -
SAO-RPG is a text-based roleplay forum based on the popular anime franchise Sword Art Online. The game runs on a play-by-post format, incorporating elements of dice-rolling systems to determine the outcome of various actions such as gathering, combat and search rolls. Most elements in SAO-RPG adhere to canon, however this roleplay does not feature canonical characters in any way.
How to Play
Players start by creating their character, fashioned under the system SAO-RPG uses. Once approved, players roleplay their characters in topics on the forum; occasionally alone and sometimes with other players. If multiple characters are present on an adventure, they take turns writing posts for each other, describing their actions and/or the environment before passing control of the pen over to their roleplay partner(s).
Sometimes, players may take actions that have an outcome to be determined by chance. In these scenarios, players will want to use the game's Dice Roller to resolve these actions; the results cast by the roller will then be incorporated into the description of the player’s actions.
This continues until the adventure reaches an end, to the consensus of all characters involved in the topic. When a topic is closed, it is sent for staff approval, and then rewards are distributed from there. Rinse and repeat!
Most of the time, adventures and environments are fluid and left up to the discretion of the players involved. However, some key fundamentals of the world need to be upheld (eg. the setting of SAO, description & key elements of floor environments) whilst some mechanics like quests, crafting and combat have more structured rotations and rules that must be abided by.
Using the Guide
Because of the many intricacies SAO-RPG holds, the manual is quite the lengthy read. We do not expect players to remember any nor all parts of the manual at any given time; simply use this guide as a reference to be reviewed against when in doubt of any mechanics, rules, structures or systems in the game.
There are two major pieces of reading when it comes to understanding SAO-RPG:
- The Site Manual, which you are reading right now, acts as our version of the Player's Handbook.
- The Resources List acts as a glossary or index for various aspects of the game.
Asking Questions
Feel free to ask questions often; even if something has been stated in the manual/guide, it never hurts to get a second opinion for verification or clarification, and the interest in the system is often interpreted as enthusiasm by staff. Members of the Player Support Team (PST) are often available to answer these questions; most of them can be found through the roleplay’s Discord server, however they may also be contactable via direct messages (DM’s) through the forum. One may refer to a list of staff here.
SAO-RPG Rules
- The username that one registers with and uses to log in will be the username of their character within Aincrad. Take care when registering accounts to choose a proper username!
- A user may have multiple characters, however they must be registered as separate accounts. Furthermore, their journals must state that the character in play is an alternative character (alt), a deviation from the user’s main character of use.
-
All roleplay posts must have a minimum of 150 words of in-character text (unless noted). Battle stats and OOC notes or comments do not count toward this minimum.
- Posts in the Merchants and Shops sub-section, as well as posts in which a character is stunned or paralyzed, require only 100 words of IC text.
- Posts in the Player Request Board sub-section, while regarded as in-character, do not have a word count requirement.
- Spamming is not allowed under any circumstances.
- Any form of cheating, intentional rule-breaking, or abuse of exploits or loopholes is strictly prohibited.
- Keep all posts and journals PG-13. Should players find themselves unsure if any content they wish to write would go beyond PG-13, message a staff member for clarification. For any content intended above PG-13, please see the Unrestricted Chat Filter sub-section.
Credits
Without the time, care and attention of the following individuals, this guide would not be as rigorous and thorough as it would be today. On behalf of SAO-RPG, we thank you for your service:
@NIGHT @Axios Deminence @Bahr @Lessa @ChaseR @Snow @Freyd


- Introduction
- Table of Contents
- Starting the Game
- Roleplay Rules
- Gameplay
- Glossary
Crafting Professions
Gathering Professions
-
Floor 18
<<The Poisonous Warg>>
Party Limit: 3 | 20+ Posts
Repeatable for standard thread rewards and Bizarre Antidote.
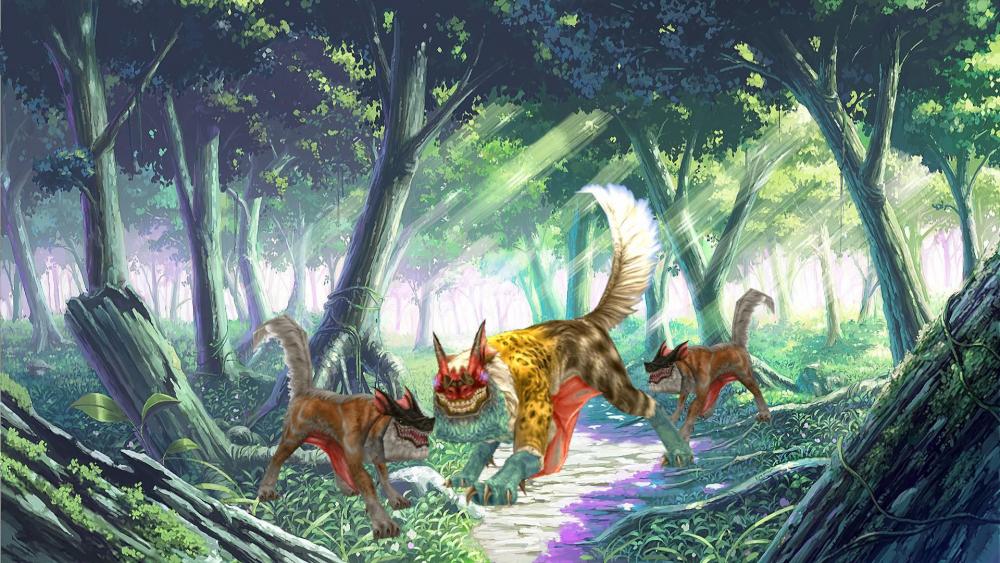
Quest Rewards:
- 500 Experience Points
- 2000 col
-
POTENTIAL | If <Venom Snapper>> and <Wolves>> are defeated
-
Each player receives:
-
Bizarre Antidote (Consumable)
- This vial, when consumed, will provide the player with the same effects as a regular Antidote of Perfect quality. In addition, the player will feel lighter, granting them an additional point of EVA. This effect can stack with other EVA consumables. Effect lasts one thread, or until all Antidote charges are consumed.
-
Bizarre Antidote (Consumable)
-
Each player receives:
Requirements:
- Roleplay speaking to Gyrard within the city of Eriwald.
-
Roleplay escorting the Caravan to Serpent's Pitch
- Players that do not ride in the caravan must each make 3 posts before the fight.
- Players that ride in the Caravan must each make 1 post each before the fight; however, they are ambushed (see below).
-
Defeat <<Poison Snapper>> and 2 wolves simultaneously without letting the Caravan become destroyed.
- Or
- Successfully flee with 2 unmodified rolls of LD 15+ before the Caravan is destroyed. (This option provides reduced rewards.)
- Roleplay the ending.
- *Note: If <<The Caravan>> is destroyed while retreating, the player(s) fail the quest and still have to defeat Poison Snapper and Wolves.
Summary:
In the back alleys of Eriwald, the player(s) can find an NPC merchant seated on a stool within a Tavern. As the players approach him, he drinks the rest of the liquid that was left within his mug before acknowledging them. "Well, it seems I have finally found some better luck. Here I was, just beginning to believe that I'd be stuck in this wretched village forever. Came 'ere over a week ago, delivering some goods from Serpent's Pitch. Problem is, I hardly made it here to begin with. I was attacked by a pack of wolves about halfway through. Tried talkin' to the guards but it was far too out for them to venture." The round middle-aged man slides his mug back over to the bartender. "Thanks Mack." He tells the man before standing and facing the player(s). "I don't dare travel out and get attacked by those beasts. I'd stay here, but my family is waiting for me in Serpent's Pitch. They won't be able to survive without the profit I made from my sales for much longer. Say, would you be willing to protect my caravan and I across the way?"
Upon acceptance, Gyrard offers up a pleasant smile to the player(s). "Excellent. There will be a reward in it for you, even more if you can kill the beast that's causing my trouble. Allow me to prepare the Caravan and I'll meet you outside the front gates to the city." He heads out of the building and another voice will hail the player(s). "Careful out there. I've heard word that the pack's alpha gives a nasty bite. I've heard some mentions of poison. You might want to stop and grab an antidote before you go out there." Rex will nod towards the player(s) as he cleans a mug and returns to paying attention to others in the tavern.
Once the player moves out, they will find Gyrard standing outside the gate. He and the rest of his team are harnessing massive packs full of supplies onto their backs while waiting for the players to join them. "Glad you could join me, 'fraid that I couldn't manage to get you a mount. This ground is very boggy, but I've made my living by mapping out a rare and reliable route for my wagon. Keep your eye on the water, too. Lots of nasties hiding just below the surface."
Outline:
The players must protect <<The Caravan>> from attack, ensuring that it reaches Serpent's Pitch.
NPCs:

<<Gyrard>>
A simple merchant trying to make ends meet to support his family that lives within Serpent's Pitch. The middle-aged man speaks in a gruff tone and while he isn't suited for battle he is quite gifted in the art of business. He is well known and liked by his customers to the point of being on a first-name basis.
Protect the Caravan!

Players must defend <<The Caravan>> from enemy attacks!
<<The Caravan>>
HP: 500/500Abilities:
- Inanimate | The caravan is immune to all status effects except for Burn.
- Fast Travel | Players can decide to ride on the caravan on the ride, reducing the number of posts required before the fight can begin; however, this activates the enemy's <<Ambush>> ability during the first turn of combat.
- Flee! | All players forfeit their Post Action to hop into the caravan and attempt to get away. All player hate values temporarily becomes zero until they leave the caravan again. While the hate of all players is at 0, the mobs will attack <<The Caravan>>. The party leader shall roll and the enemy is successfully escaped after 2 natural rolls of LD 15+.
- Muck! | If the party leader rolls a natural LD of 5 or less while attempting to flee, the wheels of <<The Caravan>> will become stuck in the mud of the swamp. Each member of the party must devote a post action to freeing the wheel from the mud before more flee rolls may be attempted.
Enemies:
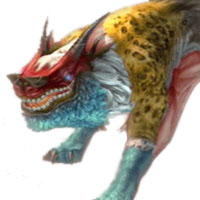
<<Poison Snapper>>
A strange mutation transformed this wolf into a much larger and colorful version of its previous incarnation With its pack, it hunts down unsuspecting merchants and is well-known for its poisonous bite.
HP: 500/500 | DMG: 100 | MIT: 45 | ACC: 2 | EVA: 1Abilities:
- Venomous Bite | On a MD 9-10, Poison Snapper sinks its fangs into the target with the highest hate. This deals 50 unmitigatable poison damage each turn for 2 turns as an ailment effect.
- Revenge | If a <<Wolf>> dies while Poison Snapper is still alive, on the turn after its ally falls, Poison Snapper shall make an attack on the player who killed it before making its normal attack.
- Destroy | If no target has hate on <<Poison Snapper>>, it shall attack <<The Caravan>>
- Ambush | Activated by <<The Caravan>> (see above), the pack shall ambush without warning, acting first in the rotation and with absolute accuracy on this attack, before the players can even get a turn.
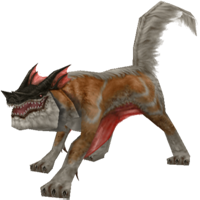
<<Wolf>>
A standard wolf, hunting alongside Poison Snapper to increase the pack's strength, ensuring a steady supply of food.HP: 200/200 | DMG: 75 | MIT: 25 | ACC: 1
Abilities:
- Destroy | If no target has hate on <<Wolf>>, it shall attack <<The Caravan>>.
- Ambush | Activated by <<The Caravan>> (see above), the pack shall ambush without warning, acting first in the rotation and with absolute accuracy on this attack, before the players can even get a turn.
Epilogue:
<<Poison Snapper>> and <<Wolves>> evaded:
SpoilerGyrard climbs out of the caravan after the threat has passed, a jolly grin resting on his face. "You have done it! Those pesky wolves won't be bothering me or any other merchants anymore! I figured you could just scare 'em off! This is excellent! Here, let's head into the city and I can hand ya your reward there."
Upon arriving at the town, he stops in front of a small cottage where two kids burst through the front door. "Daddy!" Each of them cry, wrapping themselves around the man.
"Oh dear me, after all that time I had forgotten about you!" He says in a playful tone.
"No you didn't silly!" One of the children replies.
"Alright, I have a couple of things to do, run along and I'll meet you inside real soon." He turns to the players. "Here is the money as promised." He hands the party a bag that when held instantly transfers col into the player's inventory.
<<Poison Snapper>> and <<Wolves>> Defeated:
SpoilerGyrard climbs out of the caravan after the threat has passed, a jolly grin resting on his face. "You have done it! Those pesky wolves won't be bothering me or any other merchants anymore! I figured you could just scare 'em off! This is excellent! Here, let's head into the city and I can hand ya your reward there. Give you a little somethin' extra for your hard work."
Upon arriving at the town, he stops in front of a small cottage where two kids burst through the front door. "Daddy!" Each of them cry, wrapping themselves around the man.
"Oh dear me, after all that time I had forgotten about you!" He says in a playful tone.
"No you didn't silly!" One of the children replies.
"Alright, I have a couple of things to do, run along and I'll meet you inside real soon." He turns to the players. "Here is the money as promised." He hands the party a bag that when held instantly transfers col into the player's inventory. "And for permanently fixin' my problem, here is a little something for your troubles." He hands each member a <<Bizarre Antidote>> before turning to move inside. "Once again, thank you for you help today!" He waves before moving into the cottage where the quest will come to an end.


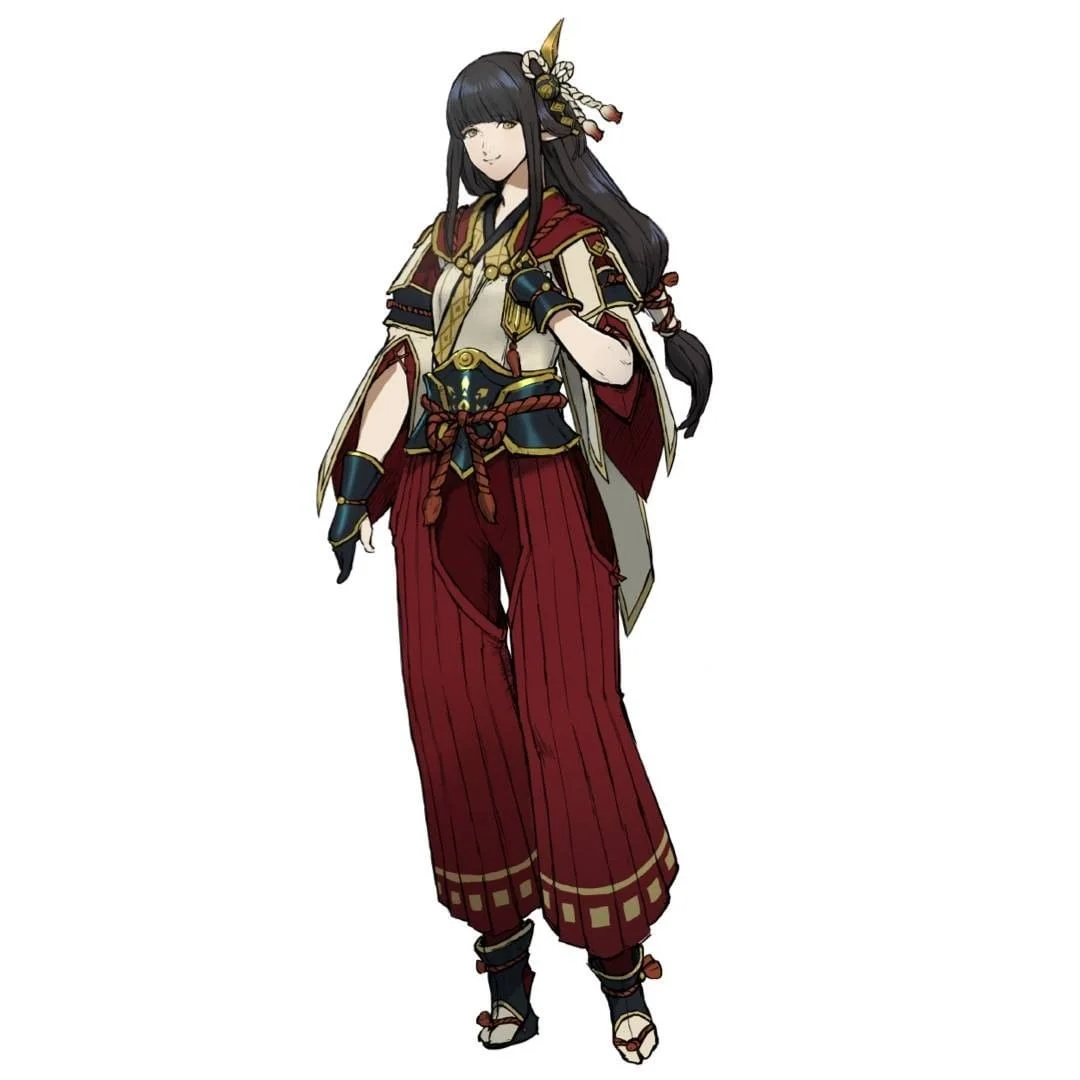


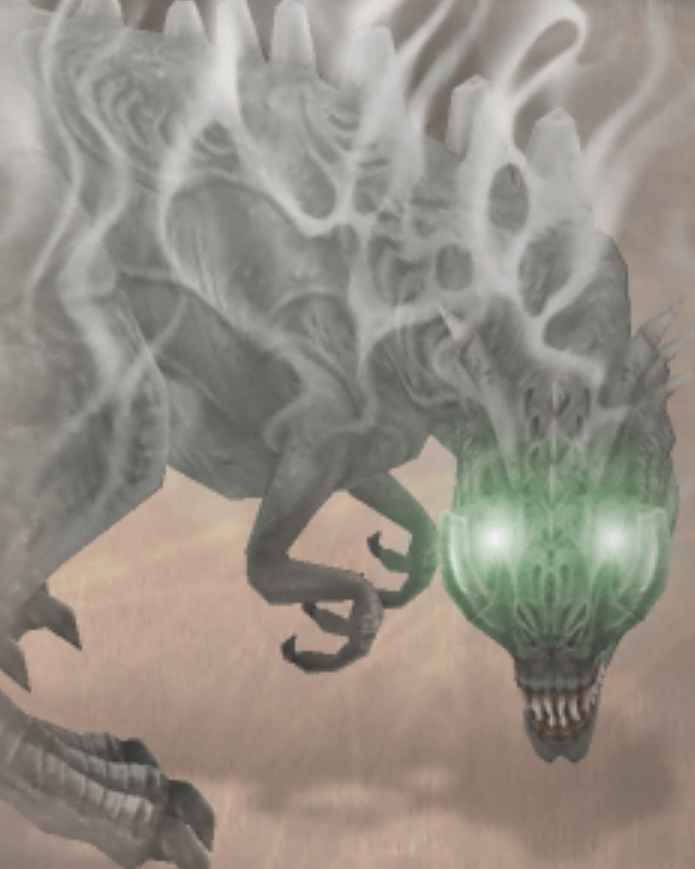
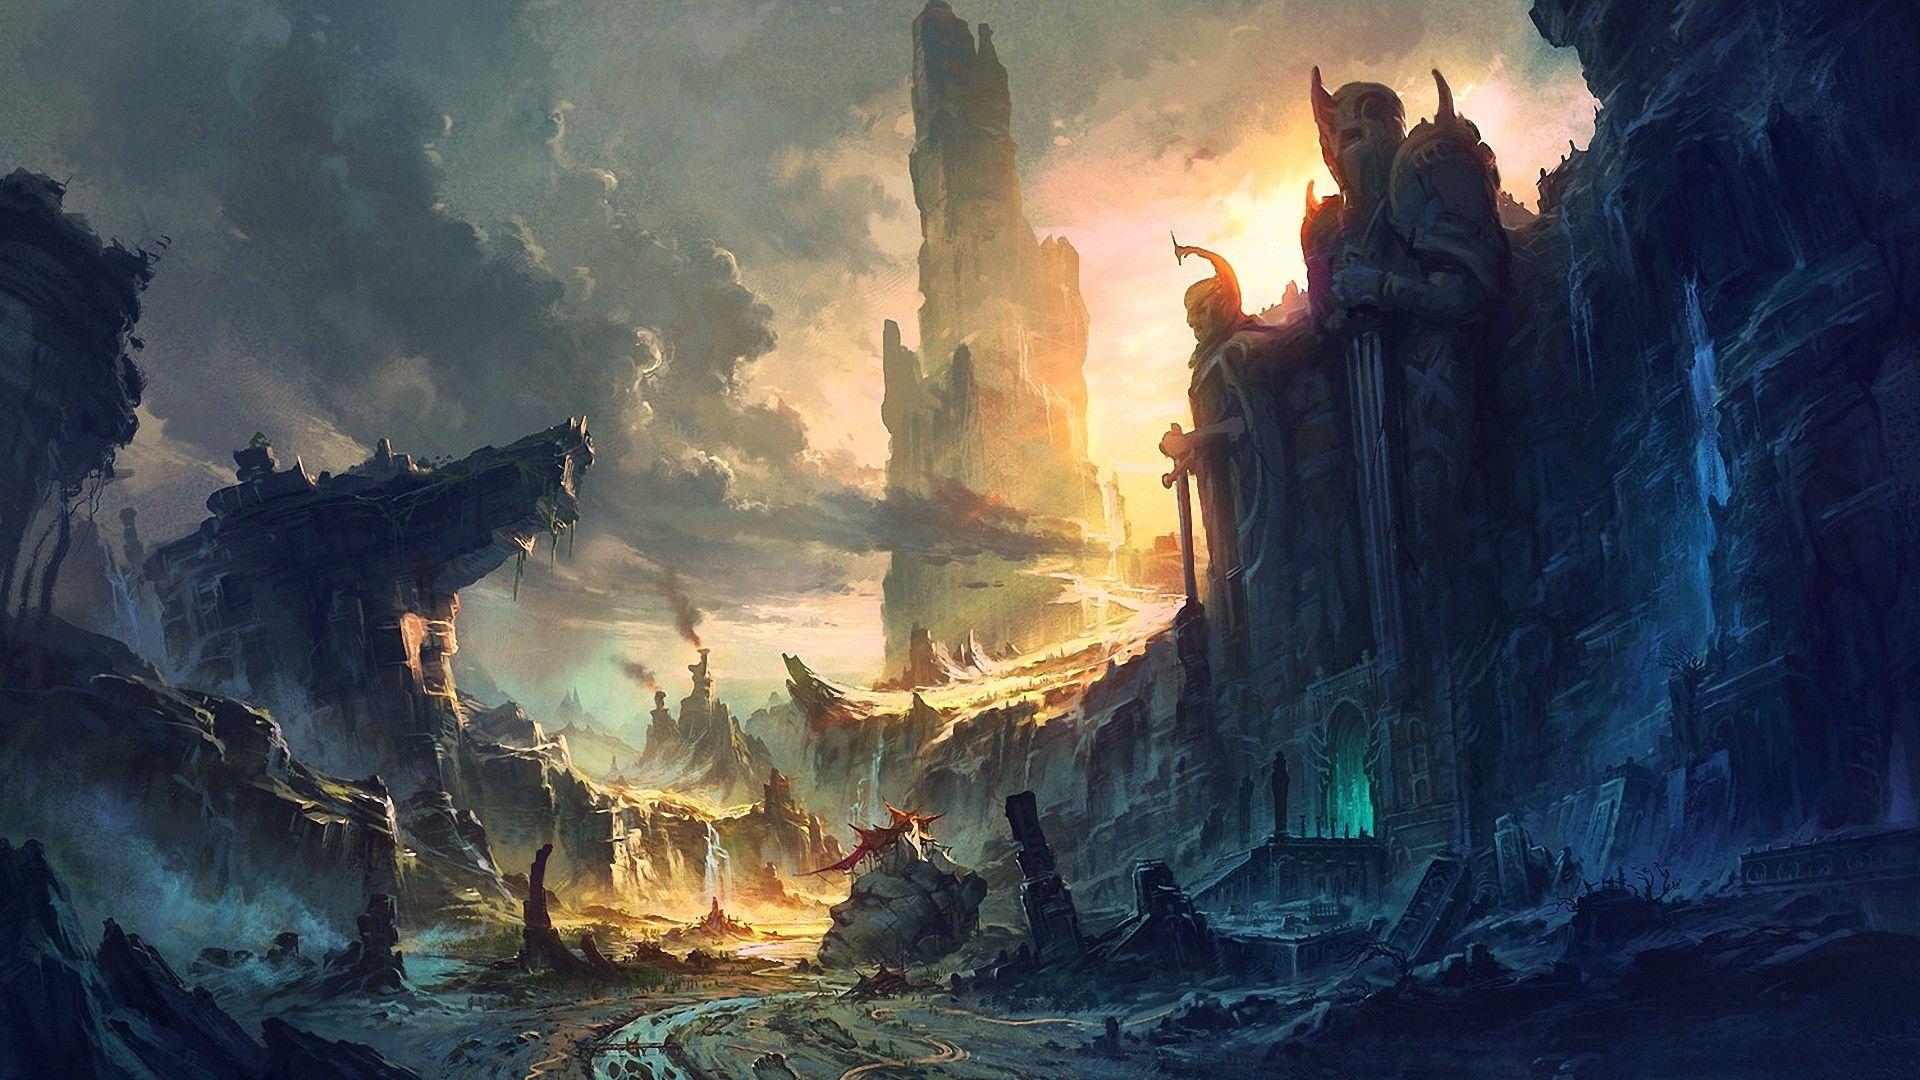

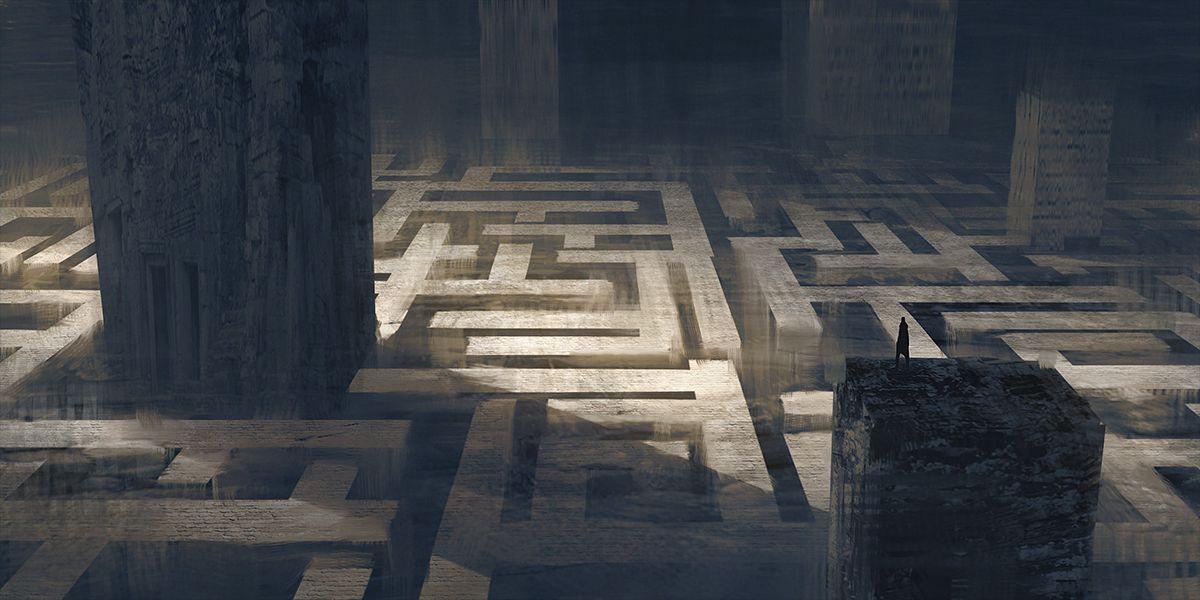


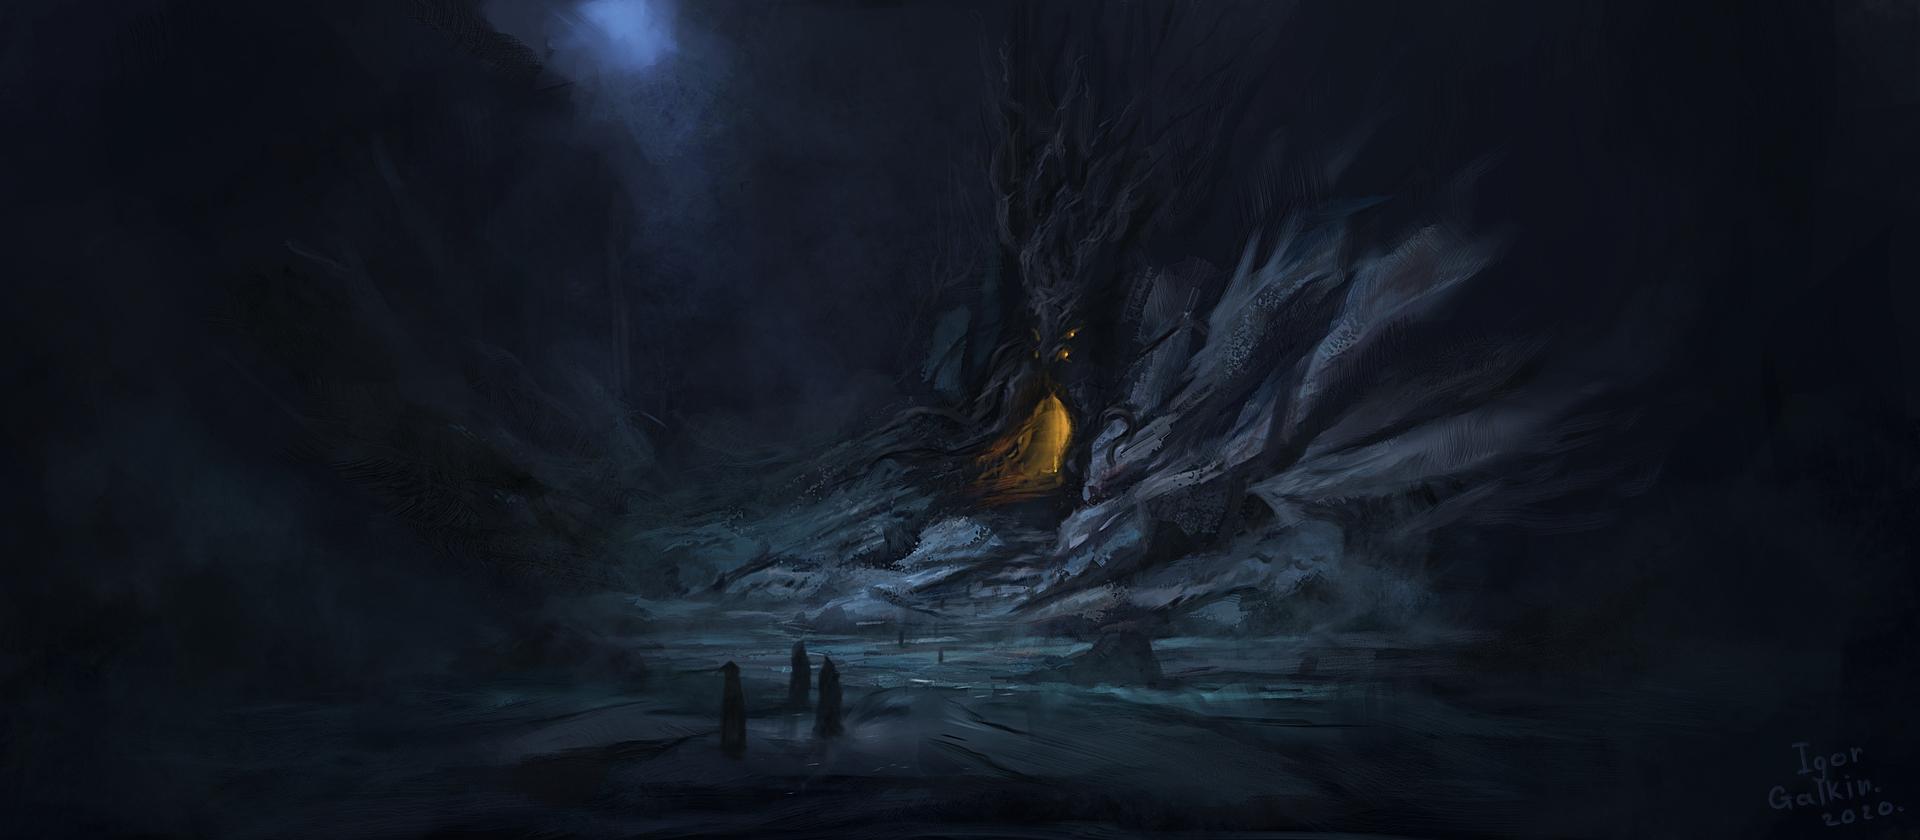
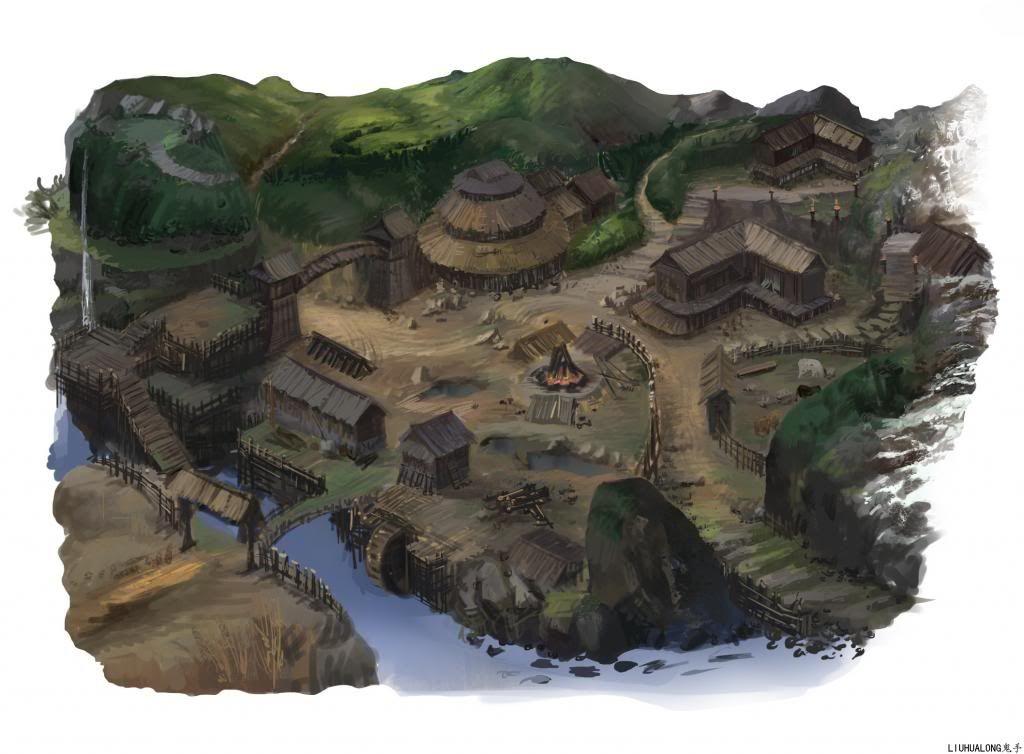


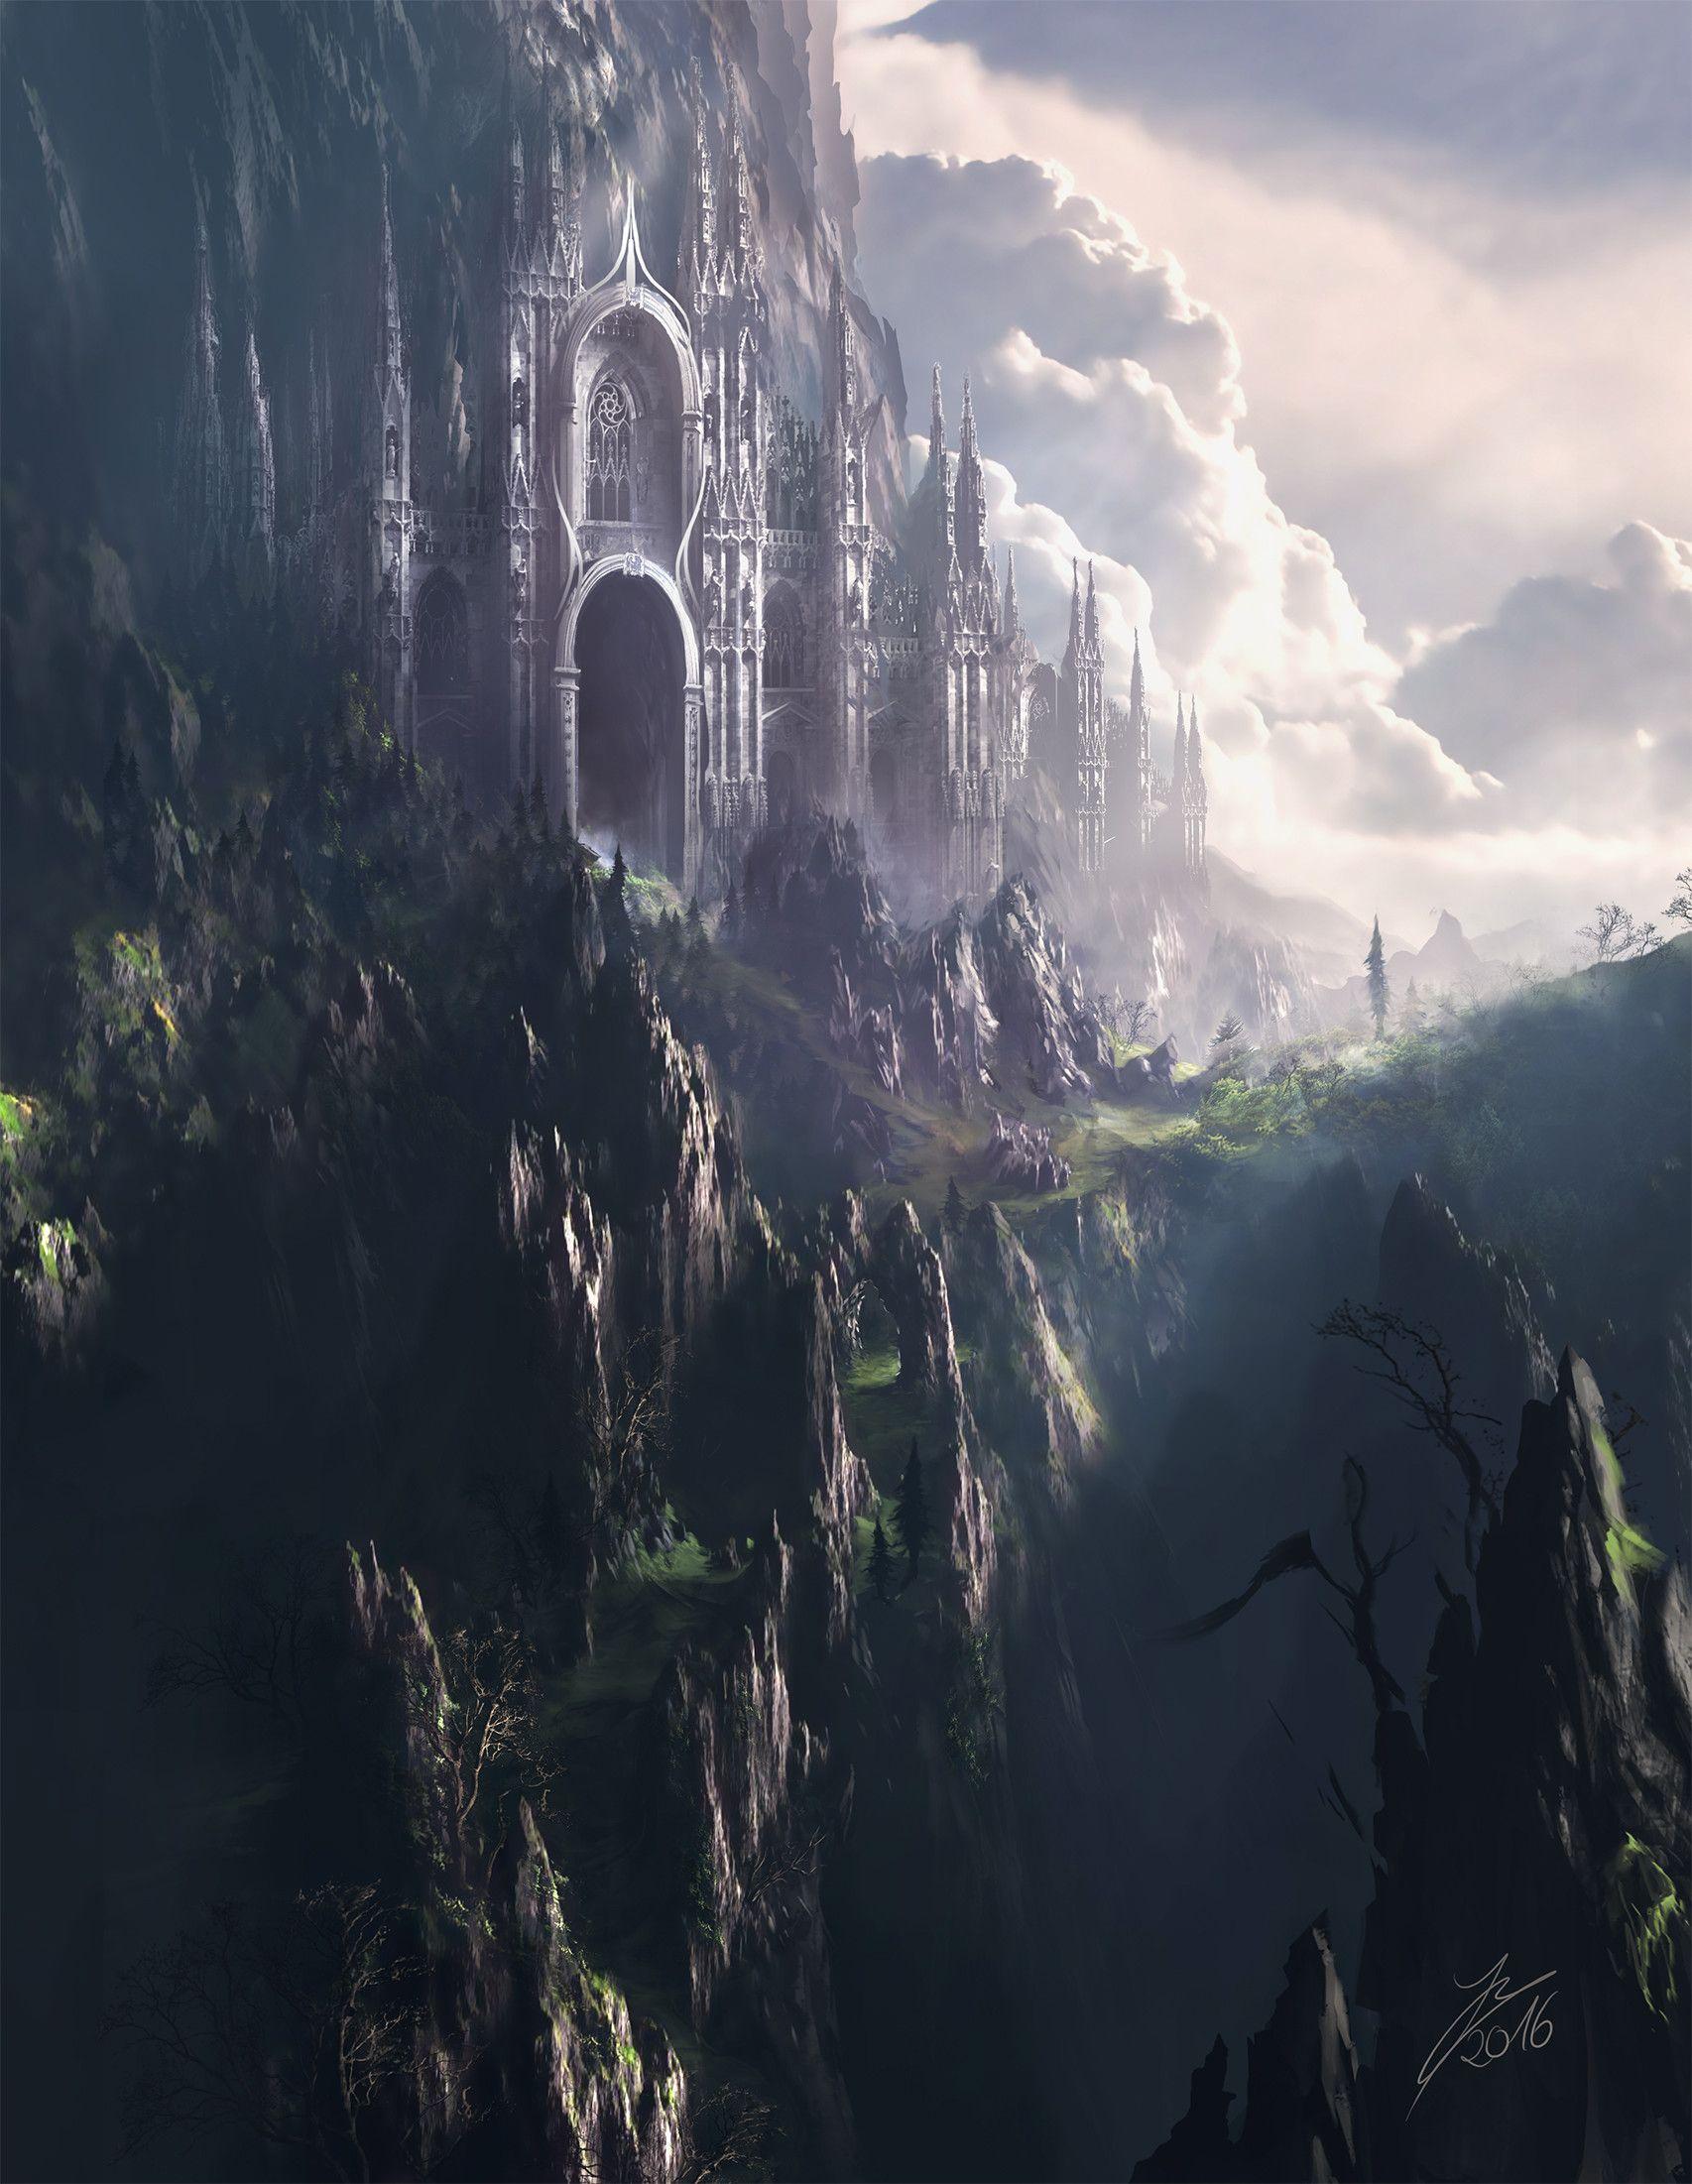
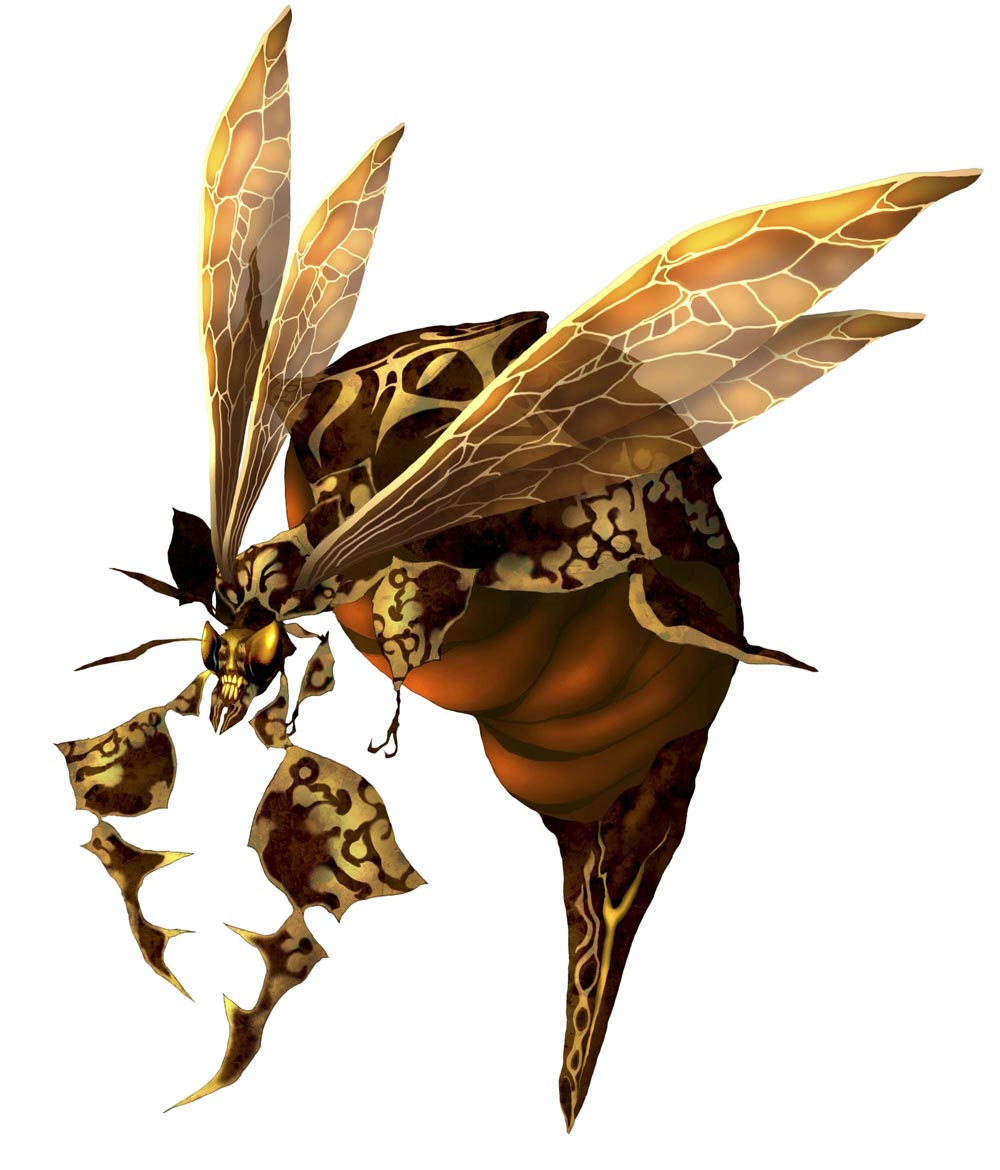
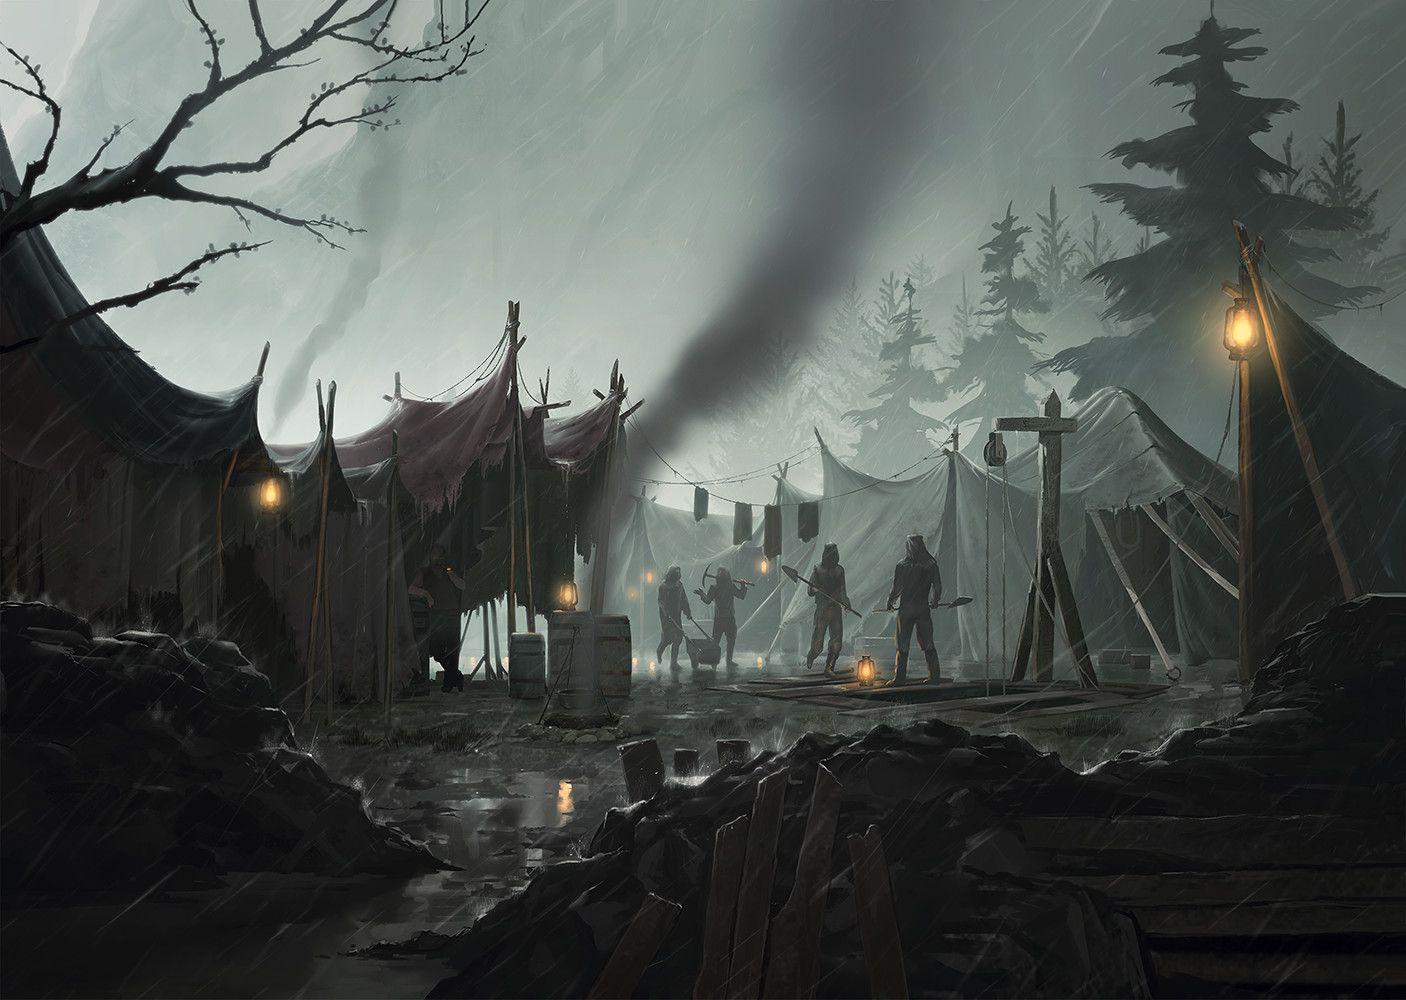


![[Monster Hunter Rise]](https://preview.redd.it/c2racb9o9p661.jpg?width=1080&format=pjpg&auto=webp&s=d5c2116065854ef1b776bcf595f223581e149a9d)
![[chearin from artstation]](https://cdnb.artstation.com/p/assets/images/images/014/011/217/4k/chearin-kim-cherry-.jpg?1544605964)
3.1 | SAO-RPG Resource List
in Tutorials
Posted
Blacksmiths can create a wide variety of weapons, armor, and shields. Their crafts and the stats they provide are essential for taking on strong enemies. The tier level, types of items, and number of daily crafts they can make vary depending on their rank:
Blacksmiths can make the following types of items:
Leveling Up:
Gaining EXP and increasing your Blacksmith Rank increases the Tier level and number of items you can craft each day.
Item Fusion:
Blacksmiths can combine items types that they are able to craft (i.e. Weapons, Light Armor, Heavy Armor, and Shields) to create higher quality items. This does not take up a daily crafting attempt. During the combination process, the components (i.e. items combined together) and the combined item (i.e. the item created as a result of combining the components), must adhere to the following rules:
Crafting Die Result Chart:
As your Blacksmith rank increases, the crafting die result chart changes, making it less likely for you to fail and more likely to succeed on higher-quality crafts. Do note that Professions have unique buffs that apply to themselves. As such, regular CD & LD bonuses do not apply unless explicitly stated otherwise.
[1] = Critical Fail (Lose materials)
[2-5] = Fail (Lose materials)
[6-9] = Salvage (Keep materials on LD 11+)
[10] = Uncommon item (1 slot)
[11] = Rare item (2 slots)
[12] = Perfect item (3 slots)
[1] = Critical failure (Lose materials)
[2-4] = Fail (Lose materials)
[5-8] = Salvage (Keep materials on LD 11+)
[9-10] = Uncommon item (1 slot)
[11] = Rare item (2 slots)
[12] = Perfect item (3 slots)
[1] = Critical failure (Lose materials)
[2-4] = Fail (Lose materials)
[5-7] = Salvage (Keep materials on LD 11+)
[8-10] = Uncommon item (1 slot)
[11] = Rare item (2 slots)
[12] = Perfect item (3 slots)
[1] = Critical failure (Lose materials)
[2-3] = Fail (Lose materials)
[4-6] = Salvage (Keep materials on LD 11+)
[7-9] = Uncommon item (1 slot)
[10-11] = Rare item (2 slots)
[12] = Perfect item (3 slots)
[1] = Critical failure (Lose materials)
[2] = Fail (Lose materials)
[3-6] = Salvage (Keep materials on LD 11+)
[7-9] = Uncommon item (1 slot)
[10-11] = Rare item (2 slots)
[12] = Perfect item (3 slots)
[1] = Critical failure (Lose materials)
[2] = Fail (Lose materials)
[3-5] = Salvage (Keep materials on LD 11+)
[6-9] = Uncommon item (1 slot)
[10-11] = Rare item (2 slots)
[12] = Perfect item (3 slots)
[1] = Critical failure (Lose materials)
[2] = Fail (Lose materials)
[3-5] = Salvage (Keep materials on LD 11+)
[6-8] = Uncommon item (1 slot)
[9-11] = Rare item (2 slots)
[12] = Perfect item (3 slots)
[1] = Critical failure (Lose materials)
[2-4] = Salvage (Keep materials on LD 11+)
[5-8] = Uncommon item (1 slot)
[9-11] = Rare item (2 slots)
[12] = Perfect item (3 slots)
[1] = Critical failure (Lose materials)
[2-4] = Salvage (Keep materials on LD 11+)
[5-7] = Uncommon item (1 slot)
[8-10] = Rare item (2 slots)
[11-12] = Perfect item (3 slots)
[1] = Critical failure (Lose materials)
[2-3] = Salvage (Keep materials on LD 11+)
[4-6] = Uncommon item (1 slot)
[7-10] = Rare item (2 slots)
[11-12] = Perfect item (3 slots)